|
|
|
Porsche, and the Porsche crest are registered trademarks of Dr. Ing. h.c. F. Porsche AG.
This site is not affiliated with Porsche in any way. Its only purpose is to provide an online forum for car enthusiasts. All other trademarks are property of their respective owners. |
|
|

  |

| cary |
 Nov 26 2019, 04:13 PM Nov 26 2019, 04:13 PM
Post
#21
|
|
Advanced Member  Group: Members Posts: 3,900 Joined: 26-January 04 From: Sherwood Oregon Member No.: 1,608 Region Association: Pacific Northwest |
QUOTE(Charles Freeborn @ Nov 26 2019, 08:52 AM)  Yowzer. Big project. Maybe I can see it some time. BTW, I've got some engine questions for you. Considering building a spare 4 for the race car. Your smiling face is always invited .............. |
   |

 
|
| cary |
Nov 26 2019, 08:48 PM
Post
#22
|
|
Advanced Member Group: Members Posts: 3,900 Joined: 26-January 04 From: Sherwood Oregon Member No.: 1,608 Region Association: Pacific Northwest |
Here is a couple shots of my door gap checking rod.
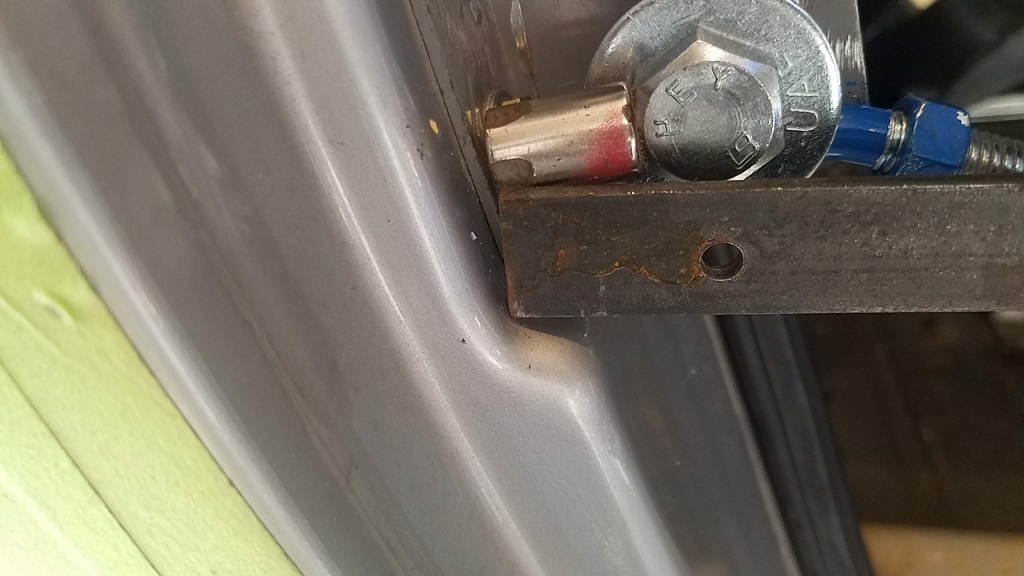 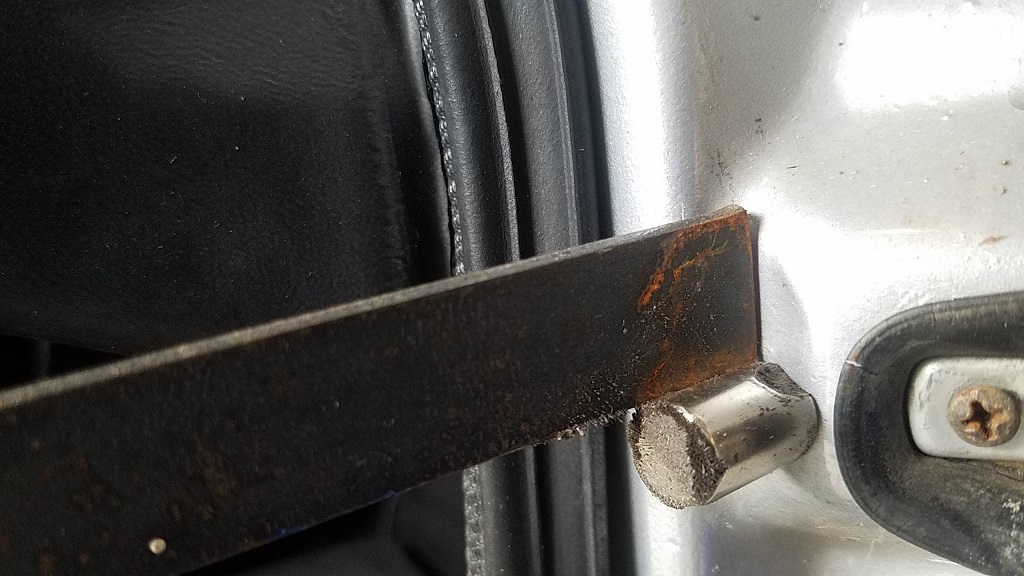 On this project I'm going to try and work around not completely cutting the backbone on the long. 1. Door braces 2. Not removing the roof 3. Using the digital level in multiple locations 4. Multiple floor screw jacks (6) I think we'll create a roof type frame to install on the chassis when a car is stripped and on the rotisserie and or frame bench. Frame bench fixtures are next after the engine drop/run stand. |
|
|
|
| cary |
Nov 26 2019, 10:23 PM
Post
#23
|
|
Advanced Member Group: Members Posts: 3,900 Joined: 26-January 04 From: Sherwood Oregon Member No.: 1,608 Region Association: Pacific Northwest |
A couple missing shots of the trimming inside the engine bay.
  |
|
|
|
| cary |
Nov 28 2019, 09:23 PM
Post
#24
|
|
Advanced Member Group: Members Posts: 3,900 Joined: 26-January 04 From: Sherwood Oregon Member No.: 1,608 Region Association: Pacific Northwest |
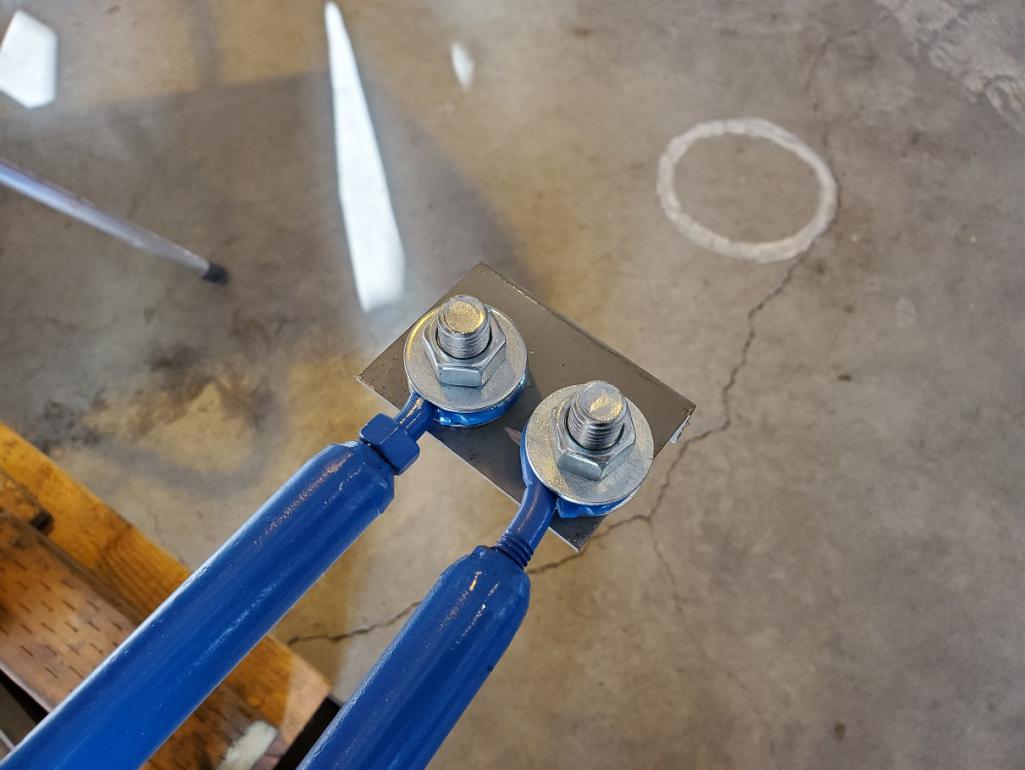
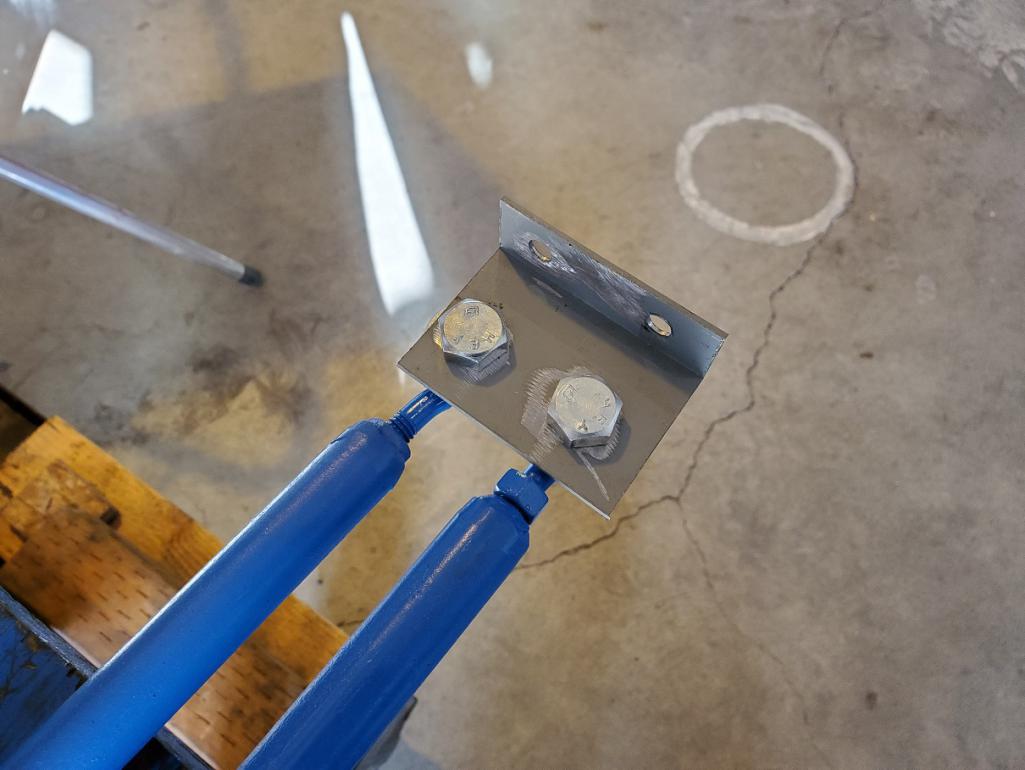
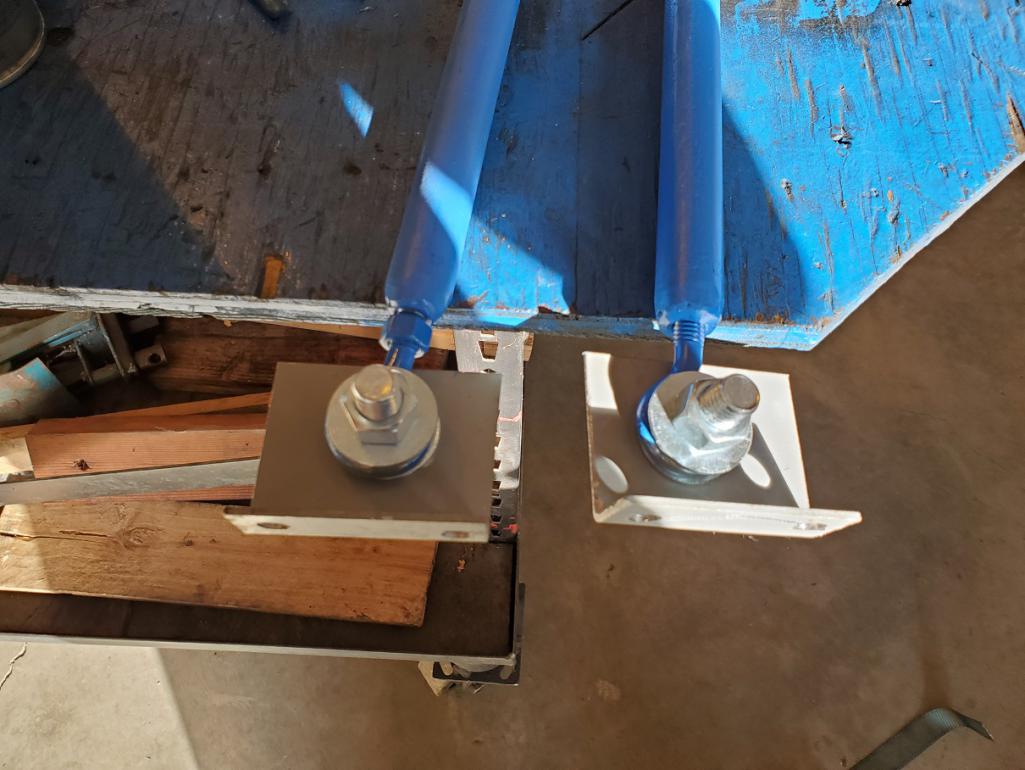
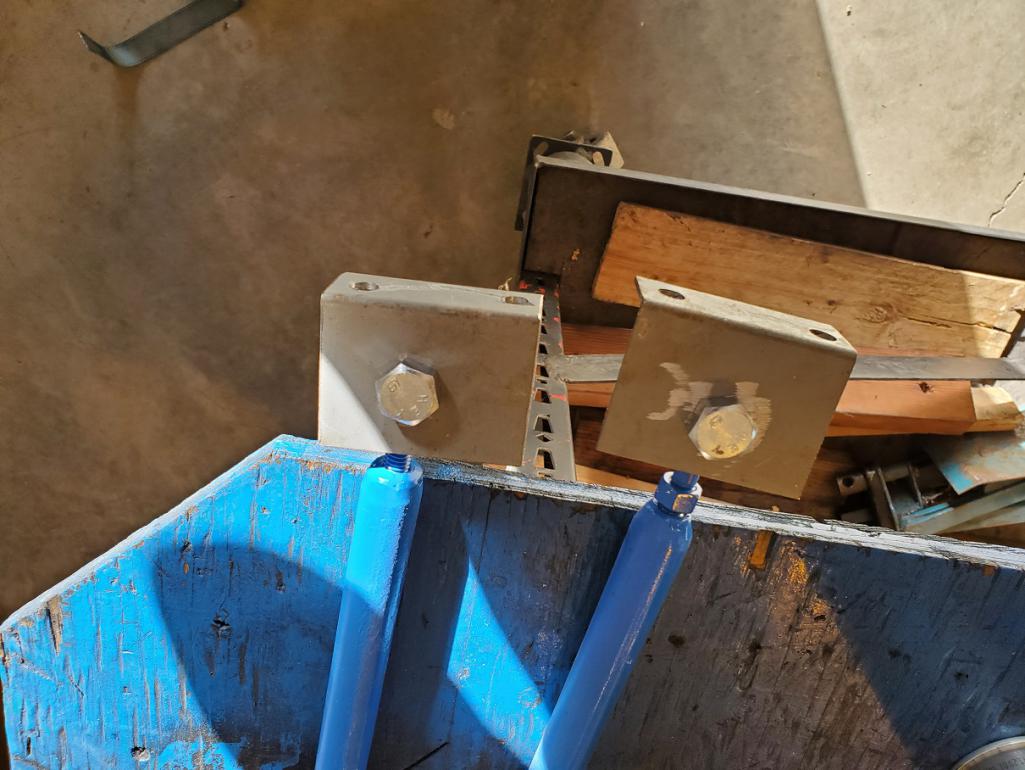
Here's a few shots of my door braces.
    |
|
|
|
| altitude411 |
Nov 28 2019, 10:47 PM
Post
#25
|
|
I drove my 6 into a tree Group: Members Posts: 1,306 Joined: 21-September 14 From: montana Member No.: 17,932 Region Association: Rocky Mountains |
Subscribed to watch Cary work his magic on another one... (IMG:style_emoticons/default/popcorn[1].gif)
|
|
|
|
| raynekat |
Nov 28 2019, 11:41 PM
Post
#26
|
|
Advanced Member Group: Members Posts: 2,171 Joined: 30-December 14 From: Coeur d'Alene, Idaho Member No.: 18,263 Region Association: Pacific Northwest |
Be careful with the axe Eugene.....err Cary.
|
|
|
|
| jesse7flying |
Nov 29 2019, 10:57 AM
Post
#27
|
|
Member Group: Members Posts: 139 Joined: 9-August 16 From: Burleson,TX Member No.: 20,281 Region Association: None |
Thx for the door brace shots Cary. Just what I needed.
Cheers--Jesse |
|
|
|
| cary |
Nov 30 2019, 06:01 PM
Post
#28
|
|
Advanced Member Group: Members Posts: 3,900 Joined: 26-January 04 From: Sherwood Oregon Member No.: 1,608 Region Association: Pacific Northwest |
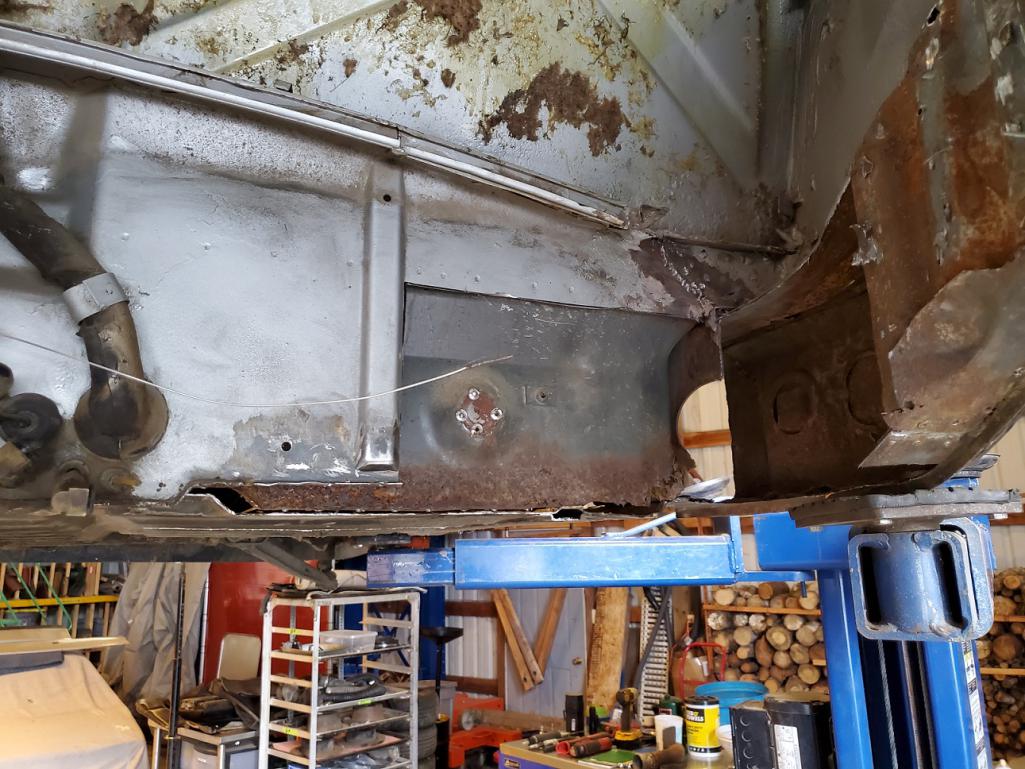
Off came the jack point without cutting into the door jamb.
I have some specially made tools that allow me to do that. It comes off without ripping any holes under any of the spot welds on upper lip.  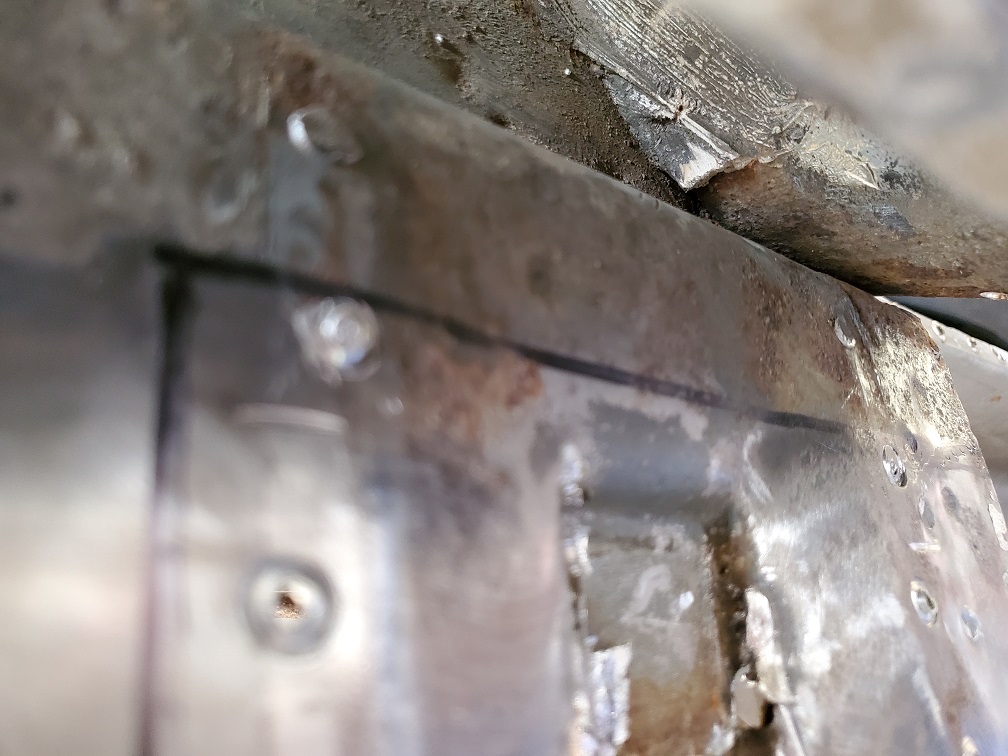 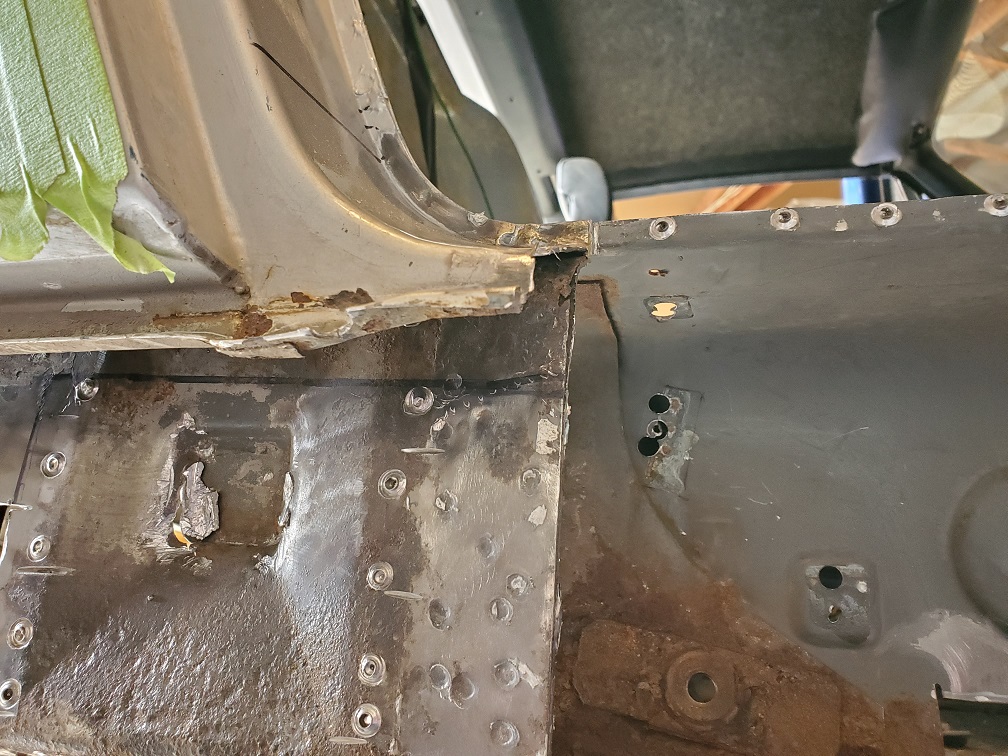 Here's one of the tools. 18" 3m belt sander. Allows me to dig out the upper spot welds. Then peel them back with multiple chisels and spot weld removers. 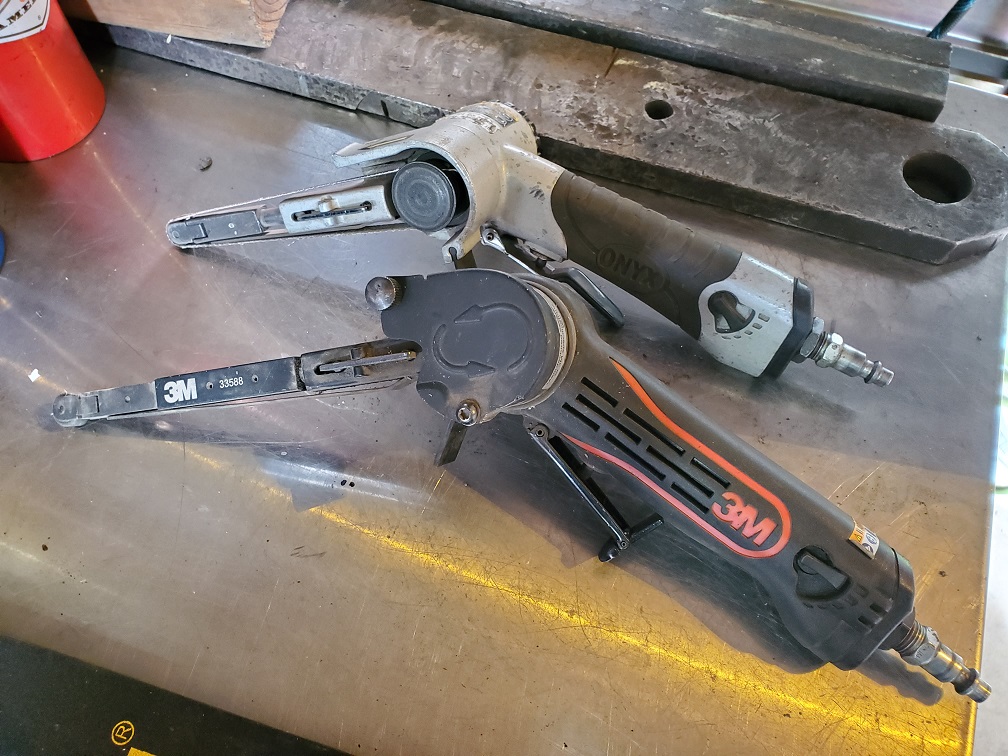 Might be adding a 25" 3m sander to the tool chest. Longer and perfect fit for the lip. |
|
|
|
| cary |
Nov 30 2019, 06:07 PM
Post
#29
|
|
Advanced Member Group: Members Posts: 3,900 Joined: 26-January 04 From: Sherwood Oregon Member No.: 1,608 Region Association: Pacific Northwest |
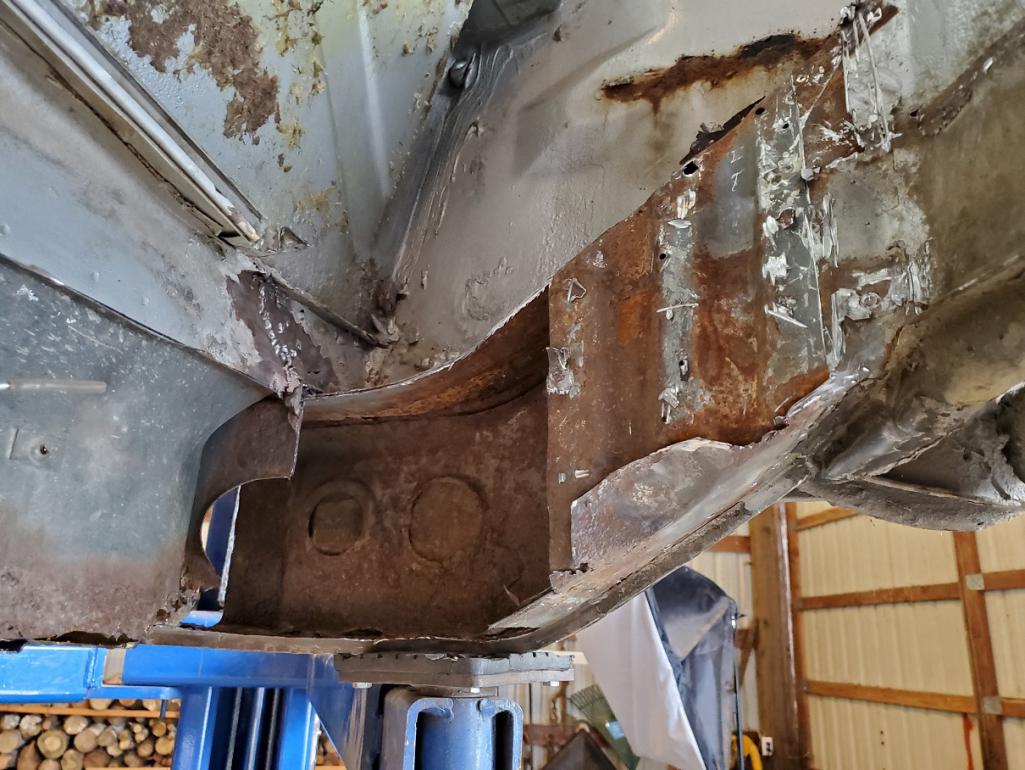
Did a test peel back on the outer wheel house. I can see the stiffener is gone, but maybe, just maybe, the rest of the skin can be saved.
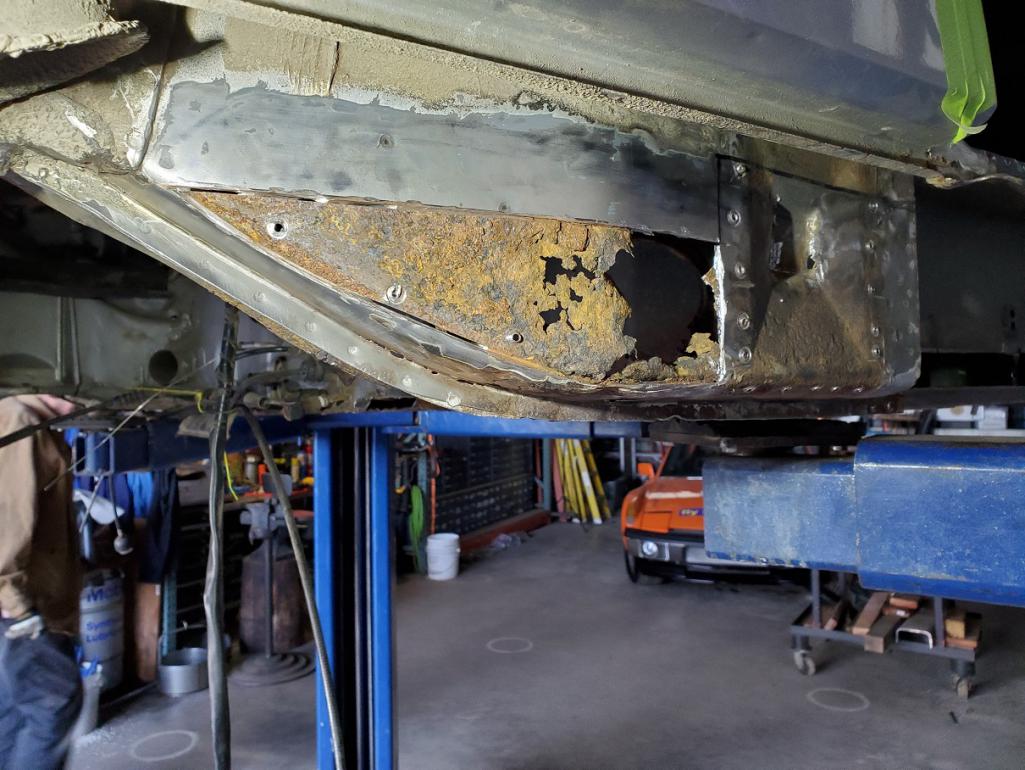 Not ................. 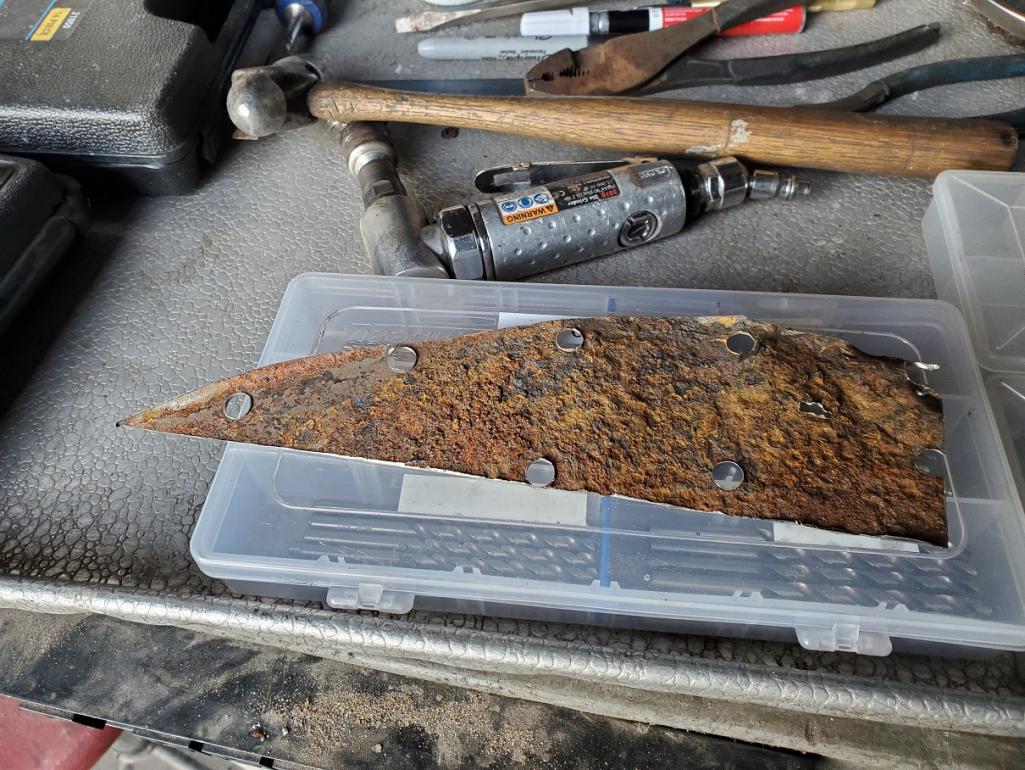 Good portion of the outer wheelhouse will need to be replaced. Now we wait for the sheet metal. |
|
|
|
| tygaboy |
Nov 30 2019, 06:58 PM
Post
#30
|
|
914 Guru Group: Members Posts: 5,826 Joined: 6-October 15 From: Petaluma, CA Member No.: 19,241 Region Association: Northern California |
It seems to me I'd be bored with "another hell hole/long repair..." (IMG:style_emoticons/default/dry.gif)
But NO! Cary, you do such a great job of detailing your work; and what also comes through clearly is your careful thinking through of the repair BEFORE you start cutting. Really informative, impressive and educational. Thanks for all that! (IMG:style_emoticons/default/cheer.gif) (IMG:style_emoticons/default/aktion035.gif) |
|
|
|
| porschetub |
Nov 30 2019, 07:17 PM
Post
#31
|
|
914 Guru Group: Members Posts: 5,116 Joined: 25-July 15 From: New Zealand Member No.: 18,995 Region Association: None |
Sad to see a car that has great outside appearance could be so rotten underneath,mind you someone mentioned these cars rusted from the inside out...no different than any car built in this era really.
|
 |
|
| cary |
Nov 30 2019, 11:08 PM
Post
#32
|
|
Advanced Member Group: Members Posts: 3,900 Joined: 26-January 04 From: Sherwood Oregon Member No.: 1,608 Region Association: Pacific Northwest |
I turned down another one just as nice, but worse. Stunning, it too silver. But starting hole was twice as large. No way I would attempt that one without the frame bench.
This one is borderline .... It's all about keeping the backbone tied together. Now we wait for sheet metal. Chris, I kinda feel bad for the "noodling" time. But its all about the "plan". Next step is determining my working height and moving in the 4 screw jacks. From there nothing moves. I'll feel much better when I'm here ...................... But a whole lot more car attached together 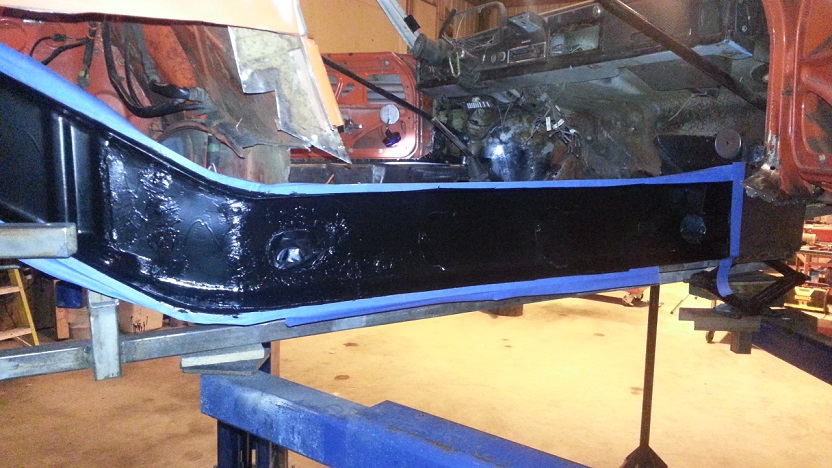 |
|
|
|
| sixnotfour |
Dec 1 2019, 12:27 AM
Post
#33
|
|
914 Wizard Group: Members Posts: 11,265 Joined: 12-September 04 Member No.: 2,744 Region Association: NineFourteenerVille |
Question do you adjust for cold shrinkage??..
|
|
|
|
| cary |
Dec 1 2019, 12:51 AM
Post
#34
|
|
Advanced Member Group: Members Posts: 3,900 Joined: 26-January 04 From: Sherwood Oregon Member No.: 1,608 Region Association: Pacific Northwest |
Not really. When I start welding I go slow. Don't go to the next weld until its spot is cooled to 120 degrees. Plus I constantly check the door gap as I go. The "H" dimension.
|
|
|
|
| AKFish |
Dec 9 2019, 07:58 PM
Post
#35
|
|
Newbie Group: Members Posts: 29 Joined: 10-December 18 From: Nampa, Idaho Member No.: 22,714 Region Association: Rocky Mountains |
Watching with great interest....if you were a little closer to Boise I would apply to get my car in line for this repair at Middle Motors.... (IMG:style_emoticons/default/sad.gif)
|
|
|
|
| Mikey914 |
Dec 10 2019, 08:39 AM
Post
#36
|
|
The rubber man Group: Members Posts: 12,782 Joined: 27-December 04 From: Hillsboro, OR Member No.: 3,348 Region Association: None |
Boise isn't that far.
I have 2 in line with him now so not sure what his schedule is but I know there is a backlog of work. If you need the work done and want it right, he's probably your closest solution. |
|
|
|
| cary |
Dec 11 2019, 02:45 PM
Post
#37
|
|
Advanced Member Group: Members Posts: 3,900 Joined: 26-January 04 From: Sherwood Oregon Member No.: 1,608 Region Association: Pacific Northwest |
I plan on working on the projects list this afternoon.
Yes, I does seem to get bit longer every month. Just when I think about "retiring" from Rothsport and working at MiddleMotors full time. Jeff brings me another rally/Baja car to help build .................. 90 day build schedule. Then a Tuthill G body car after that. The G body might be built at the new shop space at MiddleMotors. |
|
|
|
|
1 User(s) are reading this topic (1 Guests and 0 Anonymous Users)
0 Members:

|
Lo-Fi Version | Time is now: 6th June 2026 - 02:37 PM |
Invision Power Board
v9.1.4 © 2026 IPS, Inc.