|
|
|
Porsche, and the Porsche crest are registered trademarks of Dr. Ing. h.c. F. Porsche AG.
This site is not affiliated with Porsche in any way. Its only purpose is to provide an online forum for car enthusiasts. All other trademarks are property of their respective owners. |
|
|

  |

| FourBlades |
 Mar 6 2020, 04:38 PM Mar 6 2020, 04:38 PM
Post
#41
|
|
From Wreck to Rockin  Group: Members Posts: 2,054 Joined: 3-December 07 From: Brevard, FL Member No.: 8,414 Region Association: South East States |
Wow, great work and fast too. (IMG:style_emoticons/default/smilie_pokal.gif) Most people take a couple years to get that all done. You have some serious metal skills. (IMG:style_emoticons/default/welder.gif) John |
   |

 
|
| 9146C |
Mar 7 2020, 10:02 AM
Post
#42
|
|
Member Group: Members Posts: 228 Joined: 14-September 19 From: US Member No.: 23,460 Region Association: None |
Thanks for the feedback!
Attached thumbnail(s) 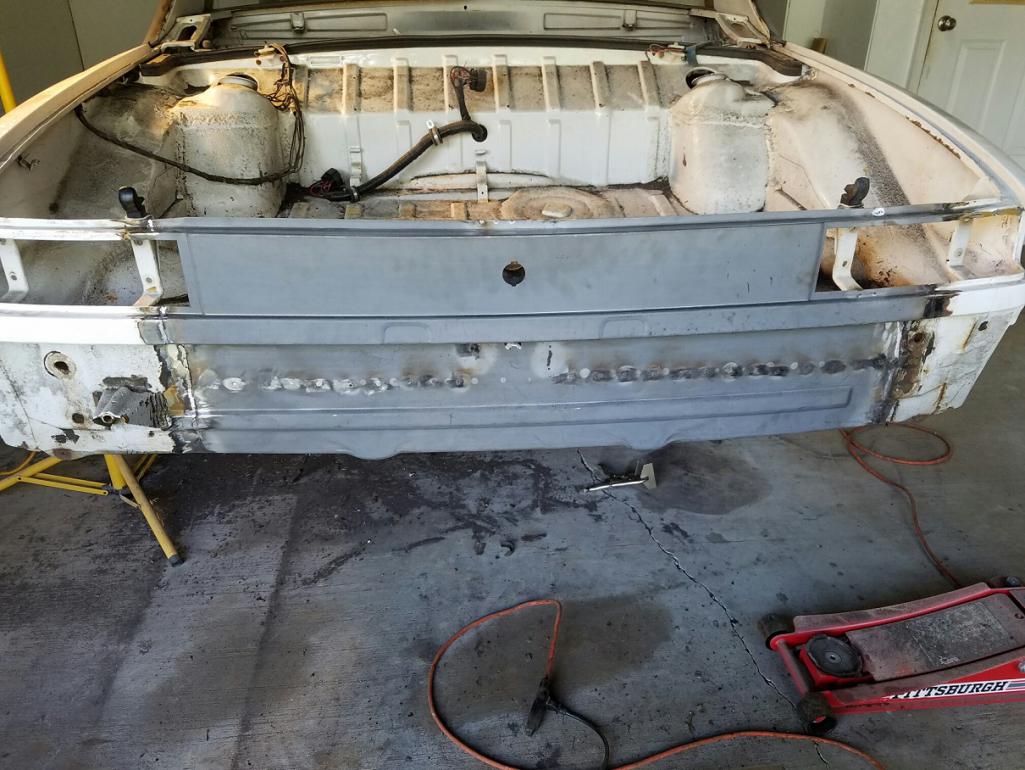
|
|
|
|
| 9146C |
Mar 10 2020, 01:08 PM
Post
#43
|
|
Member Group: Members Posts: 228 Joined: 14-September 19 From: US Member No.: 23,460 Region Association: None |
Finally on the rotisserie to start the rear section of the floor pan.
Happy to find a "rot-free" tunnel and "clean" area between the firewalls. Attached thumbnail(s) 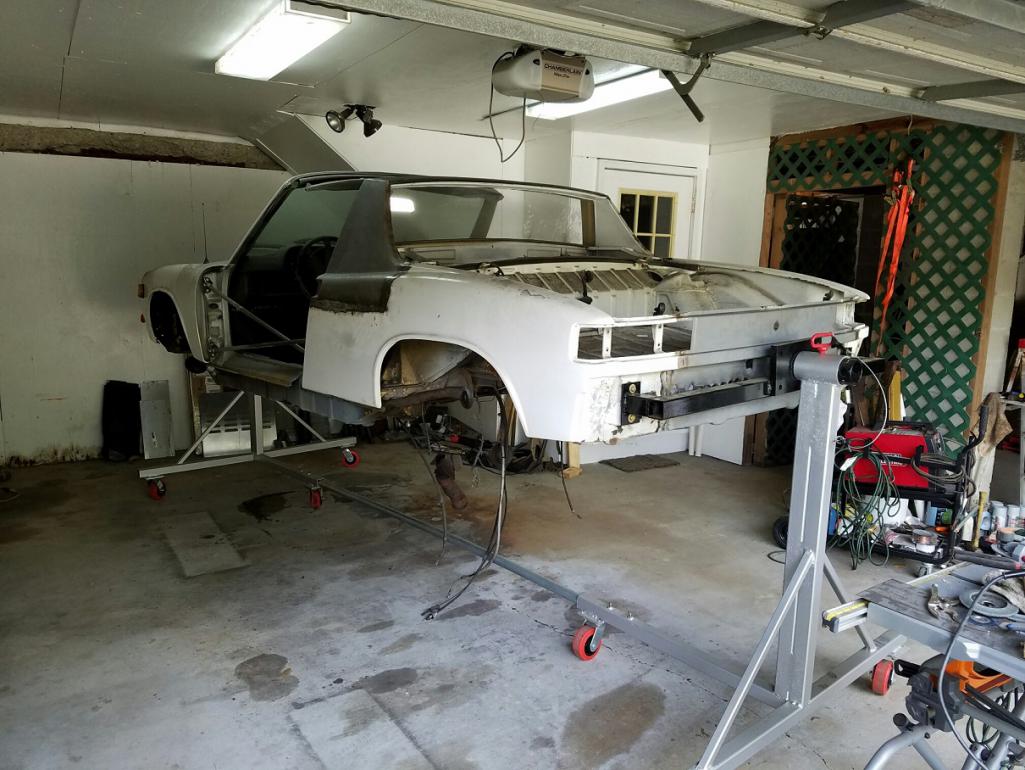 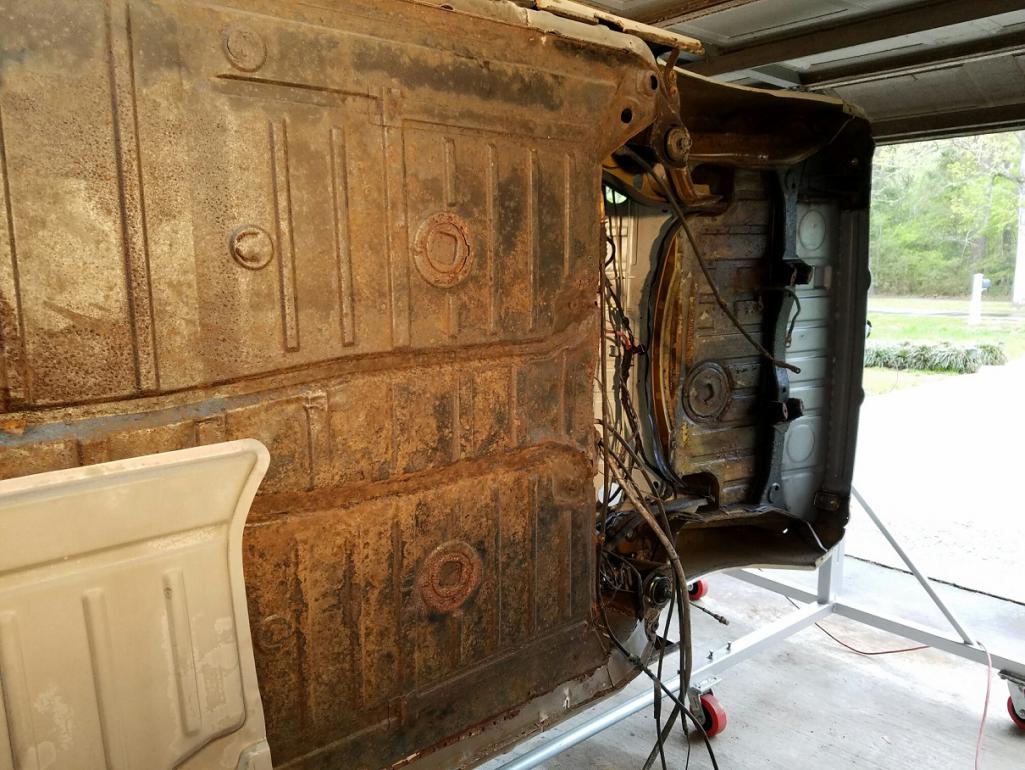 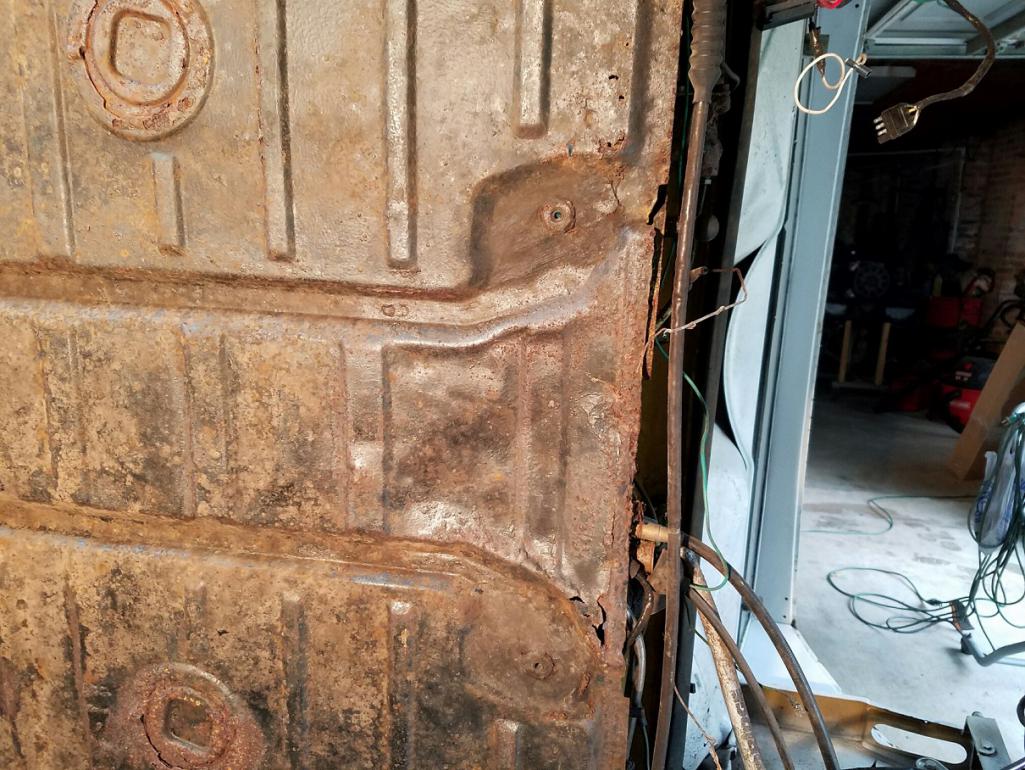 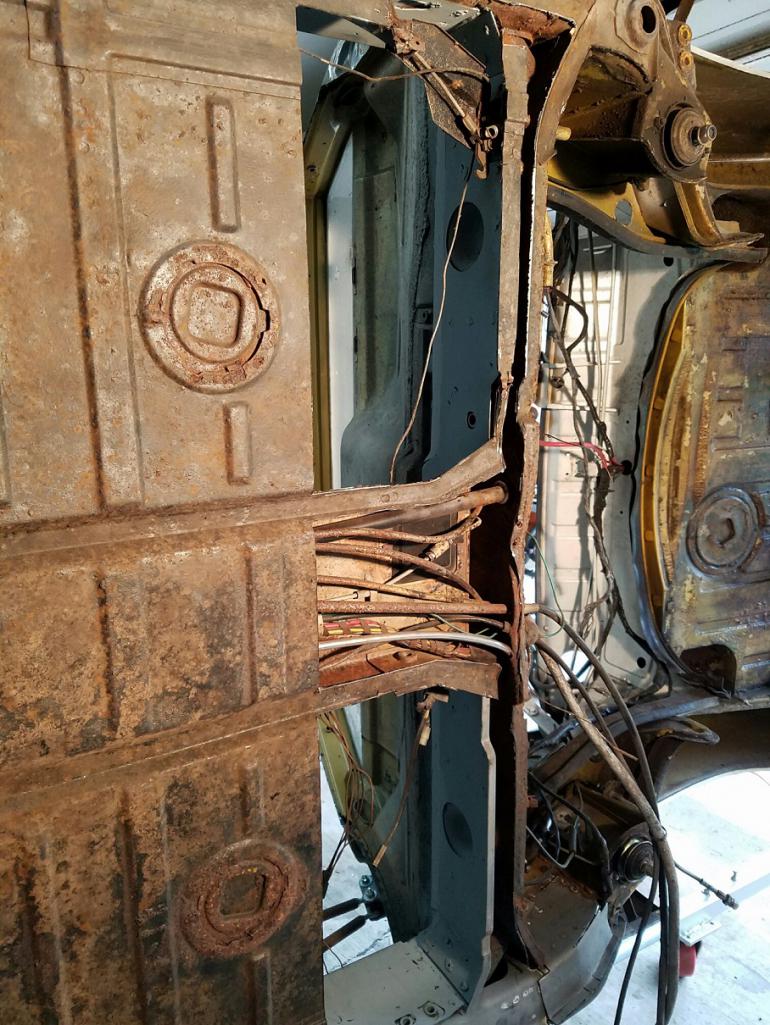
|
|
|
|
| IronHillRestorations |
Mar 10 2020, 04:51 PM
Post
#44
|
|
I. I. R. C. Group: Members Posts: 6,714 Joined: 18-March 03 From: West TN Member No.: 439 Region Association: None |
From my experience, you'll be better off to replace the entire tail panel. I made the mistake of sectioning it in (not wanting to get into the extra work at the sides) and that was more work. The replacement tail panel is not a direct duplicate. It's a nice piece, but some areas are not the same as OE
|
|
|
|
| 9146C |
Mar 10 2020, 05:06 PM
Post
#45
|
|
Member Group: Members Posts: 228 Joined: 14-September 19 From: US Member No.: 23,460 Region Association: None |
QUOTE(IronHillRestorations @ Mar 10 2020, 04:51 PM)  From my experience, you'll be better off to replace the entire tail panel. I made the mistake of sectioning it in (not wanting to get into the extra work at the sides) and that was more work. The replacement tail panel is not a direct duplicate. It's a nice piece, but some areas are not the same as OE You've piqued my interest! I'm assuming you're recommending to replace the entire rear half panel? The shorter panel from RD looked pretty close...I'll look closer tomorrow as I clean up/prep the section I cut. Thanks! |
|
|
|
| IronHillRestorations |
Mar 11 2020, 07:27 AM
Post
#46
|
|
I. I. R. C. Group: Members Posts: 6,714 Joined: 18-March 03 From: West TN Member No.: 439 Region Association: None |
QUOTE(9146C @ Mar 10 2020, 03:06 PM) QUOTE(IronHillRestorations @ Mar 10 2020, 04:51 PM) From my experience, you'll be better off to replace the entire tail panel. I made the mistake of sectioning it in (not wanting to get into the extra work at the sides) and that was more work. The replacement tail panel is not a direct duplicate. It's a nice piece, but some areas are not the same as OE You've piqued my interest! I'm assuming you're recommending to replace the entire rear half panel? The shorter panel from RD looked pretty close...I'll look closer tomorrow as I clean up/prep the section I cut. Thanks! Looks like you've already installed what I call the tail panel, or rear trunk bulkhead. |
|
|
|
| 9146C |
Apr 1 2020, 03:26 PM
Post
#47
|
|
Member Group: Members Posts: 228 Joined: 14-September 19 From: US Member No.: 23,460 Region Association: None |
It's been a while since the last update...
Rear floor pan job completed! Worked on the hell hole area to finish this job up from the inside...welding/metalwork completed...just need to clean up my welds a little more... Started on the front trunk...thought that would be one of the easier jobs... Was only expecting to correctly install the louvered panel for the front oil cooler (when I installed the cooler, I took a short cut and drilled six 1-1/2" holes rather than correctly installing the louvered vent). Made the cut out for the louvered vent panel...found the metal in the lower pan area was pretty thin...before I knew it I was making patch panel upon patch panel. As I started to get closer to the passenger front A-arm mount, I started to get nervous. Removed the angle panel from the inside of the front trunk and found quite a bit of rust between the two panels...opted to replace the front pan. As I debated whether to install the whole front pan panel or splice what I needed, I elected to go the latter route. Finally got the front pan tack-welded into place after wasting quite a bit of time trying to repair. Lesson learned... Attached image(s) 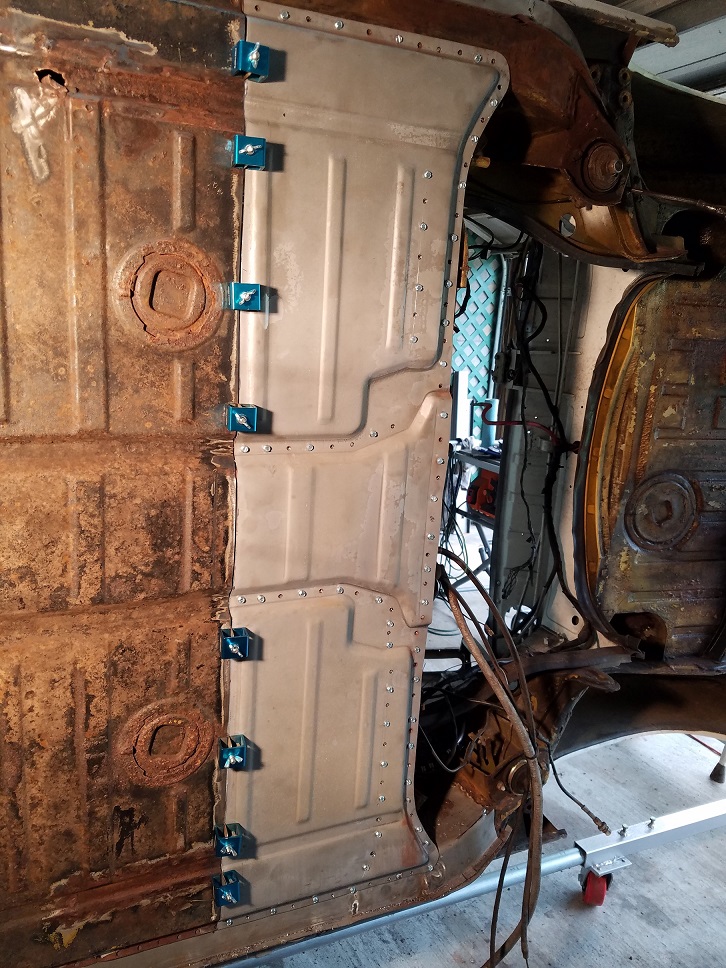 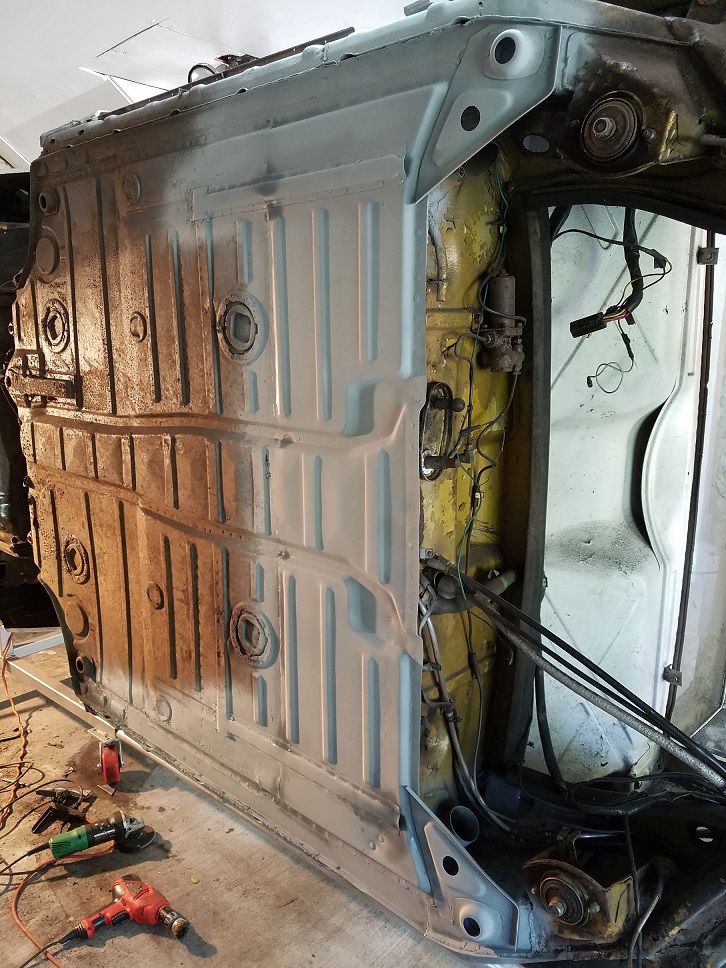 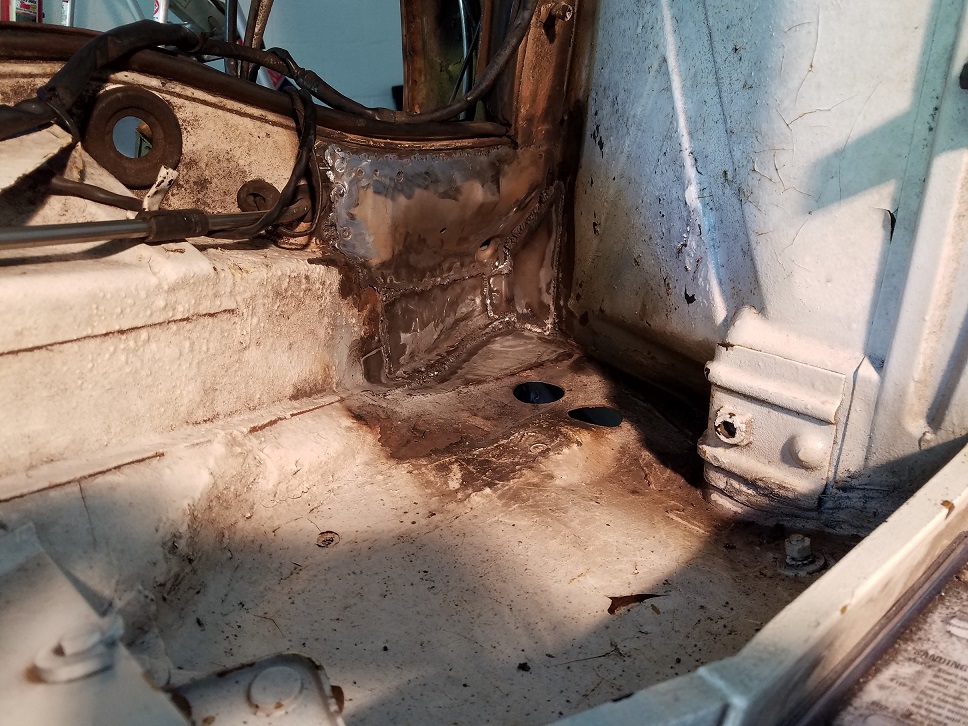 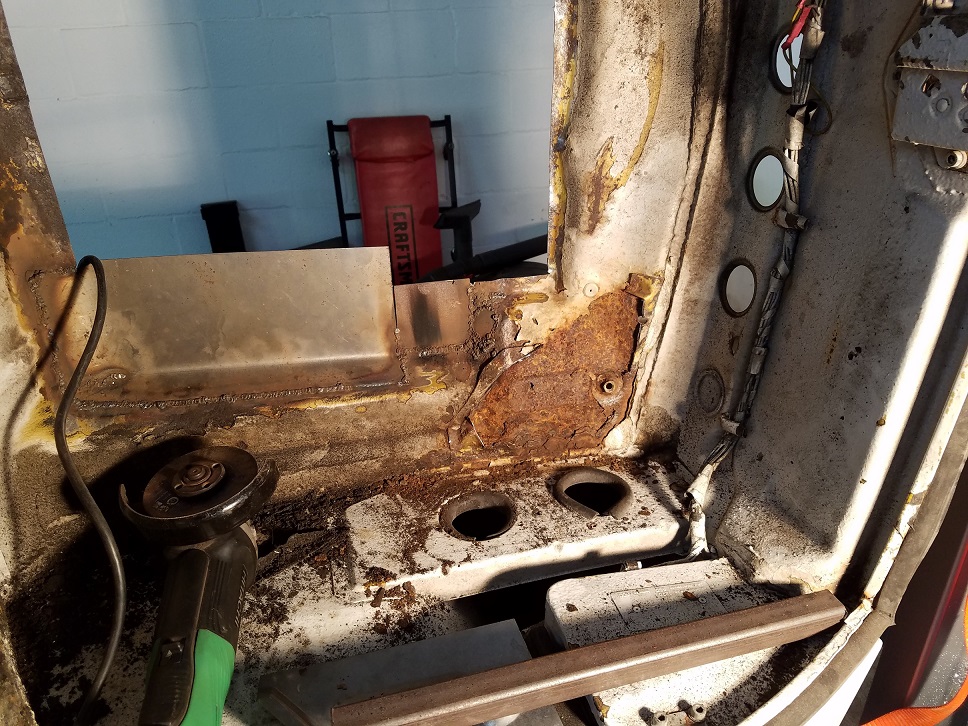
|
|
|
|
| 9146C |
Apr 6 2020, 01:30 PM
Post
#48
|
|
Member Group: Members Posts: 228 Joined: 14-September 19 From: US Member No.: 23,460 Region Association: None |
Front trunk completed (except for modification to the oil cooler inlet and hard mounts for the oil cooler shroud)...this job was a lot more than I initially anticipated...
Attached thumbnail(s) 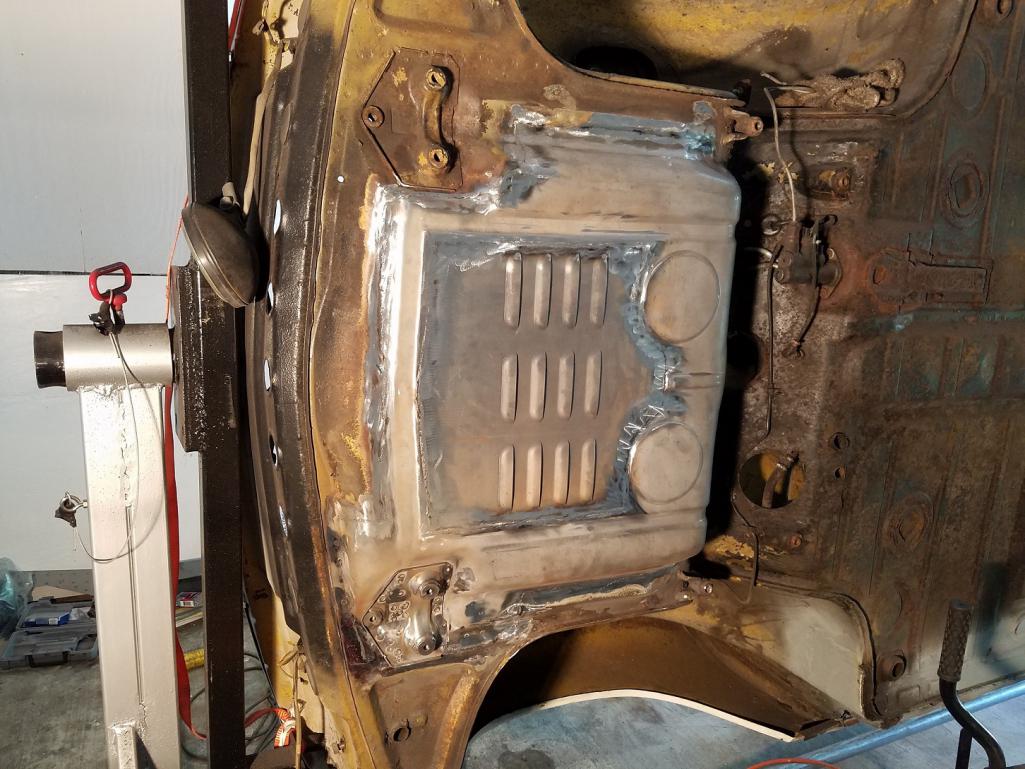 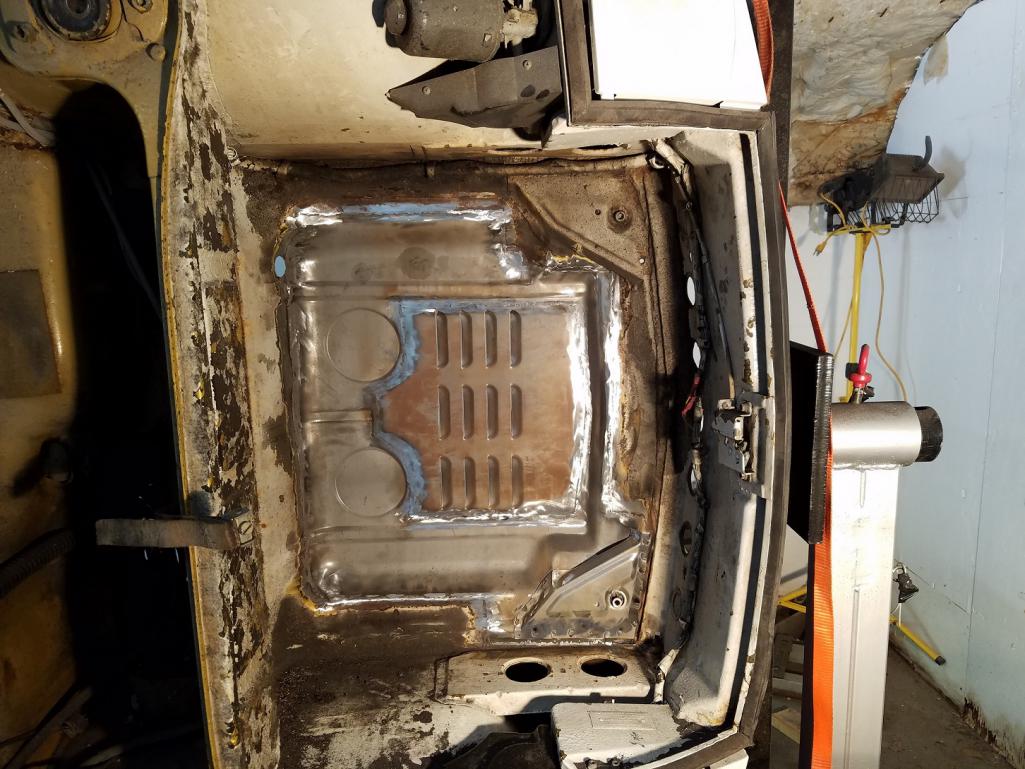
|
|
|
|
| 9146C |
Apr 12 2020, 10:45 AM
Post
#49
|
|
Member Group: Members Posts: 228 Joined: 14-September 19 From: US Member No.: 23,460 Region Association: None |
Some smaller jobs...
Fabbed a small bracket to relocate the new battery tray to the front trunk. Welded in the driver's side chassis stiffening kit (Maddogs Motor Sports). Opened up an access panel in the firewall for future maintenance. Should be able to rotate the car, install the passenger side chassis stiffening kit and the seat mounting brackets then finally media blast the underside/trunks/inside floor pan...hoping for no more surprises... Attached thumbnail(s) 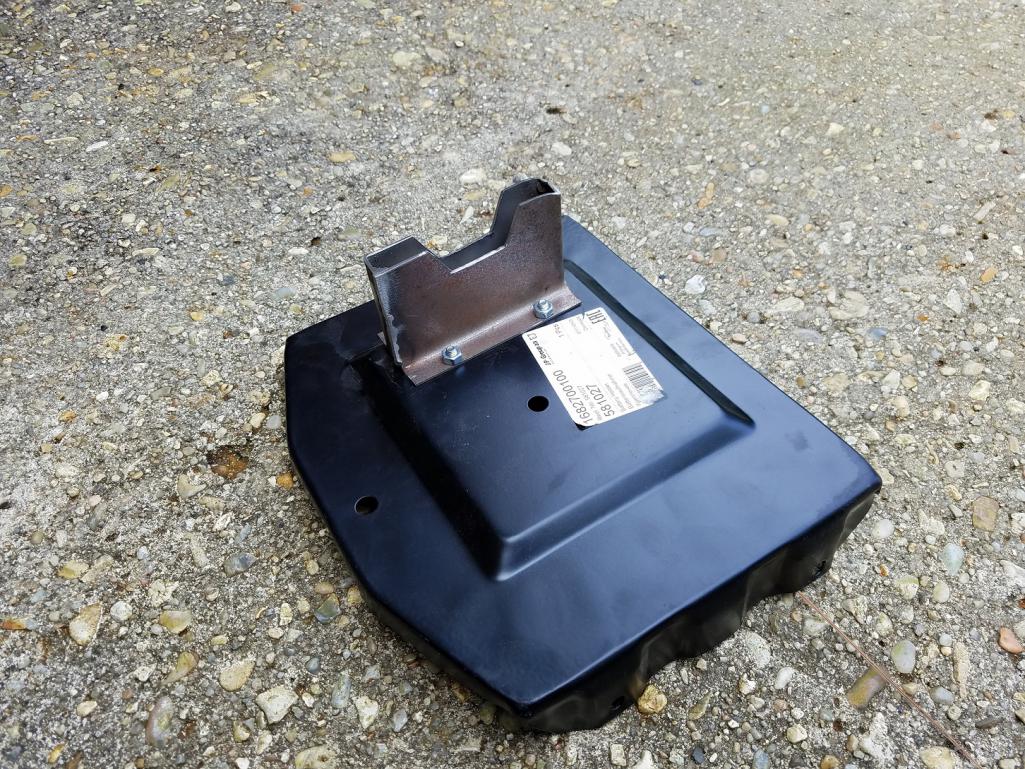 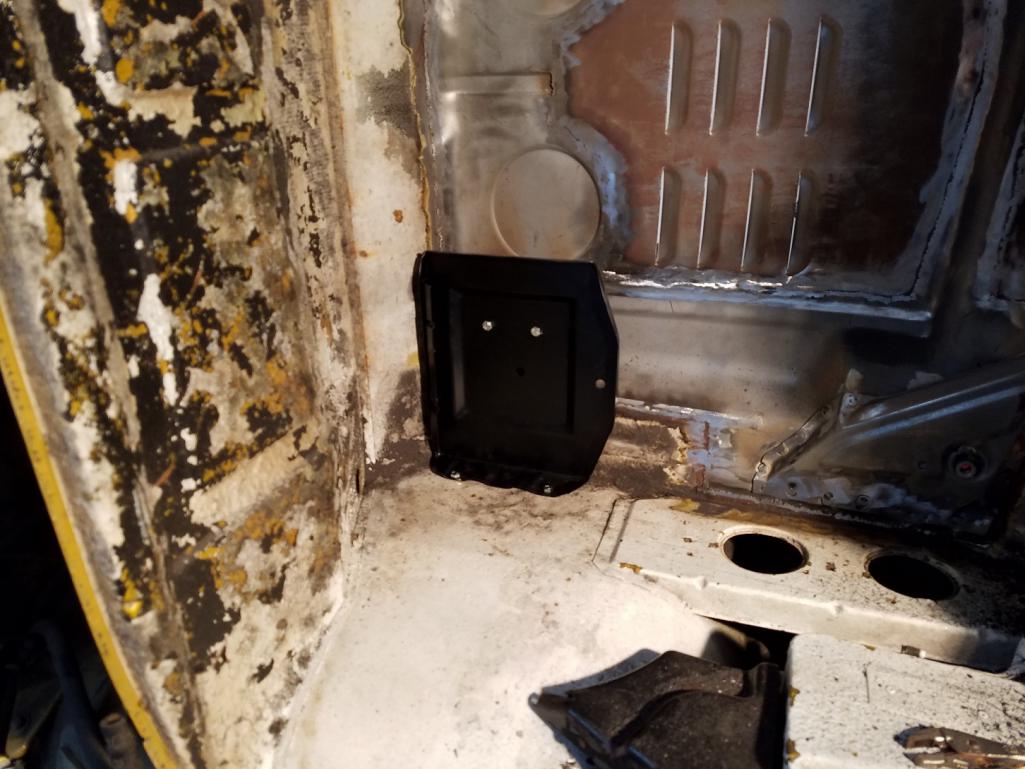 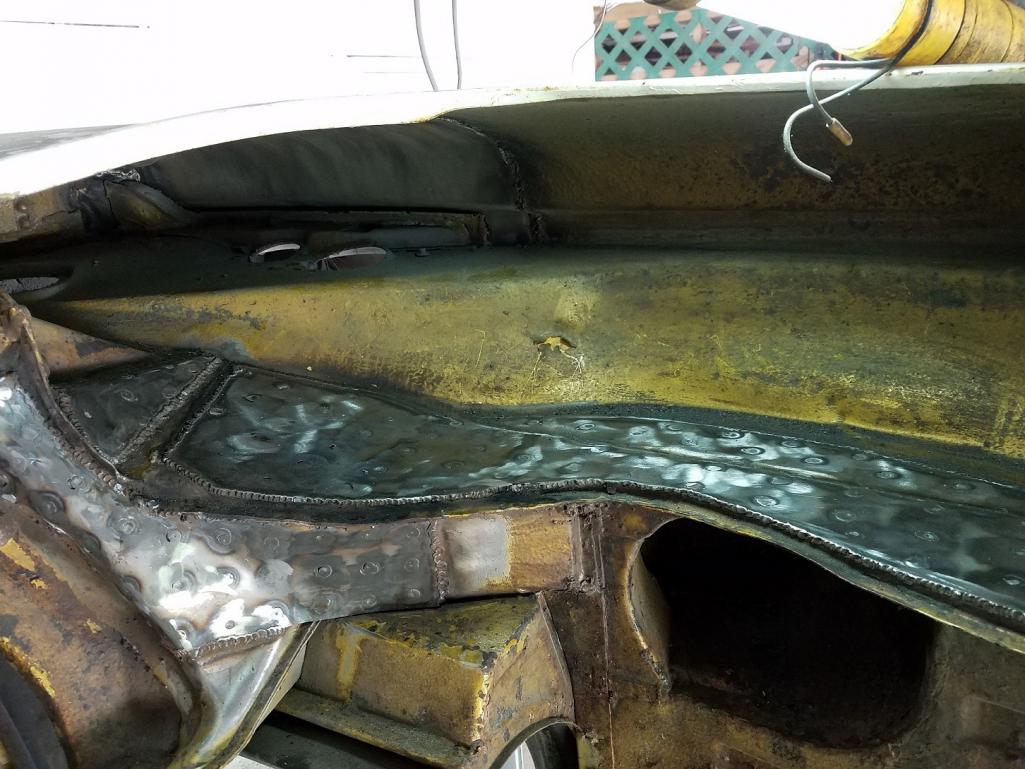 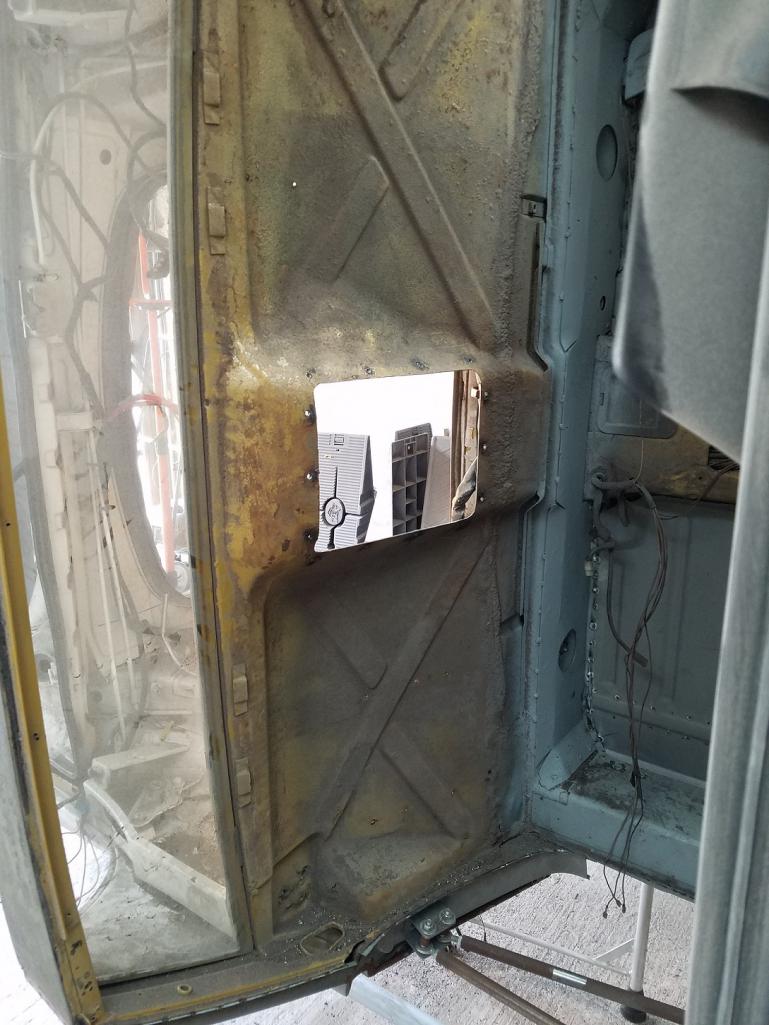 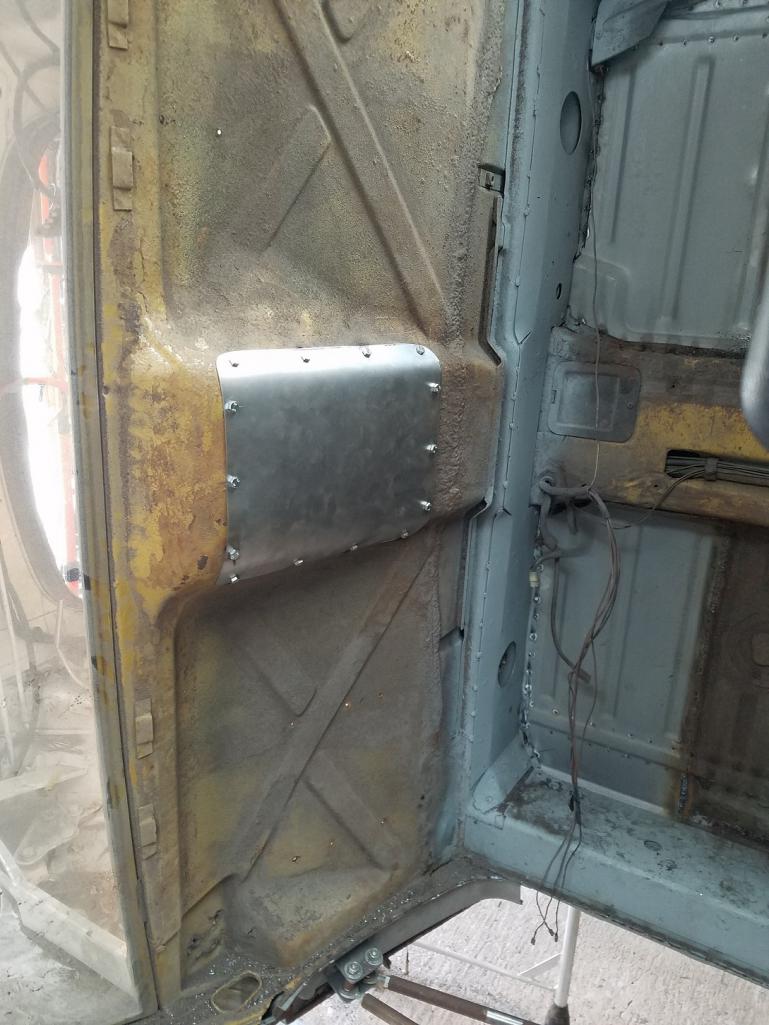
|
|
|
|
| 9146C |
Apr 17 2020, 04:16 PM
Post
#50
|
|
Member Group: Members Posts: 228 Joined: 14-September 19 From: US Member No.: 23,460 Region Association: None |
Installed the right rear chassis stiffening kit (Maddogs Motorsports).
I was "on the fence" about adding the Brad Mayeur longitudinal kit after completing the longitudinal repairs. I did a check on the existing body "sag" with and without the door cross braces. With the door braces on, I had a targa bar to windshield frame distance of 25-1/8" (as per spec). Removing the door braces, the gap between the targa bar and the windshield frame decreased by between 1/8" to 3/16" on both sides. (Of course, this is measured with the car currently supported by the bumper mounts, not the suspension points.) Corrected the gap again with the door braces and welded in the Brad Mayeur kit on both sides. After the kit install, there is no sag/difference in the targa bar to windshield gap with or without the door braces. Glad I went this route...I also like the added benefit of the increased strength at the jack points and the added benefit of the attachment to the suspension console. Attached thumbnail(s) 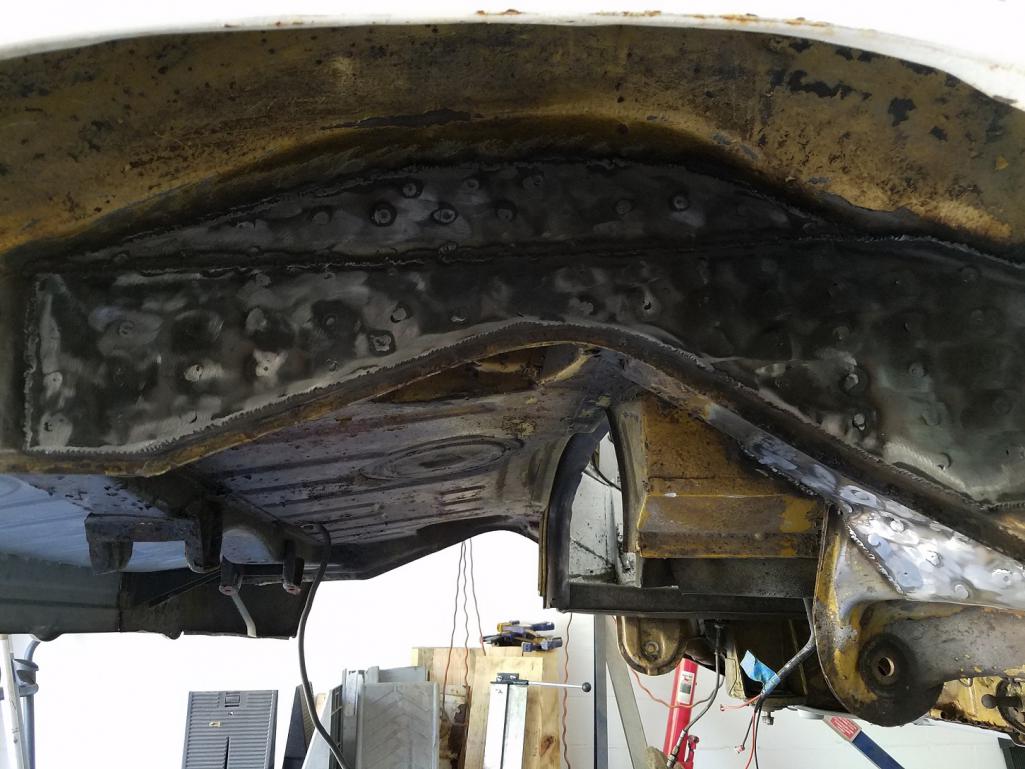 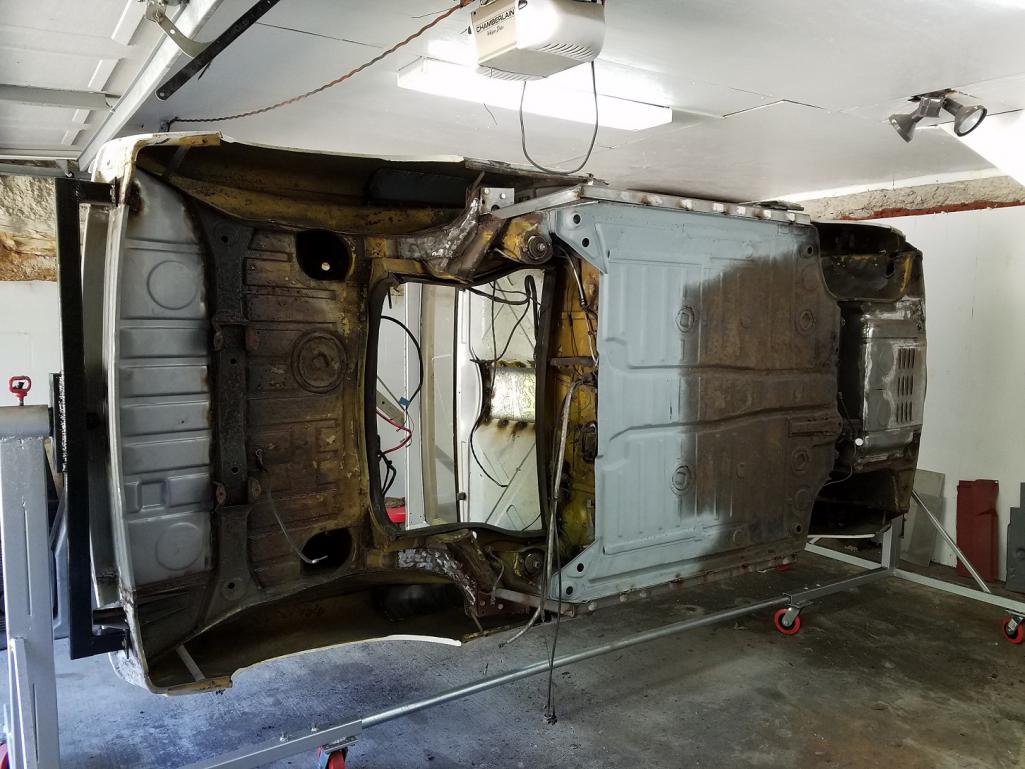 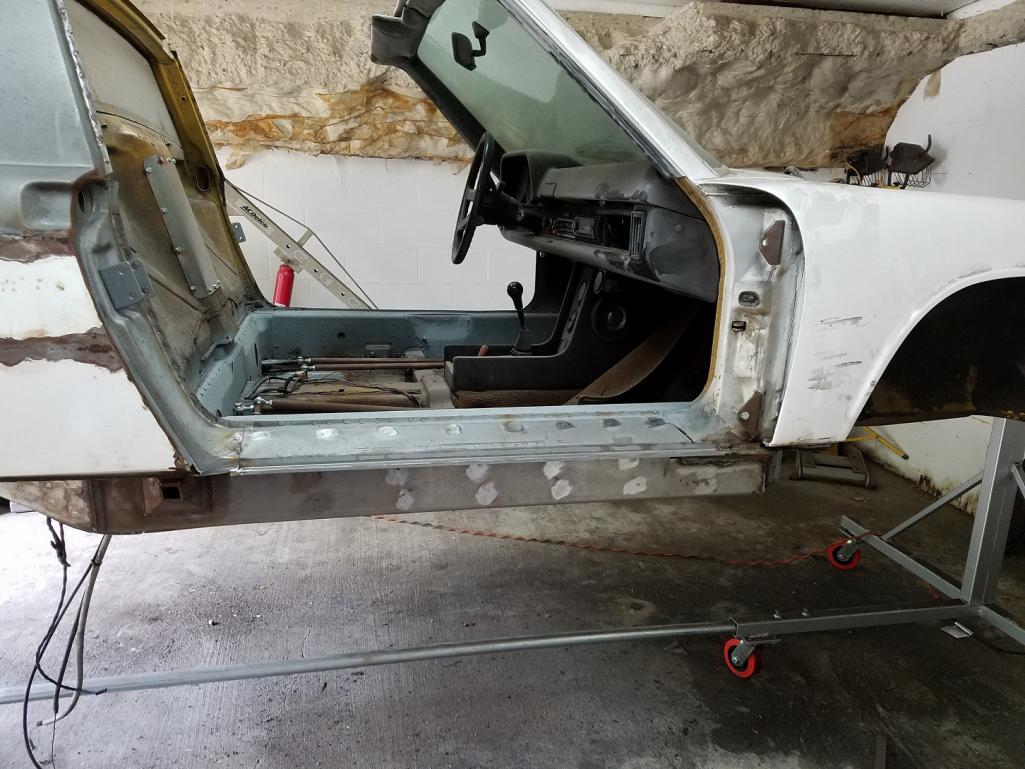
|
|
|
|
| 9146C |
Apr 27 2020, 03:28 PM
Post
#51
|
|
Member Group: Members Posts: 228 Joined: 14-September 19 From: US Member No.: 23,460 Region Association: None |
I appreciate those who responded to my other post last week about installing the GT fender flares.
Today, I mounted both passenger side flares (well, tacked in place anyway!). As planned, I started by tacking on bottom both ends and slowly worked toward the middle, cutting about 12 - 14 inches at a time and tacking as I went. I'm happy how it turned out! I think I understand better now how some of you mention the bottoms will need reshaping...mine were installed "lower" to give me what I thought would be a better top arch blend. Found another PO patch on the lower front fender...it was actually done well with the exception of the "lathering" of bondo! Thank you again to everyone for the feedback prior installing these flares! Attached thumbnail(s) 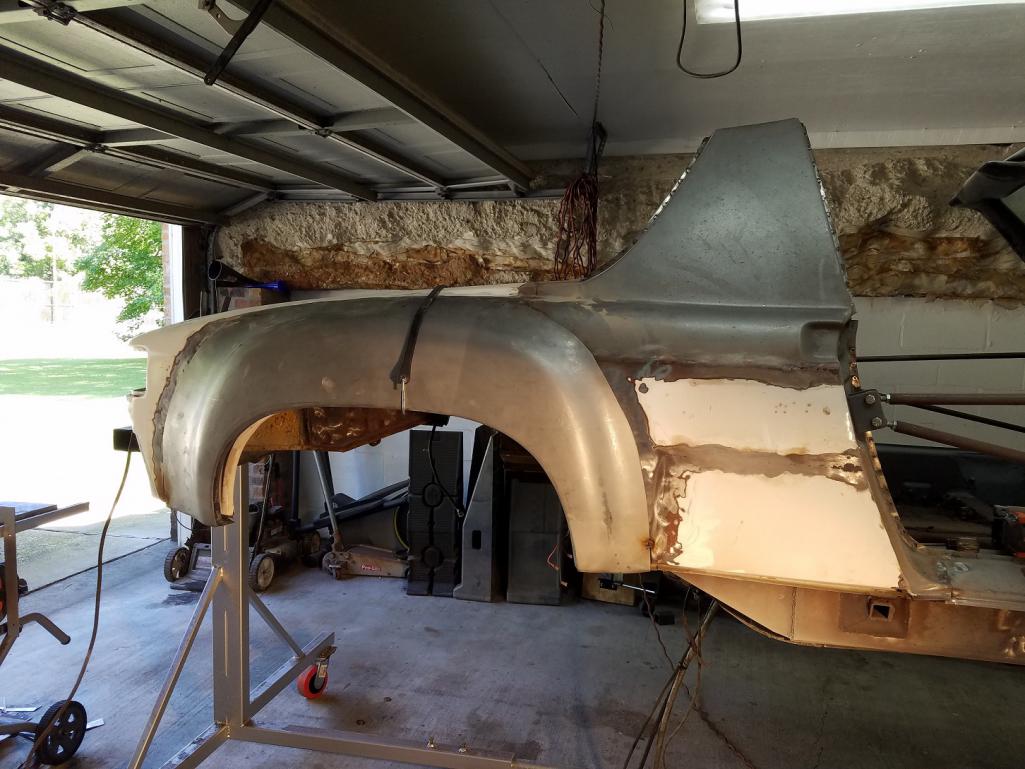 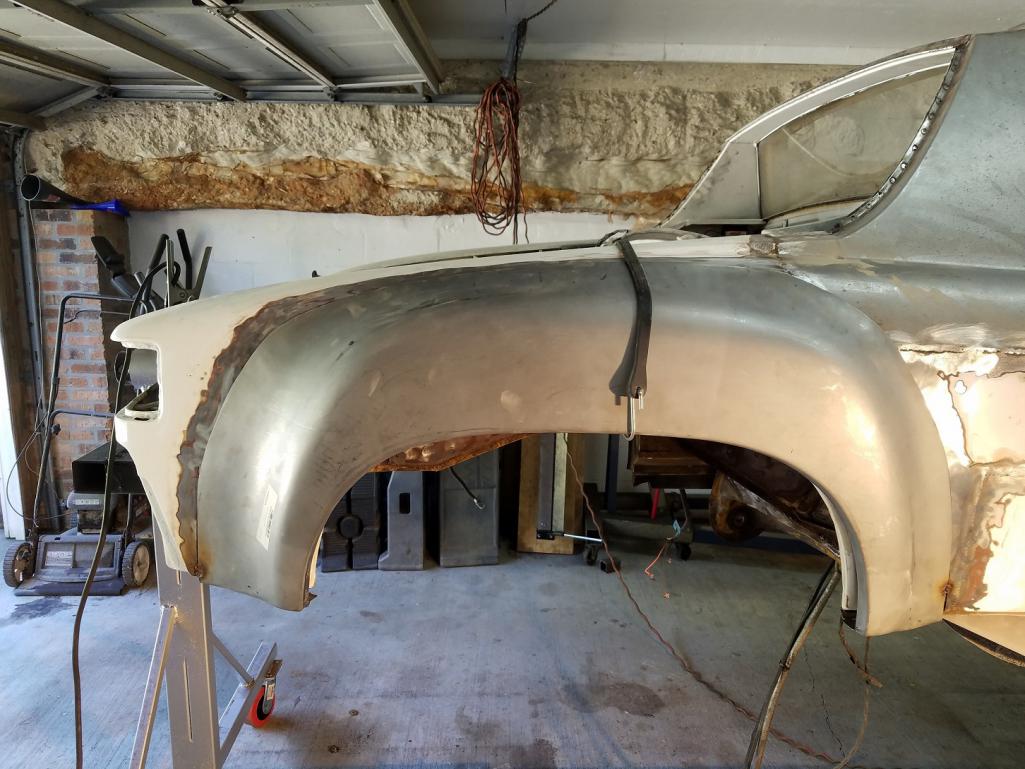 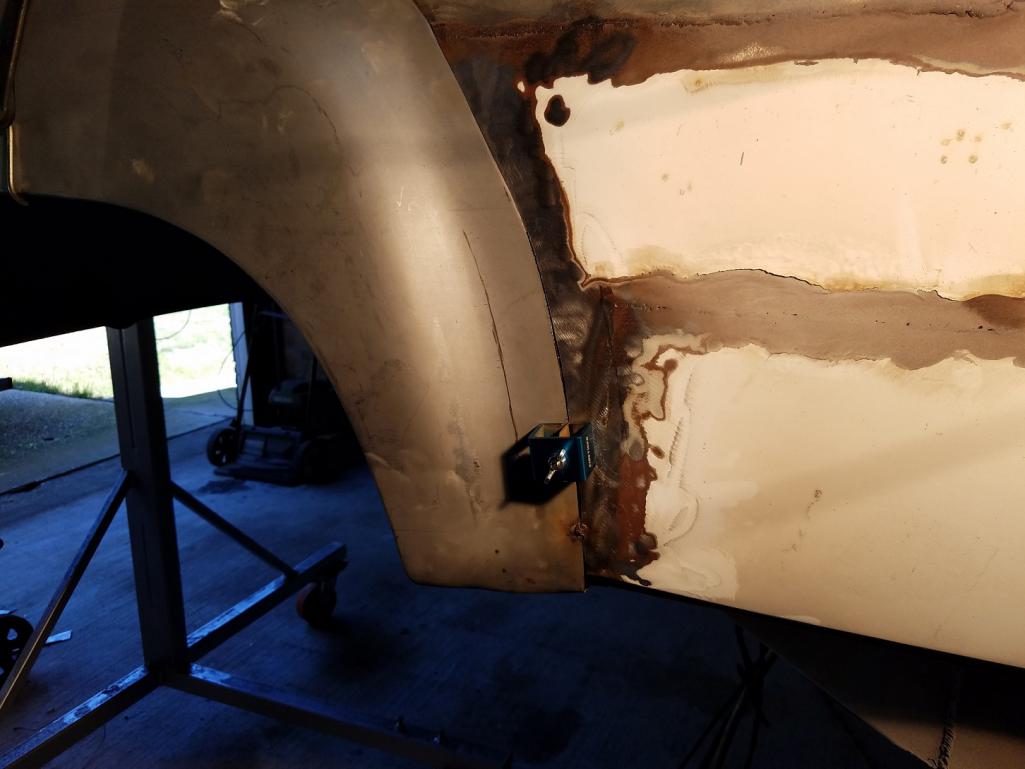 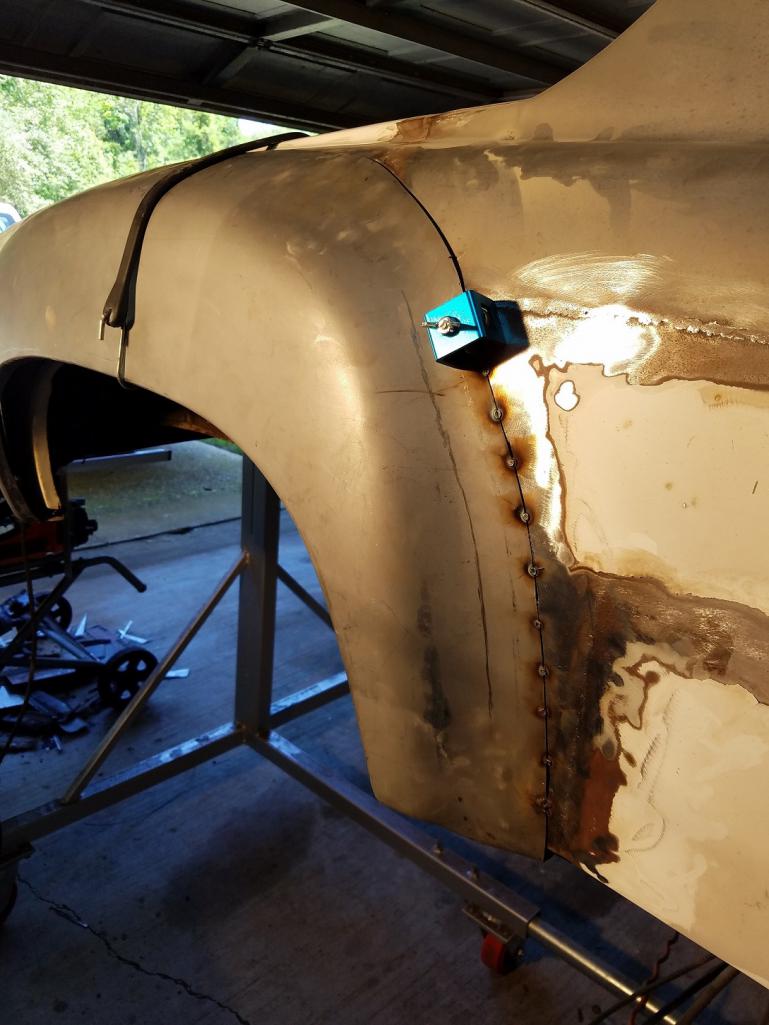  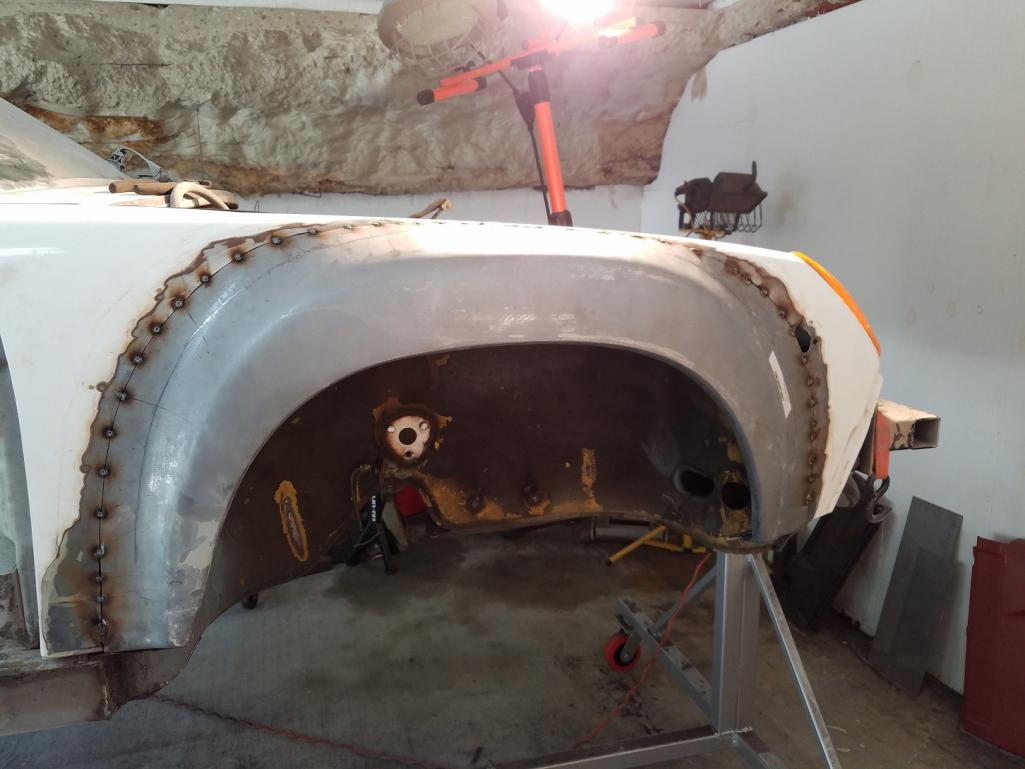  
|
|
|
|
| Cairo94507 |
Apr 27 2020, 03:36 PM
Post
#52
|
|
Michael Group: Members Posts: 9,714 Joined: 1-November 08 From: Auburn, CA Member No.: 9,712 Region Association: Northern California |
I think your placement is spot on. (IMG:style_emoticons/default/beerchug.gif)
|
 |
|
| mepstein |
Apr 27 2020, 04:52 PM
Post
#53
|
|
914-6 GT in waiting Group: Members Posts: 19,239 Joined: 19-September 09 From: Landenberg, PA/Wilmington, DE Member No.: 10,825 Region Association: MidAtlantic Region |
PRS914-6 did a write up on cutting off the bottom of the flair and reshaping it to blend in better.
|
|
|
|
| 9146C |
Apr 27 2020, 04:59 PM
Post
#54
|
|
Member Group: Members Posts: 228 Joined: 14-September 19 From: US Member No.: 23,460 Region Association: None |
Thank you Gentlemen!
This site has a wealth of information! Much appreciated! |
|
|
|
| 9146C |
Apr 30 2020, 05:55 PM
Post
#55
|
|
Member Group: Members Posts: 228 Joined: 14-September 19 From: US Member No.: 23,460 Region Association: None |
Driver's side flares now also tacked into place.
Attached thumbnail(s) 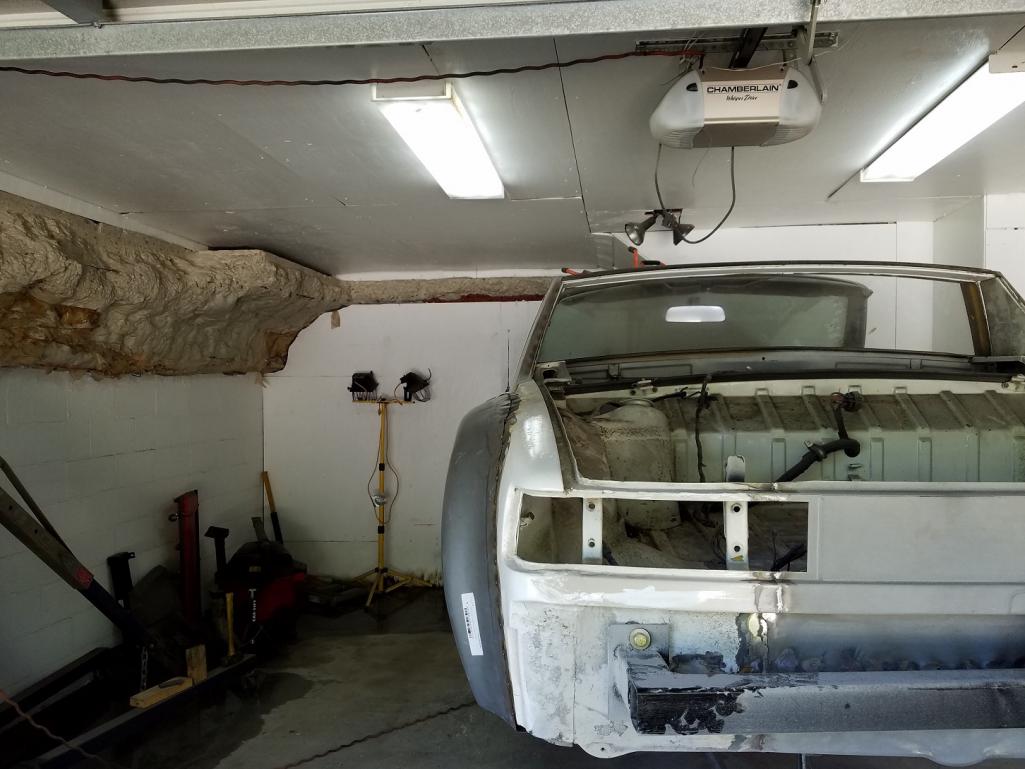 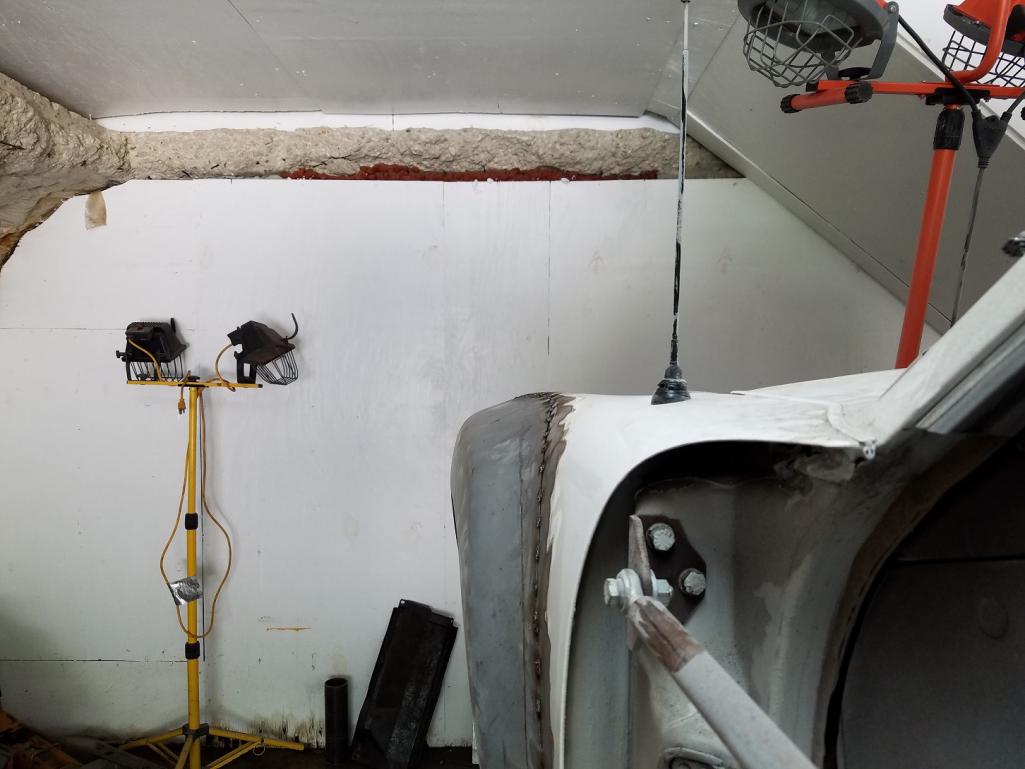 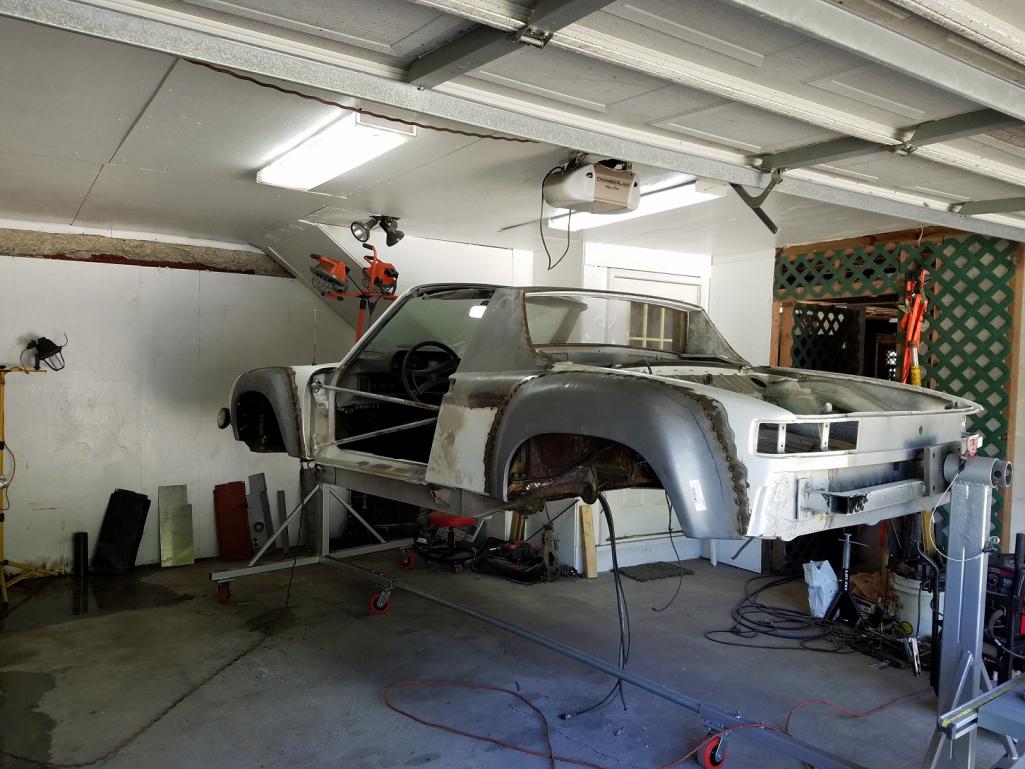
|
|
|
|
| 9146C |
May 12 2020, 03:13 PM
Post
#56
|
|
Member Group: Members Posts: 228 Joined: 14-September 19 From: US Member No.: 23,460 Region Association: None |
Still working on the bottom side of the fender flares and "metal shaping" them to better fit the rocker panels.
Started a small job I'd been putting off...after removing the seam sealer from the bottom of the quarter panel where I had to replace the door jam, found a pretty decent sized hole. Fabbed up a small piece to replace in this area...still have to fit/weld it in place, but, happy how it turned out. Attached thumbnail(s)  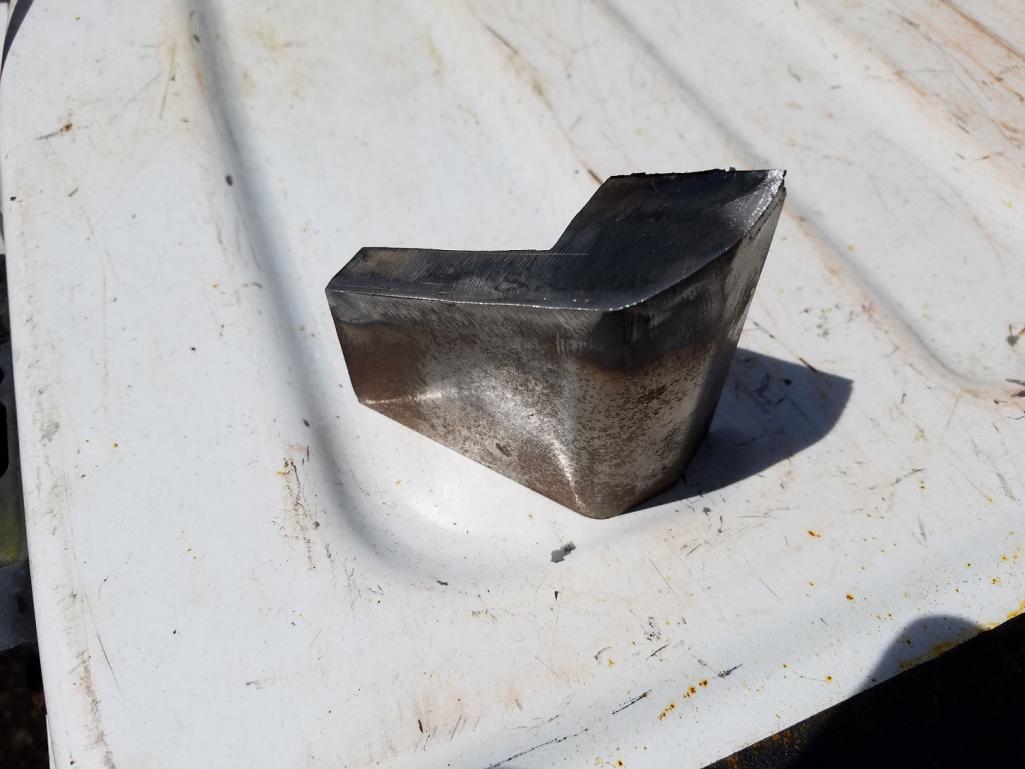 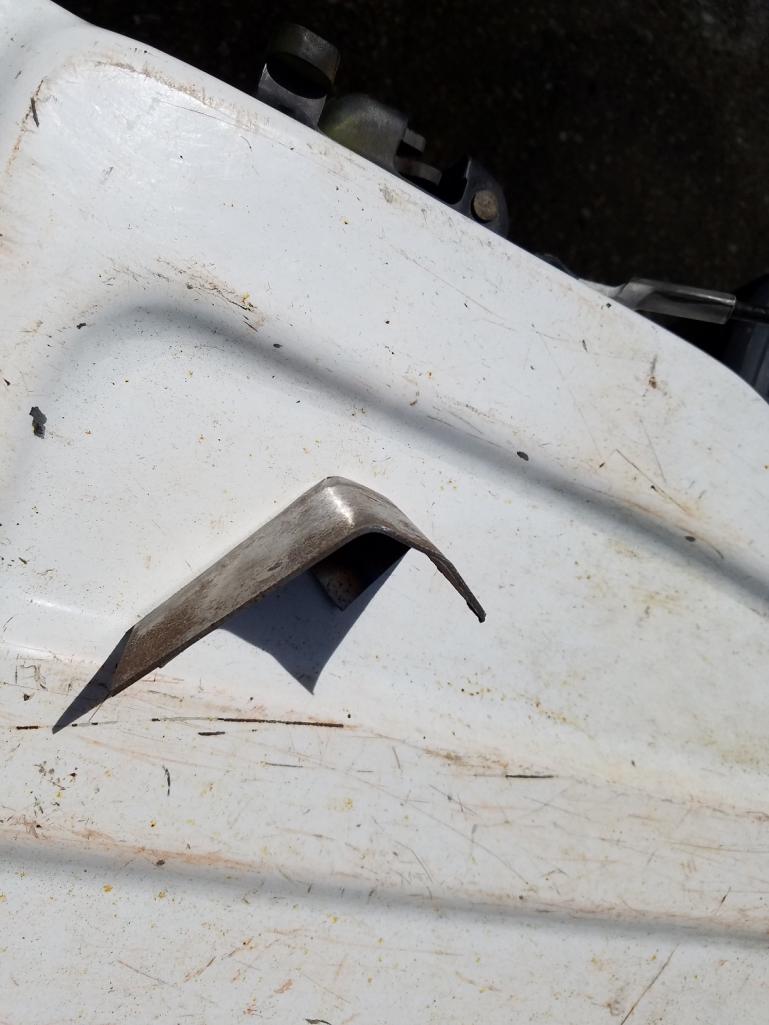 
|
|
|
|
| 9146C |
Jun 12 2020, 12:38 PM
Post
#57
|
|
Member Group: Members Posts: 228 Joined: 14-September 19 From: US Member No.: 23,460 Region Association: None |
I think the bottom side is finally done! (I suspect some folks won't necessarily approve of my choice of bottom coating...)
Media blasted the entire bottom side, sealed all the seams with SEM Seam Sealer, epoxy primed the underside, then finished sprayed with UPOL Raptor Bedliner...I'm happy how it turned out...I was never a fan of colored wheel wells, although if one were inclined, I'm sure you could paint directly over the textured bedliner for a close to factory "ripple" look. Finally on to the top side finish bodywork/filling. It's been a long six months! Attached thumbnail(s) 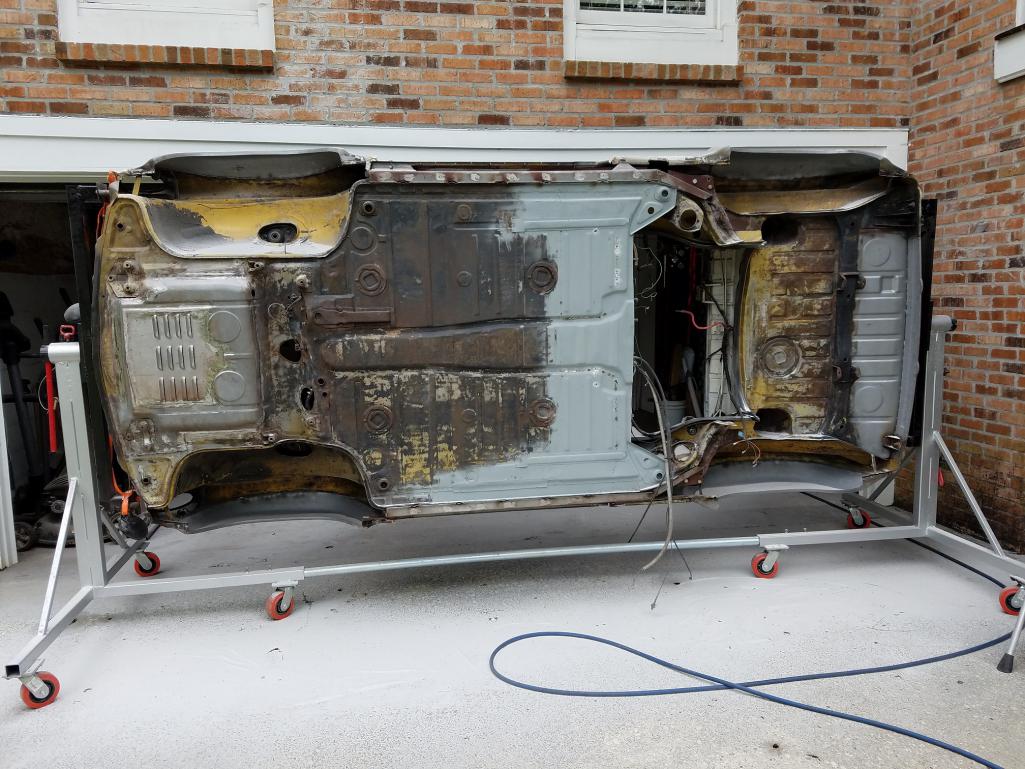 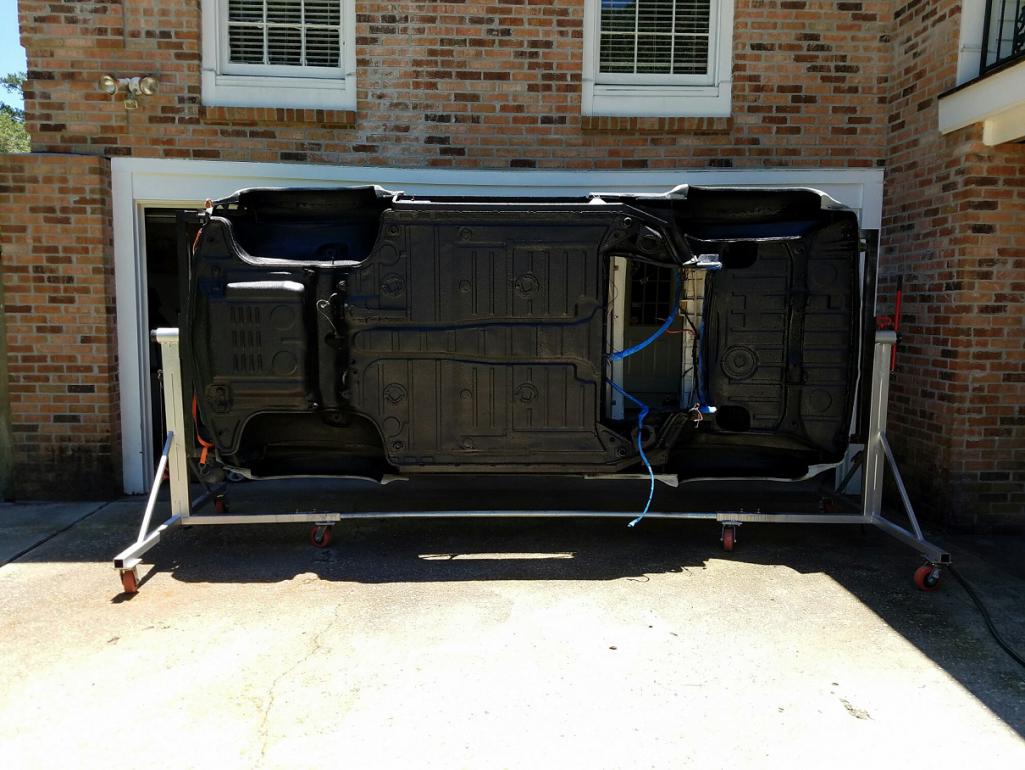
|
|
|
|
| wysri9 |
Jun 12 2020, 01:18 PM
Post
#58
|
|
Member Group: Members Posts: 199 Joined: 23-August 13 From: Aberdeen, Scotland Member No.: 16,291 Region Association: England |
|
|
|
|
| 9146C |
Jun 12 2020, 01:28 PM
Post
#59
|
|
Member Group: Members Posts: 228 Joined: 14-September 19 From: US Member No.: 23,460 Region Association: None |
Thanks for the feedback!
BTW, I actually lived in the Granite City between 2005-07; close to the Atholl Hotel on King's Gate. Fond memories! Thanks again! |
|
|
|
| 9146C |
Jun 19 2020, 11:59 AM
Post
#60
|
|
Member Group: Members Posts: 228 Joined: 14-September 19 From: US Member No.: 23,460 Region Association: None |
Off the rotisserie and onto a temporary car dolly.
I didn't feel like welding up a dolly so I made a cheap one out of lumber...used simple pipe fittings to match the four body mount locations (capped with a 1/2" to 3/8" reducer...worked out well). Now onto the final body work/filling. Attached thumbnail(s) 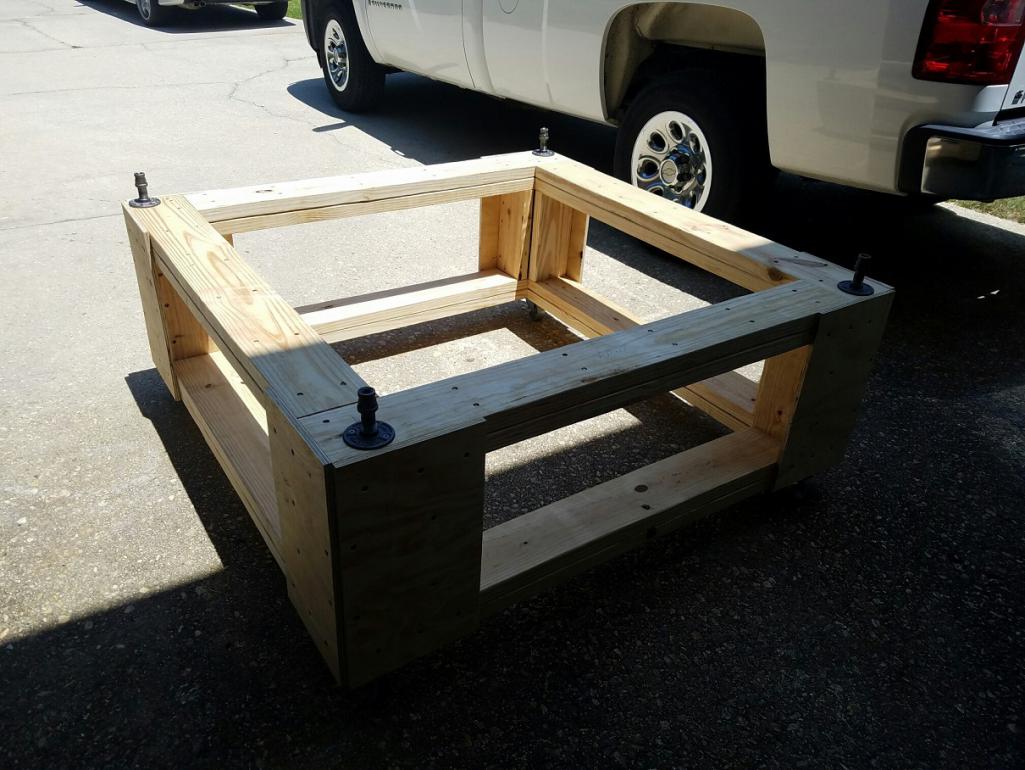 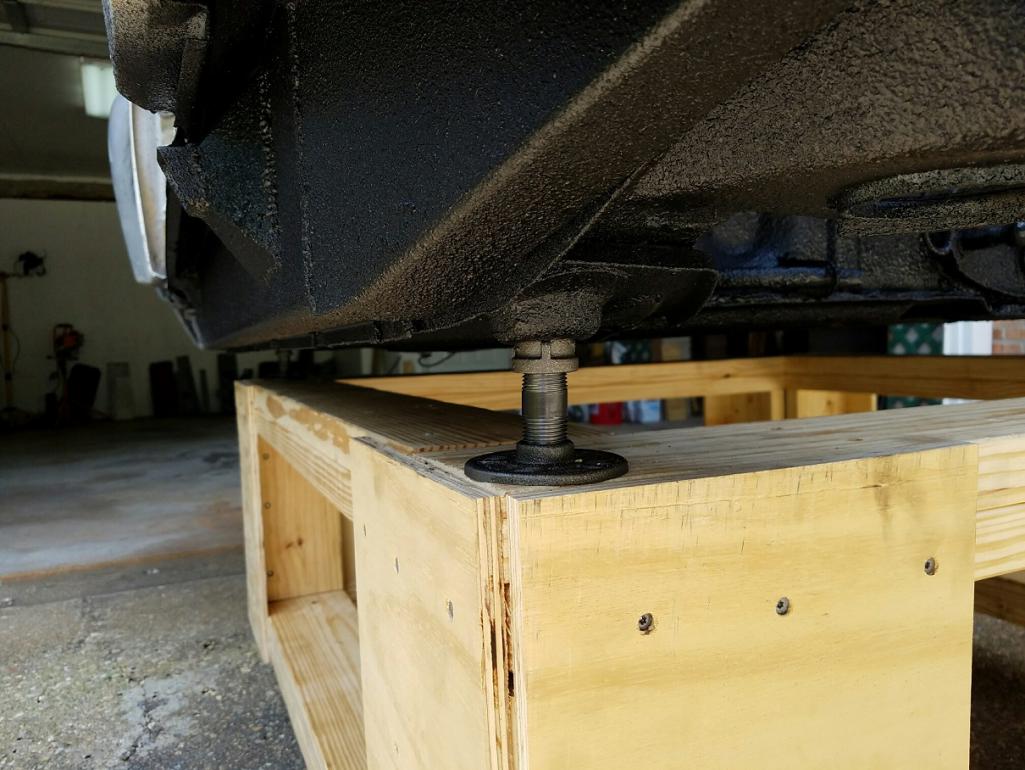  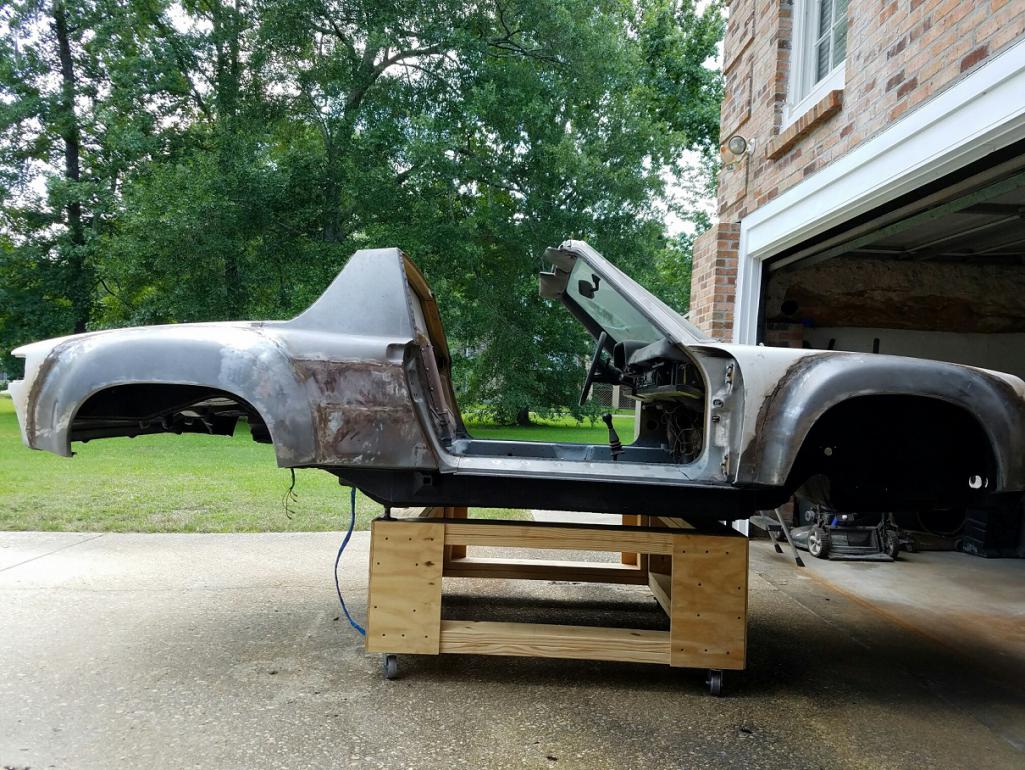
|
|
|
|
|
1 User(s) are reading this topic (1 Guests and 0 Anonymous Users)
0 Members:

|
Lo-Fi Version | Time is now: 26th April 2024 - 08:01 AM |
Invision Power Board
v9.1.4 © 2024 IPS, Inc.