|
|
|
Porsche, and the Porsche crest are registered trademarks of Dr. Ing. h.c. F. Porsche AG.
This site is not affiliated with Porsche in any way. Its only purpose is to provide an online forum for car enthusiasts. All other trademarks are property of their respective owners. |
|
|

  |

| 9146C |
 Aug 29 2020, 02:38 PM Aug 29 2020, 02:38 PM
Post
#81
|
|
Member  Group: Members Posts: 228 Joined: 14-September 19 From: US Member No.: 23,460 Region Association: None |
Thanks for the feedback Gentlemen!
Affirmative on being sure to spray the fender well lips and specifically under the doors. |
   |

 
|
| 9146C |
Sep 5 2020, 02:06 PM
Post
#82
|
|
Member Group: Members Posts: 228 Joined: 14-September 19 From: US Member No.: 23,460 Region Association: None |
This week, got the final layer of urethane primer applied and almost finished sanding/ready for paint. Hopefully next week it will be painted.
Just for giggles, I put together a video of my project so far...I was feeling a little burned out...this helped me to visualize the progress so far...and get me motivated to finish this up! https://www.youtube.com/watch?v=zsE5iefe9Eg Attached thumbnail(s) 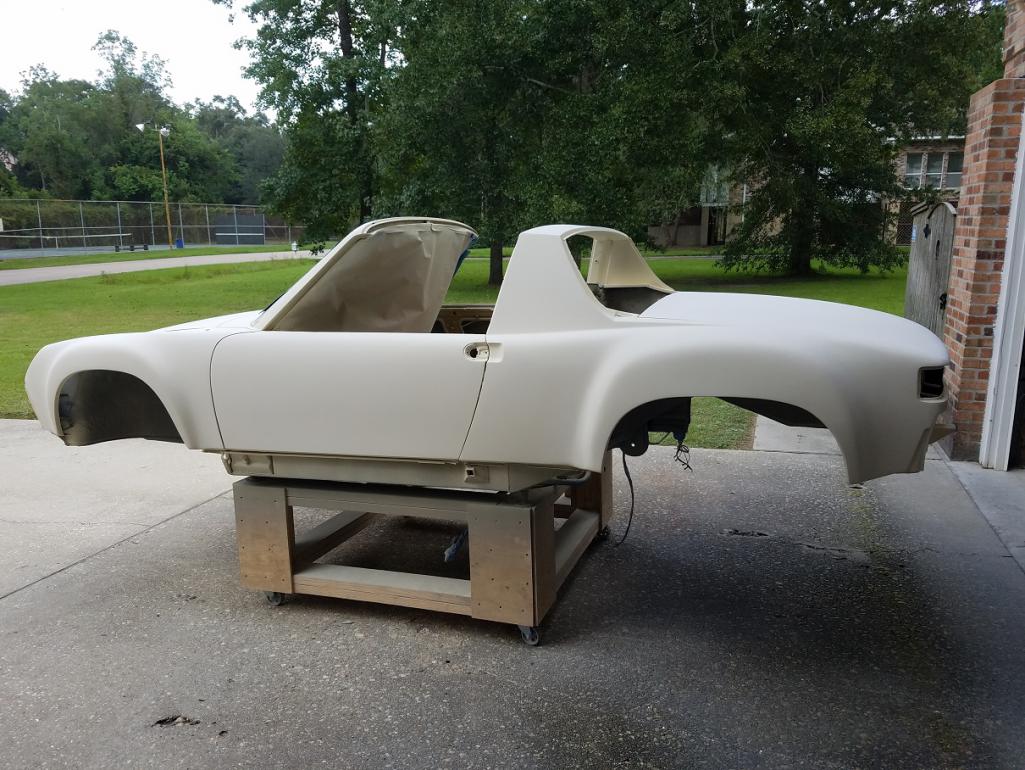 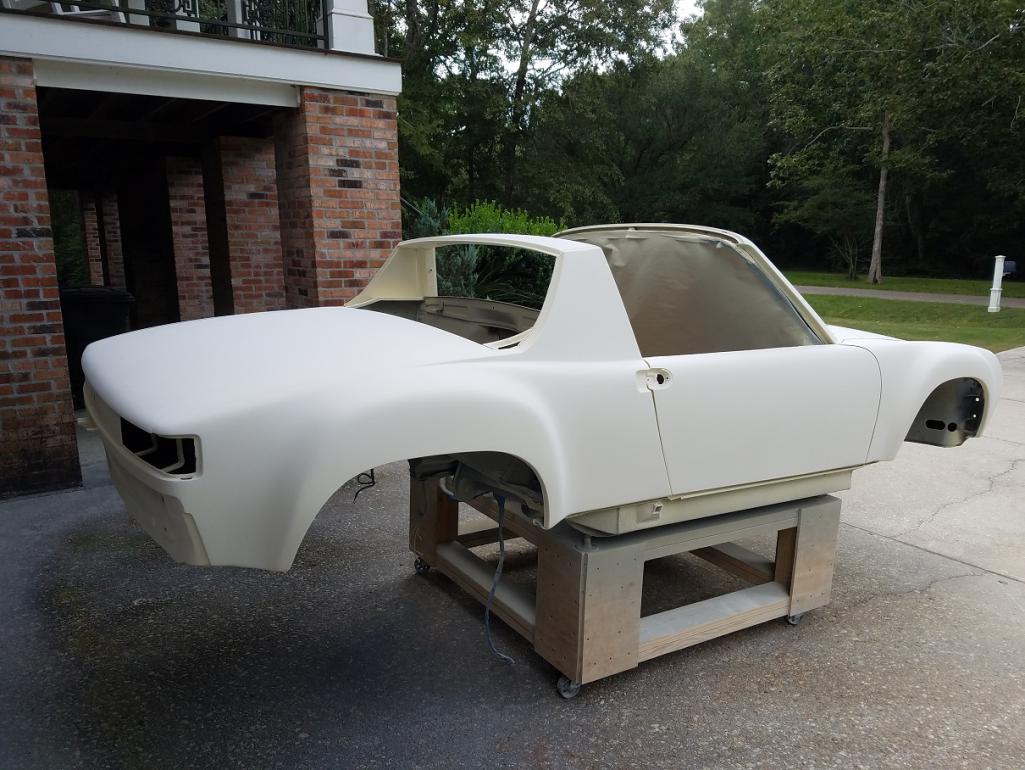 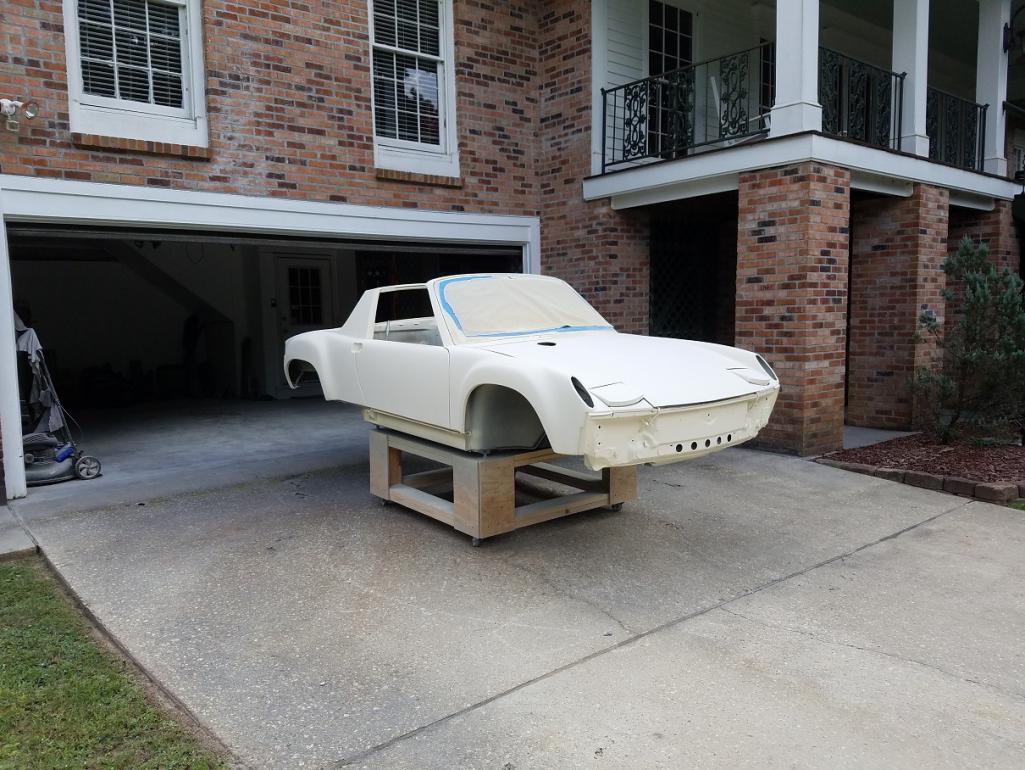
|
|
|
|
| 9146C |
Sep 11 2020, 11:34 AM
Post
#83
|
|
Member Group: Members Posts: 228 Joined: 14-September 19 From: US Member No.: 23,460 Region Association: None |
Not the greatest pictures, but, I've finally got it sprayed!!! Woo-hoo!
Now to let it cure for a bit before I sand it down/polish it smooth. Attached thumbnail(s) 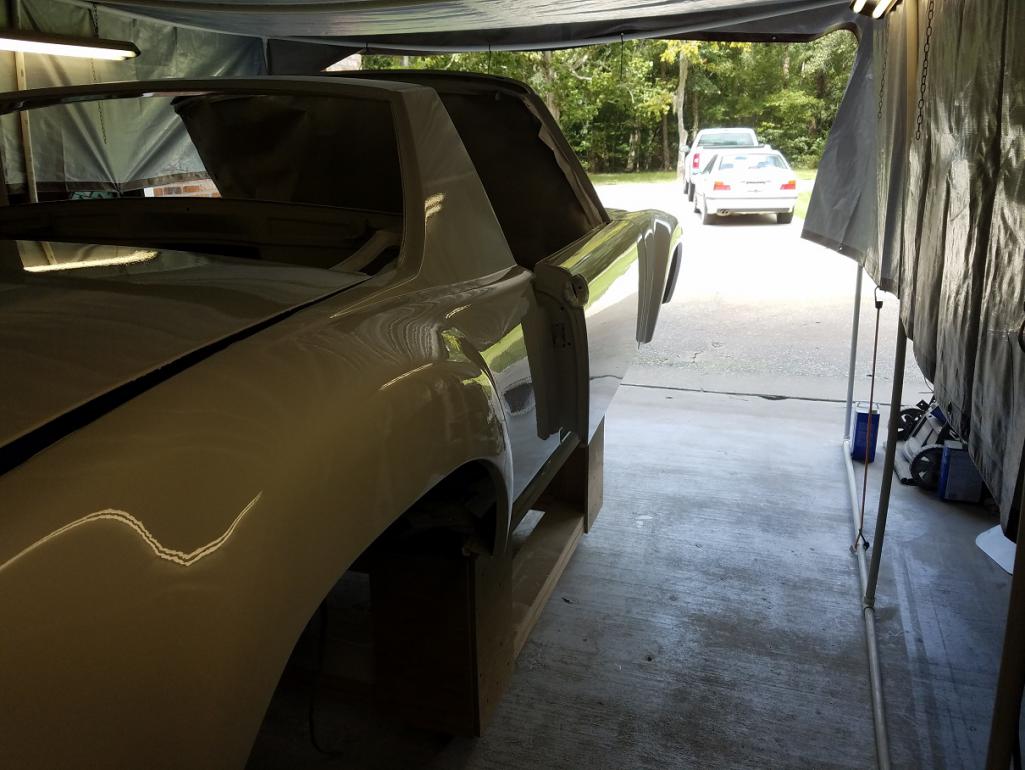  
|
|
|
|
| Root_Werks |
Sep 11 2020, 11:45 AM
Post
#84
|
|
Village Idiot Group: Members Posts: 8,315 Joined: 25-May 04 From: About 5NM from Canada Member No.: 2,105 Region Association: Pacific Northwest |
That looks like paint!
|
|
|
|
| 9146C |
Sep 11 2020, 11:52 AM
Post
#85
|
|
Member Group: Members Posts: 228 Joined: 14-September 19 From: US Member No.: 23,460 Region Association: None |
QUOTE That looks like paint! Thank you! Today feels like a milestone day!!! |
|
|
|
| wysri9 |
Sep 12 2020, 12:24 AM
Post
#86
|
|
Member Group: Members Posts: 199 Joined: 23-August 13 From: Aberdeen, Scotland Member No.: 16,291 Region Association: England |
That video is awesome. Fantastic work and the end result will be stunning. Now I will have to see if I have enough pictures to animate my shell repair (IMG:style_emoticons/default/smile.gif) (IMG:style_emoticons/default/smile.gif)
|
|
|
|
| Cairo94507 |
Sep 12 2020, 06:14 AM
Post
#87
|
|
Michael Group: Members Posts: 9,734 Joined: 1-November 08 From: Auburn, CA Member No.: 9,712 Region Association: Northern California |
Definitely cause to celebrate. (IMG:style_emoticons/default/beerchug.gif)
|
|
|
|
| 9146C |
Sep 12 2020, 06:30 AM
Post
#88
|
|
Member Group: Members Posts: 228 Joined: 14-September 19 From: US Member No.: 23,460 Region Association: None |
Thank you for the feedback, Gentlemen!
Really happy how the bodywork turned out...as frustrating as it was at times. Seeing the top coat applied makes it worthwhile. I went with a one part Acrylic Urethane (supplied by TCP). Really pleased by how it sprayed and simple to use...didn't use any additional reducer...laid down nicely without any runs...and I applied it pretty heavy to give me ample opportunity for wet sanding/polishing. I'll probably let it cure about 7 days before I start my wet sanding. It's getting there. Thanks again for the feedback! |
|
|
|
| 9146C |
Oct 27 2020, 11:35 AM
Post
#89
|
|
Member Group: Members Posts: 228 Joined: 14-September 19 From: US Member No.: 23,460 Region Association: None |
It's been a while since the last update...
Car has been wet-sanded (to 2000 grit) and cut-polished (Norton 3 Part Liquid Ice system). I need to make a second/final pass on the two deck lids...not quite happy yet with the finish on those two panels. Attached thumbnail(s) 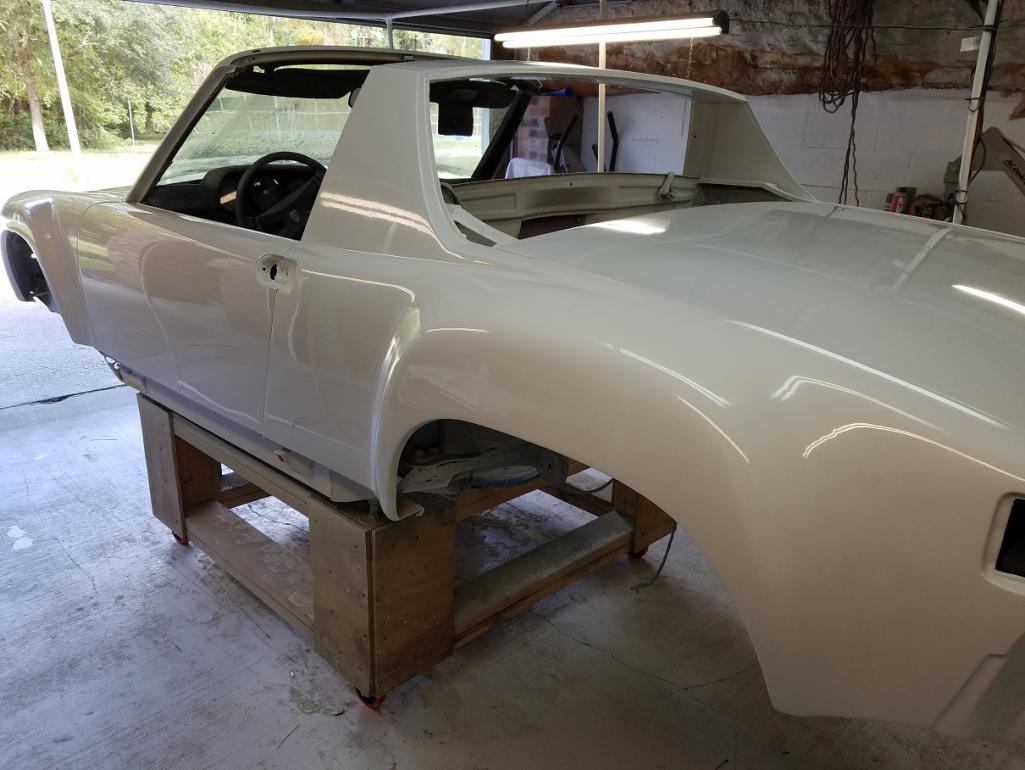 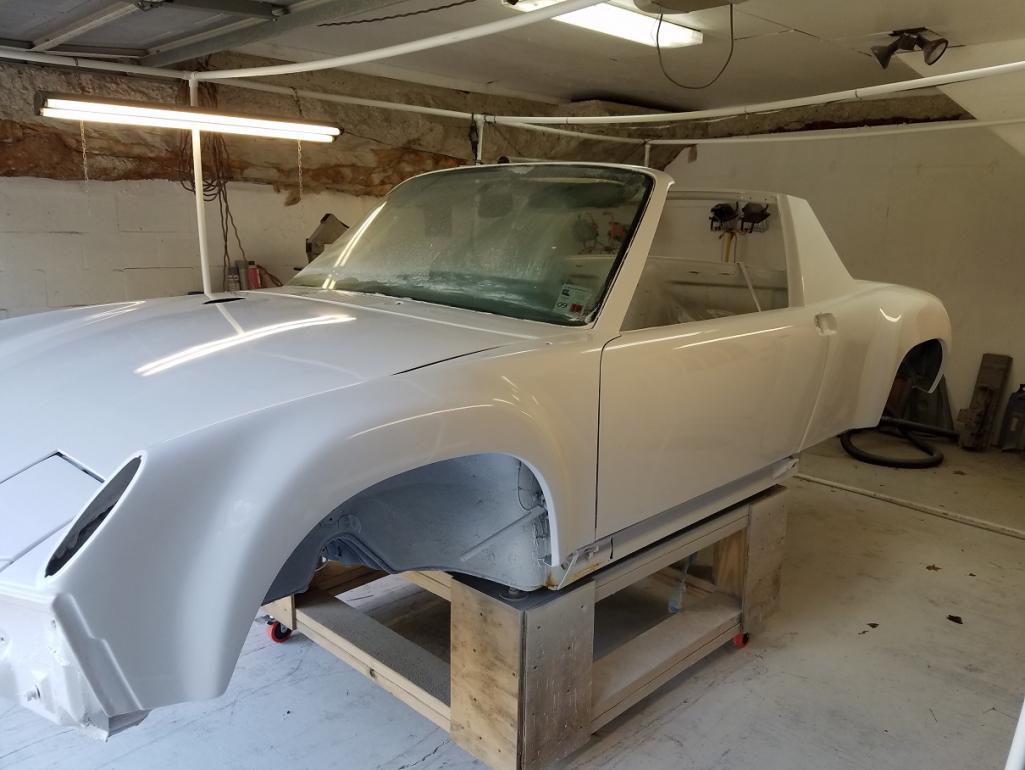 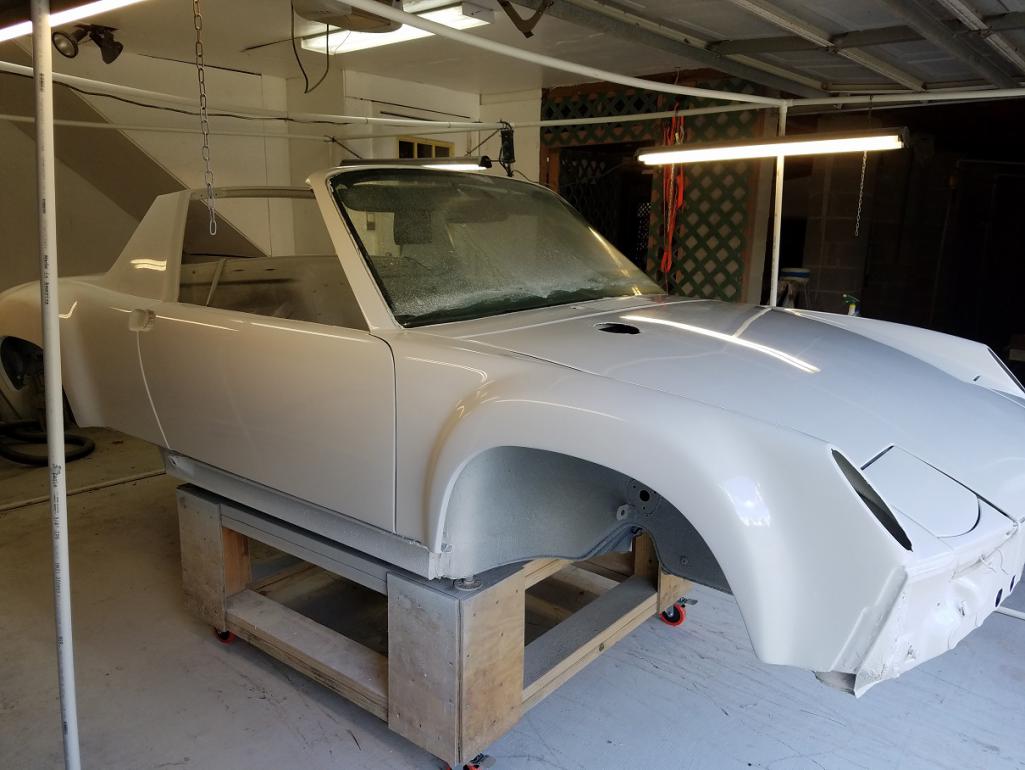 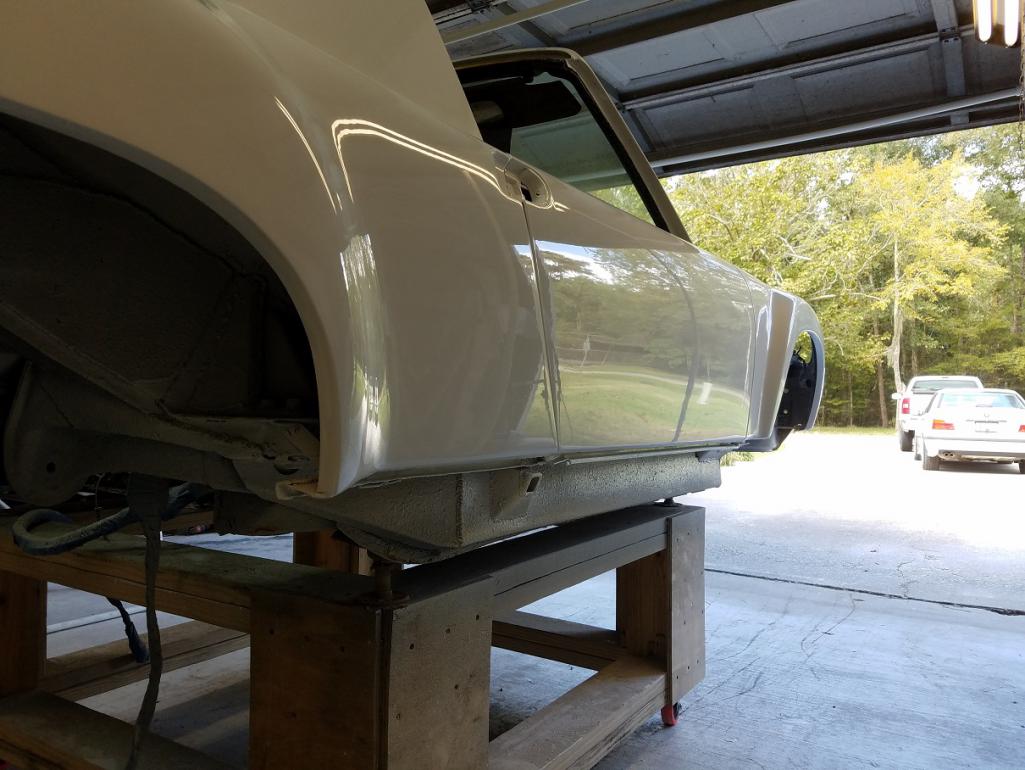 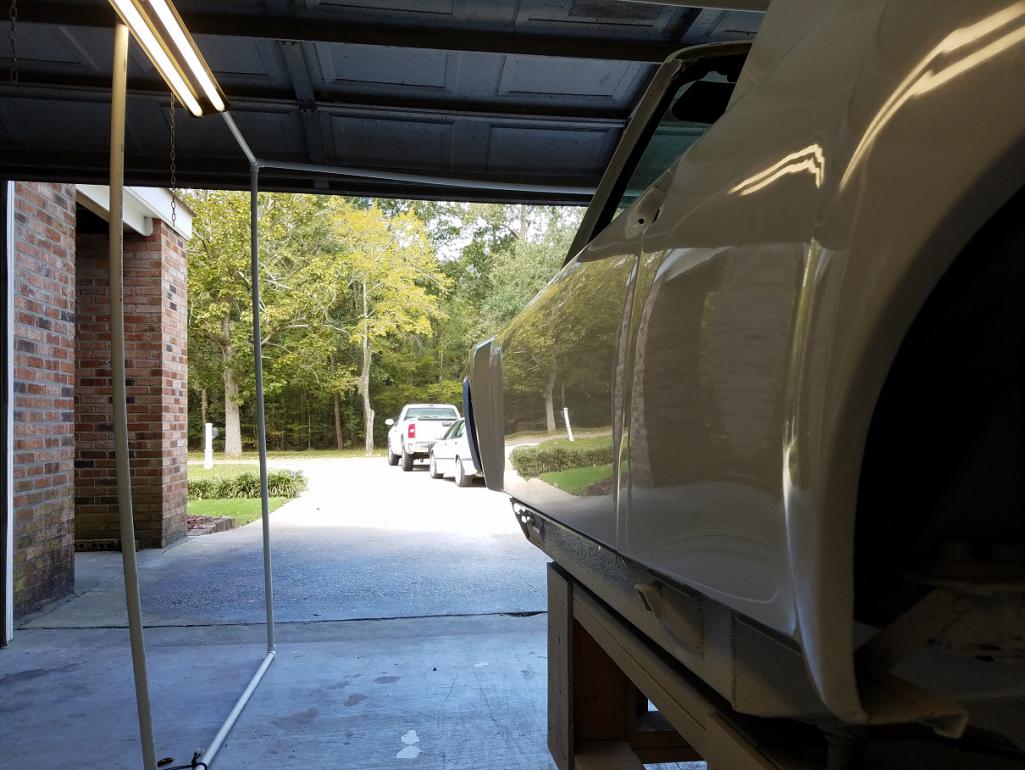
|
|
|
|
| djway |
Oct 27 2020, 01:11 PM
Post
#90
|
|
Senior Member Group: Members Posts: 787 Joined: 16-October 15 From: Riverside Member No.: 19,266 Region Association: Southern California |
Beauty
|
|
|
|
| 9146C |
Nov 3 2020, 05:13 PM
Post
#91
|
|
Member Group: Members Posts: 228 Joined: 14-September 19 From: US Member No.: 23,460 Region Association: None |
So my approach on this project may appear a little unconventional...especially after spraying the outside.
Today, I finished up brushing the inside of the cabin with 2 coats of POR-15 followed by 2 coats of epoxy topcoat. Happy how it turned out...now onto the engine bay and two trunks... Attached thumbnail(s) 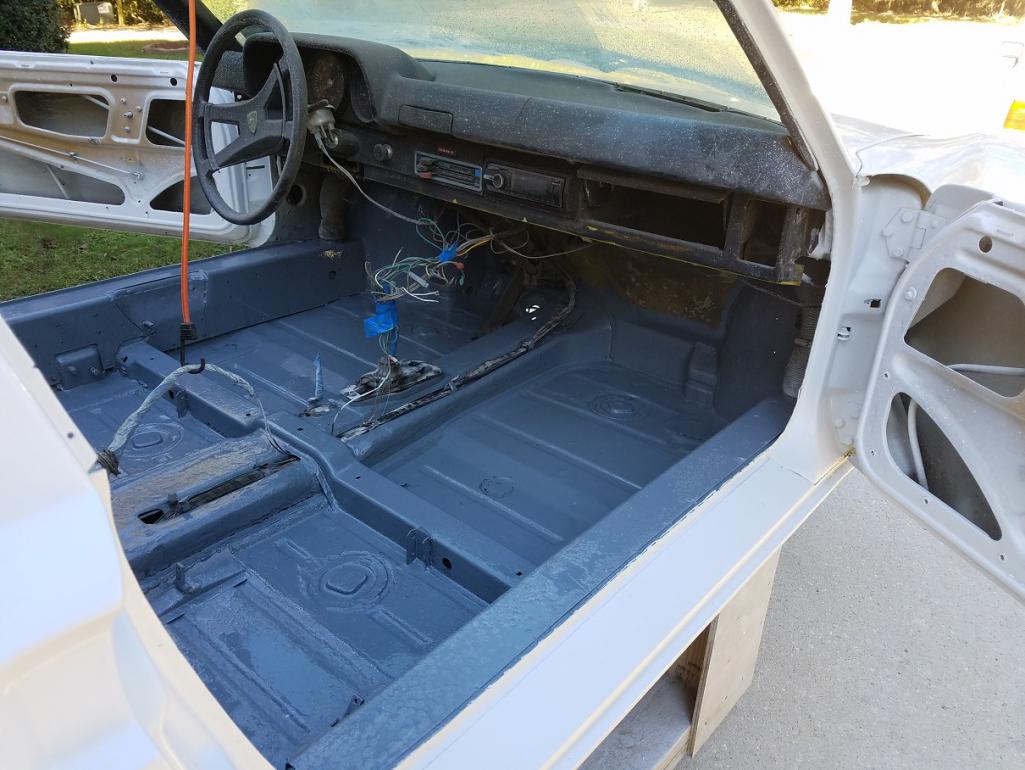 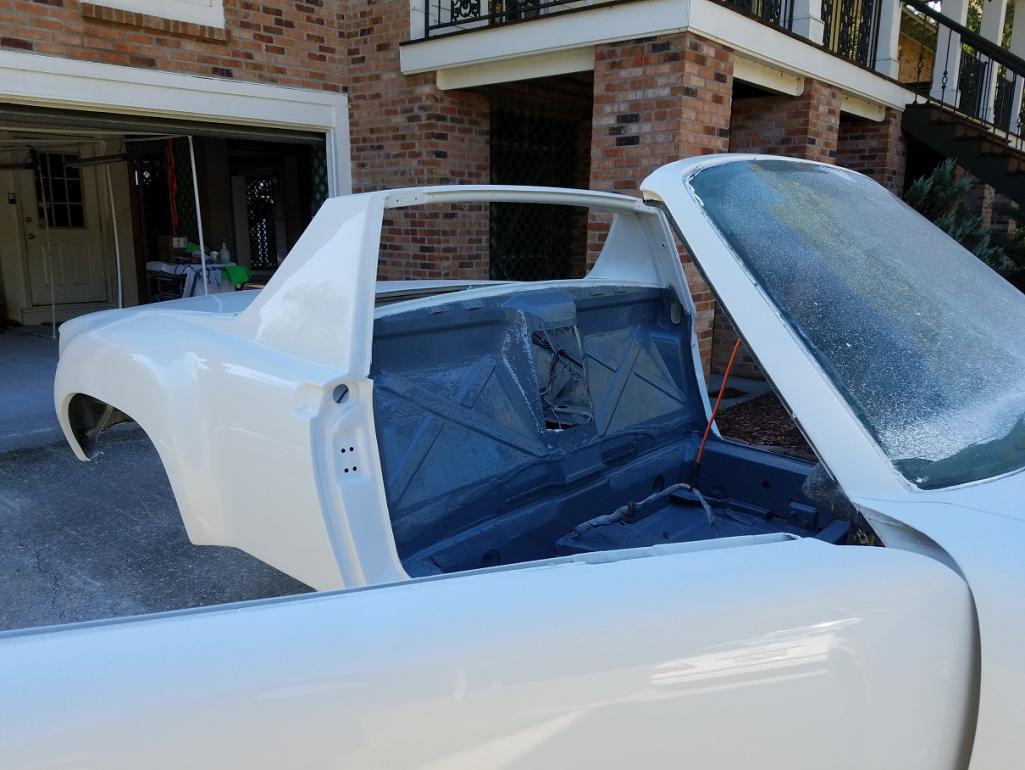 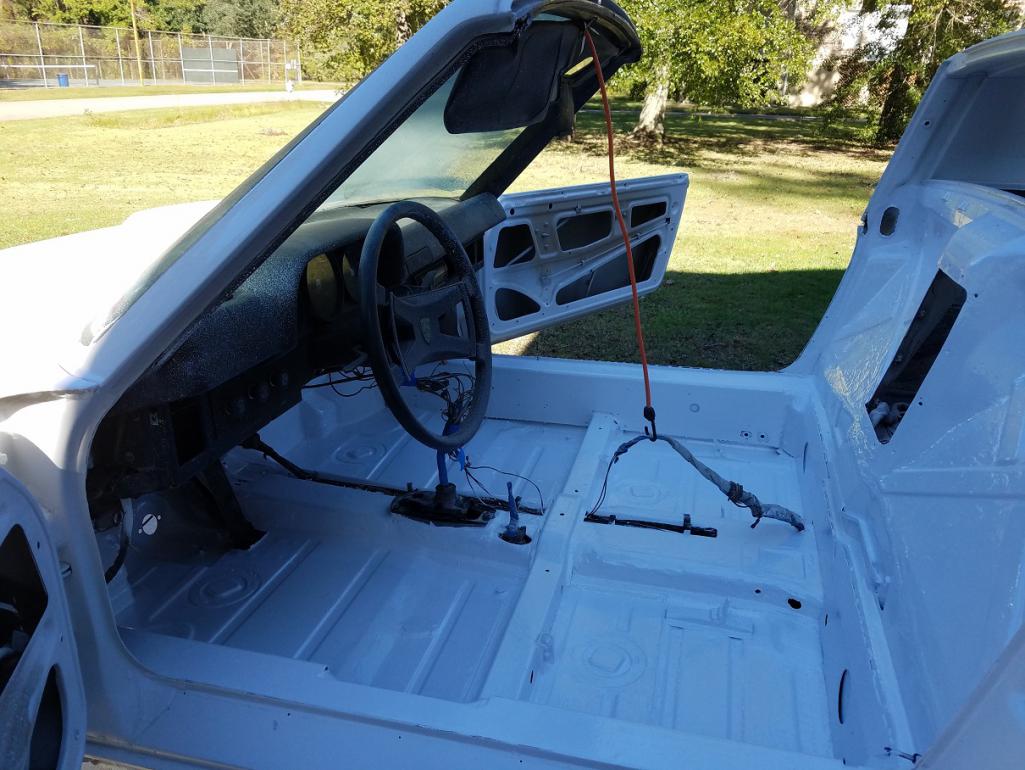 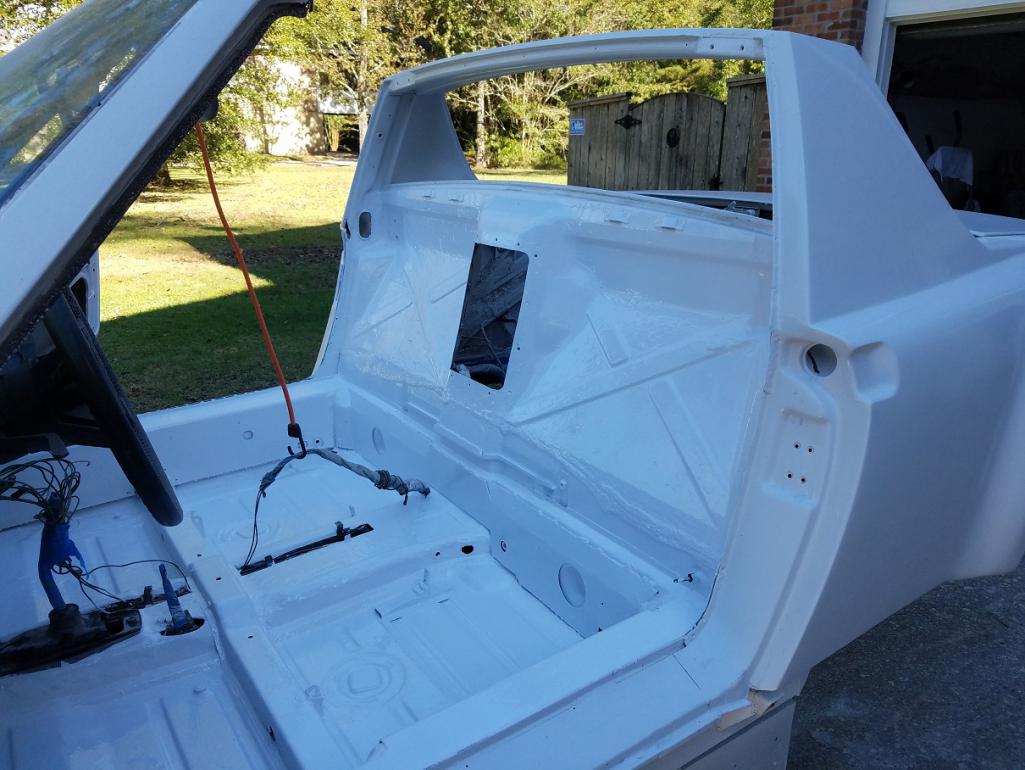
|
|
|
|
| Dion |
Nov 3 2020, 08:56 PM
Post
#92
|
|
RN Group: Members Posts: 2,764 Joined: 16-September 04 From: Audubon,PA Member No.: 2,766 Region Association: MidAtlantic Region |
Absolutely fantastic work. Car looks amazing. Feel like coming to PA and shoot some colour on mine. The time frame... man you blitzed through. Prolly doesn’t seem that way to you but wow. I can appreciate that hard work. Look forward to seeing more. (IMG:style_emoticons/default/beerchug.gif)
|
|
|
|
| 9146C |
Nov 4 2020, 08:14 AM
Post
#93
|
|
Member Group: Members Posts: 228 Joined: 14-September 19 From: US Member No.: 23,460 Region Association: None |
|
|
|
|
| djway |
Nov 5 2020, 01:35 AM
Post
#94
|
|
Senior Member Group: Members Posts: 787 Joined: 16-October 15 From: Riverside Member No.: 19,266 Region Association: Southern California |
I've done the same combo of POR and Epoxy a couple of times. Like a rock. Looks great.
|
|
|
|
| 9146C |
Nov 8 2020, 04:31 PM
Post
#95
|
|
Member Group: Members Posts: 228 Joined: 14-September 19 From: US Member No.: 23,460 Region Association: None |
Front and rear trunks now complete...2 coats POR-15 followed by 3 coats of epoxy topcoat.
Just the engine bay left to complete... Attached thumbnail(s) 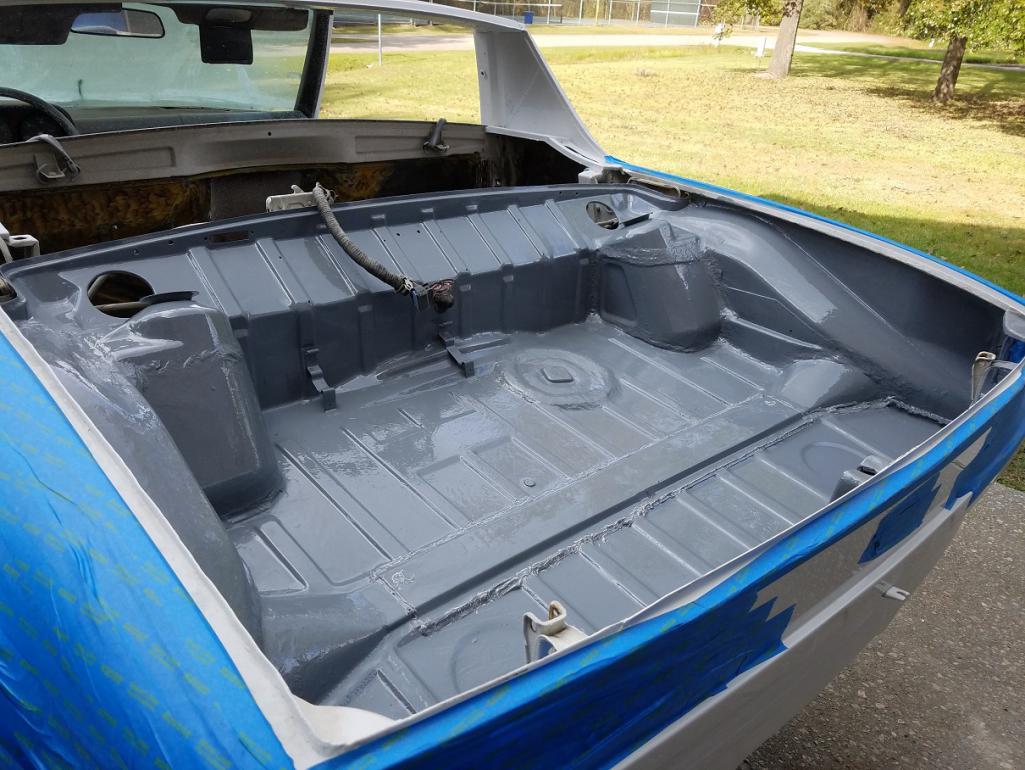 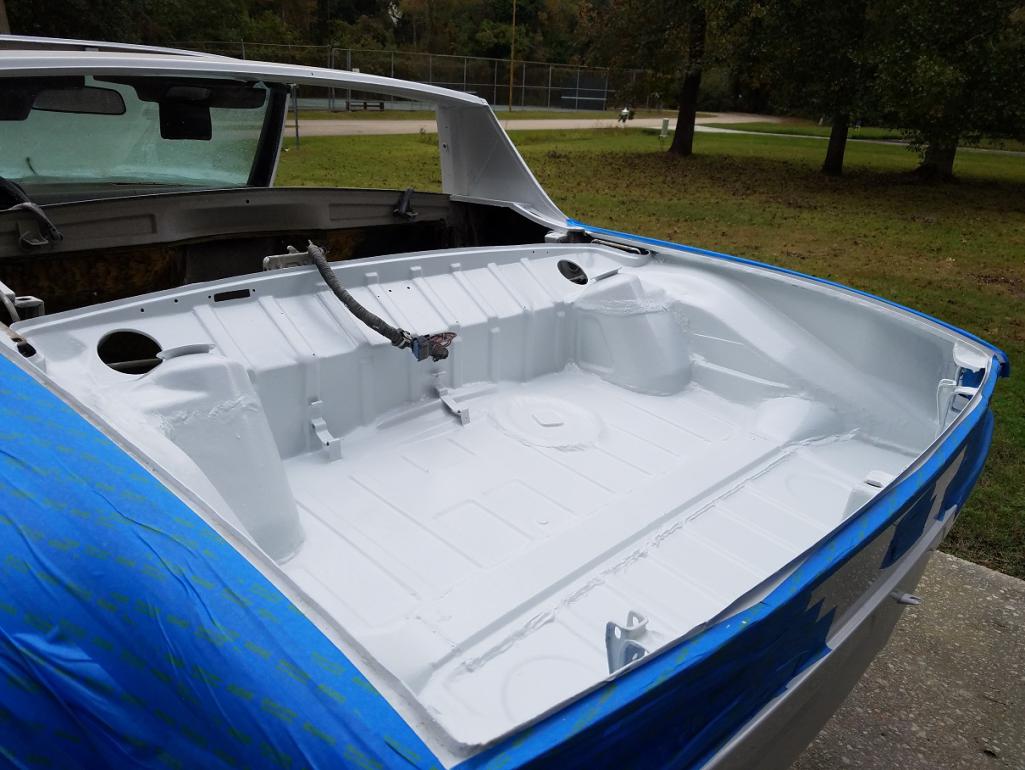 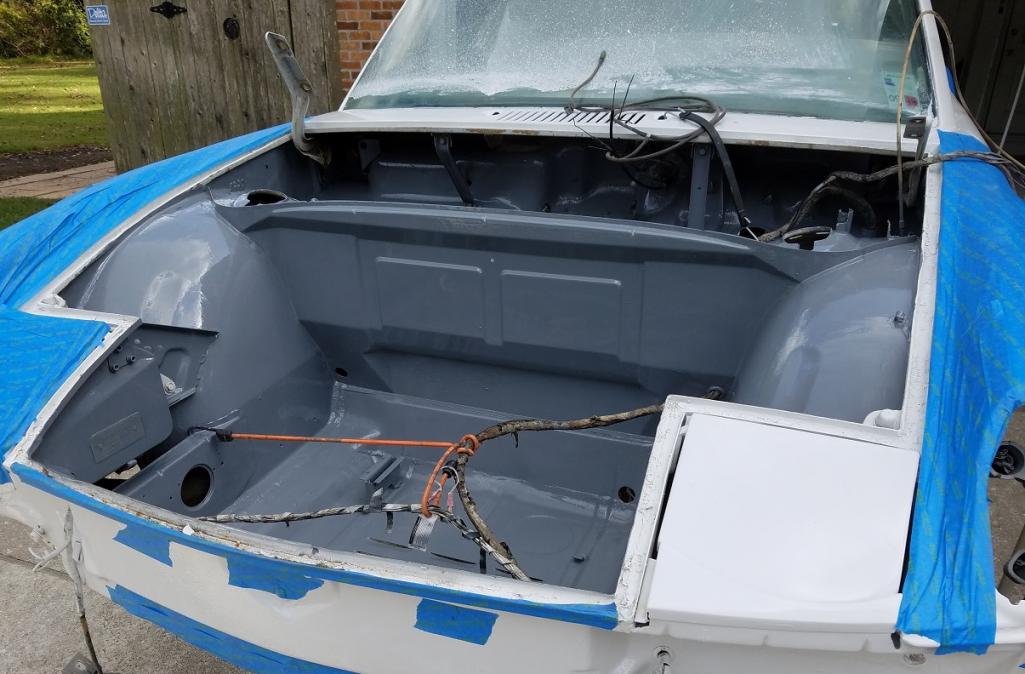 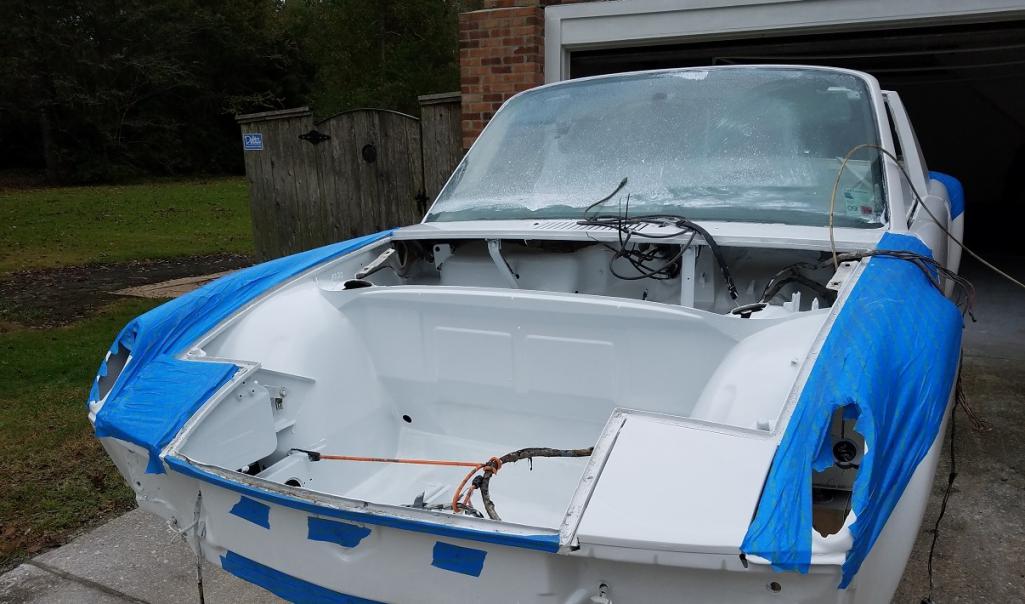 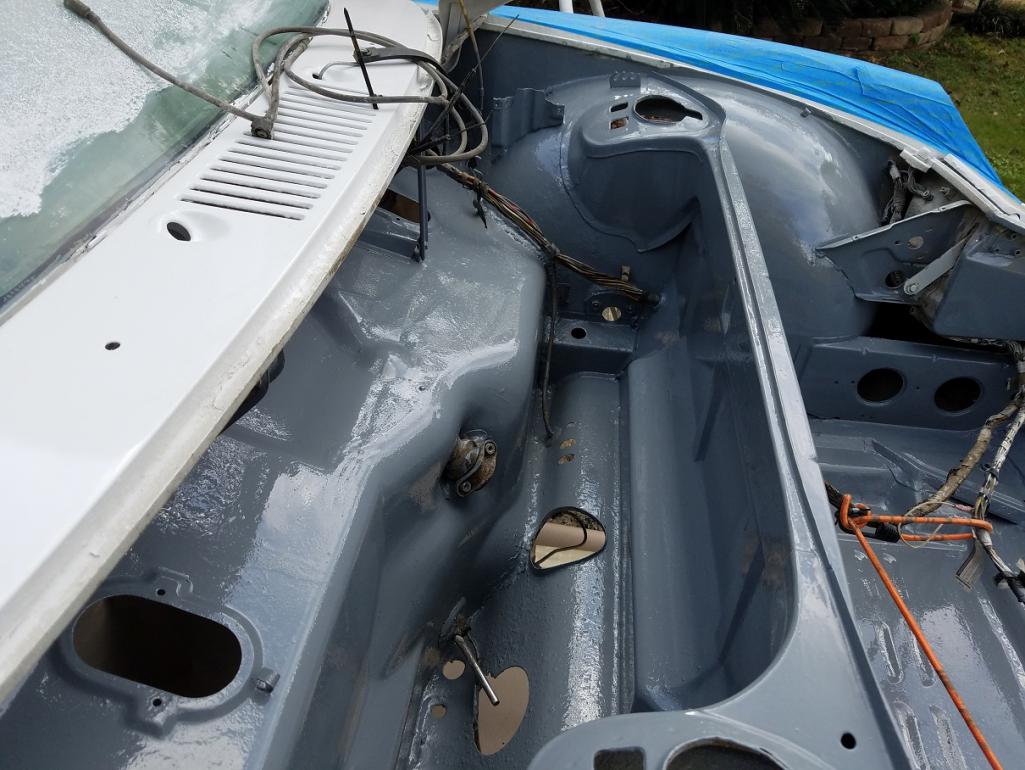 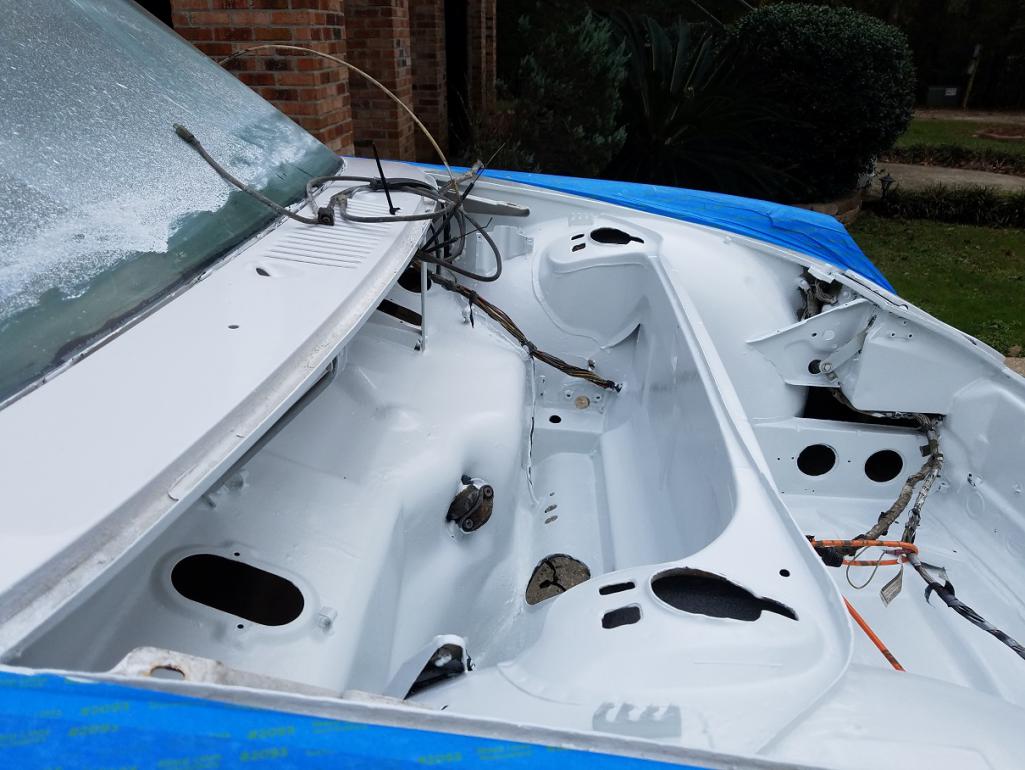
|
|
|
|
| 9146C |
Dec 11 2020, 04:15 PM
Post
#96
|
|
Member Group: Members Posts: 228 Joined: 14-September 19 From: US Member No.: 23,460 Region Association: None |
And now the re-assembly begins!
Almost have the heating/ventilation system completed (just need to install the hoses to finish). Checked both the wiper motor and fresh air fan (all 3 speeds) operation prior to re-assembly. Painted the front and rear suspension components with two coats of POR-15 semi-gloss. Shout out to @IanKarr for his excellent video on re-bushing the front control arms! Front and rear suspensions have new rubber bushings and wheel bearings. Front also included new turbo tie-rods and new ball joints. The master cylinder, front brake calipers and brake proportioning valve have all been rebuilt (not yet installed). Still waiting on a few small parts for the rear calipers. Should be ready now to also install the new brake line kit. I was thinking about how I was going to set the rear alignment. The following description is what I came up with: First, I perfectly leveled the car on the cart...level to all four corners. I then set up the rear trailing arms to be flat/parallel on the bottom side. That gave me a clearance of 185 mm from the top lug nut center to the bottom of the fender well arch (at the top, measured on both sides). Looking at a bunch of Porsche 914-6 GT pictures, I should be pretty close with that reference, I set the camber first (-3/4 degrees...luckily I had enough, and the correct, shims available!). After setting the camber I then set the drivers side brake disc alignment perfectly parallel to the driver's side longitudinal. (You can see the 1" square tubing I used in the photo for reference.) After that, I measured the distance between the front of the disk and the rear of the disk for both sides of the car...I had a similar 1" tubing jig attached to the right rear brake disc for my measurements. I think it worked out well...I set the rear with no toe-in. Next week, I'll start re-assembling the doors and install the dynamat sound proofing on the floor and firewall. Attached thumbnail(s) 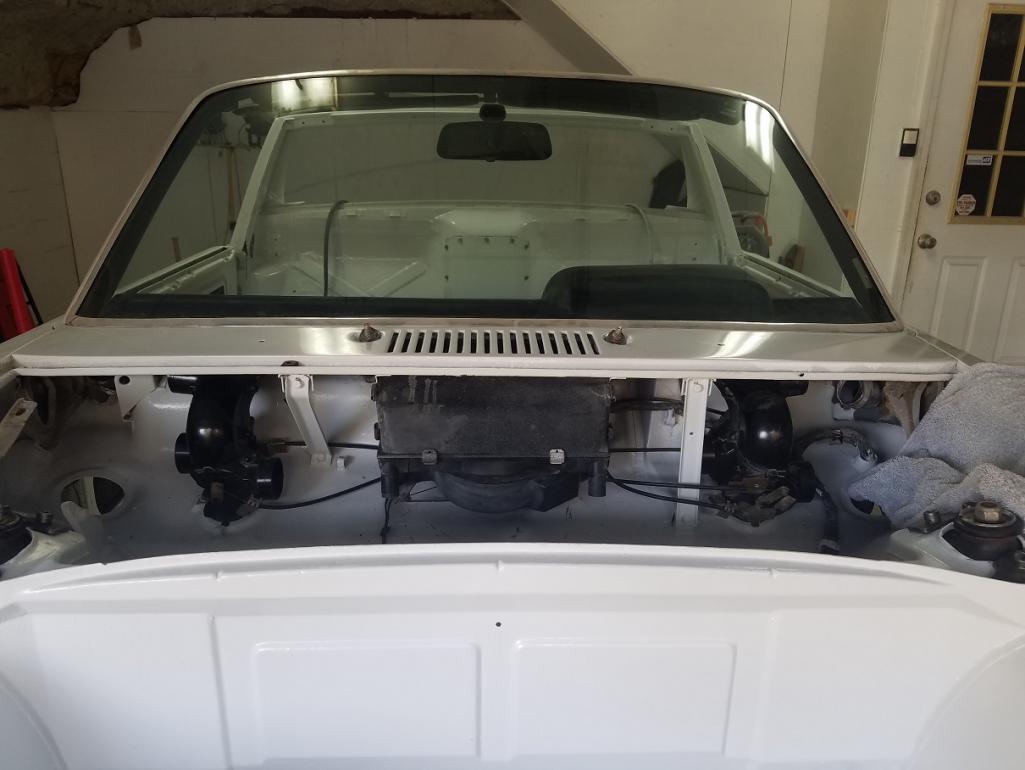 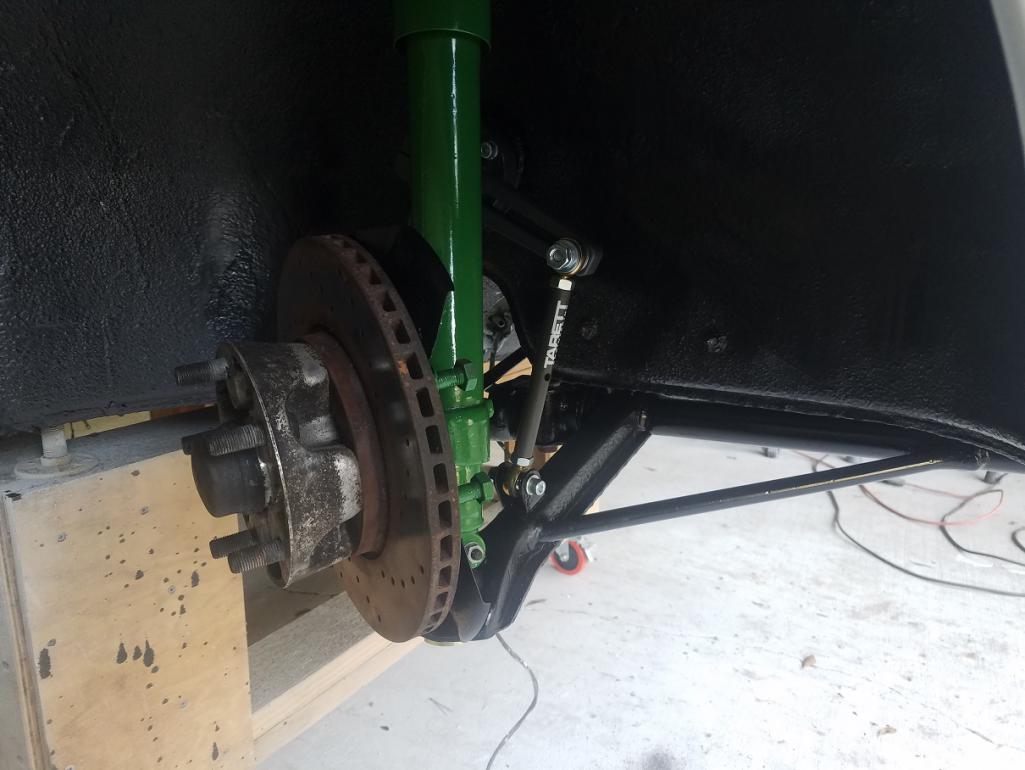 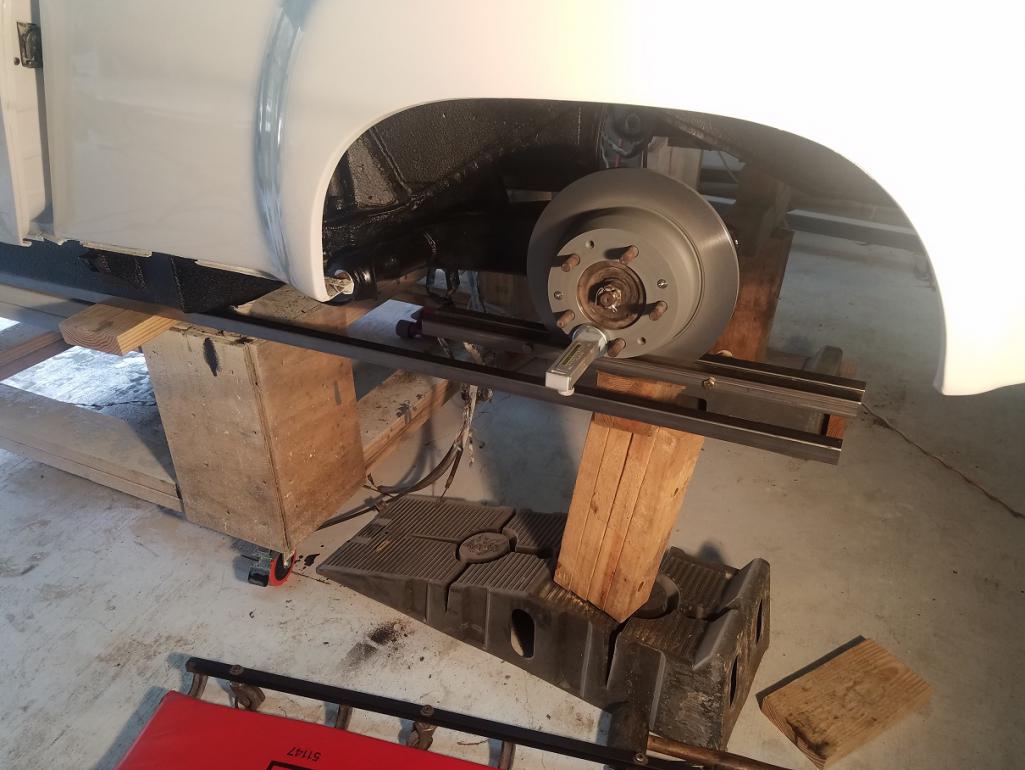 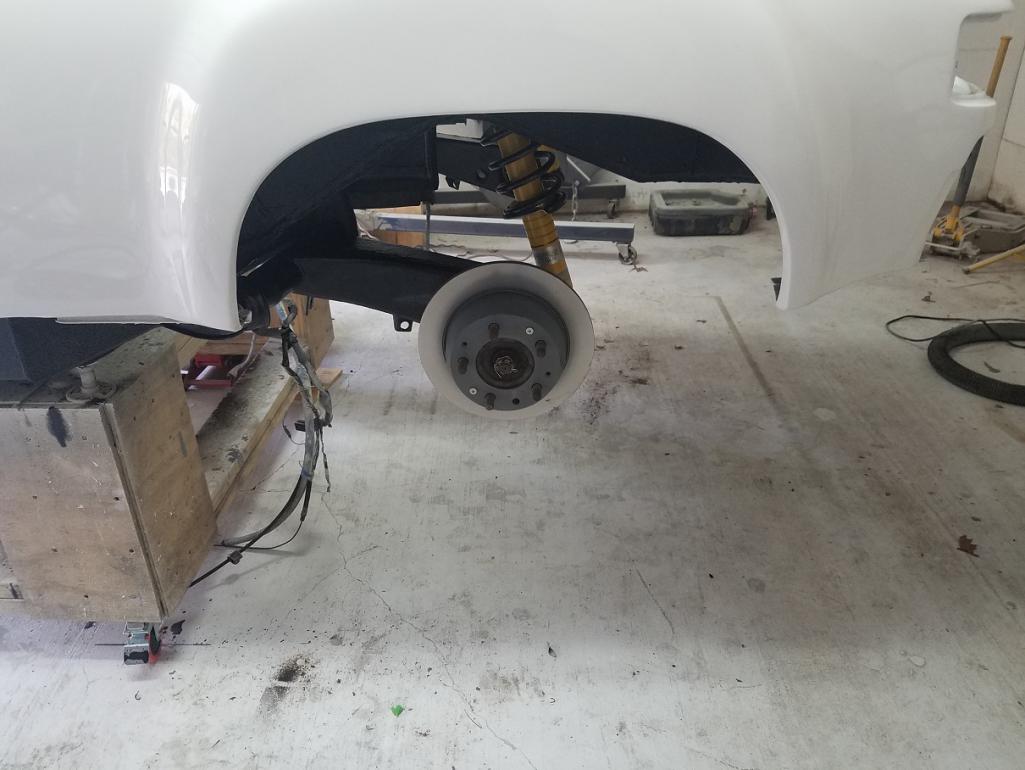
|
|
|
|
| 9146C |
Jan 31 2021, 04:04 PM
Post
#97
|
|
Member Group: Members Posts: 228 Joined: 14-September 19 From: US Member No.: 23,460 Region Association: None |
It's been a little while since I've provided an update...
Making progress and I can (almost!) see the finish line. Brake calipers, master cylinder and proportioning valve have all been rebuilt. All new brake lines installed (with the exception of two smaller pieces that were missing from my kit). All new components for the parking brake have been installed and are functioning...this'll be the first time in 20 years that my car will have a functioning hand brake! The sound deadening has been installed, and for the most part, the interior is almost finished. I still have the original, internal firewall sound proofing...the fat mat added to the rear firewall is a little redundant. For the interior, I need to finish up my gauge cluster...which means a mod to the fuel gauge. I've decided that I'm not going to re-install my center console. I'll go with a 911 combo oil temp/pressure gauge and combine the fuel into the tach...already have my replacement VDO fuel gauge and Bosch tach internals ready to be re-assembled. I'll also have a custom shifter boot made up to accommodate the base of my old, Weltmeister shifter base. This week, I also picked up my new tires...Conti Exteme Contacts...205/50/16 and 225/50/16. The engine bay is almost completed...re-installed the fender well oil tank as well as the oil thermostat in the right fender well. Working on completing the hard oil lines to the front oil cooler. I wanted to finish up my turn signals before I installed the hard lines through the front fender well. This weekend, I completed making the internal brackets for my Euro turn signal conversion. It's coming along... Attached thumbnail(s) 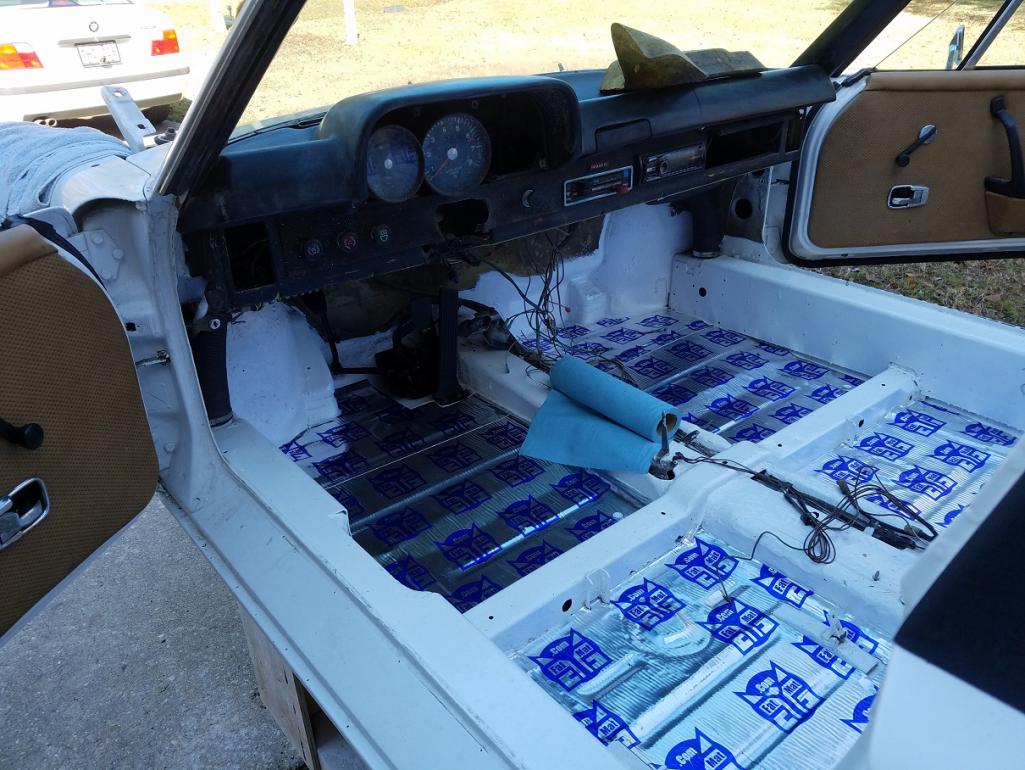 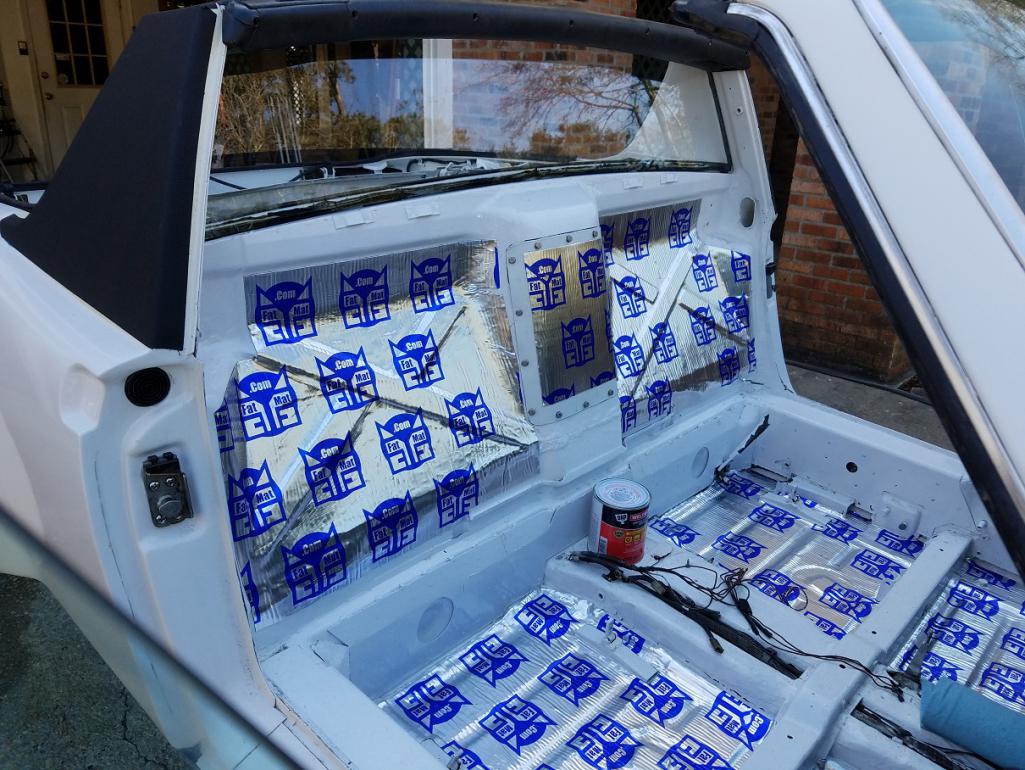 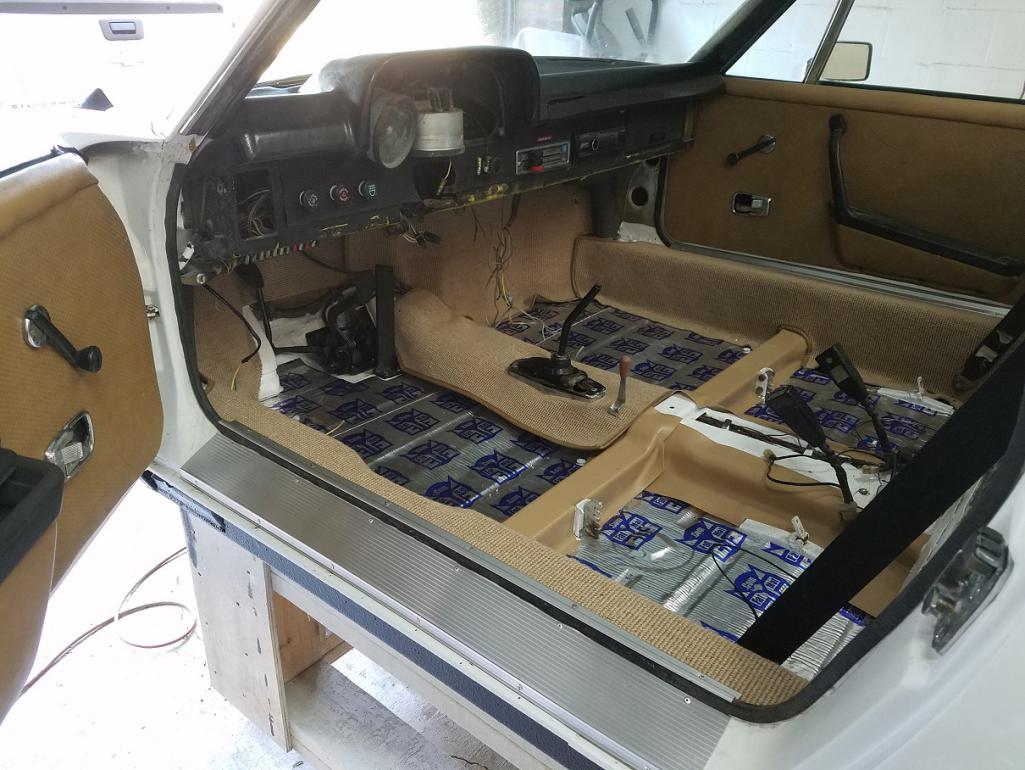 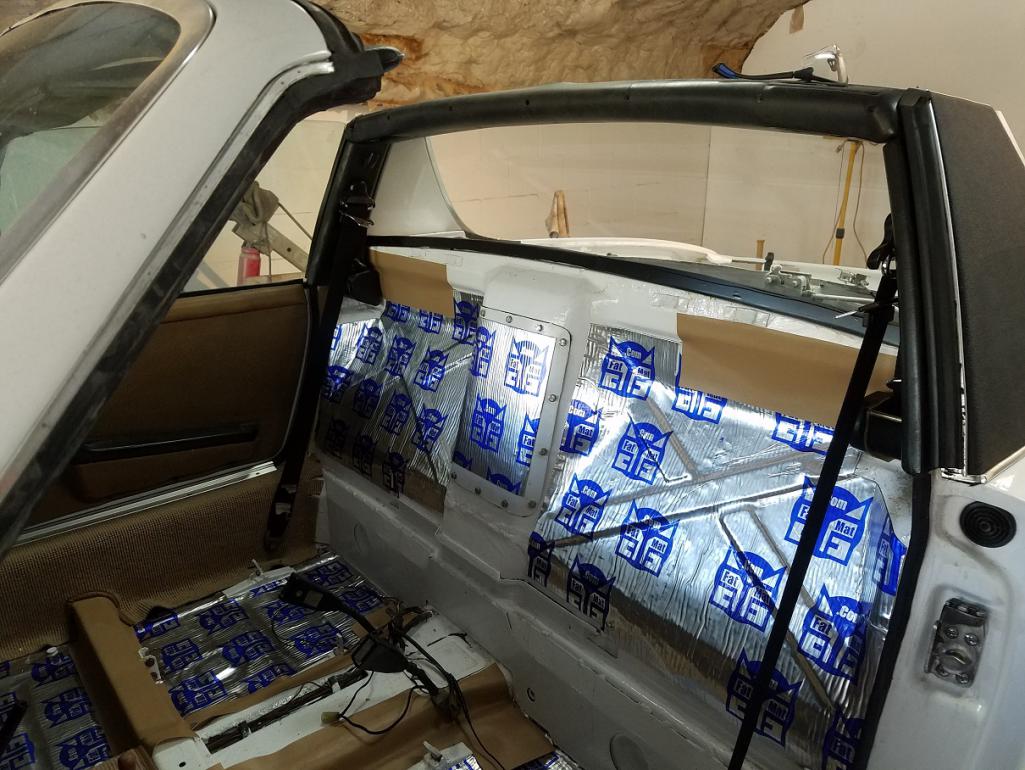 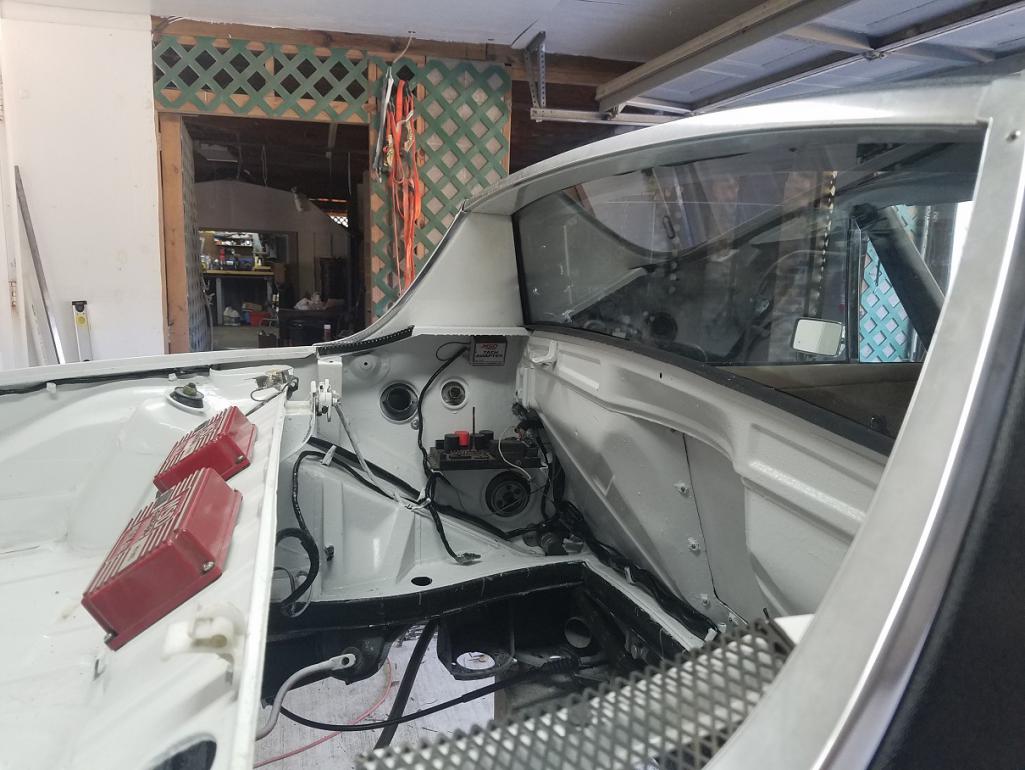 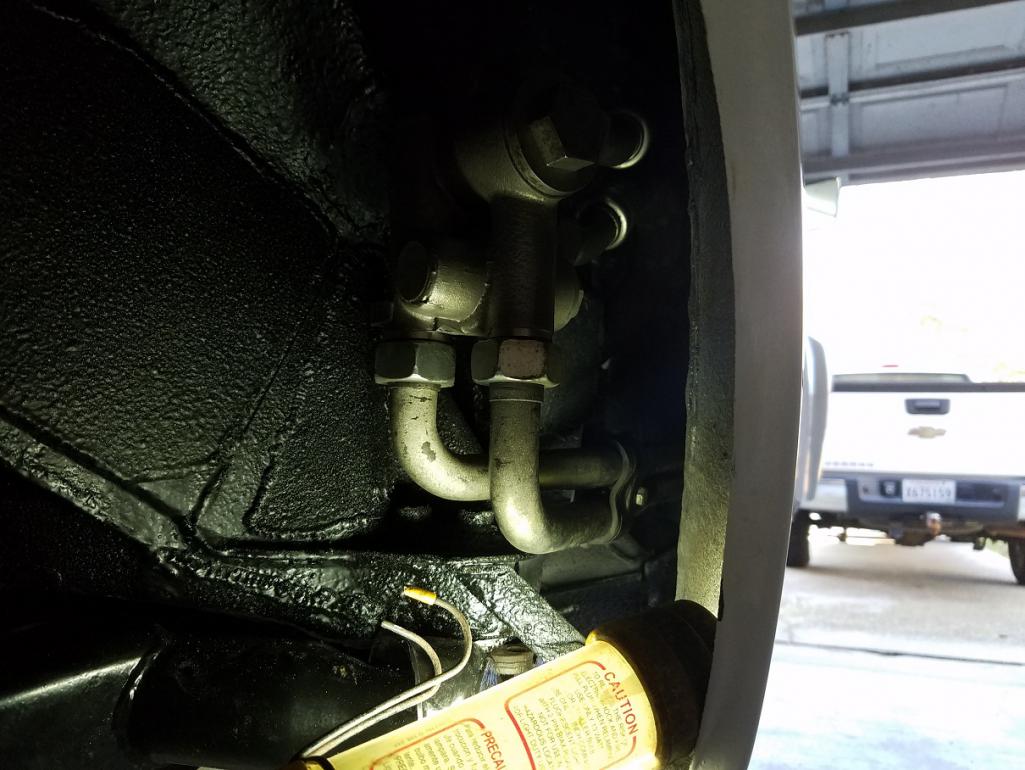 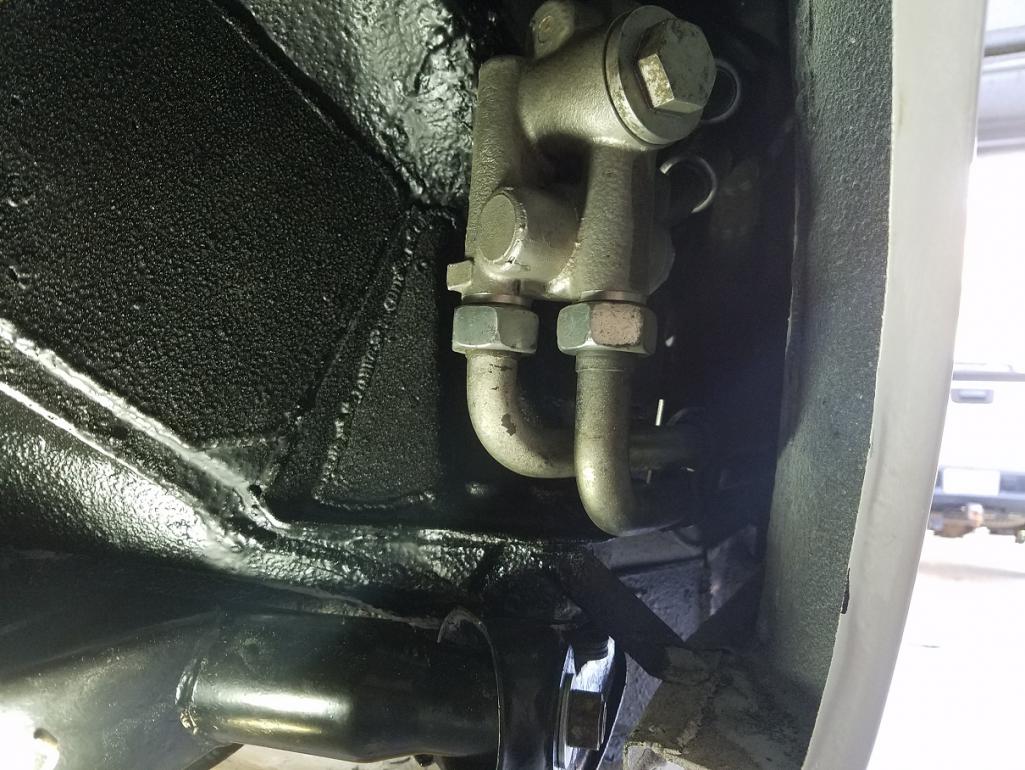 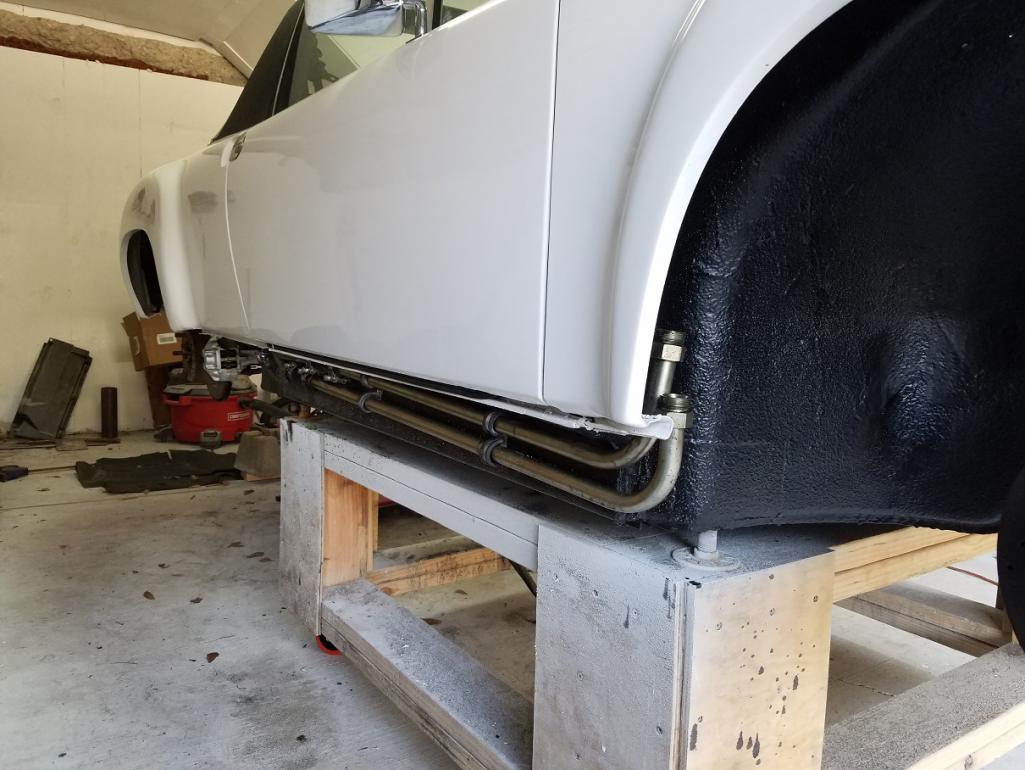 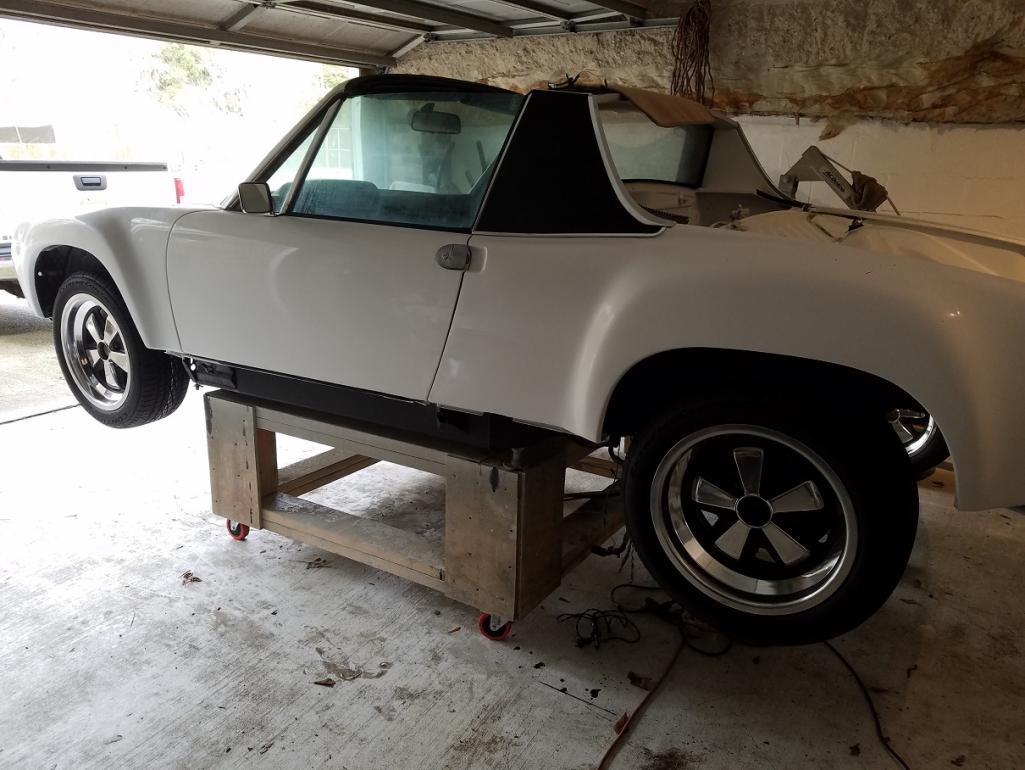
|
|
|
|
| 9146C |
Jan 31 2021, 04:05 PM
Post
#98
|
|
Member Group: Members Posts: 228 Joined: 14-September 19 From: US Member No.: 23,460 Region Association: None |
Cont'd photos...
Attached thumbnail(s) 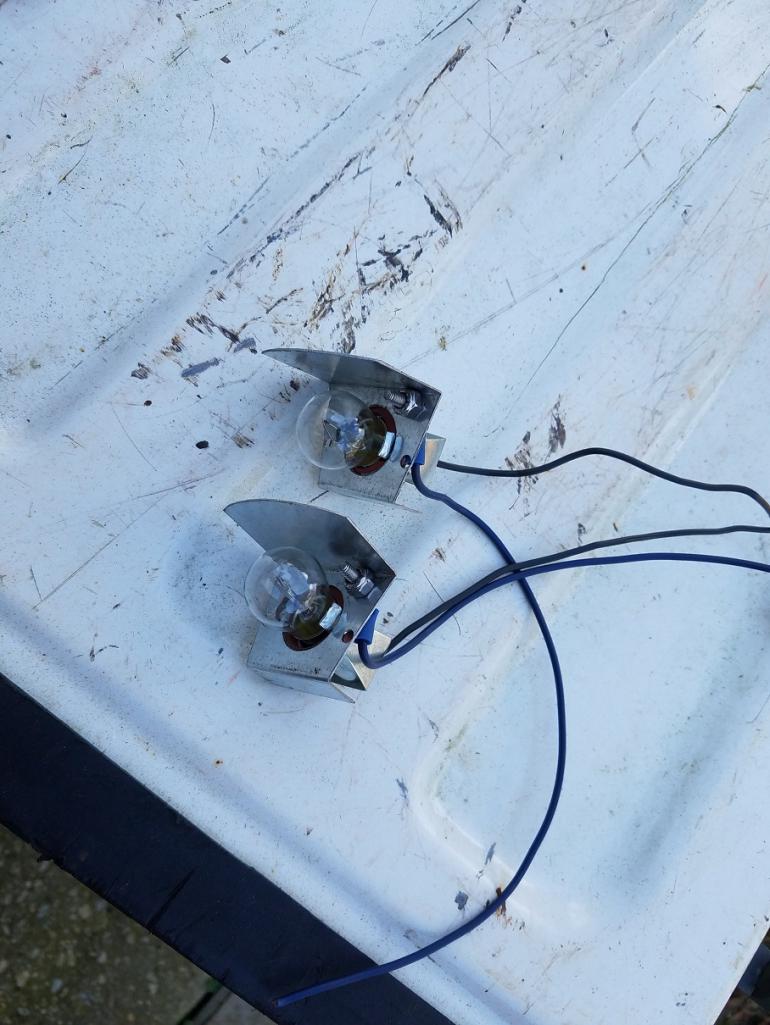 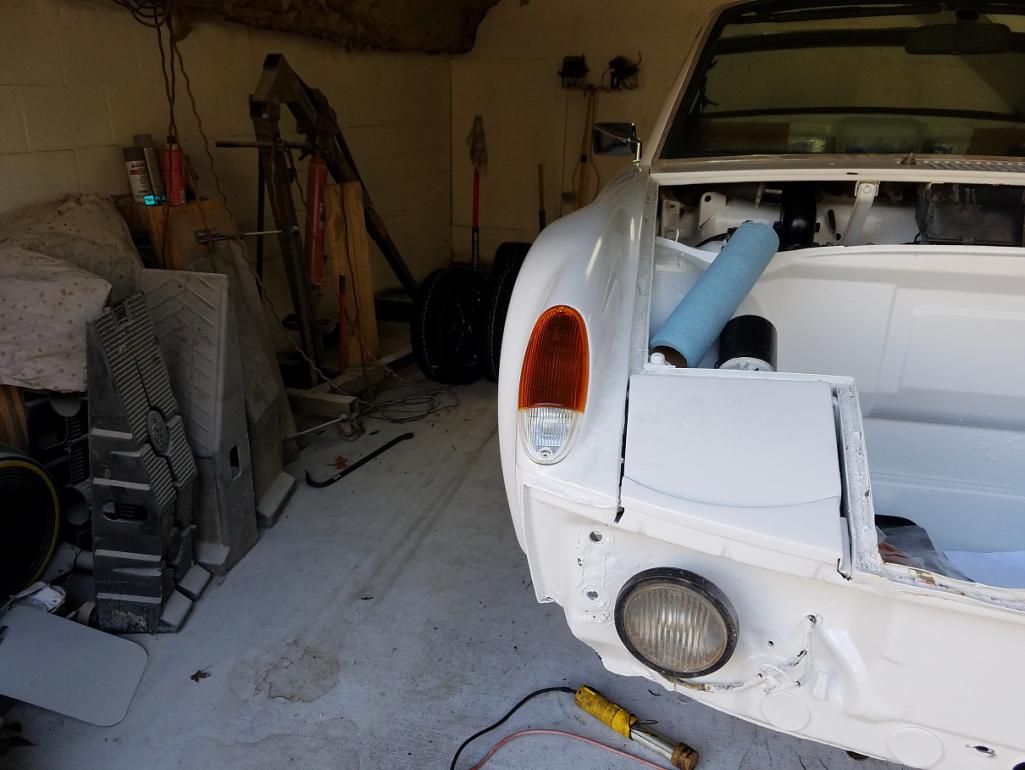  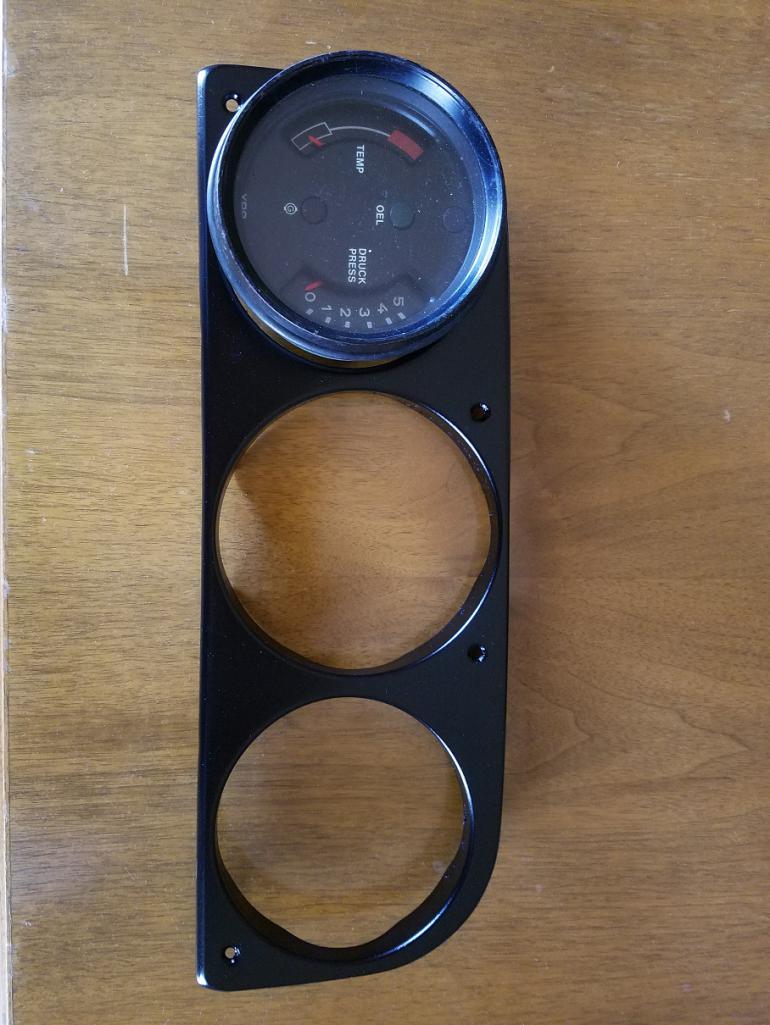
|
|
|
|
| Cairo94507 |
Jan 31 2021, 06:26 PM
Post
#99
|
|
Michael Group: Members Posts: 9,734 Joined: 1-November 08 From: Auburn, CA Member No.: 9,712 Region Association: Northern California |
Very nice. I like that you relocated the fuel gauge to the tachometer gauge. (IMG:style_emoticons/default/beerchug.gif)
|
|
|
|
| Luke M |
Jan 31 2021, 07:13 PM
Post
#100
|
|
Senior Member Group: Members Posts: 1,370 Joined: 8-February 05 From: WNY Member No.: 3,574 Region Association: North East States |
The engine bay is almost completed...re-installed the fender well oil tank as well as the oil thermostat in the right fender well. Working on completing the hard oil lines to the front oil cooler. I wanted to finish up my turn signals before I installed the hard lines through the front fender well.
Do you have more pics of the oil line install from rear to front cooler? Is it the same kit from Elephant Racing? |
|
|
|
|
2 User(s) are reading this topic (2 Guests and 0 Anonymous Users)
0 Members:

|
Lo-Fi Version | Time is now: 6th May 2024 - 03:42 PM |
Invision Power Board
v9.1.4 © 2024 IPS, Inc.