|
|
|
Porsche, and the Porsche crest are registered trademarks of Dr. Ing. h.c. F. Porsche AG.
This site is not affiliated with Porsche in any way. Its only purpose is to provide an online forum for car enthusiasts. All other trademarks are property of their respective owners. |
|
|

  |

| Sway Bar |
 Dec 18 2019, 05:50 PM Dec 18 2019, 05:50 PM
Post
#1
|
|
Member  Group: Members Posts: 88 Joined: 17-December 19 From: Okanagan Valley, Great White North Member No.: 23,743 Region Association: None |
Greetings...long time lurker first time poster.
After staying in the shadows for a little while watching and learning I figure I'd finally take the plunge and say hello and show progress of my latest undertaking. I've spend the last many years over on the 'Bird' in regards to my old 911 and other projects but it was time to try something slightly different and get back into a 914. I say get back since I had one as a young university man and was my version of a low brow Risky Business (IMG:style_emoticons/default/sunglasses.gif) I wasn't necessarily looking for a 914 but a few things fell into place that made me finally take the plunge 1) There was what seemed a really decent roller nearby 2) I had a friend of friend offer me the spoils of a left over failed conversion attempt 3) I have the 2.4L from my 911 sitting in a box doing me no good And finally I'm also and avid DIYer. I'm no pro by any means. I drive a desk for work, but I grew up always trying to build and do things on our own so it does come a little naturally and with the complete satisfaction of my 911 journey why not another. I'm also in Canada so when winter hits I need to figure out something else to do besides watch hockey and drink beer (not that there is anything wrong with that) (IMG:style_emoticons/default/lol-2.gif) Anyway, this is a great forum, love the resources, banter, etc, and figured I'd share another car/build. So, of course we all love pictures...this is what I started with. Kinda of a barn/garage find. 1972, no motor/trans, rough interior, some sort of re-spray, prior right fender accident. Key point was that besides the hell hole I couldn't find too many problem areas at first glance. So, comment away, constructive criticism is always welcome and I'm sure to reach out with a bunch of questions since I haven't figured out a few items yet for the conversion process. Cheers, Marlon 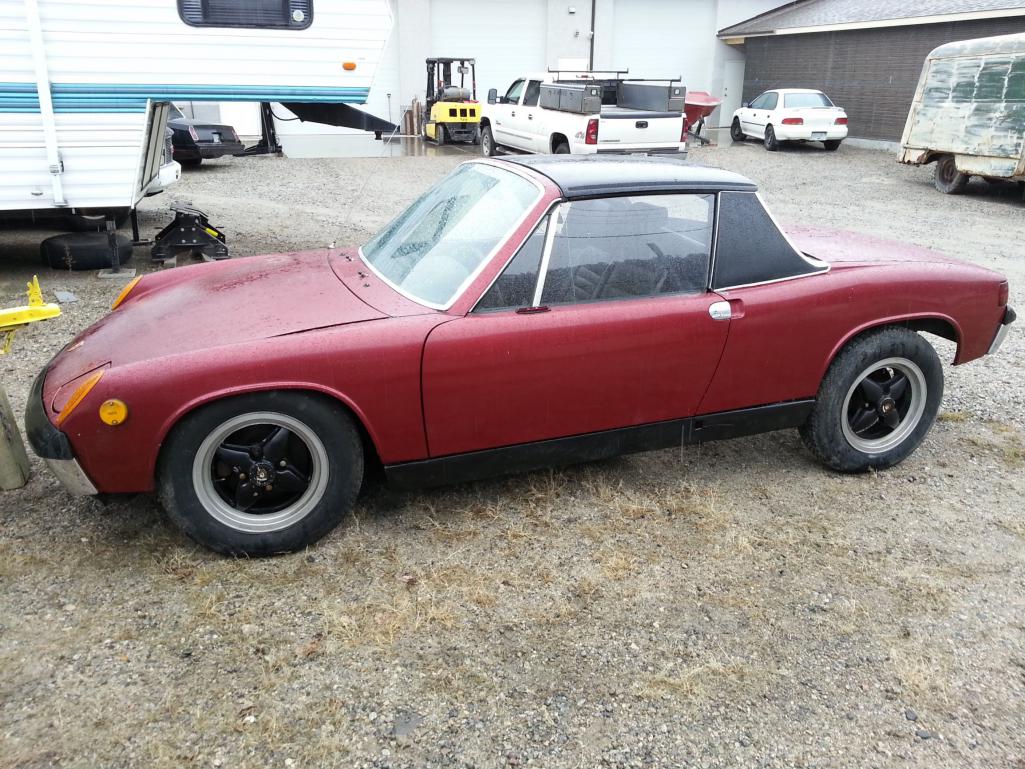 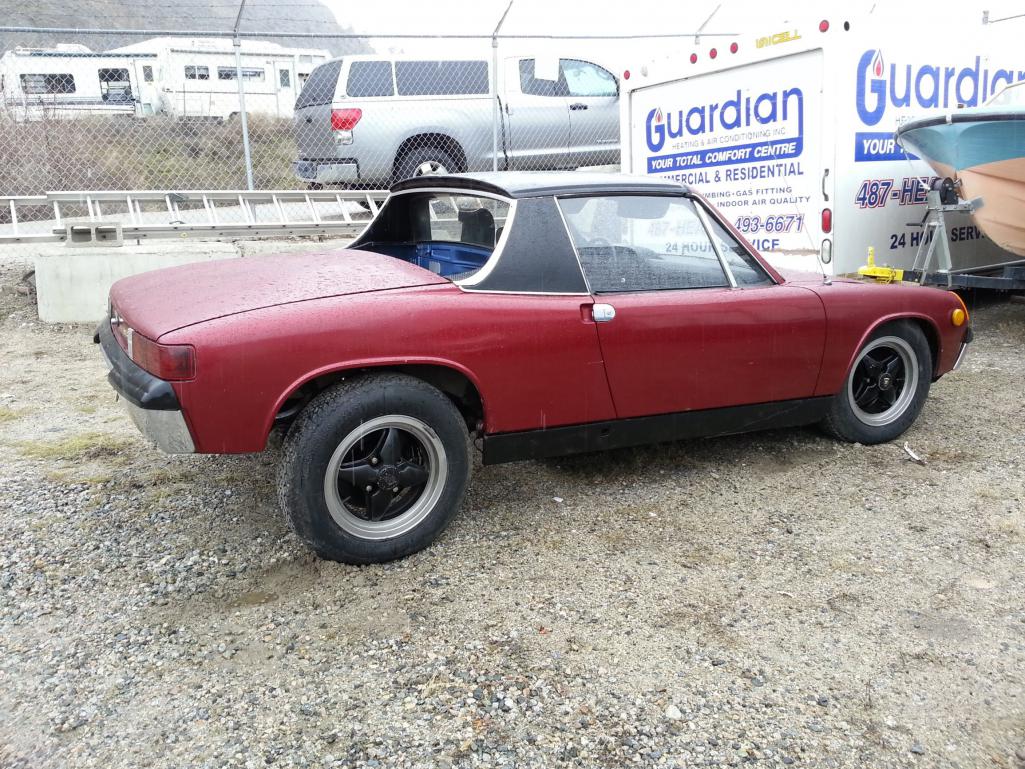 |
   |

 
|
| Sway Bar |
Dec 18 2019, 06:00 PM
Post
#2
|
|
Member Group: Members Posts: 88 Joined: 17-December 19 From: Okanagan Valley, Great White North Member No.: 23,743 Region Association: None |
Here are couple more starting point pics...and of course to make fun of myself; Risky Business in all it's glory. Blazer, T-Shirt, Ray Ban Knock offs...good times and good memories.
All I remember it was a 1970 model, maybe a 1.7 with a singe Carb and intake runners. But to me it was a Porsche; taught me how to really drive a car (since under powered, keep up the RPM, etc) That's one of cool things about cars if you are a car guy, err, person...the emotional attachment, memories, freedom. 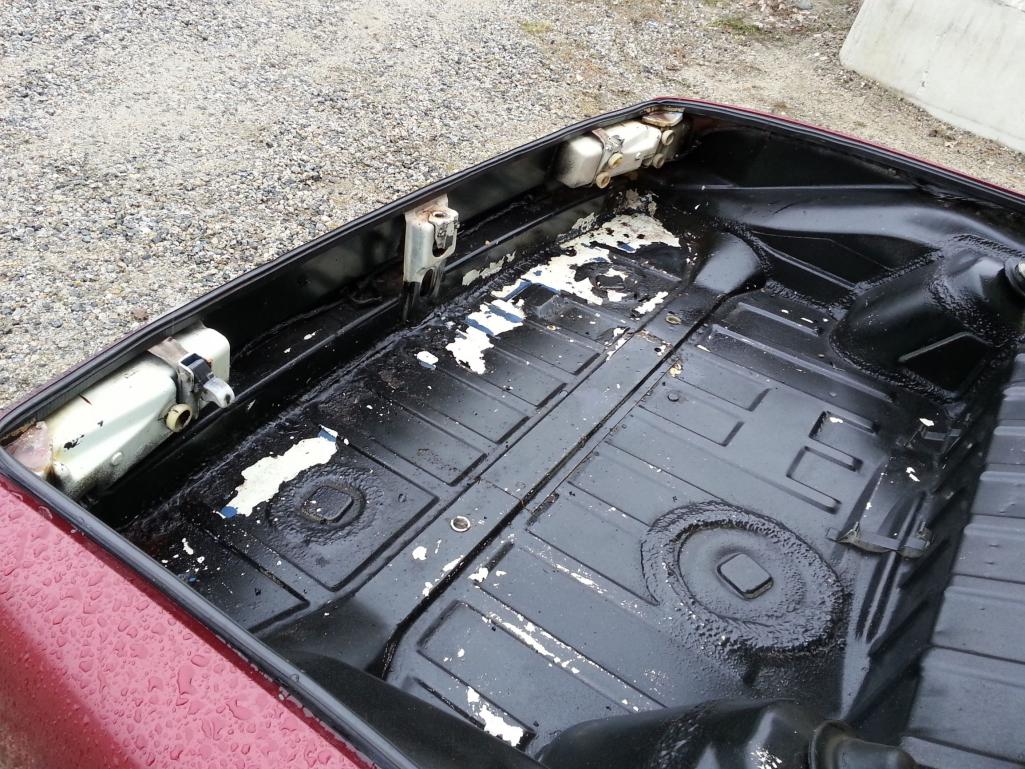 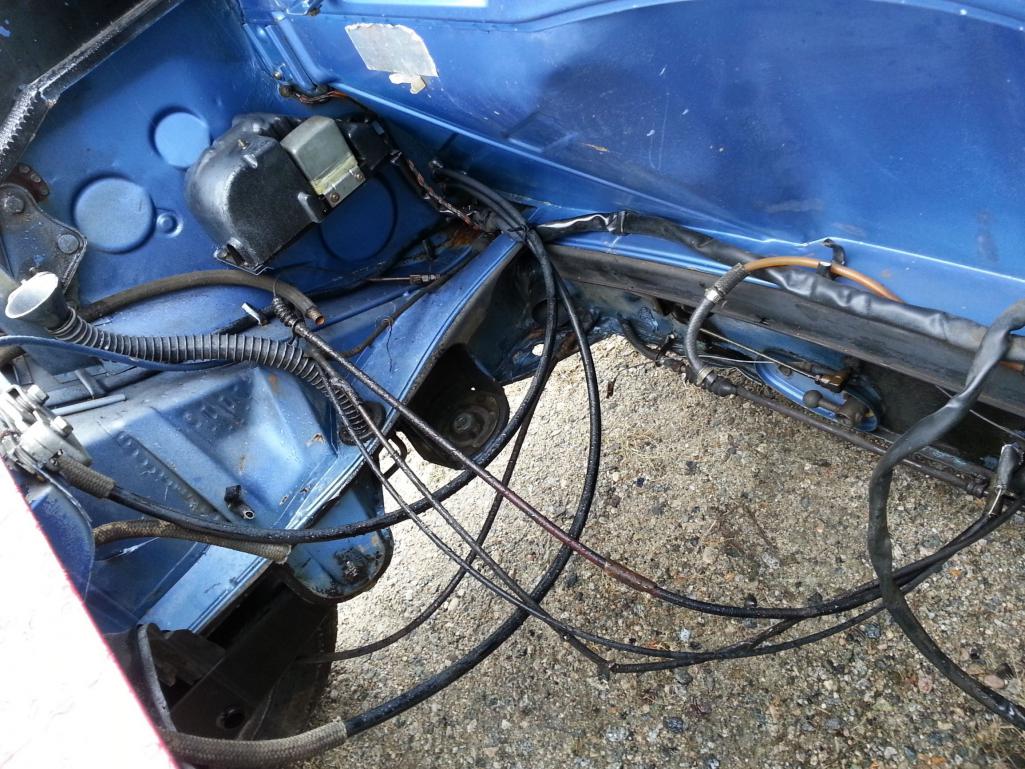 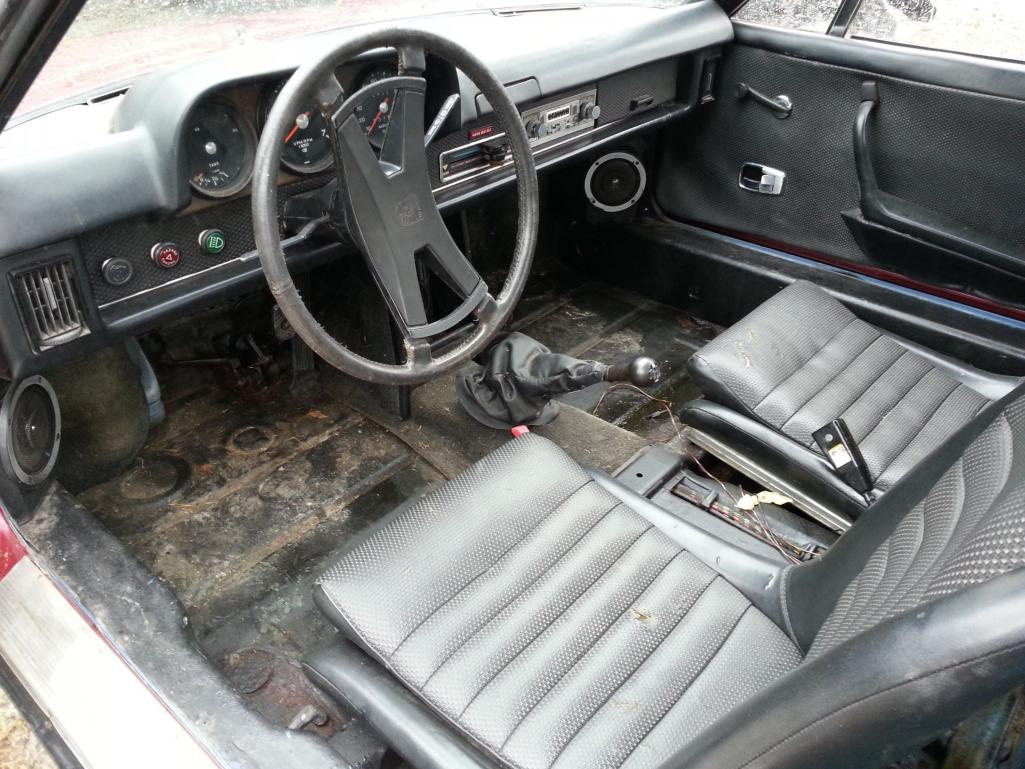 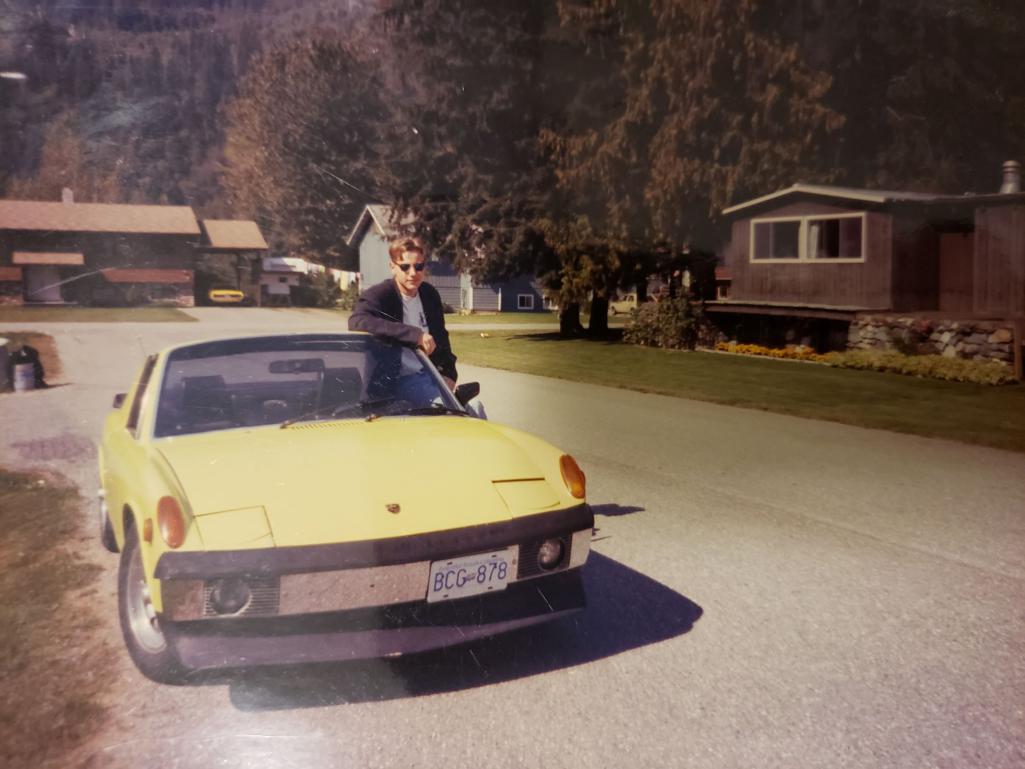 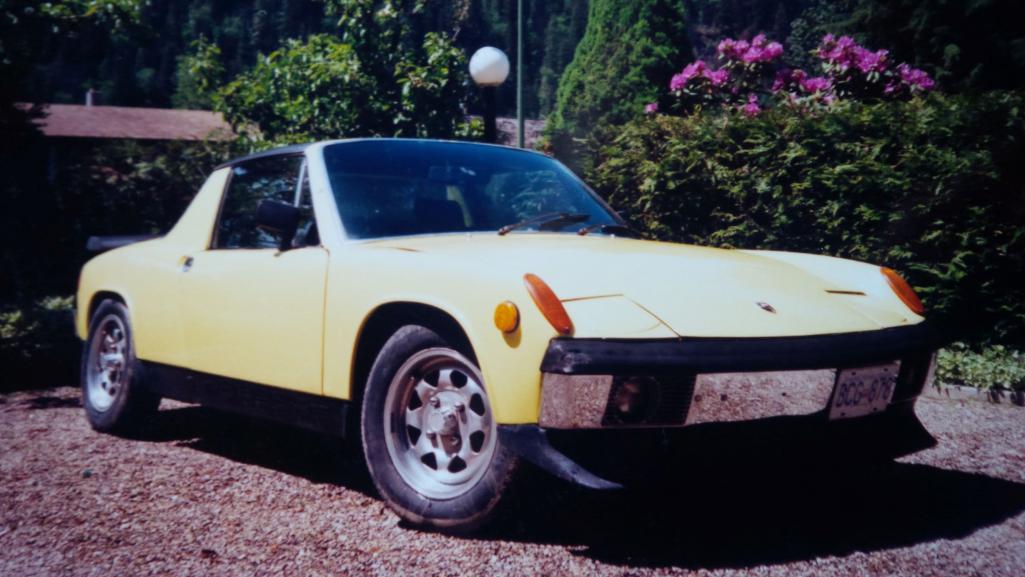 |
|
|
|
| Dion |
Dec 18 2019, 06:03 PM
Post
#3
|
|
RN Group: Members Posts: 2,762 Joined: 16-September 04 From: Audubon,PA Member No.: 2,766 Region Association: MidAtlantic Region |
(IMG:style_emoticons/default/welcome.png) Welcome! I’m tuned in to see where this project goes. I have a 2.4 going in my six conversion as well. Interesting rims? (Black ones, first pic) American racing LeMans rims? The snowplow front spoiler on the yellow one seems appropriate for a Canadian 914! Heheheh
Good luck with the project. |
|
|
|
| 76-914 |
Dec 18 2019, 06:35 PM
Post
#4
|
|
Repeat Offender & Resident Subaru Antagonist Group: Members Posts: 13,490 Joined: 23-January 09 From: Temecula, CA Member No.: 9,964 Region Association: Southern California |
|
|
|
|
| Sway Bar |
Dec 18 2019, 06:37 PM
Post
#5
|
|
Member Group: Members Posts: 88 Joined: 17-December 19 From: Okanagan Valley, Great White North Member No.: 23,743 Region Association: None |
Yes, American Racing wheels, which are great.... in 5 bolt configuration. To me they just don't look right as a 4 bolt. Anyway, I have 7 and 8 x 15 Fuchs for the end game.
The whole project really started when I was offered first dibs for a bunch of conversion pieces from a 20 year old conversion attempt. It was one of those opportunities I couldn't pass up on. The project never made it to any form of completion but what I did find out was that they spared no expense. Most of everything was new and it sat in a garage. They loved paint so they painted everything weird colors so I send a few weeks cleaning and stripping paint and found out I ended up with NOS..Bilstein Struts and inserts, Welmeister front and rear sway bars, new sway away T-Bars, New 930 cross vented rotors, brake shoes. Looks like 1972 Aluminum S- Calipers, and they beefed up the rear trailing arms I gather for some sort of V-8 Conversion. So basically the entire undercarriage was ready for me to convert...almost too easy (IMG:style_emoticons/default/biggrin.gif) Took this... 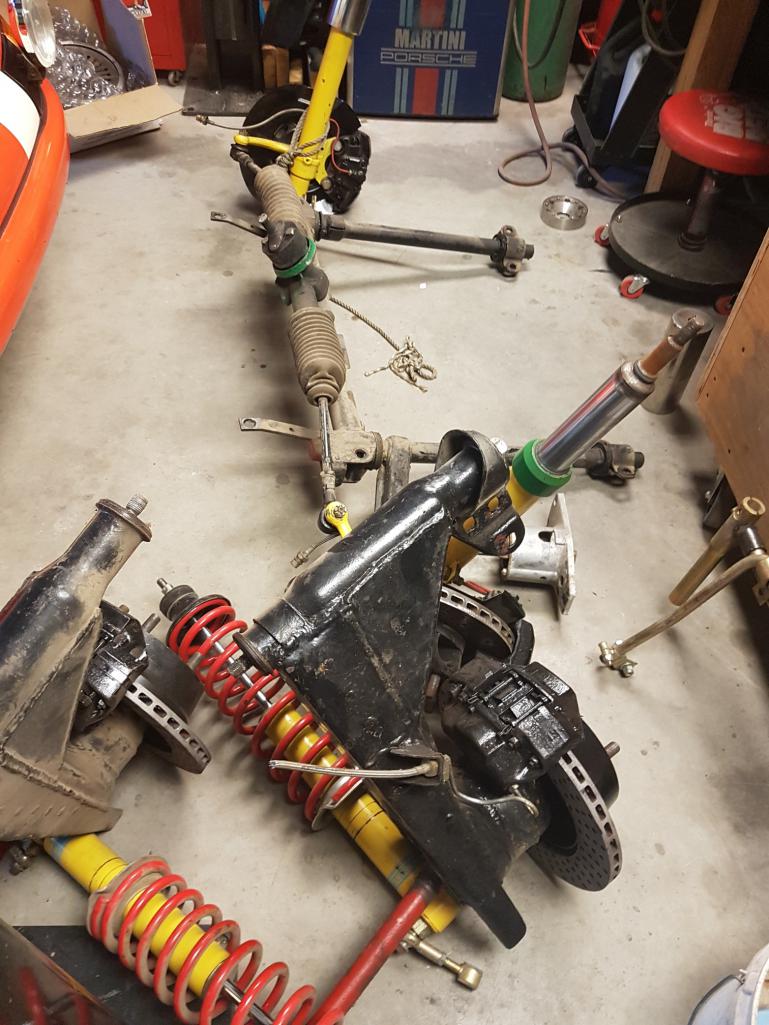 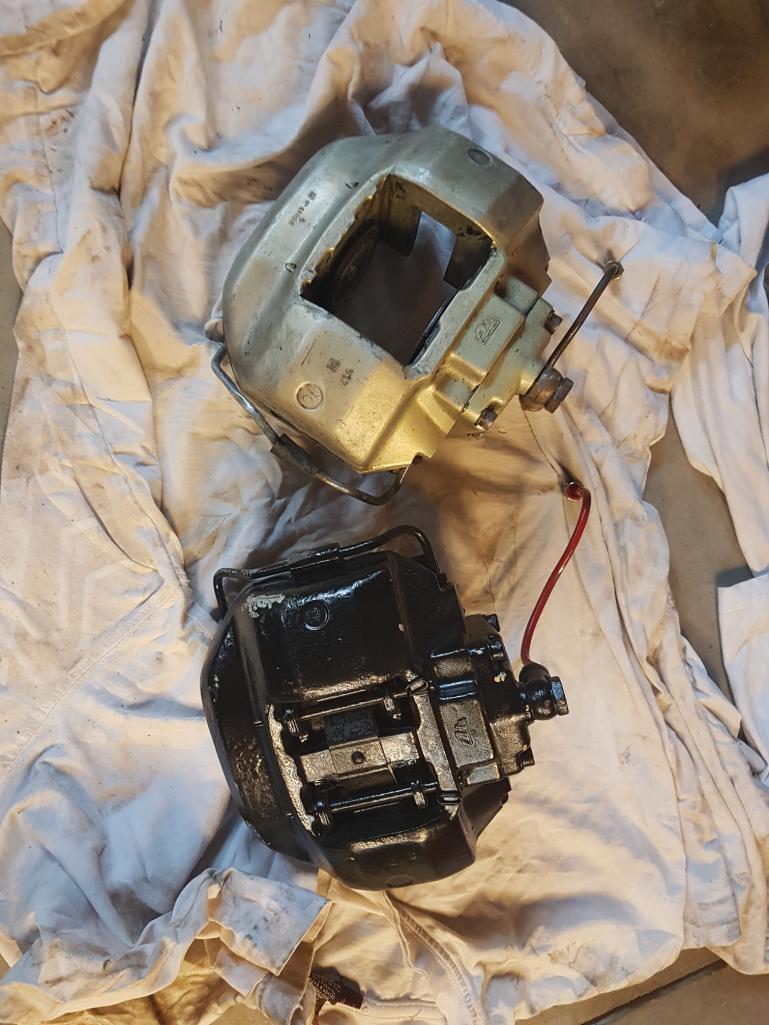 Ended up with this...I didn't even have a car yet. 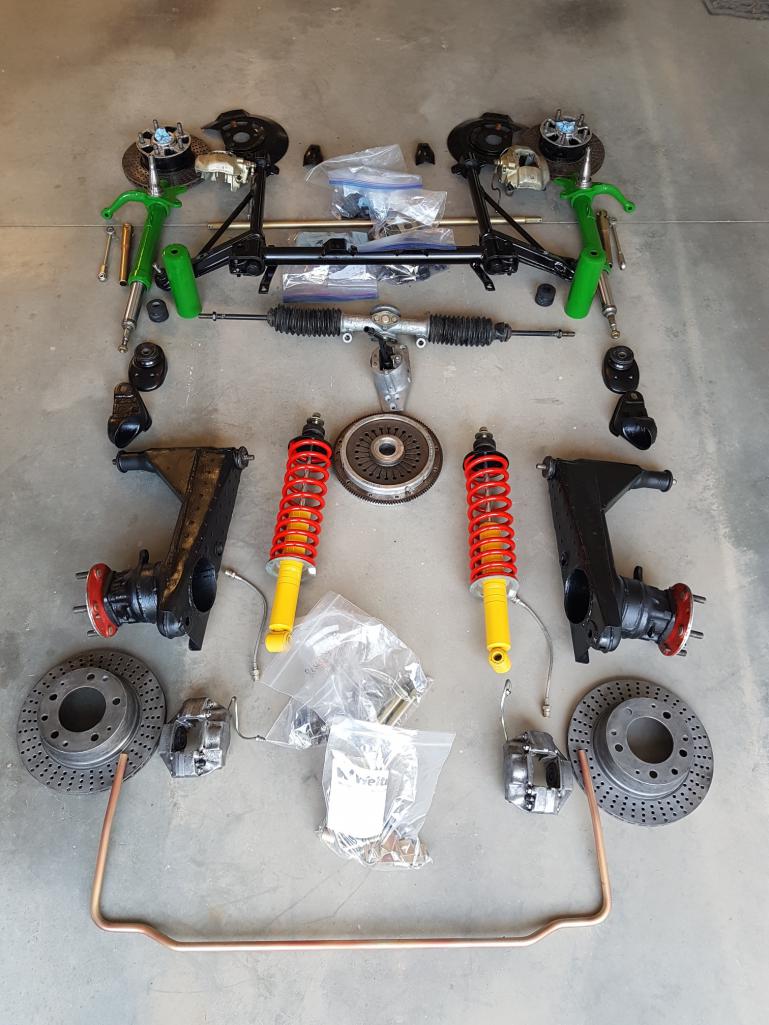 |
|
|
|
| Superhawk996 |
Dec 18 2019, 06:50 PM
Post
#6
|
|
914 Guru Group: Members Posts: 5,747 Joined: 25-August 18 From: Woods of N. Idaho Member No.: 22,428 Region Association: Galt's Gulch |
|
|
|
|
| Retroracer |
Dec 18 2019, 06:54 PM
Post
#7
|
|
Senior Member Group: Members Posts: 609 Joined: 7-July 13 From: Bend OR Member No.: 16,100 Region Association: Pacific Northwest |
Looks like some nice puzzle pieces you've got there!
Keep the posts coming and (IMG:style_emoticons/default/welcome.png) . - Tony |
|
|
|
| theer |
Dec 18 2019, 07:11 PM
Post
#8
|
|
Senior Member Group: Members Posts: 676 Joined: 31-July 15 From: Dover, MA Member No.: 19,014 Region Association: North East States |
|
|
|
|
| mb911 |
Dec 18 2019, 07:46 PM
Post
#9
|
|
914 Guru Group: Members Posts: 6,810 Joined: 2-January 09 From: Burlington wi Member No.: 9,892 Region Association: Upper MidWest |
Looks like a great start.
|
|
|
|
| Sway Bar |
Dec 18 2019, 08:21 PM
Post
#10
|
|
Member Group: Members Posts: 88 Joined: 17-December 19 From: Okanagan Valley, Great White North Member No.: 23,743 Region Association: None |
Thanks for all the greetings. I figure one more post for my initial day. I'm about 8 months of spare time, odd weekends, and skipping work days into this. So, I have a few more worth while posts to get caught up.
As with many of us, once we get the car in the garage it's hard not to start tearing into it. I was again very surprised at the over all condition on this since I had no history at all. I've seen some of the projects on here and I am in awe and amazed at some of the fantastic 'rebirths' and saves that many have done. Luckily this car seemed to have fared well over the years. My welding skills are probably my weakest point and I was hoping to do very little of it. I think an earlier accident may have given this car some life as it must have been still worth saving and some replacement panels must have come into play. The right fender looks to be a replacement from the seam brazing I noticed and the rockers are rock solid. The hood looks to be a replacement as well. 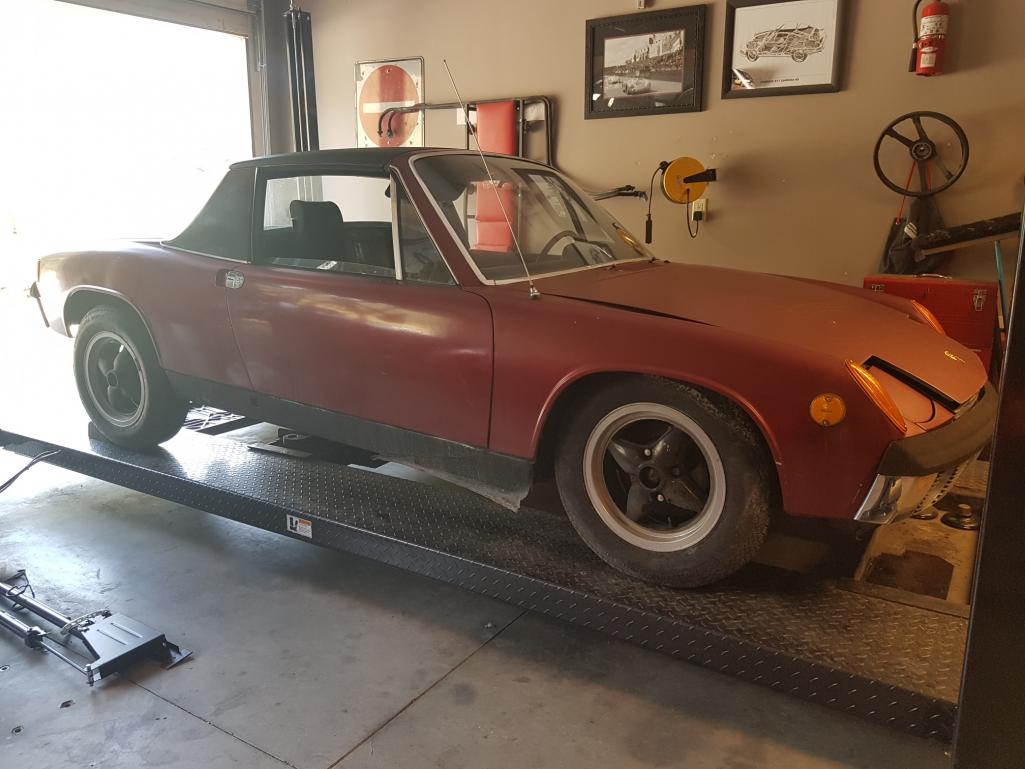 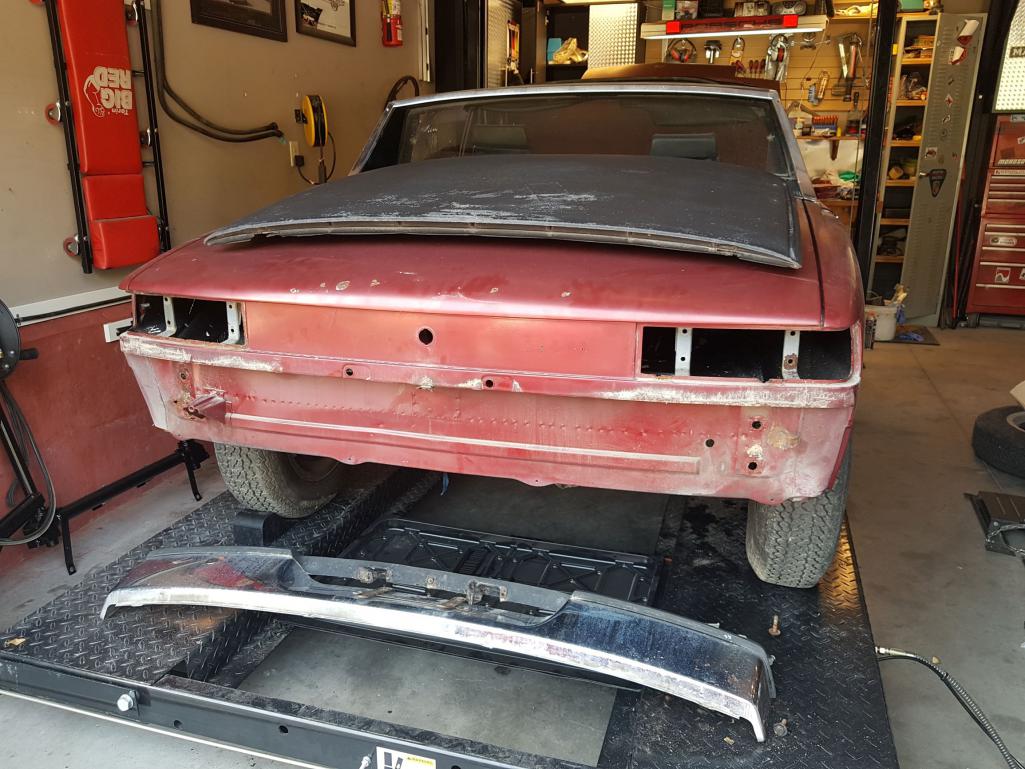 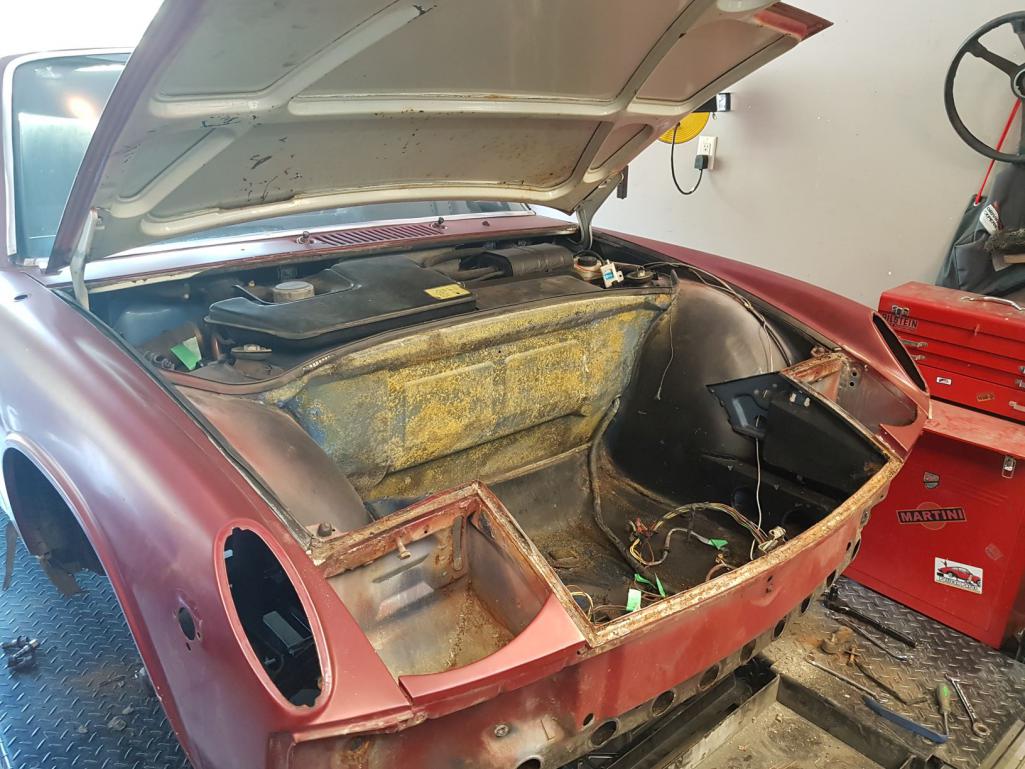 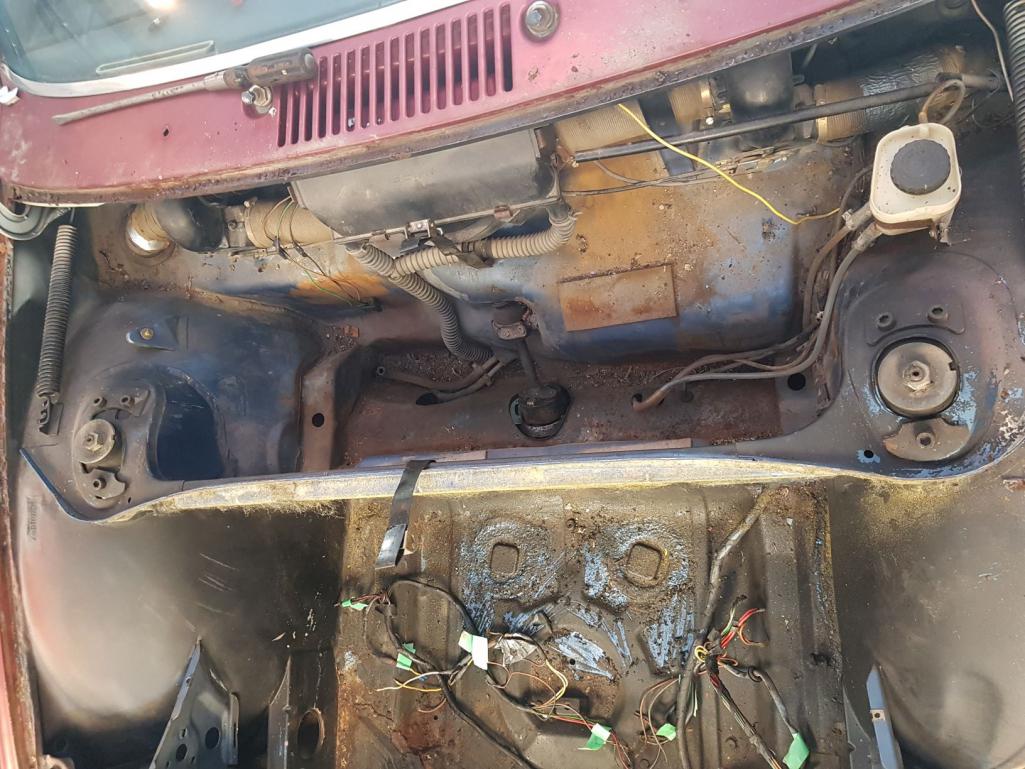 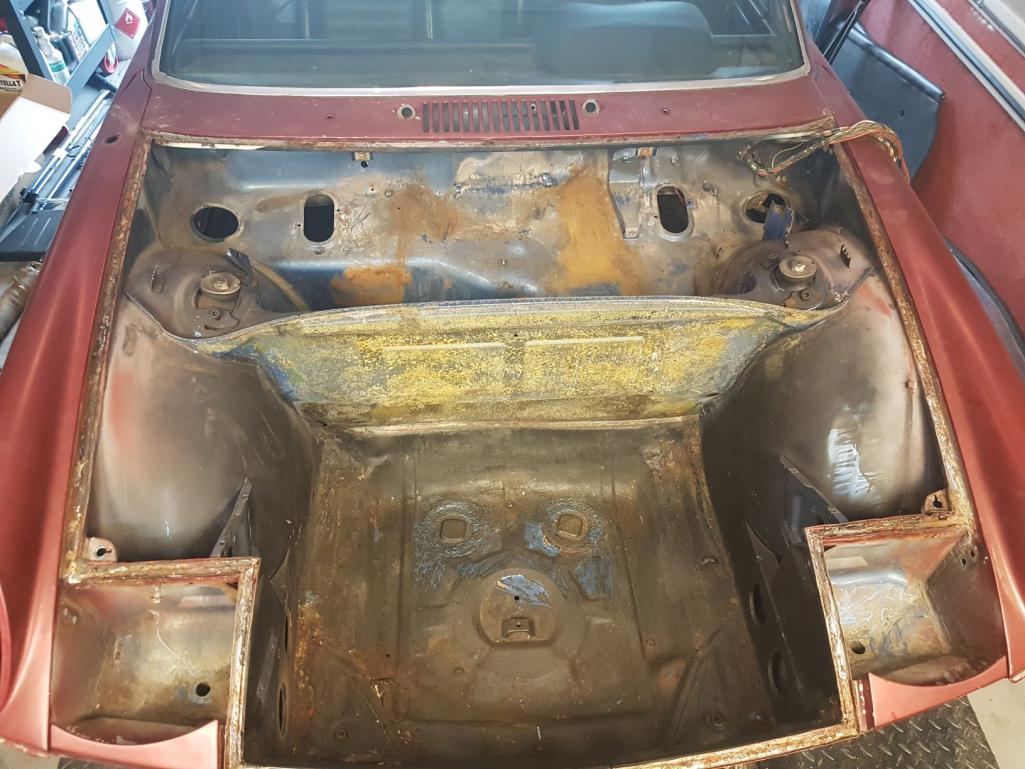 Of course one thing leads to another and I really started to strip items away...that's future me's problem when reassembly is required. 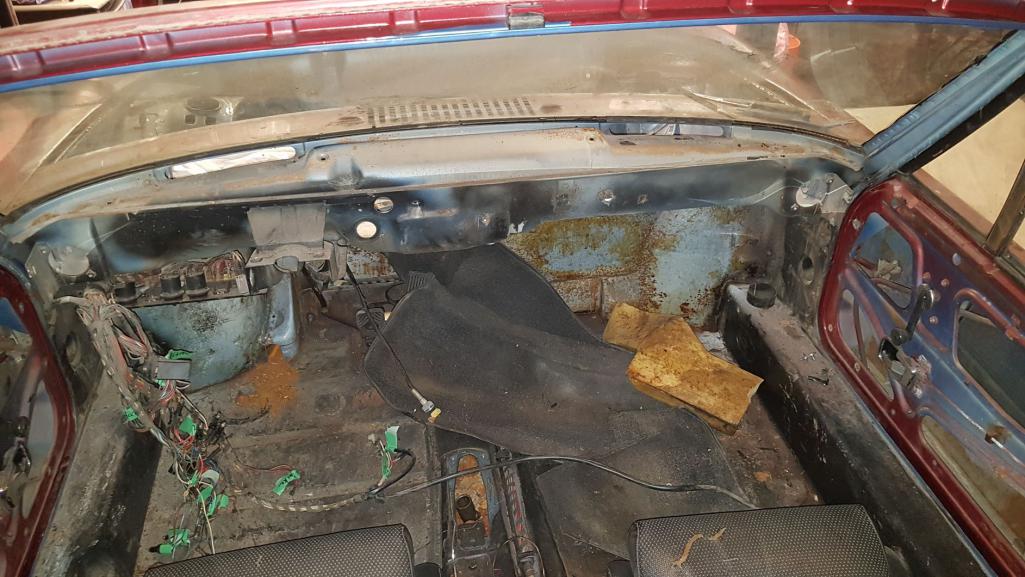 |
|
|
|
| AZBanks |
Dec 18 2019, 08:40 PM
Post
#11
|
|
Senior Member Group: Members Posts: 1,056 Joined: 7-December 05 From: New River, AZ Member No.: 5,245 Region Association: Southwest Region |
(IMG:style_emoticons/default/welcome.png)
I love the American Racing Wheels. They are my favorite 4 lug wheels. I agree 5 lug wheels look better than 4 but if I've gotta go with 4, the American Racing wheels you've got are the best. |
|
|
|
| Jett |
Dec 18 2019, 08:52 PM
Post
#12
|
|
Senior Member Group: Members Posts: 1,633 Joined: 27-July 14 From: Seattle Member No.: 17,686 Region Association: Pacific Northwest |
That is a nice blue color... sorry colour (IMG:style_emoticons/default/smile.gif)
|
|
|
|
| Sway Bar |
Dec 19 2019, 02:12 PM
Post
#13
|
|
Member Group: Members Posts: 88 Joined: 17-December 19 From: Okanagan Valley, Great White North Member No.: 23,743 Region Association: None |
Decided to jump around and tackle different items...maybe so I don't get bored doing one continuous thing?
I also try to clean and prep everything as I take them off. It sometimes slows down the process but I think it really speeds up the assembly and fun stuff when you can simply pick an item off the shelf, or in my case the downstairs family room and spare bedroom to my wife's dismay (IMG:style_emoticons/default/unsure.gif) Grabbed the fuel tank and tried the POR15 treatment. I have never done this...I assume good results. Anyone try this themselves on a crusty tank? The etching process worked quite well and really the tank looked good. 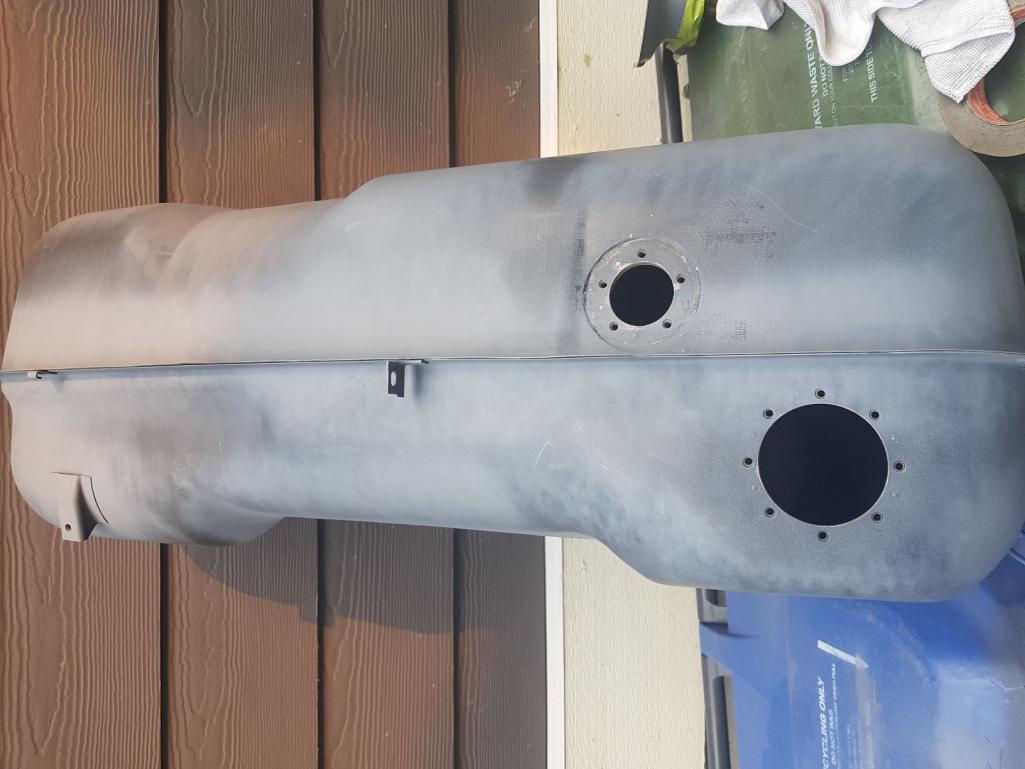 After rolling around the tank with big nuts and bolts and final etching. 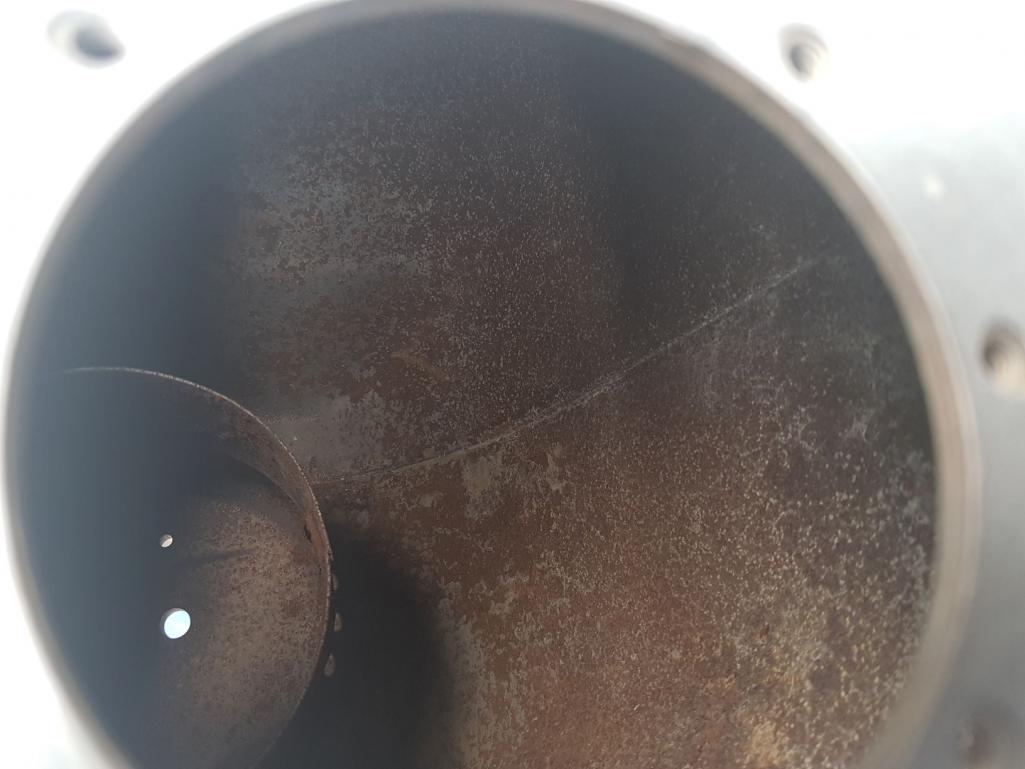 Final coating treatment...looks fresh and clean. 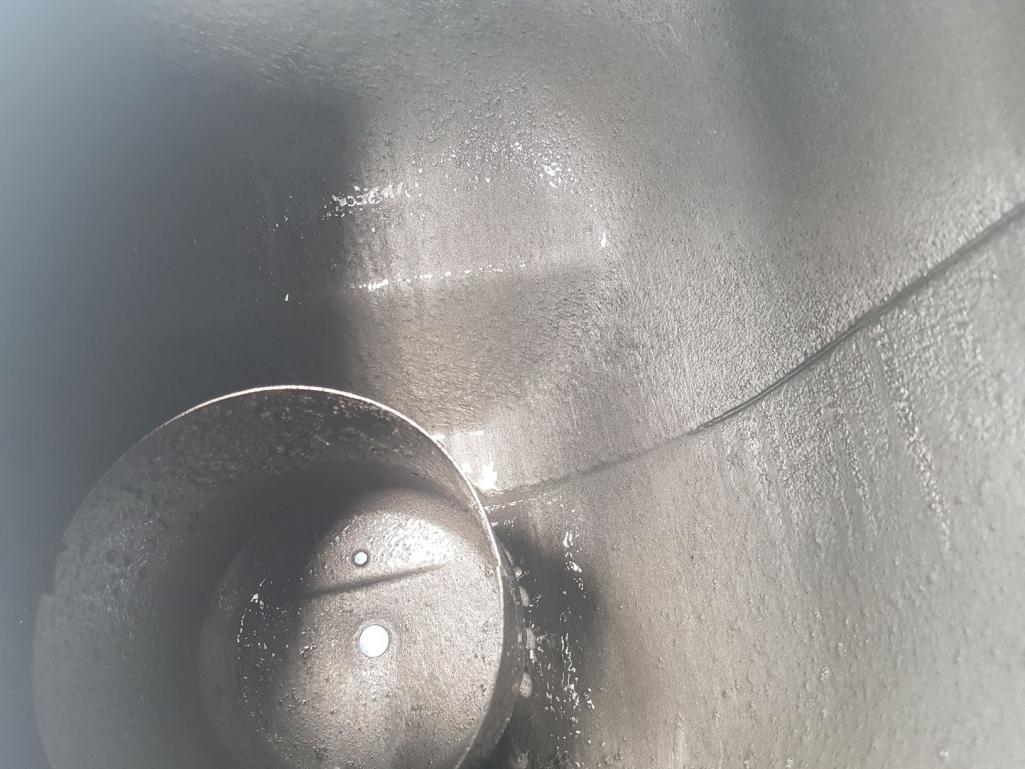 No leaks that's the main thing right? |
|
|
|
| Sway Bar |
Dec 19 2019, 02:15 PM
Post
#14
|
|
Member Group: Members Posts: 88 Joined: 17-December 19 From: Okanagan Valley, Great White North Member No.: 23,743 Region Association: None |
QUOTE(Jett @ Dec 18 2019, 06:52 PM)  haa...you must be part Canadian, not only knowing the other spelling, you even said Sorry. (IMG:style_emoticons/default/laugh.gif) |
|
|
|
| Tdskip |
Dec 19 2019, 07:42 PM
Post
#15
|
|
Advanced Member Group: Members Posts: 3,684 Joined: 1-December 17 From: soCal Member No.: 21,666 Region Association: None |
One tip when using epoxy like that on a gas tank is to make sure that the thread holes have Vaseline on them so they don’t get coated and then required Remedial attention.
Thanks for starting the thread, please continue to keep us posted and good luck! |
|
|
|
| Sway Bar |
Dec 19 2019, 09:33 PM
Post
#16
|
|
Member Group: Members Posts: 88 Joined: 17-December 19 From: Okanagan Valley, Great White North Member No.: 23,743 Region Association: None |
QUOTE(Tdskip @ Dec 19 2019, 05:42 PM) One tip when using epoxy like that on a gas tank is to make sure that the thread holes have Vaseline on them so they don’t get coated and then required Remedial attention. Thanks for starting the thread, please continue to keep us posted and good luck! Hey, that's a pretty handy tip...luckily the threads for the fuel outlets are on the exterior but I did have to clean/chase a little on the small fuel bung holes. So, even though I have a budget, and trying to stay near it, and I'm only installing a 2.4L I figure I would go with a front oil cooler. I want the over all end project to have a little street hot rod feel. Plus the 2.4L is the matching number to my 911 and will have to stay with it in the end, so I'm trying to design the over all engineering to be able to take any Porsche Air cooled 6 (within reason) I followed some great threads showing the process to removing/reinforcing the front end for pan removal etc. Again, welding is not always the nicest but I over engineer and plan for covering any of my welds...gotta love that seam sealer and undercoating.  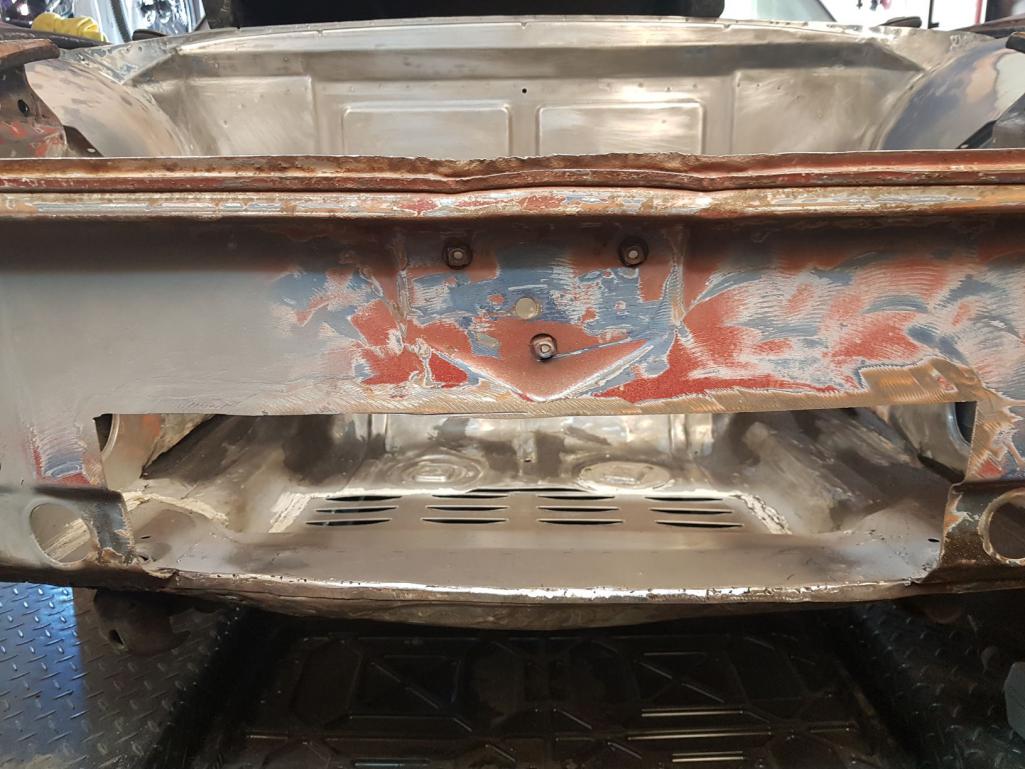 It think the intake and floor pan worked out all right. Once cleaned up, epoxy primed, coated, and finally painted it will look all right...plus a shroud goes over top of it all. 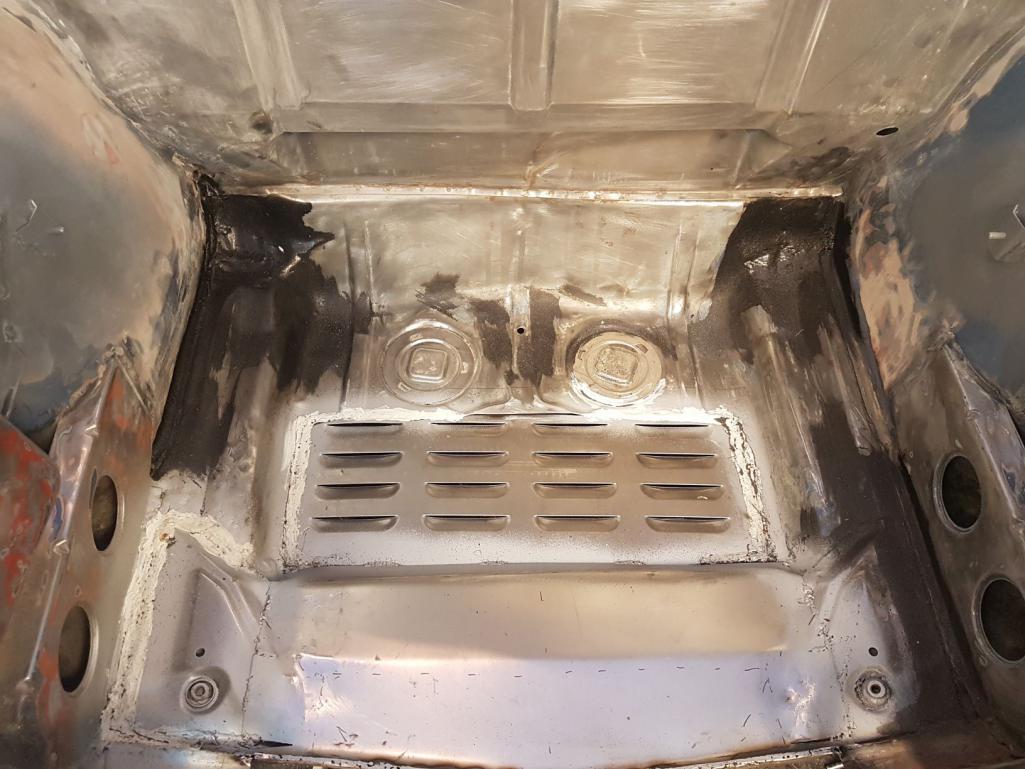 I'm not worried about originality or duplication of the real grill/cover or other components...I'm more of a believer of "Function over Form"... but I am happy with the fit and finish of my attempt. 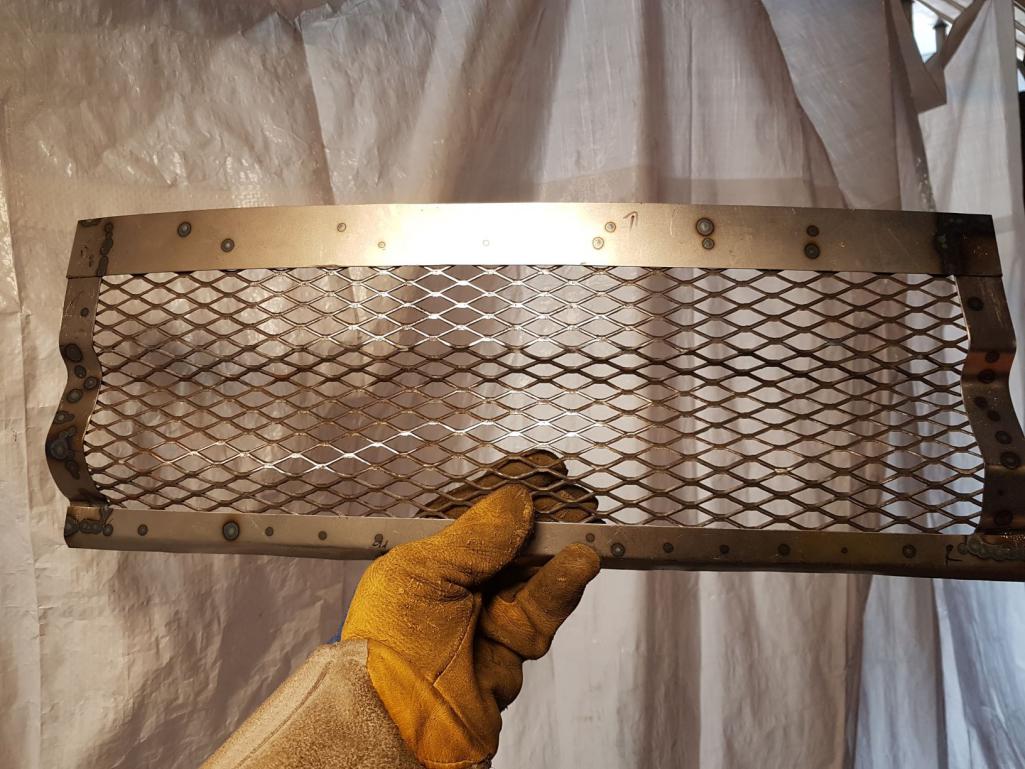 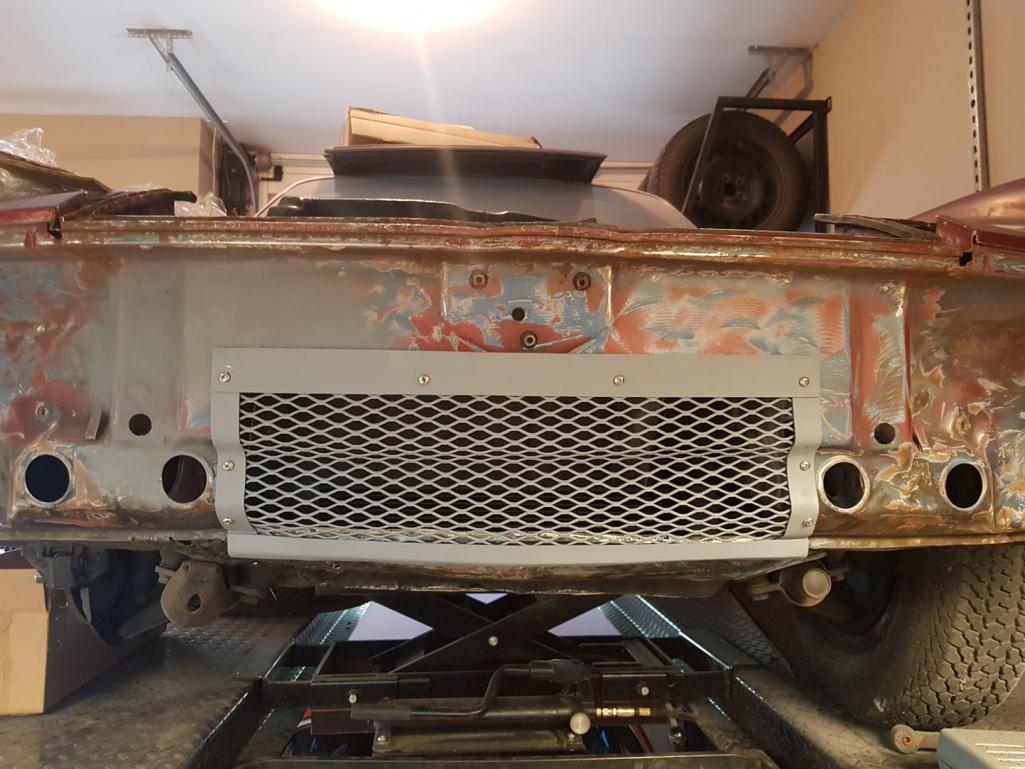 |
|
|
|
| IVGUY |
Dec 21 2019, 11:09 PM
Post
#17
|
|
Member Group: Members Posts: 53 Joined: 18-January 05 From: Summerland BC Canada Member No.: 3,468 Region Association: Canada |
Welcome ..looks like you’re in the South Okanagan.... there’s a few 914’s around ..At least 2 here in Summerland ....reach out if you need any local info otherwise see you at Cars and Coffee in the spring
|
|
|
|
| Sway Bar |
Dec 23 2019, 12:06 PM
Post
#18
|
|
Member Group: Members Posts: 88 Joined: 17-December 19 From: Okanagan Valley, Great White North Member No.: 23,743 Region Association: None |
QUOTE(IVGUY @ Dec 21 2019, 09:09 PM) Welcome ..looks like you’re in the South Okanagan.... there’s a few 914’s around ..At least 2 here in Summerland ....reach out if you need any local info otherwise see you at Cars and Coffee in the spring Summerland is a little hotbed for Early Porsche's! I'm familiar with a few old P-cars and owners from there. As for Cars and Coffee, if you've been in the past I'm sure we've probably have met. Most know me by my 911 since it kinda sticks out from the rest of crowd. Marlon |
|
|
|
| Sway Bar |
Dec 23 2019, 12:26 PM
Post
#19
|
|
Member Group: Members Posts: 88 Joined: 17-December 19 From: Okanagan Valley, Great White North Member No.: 23,743 Region Association: None |
Got some more progress pics from the project....after fooling around with the front grill I started on the undercarriage. Project idea is for me to do all the underside, inner's, trunks, etc. Then get a real pro for the shiny parts.
That being said I started to tackle the wheel wheels, rockers, and floor pans looking for trouble. Again, got very lucky. The underside had I gather some sort of early undercoating. It was a pain to remove since no real quick mechanical method seemed to work. Wire brushes, sanding or chemical would just gum up or make a mess so really it was and sharp scraper and chip away. It chipped of fairly easy and exposed a really well preserved underside. The only few floor pan issues were from water sitting in the interior and rusting through to the bottom. The rockers were rock solid too. 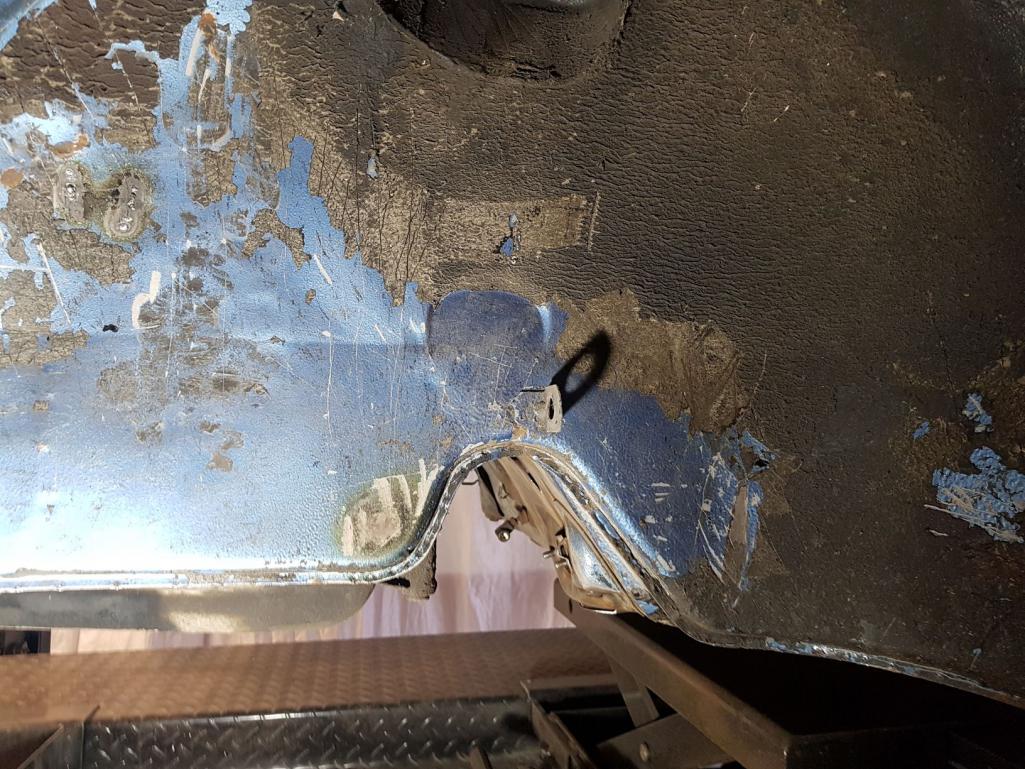 So, decided to play and try my hand and making cool racing bits. Not really necessary but why not. Made some gusseting and sway bar reinforcement. There is my poor welding skills in all it's glory. Didn't look too bad after dressing the welds and once under undercoating they will look just fine.  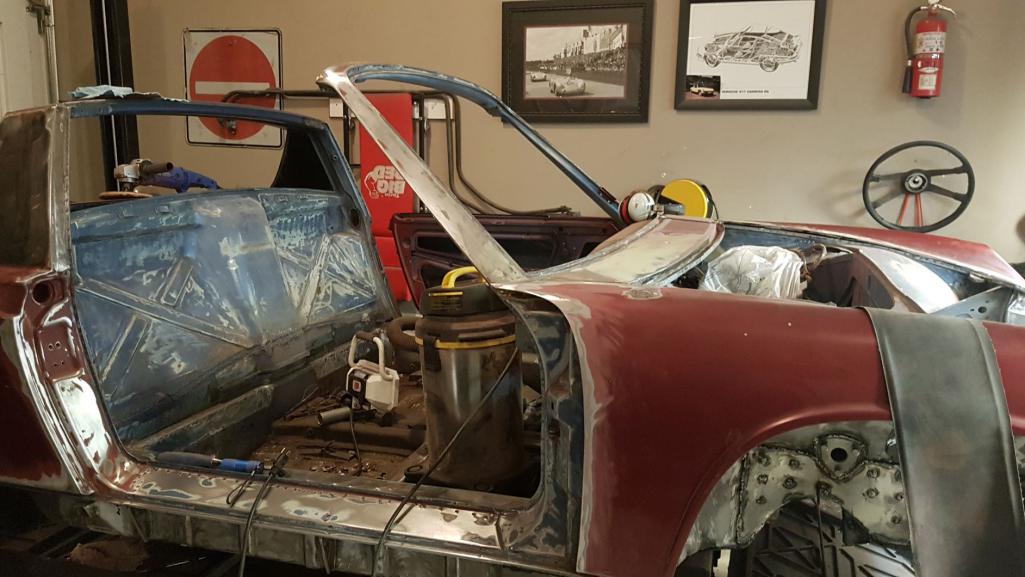 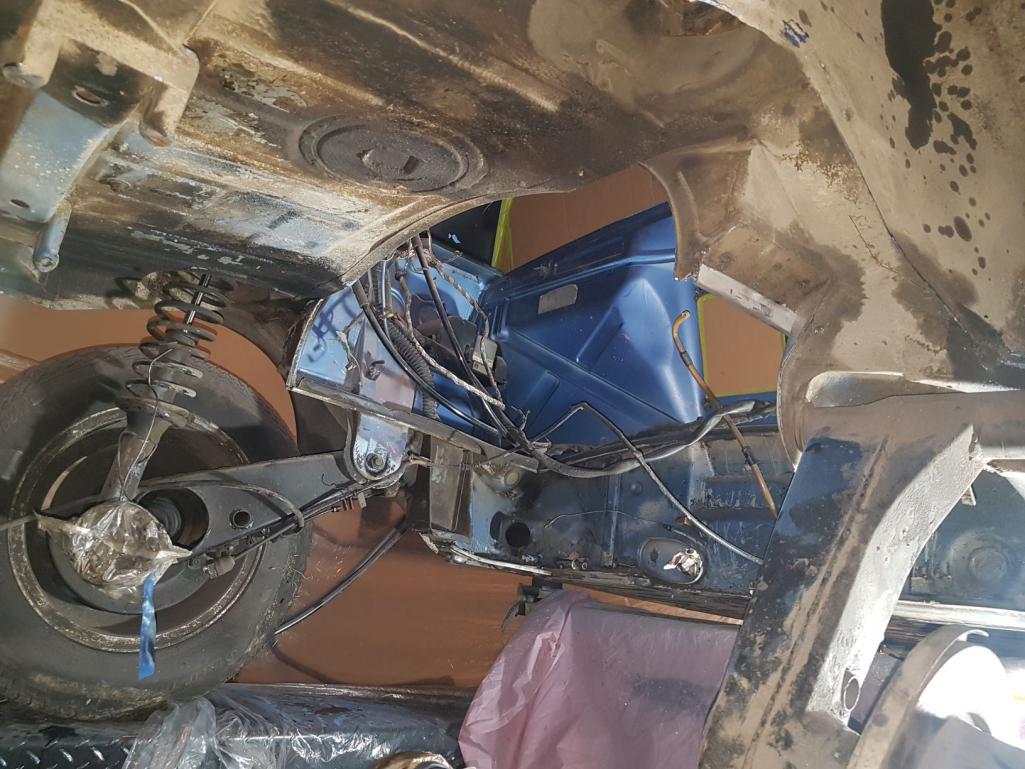 The rear has a lot of surface area but wanted to do the job right (and cost effective) 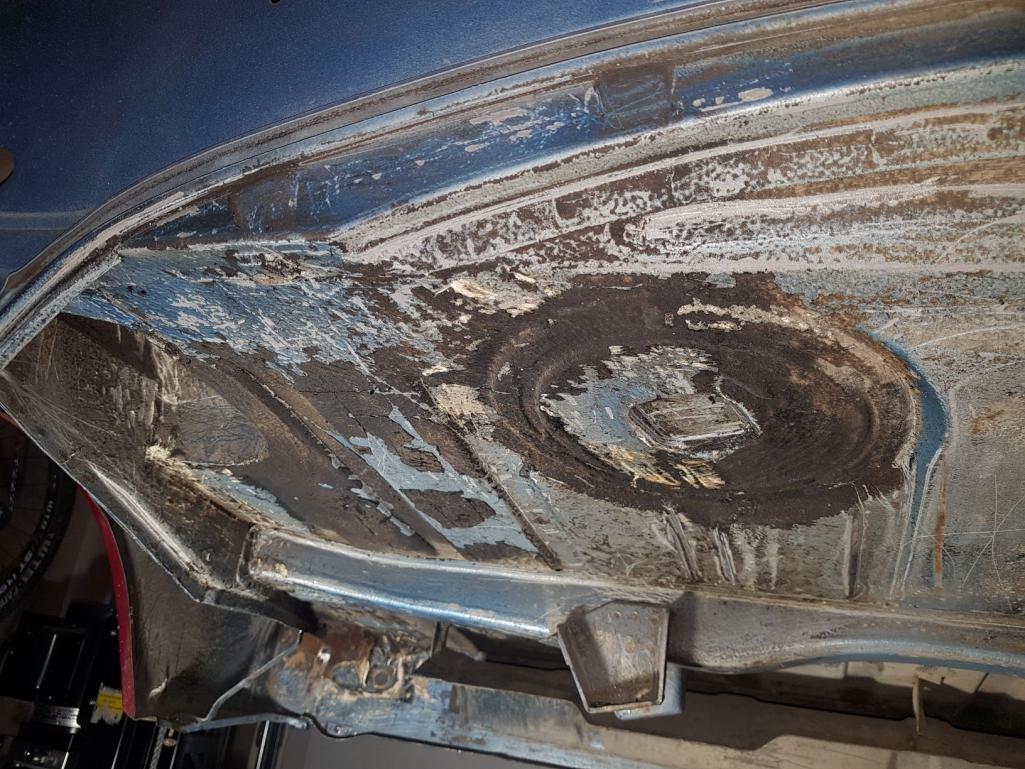 |
|
|
|
| Sway Bar |
Dec 27 2019, 05:19 PM
Post
#20
|
|
Member Group: Members Posts: 88 Joined: 17-December 19 From: Okanagan Valley, Great White North Member No.: 23,743 Region Association: None |
Couple more shots before the final scrub down to metal on the underside and inners...Once on a roll I kept forgetting to take pictures but got some major milestone ones regardless.
One question...for the life of me, I can't find the shortcuts for subscribed threads. I know how to subscribe but once done where is the link/shortcut? I know it must be simple but I can't seem to find it. My final fix for the hell hole..it wasn't that bad but after I patched it I decided to over patch, kinda like the body reinforcement kit which I also did...wasn't necessary but I thought again why not. 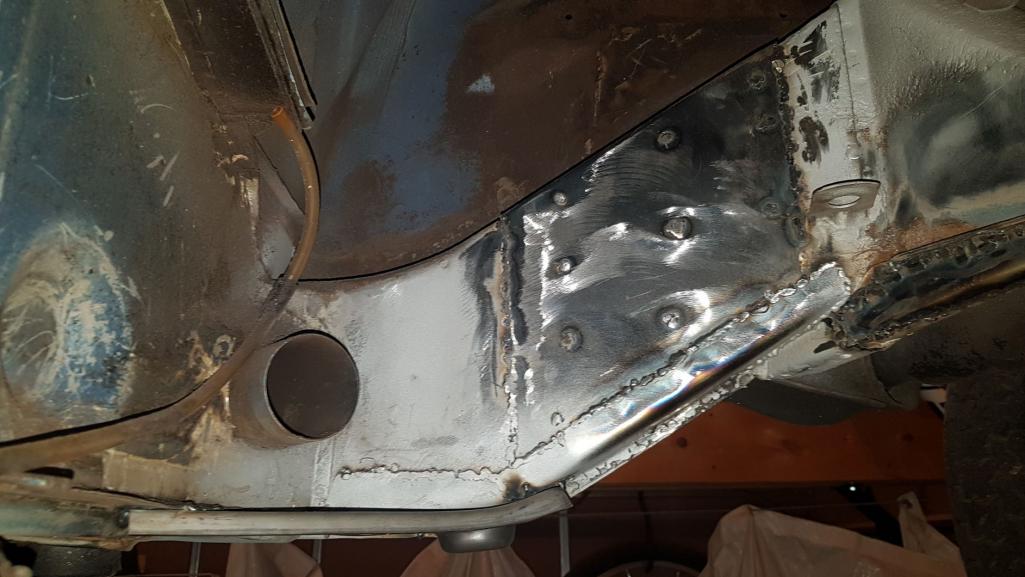  So after this I took everything down to metal and found a few other little problem spots. Finally after all that I cleaned and cleaned and then built a tent (hint: not to sleep in) |
|
|
|
|
1 User(s) are reading this topic (1 Guests and 0 Anonymous Users)
0 Members:

|
Lo-Fi Version | Time is now: 25th April 2024 - 02:20 AM |
Invision Power Board
v9.1.4 © 2024 IPS, Inc.