|
|
|
Porsche, and the Porsche crest are registered trademarks of Dr. Ing. h.c. F. Porsche AG.
This site is not affiliated with Porsche in any way. Its only purpose is to provide an online forum for car enthusiasts. All other trademarks are property of their respective owners. |
|
|

  |

| FourBlades |
 Dec 27 2019, 06:49 PM Dec 27 2019, 06:49 PM
Post
#21
|
|
From Wreck to Rockin  Group: Members Posts: 2,054 Joined: 3-December 07 From: Brevard, FL Member No.: 8,414 Region Association: South East States |
Welcome to 914 World! Looks like a very solid car to start with. The original color appears to be Marathon Blue Metallic. You clearly have some skills, this should be a good build. (IMG:style_emoticons/default/first.gif) John |
   |

 
|
| pete000 |
Dec 27 2019, 06:57 PM
Post
#22
|
|
Senior Member Group: Members Posts: 1,885 Joined: 23-August 10 From: Bradenton Florida Member No.: 12,094 Region Association: South East States |
Nice rescue!
|
|
|
|
| PanelBilly |
Dec 27 2019, 07:57 PM
Post
#23
|
|
914 Guru Group: Members Posts: 5,804 Joined: 23-July 06 From: Kent, Wa Member No.: 6,488 Region Association: Pacific Northwest |
Welcome aboard. I’d support the door openings while your working on the body. Double check the door fit first to make sure your happy with it.
|
|
|
|
| Sway Bar |
Dec 27 2019, 08:18 PM
Post
#24
|
|
Member Group: Members Posts: 88 Joined: 17-December 19 From: Okanagan Valley, Great White North Member No.: 23,743 Region Association: None |
Thanks for the comments...I've tried my hands at 2 911 builds and each time I try to do a little more. The 914 is the farthest I've gone in one go and I keep changing the end result in my head. I'm having fun with this platform.
Next up Epoxy primer...makes the car look real good real fast. I found it fun and easy to spray. I've done inner fenders or panels before but nothing this large in one go. 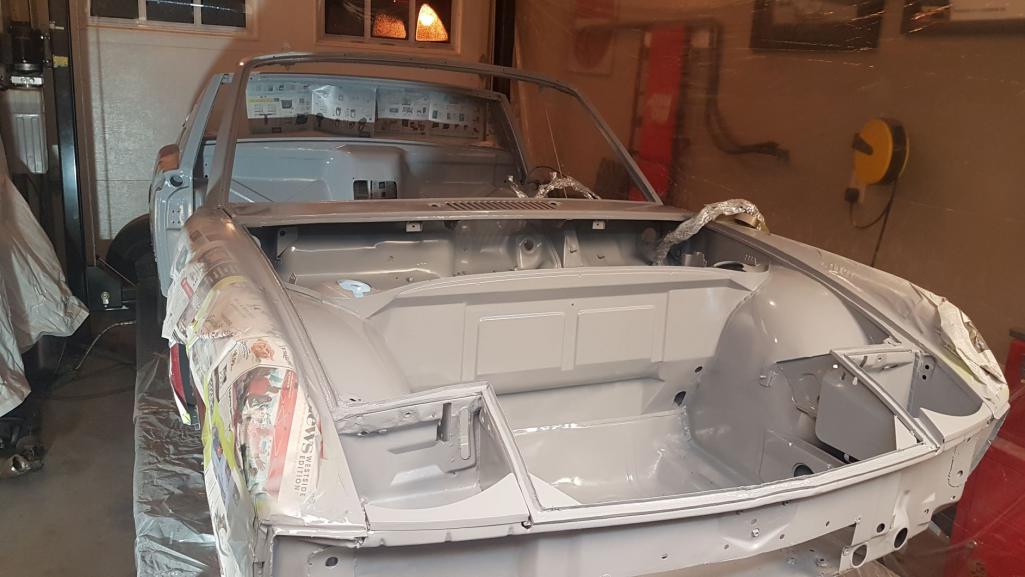 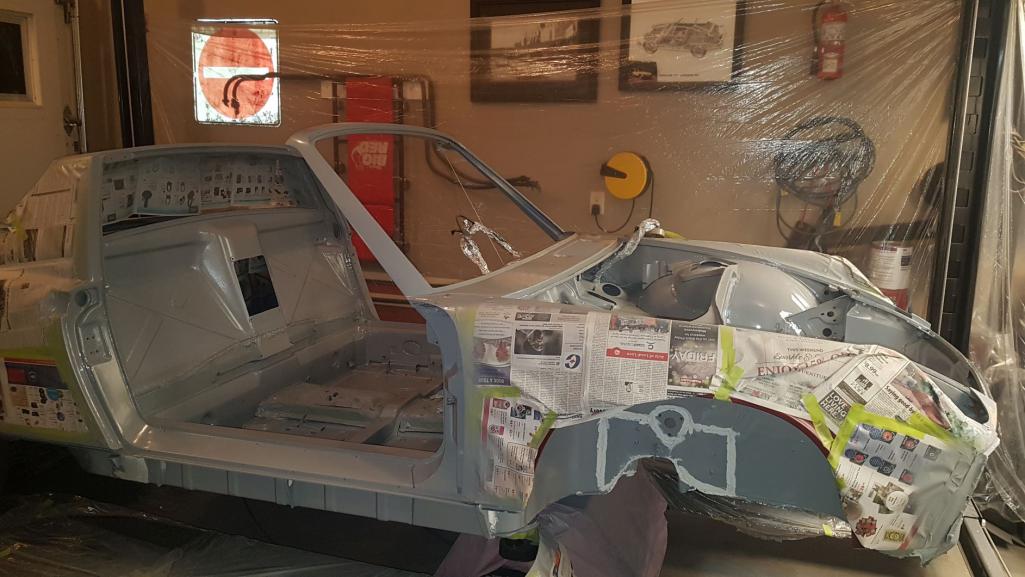 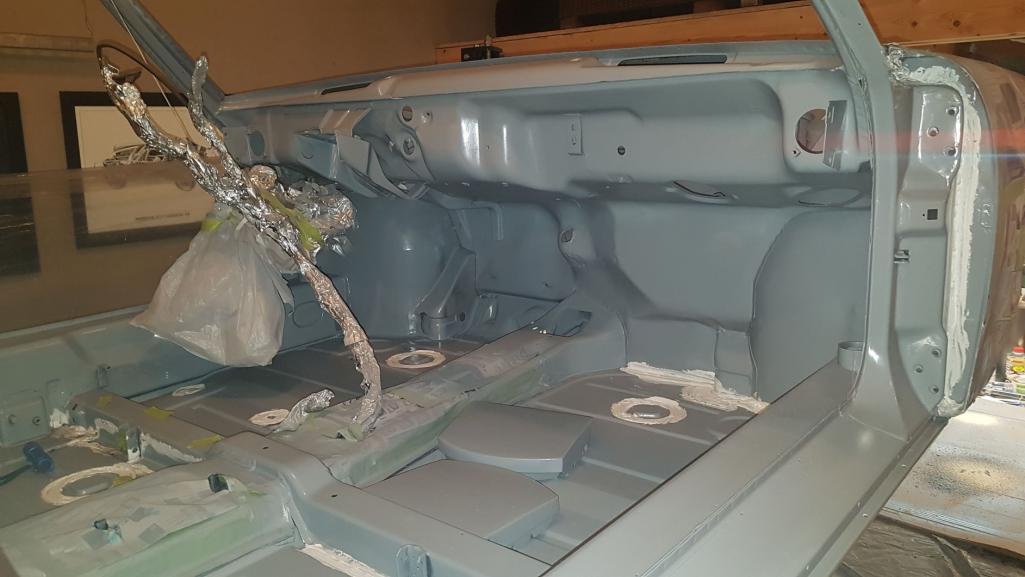 Once cured I decided to texture undercoat the underside and certain areas before applying color. 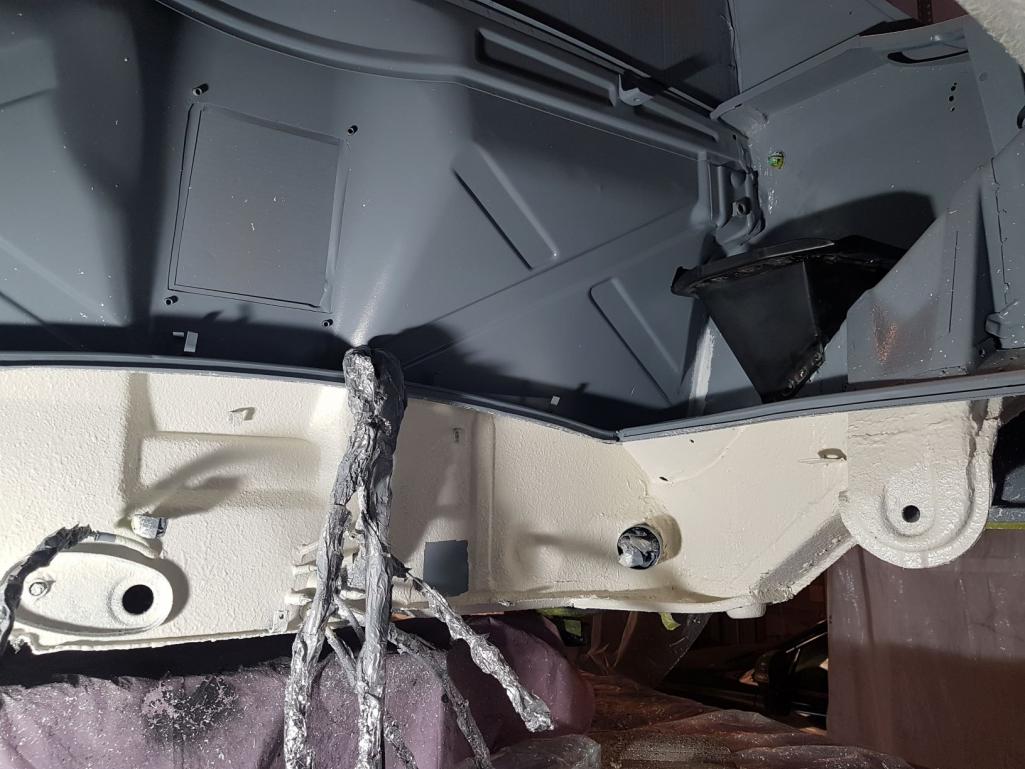 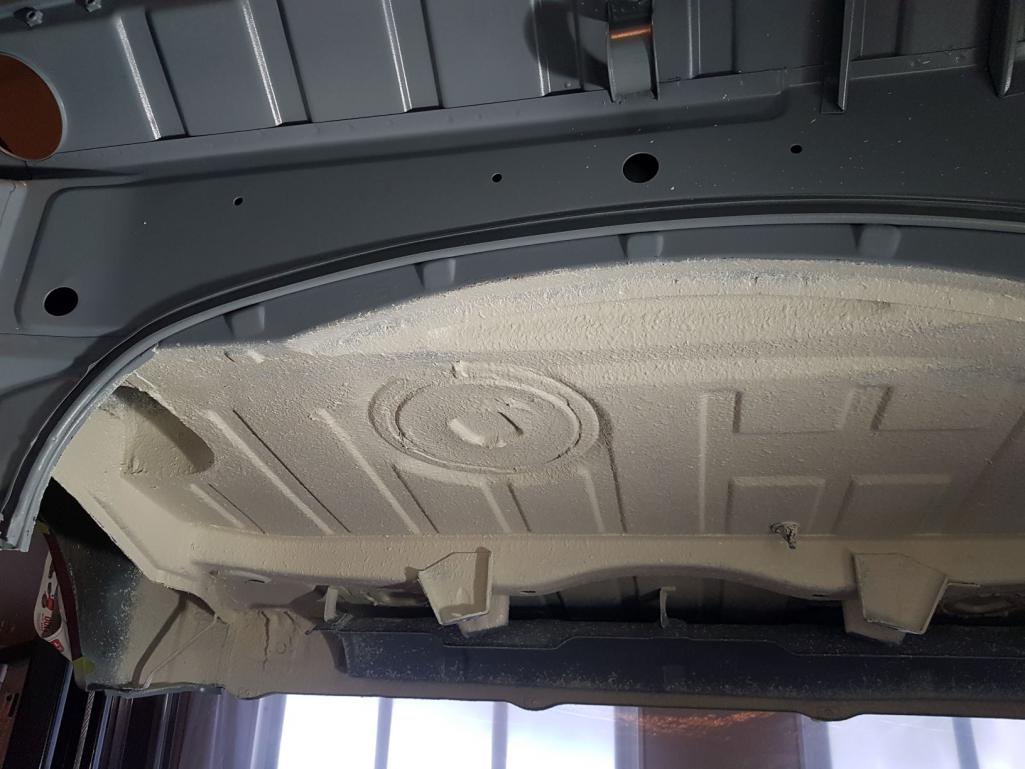 In the end I'm really happy with the end result and next would be a dash of color. Again, something I've never really tackled at this size. 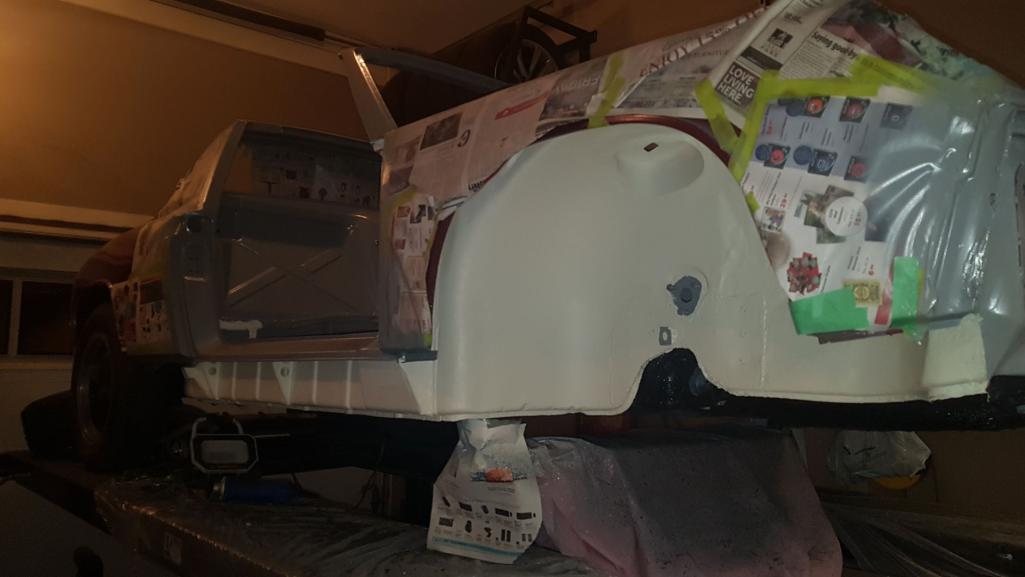 Attached thumbnail(s) 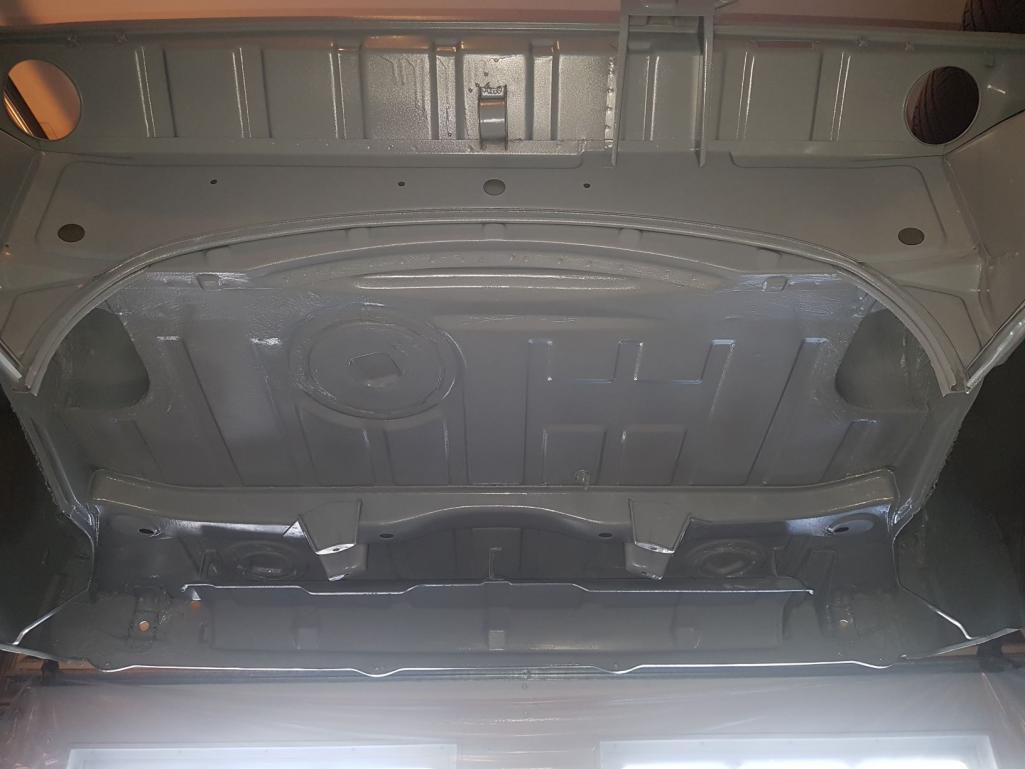
|
|
|
|
| dr.tim |
Dec 27 2019, 08:35 PM
Post
#25
|
|
Member Group: Members Posts: 101 Joined: 17-December 11 From: Butte, America Member No.: 13,907 Region Association: Rocky Mountains |
|
|
|
|
| Sway Bar |
Dec 30 2019, 05:18 PM
Post
#26
|
|
Member Group: Members Posts: 88 Joined: 17-December 19 From: Okanagan Valley, Great White North Member No.: 23,743 Region Association: None |
Picked a color...love the color.
Hard to get feel for any color from pictures. Base plus clear Blau Metallic  Can sort of get a feel for the metallic flake. 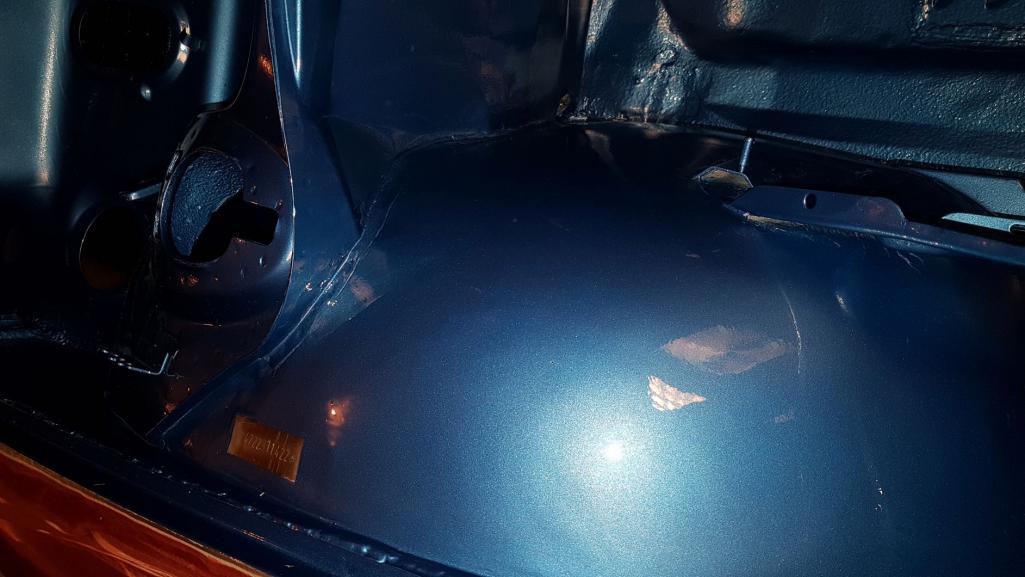 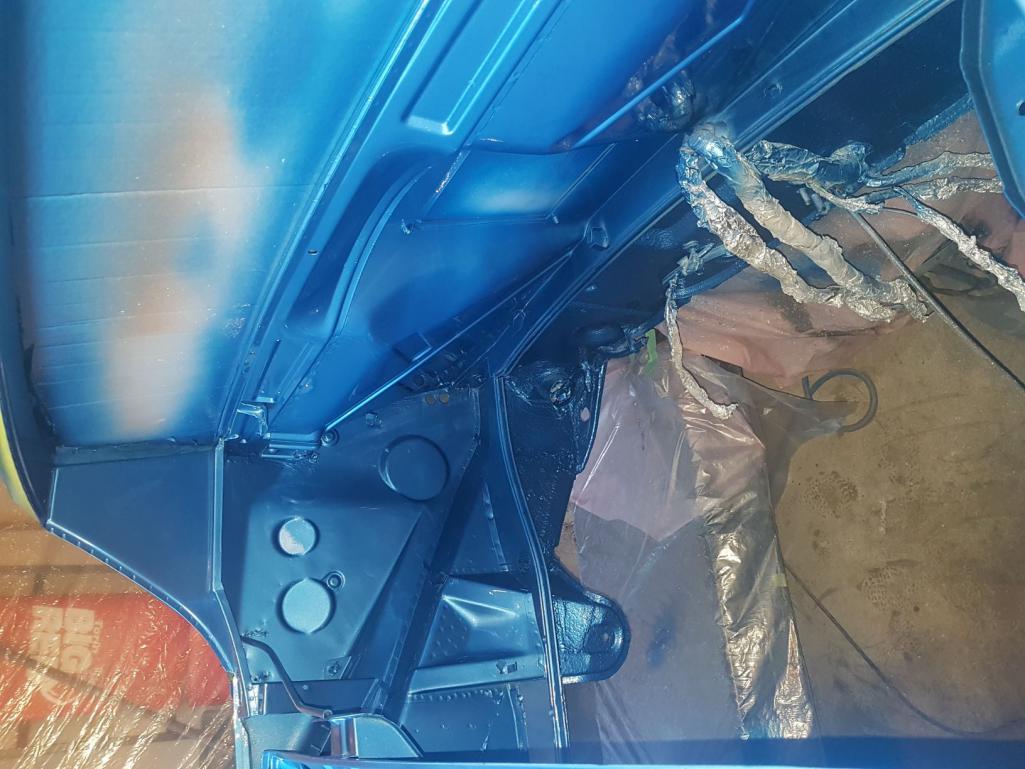 |
|
|
|
| Sway Bar |
Dec 30 2019, 05:23 PM
Post
#27
|
|
Member Group: Members Posts: 88 Joined: 17-December 19 From: Okanagan Valley, Great White North Member No.: 23,743 Region Association: None |
Excited to see what the exterior will look like with a real painter shooting.
This concluded another huge milestone. Now I can reassemble some of the chassis, suspension and the likes. Plan was to ship it out the door to a good friend and learn some real body work and prep for paint. 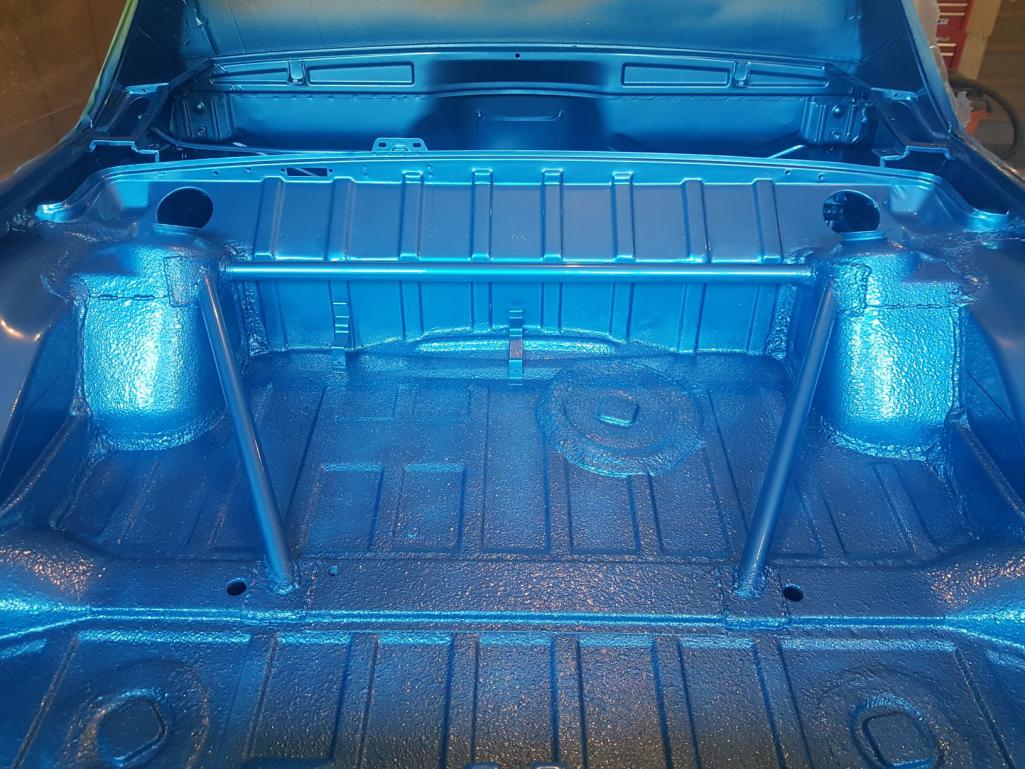 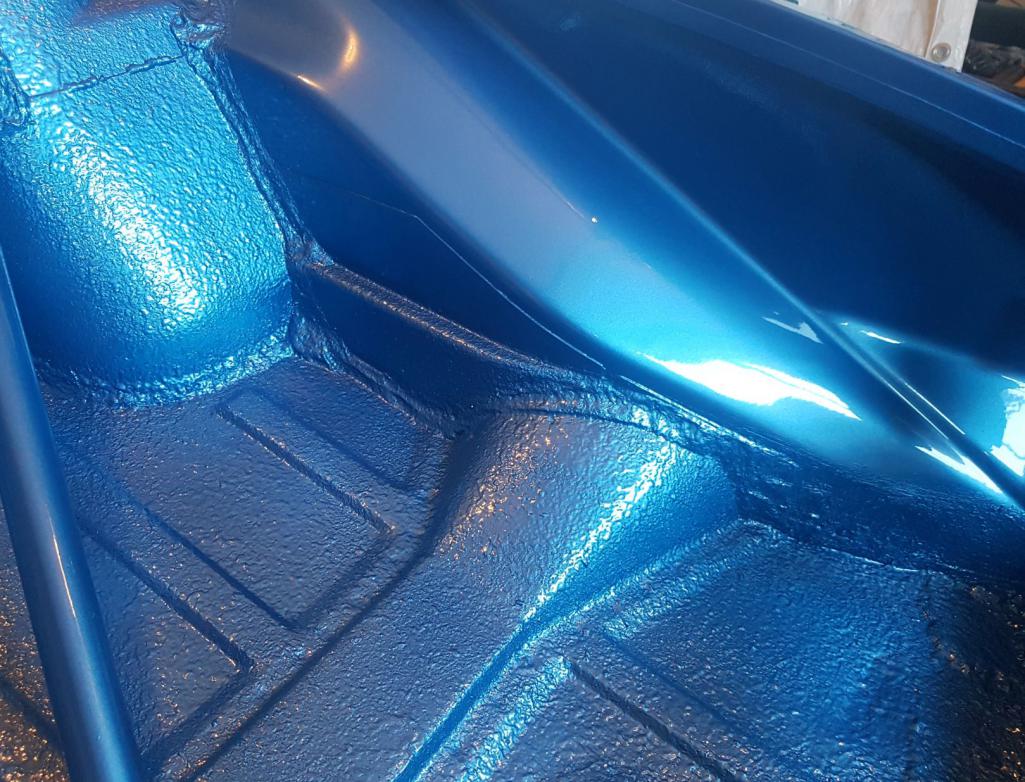 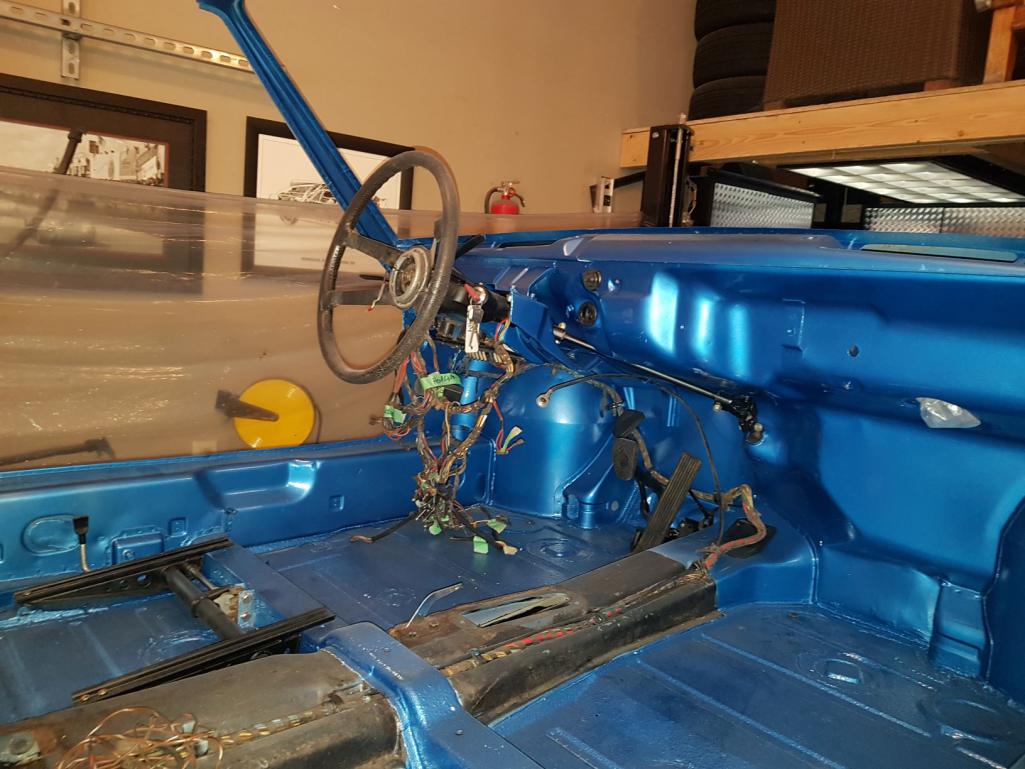 |
|
|
|
| Sway Bar |
Jan 6 2020, 03:51 PM
Post
#28
|
|
Member Group: Members Posts: 88 Joined: 17-December 19 From: Okanagan Valley, Great White North Member No.: 23,743 Region Association: None |
Few more in progress...Re-install of suspension. Was going to forgo a parking brake but had most of the 911 e-brake parts on hand and a parking brake really is handy.
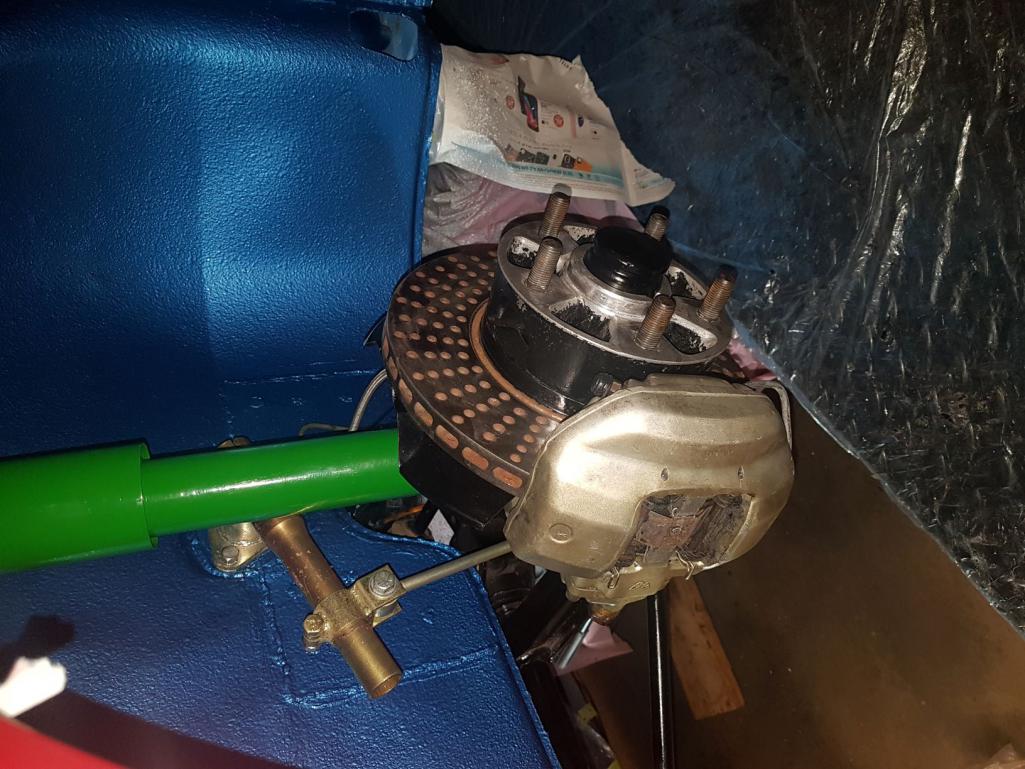 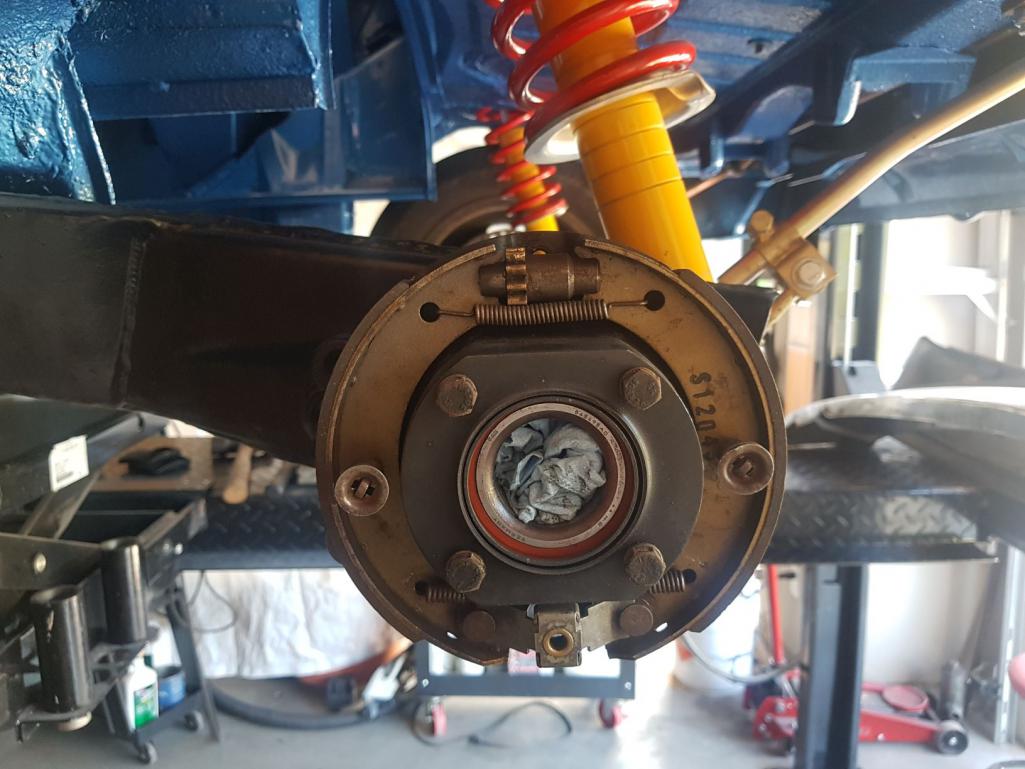 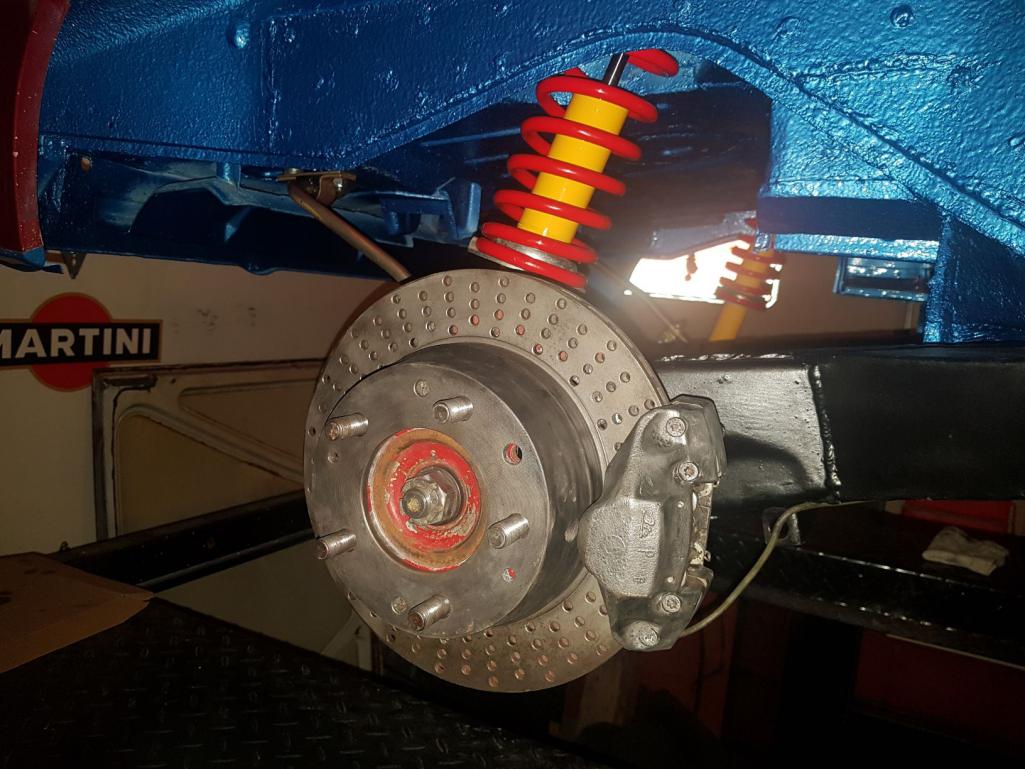 After this is was a little more paint removal that i wanted to undertake before it was out the door for some fender treatment. 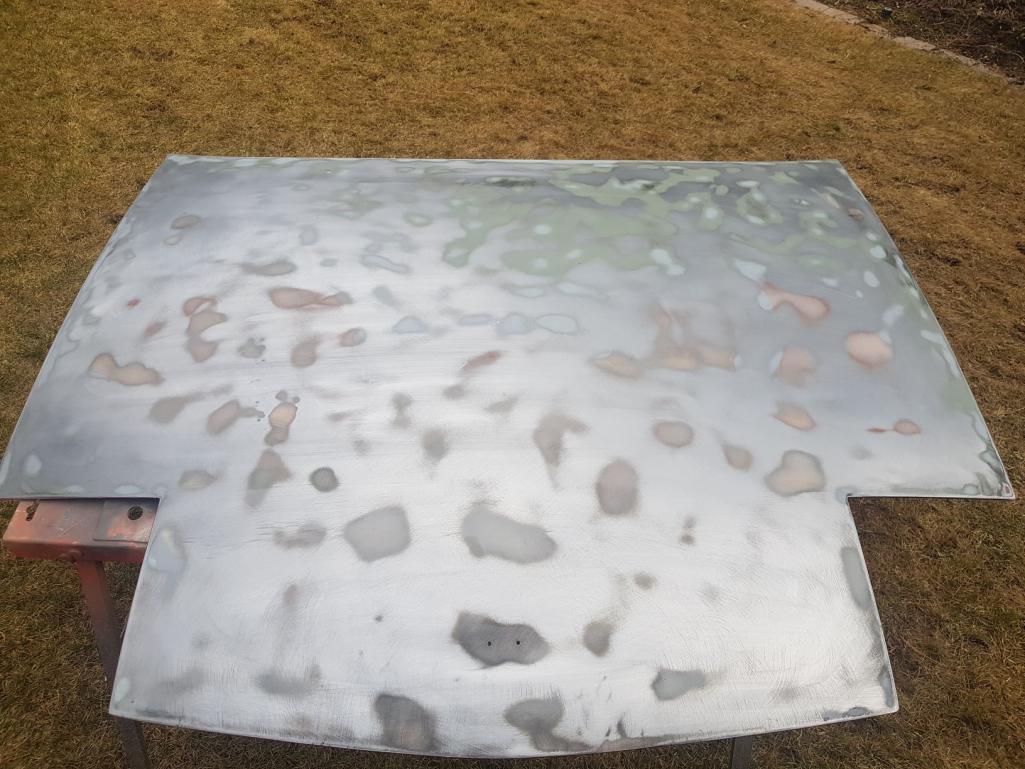 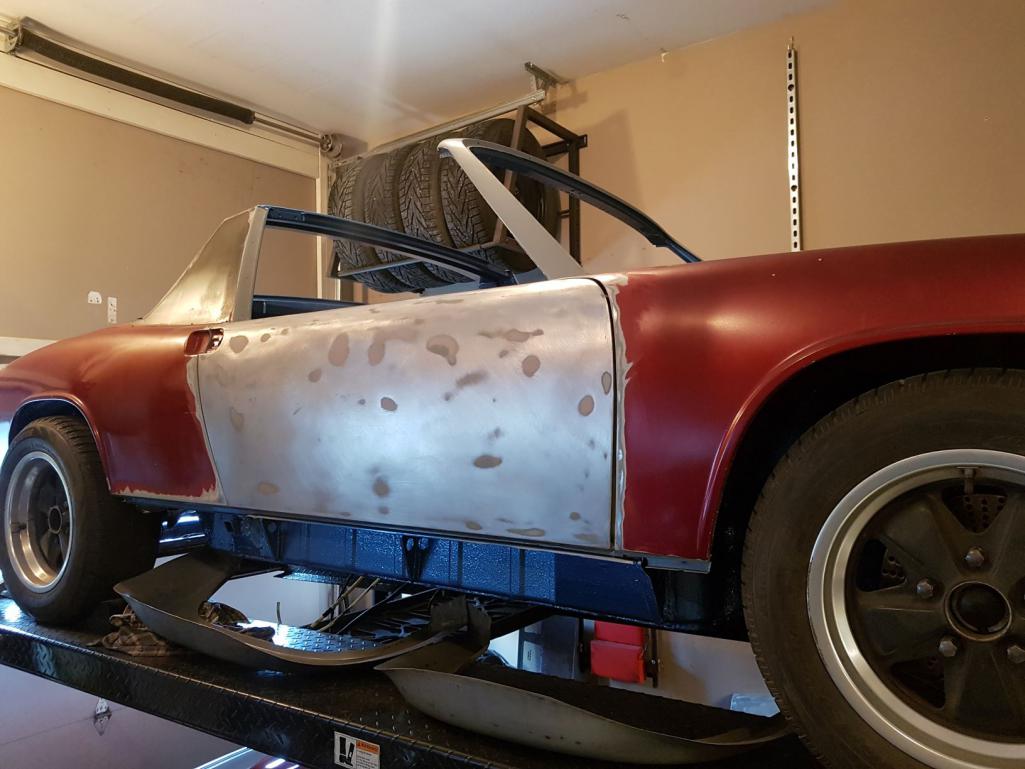 |
|
|
|
| mb911 |
Jan 6 2020, 04:20 PM
Post
#29
|
|
914 Guru Group: Members Posts: 6,823 Joined: 2-January 09 From: Burlington wi Member No.: 9,892 Region Association: Upper MidWest |
Looks great.. Please note don't drill the tank holes until you get the tank. Make a template off of that 1st. It will benefit you..
|
|
|
|
| porschetub |
Jan 6 2020, 04:24 PM
Post
#30
|
|
Advanced Member Group: Members Posts: 4,697 Joined: 25-July 15 From: New Zealand Member No.: 18,995 Region Association: None |
QUOTE(Sway Bar @ Jan 7 2020, 10:51 AM)  Few more in progress...Re-install of suspension. Was going to forgo a parking brake but had most of the 911 e-brake parts on hand and a parking brake really is handy. Just noticed your handbrake setup,can't see a top brake shoe retainer on the trailing arms ? don't rely on the back plate to retain the shoes,its simply not strong enough for an emergency brake...ask me how I know. If you have them ignore my comment,if not you need to weld a 40mm wide tab on the trailing arms,the car these parts come off (911) already has that piece on the trailing arms. You are making amazing progress on this build and I love the colour...keep it up the good work (IMG:style_emoticons/default/beerchug.gif) |
|
|
|
| Sway Bar |
Jan 6 2020, 05:30 PM
Post
#31
|
|
Member Group: Members Posts: 88 Joined: 17-December 19 From: Okanagan Valley, Great White North Member No.: 23,743 Region Association: None |
QUOTE(mb911 @ Jan 6 2020, 02:20 PM) Looks great.. Please note don't drill the tank holes until you get the tank. Make a template off of that 1st. It will benefit you.. Thanks Tank was in when I took the plunge. Just doing the raw hole like what I did on my 911. More racer like (IMG:style_emoticons/default/rolleyes.gif) ? Trying my hand with my own bolt it filler neck to the existing tank and whatever one calls the existing overfill/spill surround. Marlon |
|
|
|
| Sway Bar |
Jan 6 2020, 05:42 PM
Post
#32
|
|
Member Group: Members Posts: 88 Joined: 17-December 19 From: Okanagan Valley, Great White North Member No.: 23,743 Region Association: None |
QUOTE(porschetub @ Jan 6 2020, 02:24 PM) QUOTE(Sway Bar @ Jan 7 2020, 10:51 AM) Few more in progress...Re-install of suspension. Was going to forgo a parking brake but had most of the 911 e-brake parts on hand and a parking brake really is handy. Just noticed your handbrake setup,can't see a top brake shoe retainer on the trailing arms ? don't rely on the back plate to retain the shoes,its simply not strong enough for an emergency brake...ask me how I know. If you have them ignore my comment,if not you need to weld a 40mm wide tab on the trailing arms,the car these parts come off (911) already has that piece on the trailing arms. You are making amazing progress on this build and I love the colour...keep it up the good work (IMG:style_emoticons/default/beerchug.gif) It's hidden but it's there, I did weld in a 40mm tab/retainer in the rear between the shoes. Everything I believe checks out. I say believe, since the one item I'm missing is the short cable piece from the e-brake handle to the equalizer bar. On the list of little items to finish. |
|
|
|
| Cairo94507 |
Jan 7 2020, 08:41 AM
Post
#33
|
|
Michael Group: Members Posts: 9,726 Joined: 1-November 08 From: Auburn, CA Member No.: 9,712 Region Association: Northern California |
I think you are doing a great job and I love the color. Looking forward to seeing the exterior body work and paint. (IMG:style_emoticons/default/beerchug.gif) (IMG:style_emoticons/default/welcome.png) |
|
|
|
| Sway Bar |
Jan 7 2020, 11:31 AM
Post
#34
|
|
Member Group: Members Posts: 88 Joined: 17-December 19 From: Okanagan Valley, Great White North Member No.: 23,743 Region Association: None |
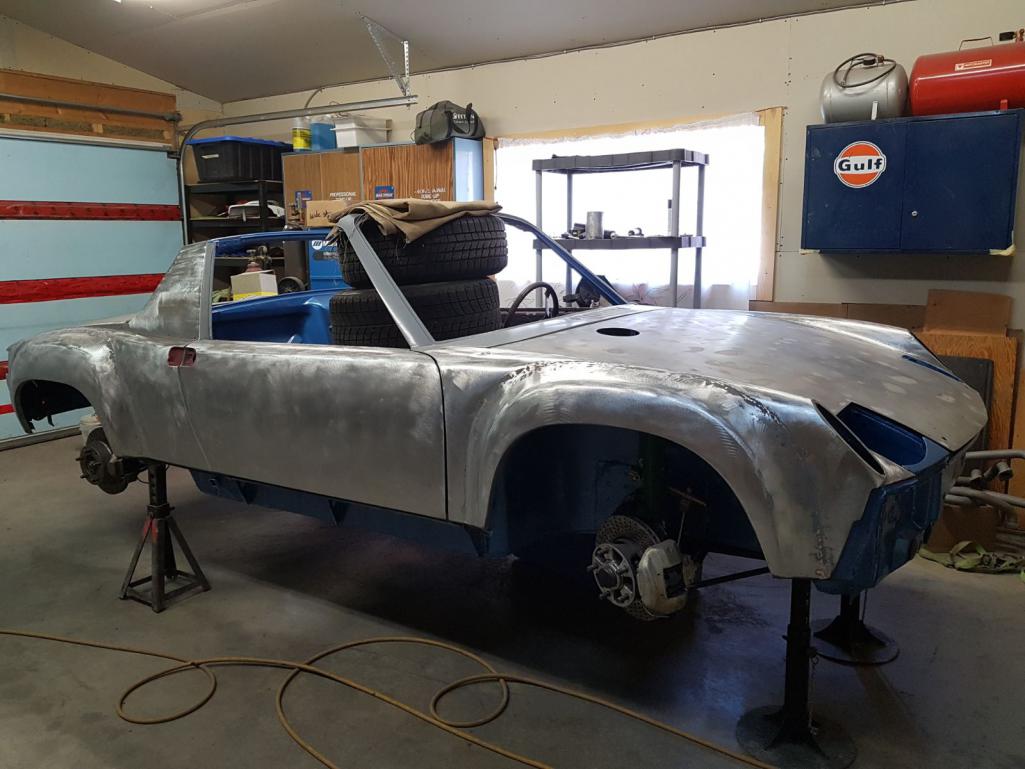
QUOTE(Sway Bar @ Jan 6 2020, 03:30 PM) QUOTE(mb911 @ Jan 6 2020, 02:20 PM) Looks great.. Please note don't drill the tank holes until you get the tank. Make a template off of that 1st. It will benefit you.. Thanks Tank was in when I took the plunge. Just doing the raw hole like what I did on my 911. More racer like (IMG:style_emoticons/default/rolleyes.gif) ? Trying my hand with my own bolt it filler neck to the existing tank and whatever one calls the existing overfill/spill surround. Marlon My duhh moment. (IMG:style_emoticons/default/screwy.gif) You are of course talking about your oil tank yet to come. I was already thinking of this pic that was upcoming in which I got out the big hole saw for the hood. This is when I dropped off the car with a good friend who happens to be a a real awesome body dude. Idea was that I was still going to do and learn the body prep and finish under his mentorship but he would do the heavy lifting and of course the fenders. Spend a lot of time test fitting, string lining, measuring and aligning the fenders so both sides are symmetrical, straight and flow together front to back. 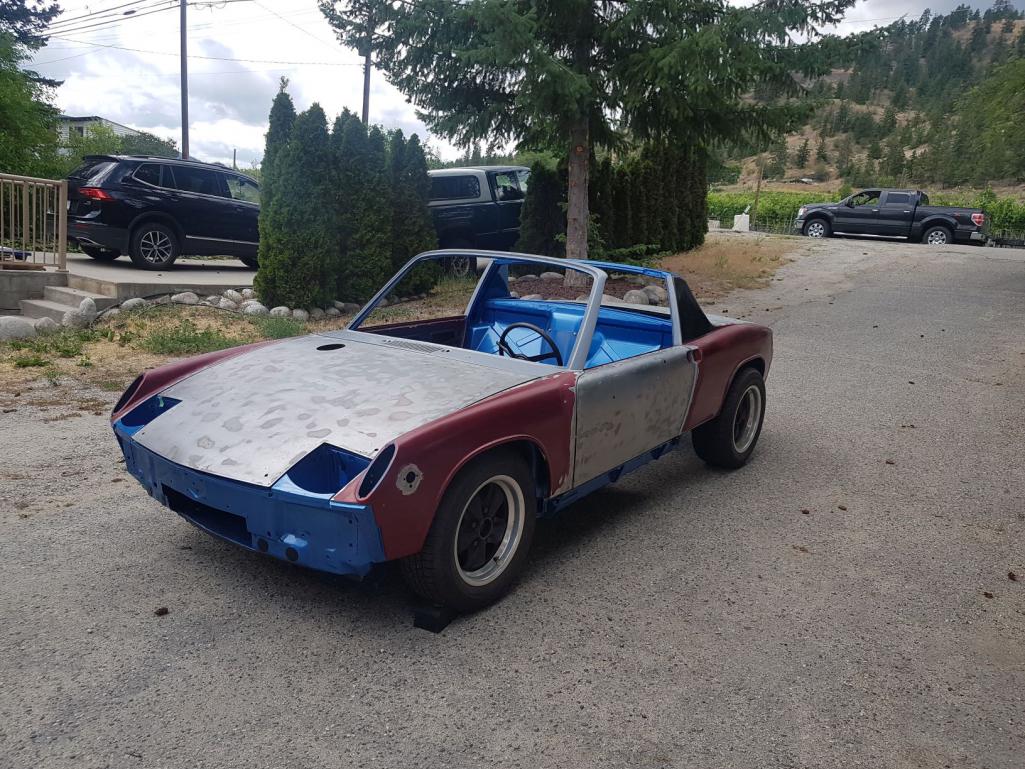 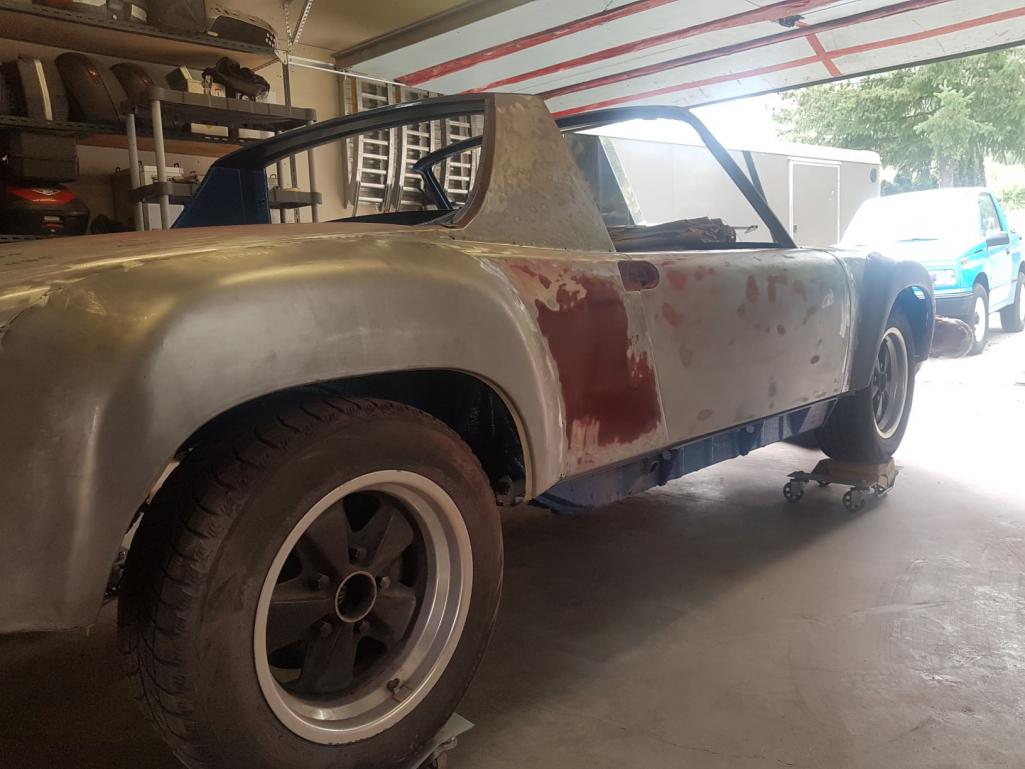 |
|
|
|
| billh1963 |
Jan 7 2020, 11:42 AM
Post
#35
|
|
Car Hoarder! Group: Members Posts: 3,402 Joined: 28-March 11 From: South Carolina Member No.: 12,871 Region Association: South East States |
Watching with interest! I'll be doing something similar later this year....
|
|
|
|
| Sway Bar |
Jan 7 2020, 11:45 AM
Post
#36
|
|
Member Group: Members Posts: 88 Joined: 17-December 19 From: Okanagan Valley, Great White North Member No.: 23,743 Region Association: None |
QUOTE(Cairo94507 @ Jan 7 2020, 06:41 AM) I think you are doing a great job and I love the color. Looking forward to seeing the exterior body work and paint. (IMG:style_emoticons/default/beerchug.gif) (IMG:style_emoticons/default/welcome.png) Thanks, its been a fun project thus far. It has been a sort of open canvass. I don't really have an end product in mind except for the fenders and the 2.4L. I look at all the awesome threads, builds and cars on this site and keep getting ideas. |
|
|
|
| Sway Bar |
Jan 10 2020, 12:40 PM
Post
#37
|
|
Member Group: Members Posts: 88 Joined: 17-December 19 From: Okanagan Valley, Great White North Member No.: 23,743 Region Association: None |
Body Work Time...so really starting to understand the amount of time required for a good end result. I great paint job is only the result of great prep and finish and you truly get what you pay for. The amount of hours is quite incredible especially the hand work. I'm amazed on the amount of product that ends up on the ground even with well prepared metal.
The fenders even though seemly great reproductions from RD are far from weld on and good to go. They took a lot more massaging to make a great fit. I left that to the pro while my work out consisted of the doors and deck lids. Doors were in really good shape and besides a few areas for the rubber seal trim I had solid panels to work with. 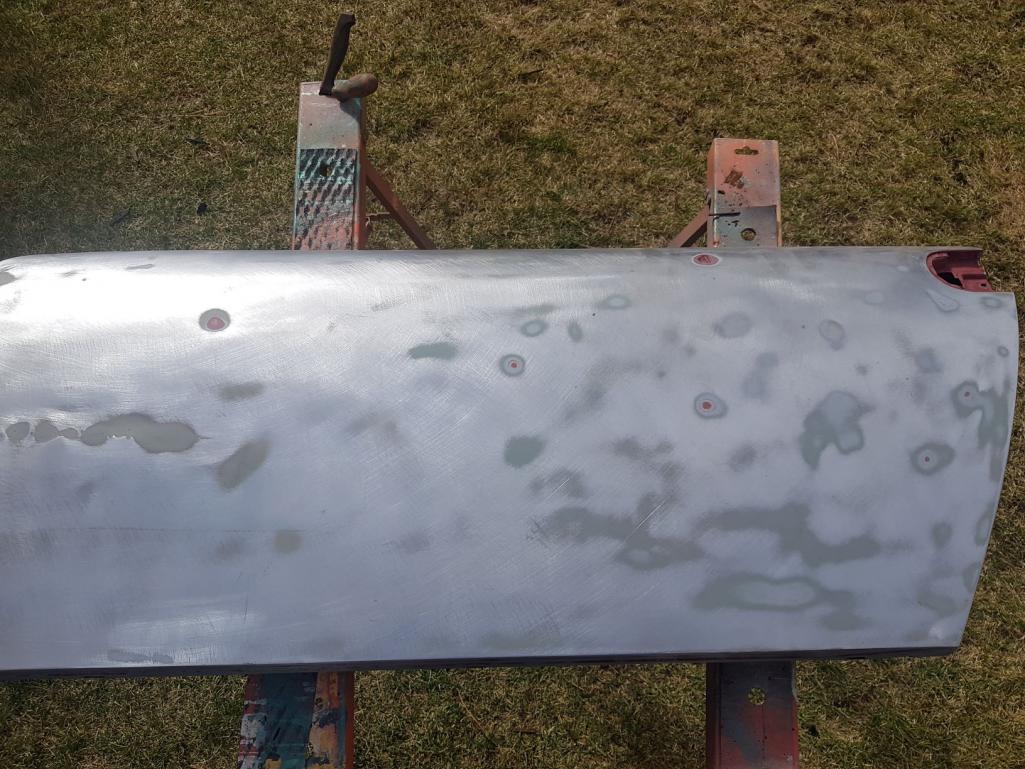 After epoxy and time to cure it was on to primer and sanding, guide coat, sanding, guide coat, sanding, spot reapply, guide coat, sanding...you get the idea. I worked through various grits with the eventual final being 600 prior to shipping off to paint. You can see the master indicating all the areas that still needed attention as I progressed along various stages. 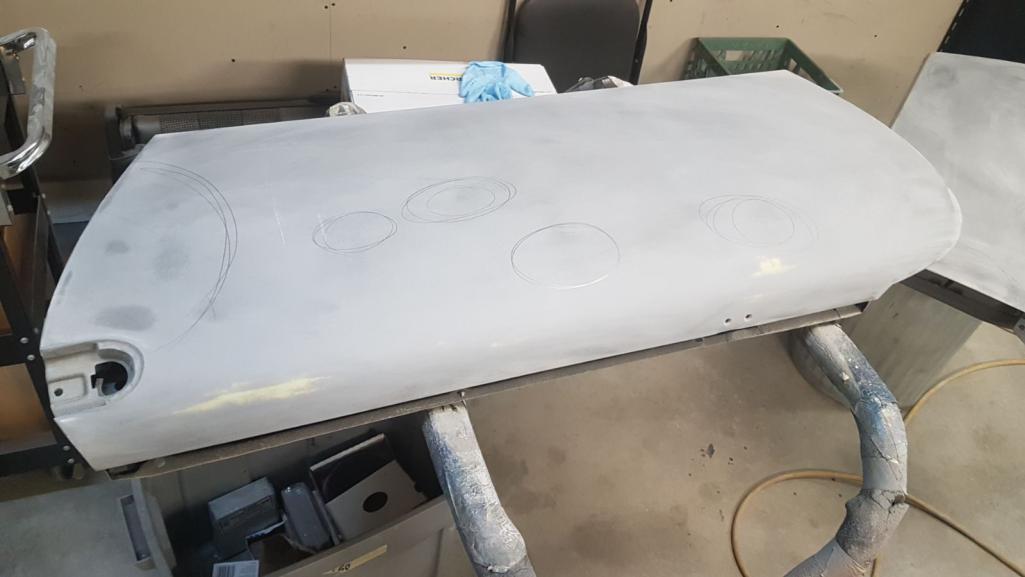 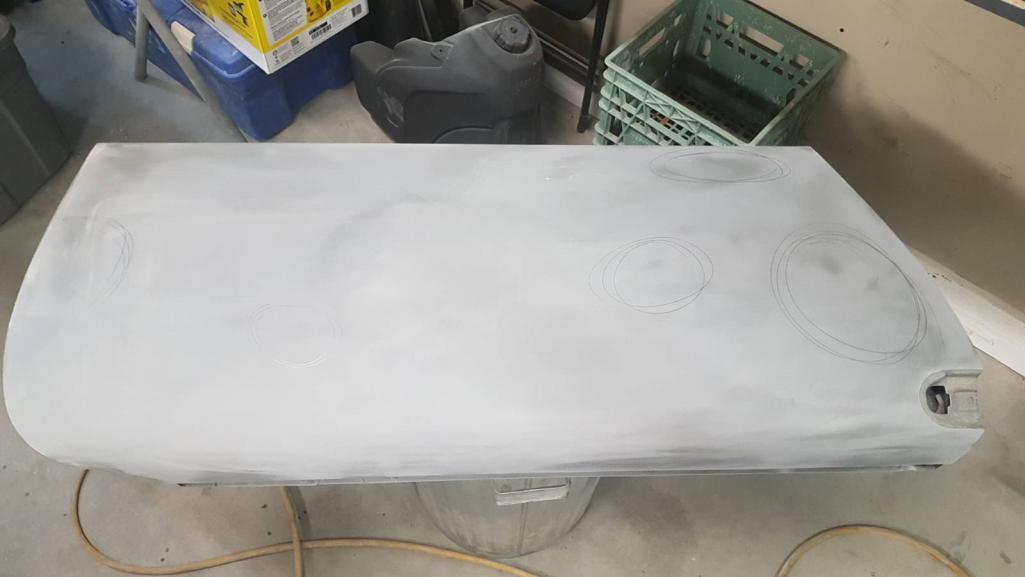 |
|
|
|
| Sway Bar |
Jan 10 2020, 12:51 PM
Post
#38
|
|
Member Group: Members Posts: 88 Joined: 17-December 19 From: Okanagan Valley, Great White North Member No.: 23,743 Region Association: None |
Never really did take too many early pics as we progressed but I'm sure we all have seen many pics before...various stages of fender install, application, and finish.
 Initial stages of shaping and blending of flares. 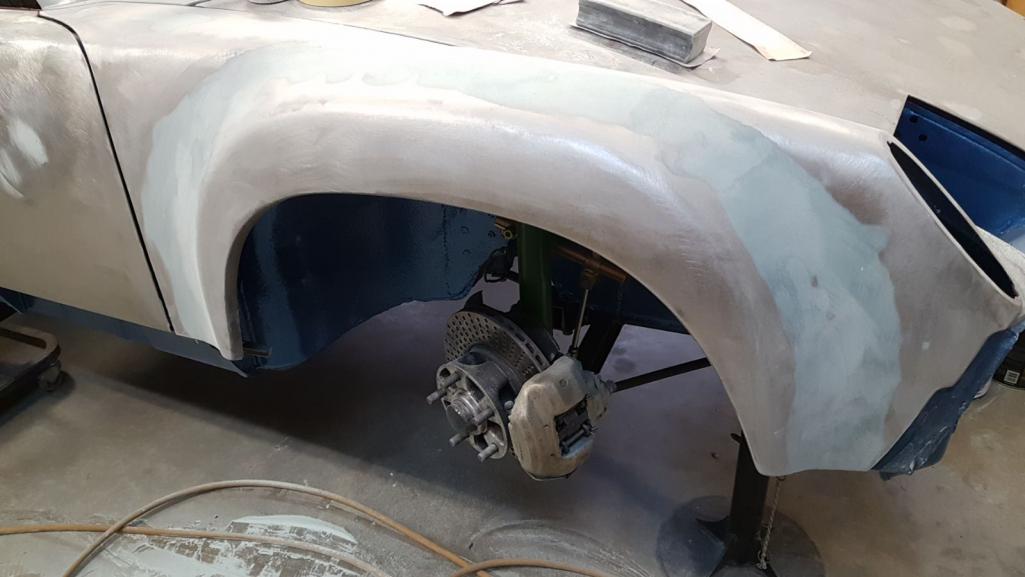 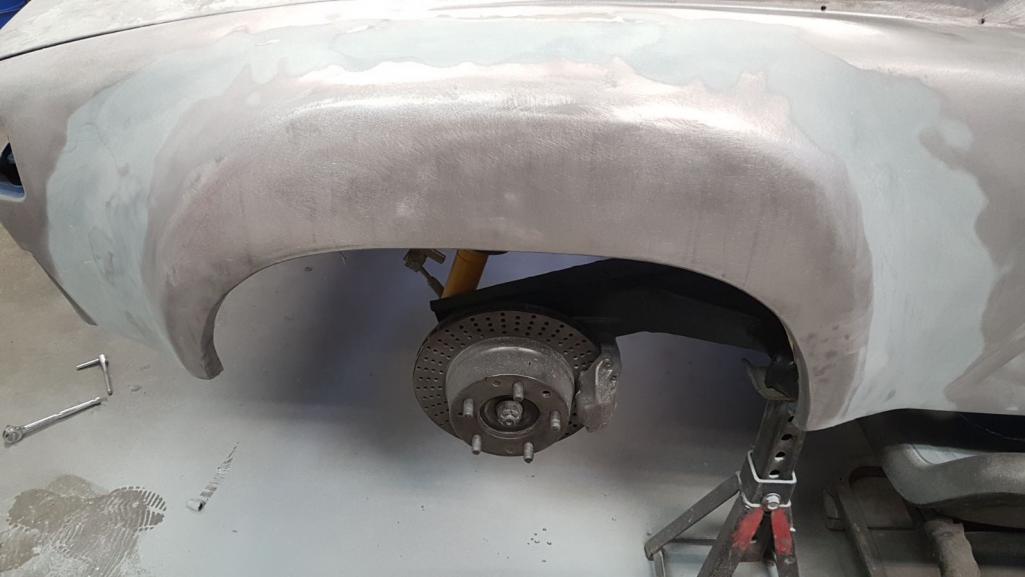 Starting to look like something good now. 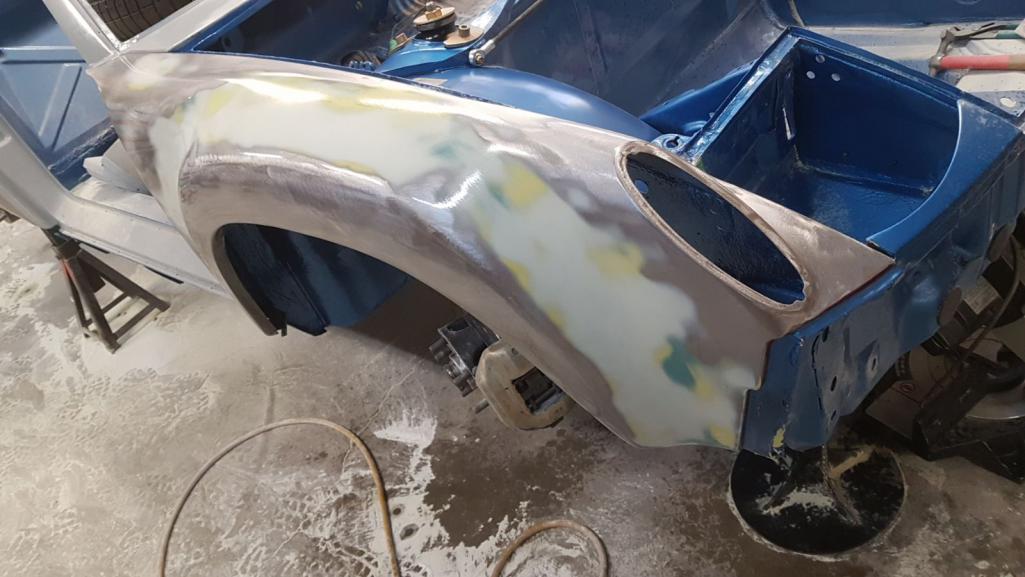 And eventually after all prep the initial epoxy application...the begining of the end product. Of course posting pics makes it look so easy but many many hours of labour. 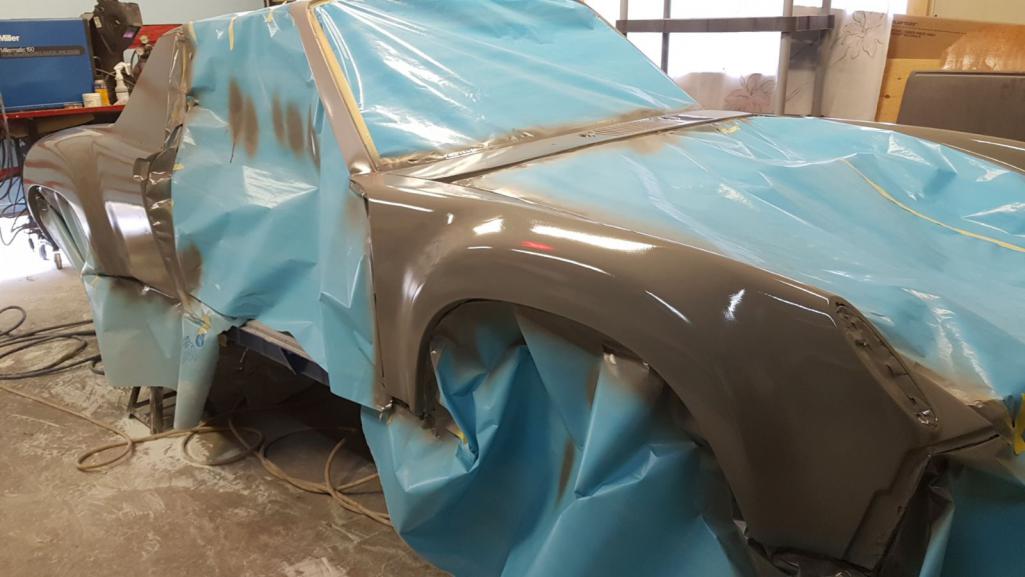 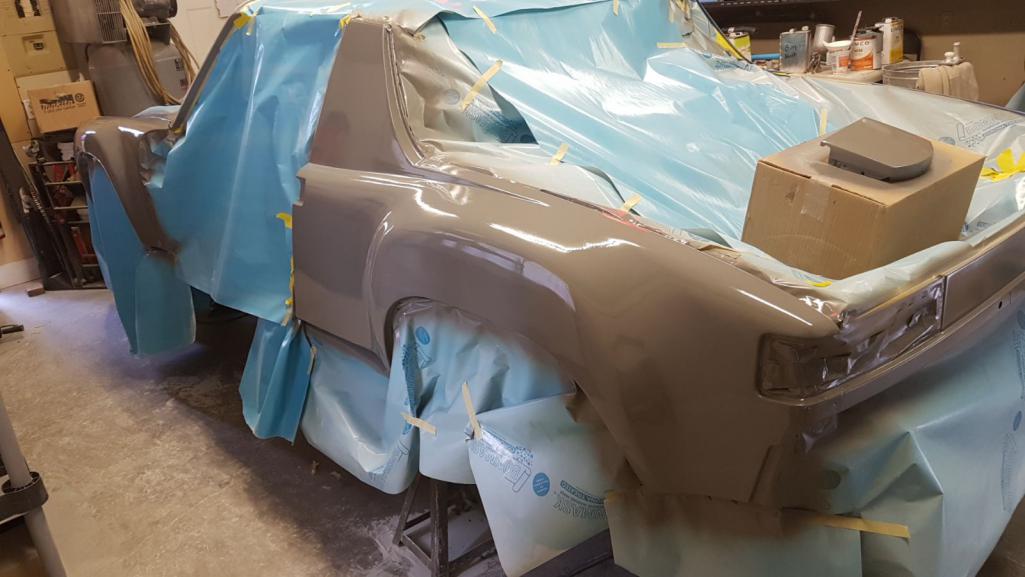 |
|
|
|
| billh1963 |
Jan 13 2020, 01:40 PM
Post
#39
|
|
Car Hoarder! Group: Members Posts: 3,402 Joined: 28-March 11 From: South Carolina Member No.: 12,871 Region Association: South East States |
Any updates?
|
|
|
|
| JRust |
Jan 13 2020, 02:41 PM
Post
#40
|
|
914 Guru Group: Members Posts: 6,305 Joined: 10-January 03 From: Corvallis Oregon Member No.: 129 Region Association: Pacific Northwest |
Man you are flying through this. Love the way it is looking
|
|
|
|
|
2 User(s) are reading this topic (2 Guests and 0 Anonymous Users)
0 Members:

|
Lo-Fi Version | Time is now: 4th May 2024 - 09:09 PM |
Invision Power Board
v9.1.4 © 2024 IPS, Inc.