|
|
|
Porsche, and the Porsche crest are registered trademarks of Dr. Ing. h.c. F. Porsche AG.
This site is not affiliated with Porsche in any way. Its only purpose is to provide an online forum for car enthusiasts. All other trademarks are property of their respective owners. |
|
|

  |

| RiqueMar |
 May 7 2020, 11:18 PM May 7 2020, 11:18 PM
Post
#21
|
|
Enrique Allen Mar  Group: Members Posts: 2,169 Joined: 28-August 08 From: San Diego, CA Member No.: 9,478 Region Association: Southern California |
Looking great! Can't wait to see more photos!
|
   |

 
|
| Detroit |
May 8 2020, 06:32 AM
Post
#22
|
|
Member Group: Members Posts: 60 Joined: 28-December 16 From: Detroit metro area Member No.: 20,709 Region Association: Upper MidWest |
I'm so glad you started this thread1 Grafting the factory fender lips onto flared rear arches (while keeping the front end stock) is exactly what I want to do, but I've never seen another 914 done that way.
Can't wait to see this with wheels on it, but if you could post a few more pics showing the front and rear arches together, I'd be grateful... |
|
|
|
| wysri9 |
May 11 2020, 05:06 AM
Post
#23
|
|
Member Group: Members Posts: 199 Joined: 23-August 13 From: Aberdeen, Scotland Member No.: 16,291 Region Association: England |
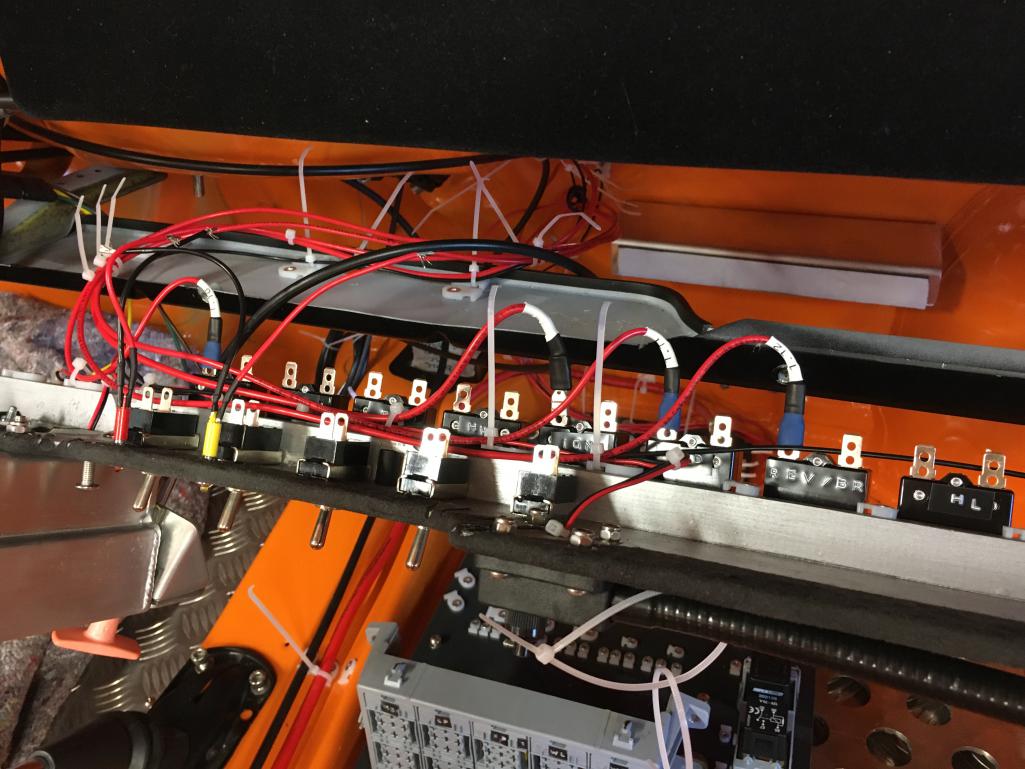
So the major electrical components are now in the car. Let the wiring begin....... (IMG:style_emoticons/default/smile.gif) (IMG:style_emoticons/default/smile.gif)
Attached thumbnail(s) 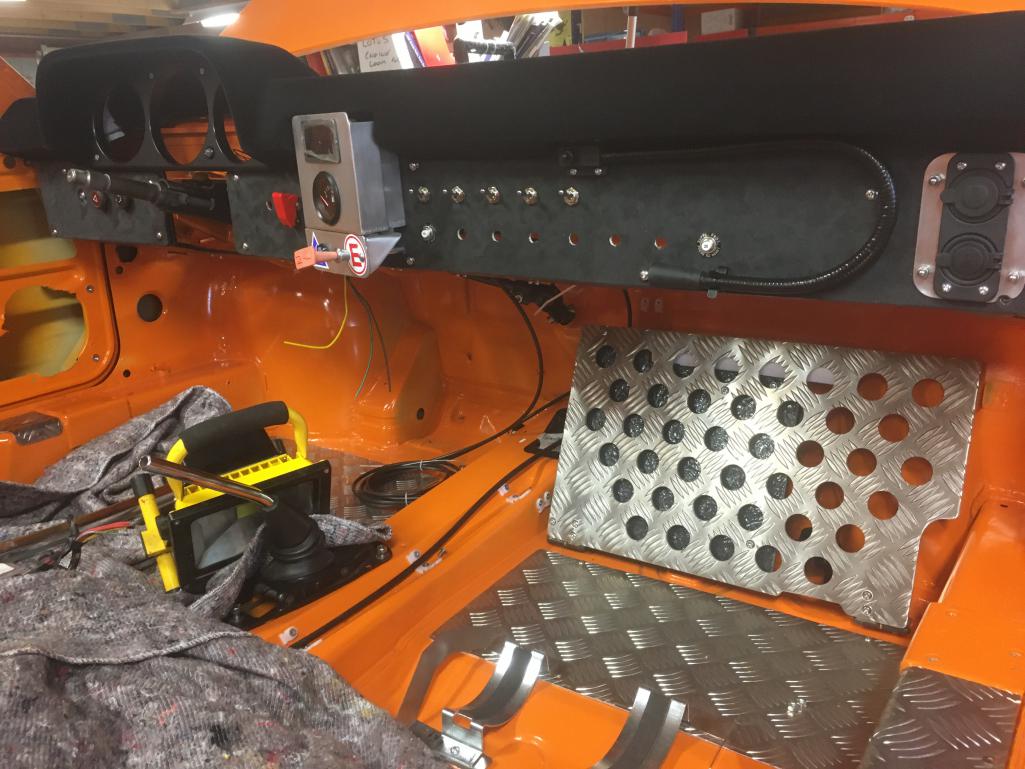
|
|
|
|
| wysri9 |
May 11 2020, 05:07 AM
Post
#24
|
|
Member Group: Members Posts: 199 Joined: 23-August 13 From: Aberdeen, Scotland Member No.: 16,291 Region Association: England |
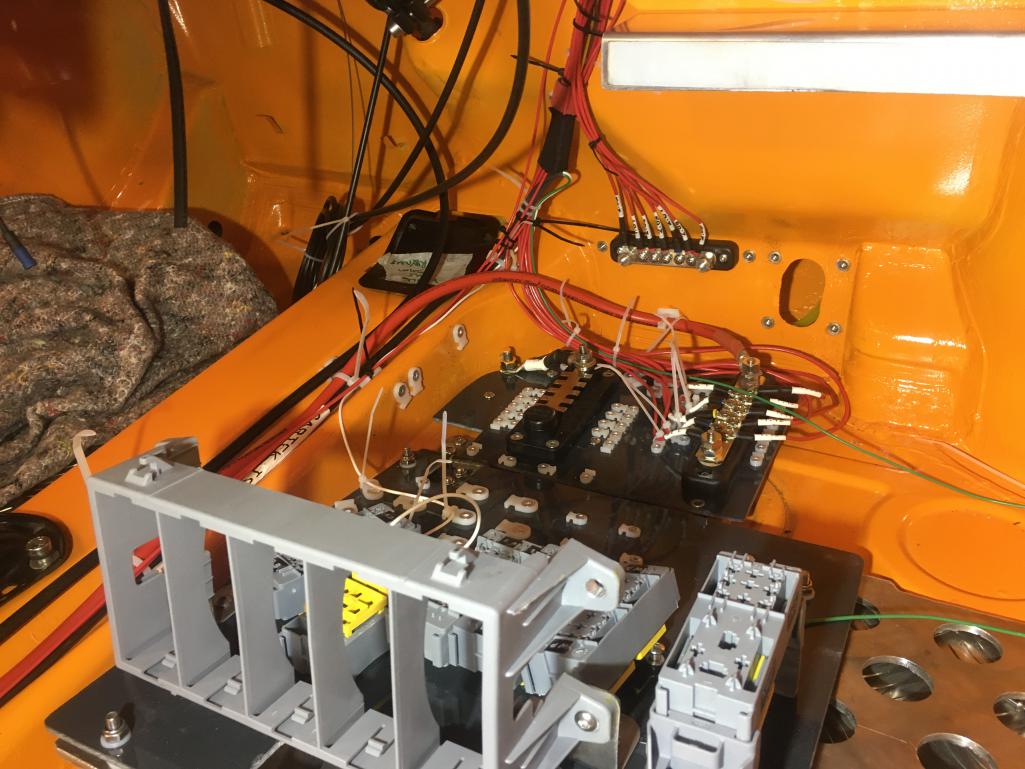
and underneath the footboard lies......
Attached thumbnail(s) 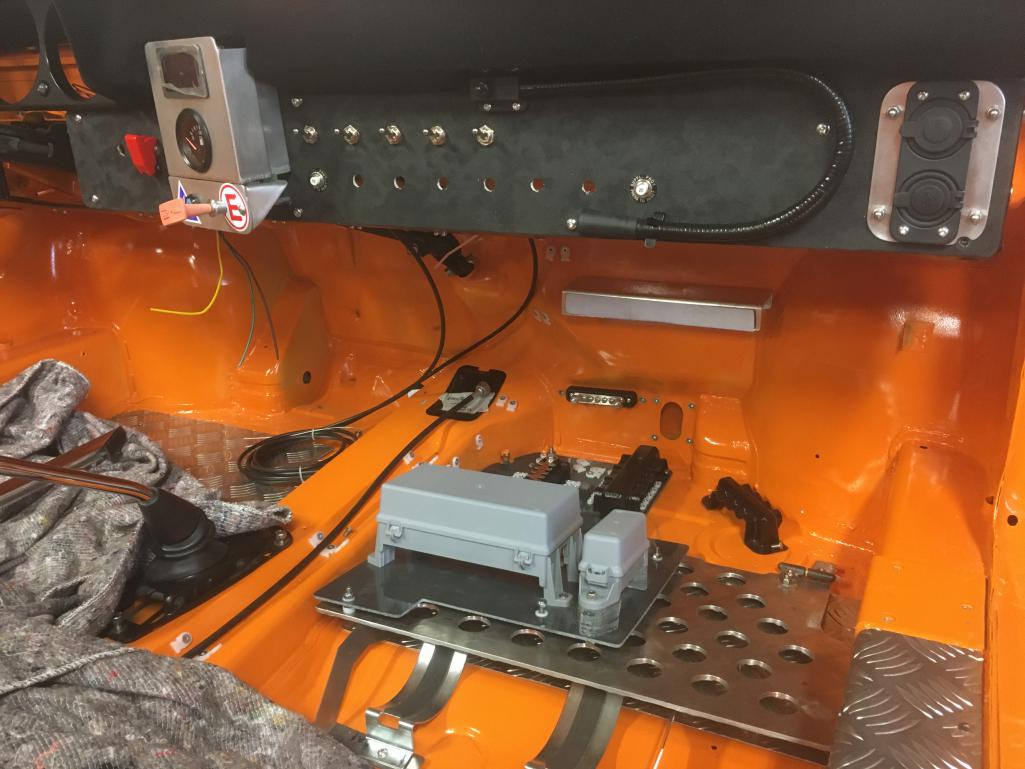
|
|
|
|
| wysri9 |
May 11 2020, 05:08 AM
Post
#25
|
|
Member Group: Members Posts: 199 Joined: 23-August 13 From: Aberdeen, Scotland Member No.: 16,291 Region Association: England |
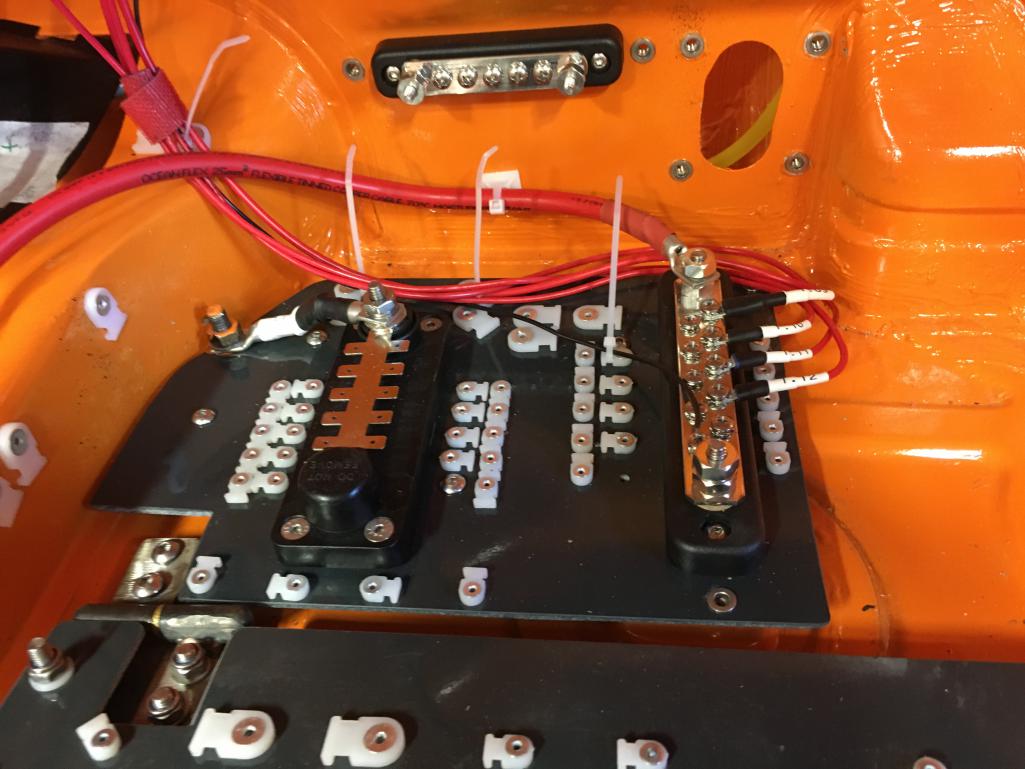
Heres a closer look. The big relay board is because I am protecting old switches from high current....
Attached thumbnail(s) 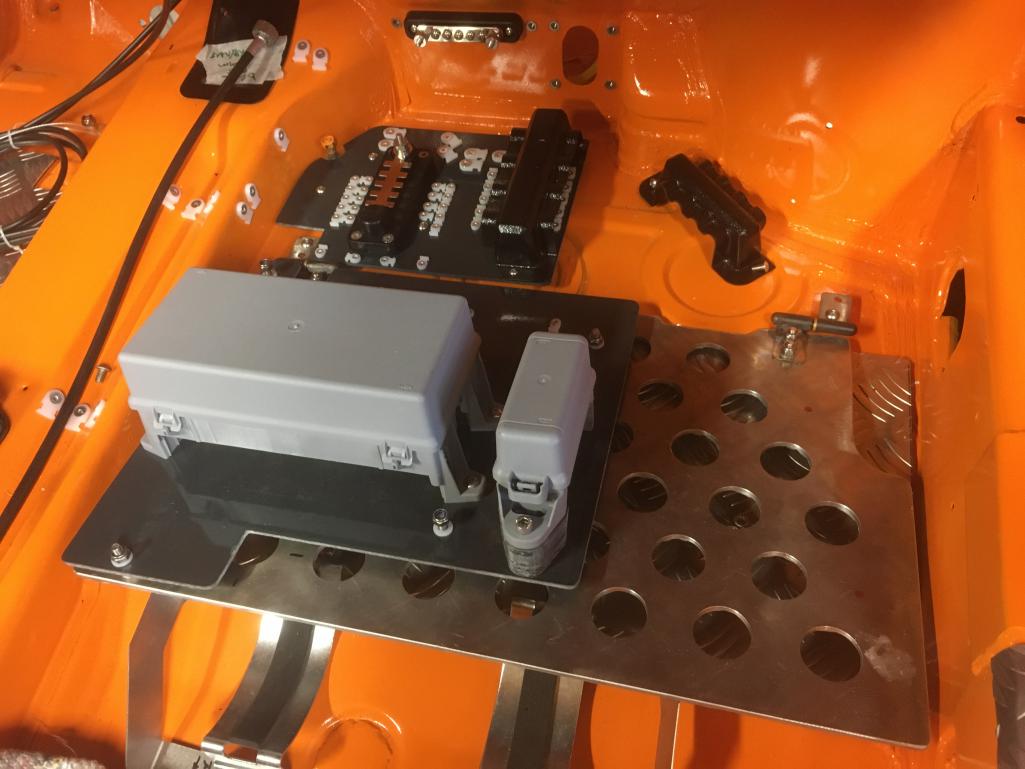
|
|
|
|
| jd74914 |
May 11 2020, 07:42 AM
Post
#26
|
|
Its alive Group: Members Posts: 4,780 Joined: 16-February 04 From: CT Member No.: 1,659 Region Association: North East States |
QUOTE(wysri9 @ May 5 2020, 03:21 AM)  And here is the relay box... Who makes this relay box? I've not seen one quite like it before and it looks nicer than the Bussman boxes typical in the US. |
|
|
|
| wysri9 |
May 11 2020, 07:47 AM
Post
#27
|
|
Member Group: Members Posts: 199 Joined: 23-August 13 From: Aberdeen, Scotland Member No.: 16,291 Region Association: England |
I got mine here:-
https://www.12voltplanet.co.uk/mta-modular-...ing-system.html Its made by MTA. Really nicely made although the two relay box and the multi relay box come with different stands so I had to make extra legs to put the 2 relay base at the same height as the other one..... (IMG:style_emoticons/default/sad.gif) |
|
|
|
| johnlush |
May 11 2020, 02:54 PM
Post
#28
|
|
What's all this then? Group: Members Posts: 371 Joined: 26-May 04 From: Cheyenne, WY Member No.: 2,108 Region Association: Rocky Mountains |
Simon,
It's great to see your build thread. You've made some nice progress since we last emailed. Looking great! John |
|
|
|
| wysri9 |
May 12 2020, 12:00 AM
Post
#29
|
|
Member Group: Members Posts: 199 Joined: 23-August 13 From: Aberdeen, Scotland Member No.: 16,291 Region Association: England |
All - thanks for the encouragement! When you set off down a different path you never quite know how it is going to be received. With several "standard" cars in the garage, I was very keen to have something a bit different. Lets see how it turns out.
John - hope you are well and coping with COVID restrictions? Nick - I hope when that Scottish tour takes place you find time to stop off in Banchory! You would be most welcome, and a joint blast up Royal Deeside would be fun (IMG:style_emoticons/default/beerchug.gif) Ill post more pics showing the sides of the car with standard front and modified rear arches. The genesis for this was a comment from a respected previous owner and car builder who advised against going too big on the tyres without enough power. Im going 6 and 7J x 16inch Fuchs and just waiting for the lockdown to ease to try the best tyre combinations. We have a local mobile tyre dealer who has said he will work with me to find the best wheel/tyre combination. I'm thinking 205/55 at the front and 225/50 at the rear as a starting point. I am hoping for 150 bhp from my 2.2L engine. Might be time for some pics of that although its not quite finished..... |
|
|
|
| wysri9 |
May 13 2020, 09:22 AM
Post
#30
|
|
Member Group: Members Posts: 199 Joined: 23-August 13 From: Aberdeen, Scotland Member No.: 16,291 Region Association: England |
Some more pics of the car as it stands
Attached thumbnail(s) 
|
|
|
|
| wysri9 |
May 13 2020, 09:24 AM
Post
#31
|
|
Member Group: Members Posts: 199 Joined: 23-August 13 From: Aberdeen, Scotland Member No.: 16,291 Region Association: England |
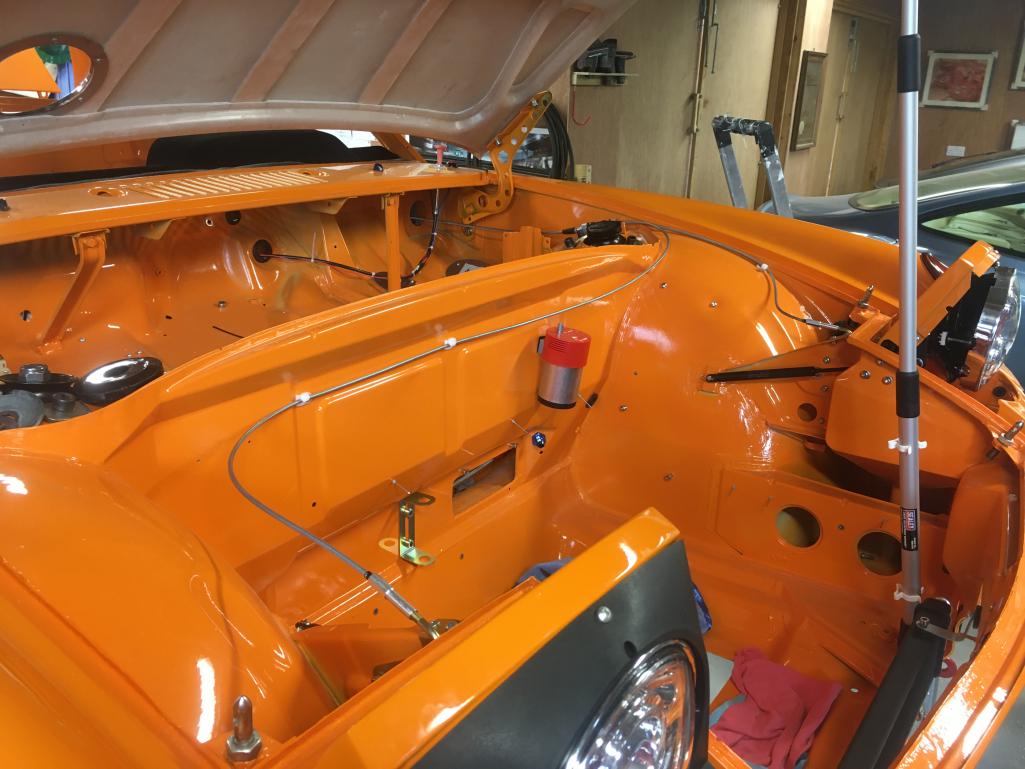
and from the front and a view in the rear trunk (boot!) showing the oil catch tank and battery position
Attached thumbnail(s) 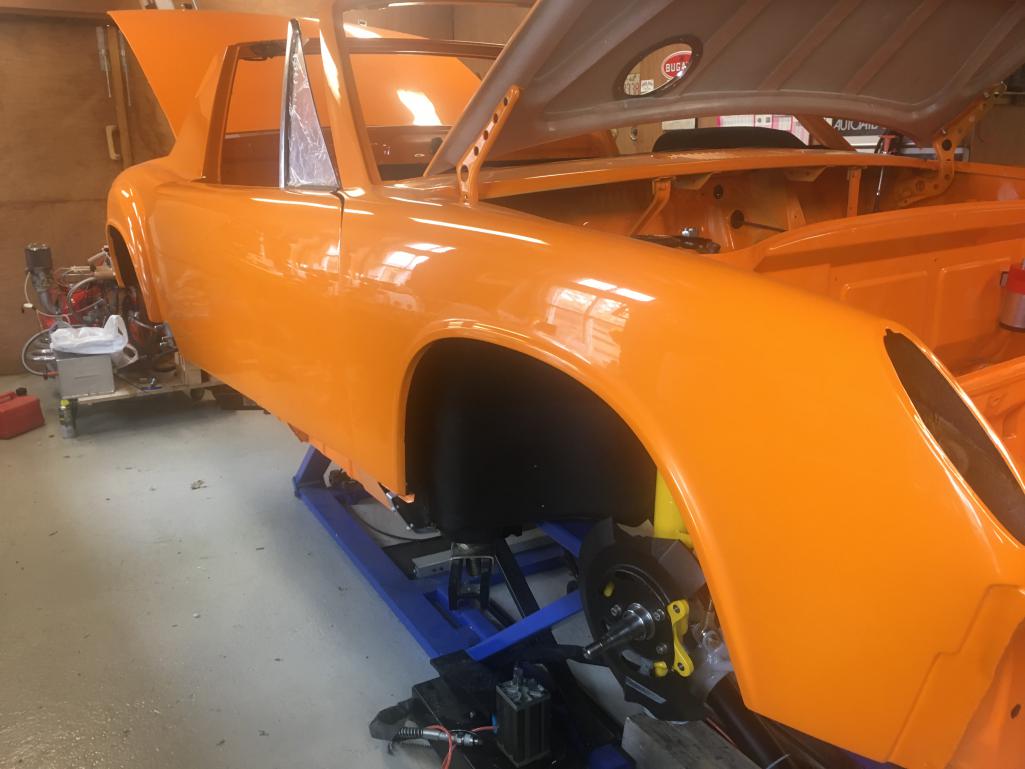 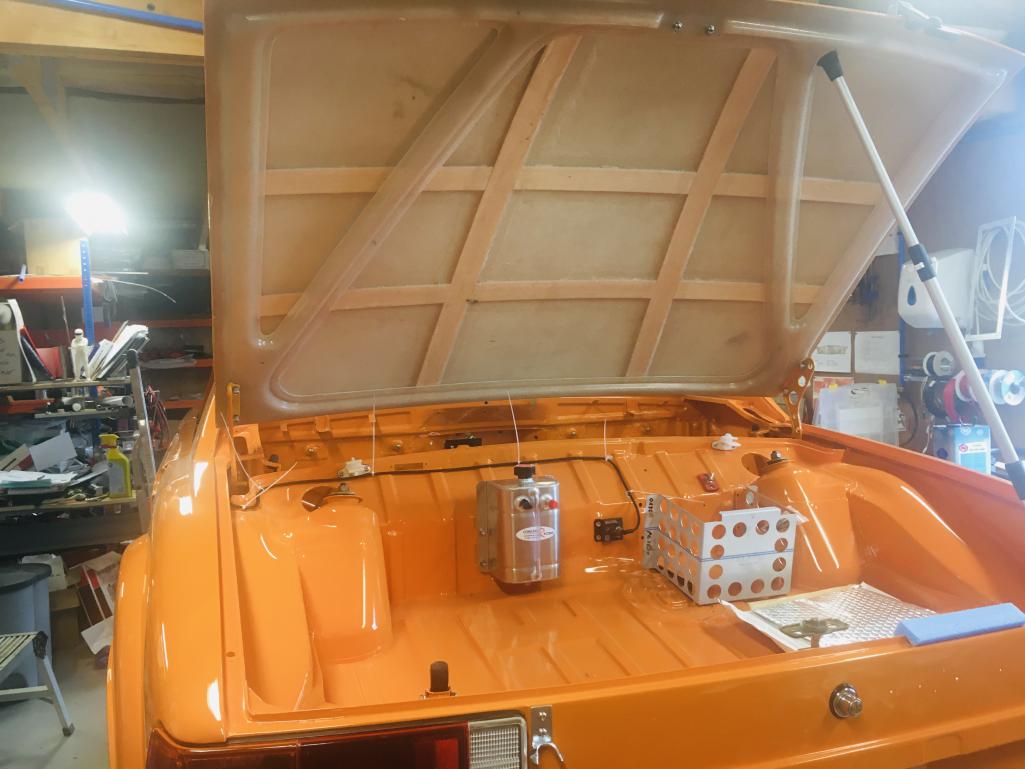
|
|
|
|
| wysri9 |
May 13 2020, 09:25 AM
Post
#32
|
|
Member Group: Members Posts: 199 Joined: 23-August 13 From: Aberdeen, Scotland Member No.: 16,291 Region Association: England |
And I thought it time I shared the engine build. Have some pushrod tube leaks to sort, but hopefully then its good to install....
Attached thumbnail(s) 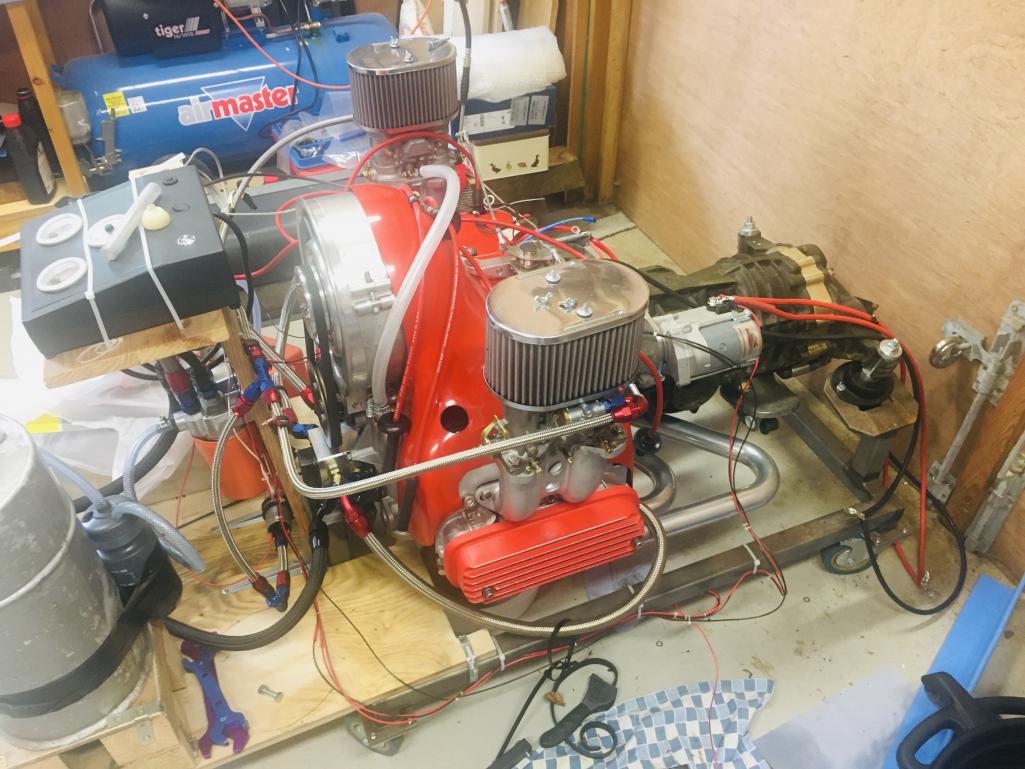
|
|
|
|
| 76-914 |
May 13 2020, 01:37 PM
Post
#33
|
|
Repeat Offender & Resident Subaru Antagonist Group: Members Posts: 13,494 Joined: 23-January 09 From: Temecula, CA Member No.: 9,964 Region Association: Southern California |
Nice work. I'll bet the finished product will be stunning. (IMG:style_emoticons/default/beerchug.gif)
|
|
|
|
| wysri9 |
Jun 1 2020, 03:41 AM
Post
#34
|
|
Member Group: Members Posts: 199 Joined: 23-August 13 From: Aberdeen, Scotland Member No.: 16,291 Region Association: England |
And so the electrical installation has commenced finally. Took a while to work up the courage but here we go (IMG:style_emoticons/default/smile.gif)
 |
|
|
|
| wysri9 |
Jun 1 2020, 03:43 AM
Post
#35
|
|
Member Group: Members Posts: 199 Joined: 23-August 13 From: Aberdeen, Scotland Member No.: 16,291 Region Association: England |
And here is the back of the custom dash panel
 |
|
|
|
| wysri9 |
Jul 2 2020, 08:26 AM
Post
#36
|
|
Member Group: Members Posts: 199 Joined: 23-August 13 From: Aberdeen, Scotland Member No.: 16,291 Region Association: England |
The electrical work progresses largely according to my plan....its slow going building the loom in the car. Every wire needs to be terminated one end, run in the car, fitted, cut to length and then terminated at the other end. With crimps, and double heat shrink each termination takes a while....my supply of cheap tie wraps is also disappearing fast..... (IMG:style_emoticons/default/smile.gif)
 |
|
|
|
| wysri9 |
Jul 2 2020, 04:22 PM
Post
#37
|
|
Member Group: Members Posts: 199 Joined: 23-August 13 From: Aberdeen, Scotland Member No.: 16,291 Region Association: England |
I was also quite pleased the way the headlights and bonnet came together,,,,
 IMG_9036.mov ( 1.62mb )
Number of downloads: 104
IMG_9036.mov ( 1.62mb )
Number of downloads: 104 |
|
|
|
| wysri9 |
Jul 2 2020, 04:24 PM
Post
#38
|
|
Member Group: Members Posts: 199 Joined: 23-August 13 From: Aberdeen, Scotland Member No.: 16,291 Region Association: England |
 The GT headlight system looks pretty good and works well after a lot of fettling..... |
|
|
|
| wysri9 |
Jul 2 2020, 04:27 PM
Post
#39
|
|
Member Group: Members Posts: 199 Joined: 23-August 13 From: Aberdeen, Scotland Member No.: 16,291 Region Association: England |
And while I was at the lights and bonnet I thought I would finally nail the bonnet pins....
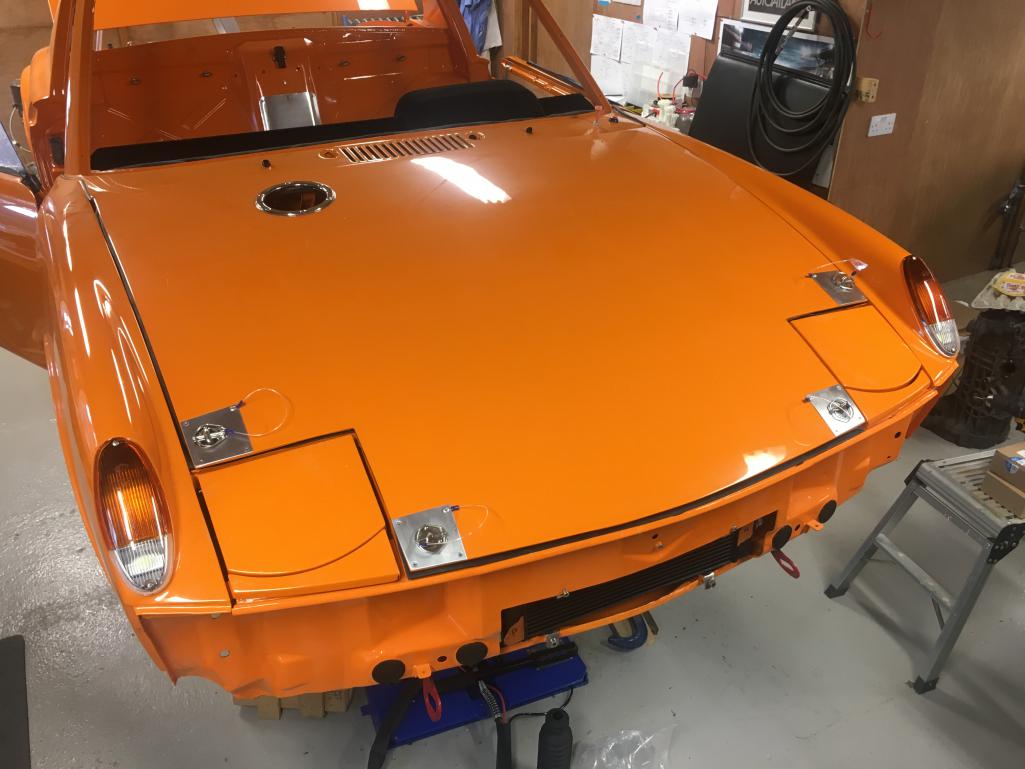 not authentic I know, but I think they look ok.....?? not authentic I know, but I think they look ok.....?? |
|
|
|
| Cairo94507 |
Jul 2 2020, 04:27 PM
Post
#40
|
|
Michael Group: Members Posts: 9,726 Joined: 1-November 08 From: Auburn, CA Member No.: 9,712 Region Association: Northern California |
Making nice progress. (IMG:style_emoticons/default/popcorn[1].gif) (IMG:style_emoticons/default/beerchug.gif)
|
|
|
|
|
1 User(s) are reading this topic (1 Guests and 0 Anonymous Users)
0 Members:

|
Lo-Fi Version | Time is now: 5th May 2024 - 04:52 AM |
Invision Power Board
v9.1.4 © 2024 IPS, Inc.