|
|
|
Porsche, and the Porsche crest are registered trademarks of Dr. Ing. h.c. F. Porsche AG.
This site is not affiliated with Porsche in any way. Its only purpose is to provide an online forum for car enthusiasts. All other trademarks are property of their respective owners. |
|
|


| Morph914 |
 Mar 12 2020, 07:07 PM Mar 12 2020, 07:07 PM
Post
#1
|
|
Member  Group: Members Posts: 435 Joined: 22-August 16 From: St Augustine, FL Member No.: 20,326 Region Association: South East States |
I am more than a couple of years into my restoration of my ‘73 1.7 (now 2.0) but did not want to bore everyone with the same old stuff you have seen before. However, I am very thankful that many members here, take the time to post there work in detail. I have followed Brent’s (bbrock) post and have used many of his examples. In fact, I have adopted his idea of painting the trunks, cabin, underside first and now am doing the exterior panels. However, I do not have the cojones to paint mine myself.
I am getting close to having the car ready for paint. Once I finish this I will get the car back to a roller so I can flatbed to the paint shop. I want to use my old 4 lug Fuchs to sent to the paint shop and not my nice 5 lug Fuchs. This is where I need advice, I sent my 4 lug hubs to PMB to be converted to 5 lug and also purchased the kit. Since I no longer have the 4 lug hubs, what would be the easiest way to accomplish this. I know Ivan purchase a pair of 4 lug hubs, just wanted to make sure I am not missing something easier. Also, I want to know if I can install the stub axles without the axles just to get it to the paint shop. There will be no engine in the car. 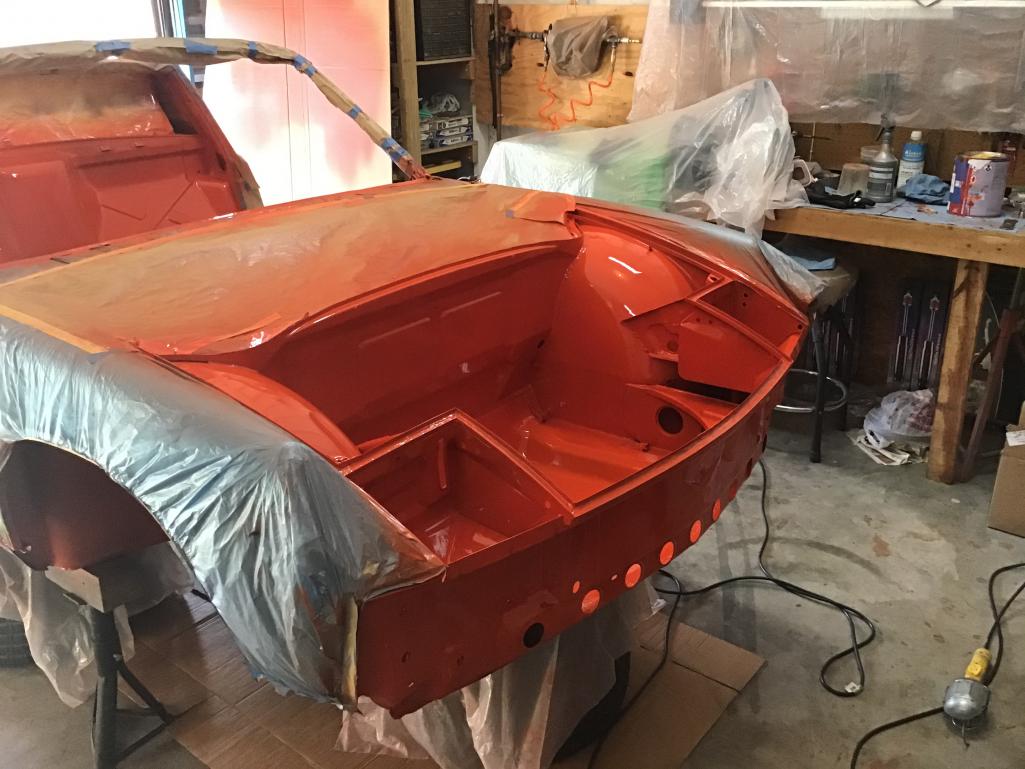 I want to use these wheels to take to the paint shop 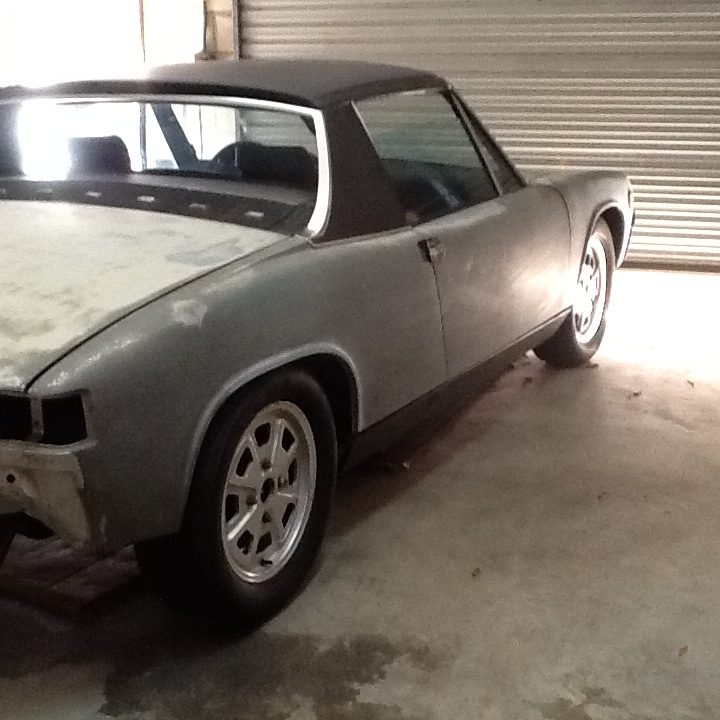 And not these 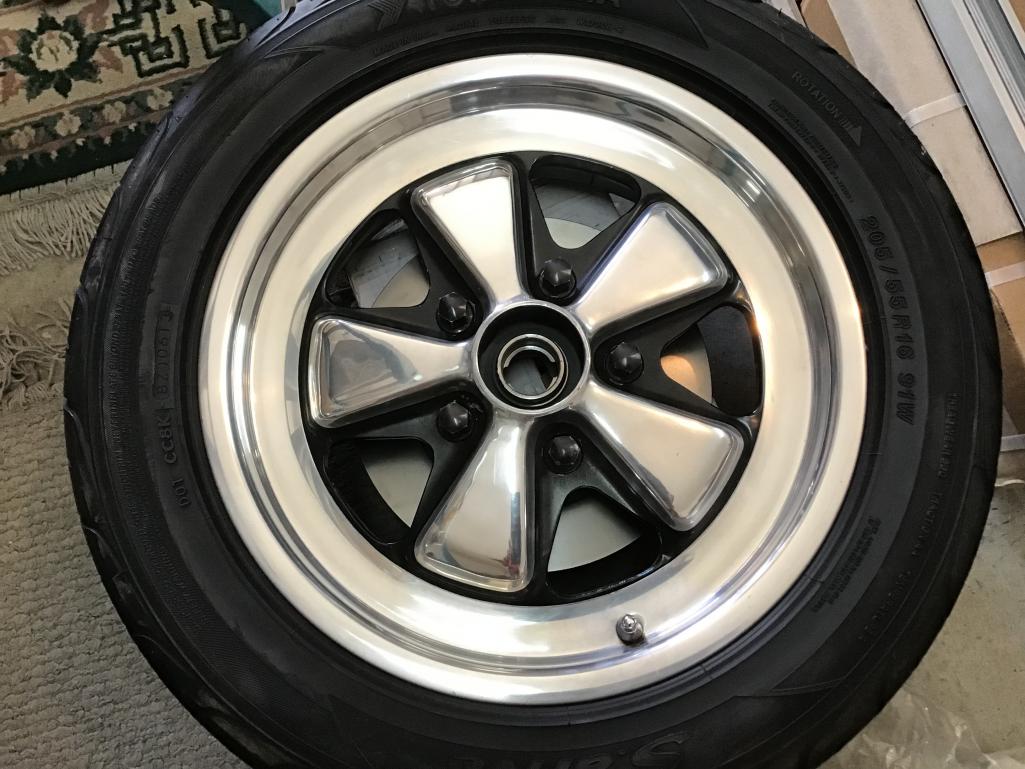 Cheers, John |
   |

 
|
  |
Replies(1 - 19)
| mepstein |
Mar 12 2020, 10:22 PM
Post
#2
|
|
914-6 GT in waiting Group: Members Posts: 19,234 Joined: 19-September 09 From: Landenberg, PA/Wilmington, DE Member No.: 10,825 Region Association: MidAtlantic Region |
If you haven't installed your five lug setup yet, install the 4 lug with stubs and you'll be fine. use old bearings since you will ruin them when you pull off the hubs.
or you can find someone with an old set of trailing arms with hubs and stubs or you can find/borrow some old five lug wheels. We use repos, spares and junk wheels for rollers and paint. |
|
|
|
| billh1963 |
Mar 13 2020, 04:17 AM
Post
#3
|
|
Car Hoarder! Group: Members Posts: 3,402 Joined: 28-March 11 From: South Carolina Member No.: 12,871 Region Association: South East States |
I agree....don't use those 4 lug Fuchs for paint. Sell them (they are worth good money) and buy some cheap wheels from a forum member.
Another option is put on the 5 lug conversion and use a cheap set of Boxster or 996 wheels for rolling around. There are plenty out there for much less than your 4 lug Fuchs will sell for. That will also give you the option of having cheap roller wheels if you need them again in the future. |
|
|
|
| Morph914 |
Mar 13 2020, 04:45 AM
Post
#4
|
|
Member Group: Members Posts: 435 Joined: 22-August 16 From: St Augustine, FL Member No.: 20,326 Region Association: South East States |
Thank you, maybe some out there has some 4 lug hubs, and I’ll start looking for some cheap wheels. I have one steel wheel, so only need 3 more.
Cheers, John |
|
|
|
| Morph914 |
Sep 29 2020, 07:13 AM
Post
#5
|
|
Member Group: Members Posts: 435 Joined: 22-August 16 From: St Augustine, FL Member No.: 20,326 Region Association: South East States |
I guess I will continue the build postings here instead of many new threads. I have had a hard time finding this link because I have not posted anything here in a while. Any trick to this?
After being back from paint, it has been very rewarding to start putting it back together and seeing some light at the end of the tunnel. (IMG:style_emoticons/default/piratenanner.gif) I painted everything except the exterior, including raptor on the belly with single stage. 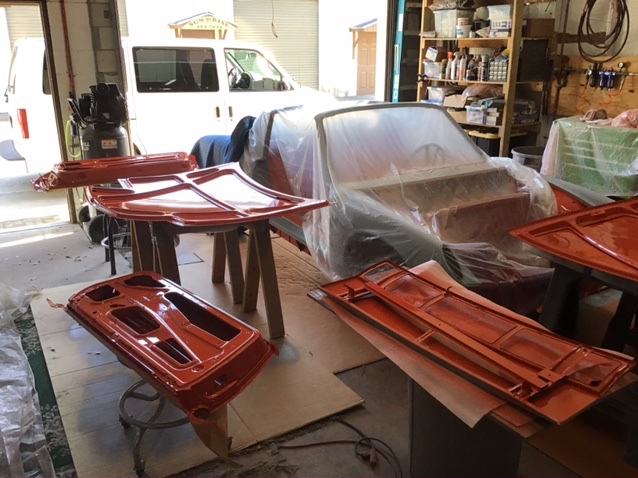 I completed all the body work and finished using 400 grit wet sanding. 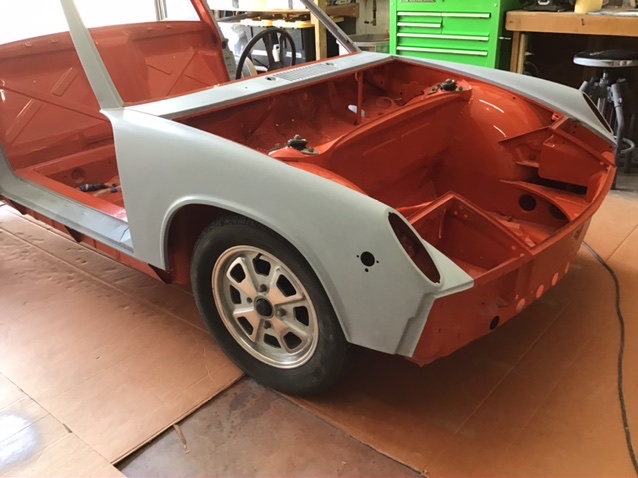 Off to the paint shop 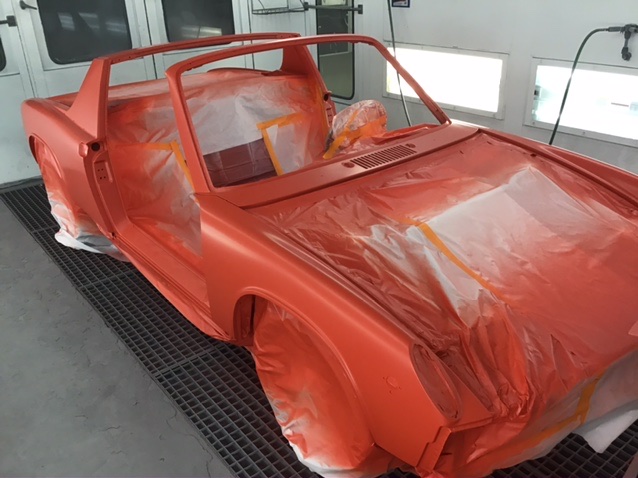 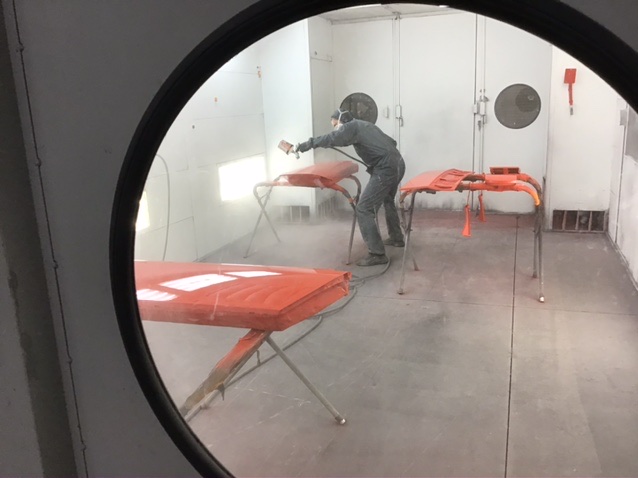 And after a few months, this is where I’m at with the car now 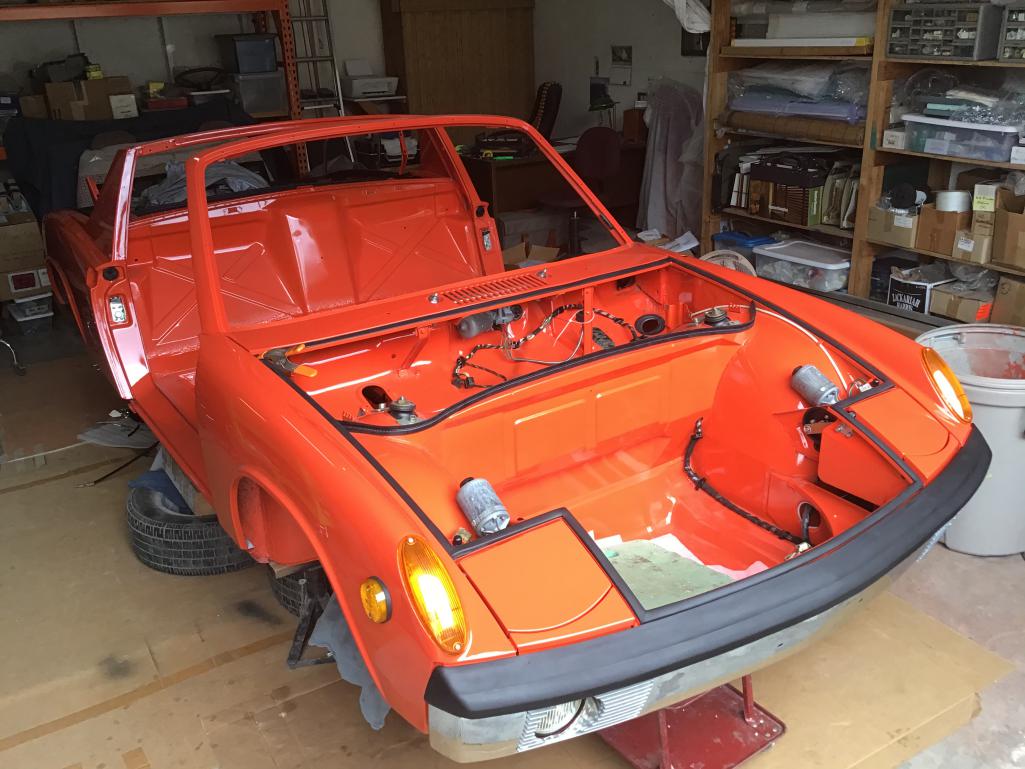 |
|
|
|
| porsche914rick |
Sep 29 2020, 07:32 AM
Post
#6
|
|
Member Group: Members Posts: 66 Joined: 6-August 14 From: Seymour, TN Member No.: 17,744 Region Association: South East States |
|
|
|
|
| JOEPROPER |
Sep 29 2020, 07:33 AM
Post
#7
|
|
The answer is "no" unless you ask... Group: Members Posts: 1,184 Joined: 21-November 15 From: White Plains New York Member No.: 19,387 Region Association: North East States |
Very nice progress. Inspiration for the reset of us! (IMG:style_emoticons/default/aktion035.gif)
|
|
|
|
| mepstein |
Sep 29 2020, 07:37 AM
Post
#8
|
|
914-6 GT in waiting Group: Members Posts: 19,234 Joined: 19-September 09 From: Landenberg, PA/Wilmington, DE Member No.: 10,825 Region Association: MidAtlantic Region |
Looks amazing. (IMG:style_emoticons/default/beerchug.gif)
|
|
|
|
| 76-914 |
Sep 29 2020, 08:17 AM
Post
#9
|
|
Repeat Offender & Resident Subaru Antagonist Group: Members Posts: 13,488 Joined: 23-January 09 From: Temecula, CA Member No.: 9,964 Region Association: Southern California |
To locate your thread or comments you've made on others threads click on your member name. Then click on profile options on the right hand side of the screen. There you will have a choice of your post's or your topics. (IMG:style_emoticons/default/beerchug.gif)
|
|
|
|
| Cairo94507 |
Sep 29 2020, 08:22 AM
Post
#10
|
|
Michael Group: Members Posts: 9,708 Joined: 1-November 08 From: Auburn, CA Member No.: 9,712 Region Association: Northern California |
Very nice to see it all coming together. You are going to have a great car and lots of fun driving it around. (IMG:style_emoticons/default/beerchug.gif)
|
|
|
|
| PanelBilly |
Sep 29 2020, 10:18 AM
Post
#11
|
|
914 Guru Group: Members Posts: 5,797 Joined: 23-July 06 From: Kent, Wa Member No.: 6,488 Region Association: Pacific Northwest |
Everything looks so nice at this stage. Assembly is a bit challenging but fun.
|
|
|
|
| Morph914 |
Sep 29 2020, 02:48 PM
Post
#12
|
|
Member Group: Members Posts: 435 Joined: 22-August 16 From: St Augustine, FL Member No.: 20,326 Region Association: South East States |
Thank you all for your comments.
I just received this engine yoke from the Samba. I was wondering if it will be obvious where to drill the holes when I get the engine mounted to the yoke and on the stand? Or shall I drill holes at 12,3,6, and 9 o’clock? Also not sure what the attached sleeve or bushing is for (IMG:style_emoticons/default/confused24.gif) 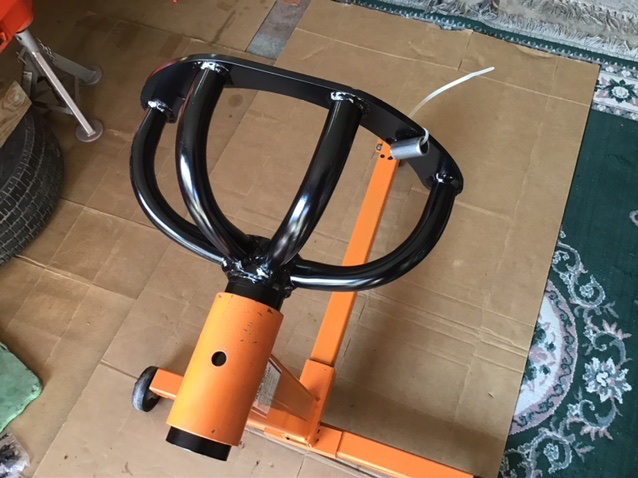 Also would like to know if there is any advantage to the yoke positioned all the way in or out flush with the edge, or somewhere in between. 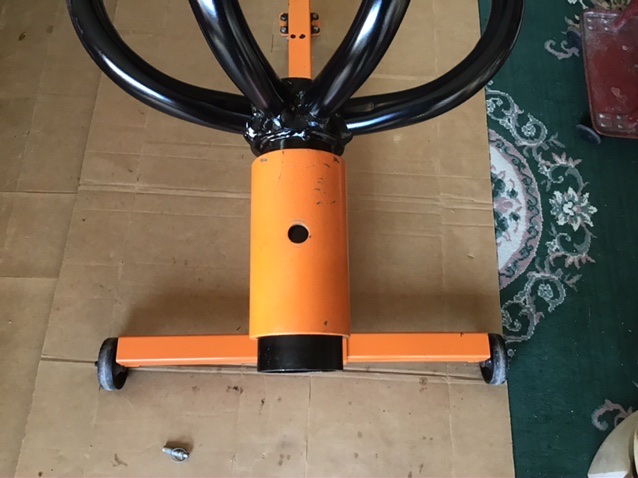 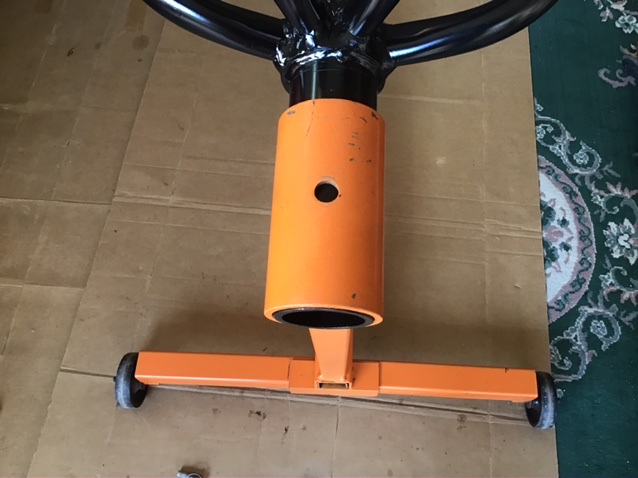 I have upgraded from 1.7 to a 2.0 and it has already been rebuilt to stock but I wanted to get it on a stand to install all the tidbits. I plan on building a big 4 with the 1.7... unless a six comes along that I cannot live without. Thanks for your replies, John |
|
|
|
| mepstein |
Sep 29 2020, 02:54 PM
Post
#13
|
|
914-6 GT in waiting Group: Members Posts: 19,234 Joined: 19-September 09 From: Landenberg, PA/Wilmington, DE Member No.: 10,825 Region Association: MidAtlantic Region |
Keep the yoke all the way in. I would drill holes every 90 degrees. The hole doesn’t have to be very big. It just needs a rod or bolt to keep it from turning while you work.
|
|
|
|
| Morph914 |
Sep 29 2020, 04:24 PM
Post
#14
|
|
Member Group: Members Posts: 435 Joined: 22-August 16 From: St Augustine, FL Member No.: 20,326 Region Association: South East States |
QUOTE(mepstein @ Sep 29 2020, 02:54 PM)  Keep the yoke all the way in. I would drill holes every 90 degrees. The hole doesn’t have to be very big. It just needs a rod or bolt to keep it from turning while you work. Will do , I held the yoke up to the case where it mounts, and there is not much meat on that case to hold the weight of the engine. I will proceed with caution. John |
|
|
|
| nditiz1 |
Sep 29 2020, 05:40 PM
Post
#15
|
|
Senior Member Group: Members Posts: 1,177 Joined: 26-May 15 From: Mount Airy, Maryland Member No.: 18,763 Region Association: MidAtlantic Region |
I have the same yoke and that's what I did. Also when you decide to go to a 6 you can use the same one (IMG:style_emoticons/default/biggrin.gif)
|
|
|
|
| Morph914 |
Sep 30 2020, 05:29 AM
Post
#16
|
|
Member Group: Members Posts: 435 Joined: 22-August 16 From: St Augustine, FL Member No.: 20,326 Region Association: South East States |
Anyone know what the zip tied sleeve/ bushing is?
 |
|
|
|
| VaccaRabite |
Sep 30 2020, 06:05 AM
Post
#17
|
|
En Garde! Group: Admin Posts: 13,423 Joined: 15-December 03 From: Dallastown, PA Member No.: 1,435 Region Association: MidAtlantic Region |
QUOTE(Morph914 @ Sep 30 2020, 07:29 AM) Anyone know what the zip tied sleeve/ bushing is? A spacer for a long case stud. Zach |
|
|
|
| Morph914 |
Sep 30 2020, 09:07 AM
Post
#18
|
|
Member Group: Members Posts: 435 Joined: 22-August 16 From: St Augustine, FL Member No.: 20,326 Region Association: South East States |
QUOTE(VaccaRabite @ Sep 30 2020, 06:05 AM) QUOTE(Morph914 @ Sep 30 2020, 07:29 AM) Anyone know what the zip tied sleeve/ bushing is? A spacer for a long case stud. Zach Thank you, I figured that’s probably what it was for, but it’s nice to confirm with the almighty forum. |
|
|
|
| Morph914 |
Sep 30 2020, 09:18 AM
Post
#19
|
|
Member Group: Members Posts: 435 Joined: 22-August 16 From: St Augustine, FL Member No.: 20,326 Region Association: South East States |
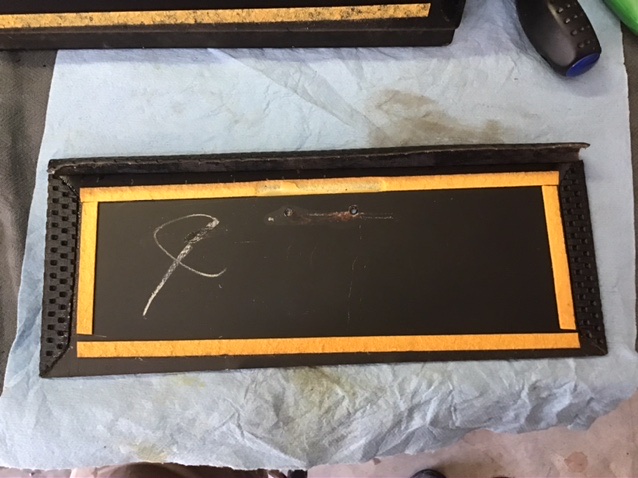
Since the weather is fantastic here today, I am working on the dash. I have installed the padding but I’m not in love with this vinyl top piece, it has too much sheen to it. I noticed in Ian’s video, his had more of a matte finish, which is desirable for low reflectivity. Both from 914 Rubber, but mine may be older. I will find out before proceeding any further.
Taped off to avoid glue where I don’t need it. 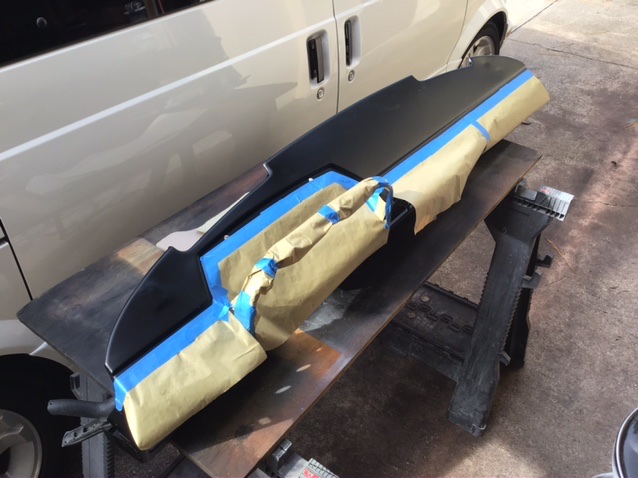 Installed some reference points and only glued half at a time. 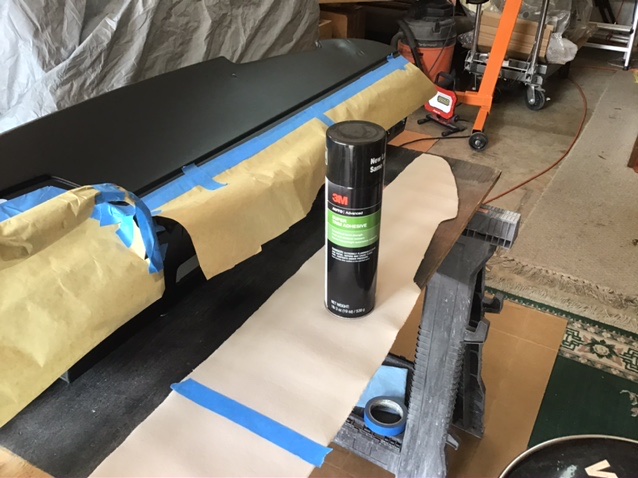 Went on well with no issues. 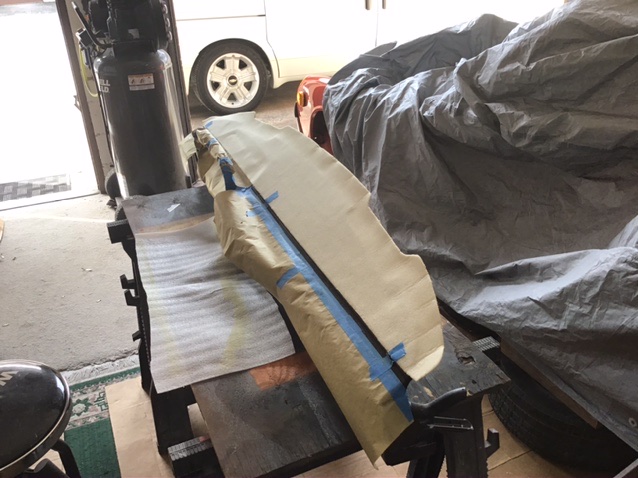 Tools of choice 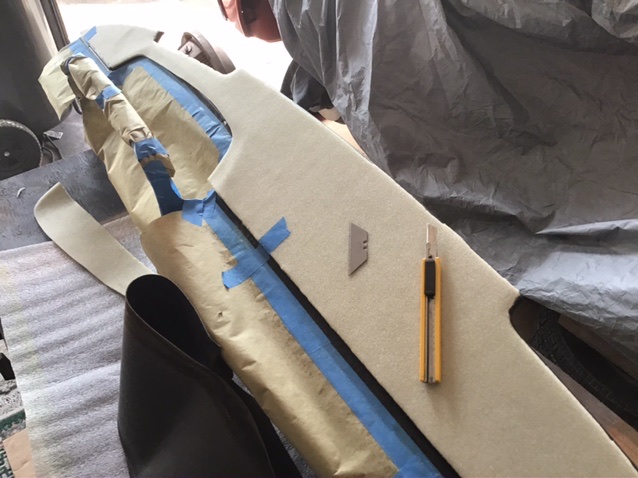 |
|
|
|
| Morph914 |
Sep 30 2020, 08:40 PM
Post
#20
|
|
Member Group: Members Posts: 435 Joined: 22-August 16 From: St Augustine, FL Member No.: 20,326 Region Association: South East States |
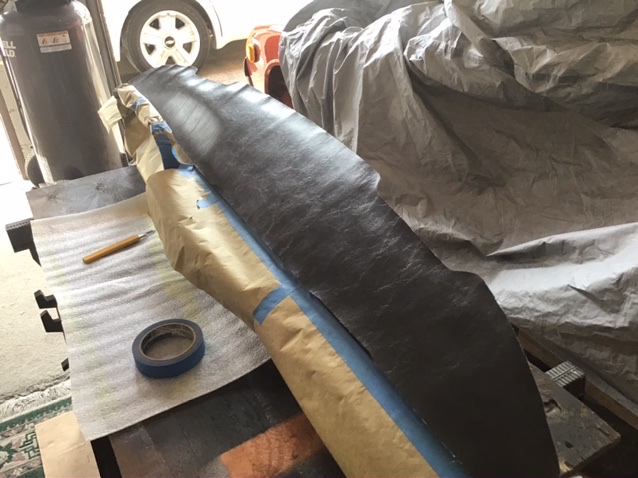
I decided not to use this piece of vinyl due to the high sheen. 914 Rubber has agreed to exchange it for a different material. I will continue on with installing the new basket weave to the front of the dash.
  |
|
|
|
|
1 User(s) are reading this topic (1 Guests and 0 Anonymous Users)
0 Members:

|
Lo-Fi Version | Time is now: 23rd April 2024 - 04:34 AM |
Invision Power Board
v9.1.4 © 2024 IPS, Inc.