|
|
|
Porsche, and the Porsche crest are registered trademarks of Dr. Ing. h.c. F. Porsche AG.
This site is not affiliated with Porsche in any way. Its only purpose is to provide an online forum for car enthusiasts. All other trademarks are property of their respective owners. |
|
|


| tazz9924 |
 Apr 4 2020, 11:27 PM Apr 4 2020, 11:27 PM
Post
#121
|
|
Senior Member  Group: Members Posts: 755 Joined: 31-May 15 From: Mooresville NC Member No.: 18,779 Region Association: None |
Heres the quick break down: My old car got totaled on the side of the road, i got a good settlement out of it and with the money im building A tube frame chassis 914 with Porsche Boxster suspension and a subaru turbo motor.
The goals: (Disclaimer some of these are really down the road and may not make the initial version 2.0, maybe 2.1 or so on and so forth. They are also goals so weather or not i achieve them, it’s something to shoot for.) Tube frame chassis, all made of DOM tube and when all when the car is fully built it should weigh 1600 ish lbs. The motor: It will have a subaru turbo motor. The initial version will see a 2.0 just so i can start having fun but eventually it’ll be a hybrid 2.5 making 400whp The suspension: It will all be porsche boxster same with the brakes so it should handle all the power and lack of weight im throwing at it. The body: It will be all fiberglass panels dzused on with the exception of the A pillar which will be a stock piece from a 914 but it will retain a vin tag. The only other stock 914 related thing will be pop up headlights which will be retained. Aero: This thing will have an extreme aero package. From the smooth underbelly with large rear diffuser and front splitter to canards and a chassis mounted rear wing, This “car” WILL have a presence like little else. Interior: Skip... JK this thing will have a digital dash, k tuned shifter, willwood pedal cluster, and a plaid racing seat. Thats about it, passenger seat is seen as optional at this point. So hopefully this should be good, i dont have much time, even in the covid 19 world we currently find ourselves in right now. It may not be a fast paced build but the goal is to have a roller by june... So lets get to building! OG car: 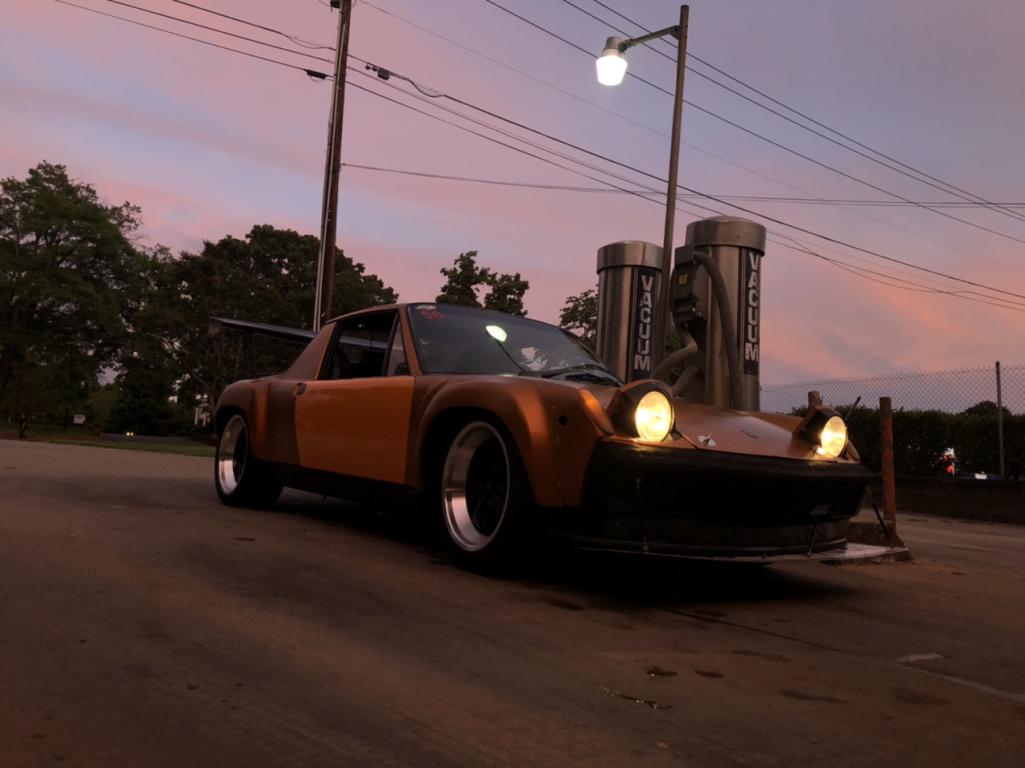 The Crash: 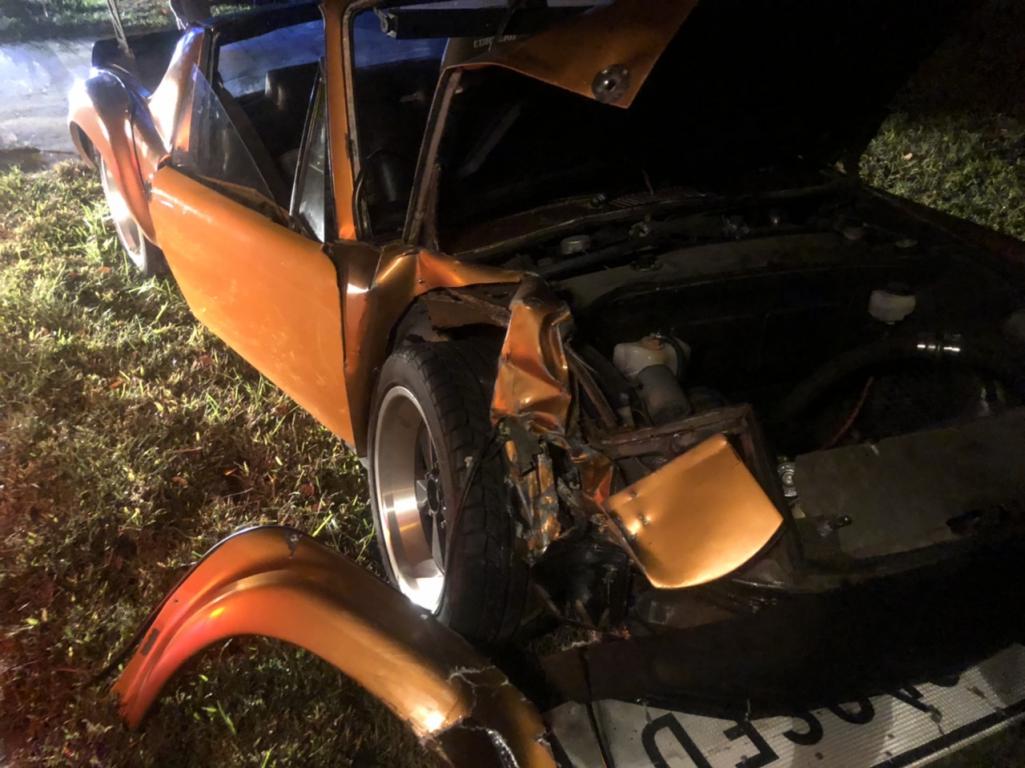 Whats Left: 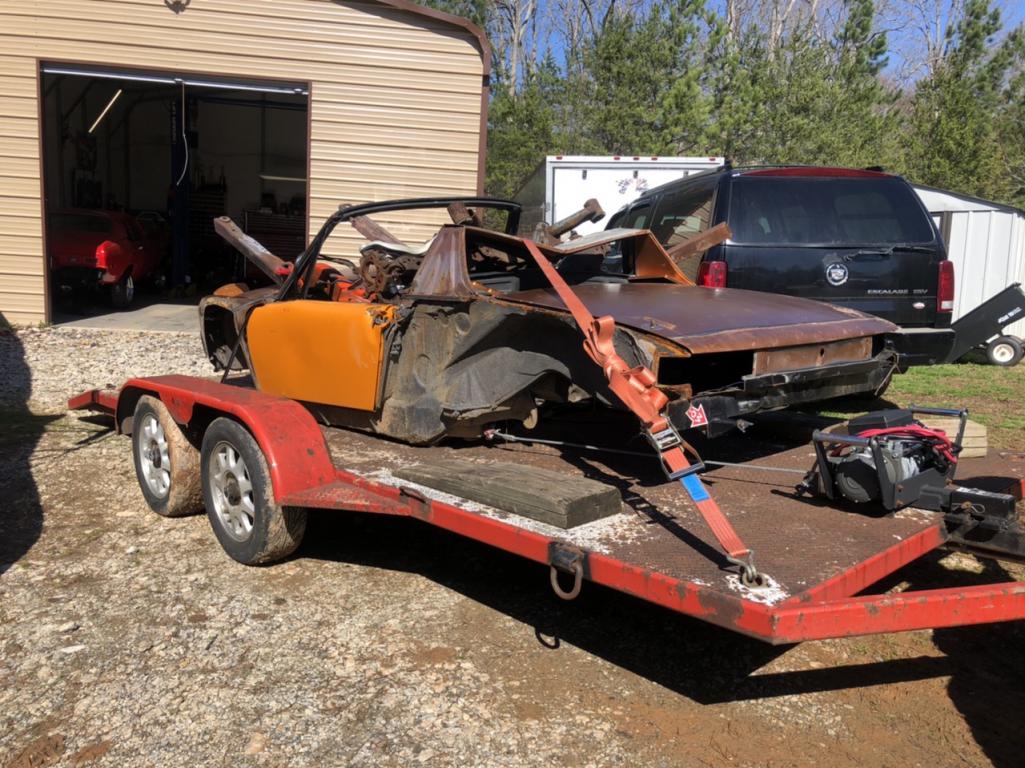 I dont have many parts left, I took all the good parts off sold what i could and kept what i needed. |
   |

 
|
Posts in this topic
 tazz9924 Tube Chassis Subaru Engine build Apr 4 2020, 11:27 PM
 tazz9924 First step is the main frame rails. i bent these u... Apr 5 2020, 08:52 AM gereed75 Interesting. Have been contemplating a similar mi... Apr 5 2020, 10:41 AM Mueller Subscribed! Apr 5 2020, 12:51 PM cali914 i like :D Apr 5 2020, 12:58 PM tazz9924 Began welding the main bit of the chassis together... Apr 5 2020, 07:26 PM Andyrew This will be a great build!!!! Are... Apr 5 2020, 09:02 PM
 tazz9924
This will be a great build!!!! Ar... Apr 6 2020, 05:45 AM Andyrew
This will be a great build!!!! A... Apr 7 2020, 05:37 PM Tbrown4x4 Loved your old car. It'll be great watching th... Apr 6 2020, 02:59 AM gereed75 What do you call your tube channel? Apr 6 2020, 06:28 AM tazz9924
What do you call your tube channel?
Ziptied, a p... Apr 6 2020, 12:28 PM jmitro very cool! Apr 6 2020, 06:42 AM tygaboy :popcorn: :sawzall: :welder: :worship: Apr 6 2020, 08:44 AM tazz9924 Spent the day adding in the wings of the chassis u... Apr 6 2020, 09:03 PM Mueller Looks great so far.
Have you measured the floor j... Apr 7 2020, 08:46 AM tazz9924
Looks great so far.
Have you measured the floor ... Apr 7 2020, 05:59 PM rgalla9146
Looks great so far.
Have you measured the floor... Apr 7 2020, 06:27 PM Andyrew Flat and straight enough is flat and straight enou... Apr 7 2020, 07:47 PM tazz9924
Flat and straight enough is flat and straight eno... Apr 7 2020, 08:48 PM tazz9924 Built a lot of gussets, i really badly wanted them... Apr 7 2020, 08:53 PM 911GT2
Lover your welding! :wub: Apr 9 2020, 01:26 AM tazz9924 Not a big day but got some of the gussets added in... Apr 8 2020, 09:23 PM Andyrew What’s the body concept going to be? Are you sti... Apr 9 2020, 12:49 AM tazz9924
What’s the body concept going to be? Are you st... Apr 9 2020, 05:54 AM Mueller
What’s the body concept going to be? Are you s... Apr 9 2020, 06:35 PM tazz9924
[quote name='tazz9924' post='2802367' date='Apr 9... Apr 9 2020, 07:13 PM Andyrew Remember their wheel offset is way different than ... Apr 9 2020, 02:21 PM tazz9924
Remember their wheel offset is way different than... Apr 9 2020, 04:32 PM sixnotfour Boxster with 914 body for reference
http://www.914... Apr 9 2020, 03:04 PM tazz9924
Boxster with 914 body for reference
http://www.91... Apr 9 2020, 04:34 PM URY914 I have one word of advice: Triangulation. Apr 9 2020, 05:56 PM tazz9924
I have one word of advice: Triangulation.
Ahh b... Apr 9 2020, 06:18 PM jd74914
I have one word of advice: [b]Triangulation.
Wh... Apr 29 2020, 09:48 AM tazz9924
I have one word of advice: [b]Triangulation.
W... Apr 29 2020, 11:49 AM tazz9924 Got the last of the welding that is possible on my... Apr 10 2020, 08:08 PM tazz9924 Finally building in 3d, got the main hoop finish n... Apr 11 2020, 09:42 PM maf914 Craftsman warranty? Good luck with that. What wa... Apr 12 2020, 06:55 AM ClayPerrine
Craftsman warranty? Good luck with that. What w... Apr 12 2020, 07:36 AM Andyrew I hear Ace and Lowe's still exchange them. Cra... Apr 12 2020, 08:37 AM tygaboy Imagine if we had professional sportscasters, I... Apr 12 2020, 09:13 AM tazz9924
[i]Imagine if we had professional sportscasters, ... Apr 12 2020, 11:22 AM tygaboy
Dang i appreciate it! the comment on post 19 ... Apr 12 2020, 10:08 PM sixnotfour in my 914 my seat is on the floor in the back and ... Apr 12 2020, 12:16 PM tazz9924
in my 914 my seat is on the floor in the back and... Apr 12 2020, 01:30 PM ClayPerrine I think it is kind of telling that this tube frame... Apr 13 2020, 07:21 AM tazz9924 I started work on the dash bar and uprights today.... Apr 13 2020, 09:14 PM sixnotfour http://www.914world.com/bbs2/index.php?sho...845... Apr 14 2020, 05:13 AM tazz9924
http://www.914world.com/bbs2/index.php?sho...845... Apr 14 2020, 06:03 AM Andyrew Someone is going low low I take it? I like the ide... Apr 14 2020, 04:27 PM tazz9924
Someone is going low low I take it? I like the id... Apr 14 2020, 05:22 PM tazz9924 Ok update: I was out of town for a couple days and... Apr 19 2020, 07:50 PM tazz9924 I finally got the fiberglass ive been waiting for ... Apr 24 2020, 09:50 PM tazz9924 I was delayed a few days because i was waiting for... Apr 28 2020, 09:21 PM jd74914
What's this holding? If it's seeing any... Apr 29 2020, 09:39 AM Andyrew Welds look nice!
BTDT on the greyhound in th... Apr 29 2020, 01:27 AM tazz9924
Welds look nice!
BTDT on the greyhound in t... Apr 29 2020, 05:55 AM tazz9924 I continued mounting the front subrame. Still sitt... May 6 2020, 12:05 PM tygaboy Holy Moley! That bad boy will be a roller soon... May 6 2020, 04:02 PM tazz9924
Holy Moley! That bad boy will be a roller soo... May 6 2020, 06:35 PM tazz9924 Finally! im done welding up the front subframe... May 10 2020, 12:44 PM tazz9924 Made my strut tops! Ill be honest i was very e... May 13 2020, 09:56 PM 914forme They will be plenty strong as the top plate is tak... May 14 2020, 05:59 AM tazz9924 major progress.
I cut the holes in the strut tops ... May 15 2020, 11:45 PM tygaboy Isn't it fun triple double checking all the me... May 16 2020, 07:29 AM tazz9924
Isn't it fun triple double checking all the m... May 16 2020, 08:57 AM Andyrew WOO solid progress!
You should throw your v... May 16 2020, 08:13 AM tazz9924
WOO solid progress!
You should throw your ... May 16 2020, 08:57 AM JOEPROPER Nice video.
:popcorn: May 16 2020, 09:30 AM 76-914 Probably the fastest build yet. :beer2: May 16 2020, 12:08 PM sb914 I love the video!! Keep them coming. May 16 2020, 12:25 PM tazz9924 More bars went in today, but not every day goes sm... May 17 2020, 09:44 PM tazz9924 I can finally sleep tonight. I got that diagonal b... May 18 2020, 09:55 PM tazz9924 I figured id give a little update. My last couple ... May 22 2020, 10:23 PM 911GT2
I figured id give a little update. My last couple... May 24 2020, 02:46 AM tazz9924
I figured id give a little update. My last coupl... May 24 2020, 08:03 AM 76-914 :popcorn: May 23 2020, 09:38 AM Andyrew Good work! Fast progress! Keep it moving w... May 23 2020, 08:57 PM tazz9924 Sunday was a big day. After spending most of the d... May 25 2020, 06:31 AM tazz9924 Quick update: i picked up my doner car today! ... Jun 3 2020, 06:35 AM tazz9924 A lot of progress! ill be brief because im tir... Jun 21 2020, 07:55 PM bkrantz I get dizzy looking at the tubing angles in front ... Jun 21 2020, 09:37 PM tazz9924
I get dizzy looking at the tubing angles in front... Jun 22 2020, 12:13 PM Andyrew Sweet! Love the progress! Jun 22 2020, 10:09 AM Andyrew Also that Beat is Sweet!!! Jun 22 2020, 10:09 AM tazz9924 Its a roller kinda! I added a strut bar on the... Jun 22 2020, 09:16 PM Carbon-14 Observations from afar,
looking forward to the 91... Jun 23 2020, 04:20 AM tazz9924
Observations from afar,
looking forward to the 9... Jun 23 2020, 06:13 AM Carbon-14 Those new fangled jackstands have me wishing they ... Jun 23 2020, 04:26 AM tazz9924
Those new fangled jackstands have me wishing they... Jun 23 2020, 06:11 AM Carbon-14 ct7vmJkbt60
Information overloading, to determine... Jun 23 2020, 07:53 AM tazz9924 Ill admit im a little stumped... Call it: i want t... Jun 26 2020, 08:39 PM 76-914
Ill admit im a little stumped... Call it: i want ... Jun 26 2020, 10:41 PM Carbon-14 MjkLr9CWlHk
https://robotics.ee.uwa.edu.au/theses... Jun 26 2020, 11:07 PM tazz9924 I have an easily digestible build up date in the f... Jun 28 2020, 05:55 PM EdwardBlume Damn this thread is sexy! :beer3: Jun 28 2020, 09:47 PM andrewb I always love the famous 'can do' attitude... Jun 29 2020, 07:37 AM tazz9924
I always love the famous 'can do' attitud... Jun 29 2020, 11:39 AM tazz9924 Ok this is the last update for probably a couple w... Jun 29 2020, 11:43 AM rhodyguy Are you back in Tacoma? Jun 29 2020, 02:02 PM
tazz9924
This will be a great build!!!! Ar... Apr 6 2020, 05:45 AM Andyrew
This will be a great build!!!! A... Apr 7 2020, 05:37 PM Tbrown4x4 Loved your old car. It'll be great watching th... Apr 6 2020, 02:59 AM gereed75 What do you call your tube channel? Apr 6 2020, 06:28 AM tazz9924
What do you call your tube channel?
Ziptied, a p... Apr 6 2020, 12:28 PM jmitro very cool! Apr 6 2020, 06:42 AM tygaboy :popcorn: :sawzall: :welder: :worship: Apr 6 2020, 08:44 AM tazz9924 Spent the day adding in the wings of the chassis u... Apr 6 2020, 09:03 PM Mueller Looks great so far.
Have you measured the floor j... Apr 7 2020, 08:46 AM tazz9924
Looks great so far.
Have you measured the floor ... Apr 7 2020, 05:59 PM rgalla9146
Looks great so far.
Have you measured the floor... Apr 7 2020, 06:27 PM Andyrew Flat and straight enough is flat and straight enou... Apr 7 2020, 07:47 PM tazz9924
Flat and straight enough is flat and straight eno... Apr 7 2020, 08:48 PM tazz9924 Built a lot of gussets, i really badly wanted them... Apr 7 2020, 08:53 PM 911GT2
Lover your welding! :wub: Apr 9 2020, 01:26 AM tazz9924 Not a big day but got some of the gussets added in... Apr 8 2020, 09:23 PM Andyrew What’s the body concept going to be? Are you sti... Apr 9 2020, 12:49 AM tazz9924
What’s the body concept going to be? Are you st... Apr 9 2020, 05:54 AM Mueller
What’s the body concept going to be? Are you s... Apr 9 2020, 06:35 PM tazz9924
[quote name='tazz9924' post='2802367' date='Apr 9... Apr 9 2020, 07:13 PM Andyrew Remember their wheel offset is way different than ... Apr 9 2020, 02:21 PM tazz9924
Remember their wheel offset is way different than... Apr 9 2020, 04:32 PM sixnotfour Boxster with 914 body for reference
http://www.914... Apr 9 2020, 03:04 PM tazz9924
Boxster with 914 body for reference
http://www.91... Apr 9 2020, 04:34 PM URY914 I have one word of advice: Triangulation. Apr 9 2020, 05:56 PM tazz9924
I have one word of advice: Triangulation.
Ahh b... Apr 9 2020, 06:18 PM jd74914
I have one word of advice: [b]Triangulation.
Wh... Apr 29 2020, 09:48 AM tazz9924
I have one word of advice: [b]Triangulation.
W... Apr 29 2020, 11:49 AM tazz9924 Got the last of the welding that is possible on my... Apr 10 2020, 08:08 PM tazz9924 Finally building in 3d, got the main hoop finish n... Apr 11 2020, 09:42 PM maf914 Craftsman warranty? Good luck with that. What wa... Apr 12 2020, 06:55 AM ClayPerrine
Craftsman warranty? Good luck with that. What w... Apr 12 2020, 07:36 AM Andyrew I hear Ace and Lowe's still exchange them. Cra... Apr 12 2020, 08:37 AM tygaboy Imagine if we had professional sportscasters, I... Apr 12 2020, 09:13 AM tazz9924
[i]Imagine if we had professional sportscasters, ... Apr 12 2020, 11:22 AM tygaboy
Dang i appreciate it! the comment on post 19 ... Apr 12 2020, 10:08 PM sixnotfour in my 914 my seat is on the floor in the back and ... Apr 12 2020, 12:16 PM tazz9924
in my 914 my seat is on the floor in the back and... Apr 12 2020, 01:30 PM ClayPerrine I think it is kind of telling that this tube frame... Apr 13 2020, 07:21 AM tazz9924 I started work on the dash bar and uprights today.... Apr 13 2020, 09:14 PM sixnotfour http://www.914world.com/bbs2/index.php?sho...845... Apr 14 2020, 05:13 AM tazz9924
http://www.914world.com/bbs2/index.php?sho...845... Apr 14 2020, 06:03 AM Andyrew Someone is going low low I take it? I like the ide... Apr 14 2020, 04:27 PM tazz9924
Someone is going low low I take it? I like the id... Apr 14 2020, 05:22 PM tazz9924 Ok update: I was out of town for a couple days and... Apr 19 2020, 07:50 PM tazz9924 I finally got the fiberglass ive been waiting for ... Apr 24 2020, 09:50 PM tazz9924 I was delayed a few days because i was waiting for... Apr 28 2020, 09:21 PM jd74914
What's this holding? If it's seeing any... Apr 29 2020, 09:39 AM Andyrew Welds look nice!
BTDT on the greyhound in th... Apr 29 2020, 01:27 AM tazz9924
Welds look nice!
BTDT on the greyhound in t... Apr 29 2020, 05:55 AM tazz9924 I continued mounting the front subrame. Still sitt... May 6 2020, 12:05 PM tygaboy Holy Moley! That bad boy will be a roller soon... May 6 2020, 04:02 PM tazz9924
Holy Moley! That bad boy will be a roller soo... May 6 2020, 06:35 PM tazz9924 Finally! im done welding up the front subframe... May 10 2020, 12:44 PM tazz9924 Made my strut tops! Ill be honest i was very e... May 13 2020, 09:56 PM 914forme They will be plenty strong as the top plate is tak... May 14 2020, 05:59 AM tazz9924 major progress.
I cut the holes in the strut tops ... May 15 2020, 11:45 PM tygaboy Isn't it fun triple double checking all the me... May 16 2020, 07:29 AM tazz9924
Isn't it fun triple double checking all the m... May 16 2020, 08:57 AM Andyrew WOO solid progress!
You should throw your v... May 16 2020, 08:13 AM tazz9924
WOO solid progress!
You should throw your ... May 16 2020, 08:57 AM JOEPROPER Nice video.
:popcorn: May 16 2020, 09:30 AM 76-914 Probably the fastest build yet. :beer2: May 16 2020, 12:08 PM sb914 I love the video!! Keep them coming. May 16 2020, 12:25 PM tazz9924 More bars went in today, but not every day goes sm... May 17 2020, 09:44 PM tazz9924 I can finally sleep tonight. I got that diagonal b... May 18 2020, 09:55 PM tazz9924 I figured id give a little update. My last couple ... May 22 2020, 10:23 PM 911GT2
I figured id give a little update. My last couple... May 24 2020, 02:46 AM tazz9924
I figured id give a little update. My last coupl... May 24 2020, 08:03 AM 76-914 :popcorn: May 23 2020, 09:38 AM Andyrew Good work! Fast progress! Keep it moving w... May 23 2020, 08:57 PM tazz9924 Sunday was a big day. After spending most of the d... May 25 2020, 06:31 AM tazz9924 Quick update: i picked up my doner car today! ... Jun 3 2020, 06:35 AM tazz9924 A lot of progress! ill be brief because im tir... Jun 21 2020, 07:55 PM bkrantz I get dizzy looking at the tubing angles in front ... Jun 21 2020, 09:37 PM tazz9924
I get dizzy looking at the tubing angles in front... Jun 22 2020, 12:13 PM Andyrew Sweet! Love the progress! Jun 22 2020, 10:09 AM Andyrew Also that Beat is Sweet!!! Jun 22 2020, 10:09 AM tazz9924 Its a roller kinda! I added a strut bar on the... Jun 22 2020, 09:16 PM Carbon-14 Observations from afar,
looking forward to the 91... Jun 23 2020, 04:20 AM tazz9924
Observations from afar,
looking forward to the 9... Jun 23 2020, 06:13 AM Carbon-14 Those new fangled jackstands have me wishing they ... Jun 23 2020, 04:26 AM tazz9924
Those new fangled jackstands have me wishing they... Jun 23 2020, 06:11 AM Carbon-14 ct7vmJkbt60
Information overloading, to determine... Jun 23 2020, 07:53 AM tazz9924 Ill admit im a little stumped... Call it: i want t... Jun 26 2020, 08:39 PM 76-914
Ill admit im a little stumped... Call it: i want ... Jun 26 2020, 10:41 PM Carbon-14 MjkLr9CWlHk
https://robotics.ee.uwa.edu.au/theses... Jun 26 2020, 11:07 PM tazz9924 I have an easily digestible build up date in the f... Jun 28 2020, 05:55 PM EdwardBlume Damn this thread is sexy! :beer3: Jun 28 2020, 09:47 PM andrewb I always love the famous 'can do' attitude... Jun 29 2020, 07:37 AM tazz9924
I always love the famous 'can do' attitud... Jun 29 2020, 11:39 AM tazz9924 Ok this is the last update for probably a couple w... Jun 29 2020, 11:43 AM rhodyguy Are you back in Tacoma? Jun 29 2020, 02:02 PM  |
1 User(s) are reading this topic (1 Guests and 0 Anonymous Users)
0 Members:

|
Lo-Fi Version | Time is now: 15th June 2026 - 03:00 AM |
Invision Power Board
v9.1.4 © 2026 IPS, Inc.