|
|
|
Porsche, and the Porsche crest are registered trademarks of Dr. Ing. h.c. F. Porsche AG.
This site is not affiliated with Porsche in any way. Its only purpose is to provide an online forum for car enthusiasts. All other trademarks are property of their respective owners. |
|
|

  |

| tazz9924 |
 May 10 2020, 12:44 PM May 10 2020, 12:44 PM
Post
#61
|
|
Senior Member  Group: Members Posts: 755 Joined: 31-May 15 From: Mooresville NC Member No.: 18,779 Region Association: None |
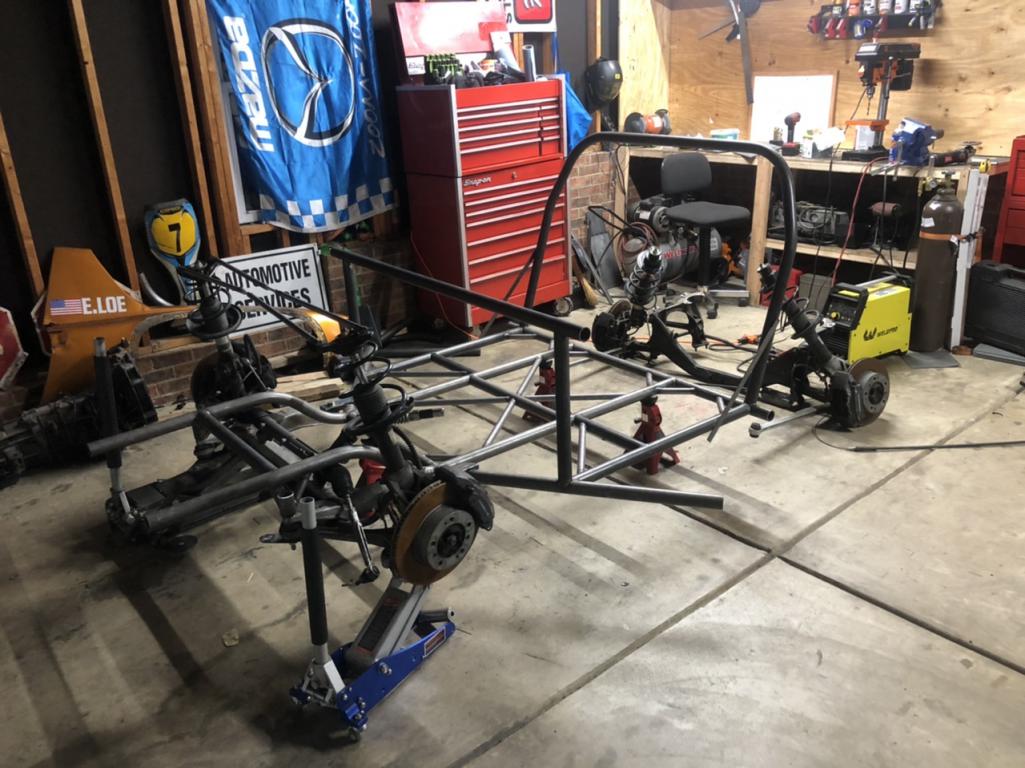
Finally! im done welding up the front subframe in place... for now. It’ll get a little more reinforcement in the future but now i must cleanse myself of the hatred that was welding the front mounts up. Now on to mounting those front struts!
 |
   |

 
|
| tazz9924 |
May 13 2020, 09:56 PM
Post
#62
|
|
Senior Member Group: Members Posts: 755 Joined: 31-May 15 From: Mooresville NC Member No.: 18,779 Region Association: None |
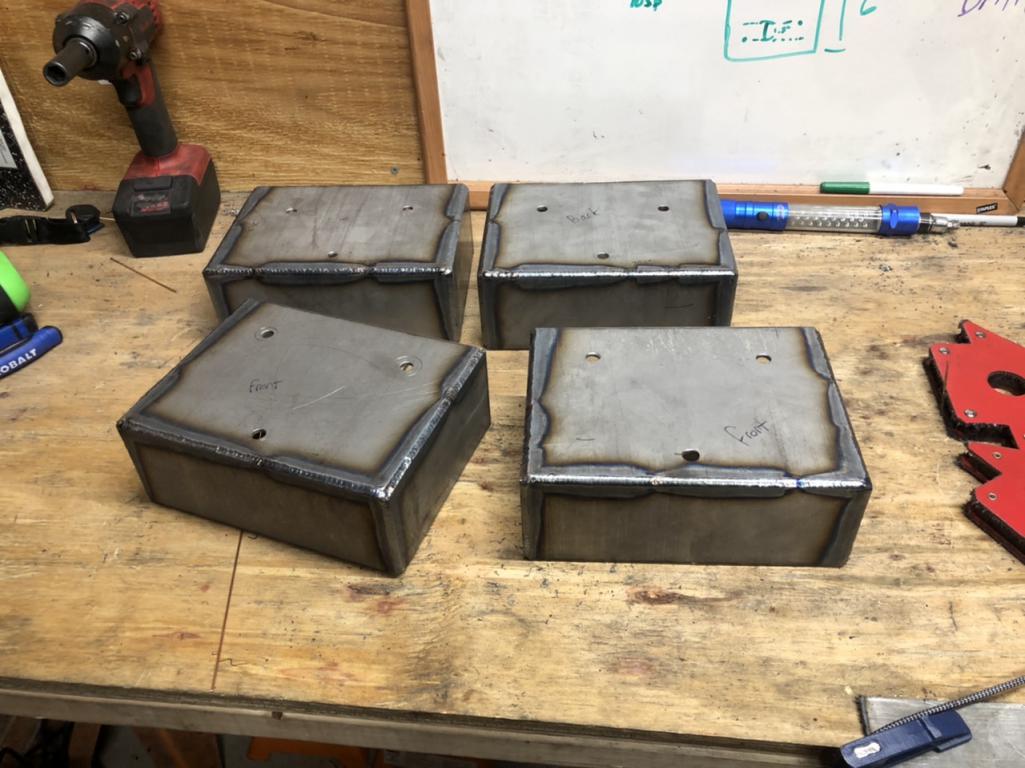
Made my strut tops! Ill be honest i was very excited about making these because i knew they could look good.. and they do! I would’ve preferred to bend the steel instead of having weld joints but i was assured of its strength so ill take it.
 |
|
|
|
| 914forme |
May 14 2020, 05:59 AM
Post
#63
|
|
Times a wastin', get wrenchin'! Group: Members Posts: 3,899 Joined: 24-July 04 From: Dayton, Ohio Member No.: 2,388 Region Association: None |
They will be plenty strong as the top plate is taking the majority of the force. The other forces will be applied at the attachment points, depending on your plans for attachment, you may need to add something down the sides to transfer the loads.
(IMG:style_emoticons/default/popcorn[1].gif) Liking the progress, and the fact it is a down and dirty build. |
|
|
|
| tazz9924 |
May 15 2020, 11:45 PM
Post
#64
|
|
Senior Member Group: Members Posts: 755 Joined: 31-May 15 From: Mooresville NC Member No.: 18,779 Region Association: None |
major progress.
I cut the holes in the strut tops to allow for the strut to pass through. 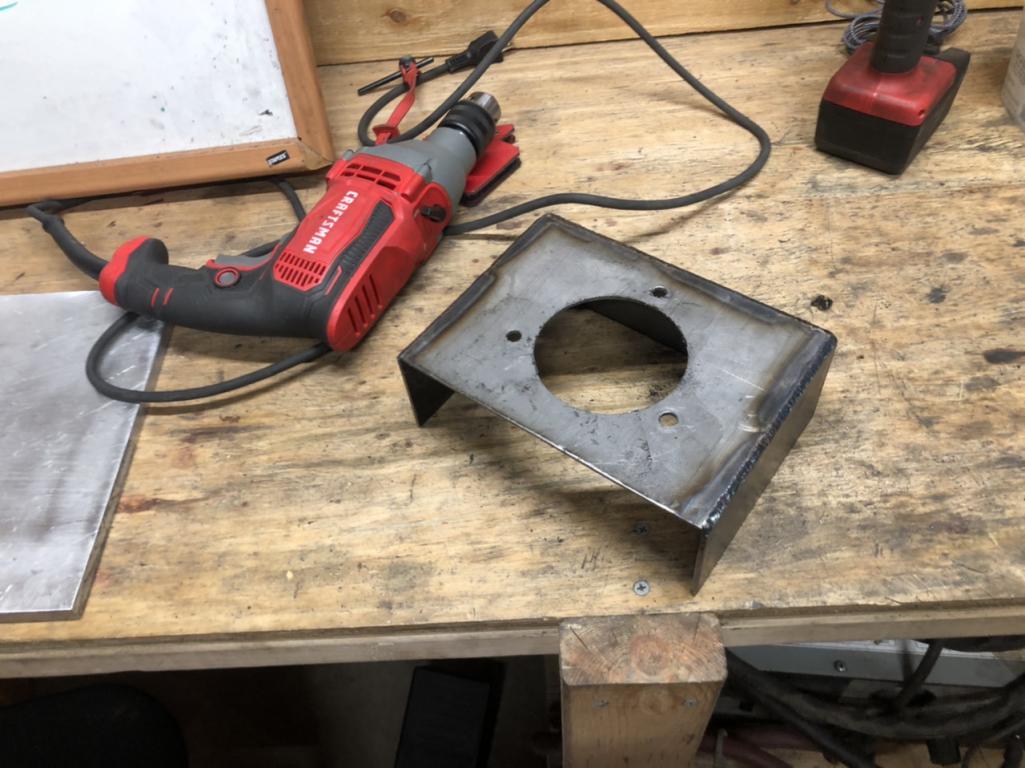 Next i welded in what ill call: The bar that links my struts together and is critical to my camber. I used quite a bit of scaffolding to make sure it was setup right. I used actual measurements from a boxster to space the struts correctly. One of the complaints of the boxster is you cant get enough camber from it stock. I added 1/4” of strut top negative camber. Its not much but i should be able to get a little more out of it if need be. The control arm angle was a point of contention for me. I couldnt find a boxsters control arm angle at full droop, so i... i eye balled it.. intelligently. i know it should be around 1 degree up at ride height, which from what ive read stock ride height is where the strength of this suspension lies. I settled on 20 degrees at full droop. I figure the car will settle an inch when it sets on the ground which will bring it somewhere close to where it should be. This car will have adjustable suspension so i can tune in the control arm angle as needed. It also sets the strut tops fairly low, which is a plus in my book. 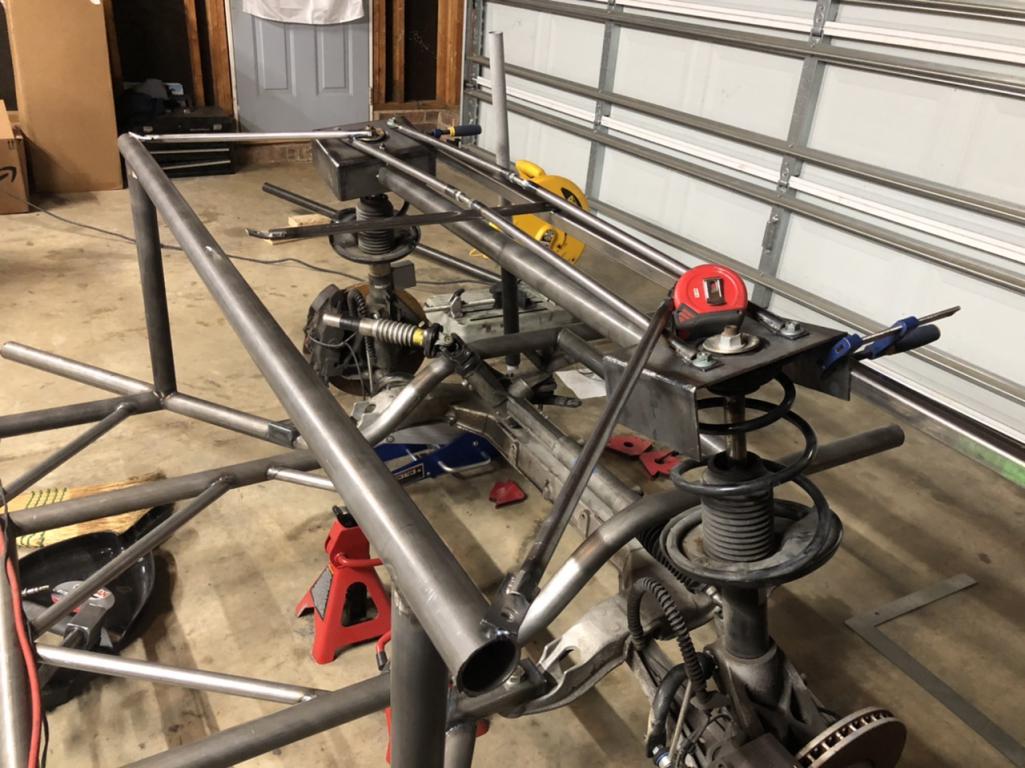 Once i finished the; The bar that links my struts together and is critical to my camber bar I then moved onto caster. I matched the caster i measured on a boxster and matched it with two temporary bars. now onto bigger and better things! 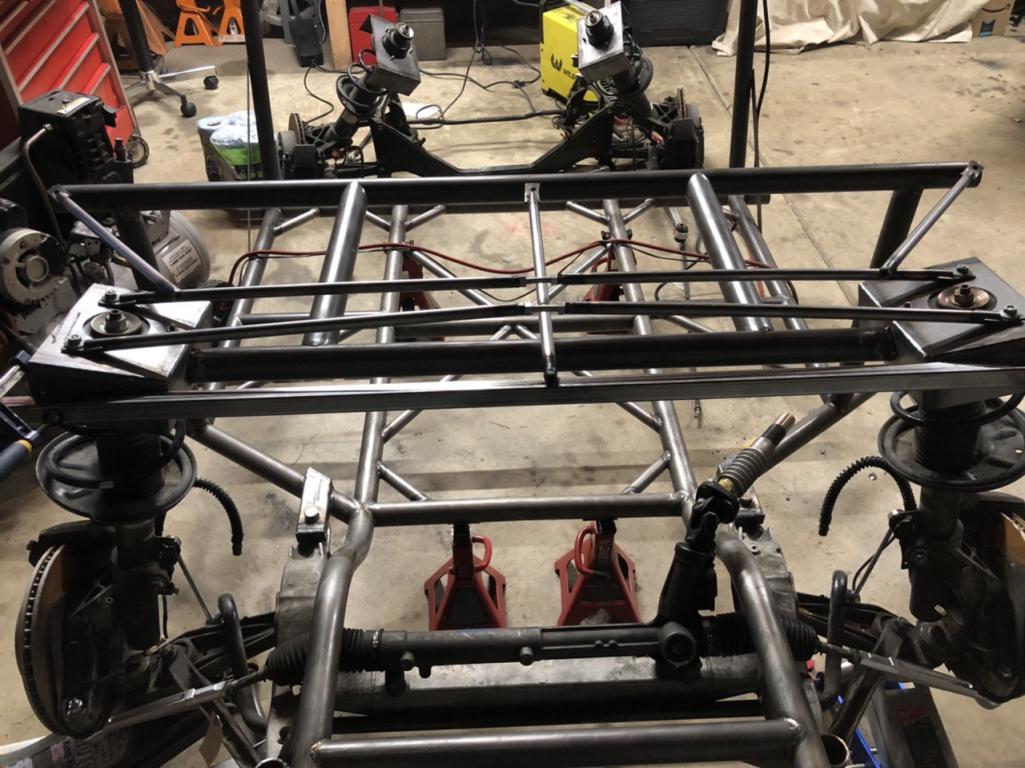 |
|
|
|
| tygaboy |
May 16 2020, 07:29 AM
Post
#65
|
|
914 Guru Group: Members Posts: 5,827 Joined: 6-October 15 From: Petaluma, CA Member No.: 19,241 Region Association: Northern California |
Isn't it fun triple double checking all the measurements and questioning your assumptions over and over? Are you laying in bed each night rethinking how you're going to design and build that next section? (IMG:style_emoticons/default/blink.gif)
You're making great progress! Can't wait to see more. |
|
|
|
| Andyrew |
May 16 2020, 08:13 AM
Post
#66
|
|
Spooling.... Please wait Group: Members Posts: 13,380 Joined: 20-January 03 From: Riverbank, Ca Member No.: 172 Region Association: Northern California |
WOO solid progress!
You should throw your video's in this build thread when your done with them. |
|
|
|
| tazz9924 |
May 16 2020, 08:57 AM
Post
#67
|
|
Senior Member Group: Members Posts: 755 Joined: 31-May 15 From: Mooresville NC Member No.: 18,779 Region Association: None |
QUOTE(Andyrew @ May 16 2020, 06:13 AM)  WOO solid progress! You should throw your video's in this build thread when your done with them. I totally spaced on that! If you want to see my beautiful(?) face actually working on this, here’s the link to my video: https://m.youtube.com/watch?v=tO0ksx4SHTo |
|
|
|
| tazz9924 |
May 16 2020, 08:57 AM
Post
#68
|
|
Senior Member Group: Members Posts: 755 Joined: 31-May 15 From: Mooresville NC Member No.: 18,779 Region Association: None |
QUOTE(tygaboy @ May 16 2020, 05:29 AM) Isn't it fun triple double checking all the measurements and questioning your assumptions over and over? Are you laying in bed each night rethinking how you're going to design and build that next section? (IMG:style_emoticons/default/blink.gif) You're making great progress! Can't wait to see more. Oh god its all i do! |
|
|
|
| JOEPROPER |
May 16 2020, 09:30 AM
Post
#69
|
|
The answer is "no" unless you ask... Group: Members Posts: 1,209 Joined: 21-November 15 From: White Plains New York Member No.: 19,387 Region Association: North East States |
Nice video.
(IMG:style_emoticons/default/popcorn[1].gif) |
|
|
|
| 76-914 |
May 16 2020, 12:08 PM
Post
#70
|
|
Repeat Offender & Resident Subaru Antagonist Group: Members Posts: 13,896 Joined: 23-January 09 From: Temecula, CA Member No.: 9,964 Region Association: Southern California |
Probably the fastest build yet. (IMG:style_emoticons/default/beerchug.gif)
|
|
|
|
| sb914 |
May 16 2020, 12:25 PM
Post
#71
|
|
Surf Guru Group: Members Posts: 4,640 Joined: 25-November 12 From: Brookings,Oregon Member No.: 15,191 Region Association: Southern California |
I love the video!! Keep them coming.
|
|
|
|
| tazz9924 |
May 17 2020, 09:44 PM
Post
#72
|
|
Senior Member Group: Members Posts: 755 Joined: 31-May 15 From: Mooresville NC Member No.: 18,779 Region Association: None |
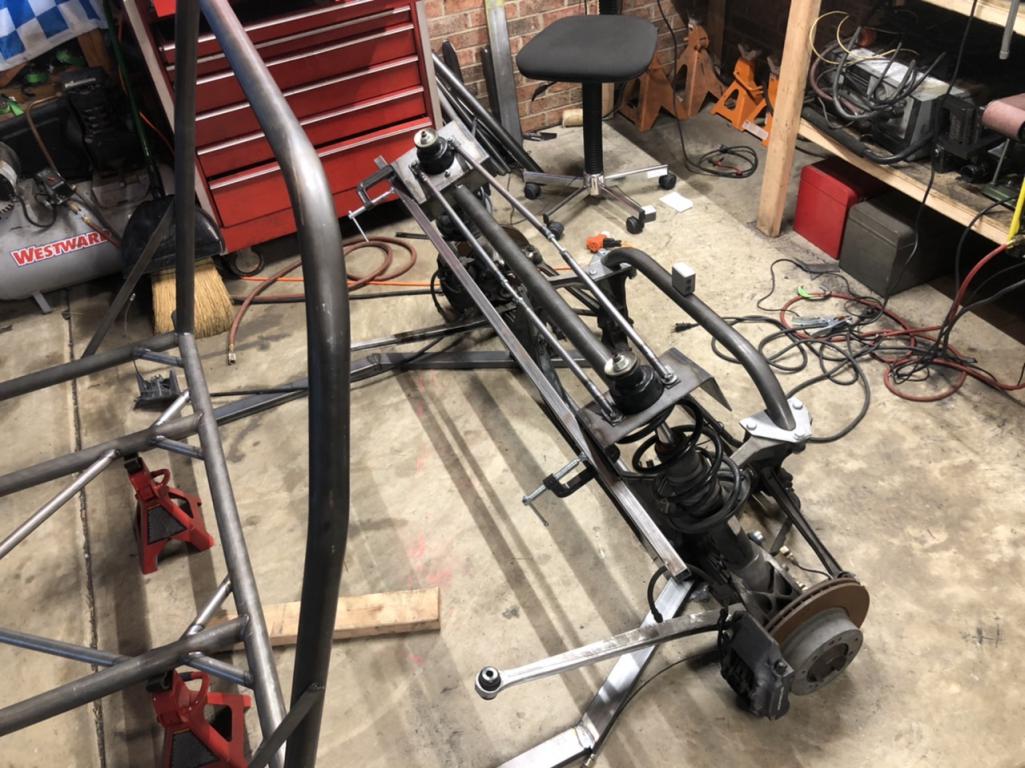
More bars went in today, but not every day goes smooth even when you get in a groove. First i made the bars that go from the dash bar to the struts, easy enough. Some complex angles that aren’t immediately obvious but some flap dish work and its all good.
 Next came the bars the go from the main chassis rails to the: The tube critical for my camber and attatching both struts. These bars were a pain! First i tried to link it up with the bar that attatches the two chassis rails. No Beans. 4 try’s down the road i gave up on that pipe dream (get it) and moved them back two inches and bingo! i even got to reuse a mistake bar. 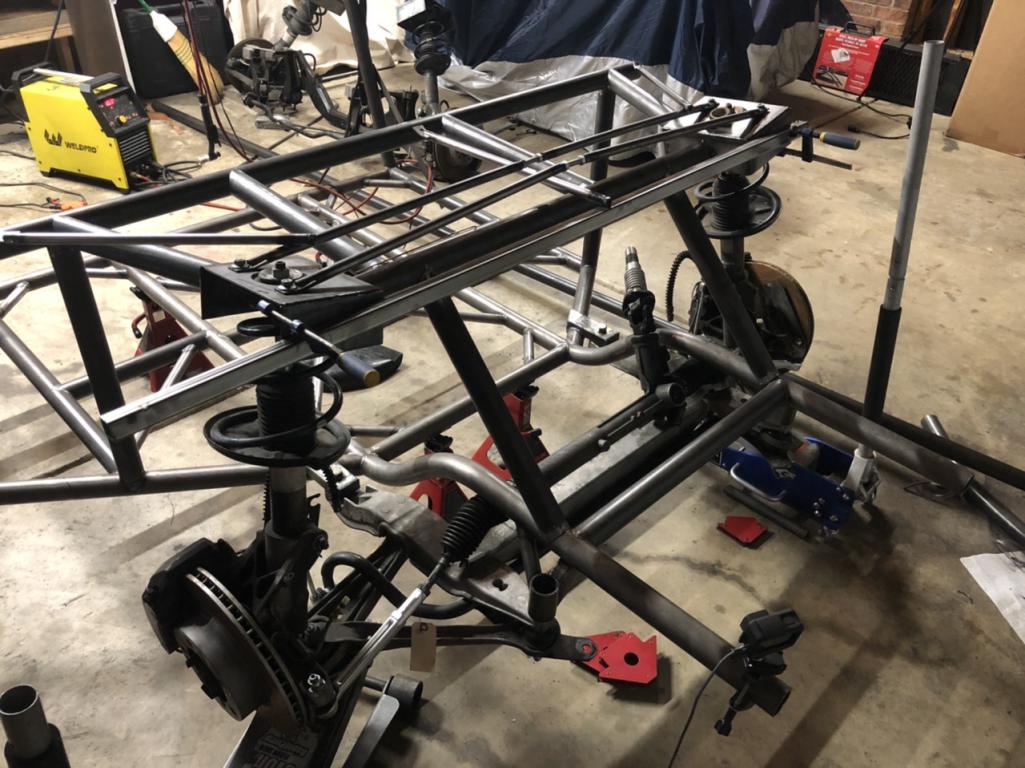 I then attempted to notch up a triangulation bar for the front section but i messed up three times on the same bar. I learned from my mistakes but dang i really wanted to start finish welding (IMG:style_emoticons/default/mad.gif) 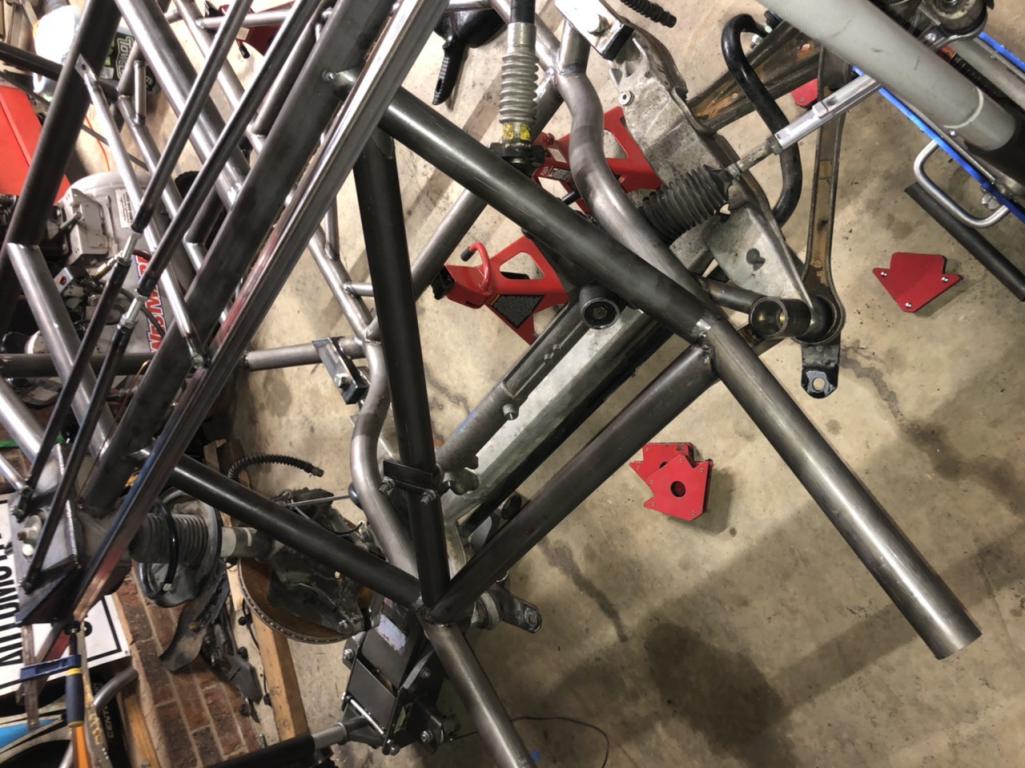 I did notice this thing looks like a teenager in that old school head gear, braces things. Do people still get those? |
|
|
|
| tazz9924 |
May 18 2020, 09:55 PM
Post
#73
|
|
Senior Member Group: Members Posts: 755 Joined: 31-May 15 From: Mooresville NC Member No.: 18,779 Region Association: None |
I can finally sleep tonight. I got that diagonal bar in with major troubles. Three attempts and a lot of hammer blows and its in.
Attached thumbnail(s) 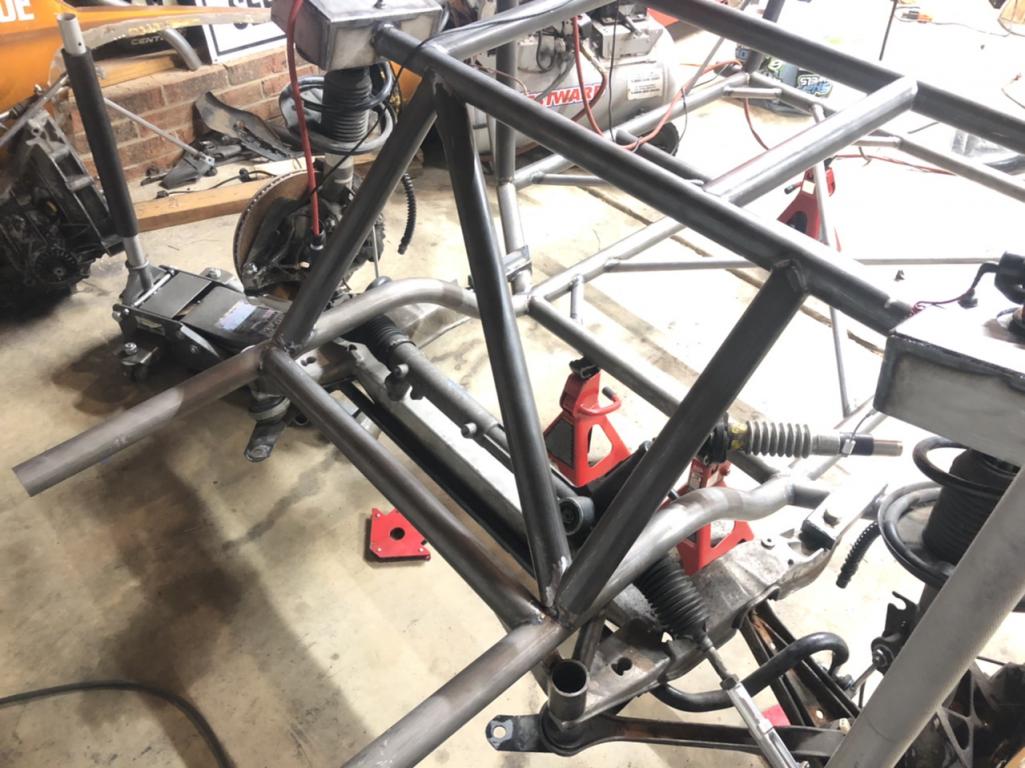
|
|
|
|
| tazz9924 |
May 22 2020, 10:23 PM
Post
#74
|
|
Senior Member Group: Members Posts: 755 Joined: 31-May 15 From: Mooresville NC Member No.: 18,779 Region Association: None |
I figured id give a little update. My last couple days have been anger inducing ive made little progress despite putting in a fair bit of time. Sometimes thats just the way it goes. I made a little subframe that’s mostly so i can align up the rear suspension. Im highly considering changing/redoing that again in the future, maybe tubular next time idk.
 It however will serve its purpose as tomorrow i embark on finally mounting that rear suspension and making my car whole!.... a little teaser: 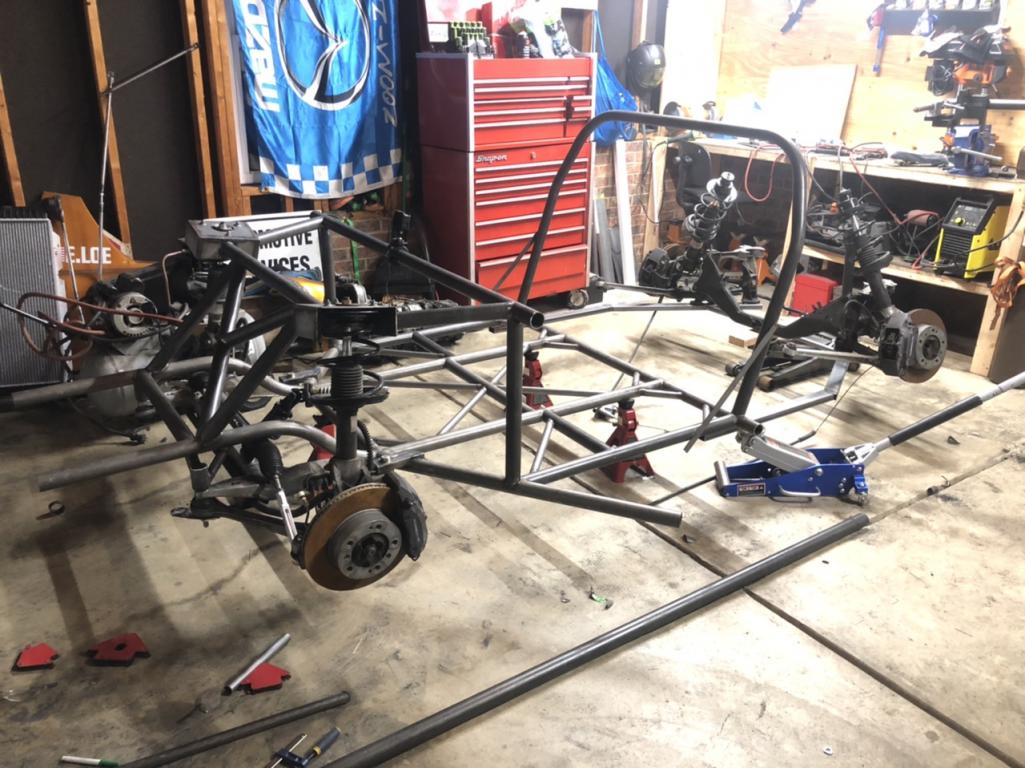 |
|
|
|
| 76-914 |
May 23 2020, 09:38 AM
Post
#75
|
|
Repeat Offender & Resident Subaru Antagonist Group: Members Posts: 13,896 Joined: 23-January 09 From: Temecula, CA Member No.: 9,964 Region Association: Southern California |
|
|
|
|
| Andyrew |
May 23 2020, 08:57 PM
Post
#76
|
|
Spooling.... Please wait Group: Members Posts: 13,380 Joined: 20-January 03 From: Riverbank, Ca Member No.: 172 Region Association: Northern California |
Good work! Fast progress! Keep it moving while you have the energy!
|
|
|
|
| 911GT2 |
May 24 2020, 02:46 AM
Post
#77
|
|
Member Group: Members Posts: 195 Joined: 2-March 11 From: The Netherlands Member No.: 12,773 Region Association: Europe |
QUOTE(tazz9924 @ May 22 2020, 08:23 PM) I figured id give a little update. My last couple days have been anger inducing ive made little progress despite putting in a fair bit of time. Sometimes thats just the way it goes. I made a little subframe that’s mostly so i can align up the rear suspension. Im highly considering changing/redoing that again in the future, maybe tubular next time idk. My advice to you, step away sometimes. I know this from experience, from building my buggy that when it feels anger inducing or like you're making little progress to something else for a while. Let your project sit for a couple of days and get back on it when you feel motivated again. You can't do quality work when you're frustrated. And you end up doing it twice. Ask me how I know. (IMG:style_emoticons/default/beerchug.gif) |
|
|
|
| tazz9924 |
May 24 2020, 08:03 AM
Post
#78
|
|
Senior Member Group: Members Posts: 755 Joined: 31-May 15 From: Mooresville NC Member No.: 18,779 Region Association: None |
QUOTE(911GT2 @ May 24 2020, 12:46 AM) QUOTE(tazz9924 @ May 22 2020, 08:23 PM) I figured id give a little update. My last couple days have been anger inducing ive made little progress despite putting in a fair bit of time. Sometimes thats just the way it goes. I made a little subframe that’s mostly so i can align up the rear suspension. Im highly considering changing/redoing that again in the future, maybe tubular next time idk. My advice to you, step away sometimes. I know this from experience, from building my buggy that when it feels anger inducing or like you're making little progress to something else for a while. Let your project sit for a couple of days and get back on it when you feel motivated again. You can't do quality work when you're frustrated. And you end up doing it twice. Ask me how I know. (IMG:style_emoticons/default/beerchug.gif) I know, i got a deadline because i have to move soon and id like it to roll asap. The little subframe was not of the utmost importance for the drivability of this car so i let myself do it frustrated. I cant wait to be done with this move and get a normal life back (IMG:style_emoticons/default/laugh.gif) |
|
|
|
| tazz9924 |
May 25 2020, 06:31 AM
Post
#79
|
|
Senior Member Group: Members Posts: 755 Joined: 31-May 15 From: Mooresville NC Member No.: 18,779 Region Association: None |
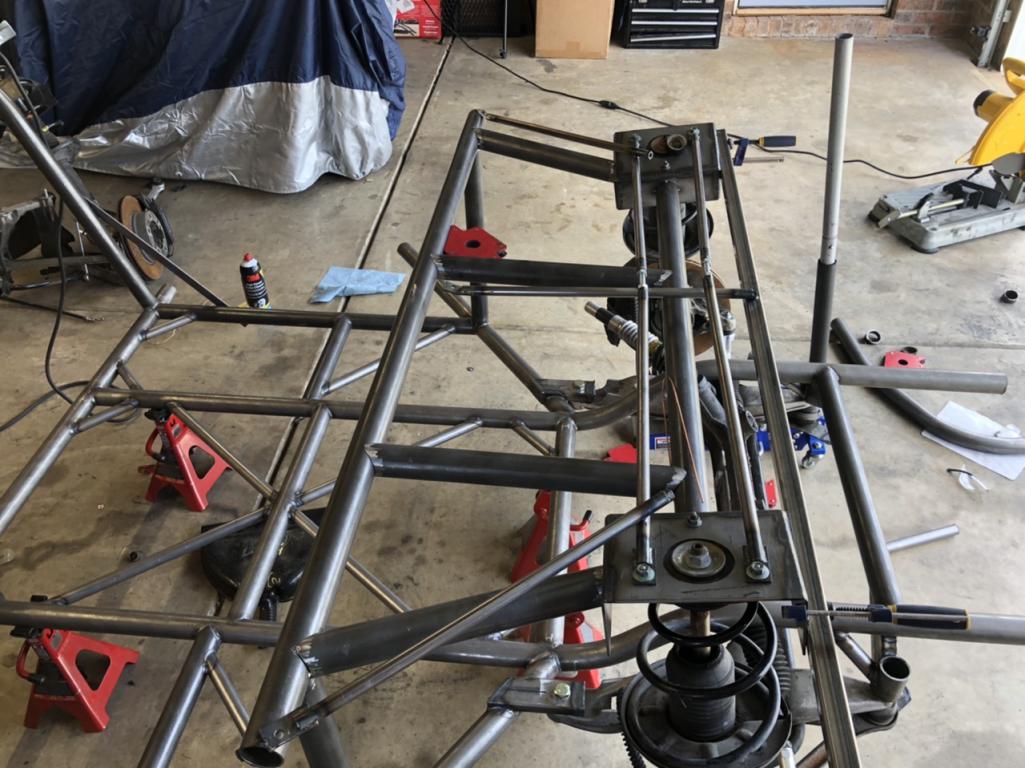
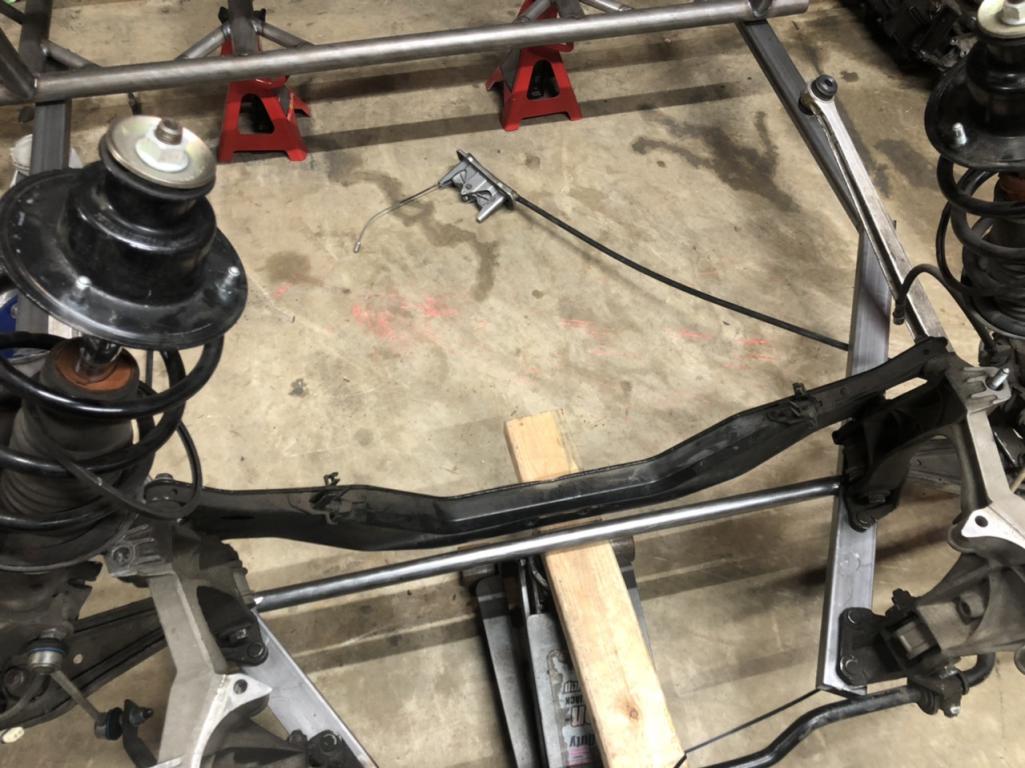
Sunday was a big day. After spending most of the day outside in the garage i completed a lot of things i needed done. First i made some spacers and mounting plates for the rear subframe mount. Some plasma cutter and like an hour of grinding later and they came out great. (i forgot to take a picture) Next i made up a ( shaped bar to connect those plates together, made another one of those fancy camber bars that go between the struts. I lined it all up and tacked it together and presto! Our first picture.
 I decided that i needed to change the subframe i already built and didn’t like, so i did. I made it slightly thinner which helped it fit between the main hoop better and cut it to length which helps with the wheelbase issue.  Now came the moment i had been waiting for; Time to put it all together and line it up. First i used a trusty ratchet strap to align the rear stuts to their proper angle. Simultaneously i had the subframe up on a jack with a piece of wood to balance it. I used my other jack, a new drill in a box, lots of scrap metal, and some card board to set the subframe height at the chassis. Its ghetto but it worked. I then got the correct rake of rear subframe. 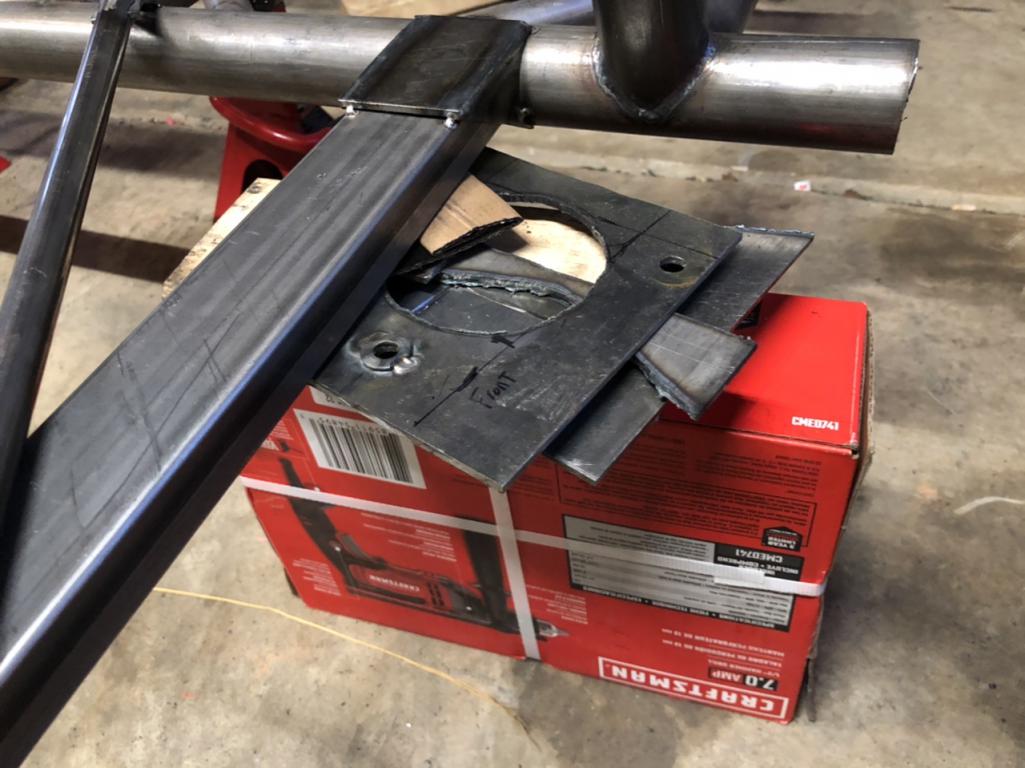 Next i setup a string alignment setup to make sure the subframe was center left to right. At some point i had to sit down and stare at it because this took like two hours to line up. But finally i got to tack everything in place and thats where we are now! 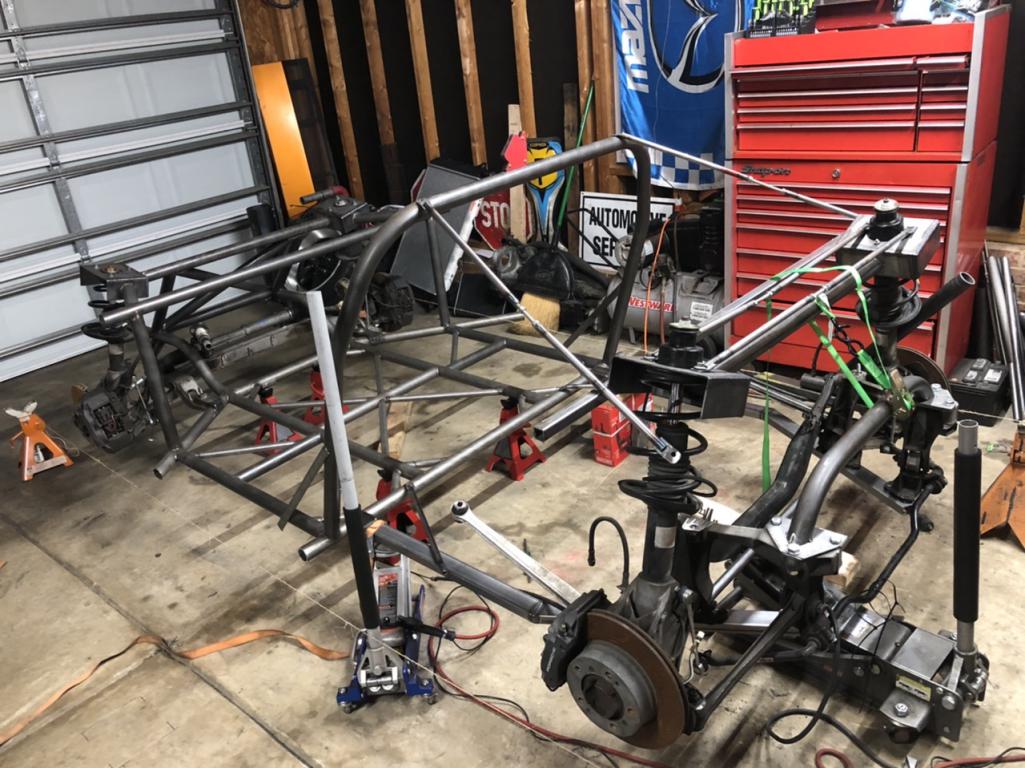 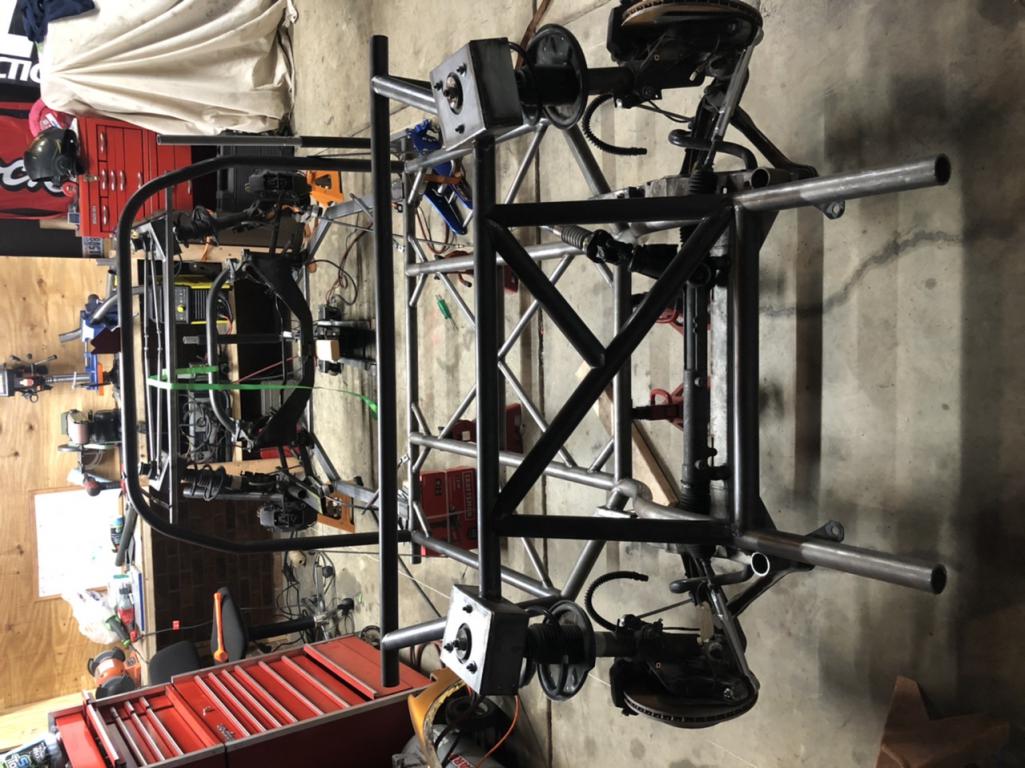 |
|
|
|
| tazz9924 |
Jun 3 2020, 06:35 AM
Post
#80
|
|
Senior Member Group: Members Posts: 755 Joined: 31-May 15 From: Mooresville NC Member No.: 18,779 Region Association: None |
Quick update: i picked up my doner car today! I put it in my nee trendy looking shop (IMG:style_emoticons/default/biggrin.gif)
 And next to my daily driver 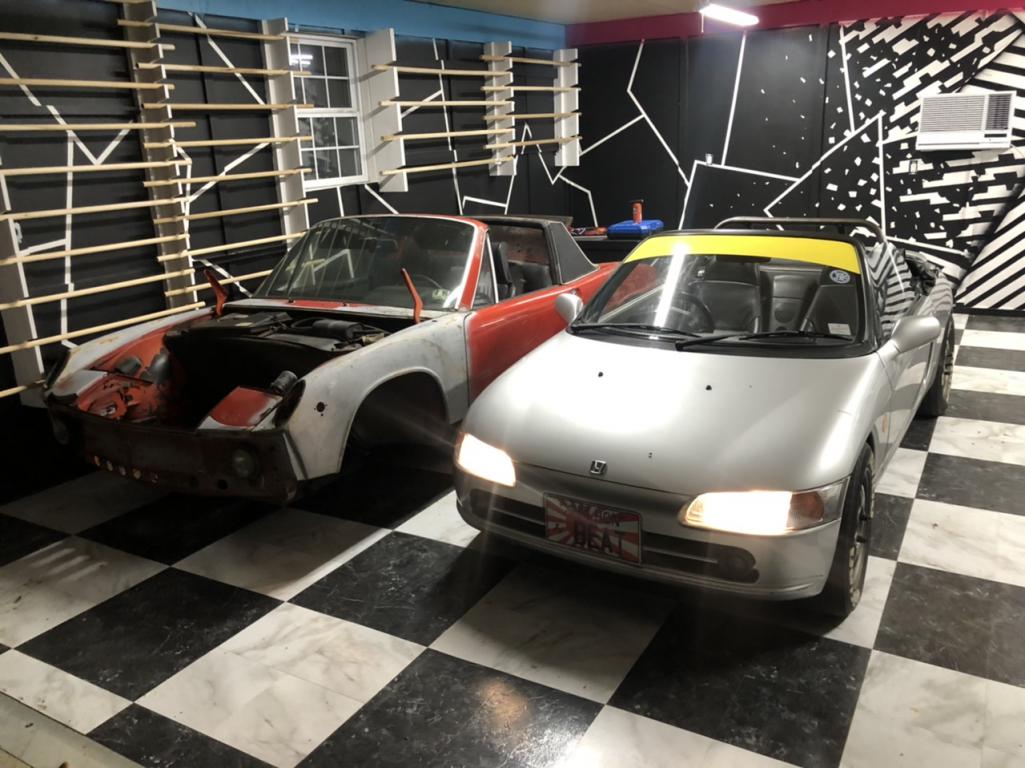 |
|
|
|
|
1 User(s) are reading this topic (1 Guests and 0 Anonymous Users)
0 Members:

|
Lo-Fi Version | Time is now: 13th June 2026 - 04:53 AM |
Invision Power Board
v9.1.4 © 2026 IPS, Inc.