|
|
|
Porsche, and the Porsche crest are registered trademarks of Dr. Ing. h.c. F. Porsche AG.
This site is not affiliated with Porsche in any way. Its only purpose is to provide an online forum for car enthusiasts. All other trademarks are property of their respective owners. |
|
|


| Frankvw |
 May 17 2020, 11:33 AM May 17 2020, 11:33 AM
Post
#1
|
|
working on my first 914 !  Group: Members Posts: 653 Joined: 13-April 16 From: Holland, the Netherlands Member No.: 19,896 Region Association: Europe |
so....firewall shifter bushing replacement !
I followed the how-to of ROb under http://www.914world.com/specs/fwsb_replace.php That was of course very helpfull. I want to show some details and tips&tricks I used to do mine Mine is a 1973 1.7. That is important, because there are several version (and sizes) around for this part. Early, Late, conversion, specials like Tangerine or Rix etc. I did not have a bushing in the firewall (I thought) and the rod was rattling and the shift play was huge. I took it apart and found the old bushing in pieces in the rubber boot and a piece in the tunnel. So ...I asked the 914 parts guy in the Netherlands for the bushing, but he had only a full set, and I needed only the firewall bushing since the others were in great shape and maybe even replaced in its life sometime Guess what, they are easy to order from Porsche ! I ordered and two days later they mailed it arrived from Germany and I picked it up. 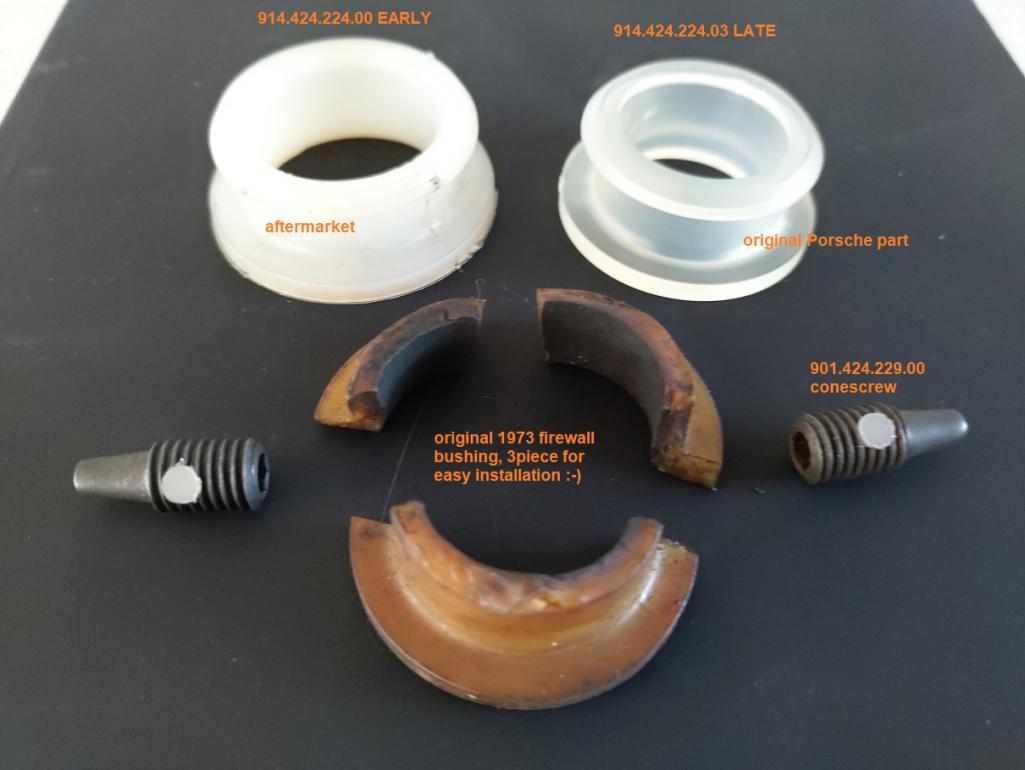 You can see the differences between the original Porsche part and the aftermarket part, no idea what brand or manufacturer that is. But you will find out there are different versions the moment the wrong one does not fit or has too much slop. The quality of the original part is way better and the size/dimensions are looking good ! 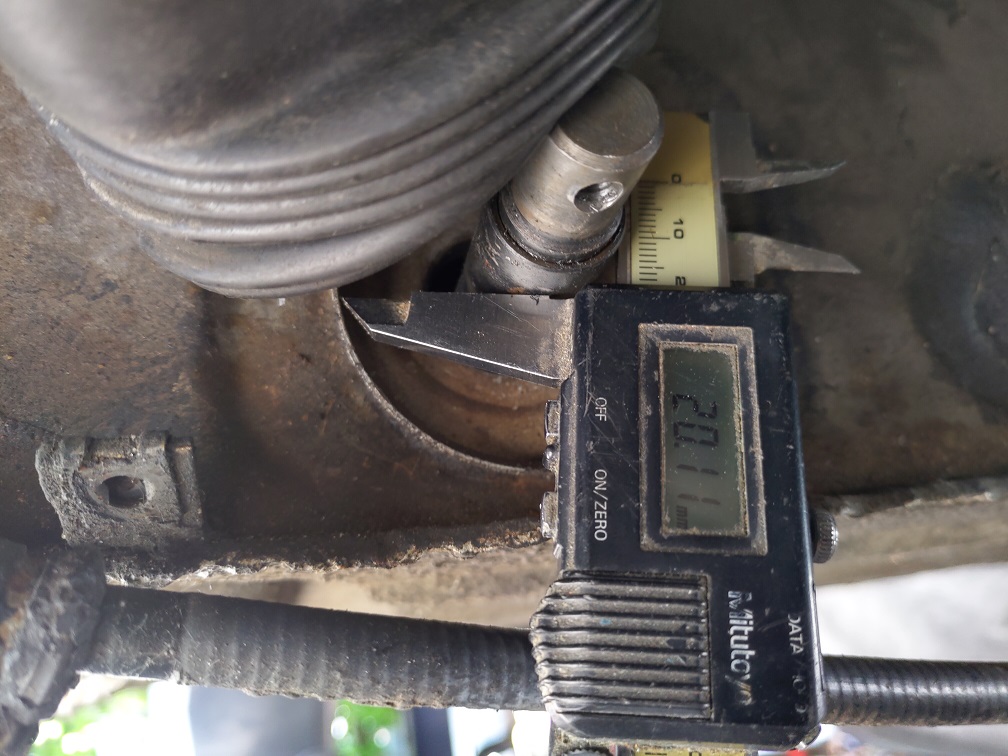 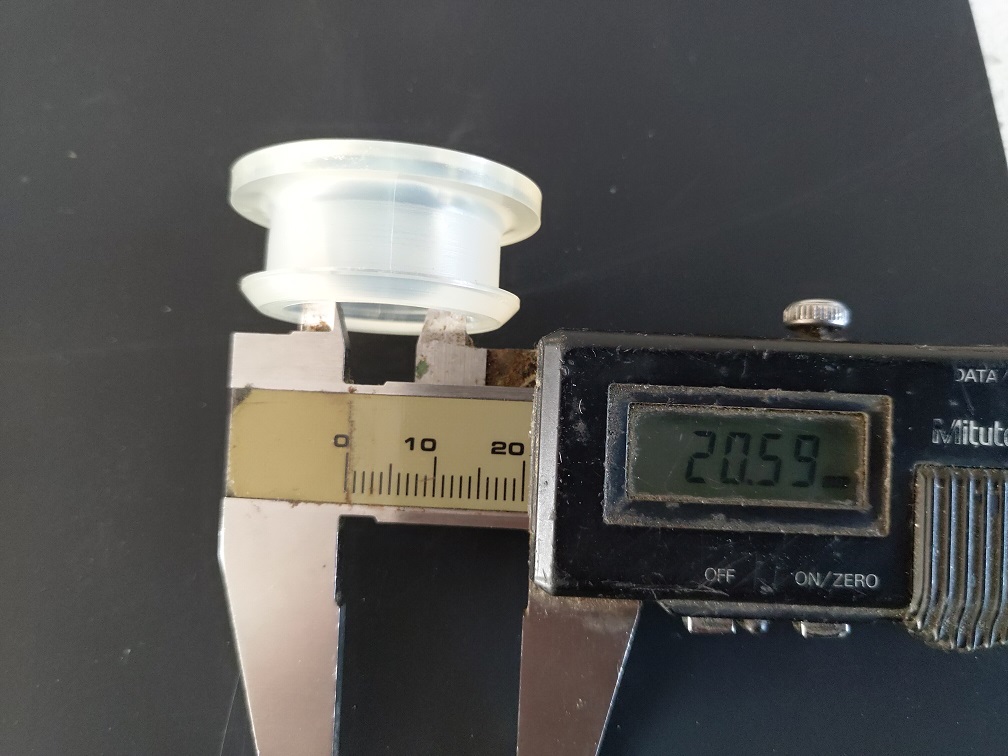 You also need the two new conescrews, pictured as well, since the old ones cannot be reused, they have a locking mechanism that is a one-time use. I was lucky the old conescrews came out easy, probably because in the past someone already looked at the other bushings. When I followed the how-to, it is mentioned: "pull the gear shifter into 3rd, to separate the two sections of the rod.... This should pull the front section out of the firewall and into the center tunnel." But not on my 73 car. I had to unbolt the shifter to get the rod in the tunnel. But before I dropped it into the tunnel, I did this: 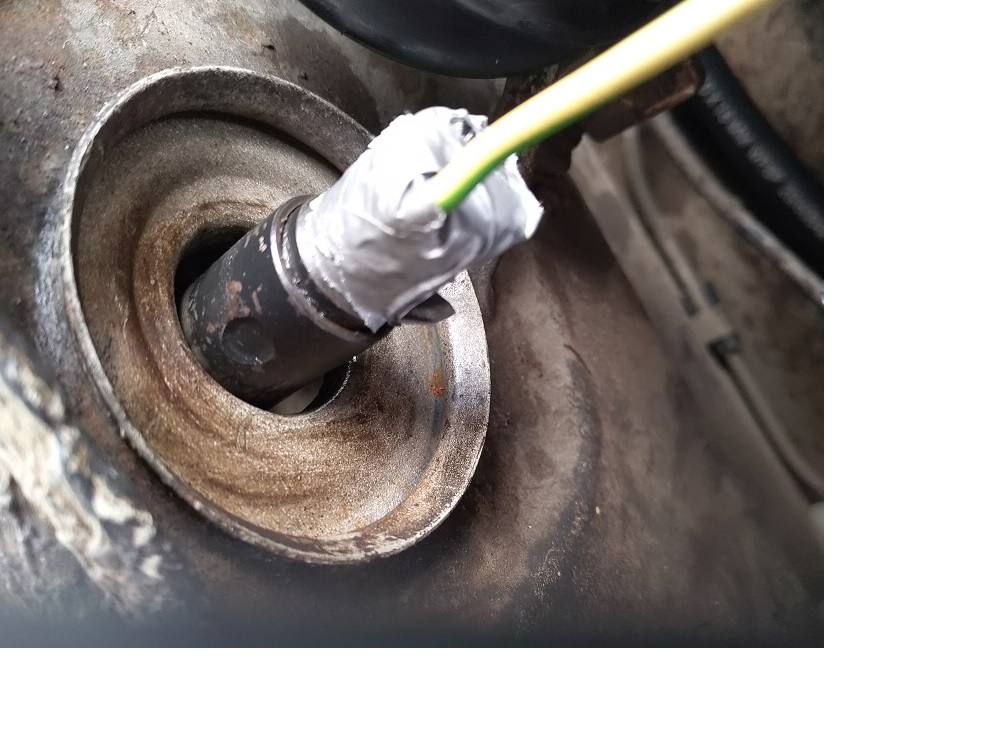 a piece of electrical copperwire, bend it, the bend part in the conescrew hole, ducktape is your friend to hold it.. and then dropped the rod in the tunnel.....and replaced the bushing. Ok, here I have to be honest. I knew for sure that I did not need to boil it, because I am Dutch and we are smart-asses and are the best. Who needs boiling !?? Ok, I have to admit that it is better to listen to the American guy in the how-to in this case. Just boil it, it was super easy after boiling ! Installed it and then looked like: 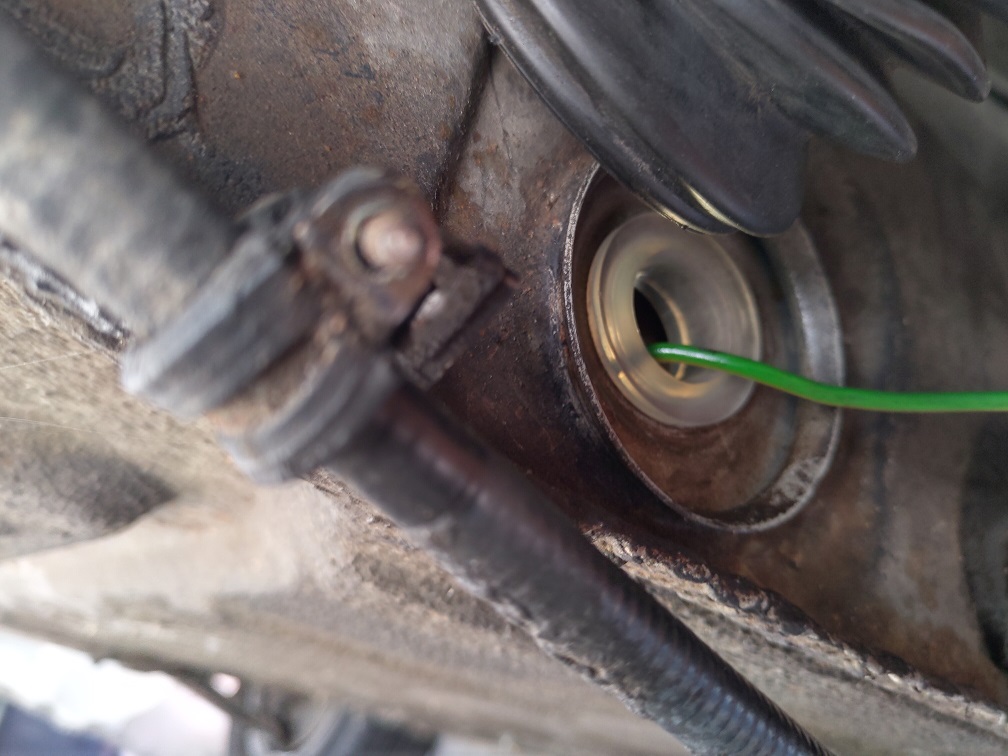 After that just pull the wire and get the rod back through the bushing. 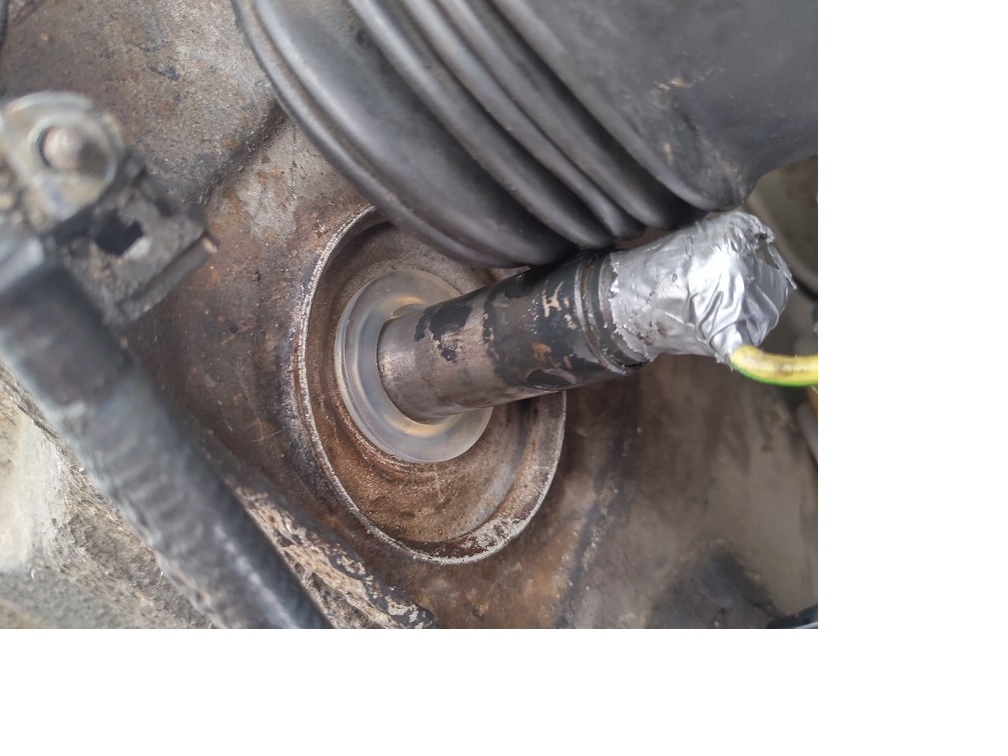 So...no need to call the wife to ask her to select a gear. She will not listen properly, it is another shiftpattern in her own car and you will get a fight. She is also Dutch, remember , so she is also a smartass and the best. So, one man, one hand job, no wife. hey... oh ..never mind. And no fishing is the tunnel for the shiftrod trying to get it through the new bushing ! Remove wire and I have my bushing in place. 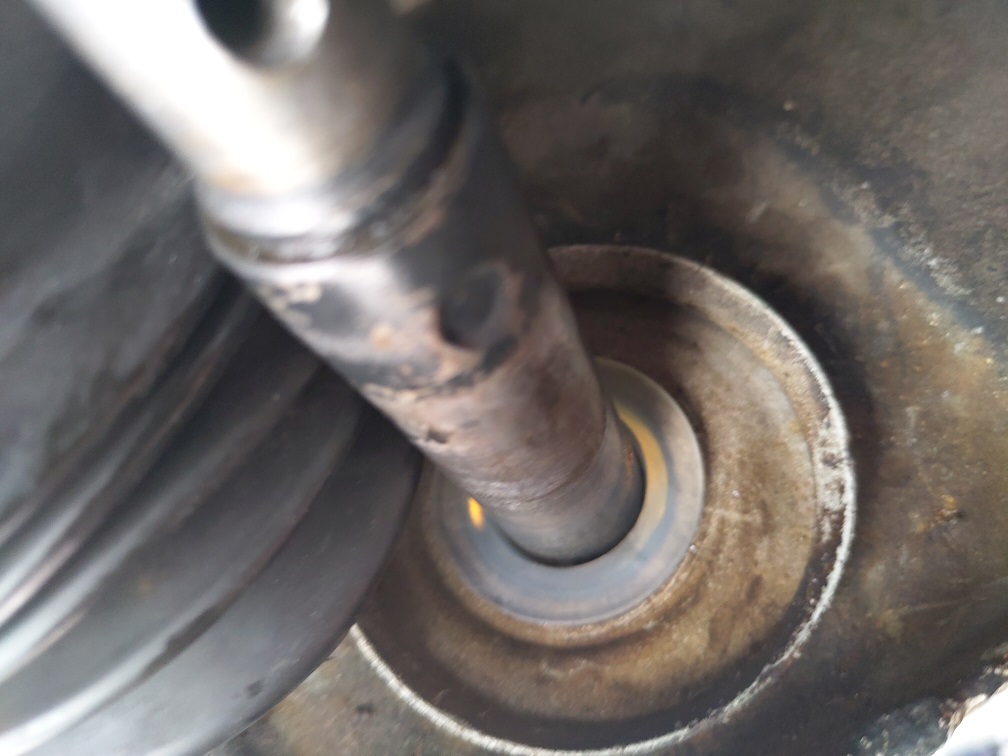 To re-install that rubberboot I was fiddling for a long time. Then I started by hand on top and side and used a pick on lowest part and took me 10 secs. Car is still on jackstands for other work, so no testdrive yet, but I come from no-bushing, and the rod is already tight in there with that new part ! I know it will be an improvement ! Hope this can help as add-on on the already how-to there is ! Again...I will use the banana now....I think I earned it (IMG:style_emoticons/default/piratenanner.gif) |
   |

 
|
Posts in this topic
 Frankvw I changed the firewall bushing.... May 17 2020, 11:33 AM
 falcor75 If you look between the seats there is an access p... May 17 2020, 11:57 AM
 Frankvw
If you look between the seats there is an access ... May 17 2020, 12:02 PM jmalone
If you look between the seats there is an access... May 17 2020, 12:33 PM depair FANTASTIC! THANKS!!! Sep 29 2024, 06:47 AM StarBear Smooth operator. :D Thanks for sharing. Sep 29 2024, 07:01 AM DennisV
So...no need to call the wife to ask her to selec... Sep 29 2024, 07:44 AM brant It’s really recommended to change all of the bus... Sep 29 2024, 10:01 AM Porschef If you want to get the best out of the situation, ... Sep 29 2024, 03:43 PM brant
If you want to get the best out of the situation,... Sep 29 2024, 04:08 PM JamesM
If you want to get the best out of the situation... Sep 29 2024, 05:19 PM jbyron Your post is inspiring me to do my own bushings. t... Sep 30 2024, 09:39 AM
Frankvw
If you look between the seats there is an access ... May 17 2020, 12:02 PM jmalone
If you look between the seats there is an access... May 17 2020, 12:33 PM depair FANTASTIC! THANKS!!! Sep 29 2024, 06:47 AM StarBear Smooth operator. :D Thanks for sharing. Sep 29 2024, 07:01 AM DennisV
So...no need to call the wife to ask her to selec... Sep 29 2024, 07:44 AM brant It’s really recommended to change all of the bus... Sep 29 2024, 10:01 AM Porschef If you want to get the best out of the situation, ... Sep 29 2024, 03:43 PM brant
If you want to get the best out of the situation,... Sep 29 2024, 04:08 PM JamesM
If you want to get the best out of the situation... Sep 29 2024, 05:19 PM jbyron Your post is inspiring me to do my own bushings. t... Sep 30 2024, 09:39 AM  |
1 User(s) are reading this topic (1 Guests and 0 Anonymous Users)
0 Members:

|
Lo-Fi Version | Time is now: 15th May 2026 - 07:52 AM |
Invision Power Board
v9.1.4 © 2026 IPS, Inc.