|
|
|
Porsche, and the Porsche crest are registered trademarks of Dr. Ing. h.c. F. Porsche AG.
This site is not affiliated with Porsche in any way. Its only purpose is to provide an online forum for car enthusiasts. All other trademarks are property of their respective owners. |
|
|


| dereknlee |
 May 24 2020, 11:26 PM May 24 2020, 11:26 PM
Post
#41
|
|
Member  Group: Members Posts: 73 Joined: 16-March 12 From: Shoreline, WA Member No.: 14,259 Region Association: Pacific Northwest |
Inspired by others on this forum, this thread will document the restoration of my 1972 914 1.7.
I bought it in summer of 2008. It was supposed to be my daily driver that I would make minor improvements to while keeping it drivable. There was a memorable couple of weeks where I was using it for my commute in the winter, with no heat (heat ducting/valves removed for paint), and then the ignition switch went out and so I was parking at the top of hills until I got that figured out/fixed. I don't know how 914s got on my radar or what drew me to this car. Le Mans was, and is, one of my favorite movies - so I thought 1970s Porsches were cool. 911s were a bit out of reach, so I guess the 914 was the next closest option. 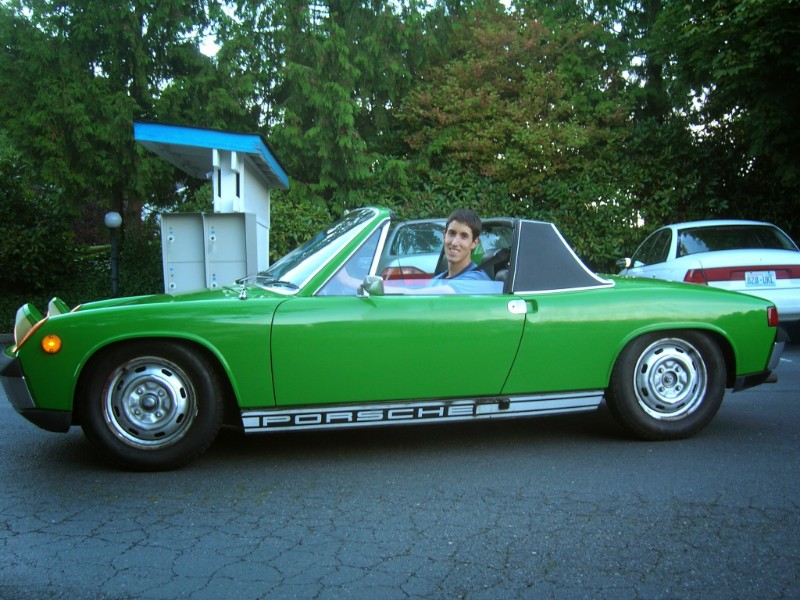  [Side note, cell phone camera technology has come a long way since 2008....and these pictures make me feel old.] 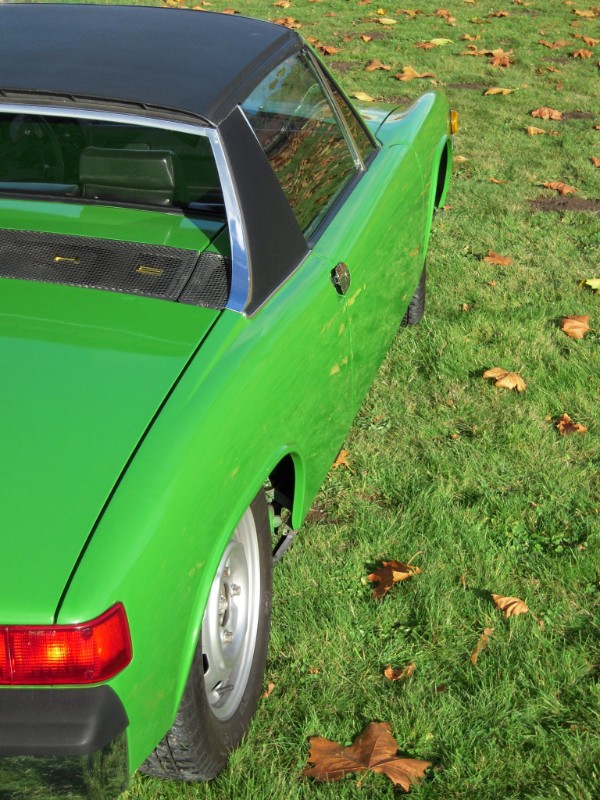 The plan for this car to be a daily driver changed (not so much by choice) when I bought a house in the fall, and upgraded from apartment carport to an actual garage. I set aside a couple weeks to drop the engine and tend to some oil leaks, and of course - discovered rust. The car hasn’t driven since (12 years as of this writing). The worst of the rust was in the hell hole. I bought a MIG welder and did a fair job of patching things up. I also attacked the rust at the driverside jack point and in the rear trunk. 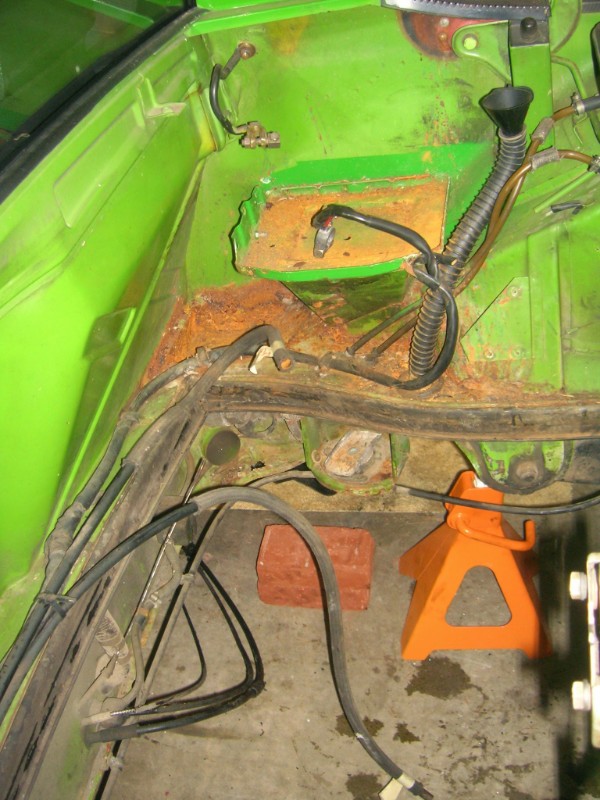 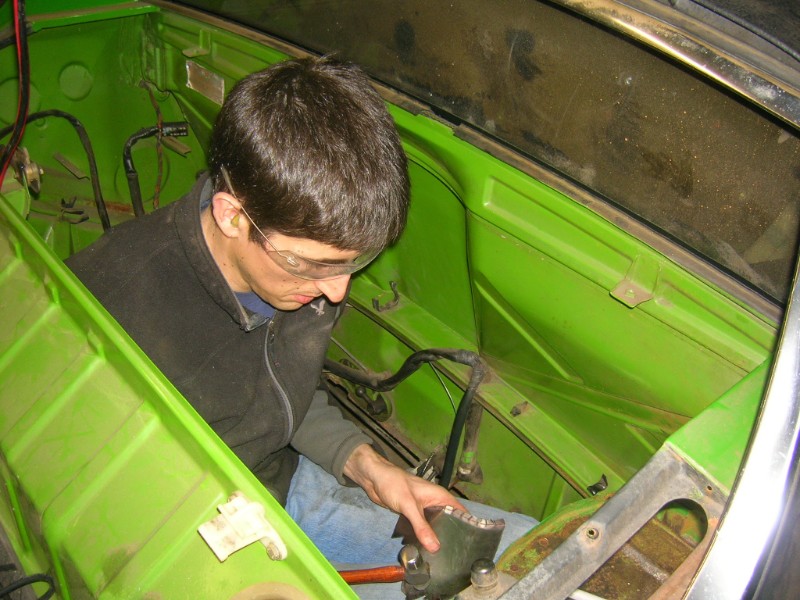 Then the house remodeling got serious. The car sat for four years before I decided I wasn’t going to learn body work and the car deserved better. I hired Eurotech Bodywerkes to finish the rust repair and repaint the car. When I bought it, the car had been re-sprayed (and poorly masked) in a John Deer green. The plan was to go back to the factory color: willow green. Eurotech found more rust in the doors, so it got new doors. They also fit factory sway bars. They fixed miscellaneous rust all over the place, filled dings, re-sealed the seams, installed a new battery tray, stripped the underside, fitted new rocker panel valances, restored the old front and rear valences and then laid down a very pretty paint job. The cabin and front tank bay are the only areas with original paint. 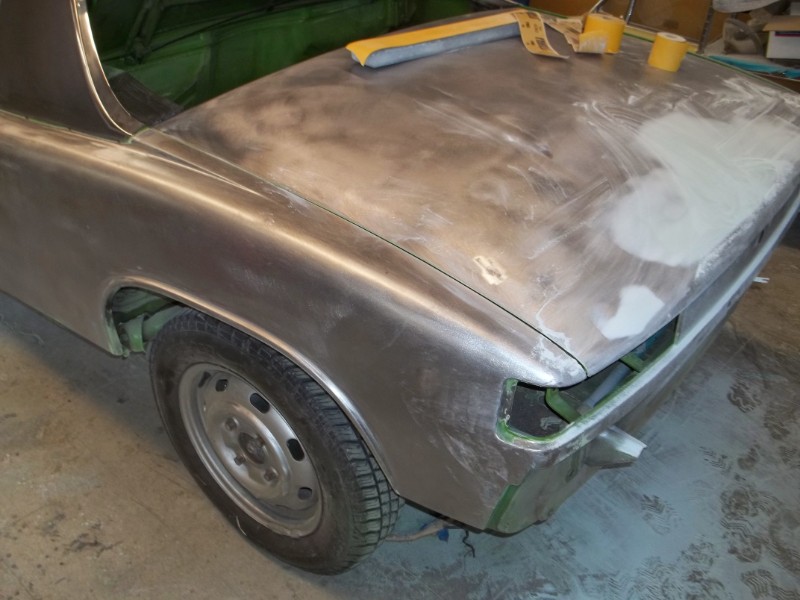 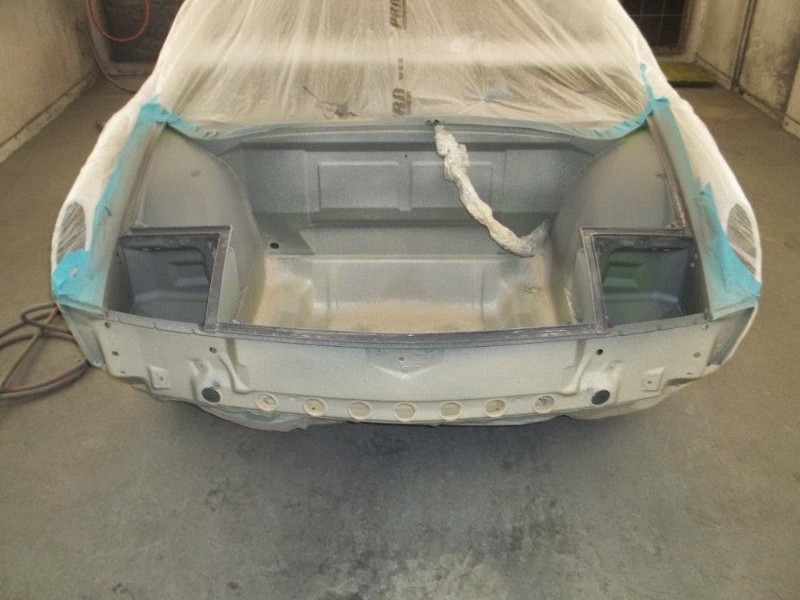 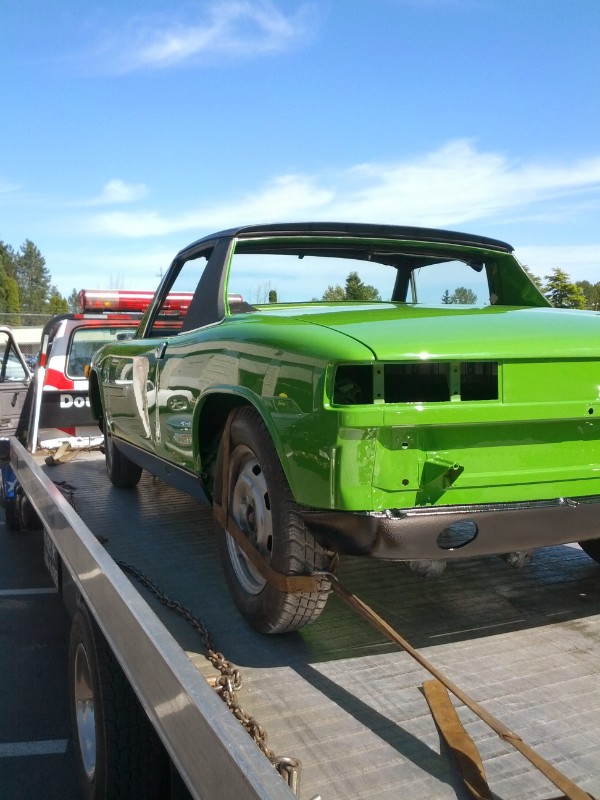 At the same time I had the engine rebuilt by NW connecting rod into a 2ish L displacement (not sure as of this writing whether it is a 1911 or 2056) with a carb cam. The plan was to fit dual Webers (more on that later). I also had the transmission rebuilt to fix a chronic 1st gear grind. And I had some parts re-plated. And then the car sat for six more years while I permitted and built/finished an addition to the house, as well as picked up some sports to occupy my time. Spring forward to Dec 2018, and a freshly separated shoulder from a cycling crash. I started working on the 914 again. Re-sealed the tank (the kits available for this are amazing).  And refurbed the wiring loom in the front trunk: 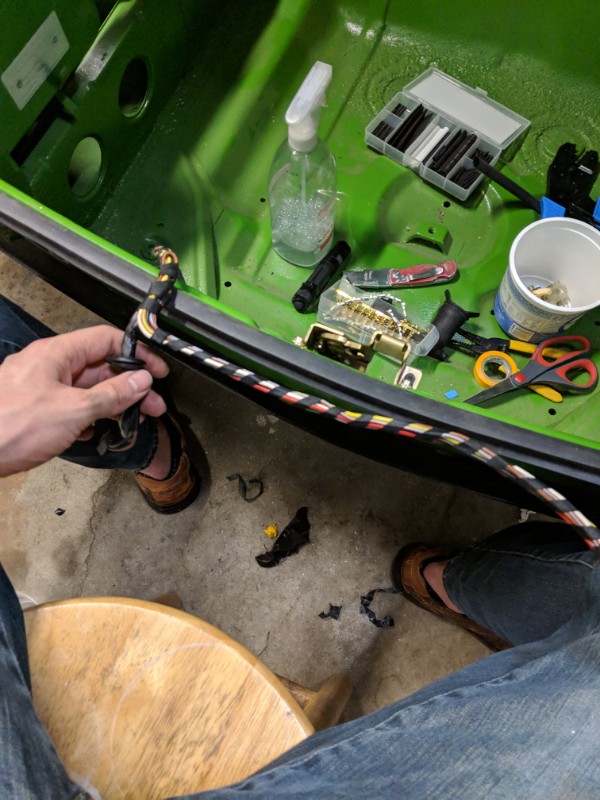 ...before getting side-tracked again by a Vanagon. The Vanagon was a 2018 acquisition that suddenly needed a motor replacement in 2019, following a catastrophic failure that occurred a few days after this picture was taken.  Which brings us to the current covid quarantine times and cancelled vanagon trips. But on the bright side, work has restarted on the 914 again. (IMG:style_emoticons/default/piratenanner.gif) Will this be the final push that sees the car on the road? Track record says no, but only time will tell. 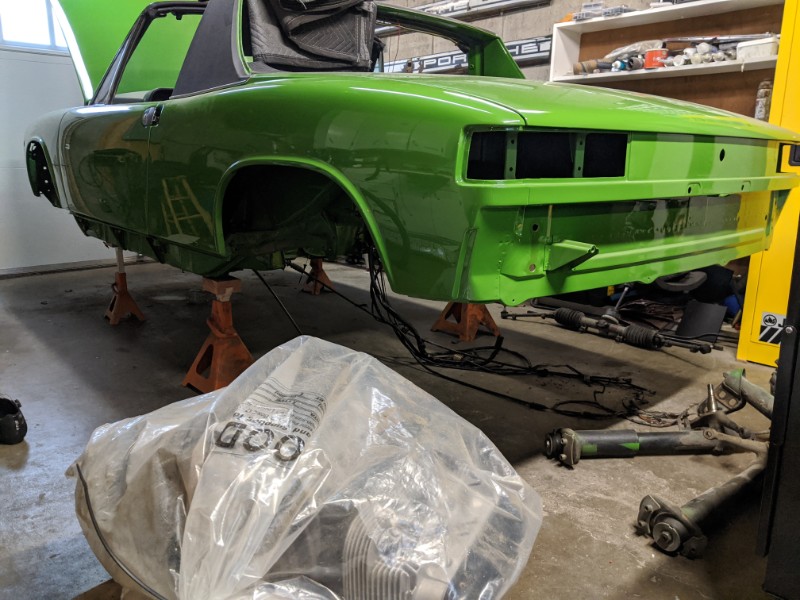 I will add additional posts to document progress. But at the outset I’d like to state my intentions with the project I would like this to be a stock 914 (IMG:style_emoticons/default/prop.gif) - at least outwardly. This presents a dilemma relative to my current 2L engine. I'd like to coax as much performance out of the engine and 1.7 L Djet system as I can. But a new cam is in order to even consider that, and as long as the engine is coming apart then I can re-think heads and displacement - with the aim to go as big as possible without ditching everything for a 2.0 L Djet or going microsquirt. -Derek |
   |

 
|
Posts in this topic
 dereknlee Derek’s Willow Green, ‘72 914 May 24 2020, 11:26 PM
 dereknlee On to recent progress. In March I picked up where... May 24 2020, 11:35 PM dereknlee I have accumulated a batch of parts that need to b... May 24 2020, 11:44 PM Cairo94507 Hi Derek- Wow. Great work and color. You are goi... May 24 2020, 11:58 PM wysri9 Great story which many of us can relate to......lo... May 25 2020, 02:49 AM
 luft
Great story which many of us can relate to......l... May 25 2020, 04:59 AM Big Len Following...... May 25 2020, 06:05 AM gereed75 Nice thread. Nice work. Nice car
Git er done... May 25 2020, 07:15 AM tygaboy Nice work. Your car looks great!
Curious: whic... May 25 2020, 07:16 AM dereknlee Thanks all for the encouragement! :beer2: ... May 25 2020, 08:27 AM dereknlee Today I disassembled the other rear axle and degre... May 25 2020, 07:46 PM bkrantz Keep up the momentum, Derek! May 25 2020, 08:01 PM billh1963 Great work! Looking forward to seeing more pro... May 26 2020, 06:17 AM jaredmcginness Awesome work and thread. The fresh willow paint lo... May 26 2020, 06:43 AM dereknlee
Awesome work and thread. The fresh willow paint l... May 26 2020, 07:23 AM VaccaRabite When I finally get around to installing my flares ... May 26 2020, 08:02 AM gereed75 Do what Mark said at the end of the other thread. ... May 26 2020, 08:15 AM rjames Hey, I also live in Shoreline. Curious where you... May 26 2020, 10:16 AM mbseto Nice work! Watching with interest... May 26 2020, 01:44 PM dereknlee
When I finally get around to installing my flares... May 26 2020, 05:58 PM flat4guy Owning a Willow Green 914 as well I am enjoying th... May 26 2020, 08:53 PM djway Car is looking good.
When I was looking into cams ... May 26 2020, 10:28 PM dereknlee Thanks guys. :beer2: When I spoke with Webcam ... May 26 2020, 10:42 PM bbrock Hi Derek, I am loving your thread! Thanks for... May 27 2020, 08:17 AM dereknlee Bit of a frustrating weekend, so I needed an easy ... Jun 1 2020, 10:47 PM bbrock I wish I had space to spread my setup out a little... Jun 2 2020, 07:59 AM Chris H. Looking great so far! Of all the great 914 co... Jun 2 2020, 09:21 AM dereknlee
Looking great so far! Of all the great 914 c... Jun 2 2020, 07:12 PM dereknlee @bbrock Thank you for the advice! That give... Jun 2 2020, 07:12 PM bbrock
@[url=http://www.914world.com/bbs2/index.php?show... Jun 2 2020, 09:52 PM doug_b_928 As Brent said I've used both epsom salt/vinega... Jun 3 2020, 05:02 PM dereknlee I may have to give caswell a try. I am happy with... Jun 3 2020, 10:43 PM dereknlee Continued with the chromate bath development this ... Jun 4 2020, 10:37 PM Spoke Car looks great. Nice chemistry set too. Jun 4 2020, 10:47 PM dereknlee Plating update, and some actual car progress later... Jun 7 2020, 08:56 PM ben*james Derek -
Great thread. Nice to see all the work an... Jun 7 2020, 09:17 PM bbrock Nice work overall and great progress on the platin... Jun 7 2020, 09:46 PM dereknlee Thanks Ben! Your car is :drooley:
Brent,
... Jun 7 2020, 10:09 PM PanelBilly Everything looks so good. Don't worry if the c... Jun 7 2020, 10:11 PM dereknlee
Everything looks so good. Don't worry if the ... Jun 7 2020, 10:46 PM dereknlee Installed new control arm bushings. The last one ... Jun 9 2020, 09:59 PM kroelofsen Nice work, did it myself a few weeks ago. Now read... Jun 10 2020, 12:41 AM dereknlee Got the rear bearings installed, and then spent so... Jun 10 2020, 10:16 PM bbrock
I wonder what the factory worker who slapped on t... Jun 11 2020, 08:24 AM JamesM
Love it! From a fellow :screwy:
Here is ... Jun 14 2020, 02:34 AM bbrock
Love it! From a fellow :screwy:
Here is... Jun 14 2020, 11:16 AM dereknlee Looks good Brent! I assume these were some so... Jun 13 2020, 10:45 PM dereknlee Whoever wielded the K stamp worked on a lot of car... Jun 14 2020, 08:05 PM flat4guy Love reading your thread - makes me feel lazy with... Jun 14 2020, 08:53 PM dereknlee
Love reading your thread - makes me feel lazy wit... Jun 14 2020, 10:25 PM dereknlee Been a busy few years, but sadly not on the 914. ... Feb 25 2024, 09:23 PM dereknlee Don't recall what specifically stalled out pro... Nov 27 2024, 10:41 PM dereknlee Front suspension and brakes are done.
On to the... Dec 8 2024, 09:49 PM dereknlee So since December I have made progress on a few fr... Jan 30 2025, 11:52 PM jd74914 Clever use of a headset press! Jan 31 2025, 08:52 AM Cairo94507 Excellent work Derek. :beer2: Jan 31 2025, 08:55 AM dereknlee Rear wire bundle is re-taped and routed back throu... Feb 2 2025, 11:36 PM Dion Nice to see you back at it. Looks great. Feb 3 2025, 07:28 AM dereknlee Few weeks of progress update:
After collecting th... Mar 5 2025, 10:10 PM Cairo94507 Coming along nicely. :beer2: Mar 6 2025, 09:53 AM friethmiller :popcorn: Mar 6 2025, 09:57 AM dereknlee Couple months of slow progress:
- I re-assembled t... Apr 26 2025, 06:36 AM rick 918-S Damn! :drooley: Apr 26 2025, 07:54 AM slowrodent very very nice job! now take some time and e... Apr 26 2025, 08:04 AM
luft
Great story which many of us can relate to......l... May 25 2020, 04:59 AM Big Len Following...... May 25 2020, 06:05 AM gereed75 Nice thread. Nice work. Nice car
Git er done... May 25 2020, 07:15 AM tygaboy Nice work. Your car looks great!
Curious: whic... May 25 2020, 07:16 AM dereknlee Thanks all for the encouragement! :beer2: ... May 25 2020, 08:27 AM dereknlee Today I disassembled the other rear axle and degre... May 25 2020, 07:46 PM bkrantz Keep up the momentum, Derek! May 25 2020, 08:01 PM billh1963 Great work! Looking forward to seeing more pro... May 26 2020, 06:17 AM jaredmcginness Awesome work and thread. The fresh willow paint lo... May 26 2020, 06:43 AM dereknlee
Awesome work and thread. The fresh willow paint l... May 26 2020, 07:23 AM VaccaRabite When I finally get around to installing my flares ... May 26 2020, 08:02 AM gereed75 Do what Mark said at the end of the other thread. ... May 26 2020, 08:15 AM rjames Hey, I also live in Shoreline. Curious where you... May 26 2020, 10:16 AM mbseto Nice work! Watching with interest... May 26 2020, 01:44 PM dereknlee
When I finally get around to installing my flares... May 26 2020, 05:58 PM flat4guy Owning a Willow Green 914 as well I am enjoying th... May 26 2020, 08:53 PM djway Car is looking good.
When I was looking into cams ... May 26 2020, 10:28 PM dereknlee Thanks guys. :beer2: When I spoke with Webcam ... May 26 2020, 10:42 PM bbrock Hi Derek, I am loving your thread! Thanks for... May 27 2020, 08:17 AM dereknlee Bit of a frustrating weekend, so I needed an easy ... Jun 1 2020, 10:47 PM bbrock I wish I had space to spread my setup out a little... Jun 2 2020, 07:59 AM Chris H. Looking great so far! Of all the great 914 co... Jun 2 2020, 09:21 AM dereknlee
Looking great so far! Of all the great 914 c... Jun 2 2020, 07:12 PM dereknlee @bbrock Thank you for the advice! That give... Jun 2 2020, 07:12 PM bbrock
@[url=http://www.914world.com/bbs2/index.php?show... Jun 2 2020, 09:52 PM doug_b_928 As Brent said I've used both epsom salt/vinega... Jun 3 2020, 05:02 PM dereknlee I may have to give caswell a try. I am happy with... Jun 3 2020, 10:43 PM dereknlee Continued with the chromate bath development this ... Jun 4 2020, 10:37 PM Spoke Car looks great. Nice chemistry set too. Jun 4 2020, 10:47 PM dereknlee Plating update, and some actual car progress later... Jun 7 2020, 08:56 PM ben*james Derek -
Great thread. Nice to see all the work an... Jun 7 2020, 09:17 PM bbrock Nice work overall and great progress on the platin... Jun 7 2020, 09:46 PM dereknlee Thanks Ben! Your car is :drooley:
Brent,
... Jun 7 2020, 10:09 PM PanelBilly Everything looks so good. Don't worry if the c... Jun 7 2020, 10:11 PM dereknlee
Everything looks so good. Don't worry if the ... Jun 7 2020, 10:46 PM dereknlee Installed new control arm bushings. The last one ... Jun 9 2020, 09:59 PM kroelofsen Nice work, did it myself a few weeks ago. Now read... Jun 10 2020, 12:41 AM dereknlee Got the rear bearings installed, and then spent so... Jun 10 2020, 10:16 PM bbrock
I wonder what the factory worker who slapped on t... Jun 11 2020, 08:24 AM JamesM
Love it! From a fellow :screwy:
Here is ... Jun 14 2020, 02:34 AM bbrock
Love it! From a fellow :screwy:
Here is... Jun 14 2020, 11:16 AM dereknlee Looks good Brent! I assume these were some so... Jun 13 2020, 10:45 PM dereknlee Whoever wielded the K stamp worked on a lot of car... Jun 14 2020, 08:05 PM flat4guy Love reading your thread - makes me feel lazy with... Jun 14 2020, 08:53 PM dereknlee
Love reading your thread - makes me feel lazy wit... Jun 14 2020, 10:25 PM dereknlee Been a busy few years, but sadly not on the 914. ... Feb 25 2024, 09:23 PM dereknlee Don't recall what specifically stalled out pro... Nov 27 2024, 10:41 PM dereknlee Front suspension and brakes are done.
On to the... Dec 8 2024, 09:49 PM dereknlee So since December I have made progress on a few fr... Jan 30 2025, 11:52 PM jd74914 Clever use of a headset press! Jan 31 2025, 08:52 AM Cairo94507 Excellent work Derek. :beer2: Jan 31 2025, 08:55 AM dereknlee Rear wire bundle is re-taped and routed back throu... Feb 2 2025, 11:36 PM Dion Nice to see you back at it. Looks great. Feb 3 2025, 07:28 AM dereknlee Few weeks of progress update:
After collecting th... Mar 5 2025, 10:10 PM Cairo94507 Coming along nicely. :beer2: Mar 6 2025, 09:53 AM friethmiller :popcorn: Mar 6 2025, 09:57 AM dereknlee Couple months of slow progress:
- I re-assembled t... Apr 26 2025, 06:36 AM rick 918-S Damn! :drooley: Apr 26 2025, 07:54 AM slowrodent very very nice job! now take some time and e... Apr 26 2025, 08:04 AM  |
1 User(s) are reading this topic (1 Guests and 0 Anonymous Users)
0 Members:

|
Lo-Fi Version | Time is now: 15th June 2026 - 02:53 AM |
Invision Power Board
v9.1.4 © 2026 IPS, Inc.