|
|
|
Porsche, and the Porsche crest are registered trademarks of Dr. Ing. h.c. F. Porsche AG.
This site is not affiliated with Porsche in any way. Its only purpose is to provide an online forum for car enthusiasts. All other trademarks are property of their respective owners. |
|
|

  |

| Curbandgutter |
 Mar 16 2021, 11:36 AM Mar 16 2021, 11:36 AM
Post
#61
|
|
Senior Member  Group: Members Posts: 566 Joined: 8-March 13 From: Murrieta CA Member No.: 15,637 Region Association: Southern California |
QUOTE(Curbandgutter @ Mar 16 2021, 10:32 AM)  Hey Chris great work! (IMG:style_emoticons/default/pray.gif) (IMG:style_emoticons/default/pray.gif) There's alot of thinking that went into that seemingly simple looking piece. Couple of questions ( well 3 1/2 actually): 1) Did you do the stretching and shrinking before or after opening the hole for the gauges? 2) what procedure did you use to flange the inside of the gauges? Did you use a huge dimple die? 3) did you use the tipping die to get the flange along the perimeter of the guage cluster? (3-1/2) If so, how did you deal with the distortion? I asking since I was planning on doing my gauge cluster out of aluminum but for the Getty dash? Thanks in advance. Never mind on questions 2, 3 and 3 1/2. I just noticed that I was looking at the back side of the factory piece. |
   |

 
|
| tygaboy |
Mar 16 2021, 06:30 PM
Post
#62
|
|
914 Guru Group: Members Posts: 5,802 Joined: 6-October 15 From: Petaluma, CA Member No.: 19,241 Region Association: Northern California |
QUOTE(Curbandgutter @ Mar 16 2021, 10:36 AM) QUOTE(Curbandgutter @ Mar 16 2021, 10:32 AM) Hey Chris great work! (IMG:style_emoticons/default/pray.gif) (IMG:style_emoticons/default/pray.gif) There's alot of thinking that went into that seemingly simple looking piece. Couple of questions ( well 3 1/2 actually): 1) Did you do the stretching and shrinking before or after opening the hole for the gauges? 2) what procedure did you use to flange the inside of the gauges? Did you use a huge dimple die? 3) did you use the tipping die to get the flange along the perimeter of the guage cluster? (3-1/2) If so, how did you deal with the distortion? I asking since I was planning on doing my gauge cluster out of aluminum but for the Getty dash? Thanks in advance. Never mind on questions 2, 3 and 3 1/2. I just noticed that I was looking at the back side of the factory piece. @Curbandgutter Rudy, I do all the hole cutting, then bend the flange along the lower edge, then stamp, then shrink/stretch the flange as needed. |
|
|
|
| tygaboy |
Mar 16 2021, 06:37 PM
Post
#63
|
|
914 Guru Group: Members Posts: 5,802 Joined: 6-October 15 From: Petaluma, CA Member No.: 19,241 Region Association: Northern California |
NOTE TO ALL PARTIES interested in one of these panels:
Apologies, guys. I let this effort get put on a back burner. My 914 build, helping on a buddy's race car, and now my own RacerBenz build, have sucked me in pretty deep. Not trying to make excuses, just telling you what's up. It seems there's a lot of interest so give me a bit and I'll do a run of these. I'll fill the requests in order your replies were posted. I can't promise everyone will get one, let's see how my time plays out. Thanks in advance for understanding. Chris |
|
|
|
| GregAmy |
Mar 16 2021, 08:09 PM
Post
#64
|
|
Advanced Member Group: Members Posts: 2,650 Joined: 22-February 13 From: Middletown CT Member No.: 15,565 Region Association: North East States |
What are you kids doing for turn signal and high beam indicators with these tachs? Just dropping an LED somewhere in the panel? Just going without?
|
|
|
|
| Chris H. |
Mar 16 2021, 08:57 PM
Post
#65
|
|
Senior Member Group: Members Posts: 4,079 Joined: 2-January 03 From: Chicago 'burbs Member No.: 73 Region Association: Upper MidWest |
Hey Greg,
The Speedhut speedo has turn signals and high beam indicators in it. |
|
|
|
| GregAmy |
Mar 17 2021, 07:43 AM
Post
#66
|
|
Advanced Member Group: Members Posts: 2,650 Joined: 22-February 13 From: Middletown CT Member No.: 15,565 Region Association: North East States |
QUOTE(Chris H. @ Mar 16 2021, 09:57 PM) The Speedhut speedo has turn signals and high beam indicators in it. Ah, OK. I'm just doing the tach (stock panel). I'll drill in some small LEDs. |
|
|
|
| GregAmy |
May 20 2021, 03:27 PM
Post
#67
|
|
Advanced Member Group: Members Posts: 2,650 Joined: 22-February 13 From: Middletown CT Member No.: 15,565 Region Association: North East States |
Quick follow up.
I bought some LEDs off eBay and made my own warnings after replacing the tach with a Speedhut. - Red - oil pressure (I have no idea why Porsche decided to use GREEN for oil pressure) - Yellow - GEN failure - Blue - Brights - Green - turn signals https://www.amazon.com/gp/product/B01AHQJ06G Works great. I may do a Speedhut speedometer, but not really wanting to spend that coin right now... 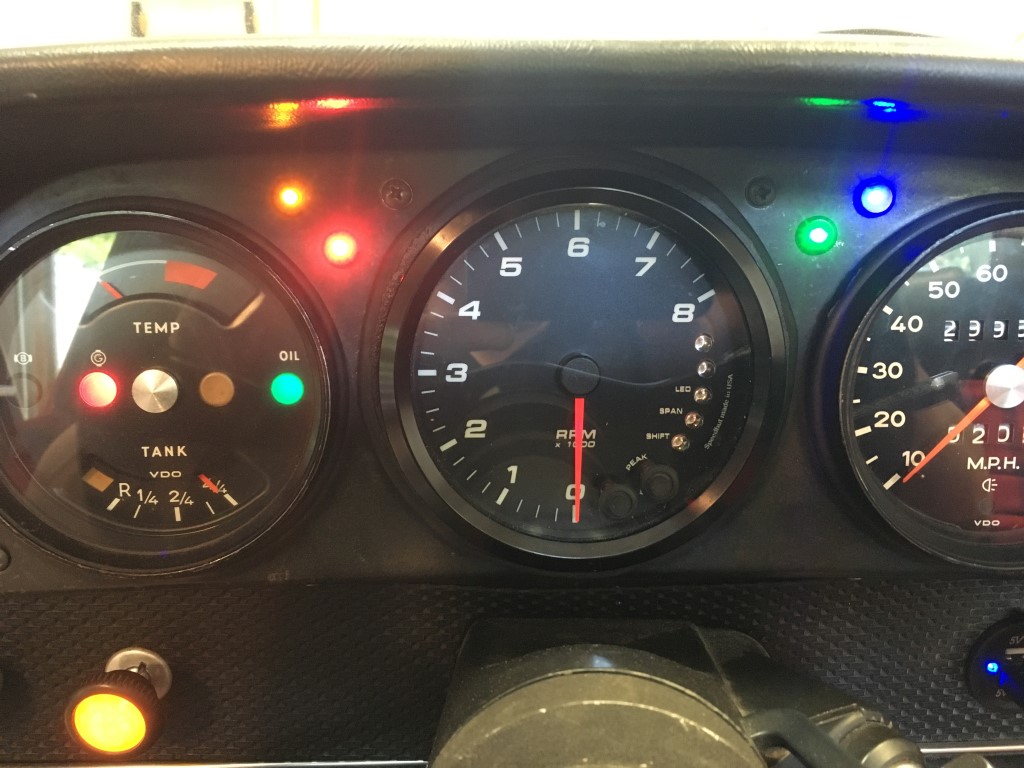 |
|
|
|
| AZBanks |
May 20 2021, 06:19 PM
Post
#68
|
|
Senior Member Group: Members Posts: 1,079 Joined: 7-December 05 From: New River, AZ Member No.: 5,245 Region Association: Southwest Region |
I'll take 2 if you get time to make them. Aluminum is my preference but I'd be happy with steel if that's what you have available.
|
|
|
|
| tygaboy |
Jun 6 2021, 05:13 PM
Post
#69
|
|
914 Guru Group: Members Posts: 5,802 Joined: 6-October 15 From: Petaluma, CA Member No.: 19,241 Region Association: Northern California |
While I had the plasma table fired up to make a new gauge panel for the Holley digital dash, I figured I may as well make as many of the SpeedHut panels as the material would support.
Six will be available. Three have the hole for the dimmer, three don't. I figured some folks may not want to mount the dimmer in the dash, others would. One has a flaw (a gack in the edge, pointed out in the pic) on what will be the tipped flange. This flaw can't be see once installed but I'll knock off $10 for that one. Anyway... If you're still interested, I should have these ready to go in a week or so. - these are .063 3003 aluminum - they will not be painted - they do not have the raised stamping for the dimmer - they are set up for a 4.5" center gauge, 4" outer gauges $35 plus shipping from 94952. Yes, I'd said $20 earlier but that was a year ago and I was being too generous with my time and consumables. Just be thankful I'm not making them out of wood. (IMG:style_emoticons/default/lol-2.gif) Let me know if you're interested. I'll probably make more once I get more material. Thanks again for your patience. Chris Attached thumbnail(s) 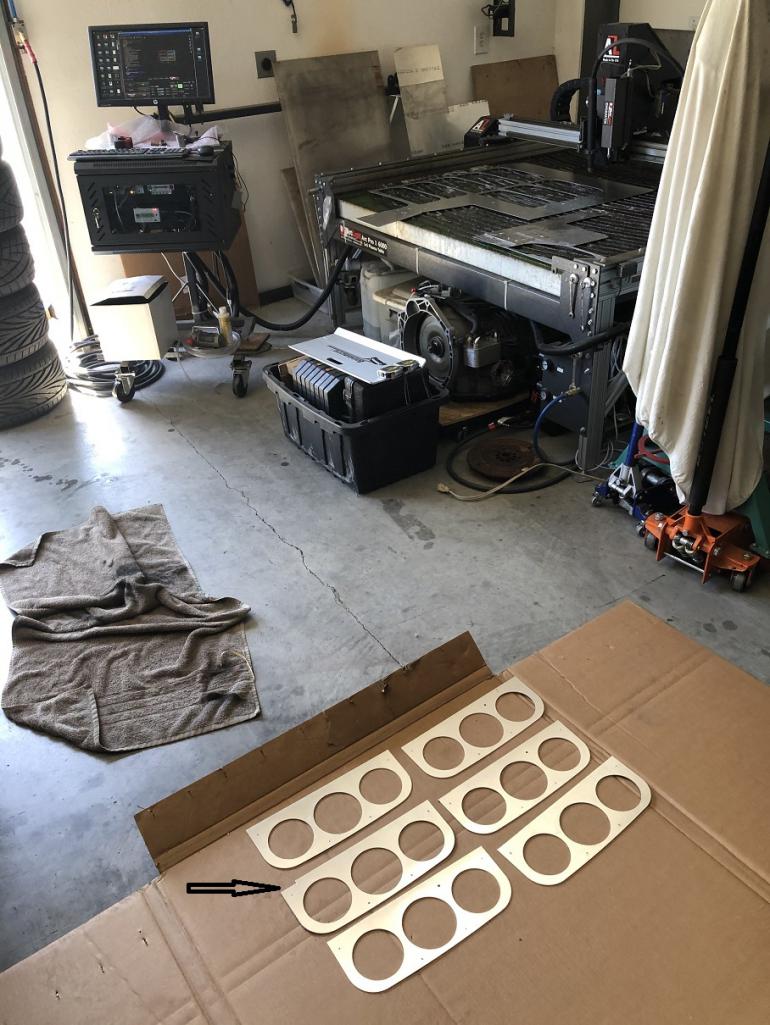
|
|
|
|
| Chris H. |
Jun 7 2021, 12:28 PM
Post
#70
|
|
Senior Member Group: Members Posts: 4,079 Joined: 2-January 03 From: Chicago 'burbs Member No.: 73 Region Association: Upper MidWest |
Well worth $35. Chris was kind enough to send me one of his prototypes. The gauges fit PERFECTLY. Not a mm of play. It looks stock and you can paint it any color you want. I hogged out the dimmer hole and made it my brake warning light. If you have speedhut gauges and don’t have the ability to make one of these you may want to act quickly!
 |
|
|
|
| Alain V. |
Jun 7 2021, 06:09 PM
Post
#71
|
|
Member Group: Members Posts: 199 Joined: 15-March 13 From: Kansas Member No.: 15,655 Region Association: None |
I'll take one. will send a pm
|
|
|
|
| tygaboy |
Jun 18 2021, 05:52 PM
Post
#72
|
|
914 Guru Group: Members Posts: 5,802 Joined: 6-October 15 From: Petaluma, CA Member No.: 19,241 Region Association: Northern California |
When you're a tool whore like me, you look for any reason/excuse for more shop goodies!
Since I'm making a few of these gauge panels for others, I simply couldn't deliver them without duplicating the stock panel's screw dimples. So I treated myself to a Tatco hand squeezer with a rivet and dimple die set. 1. Drill an appropriate hole 2. Select the desired die 3. Position the die in the hole (orientation matters!) 4. SQUEEZE! A dimple is created and the factory fastener sits just like we'd want it to. It's the little details like this that I really like. It's great having the right tool for the job and now that I have it, I'll wrap up the gauge panels for those who've asked for one. Attached thumbnail(s) 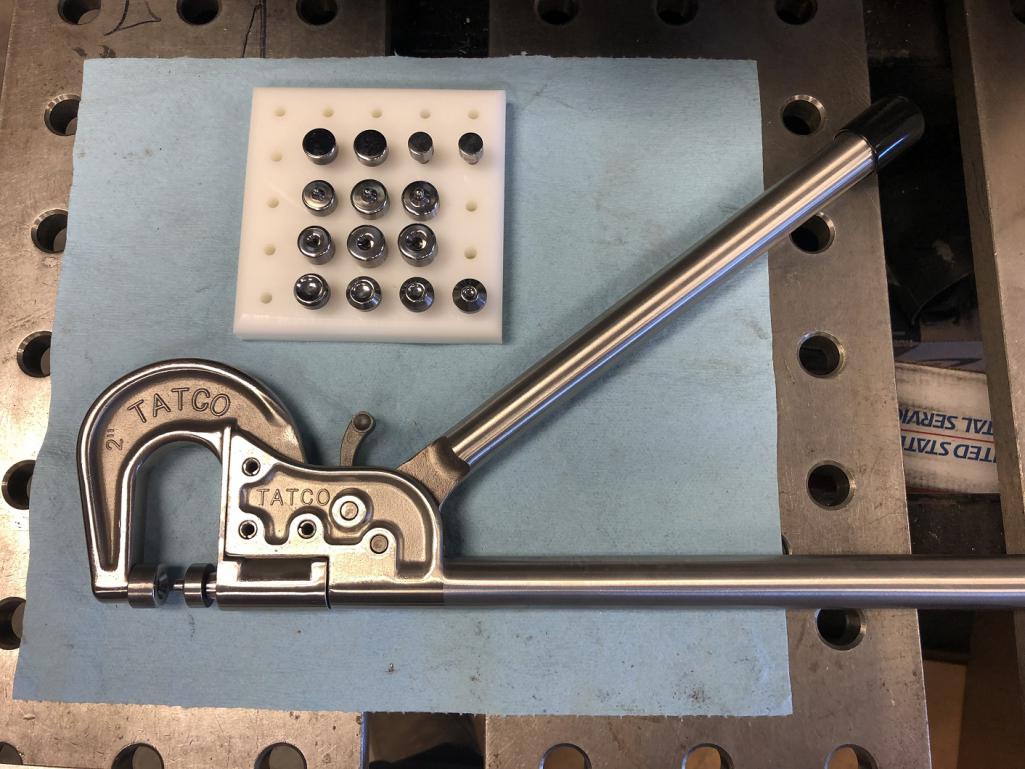 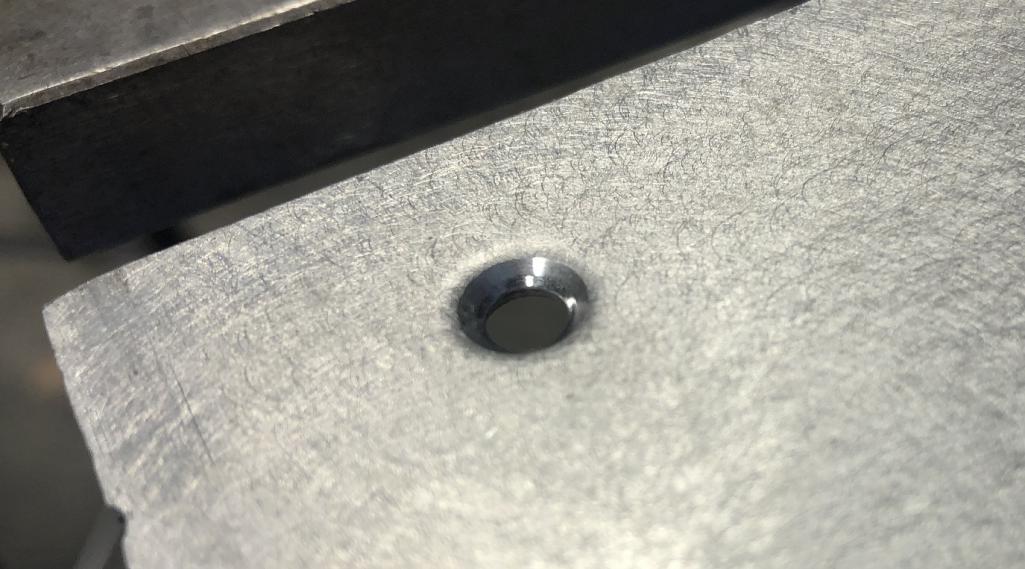 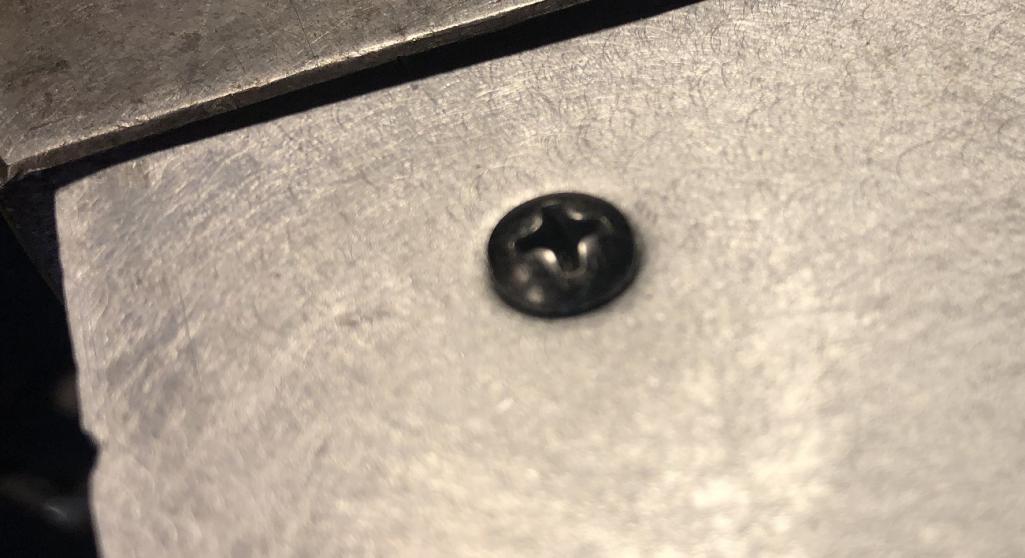
|
|
|
|
| FL000 |
Jun 19 2021, 11:37 AM
Post
#73
|
|
Member Group: Members Posts: 479 Joined: 31-January 12 From: Lancaster, CA Member No.: 14,076 Region Association: Southern California |
If any of these are still available I will gladly take one.
|
|
|
|
| 808 WRX |
Jun 19 2021, 02:19 PM
Post
#74
|
|
Member Group: Members Posts: 61 Joined: 4-June 20 From: San Jose, CA Member No.: 24,349 Region Association: Northern California |
Hi Chris,
I'd like one of these too, if there are any left (preferably without the dimmer hole). |
|
|
|
| Jack Standz |
Jun 19 2021, 02:51 PM
Post
#75
|
|
Senior Member Group: Members Posts: 740 Joined: 15-November 19 From: Happy Place (& surrounding area) Member No.: 23,644 Region Association: None |
Chris, I still want one - with a dimmer hole.
Thanks again! |
|
|
|
| tygaboy |
Jun 19 2021, 05:08 PM
Post
#76
|
|
914 Guru Group: Members Posts: 5,802 Joined: 6-October 15 From: Petaluma, CA Member No.: 19,241 Region Association: Northern California |
QUOTE(808 WRX @ Jun 19 2021, 01:19 PM) Hi Chris, I'd like one of these too, if there are any left (preferably without the dimmer hole). @808 WRX Efren - We can finish up a "no hole" panel when you come to pick up the wheel. Better yet, YOU can add the dimples to yours! |
|
|
|
| pdlightning |
Jun 19 2021, 08:54 PM
Post
#77
|
|
Pdlightning Group: Members Posts: 211 Joined: 4-February 11 From: Santa Clarita Member No.: 12,660 Region Association: Southern California |
QUOTE(tygaboy @ Jun 11 2020, 01:15 PM) EDIT on 6/6/2021 I made 6 SpeedHut gauge panels today. See my post on page 4 of this thread for a "fresh off the plasma table" pic. If you're still interested, I should have these ready to go in a week or so. - these are .063 3003 aluminum - they will not be painted - they do not have the raised stamping for the dimmer - they are set up for a 4.5" center gauge, 4" outer gauges - 3 have holes for the dimmer, 3 don't $35 plus shipping from 94952. Yes, I'd said $20 earlier but that was a year ago and I was being too generous with my time and consumables. Just be thankful I'm not making them out of wood. (IMG:style_emoticons/default/laugh.gif) Let me know if you're interested. I'll probably make more once I get more material. Thanks again for your patience. Chris EDIT on 6/24/20: To the interested parties who've already contacted me or posted here to date: The plasma table is back in action so now I'm tuning the design. See my post from today (6/24) for the latest updates re: what's new and what I still have to do. _______________ As to price, it'll be the same thing I try and pull off whenever I do stuff for friends: Cost of materials and consumables and you buy me a coffee if we ever meet. I'm thinking $20 plus shipping. Thanks for your patience. Chris _____________ For those using or contemplating SpeedHut gauges, you'll find they are just a bit undersized compared to the stock gauges and require some sort of wrapping or spacer in order to fit well in the stock panel. I opted to give a go to working up a replacement panel and as I was making it, I thought, while I'm cutting one, I could cut a few more, if there was interest. This is V1 and it needs a couple minor tweaks, but you get the idea. Note that it has a 90 degree fold along the bottom edge that I'll stretch so the panel curves a bit, like the factory part. This one is .060 aluminum but I could do steel, too. Would anyone be interested in one? PM me, thanks, Chris Greetings and Thank you Chris. I am one of the lucky ones who want one with the hole. Post your Paypay account and I will gladly send you BIG dollars for mine. We appreciate your great work! Thanks, Mike CC PM |
|
|
|
| 808 WRX |
Jun 19 2021, 11:51 PM
Post
#78
|
|
Member Group: Members Posts: 61 Joined: 4-June 20 From: San Jose, CA Member No.: 24,349 Region Association: Northern California |
QUOTE(tygaboy @ Jun 19 2021, 04:08 PM) 808 WRX Efren - We can finish up a "no hole" panel when you come to pick up the wheel. Better yet, YOU can add the dimples to yours! Even better! That sounds like fun (IMG:style_emoticons/default/happy11.gif) |
|
|
|
| tygaboy |
Jun 20 2021, 04:26 PM
Post
#79
|
|
914 Guru Group: Members Posts: 5,802 Joined: 6-October 15 From: Petaluma, CA Member No.: 19,241 Region Association: Northern California |
Panels are ready to ship and I'll be contacting the interested parties to get shipping info.
The final update, and please check the pics, is: - the panel front is sanded w/80 grit on an orbital and is essentially ready to install as is, or paint - the panel rear surface has just been tidied up a bit - each panel has through the stretcher and fully mounted to verify fit to a stock dash - these panels DO NOT have holes for those two "under side" mounting screws - for those who are getting a "with hole" for your dimmer knob, I've included a flatted washer that you'll need to slip over the dimmer shaft before installing it in the panel. As I mentioned earlier, it's the little things! NOTE: When fitting your gauges, you may find you have to "screw" the gauge into the hole. Once it's in past the threads on the gauge body, there's a little bit of movement within the hole. I like to position the gauge so it's "resting" on the bottom, then tighten up the mounting ring. Once you receive your panel, if you have any questions or issues, just contact me and we'll work it out. Finally, if you would, please post up some pics, once you get your gauges installed. Thanks and I hope you like them! Attached thumbnail(s) 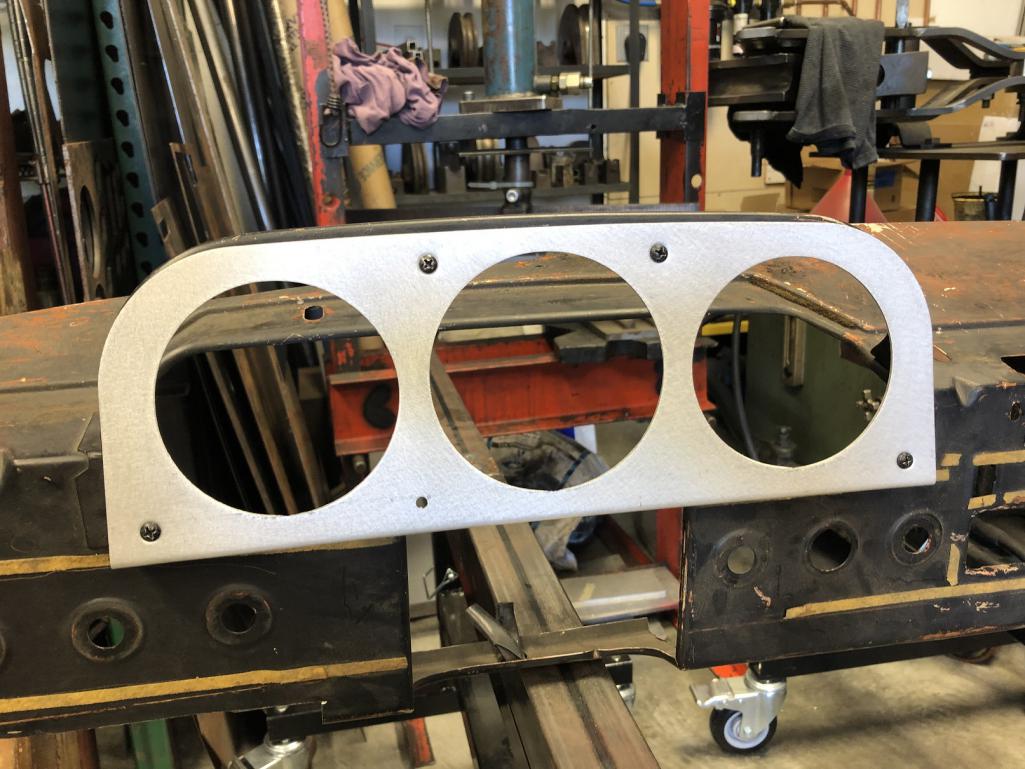 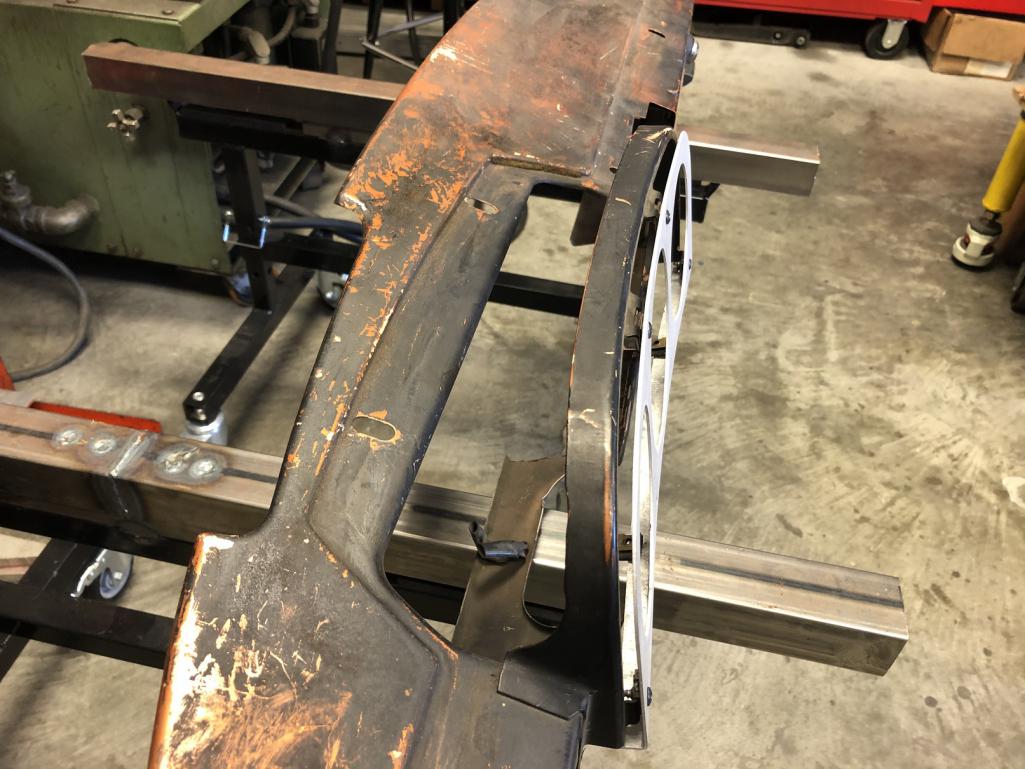 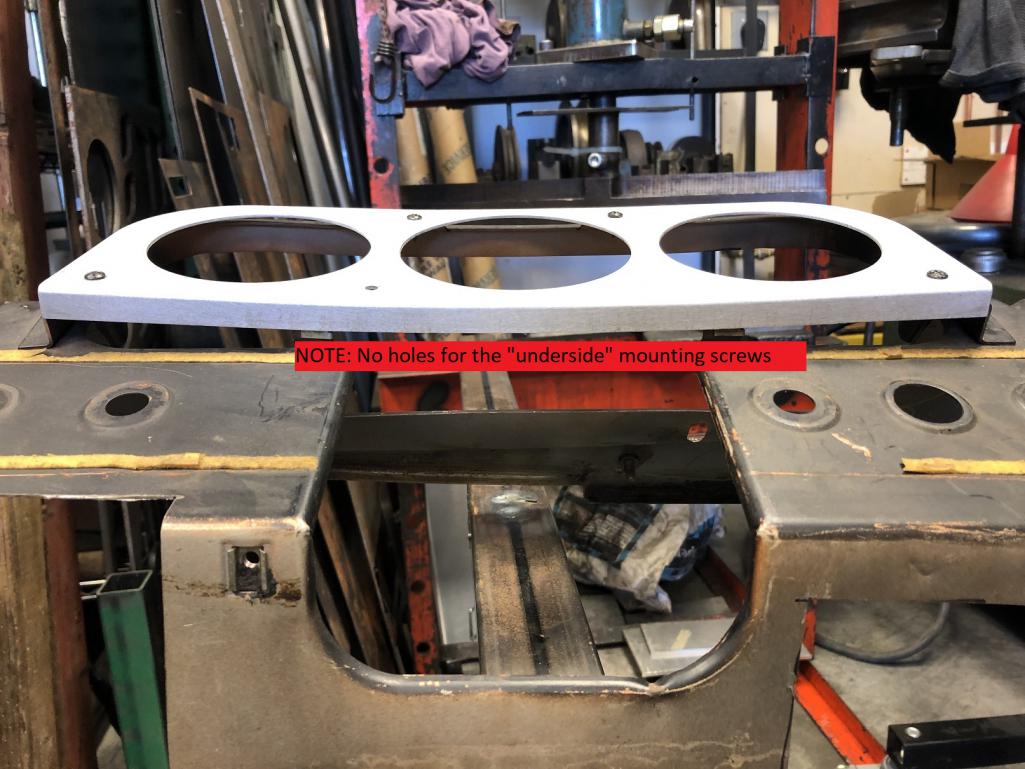 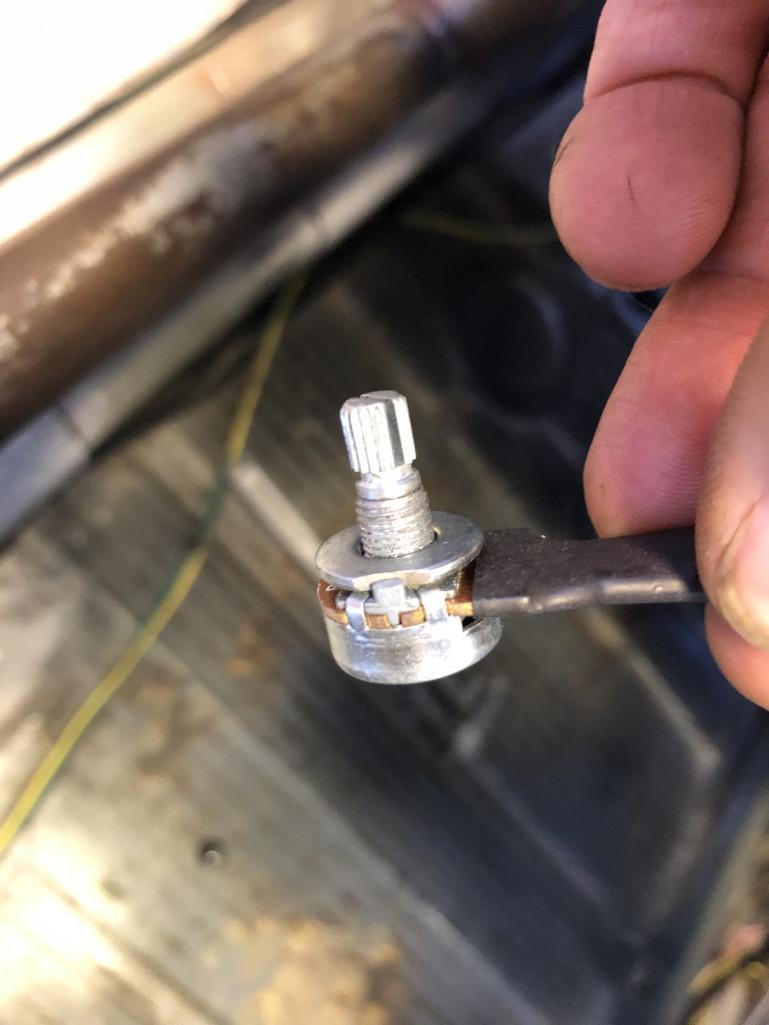 Attached image(s) 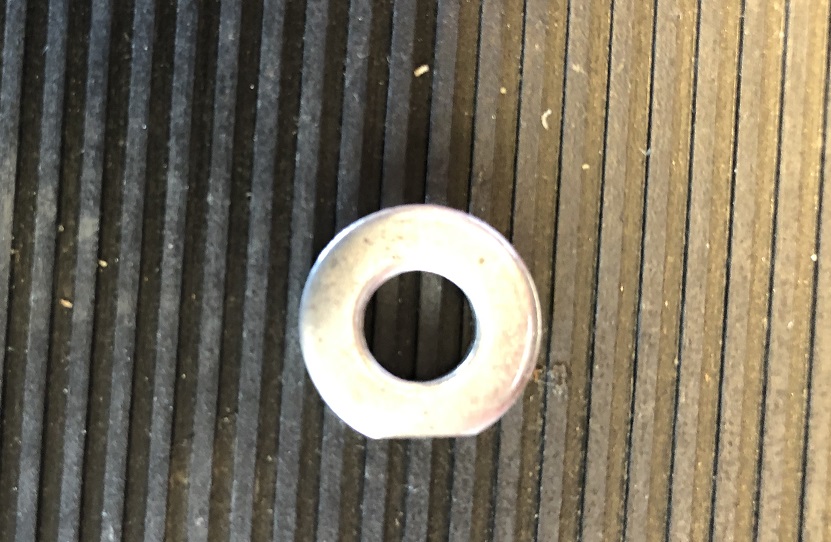
|
|
|
|
| tygaboy |
Jul 6 2021, 04:17 PM
Post
#80
|
|
914 Guru Group: Members Posts: 5,802 Joined: 6-October 15 From: Petaluma, CA Member No.: 19,241 Region Association: Northern California |
I shipped all the ordered panels today. Those who ordered one have a PM with the payment details.
Thanks and lets see some pics once you get it installed. Chris |
|
|
|
|
1 User(s) are reading this topic (1 Guests and 0 Anonymous Users)
0 Members:

|
Lo-Fi Version | Time is now: 27th March 2026 - 06:22 AM |
Invision Power Board
v9.1.4 © 2026 IPS, Inc.