|
|
|
Porsche, and the Porsche crest are registered trademarks of Dr. Ing. h.c. F. Porsche AG.
This site is not affiliated with Porsche in any way. Its only purpose is to provide an online forum for car enthusiasts. All other trademarks are property of their respective owners. |
|
|

  |

| roundtwo |
 Apr 7 2022, 05:06 PM Apr 7 2022, 05:06 PM
Post
#61
|
|
Member  Group: Members Posts: 353 Joined: 9-February 20 From: Petaluma, CA Member No.: 23,905 Region Association: Central California |
Inspirational metal work! Way to solder on through the tougher work.
|
   |

 
|
| pencap914 |
Sep 18 2022, 10:14 PM
Post
#62
|
|
Member Group: Members Posts: 81 Joined: 16-April 06 Member No.: 5,872 Region Association: Northern California |
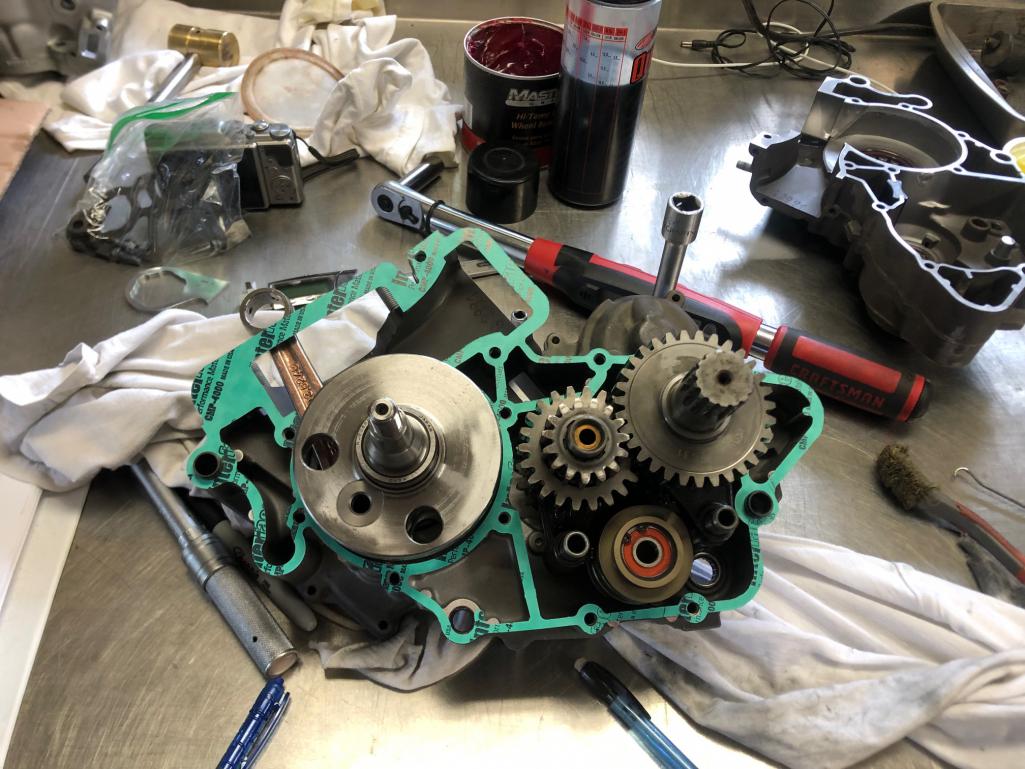
Well progress has been slow this spring/summer. Had my KTM grenade, so had to get the engine rebuilt, then had a 2nd kid, so live has gotten in the way of progress on the 914.
Since my last update;
Really not looking forward to the front two cowl repairs where the windshield frame meets the front fenders.... That will be next on the list along with some other minor fabrication for oil cooling system. Halfway through sanding the old rattle can black paint off. 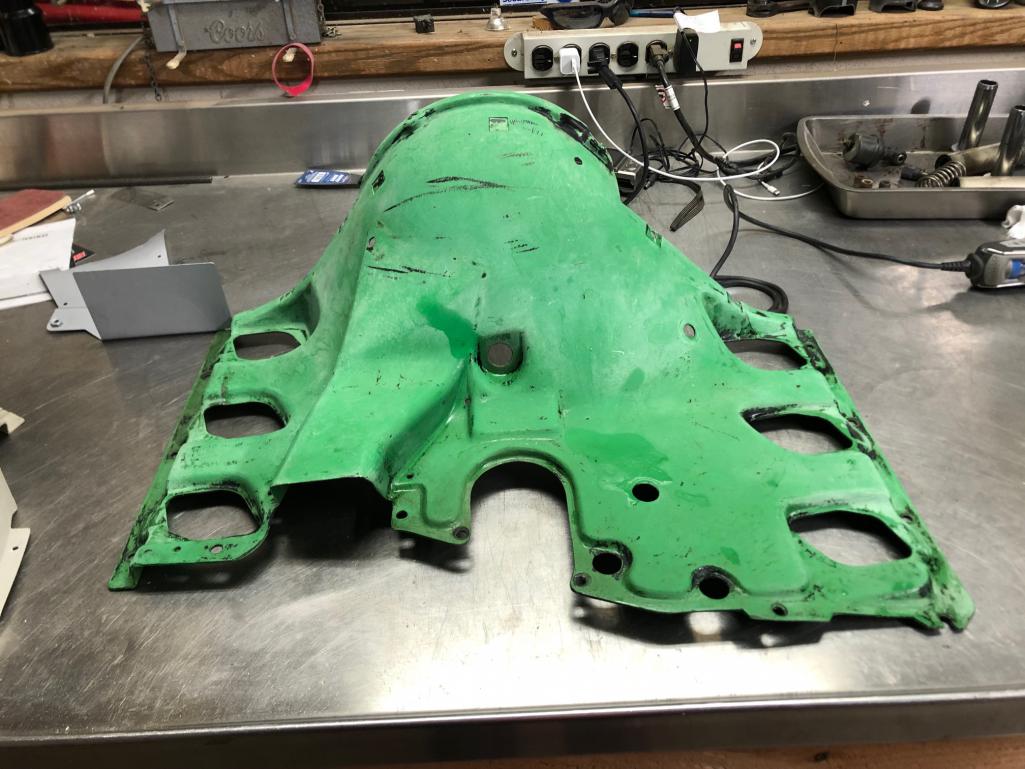 Cowl painted and placed on engine. Carburetors mock placed just to get me all fizzy about the project again. 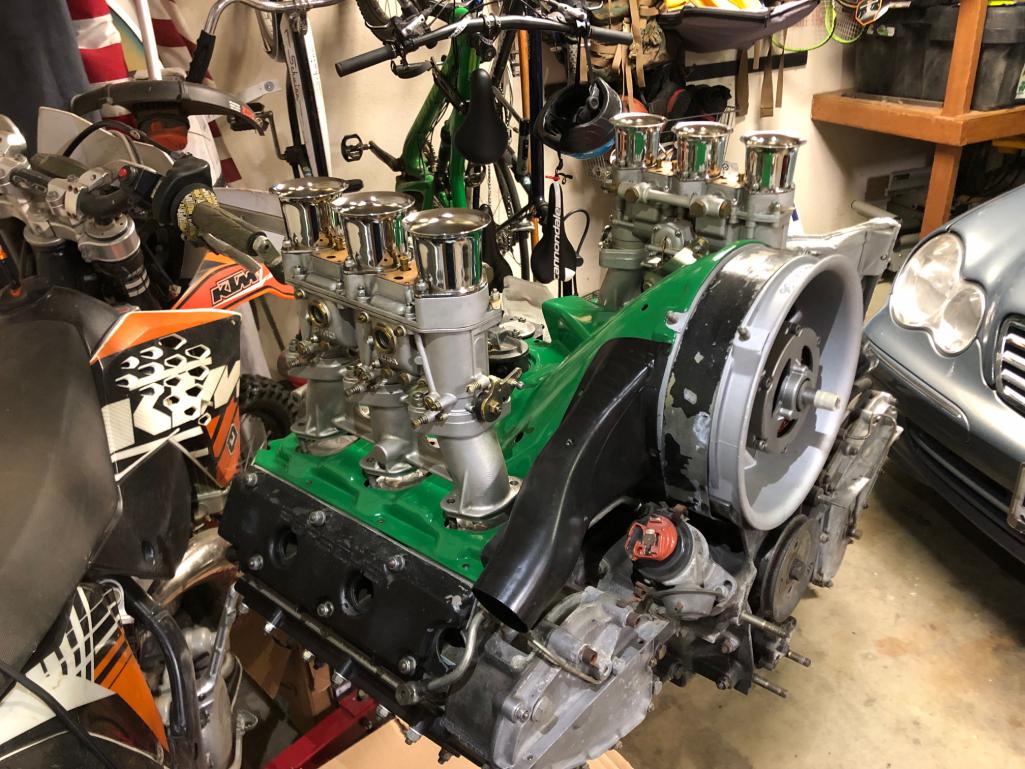 Frame dolly fabrication in progress 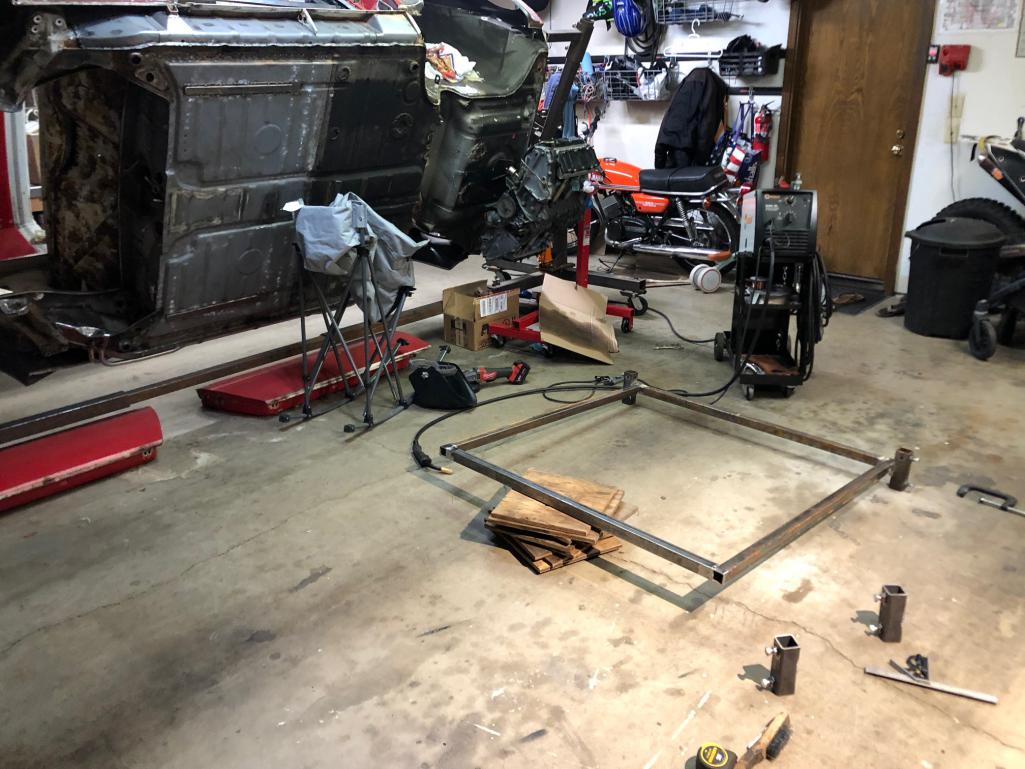 Frame dolly completed and placed under the rotisserie. 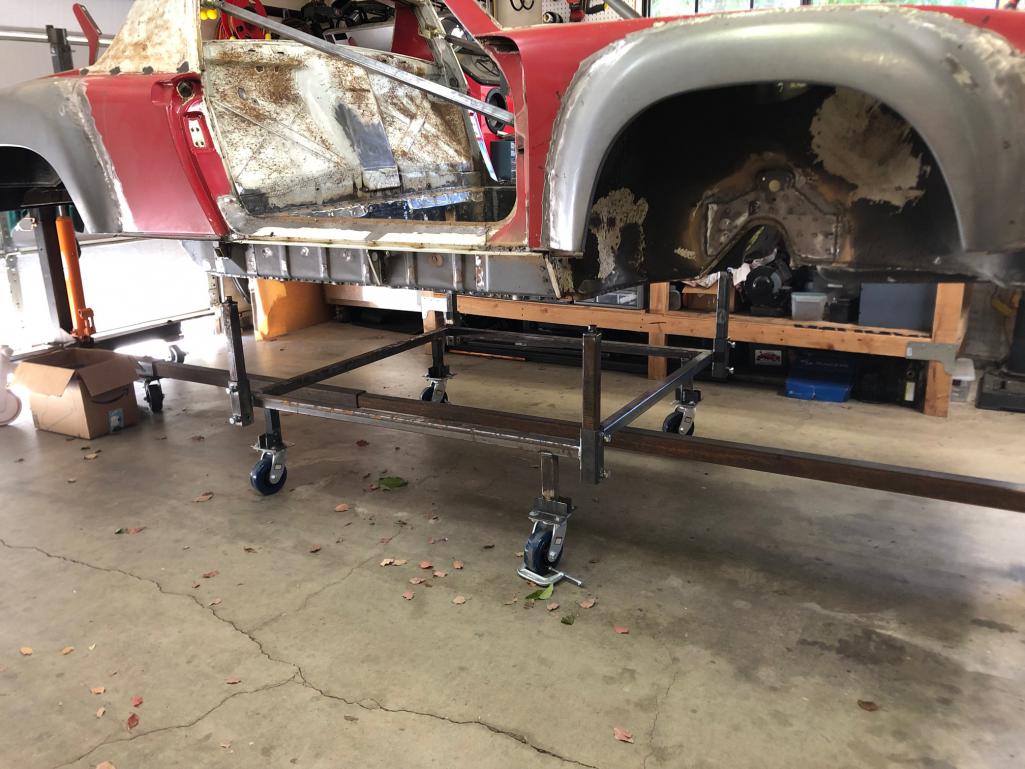 How she sits today: 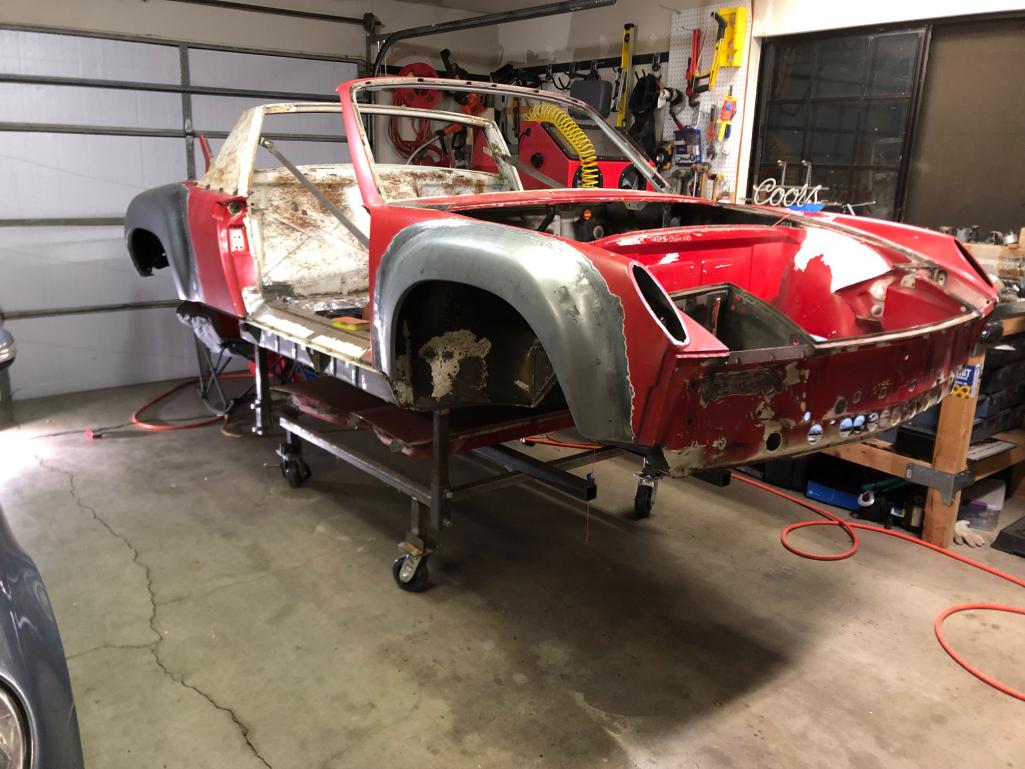 |
|
|
|
| pencap914 |
Sep 18 2022, 10:27 PM
Post
#63
|
|
Member Group: Members Posts: 81 Joined: 16-April 06 Member No.: 5,872 Region Association: Northern California |
KTM engine mid-rebuild. Hopefully it will get some use this fall, but with the fresh baby its hard to get the green light to get away for a weekend!
 Also, the other P-car is in constant need of attention.... 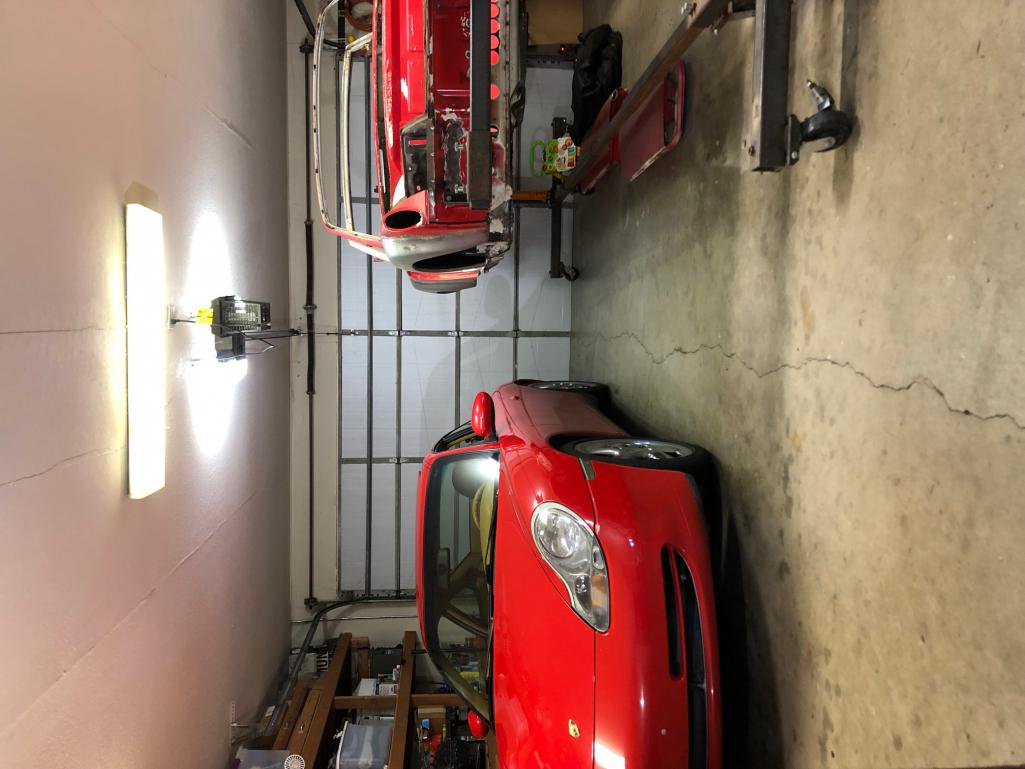 Anyway enough distractions. Back in the garage I go. (IMG:style_emoticons/default/welder.gif) |
|
|
|
| Graydingo |
Sep 20 2022, 08:34 AM
Post
#64
|
|
Member Group: Members Posts: 82 Joined: 12-August 22 From: Las Vegas Member No.: 26,768 Region Association: Southwest Region |
Great thread! Thanks for documenting the 4cyl mount delete and front cooler pics. Very helpful.
|
|
|
|
| pencap914 |
Sep 29 2022, 08:48 PM
Post
#65
|
|
Member Group: Members Posts: 81 Joined: 16-April 06 Member No.: 5,872 Region Association: Northern California |
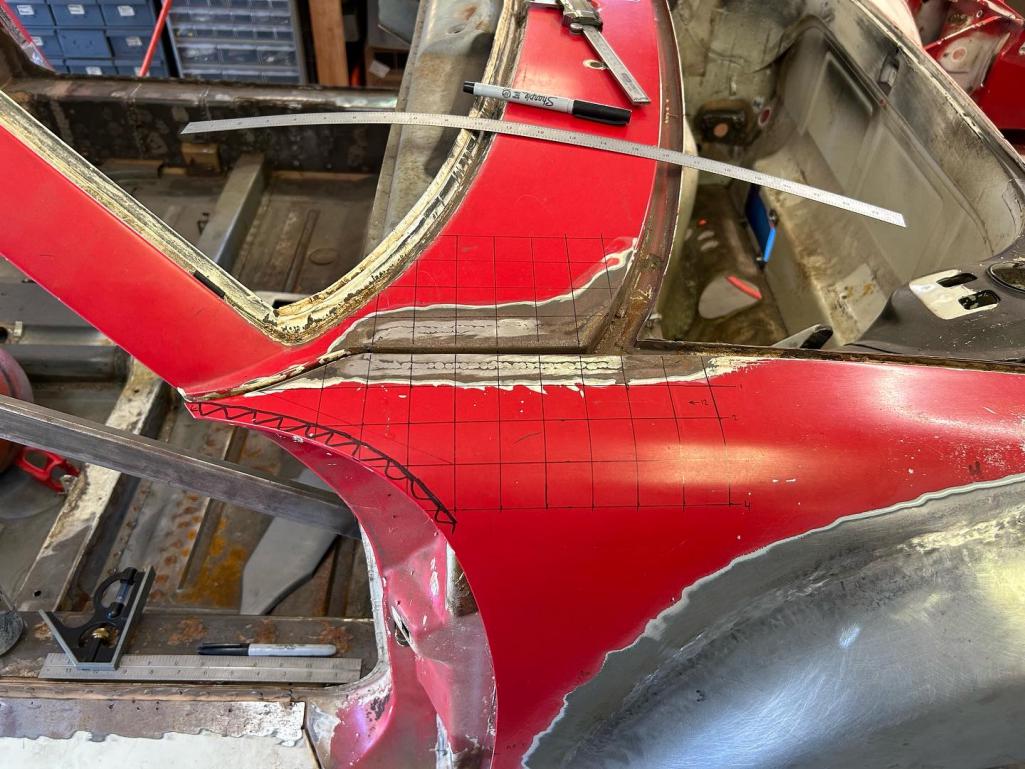
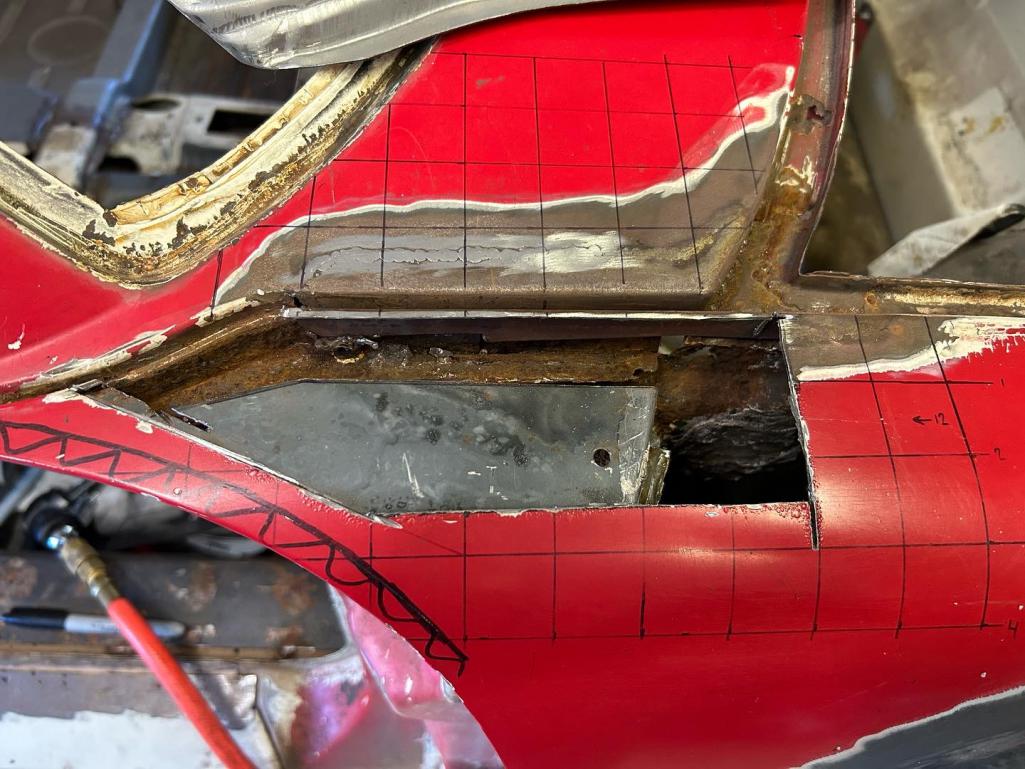
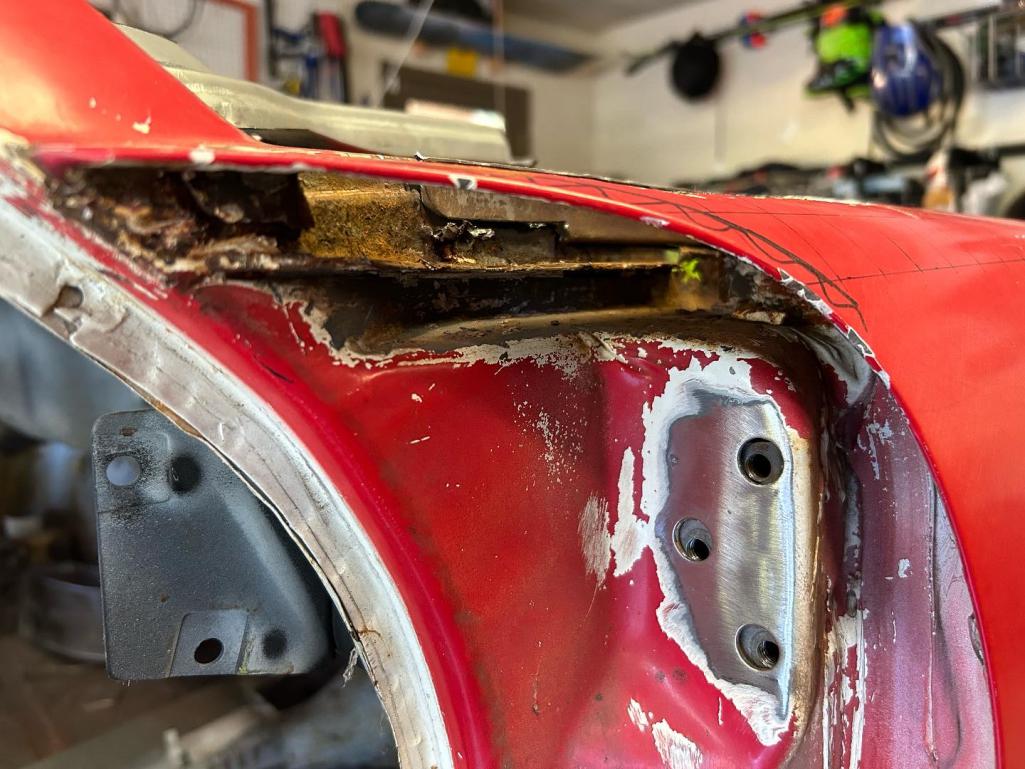
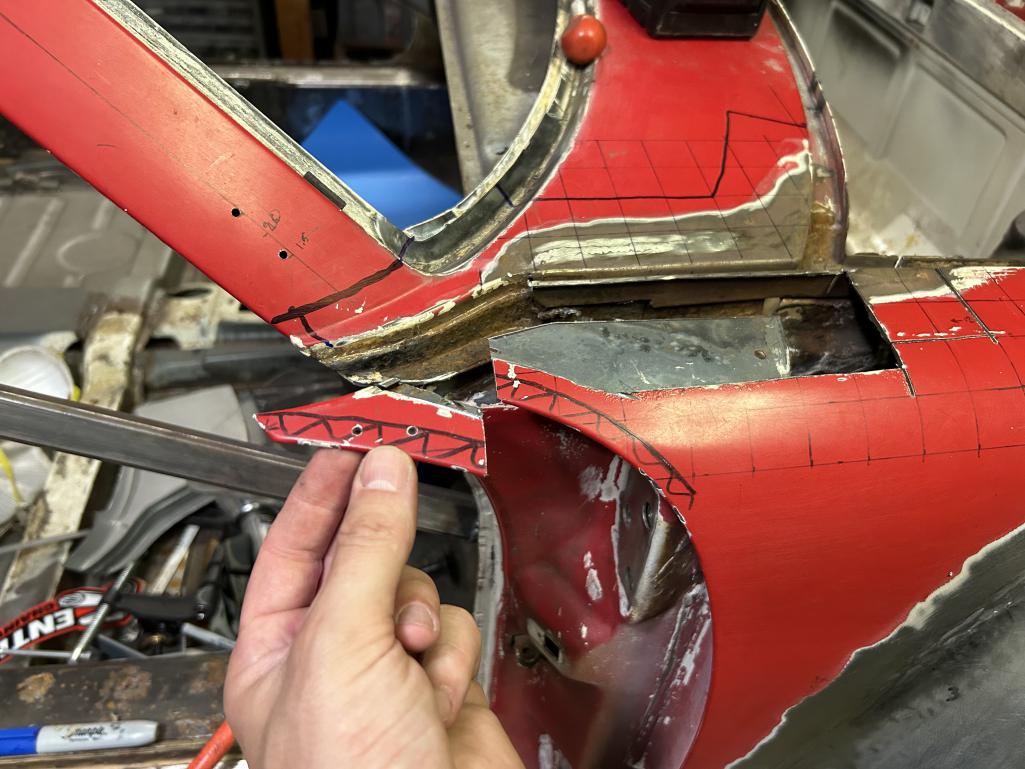
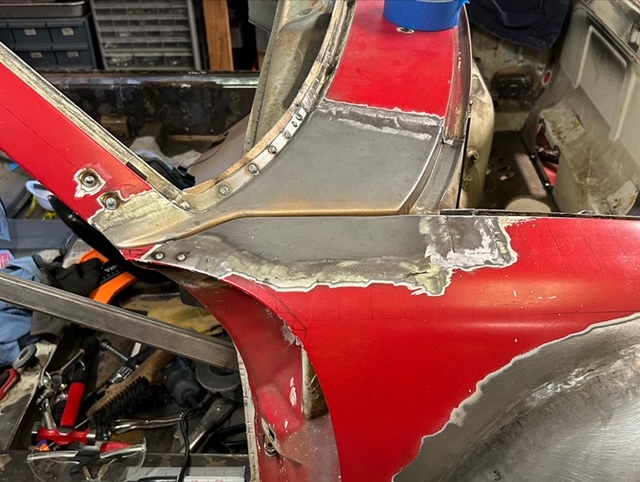
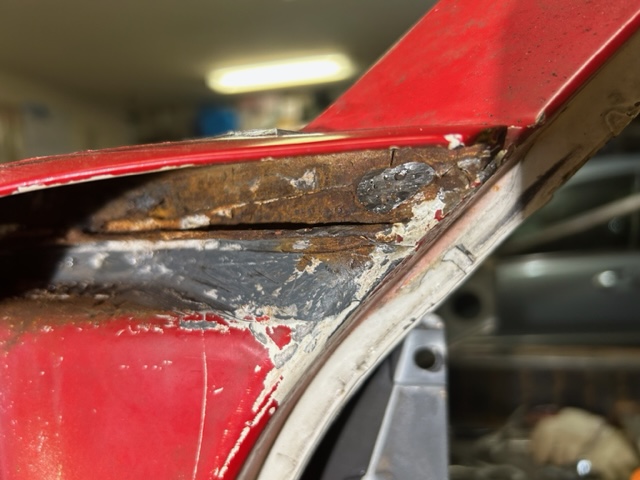
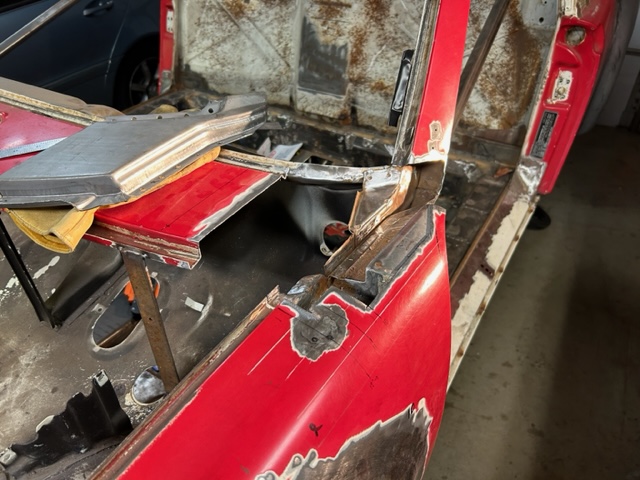
Finally after a year of avoiding it I decided to open the can-o-worms that is the front cowl repair. I'm just a home hobbyist who dabbles in this sort of thing so naturally I was a bit intimidated. Once again, a repair attempt was made (by a professional shop) under previous ownership. But they only did minimal surficial repairs that I had concerns that would come back to haunt me later if I didn't address it properly. So here's the first few cuts I made. Trying to avoid disturbing the folded corner of the fender to not mess with the door gap but it looks as if there's no way around chopping it off to get to the areas needed. I found a few good threads to click through photos, so hopefully it turns out better than it's status quo.
   |
|
|
|
| Montreal914 |
Sep 29 2022, 09:29 PM
Post
#66
|
|
Advanced Member Group: Members Posts: 2,106 Joined: 8-August 10 From: Claremont, CA Member No.: 12,023 Region Association: Southern California |
I like the approach you are using. Seems like you are getting to the heart of the matter. I am wondering if you couldn't fabricate the missing replacement metal. (IMG:style_emoticons/default/idea.gif)
The fender top AA replacement piece has a really large radius where the rubber strip will go at the joint fender/cowl. That is one reason why I decided not to use it. The other reason was the fold at the door gap (or lack thereof (IMG:style_emoticons/default/dry.gif) ), but you kept the original in place, so you are good there, good idea! I was not comfortable working that area, but overall, I am happy with my humble results. I am sure you will be fine. (IMG:style_emoticons/default/sunglasses.gif) Good luck and keep on sharing! ...Oh and that 2.7, yes that shine is very motivating!! (IMG:style_emoticons/default/smilie_pokal.gif) |
|
|
|
| Montreal914 |
Sep 29 2022, 09:37 PM
Post
#67
|
|
Advanced Member Group: Members Posts: 2,106 Joined: 8-August 10 From: Claremont, CA Member No.: 12,023 Region Association: Southern California |
This is what I am referring to... (IMG:style_emoticons/default/dry.gif)
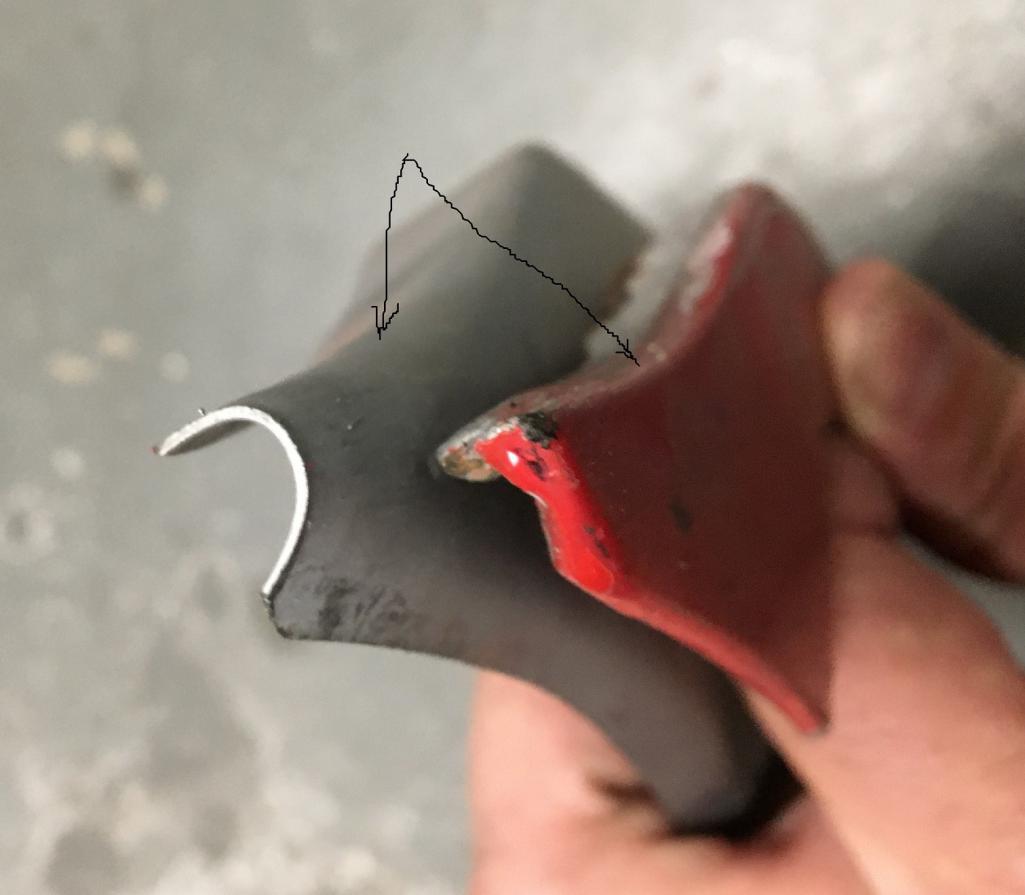 This large radius will not look good with the T shaped rubber strip in there. There will be gaps. This need to be pretty much square on both sides. |
|
|
|
| pencap914 |
Sep 29 2022, 11:23 PM
Post
#68
|
|
Member Group: Members Posts: 81 Joined: 16-April 06 Member No.: 5,872 Region Association: Northern California |
@montreal914
Thanks for sharing that. Yeah I'm going to do my best to re-use the outer "folded" piece original to the car. The inner radius issue I'll have to cross that bridge when I get to it. Hopefully I can massage the AA piece enough to tighten up that radius. Some hammering will be in my future. I used cleko's to "save the spot" where the corner piece goes to hopefully preserve the door gap. 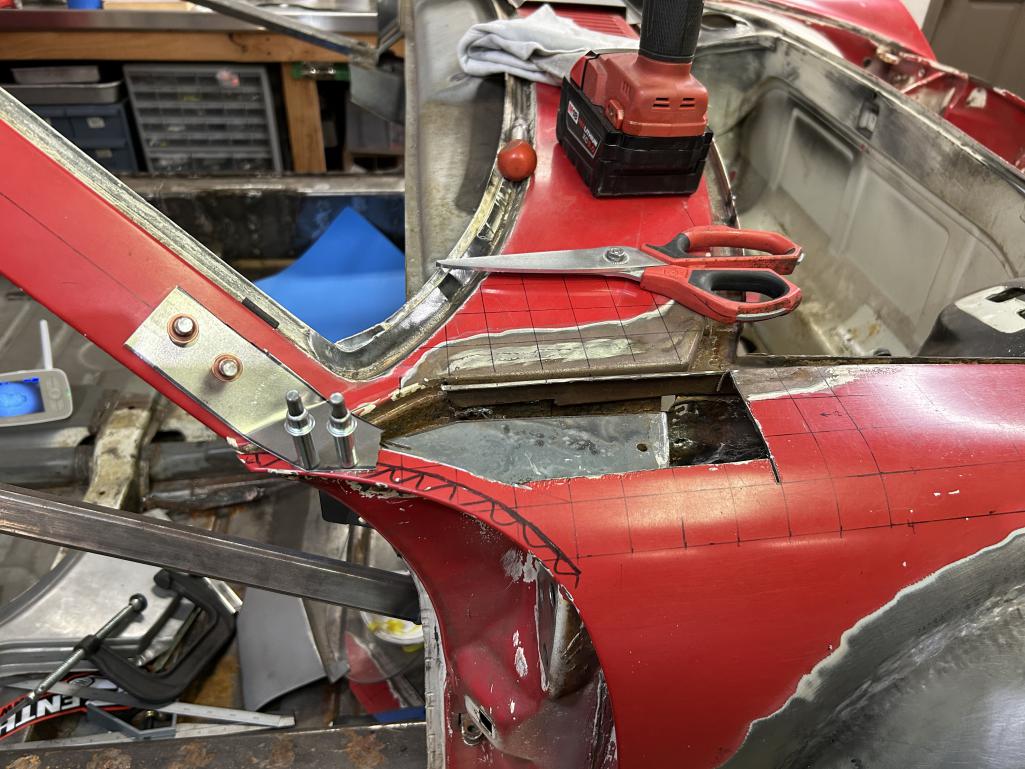 |
|
|
|
| pencap914 |
Sep 29 2022, 11:24 PM
Post
#69
|
|
Member Group: Members Posts: 81 Joined: 16-April 06 Member No.: 5,872 Region Association: Northern California |
 |
|
|
|
| pencap914 |
Oct 23 2022, 08:42 PM
Post
#70
|
|
Member Group: Members Posts: 81 Joined: 16-April 06 Member No.: 5,872 Region Association: Northern California |
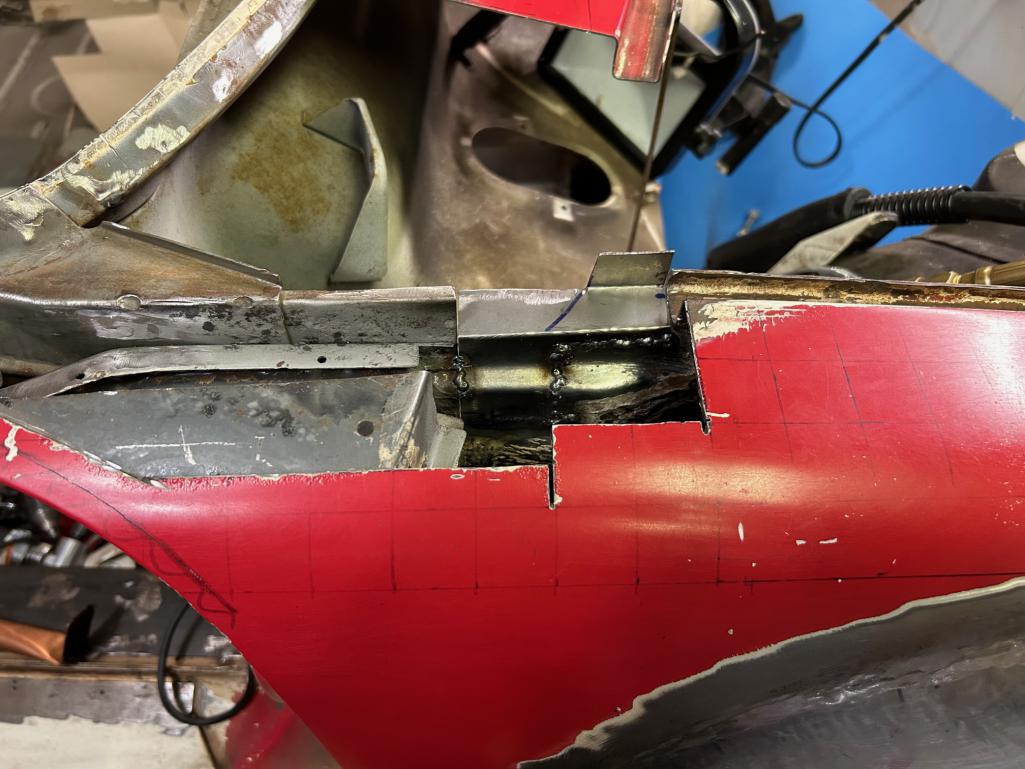
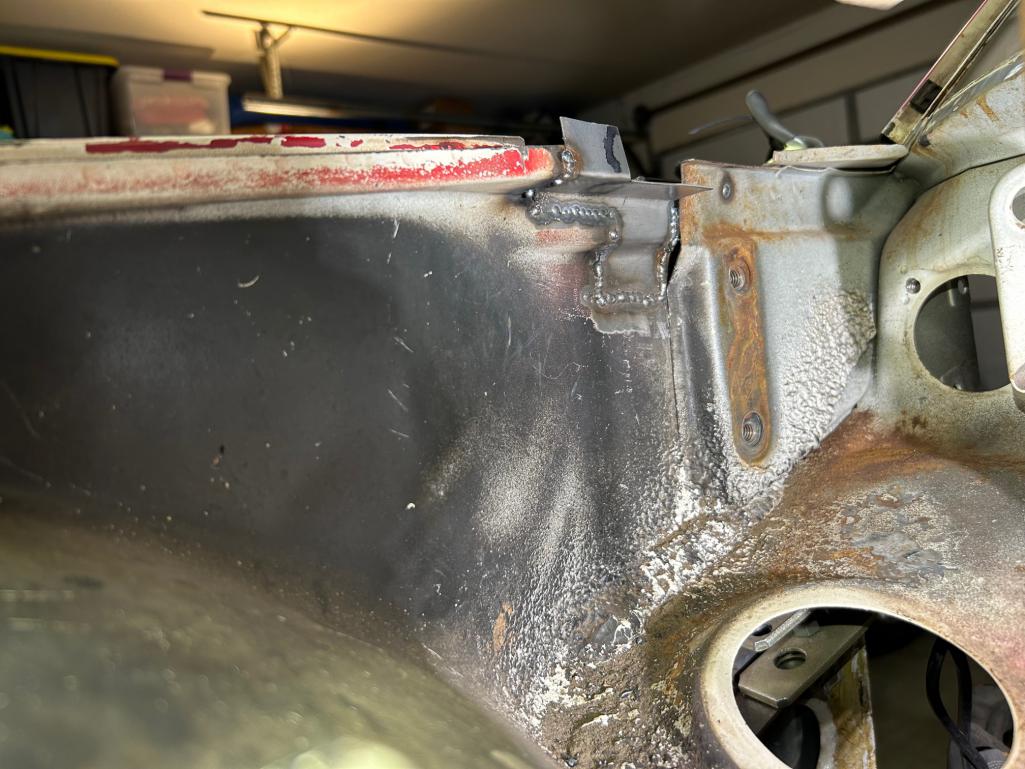
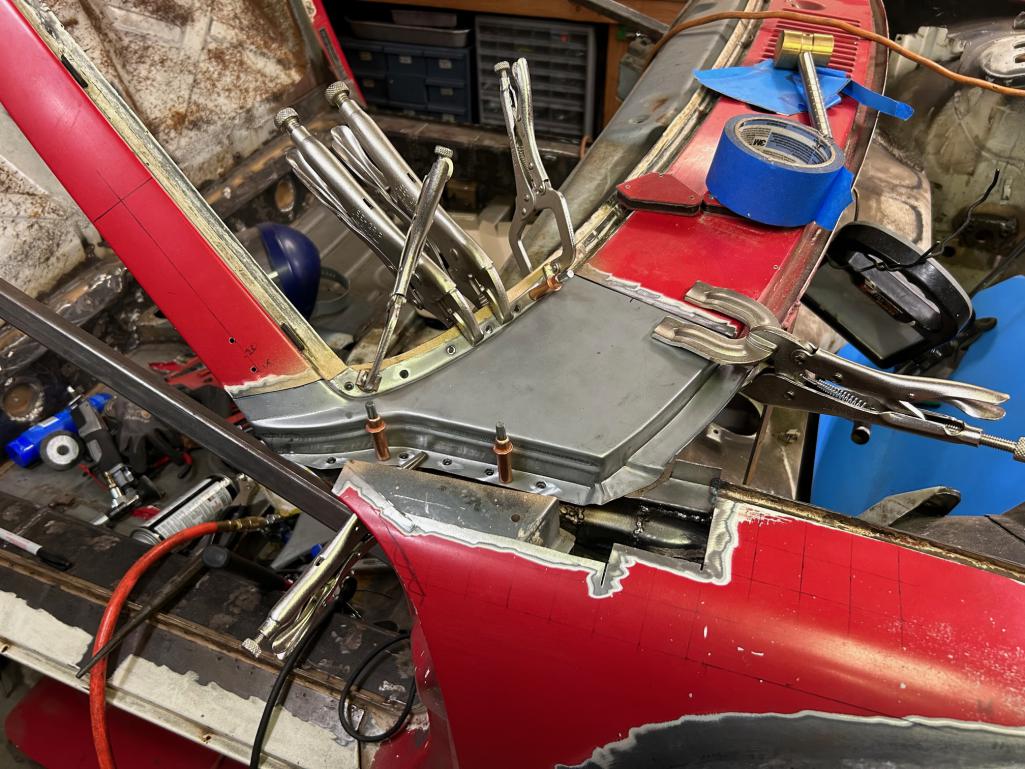
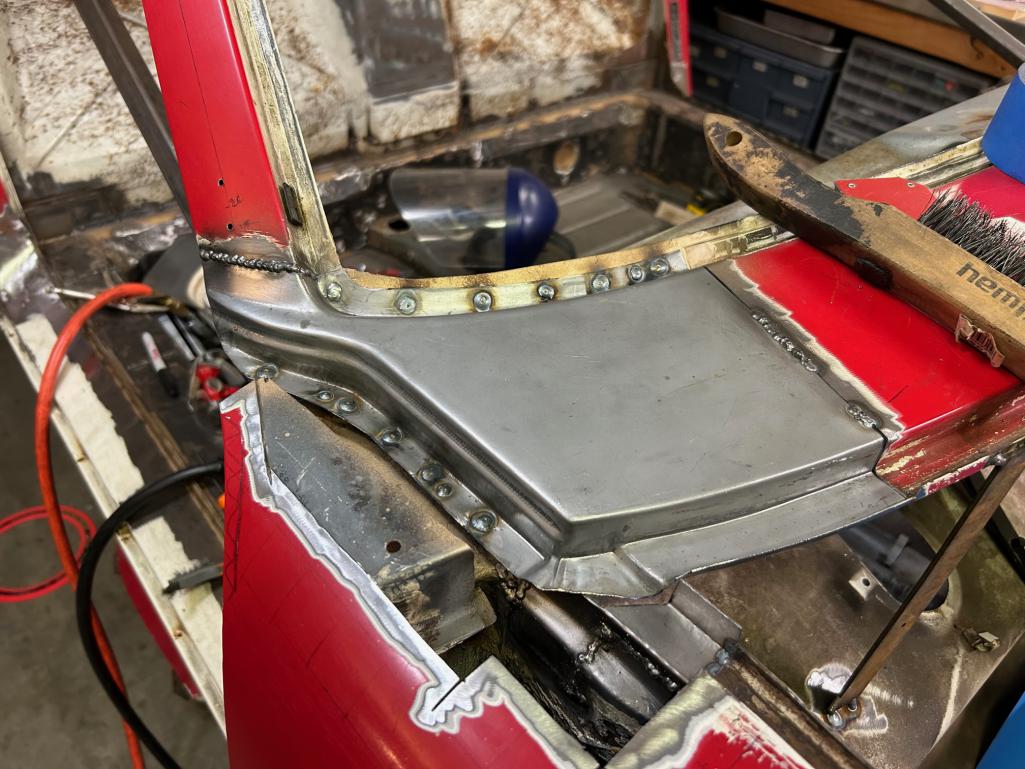
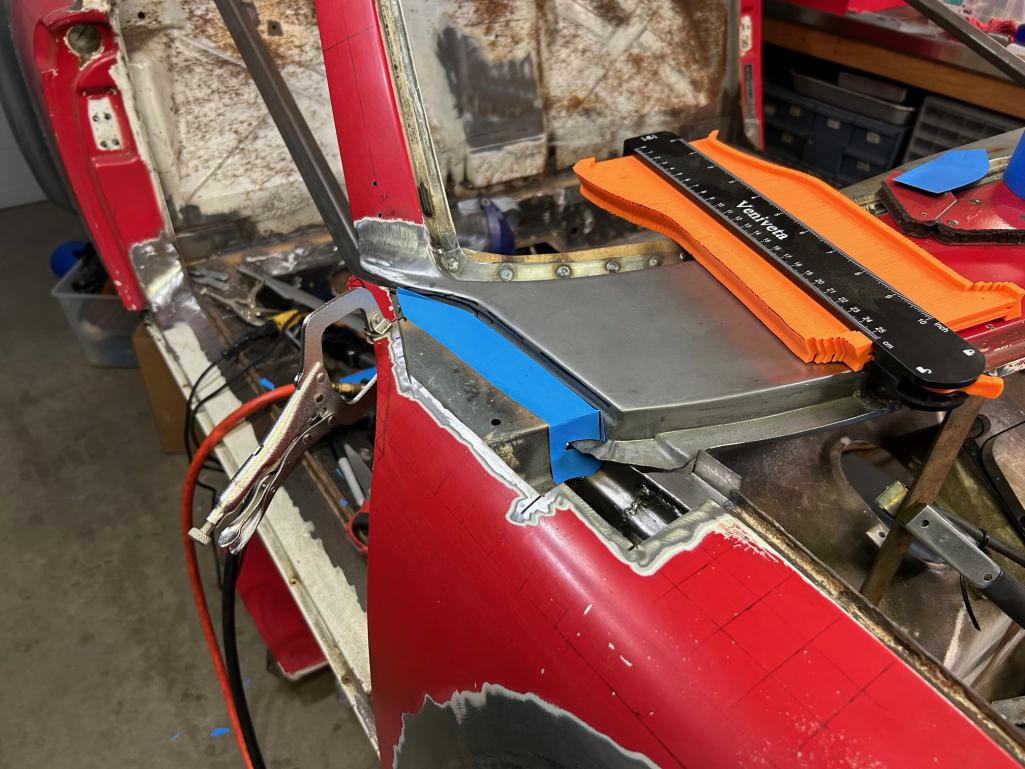
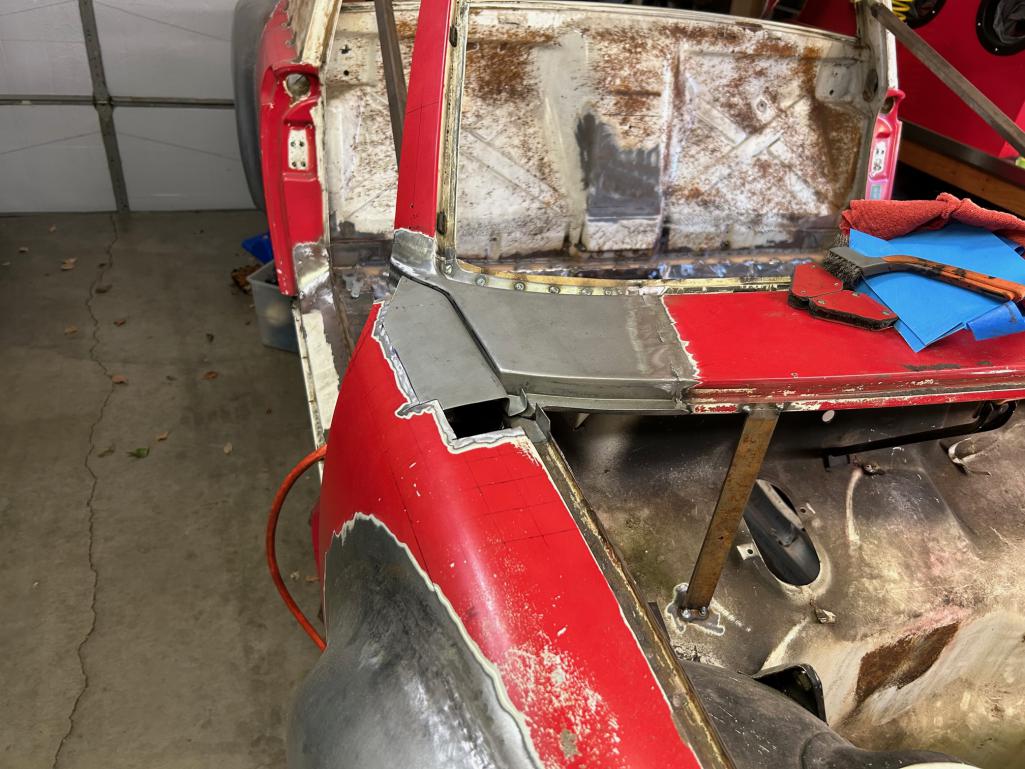
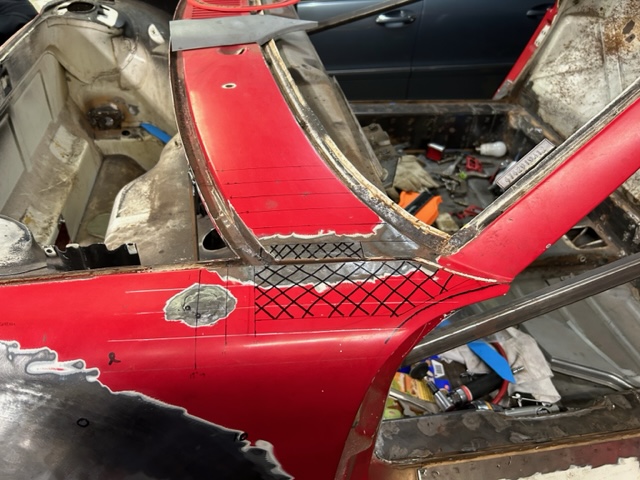
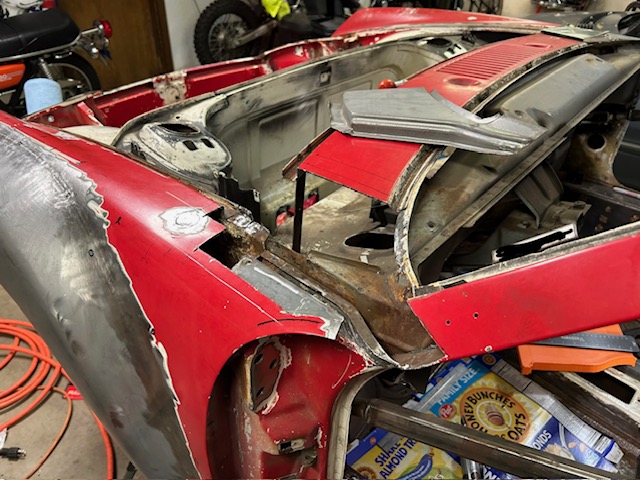
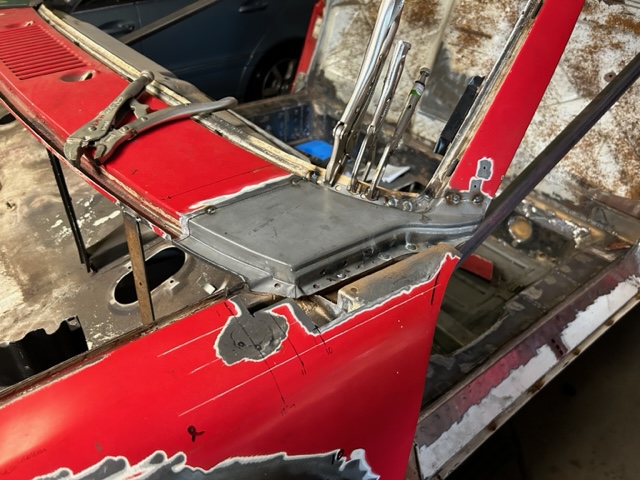
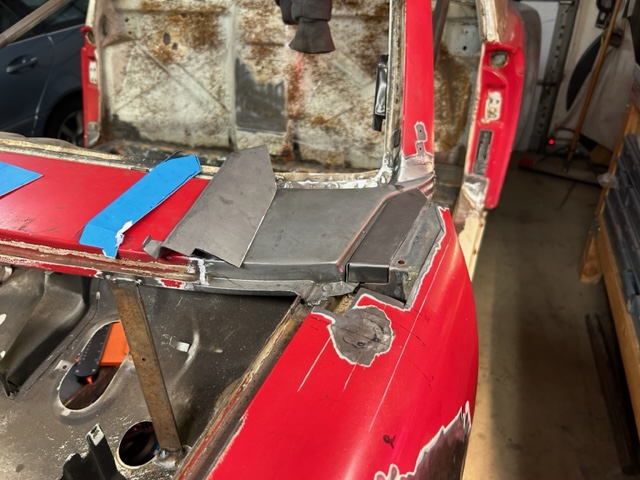
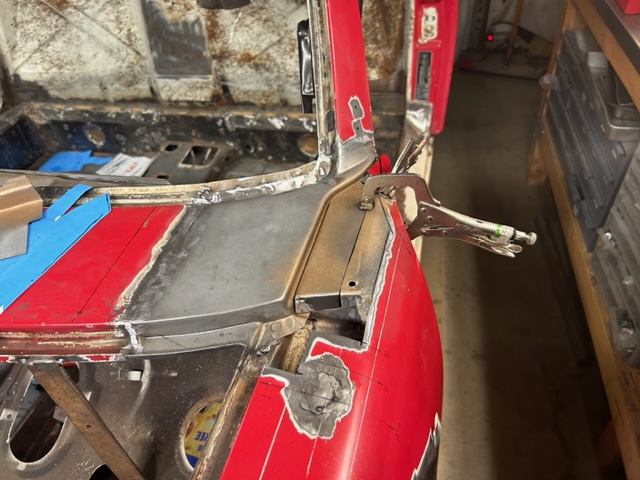
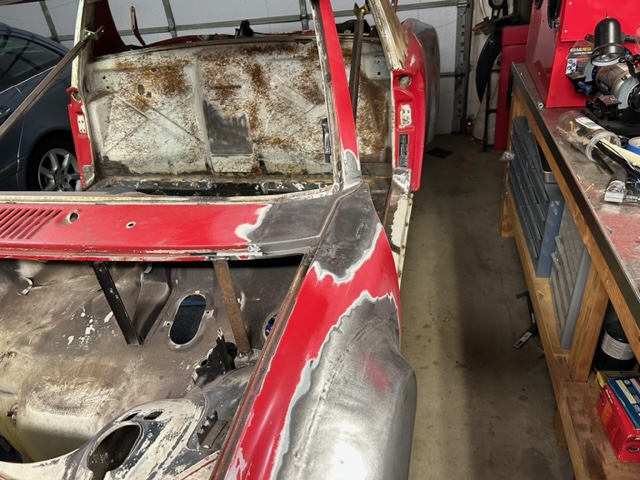
Made some more progress on the cowl repair:
   |
|
|
|
| pencap914 |
Oct 23 2022, 08:45 PM
Post
#71
|
|
Member Group: Members Posts: 81 Joined: 16-April 06 Member No.: 5,872 Region Association: Northern California |
   |
|
|
|
| pencap914 |
Oct 23 2022, 08:46 PM
Post
#72
|
|
Member Group: Members Posts: 81 Joined: 16-April 06 Member No.: 5,872 Region Association: Northern California |
  |
|
|
|
| Graydingo |
Oct 24 2022, 06:15 AM
Post
#73
|
|
Member Group: Members Posts: 82 Joined: 12-August 22 From: Las Vegas Member No.: 26,768 Region Association: Southwest Region |
Inspiring metal work!
|
|
|
|
| Cairo94507 |
Oct 24 2022, 06:42 AM
Post
#74
|
|
Michael Group: Members Posts: 10,634 Joined: 1-November 08 From: Auburn, CA Member No.: 9,712 Region Association: Northern California |
That is looking very, very good. (IMG:style_emoticons/default/beerchug.gif)
|
 |
|
| Retroracer |
Oct 24 2022, 02:55 PM
Post
#75
|
|
Senior Member Group: Members Posts: 656 Joined: 7-July 13 From: Bend OR Member No.: 16,100 Region Association: Pacific Northwest |
Nice skills there! Keep the posts coming....
- Tony |
|
|
|
| roundtwo |
Oct 25 2022, 11:19 AM
Post
#76
|
|
Member Group: Members Posts: 353 Joined: 9-February 20 From: Petaluma, CA Member No.: 23,905 Region Association: Central California |
[quote name='pencap914' date='Nov 7 2021, 09:26 AM' post='2958276']
Also working on restoring the fiberglass engine shroud for the 2.7. Few cracks in the fiberglass will have to be addressed, then sanded and painted. This week I'll stop buy the automotive paint shop to talk about what would the best paint options would be for this. A fiberglass engine shroud is a challenging place for automotive paint.... Inspiring work! (IMG:style_emoticons/default/beerchug.gif) I'm at a cross roads as to what paint to use on my engine shroud (3.0 Carrera ) that's resistant to fuel and oil. Did you find a good product. I'm think about PPG single stage. thanks, Todd |
|
|
|
| pencap914 |
Oct 27 2022, 10:12 AM
Post
#77
|
|
Member Group: Members Posts: 81 Joined: 16-April 06 Member No.: 5,872 Region Association: Northern California |
Todd,
I used a PPG 2K paint in a "SprayMax" can where the hardener is built into the can. My local automotive paint shop mixed it on site and said it should hold up to heat/fuel better than regular ol' spray paint. Here's the photo of what shade of green matched pretty close to the original green color the shroud was. 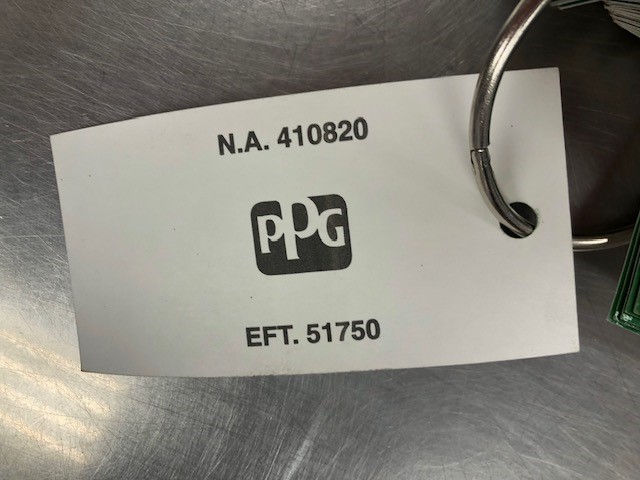 |
|
|
|
| pencap914 |
Aug 7 2023, 10:01 PM
Post
#78
|
|
Member Group: Members Posts: 81 Joined: 16-April 06 Member No.: 5,872 Region Association: Northern California |
I know its been...*looks at watch* 10 months since I've posted progress. But here's a few update photos:
         Some of the South Lake Tahoe WCR photos:  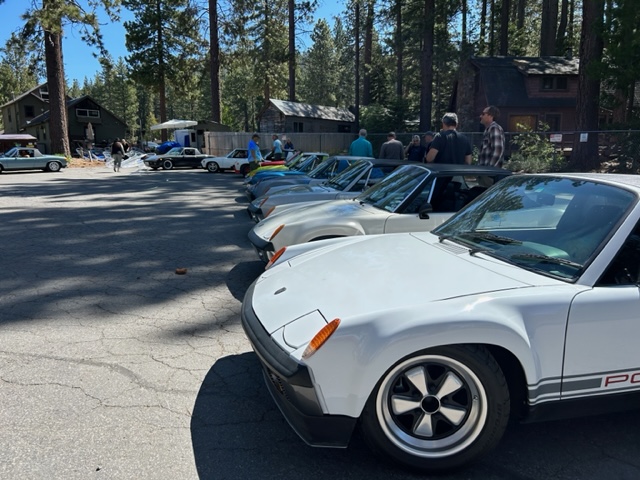 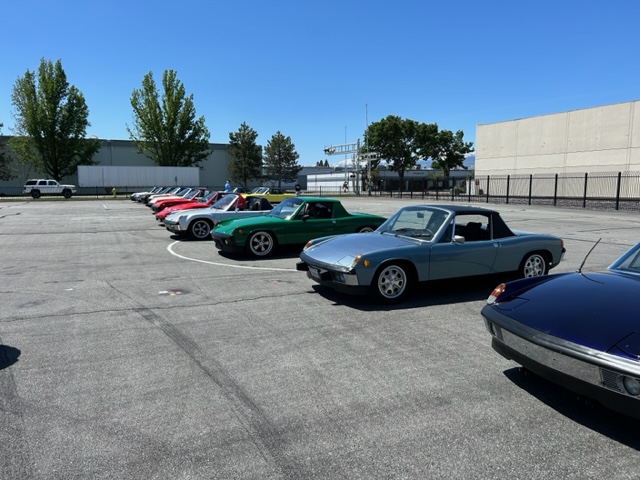 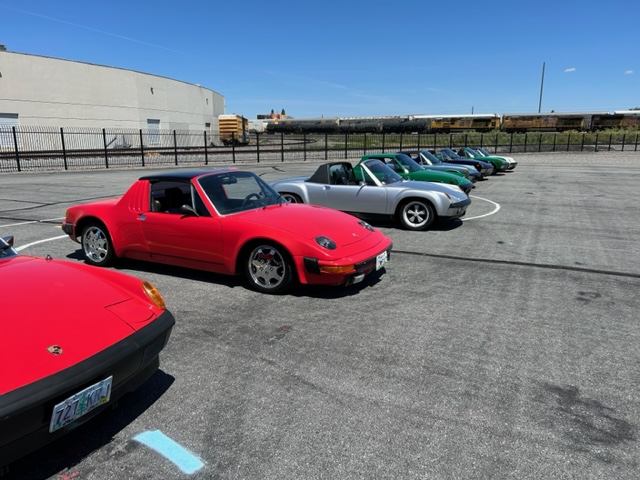 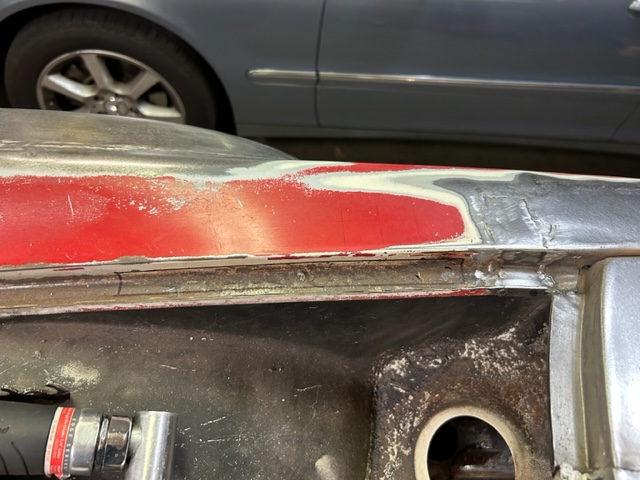 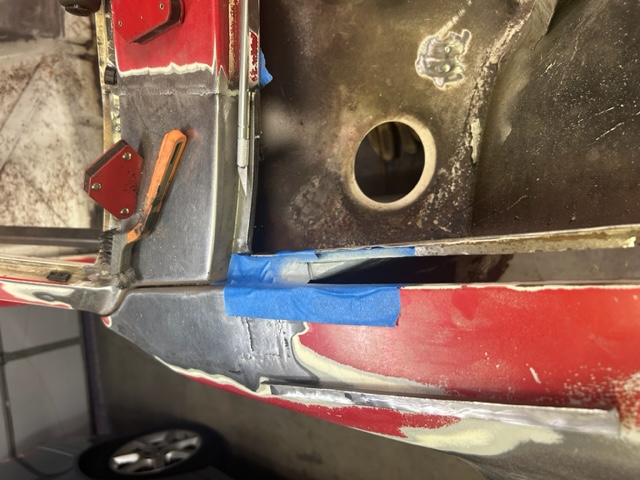 Attached image(s) 
|
|
|
|
| pencap914 |
Aug 7 2023, 10:18 PM
Post
#79
|
|
Member Group: Members Posts: 81 Joined: 16-April 06 Member No.: 5,872 Region Association: Northern California |
Made a patch panel inside the passenger side frunk weatherstip channel and some engine bits arrived! New wiring harness, 123 ignition distributor, studs to mount the PMO carburetors, and oil line restrictors from a 930. (IDK... Wayne D recommended them in his book...)
I know I know, the fan and shroud strap look ugly. This is where I have to say to myself "perfection is the enemy of progress." I've got bigger fish to fry with this project. I've acquired a 7R 2.4 block that I plan to build as the hotrod engine that will be all shiny. This 2.7 will hopefully just get me on the road.... someday... Next on the agenda: Mount MOCAL oil T-stat, oil lines and oil cooler shroud. (IMG:style_emoticons/default/welder.gif) 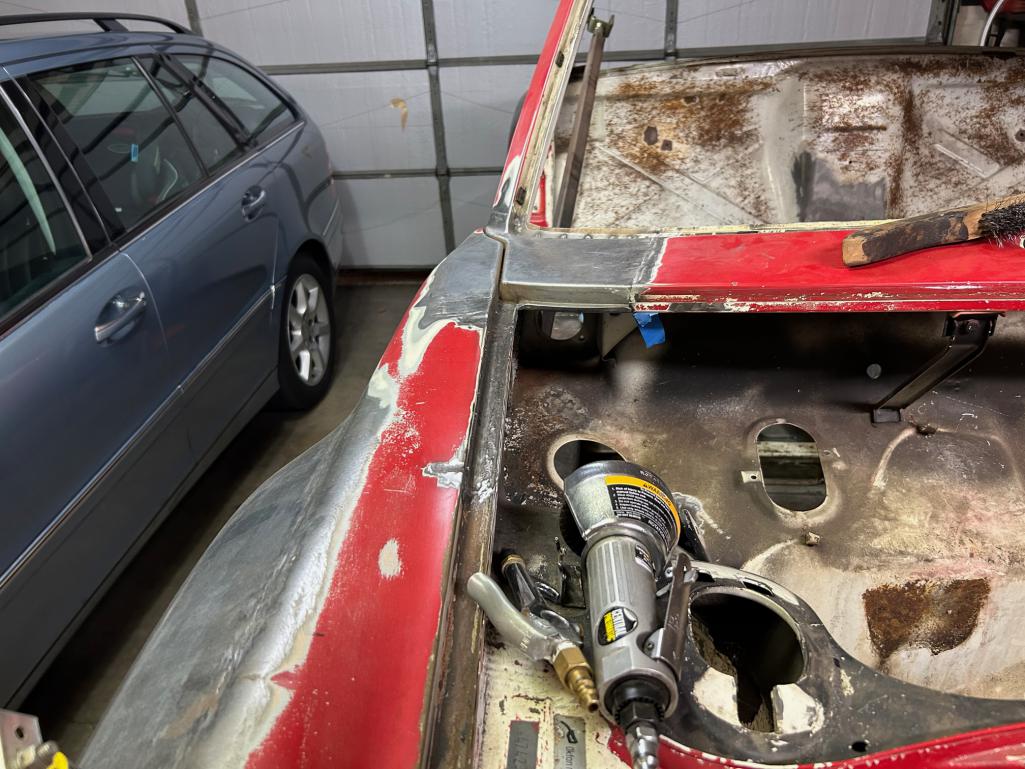  |
|
|
|
| TRS63 |
Aug 8 2023, 02:47 AM
Post
#80
|
|
Member Group: Members Posts: 326 Joined: 14-September 20 From: Germany - Stuttgart Member No.: 24,690 Region Association: Europe |
Slowly but surely you will be driving it ! Thanks for sharing !
Antoine |
|
|
|
|
1 User(s) are reading this topic (1 Guests and 0 Anonymous Users)
0 Members:

|
Lo-Fi Version | Time is now: 18th May 2026 - 06:45 AM |
Invision Power Board
v9.1.4 © 2026 IPS, Inc.