|
|
|
Porsche, and the Porsche crest are registered trademarks of Dr. Ing. h.c. F. Porsche AG.
This site is not affiliated with Porsche in any way. Its only purpose is to provide an online forum for car enthusiasts. All other trademarks are property of their respective owners. |
|
|


| AndrewBlyholder |
 Aug 15 2020, 12:36 PM Aug 15 2020, 12:36 PM
Post
#1
|
|
Member  Group: Members Posts: 109 Joined: 20-September 04 From: Richmond, CA Member No.: 2,791 |
Launching in my hell hole rust repair. Need some advice on the usual welding technique for patching.
Many of the patch parts have flanges that match the factory stampings. I assume the factory spot welded these things together. Is that correct? Don't have a spot welder, and probably couldn't reach most of these locations if I did. What's the usual technique then? Drill holes in the flanges and fill with rosette welds? Or just weld the edges of the flanges? I'm replacing some sections of the main longitudinal tubes under the battery. That tube was a double walled on both the inside and outside faces. The replacement panel I have from AA has the double wall spot welded onto it. But how do I go about getting both panels weld together at the butt joint where the patch meets the original? Grind/cut the outer face back a little bit more than the inner panel, weld the inner first, and then weld up the outer? Battery tray replacement questions: - The lower support has three flanges on it. The front and side flange are easily accessible for welding, but the rear flange is turned inward. Do you weld that one too or leave it unwelded? What did the factory do there? - The easy way to attach the battery tray to the support would be to weld them together first. Is that recommended? But if you do that, then there would be no way to weld the inward turned rear flange of the support. Thanks for any and all suggestions. Andrew Blyholder |
   |

 
|
  |
Replies
| AndrewBlyholder |
Aug 17 2020, 10:53 AM
Post
#2
|
|
Member Group: Members Posts: 109 Joined: 20-September 04 From: Richmond, CA Member No.: 2,791 |
Also found that the inner trailing arm ear was badly cracked on both sides:
Outer face: 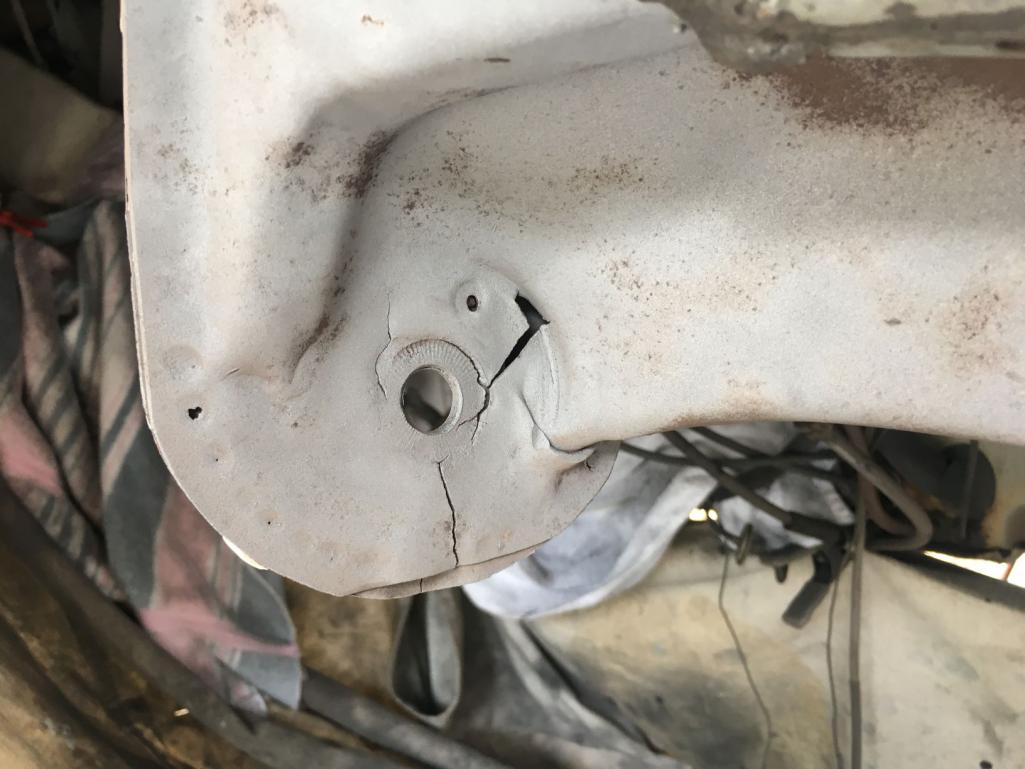 Inner face: (haven't figured out how to rotate protrait photos yet, so please excuse the sideways rotation) 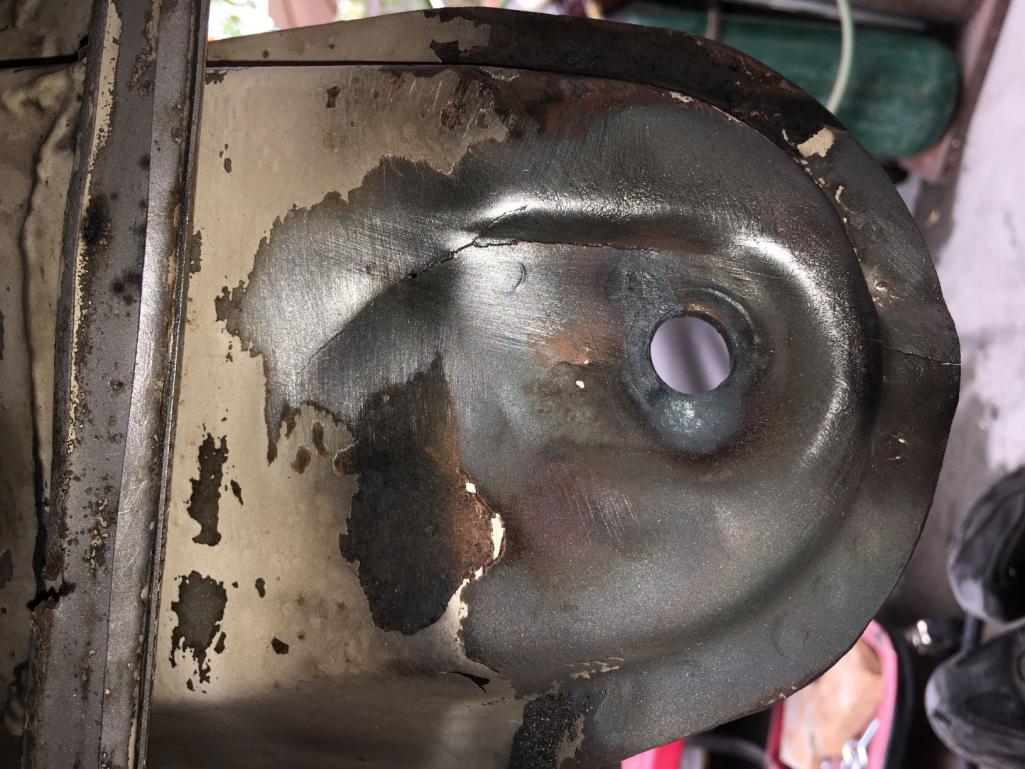 I cleaned these up with a Habor Freight 20# media blaster. Worked pretty well on things that are just painted, but doesn't do much against the thick undercoating and seam sealer. For removing that, I found a wire wheel to be much faster. Here's the ears after welding up the cracks: 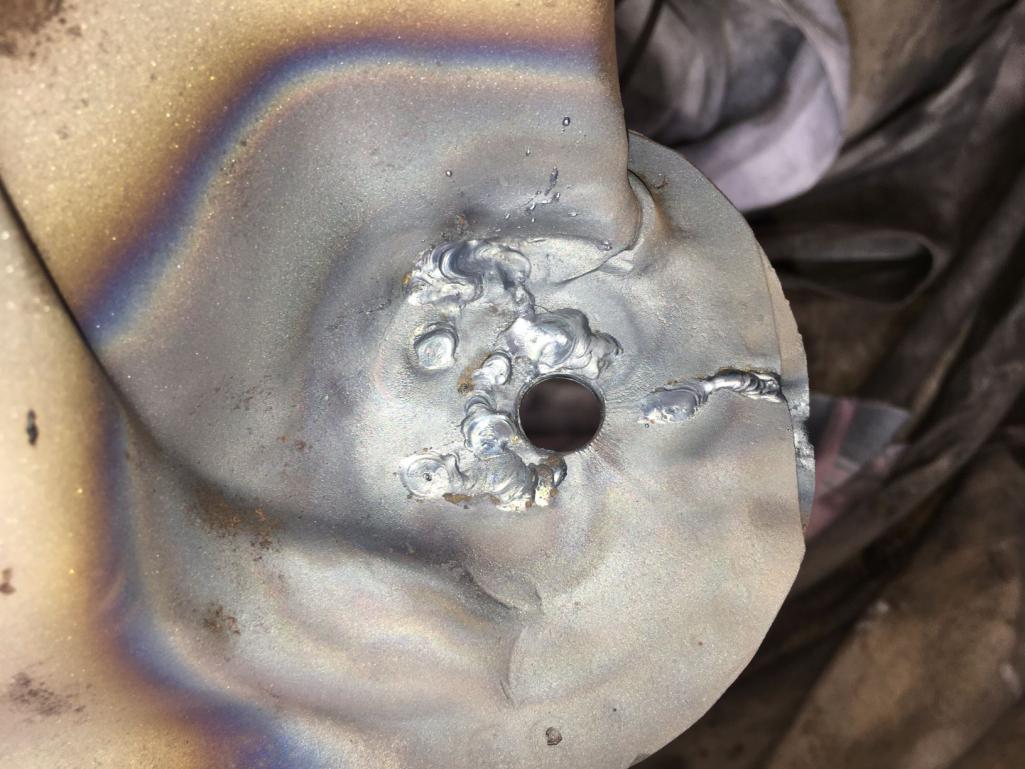  I consider myself just an ok welder, and my overhead and vertical skills are still pretty weak. So no haters on the weld beads. Hopefully I'll get better as this project goes along. The welders I have available to me are gas and TIG. A friend who is a master welder with many, many years of old car restoration experience recommended I use gas for this as it's much more tolerant of rusty metal. I'm trying to clean/grind everything I weld completely, but it will be impossible to get perfect prep on this type of project. Andrew Attached thumbnail(s) 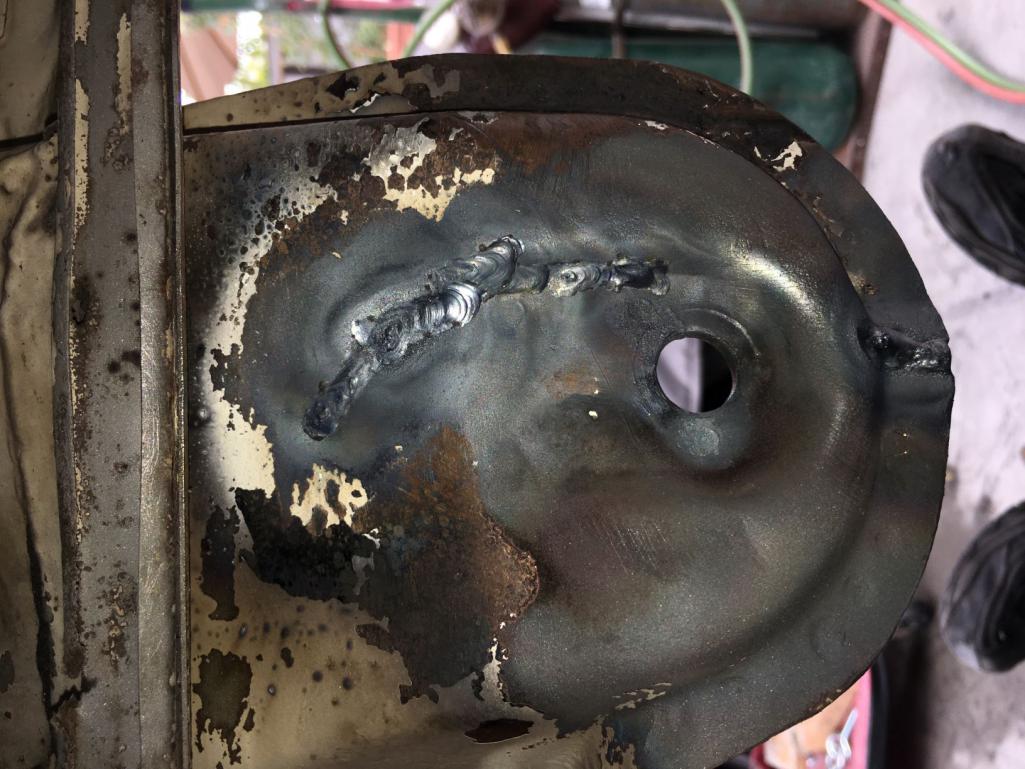
|
|
|
|
| SirAndy |
Aug 17 2020, 02:27 PM
Post
#3
|
|
Resident German Group: Admin Posts: 41,651 Joined: 21-January 03 From: Oakland, Kalifornia Member No.: 179 Region Association: Northern California |
QUOTE(AndrewBlyholder @ Aug 17 2020, 09:53 AM)  Also found that the inner trailing arm ear was badly cracked on both sides: @AndrewBlyholder Racer Chris at Tangerine Racing makes an excellent reinforcement piece for this: http://www.tangerineracing.com/chassis.htm (IMG:style_emoticons/default/bye1.gif) |
 |
|
Posts in this topic
 AndrewBlyholder Looking for hell hole welding advice Aug 15 2020, 12:36 PM
 Superhawk996 Andrew - no easy answers to all of your questions.... Aug 15 2020, 01:00 PM
 SirAndy Yes - flanges were spot welded at factory. Yes - ... Aug 15 2020, 09:59 PM bkrantz One more thing to watch for: Even the relatively i... Aug 15 2020, 09:09 PM mtndawg I’ve welded the stand in, then bolted the tray s... Aug 15 2020, 11:29 PM BillC
I’ve welded the stand in, then bolted the tray ... Aug 16 2020, 02:27 PM DRPHIL914
I’ve welded the stand in, then bolted the tray ... Aug 18 2020, 06:24 AM AndrewBlyholder Thanks for the advice.
I'll check out the spe... Aug 16 2020, 02:30 PM bkrantz
Thanks for the advice.
I'll check out the sp... Aug 16 2020, 08:18 PM bbrock
Thanks for the advice.
I'll check out the sp... Aug 16 2020, 09:37 PM AndrewBlyholder Ok, backing up a bit to give the background on my ... Aug 17 2020, 10:32 AM AndrewBlyholder In my enthusiasm of cutting out the rust, I cut of... Aug 17 2020, 11:02 AM Superhawk996 Yup . . . you've got a project on your hands.... Aug 17 2020, 11:19 AM bbrock
Depending on your goals, you may want to consider... Aug 17 2020, 12:26 PM brant
Depending on your goals, you may want to conside... Aug 17 2020, 01:02 PM Krieger If you had smaller, harder tires you wouldn't ... Aug 17 2020, 11:54 PM Krieger This is how PMB did it. I copied this from a very... Aug 18 2020, 12:01 AM AndrewBlyholder All good advice on the trailing arm ear.
This car... Aug 18 2020, 10:36 PM AndrewBlyholder More progress:
20 years ago, I totaled my previou... Aug 21 2020, 10:37 AM SirAndy Always good to see some progress, rust repair can ... Aug 21 2020, 12:45 PM Krieger Awesome! That was the hard part! Aug 21 2020, 04:36 PM IronHillRestorations Looking good! I was concerned about the crack... Aug 21 2020, 04:53 PM Tdskip Thanks for the updates.
@[url=http://www.914worl... Aug 23 2020, 06:35 AM AndrewBlyholder
Thanks for the updates.
@[url=http://www.914wor... Aug 23 2020, 01:28 PM AndrewBlyholder Ok, here's the part where you learn by seeing ... Aug 23 2020, 01:17 PM AndrewBlyholder Another question: Am I crazy for doing this with ... Aug 23 2020, 01:33 PM IronHillRestorations I'd use a MIG Aug 23 2020, 02:59 PM Superhawk996 Before you go buy a MIG. Try a smaller tip.
To... Aug 23 2020, 03:36 PM AndrewBlyholder
Before you go buy a MIG. Try a smaller tip.
T... Aug 28 2020, 12:04 PM Superhawk996
Have you heard of Kent White? He's a big pro... Aug 28 2020, 04:32 PM AndrewBlyholder
[quote name='AndrewBlyholder' post='2846684' date... Aug 29 2020, 11:33 AM AndrewBlyholder Ok, been so busy working on this trying to get the... Aug 28 2020, 11:51 AM Krieger Good job Andrew! :beer2: Aug 28 2020, 06:01 PM Tdskip Nice work and thanks for the updates. Aug 29 2020, 07:06 AM AndrewBlyholder Forgot to include in my last update the status of ... Aug 29 2020, 11:45 AM AndrewBlyholder Just to finish off this thread, thought I'd po... Oct 20 2020, 12:30 PM Superhawk996
(Disclaimer: previous owners replaced the inner ... Oct 20 2020, 05:25 PM AndrewBlyholder
(Disclaimer: previous owners replaced the inner... Oct 22 2020, 11:46 AM AZBanks Nice work. It looks good. Oct 20 2020, 02:22 PM
SirAndy Yes - flanges were spot welded at factory. Yes - ... Aug 15 2020, 09:59 PM bkrantz One more thing to watch for: Even the relatively i... Aug 15 2020, 09:09 PM mtndawg I’ve welded the stand in, then bolted the tray s... Aug 15 2020, 11:29 PM BillC
I’ve welded the stand in, then bolted the tray ... Aug 16 2020, 02:27 PM DRPHIL914
I’ve welded the stand in, then bolted the tray ... Aug 18 2020, 06:24 AM AndrewBlyholder Thanks for the advice.
I'll check out the spe... Aug 16 2020, 02:30 PM bkrantz
Thanks for the advice.
I'll check out the sp... Aug 16 2020, 08:18 PM bbrock
Thanks for the advice.
I'll check out the sp... Aug 16 2020, 09:37 PM AndrewBlyholder Ok, backing up a bit to give the background on my ... Aug 17 2020, 10:32 AM AndrewBlyholder In my enthusiasm of cutting out the rust, I cut of... Aug 17 2020, 11:02 AM Superhawk996 Yup . . . you've got a project on your hands.... Aug 17 2020, 11:19 AM bbrock
Depending on your goals, you may want to consider... Aug 17 2020, 12:26 PM brant
Depending on your goals, you may want to conside... Aug 17 2020, 01:02 PM Krieger If you had smaller, harder tires you wouldn't ... Aug 17 2020, 11:54 PM Krieger This is how PMB did it. I copied this from a very... Aug 18 2020, 12:01 AM AndrewBlyholder All good advice on the trailing arm ear.
This car... Aug 18 2020, 10:36 PM AndrewBlyholder More progress:
20 years ago, I totaled my previou... Aug 21 2020, 10:37 AM SirAndy Always good to see some progress, rust repair can ... Aug 21 2020, 12:45 PM Krieger Awesome! That was the hard part! Aug 21 2020, 04:36 PM IronHillRestorations Looking good! I was concerned about the crack... Aug 21 2020, 04:53 PM Tdskip Thanks for the updates.
@[url=http://www.914worl... Aug 23 2020, 06:35 AM AndrewBlyholder
Thanks for the updates.
@[url=http://www.914wor... Aug 23 2020, 01:28 PM AndrewBlyholder Ok, here's the part where you learn by seeing ... Aug 23 2020, 01:17 PM AndrewBlyholder Another question: Am I crazy for doing this with ... Aug 23 2020, 01:33 PM IronHillRestorations I'd use a MIG Aug 23 2020, 02:59 PM Superhawk996 Before you go buy a MIG. Try a smaller tip.
To... Aug 23 2020, 03:36 PM AndrewBlyholder
Before you go buy a MIG. Try a smaller tip.
T... Aug 28 2020, 12:04 PM Superhawk996
Have you heard of Kent White? He's a big pro... Aug 28 2020, 04:32 PM AndrewBlyholder
[quote name='AndrewBlyholder' post='2846684' date... Aug 29 2020, 11:33 AM AndrewBlyholder Ok, been so busy working on this trying to get the... Aug 28 2020, 11:51 AM Krieger Good job Andrew! :beer2: Aug 28 2020, 06:01 PM Tdskip Nice work and thanks for the updates. Aug 29 2020, 07:06 AM AndrewBlyholder Forgot to include in my last update the status of ... Aug 29 2020, 11:45 AM AndrewBlyholder Just to finish off this thread, thought I'd po... Oct 20 2020, 12:30 PM Superhawk996
(Disclaimer: previous owners replaced the inner ... Oct 20 2020, 05:25 PM AndrewBlyholder
(Disclaimer: previous owners replaced the inner... Oct 22 2020, 11:46 AM AZBanks Nice work. It looks good. Oct 20 2020, 02:22 PM |
3 User(s) are reading this topic (3 Guests and 0 Anonymous Users)
0 Members:

|
Lo-Fi Version | Time is now: 21st May 2024 - 09:31 AM |
Invision Power Board
v9.1.4 © 2024 IPS, Inc.