|
|
|
Porsche, and the Porsche crest are registered trademarks of Dr. Ing. h.c. F. Porsche AG.
This site is not affiliated with Porsche in any way. Its only purpose is to provide an online forum for car enthusiasts. All other trademarks are property of their respective owners. |
|
|

  |

| rfinegan |
 Aug 21 2020, 08:18 AM Aug 21 2020, 08:18 AM
Post
#1
|
|
Senior Member  Group: Members Posts: 973 Joined: 8-February 13 From: NC Member No.: 15,499 Region Association: MidAtlantic Region |
I stated the backdating of my rear BUB and thought I would share the Solution for the bumper shock holes. The are spacers and flyers from Lowes H/W electrical hole fillers and reducers held in place with seam sealer...and while the seam sealer is out I did the cover hold down deletes and sprayed some color
Enjoy More pic s the project continues 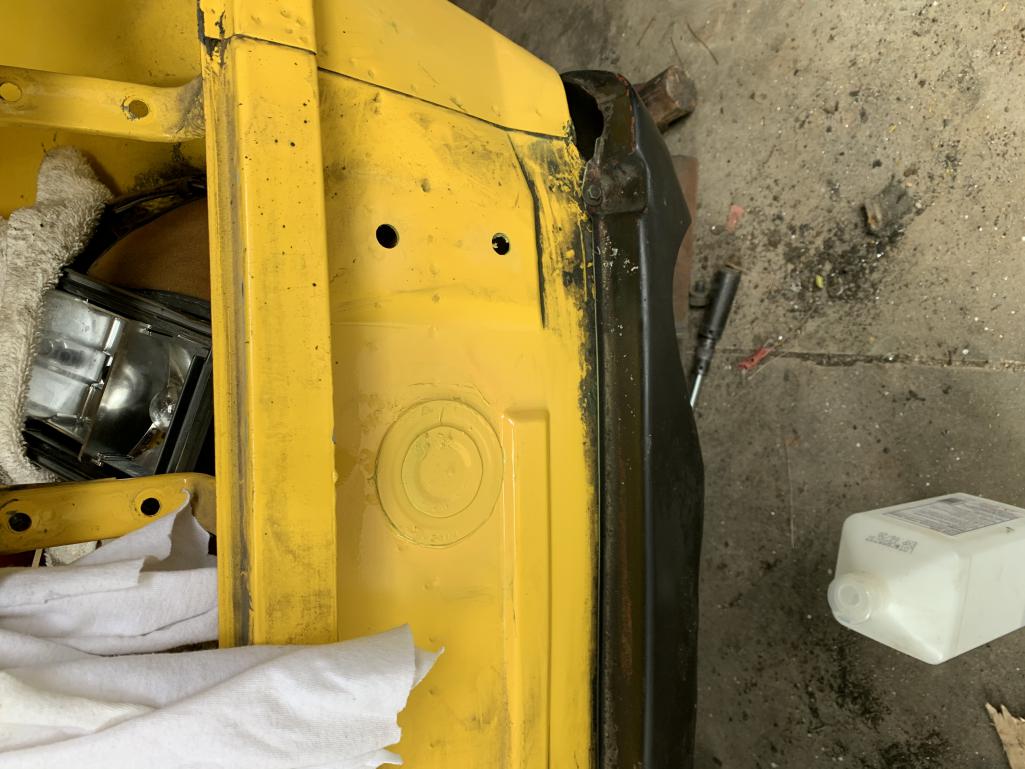 |
   |

 
|
| rfinegan |
Aug 21 2020, 08:19 AM
Post
#2
|
|
Senior Member Group: Members Posts: 973 Joined: 8-February 13 From: NC Member No.: 15,499 Region Association: MidAtlantic Region |
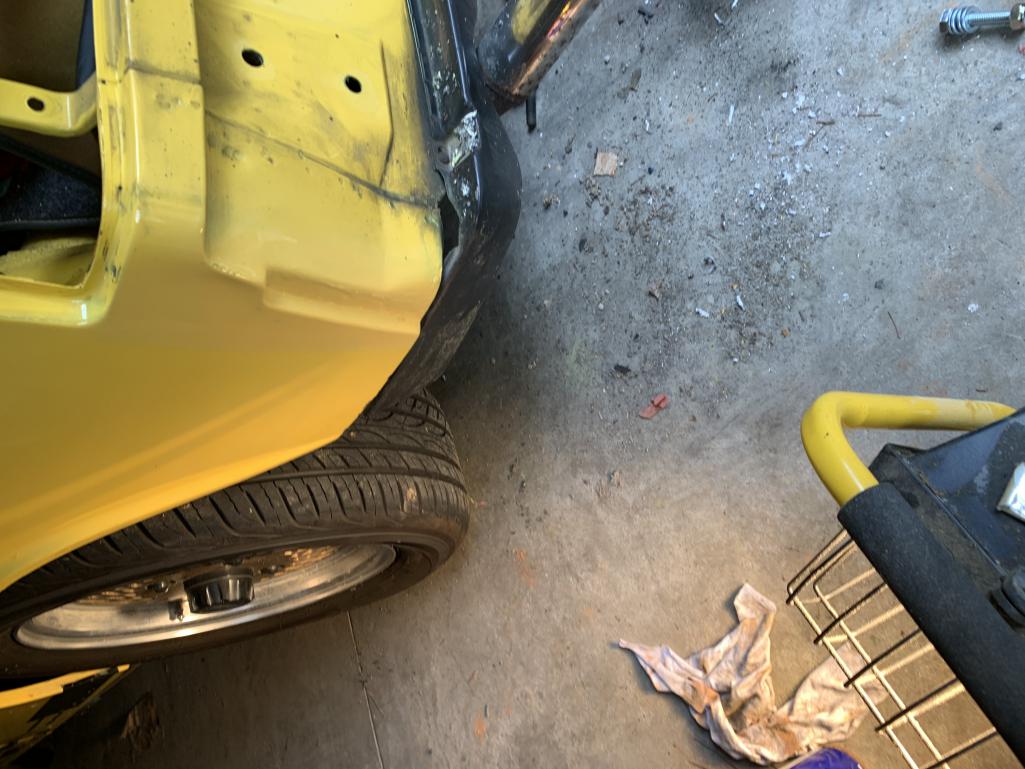
another pic
 |
|
|
|
| jim_hoyland |
Aug 21 2020, 12:12 PM
Post
#3
|
|
Get that VIN ? Group: Members Posts: 9,303 Joined: 1-May 03 From: Sunset Beach, CA Member No.: 643 Region Association: Southern California |
(IMG:style_emoticons/default/smile.gif) Nice ! Can you show the individual pieces before installation; I’m going to be doing h th his soon
|
|
|
|
| rfinegan |
Aug 22 2020, 07:54 AM
Post
#4
|
|
Senior Member Group: Members Posts: 973 Joined: 8-February 13 From: NC Member No.: 15,499 Region Association: MidAtlantic Region |
QUOTE(jim_hoyland @ Aug 21 2020, 10:12 AM)  (IMG:style_emoticons/default/smile.gif) Nice ! Can you show the individual pieces before installation; I’m going to be doing h th his soon Here is the knock out seals I used.. 1 1/4 knock out seal 2' 1 1/4 reducing washer Theres is a Large knock out seal that may fit the hole directly but the bottom hole may not be covered and will need be filled. Seam sealer will work too but I did not go that way as I would have to go back to the store again (up to you) Attached thumbnail(s) 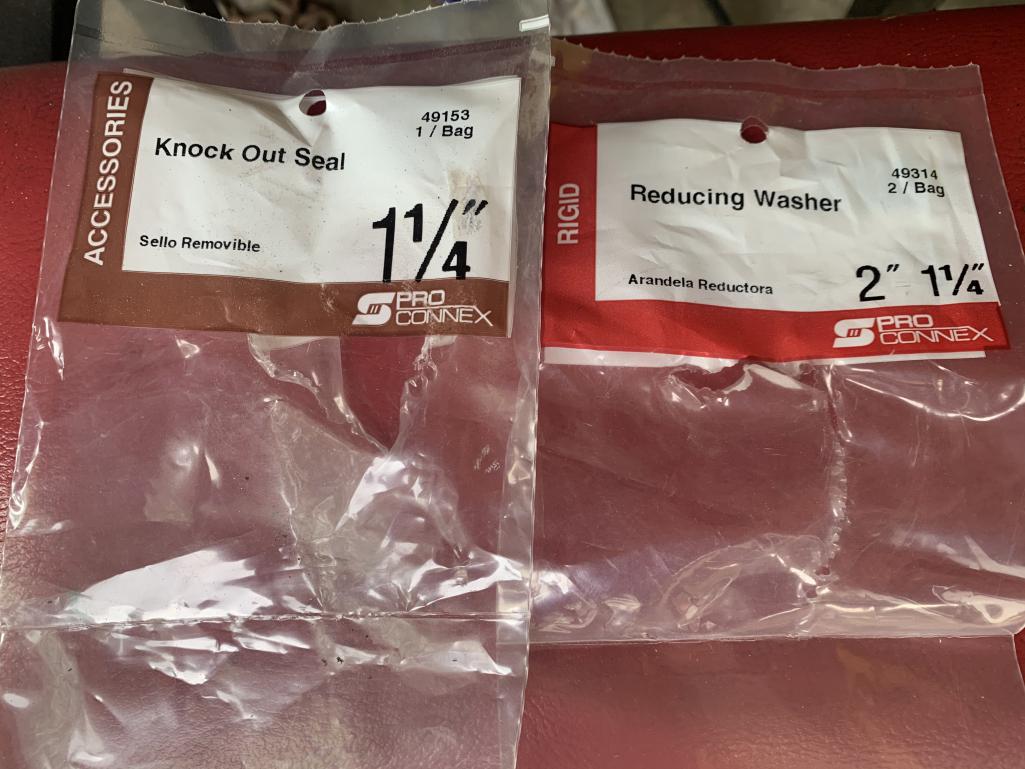
|
|
|
|
| rfinegan |
Aug 22 2020, 07:55 AM
Post
#5
|
|
Senior Member Group: Members Posts: 973 Joined: 8-February 13 From: NC Member No.: 15,499 Region Association: MidAtlantic Region |
here is a pic of a large Knock out seal
Attached thumbnail(s) 
|
|
|
|
| jim_hoyland |
Aug 22 2020, 10:17 AM
Post
#6
|
|
Get that VIN ? Group: Members Posts: 9,303 Joined: 1-May 03 From: Sunset Beach, CA Member No.: 643 Region Association: Southern California |
Does the heat shield or muffler have to be removed to install the lower bolts; IIRC, they are below the trunk floor...
Did you drill out the rubber bumper holders at each end ? or Cut ? |
|
|
|
| rfinegan |
Aug 22 2020, 10:47 AM
Post
#7
|
|
Senior Member Group: Members Posts: 973 Joined: 8-February 13 From: NC Member No.: 15,499 Region Association: MidAtlantic Region |
Here is an alignment tip: Use the seem and the roll ed edge off the bumper top seen here:
 |
|
|
|
| rfinegan |
Aug 22 2020, 10:48 AM
Post
#8
|
|
Senior Member Group: Members Posts: 973 Joined: 8-February 13 From: NC Member No.: 15,499 Region Association: MidAtlantic Region |
and the other side:
Attached thumbnail(s) 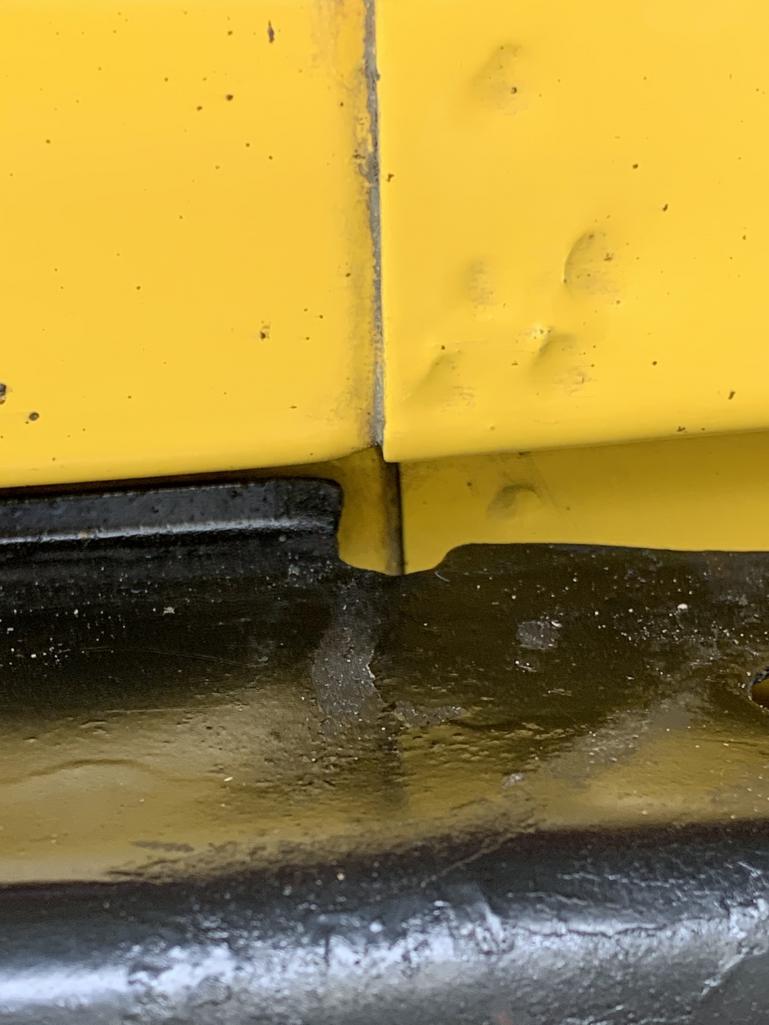
|
|
|
|
| rfinegan |
Aug 22 2020, 10:55 AM
Post
#9
|
|
Senior Member Group: Members Posts: 973 Joined: 8-February 13 From: NC Member No.: 15,499 Region Association: MidAtlantic Region |
Need to move about an 1/8 inch to the right
|
|
|
|
| rfinegan |
Aug 22 2020, 11:01 AM
Post
#10
|
|
Senior Member Group: Members Posts: 973 Joined: 8-February 13 From: NC Member No.: 15,499 Region Association: MidAtlantic Region |
QUOTE(jim_hoyland @ Aug 22 2020, 08:17 AM) Does the heat shield or muffler have to be removed to install the lower bolts; IIRC, they are below the trunk floor... Did you drill out the rubber bumper holders at each end ? or Cut ? I did pull the lenses and tail lights our to ensure the cover and bumper did not hit them or get paint on them when i removed the cover hold downs. The muffler and shield are not in the way. But an extension was needed pull the shocks. I used a spot weld cutter (Harbor Freight ) Fist time user. And they work very well with little cutting on the fender. I used a cut off wheel and die grinder to sooth out and covered with seam sealer..then paint MY cover had "nail "Rivets on the corners and under the lenses that I tapped our from under the car with a punch. I could have just pulled the cover off these but want to same the cover and the rivets had to come out anyhow Seen here: Attached thumbnail(s) 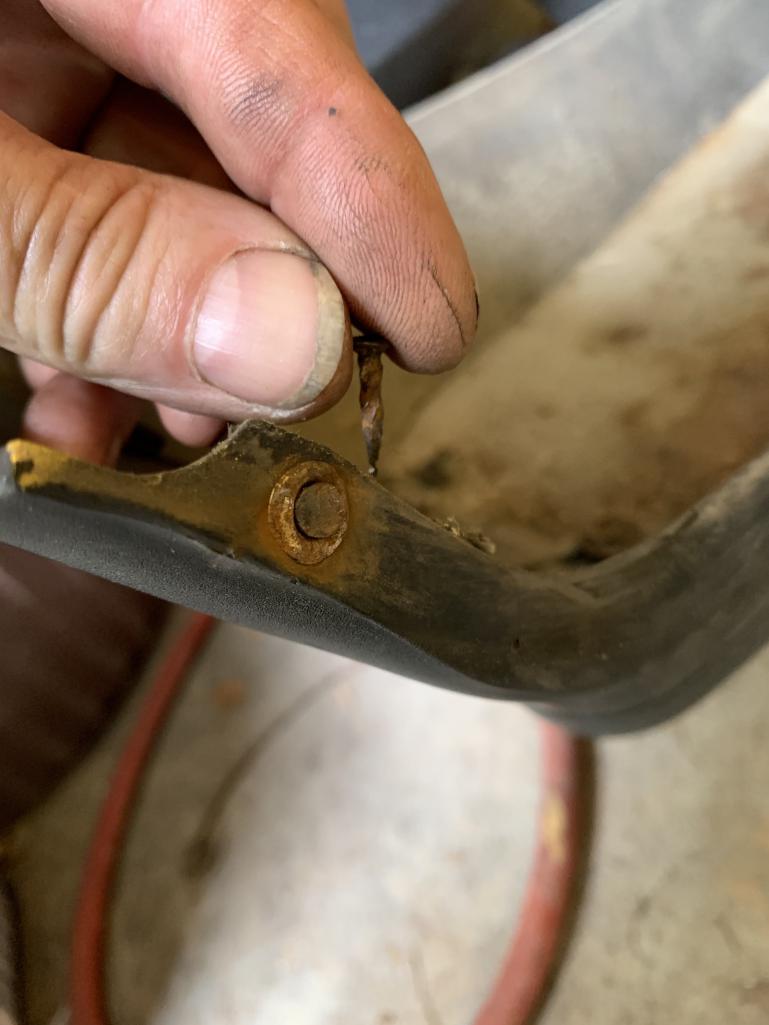
|
|
|
|
| rfinegan |
Aug 22 2020, 11:16 AM
Post
#11
|
|
Senior Member Group: Members Posts: 973 Joined: 8-February 13 From: NC Member No.: 15,499 Region Association: MidAtlantic Region |
hold down removal:
Attached thumbnail(s) 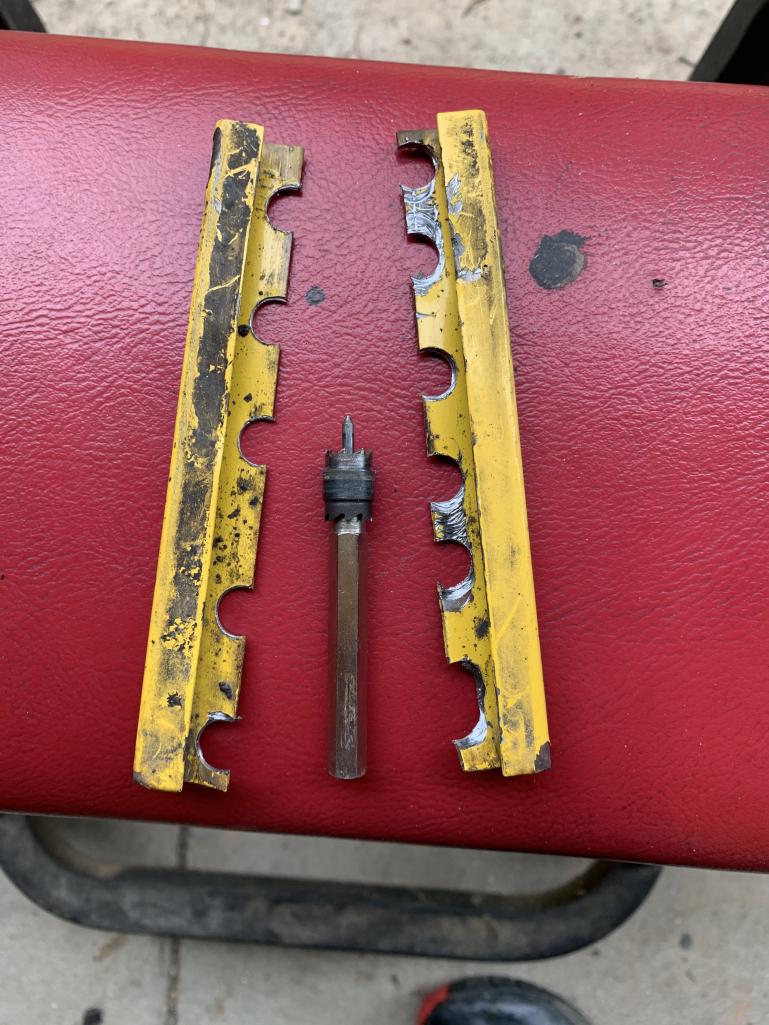
|
|
|
|
| rfinegan |
Aug 22 2020, 02:54 PM
Post
#12
|
|
Senior Member Group: Members Posts: 973 Joined: 8-February 13 From: NC Member No.: 15,499 Region Association: MidAtlantic Region |
need the tops now...
Attached thumbnail(s) 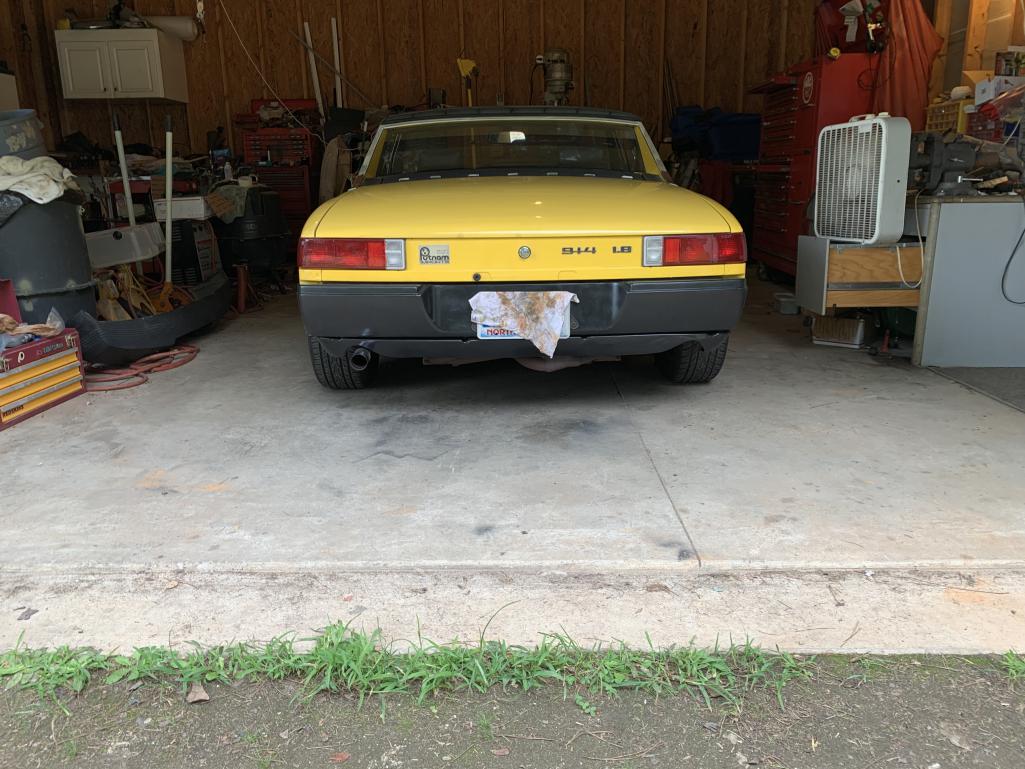
|
|
|
|
| Cairo94507 |
Aug 22 2020, 04:49 PM
Post
#13
|
|
Michael Group: Members Posts: 9,771 Joined: 1-November 08 From: Auburn, CA Member No.: 9,712 Region Association: Northern California |
Probably the single biggest difference you can make to the appearance of the late cars to increase their beauty. Once you get a bumper top you will love it even more. (IMG:style_emoticons/default/beerchug.gif)
|
 |
|
| RiqueMar |
Aug 24 2020, 11:27 AM
Post
#14
|
|
Enrique Allen Mar Group: Members Posts: 2,169 Joined: 28-August 08 From: San Diego, CA Member No.: 9,478 Region Association: Southern California |
|
|
|
|
| maf914 |
Aug 24 2020, 02:08 PM
Post
#15
|
|
Not a Guru! Group: Members Posts: 3,049 Joined: 30-April 03 From: Central Florida Member No.: 632 Region Association: None |
rfinegan,
Nice work and thanks for the writeup. Could you comment on locating the four bumper mounting bolt holes? Any tips would be appreciated. Do you intend to use nuts, bolts and washers for mounting? Or some sort of riv-nuts and bolts? Thanks. |
|
|
|
| jim_hoyland |
Aug 24 2020, 04:52 PM
Post
#16
|
|
Get that VIN ? Group: Members Posts: 9,303 Joined: 1-May 03 From: Sunset Beach, CA Member No.: 643 Region Association: Southern California |
QUOTE(maf914 @ Aug 24 2020, 01:08 PM) rfinegan, Nice work and thanks for the writeup. Could you comment on locating the four bumper mounting bolt holes? Any tips would be appreciated. Do you intend to use nuts, bolts and washers for mounting? Or some sort of riv-nuts and bolts? Thanks. (IMG:style_emoticons/default/smile.gif) I'd like to know too, since I'll doing this |
|
|
|
| rfinegan |
Aug 25 2020, 04:32 AM
Post
#17
|
|
Senior Member Group: Members Posts: 973 Joined: 8-February 13 From: NC Member No.: 15,499 Region Association: MidAtlantic Region |
QUOTE(maf914 @ Aug 24 2020, 12:08 PM) rfinegan, Nice work and thanks for the writeup. Could you comment on locating the four bumper mounting bolt holes? Any tips would be appreciated. Do you intend to use nuts, bolts and washers for mounting? Or some sort of riv-nuts and bolts? Thanks. Factory is bolts and lock washers. I decided to use studs by cutting the heads of the bolts and chamfering the ends and nylon lock nuts. This lets you install the bumper with one person and not have to align the bumper and try to get the bolts stated in the holes at the same time. 8mmX1.25x50 May be just a tad long but worked fine Also have the Dog bones handy when you do this . They have the correct spacing/ the same as the bumper and can help ensure the holes are going in the right location FWIW: I was Following the post here on Sticky on where to drill the holes, BE CAREFUL.. Mine were off and needed to be opened up/drilled again...in the right location. My bumper is not new and may have a few tweeks. Use you bumper to find your holes and double check before drilling 1) Tape the area where the hole will be drilled with blue painters tape 2) Cut the heads off the 8mm 1.25x50 bolts and screw the new studs into the top holes of the bumper. 3) I left the bottom valance on to help center the bumper. This will ensure the correct vertical spacing as the fit has just a little play/spacing 4) Center the bumper in the desired area and give it a tap with your open hand to mark the tape in the location for the top holes 5) Go back and measure the hole to the sticky in the forum (this is the relaity check) 6) Drill the holes with a 1/2 step drill. They are cheep and do a great EZ job on this 7) Insure bumper is desired location top to bottom and left to right. Open holes as needed to fine tune 8) Add lower studs and dog bones(optional but helps minimize scratches) 9) Install bumper studs/dog bones in top holes in new fine tuned location 10) Tap bumper for new location for lower holes on blue tap 11) Drill bottom holes with 1/2 step drill 12) Install and fine tune as needed -Robert On a scale of 1-10 for difficulty 1=new gas cap/seal 10=Transition overhaul This job is a 2-3. There is some drilling, cutting and grinding but can be done in a few hours (less paint) I can measure my holes once I get the Gel cote tops. But for now they are installed |
|
|
|
| jim_hoyland |
Aug 25 2020, 06:12 AM
Post
#18
|
|
Get that VIN ? Group: Members Posts: 9,303 Joined: 1-May 03 From: Sunset Beach, CA Member No.: 643 Region Association: Southern California |
That's great info Robert; I see from your pic the bumper top is off; does the top need to be attached for fitment ? Or do you rely on the valene fo fitting
|
|
|
|
| rfinegan |
Aug 25 2020, 07:05 AM
Post
#19
|
|
Senior Member Group: Members Posts: 973 Joined: 8-February 13 From: NC Member No.: 15,499 Region Association: MidAtlantic Region |
QUOTE(jim_hoyland @ Aug 25 2020, 04:12 AM) That's great info Robert; I see from your pic the bumper top is off; does the top need to be attached for fitment ? Or do you rely on the valene fo fitting Not sure, this is my first too... I post back soon when i get my Gel coat tops I am sure some one can make a full size template from the back of a Factory car with little effort using the seam and ledge as a reference. That would be a big help to everyone backdating |
|
|
|
| maf914 |
Aug 25 2020, 08:56 AM
Post
#20
|
|
Not a Guru! Group: Members Posts: 3,049 Joined: 30-April 03 From: Central Florida Member No.: 632 Region Association: None |
Robert,
Thanks for all of the great info. I am gathering parts at this time. Here is a detailed thread from the Classic Thread Forum: http://www.914world.com/bbs2/index.php?sho...225743&st=0 |
|
|
|
|
1 User(s) are reading this topic (1 Guests and 0 Anonymous Users)
0 Members:

|
Lo-Fi Version | Time is now: 20th May 2024 - 10:12 AM |
Invision Power Board
v9.1.4 © 2024 IPS, Inc.