|
|
|
Porsche, and the Porsche crest are registered trademarks of Dr. Ing. h.c. F. Porsche AG.
This site is not affiliated with Porsche in any way. Its only purpose is to provide an online forum for car enthusiasts. All other trademarks are property of their respective owners. |
|
|

  |

| sholman5 |
 Sep 30 2020, 10:30 AM Sep 30 2020, 10:30 AM
Post
#21
|
|
Kraut burner  Group: Members Posts: 197 Joined: 11-September 16 From: Ormond beach, Fl. Member No.: 20,391 Region Association: South East States |
 Instead of welding the tray and support in place. Installed inserts to secure the support and drilled holes thru the the tray and wall. Tray bolts to the support via battery hold down. 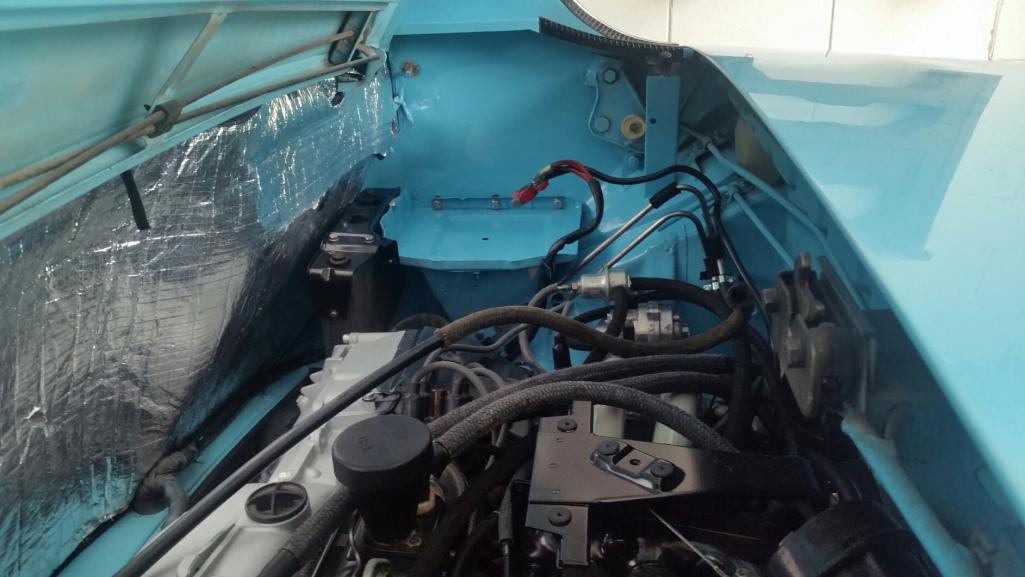 |
   |

 
|
| pt_700 |
Sep 30 2020, 11:39 AM
Post
#22
|
|
Senior Member Group: Members Posts: 1,113 Joined: 4-March 10 From: san jose, ca Member No.: 11,430 Region Association: Northern California |
i'm liking the idea of a bolt in tray and or supports. would sure make accessing the area for cleanup easier...
in order to remove both cleanly, do i simply locate & drill out the spot welds? is there access to the backsides as seen above in the rear wheel well? |
|
|
|
| Frankvw |
Sep 30 2020, 11:45 AM
Post
#23
|
|
working on my first 914 ! Group: Members Posts: 653 Joined: 13-April 16 From: Holland, the Netherlands Member No.: 19,896 Region Association: Europe |
wow, great result to show for !!!!
Did you carefully 'dremel' out the old leftovers of the old batterytray ? What kind of inserts did you use so the bolts could be used later ? Thanks for your updates and feedback ! |
|
|
|
| sholman5 |
Sep 30 2020, 02:52 PM
Post
#24
|
|
Kraut burner Group: Members Posts: 197 Joined: 11-September 16 From: Ormond beach, Fl. Member No.: 20,391 Region Association: South East States |
QUOTE(pt_700 @ Sep 30 2020, 01:39 PM)  i'm liking the idea of a bolt in tray and or supports. would sure make accessing the area for cleanup easier... in order to remove both cleanly, do i simply locate & drill out the spot welds? is there access to the backsides as seen above in the rear wheel well? QUOTE(Frankvw @ Sep 30 2020, 01:45 PM) wow, great result to show for !!!! Did you carefully 'dremel' out the old leftovers of the old batterytray ? What kind of inserts did you use so the bolts could be used later ? Thanks for your updates and feedback ! I used a spot weld bit to remove the tray and support and ground down the spot weld. Then attached the tray to the support with a bolt that would usually secure the battery to the tray. Set the tray and support in position in the engine compartment. I pre drilled three holes at the back of the tray and the lower tab of the support. Marked the holes on the side wall of the engine compartment and the rail structure. For the tray I used the largest bolts possible, you can access the rear wheel well to put the nuts on and tighten them. The holes in the structure rail for the support depends on the size of the inserts used. Luckily for me a friend had a complete set of different size also the tool used to insert and crush the insert. I also put 2 rubber washers on every bolt used as a spacer in between the support and rail structure and tray and side wall. Hope this helps. |
|
|
|
| Frankvw |
Oct 1 2020, 04:12 AM
Post
#25
|
|
working on my first 914 ! Group: Members Posts: 653 Joined: 13-April 16 From: Holland, the Netherlands Member No.: 19,896 Region Association: Europe |
Yes that helps !!
"For the tray I used the largest bolts possible, you can access the rear wheel well to put the nuts on and tighten them" I was not aware I could reach in there all that way up. So, that is great info. Your tray-area looks great again ! |
|
|
|
| pt_700 |
Oct 1 2020, 10:08 PM
Post
#26
|
|
Senior Member Group: Members Posts: 1,113 Joined: 4-March 10 From: san jose, ca Member No.: 11,430 Region Association: Northern California |
so, you can't get behind where you bolted the support and you had to use some sort of threaded insert, installed from the engine compartment side?
could you point me towards that product, please? i really appreciate your pointers on this! |
|
|
|
| mtndawg |
Oct 1 2020, 10:36 PM
Post
#27
|
|
Member Group: Members Posts: 414 Joined: 26-January 09 From: Granite Bay, Ca Member No.: 9,985 Region Association: None |
I’ve done a bolt down battery tray in 2 cars. Looks really nice.
Attached image(s) 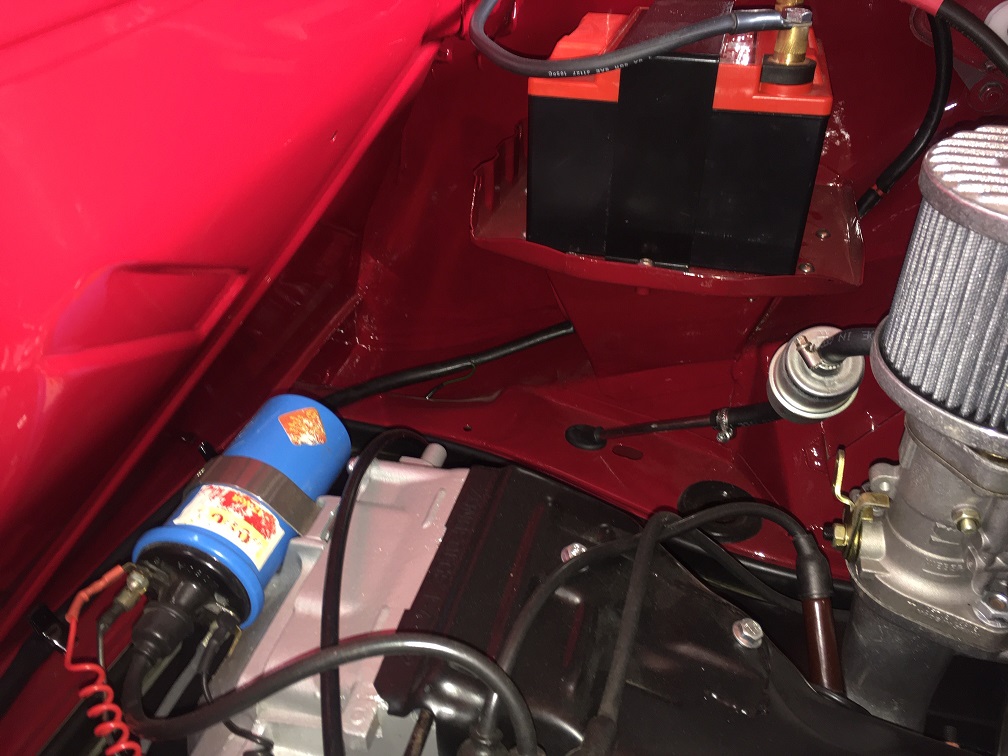
|
|
|
|
| pt_700 |
Oct 6 2020, 12:11 PM
Post
#28
|
|
Senior Member Group: Members Posts: 1,113 Joined: 4-March 10 From: san jose, ca Member No.: 11,430 Region Association: Northern California |
nutsert is one of the products (rivetnuts too). like a threaded rivet.
learn something new almost every day or yet another toy / tool to buy, ha ha! https://www.ebay.com/b/Nutsert/183908/bn_7023259115 |
|
|
|
| pt_700 |
Oct 16 2020, 09:59 PM
Post
#29
|
|
Senior Member Group: Members Posts: 1,113 Joined: 4-March 10 From: san jose, ca Member No.: 11,430 Region Association: Northern California |
finally some progress on this, intervening was the power steering rack on my '83 accord (53k miles!) which sprung a rather large leak, forcing me to learn steering rack replacement but, i digress... let's just say the drive to the alignment shop a few miles away on city streets was "interesting"...
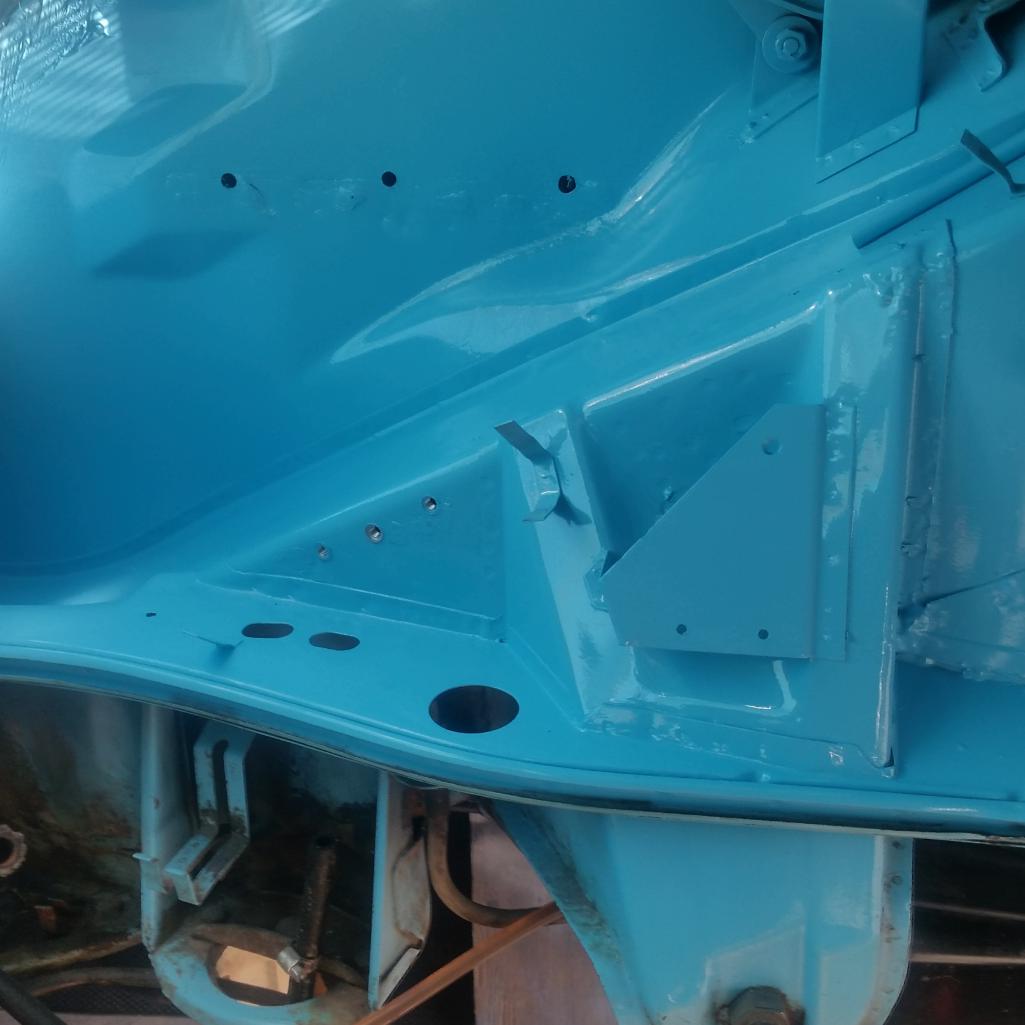
probably shoulda called in experienced help on this but, the rusty battery tray's out. i was contemplating even sharing this (not my best work) but, figure it might be a lesson to someone else. i had a helluva time figuring out (i mean missing) where the spot welds were. easy enough to see the little dimples on clean sheet metal but, i was kinda drillin' blind here. after going at it with a wire brush on my cordless drill, i used a permetex product that sprays on in 2-3 light coats as clear, turning black where it finds rust (pics taken several hours later). as you can see, i decided on a hybrid bolt in, given the condition of the support and my bumbling attempts on removal of just the tray... i guess i'll use the holes i've already made to mark the new tray and carefully drill. debating if i want to use the threaded inserts that came with my new toy or just regular bolts as there's decent access. (IMG:style_emoticons/default/wacko.gif) 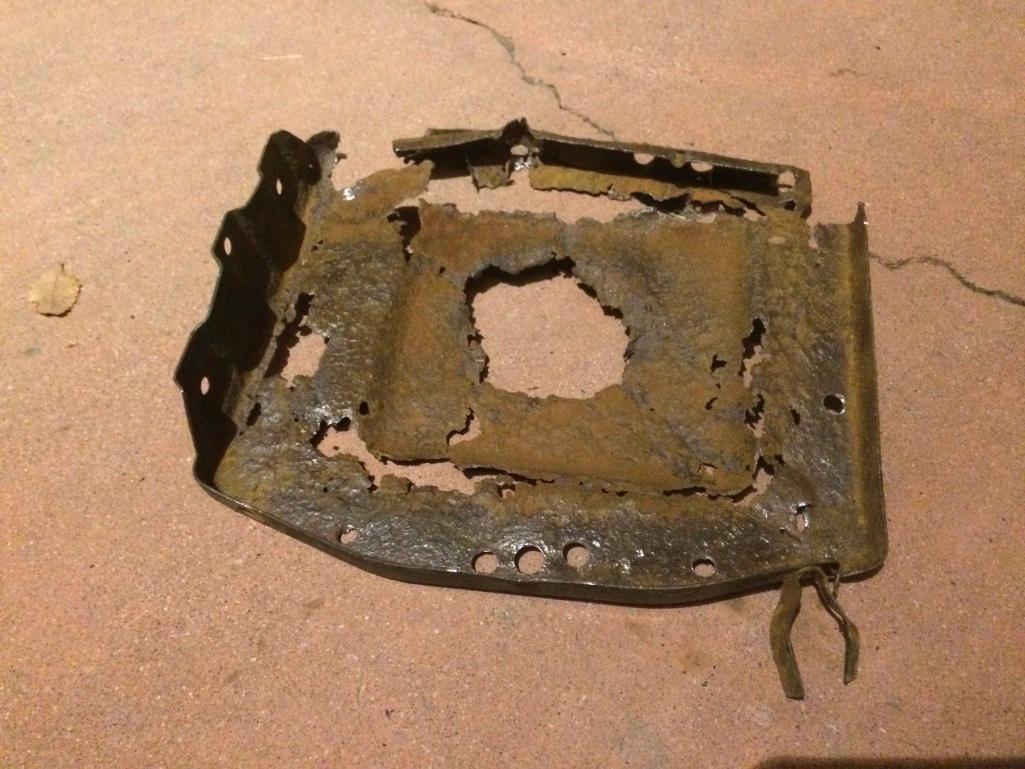 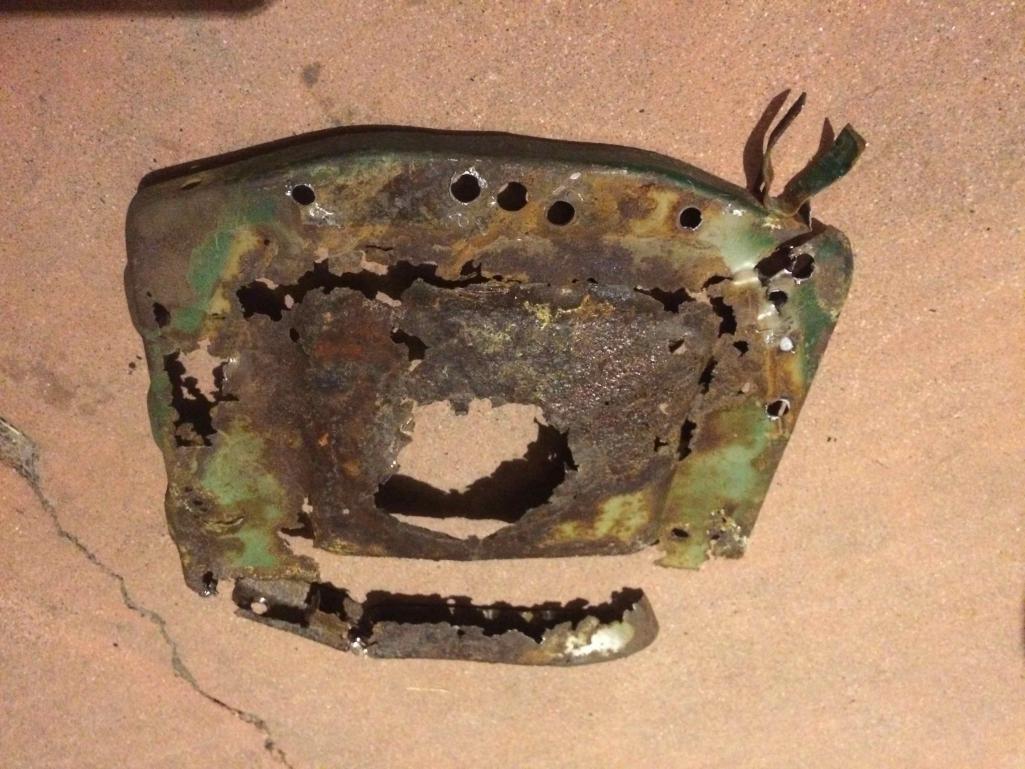 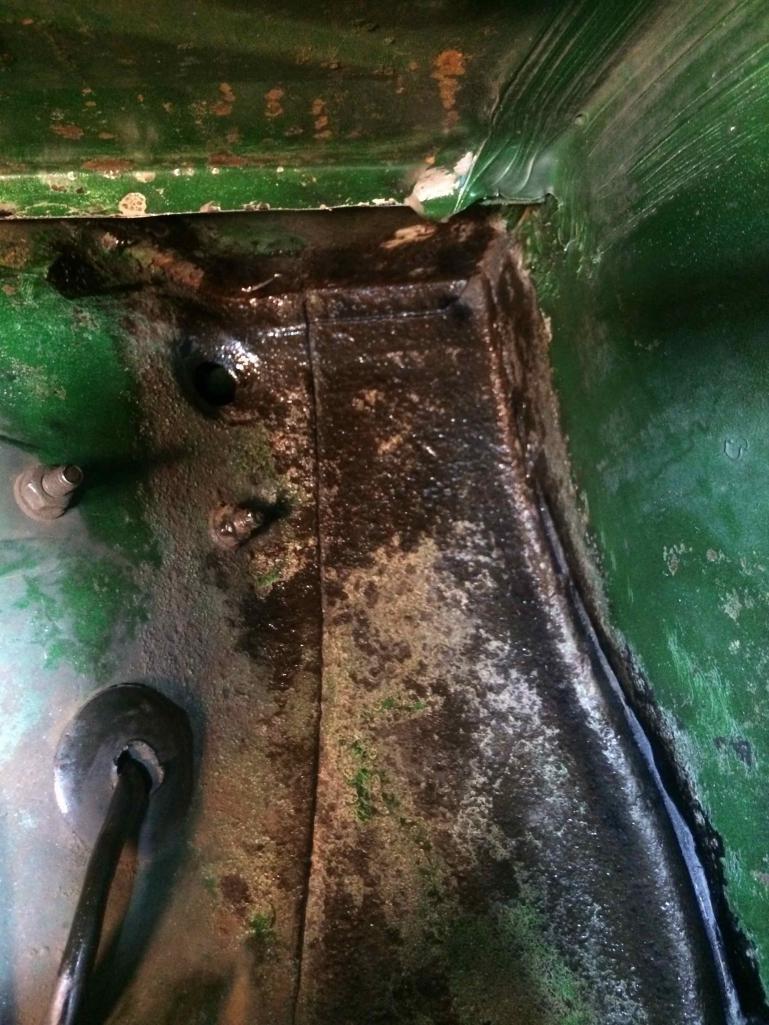 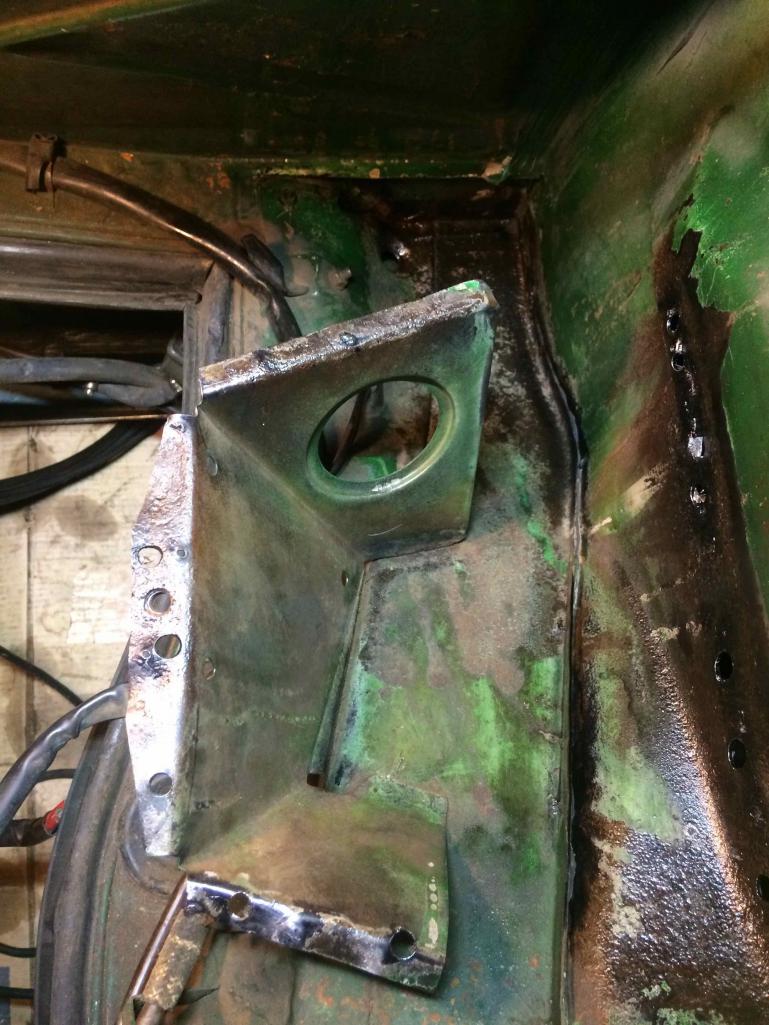 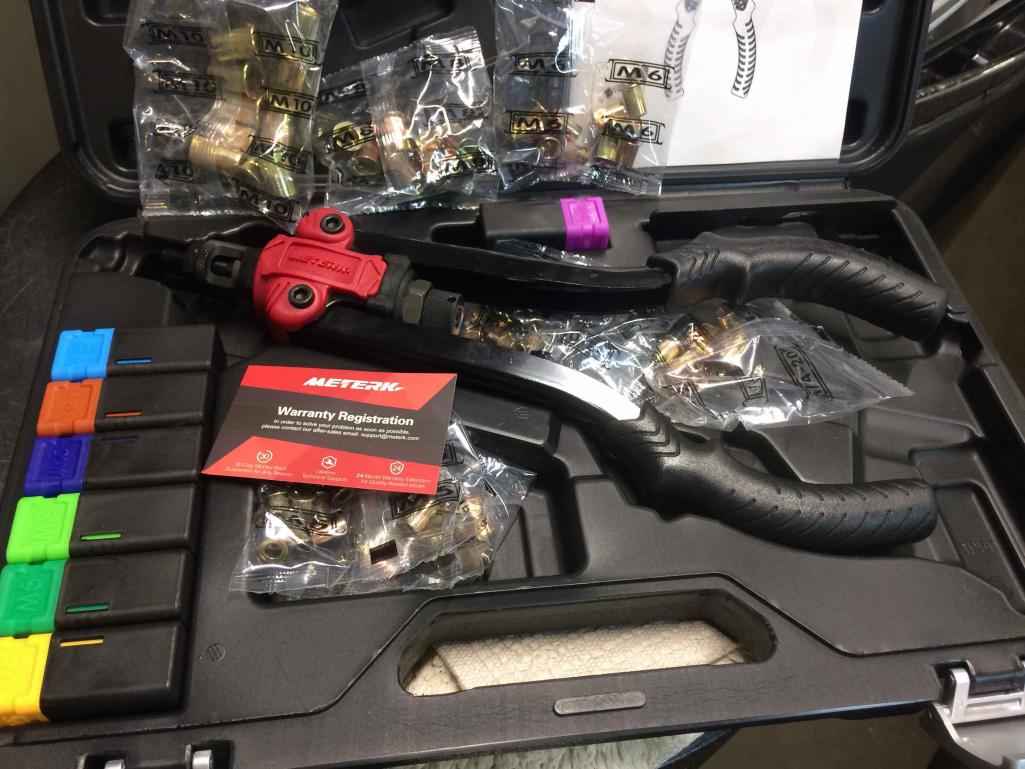 |
|
|
|
| Superhawk996 |
Oct 17 2020, 06:53 AM
Post
#30
|
|
914 Guru Group: Members Posts: 7,938 Joined: 25-August 18 From: Woods of N. Idaho Member No.: 22,428 Region Association: Galt's Gulch |
Glad to see you're getting after it and that the metal is pretty solid in Hell Hole. You're really lucky on that account.
Hard to tell from pictures but it seems like you still have quite a bit of corrosion there. I've found that when I apply Ospho or Metal Prep it helps to let it turn black and dry. Then go back and wire wheel it again. Wear a respirator. That digs out more of the rust that Ospho neutralized, and then reapply again. Sometimes I do this 2 -3 times if the rust and pitting was deep. Eventually you'll find that when you appply the rust neuatralizer that you're not getting nearly as much blackening (rust conversion) meaning there is very little active rust actually left down in the pitting that is getting neutralized. |
|
|
|
| Tdskip |
Oct 17 2020, 07:21 AM
Post
#31
|
|
Advanced Member Group: Members Posts: 3,783 Joined: 1-December 17 From: soCal Member No.: 21,666 Region Association: None |
QUOTE(Superhawk996 @ Oct 17 2020, 07:53 AM) Glad to see you're getting after it and that the metal is pretty solid in Hell Hole. You're really lucky on that account. Hard to tell from pictures but it seems like you still have quite a bit of corrosion there. I've found that when I apply Ospho or Metal Prep it helps to let it turn black and dry. Then go back and wire wheel it again. Wear a respirator. That digs out more of the rust that Ospho neutralized, and then reapply again. Sometimes I do this 2 -3 times if the rust and pitting was deep. Eventually you'll find that when you appply the rust neuatralizer that you're not getting nearly as much blackening (rust conversion) meaning there is very little active rust actually left down in the pitting that is getting neutralized. Exactly how I do it - takes some time but you need to do 3 or 4 cycles like that to make sure the metal is clean. There will always be more rust under the black spots on the first couple passes. @pt_700 thanks for the update and no need to afford anything! You are getting it done. |
|
|
|
| mlindner |
Oct 17 2020, 08:05 AM
Post
#32
|
|
Senior Member Group: Members Posts: 1,790 Joined: 11-November 11 From: Merrimac, WI Member No.: 13,770 Region Association: Upper MidWest |
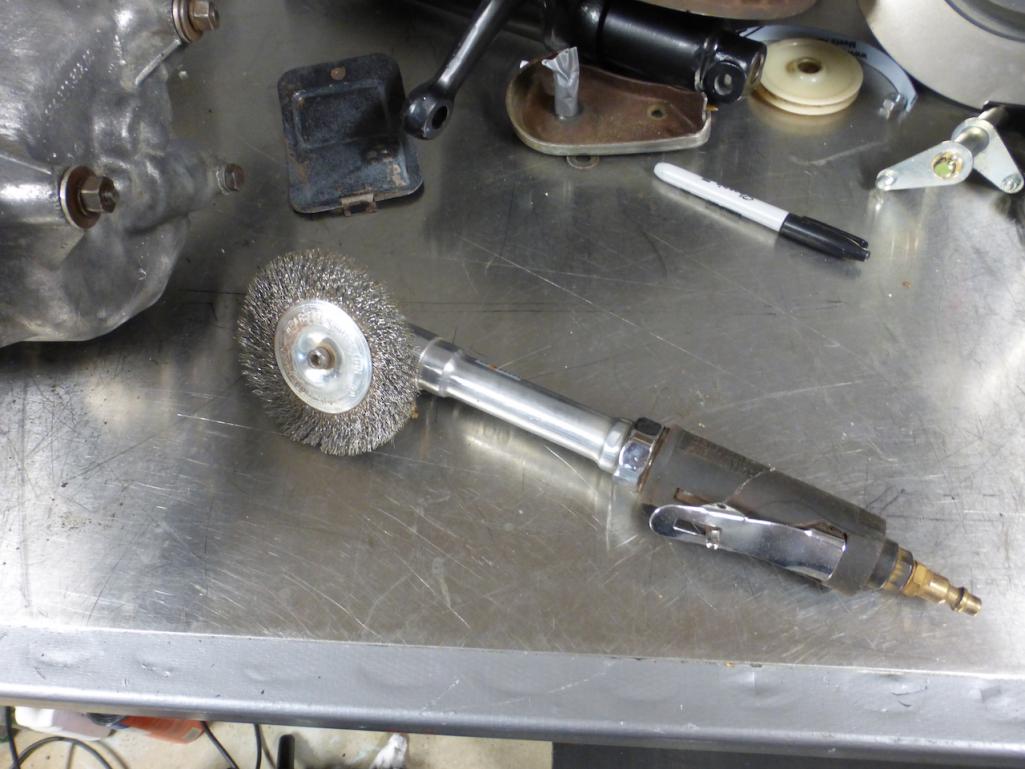
PT 700, using revnuts...make sure they fit very tight to the hole you drill. And second, to clean up hell hole buy a cheap HF extended grinder, then cut off the 1/4 shaft on the wire wheel and drill out to fit. Work great for cleaning up tight areas like that and in inner fender. I used it on the entire bottom of my car. Best, Mark
 |
|
|
|
| pt_700 |
Oct 17 2020, 11:25 AM
Post
#33
|
|
Senior Member Group: Members Posts: 1,113 Joined: 4-March 10 From: san jose, ca Member No.: 11,430 Region Association: Northern California |
thanks for the tips! i'll get back in there for another round or two of wire wheel.
|
|
|
|
| pt_700 |
Oct 18 2020, 10:51 PM
Post
#34
|
|
Senior Member Group: Members Posts: 1,113 Joined: 4-March 10 From: san jose, ca Member No.: 11,430 Region Association: Northern California |
one small step forward, two steps back... not unexpected on a 50 year old, semi-neglected car...
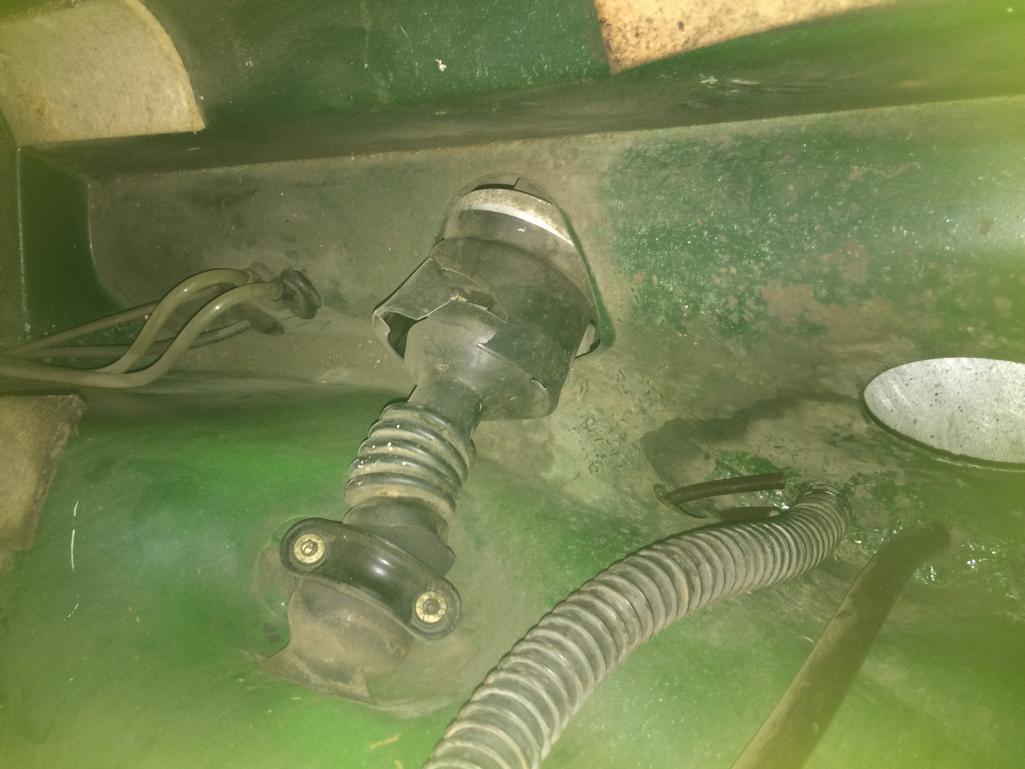
round 2 of wire wheel / rust treatment on the hell hole yielded much reddish dust and a similar amount of black where i'd sprayed the rust treatment. i'm hoping a new to me toy (flexible attachment for my drill to wire wheel) will allow me to get into there better. i like that right angle air grinder @mlindner has, might this be the project that drives me to pneumatic? while i wait for that new toy, i decided to install tangerine racing fuel lines. "while i was in there", i found 2 new rust spots. @superhawk996 called it, i have a perforation in my floor, under the passenger seat. i've elected to clean up the bottom, spray some rust treatment through the hole and put it on my growing "to do" list... the other spot was under the fuel tank. anyone else notice the gap seen in the last picture to the left of the fuel overflow tube? the splash tray under the steering rack was a bit bent, perhaps from an encounter with a wrecker many years ago.. having seen much worse repaired here, i know i'm fortunate. like hearing "yes, it's cancer but, having caught it early, it's very treatable...". 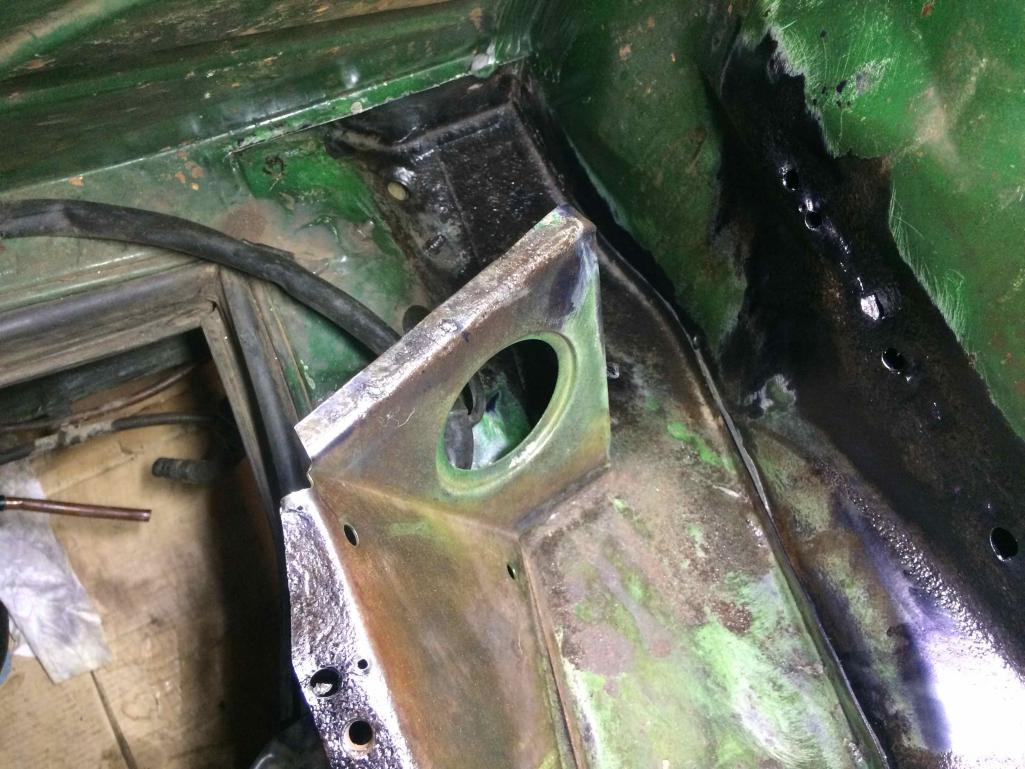 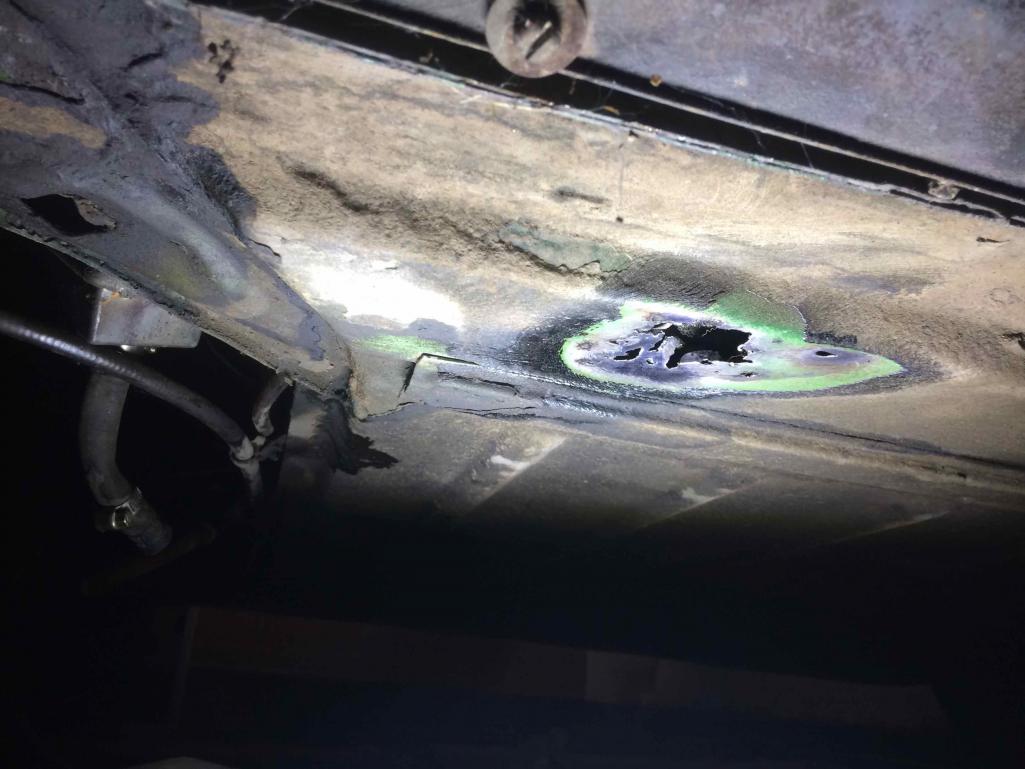 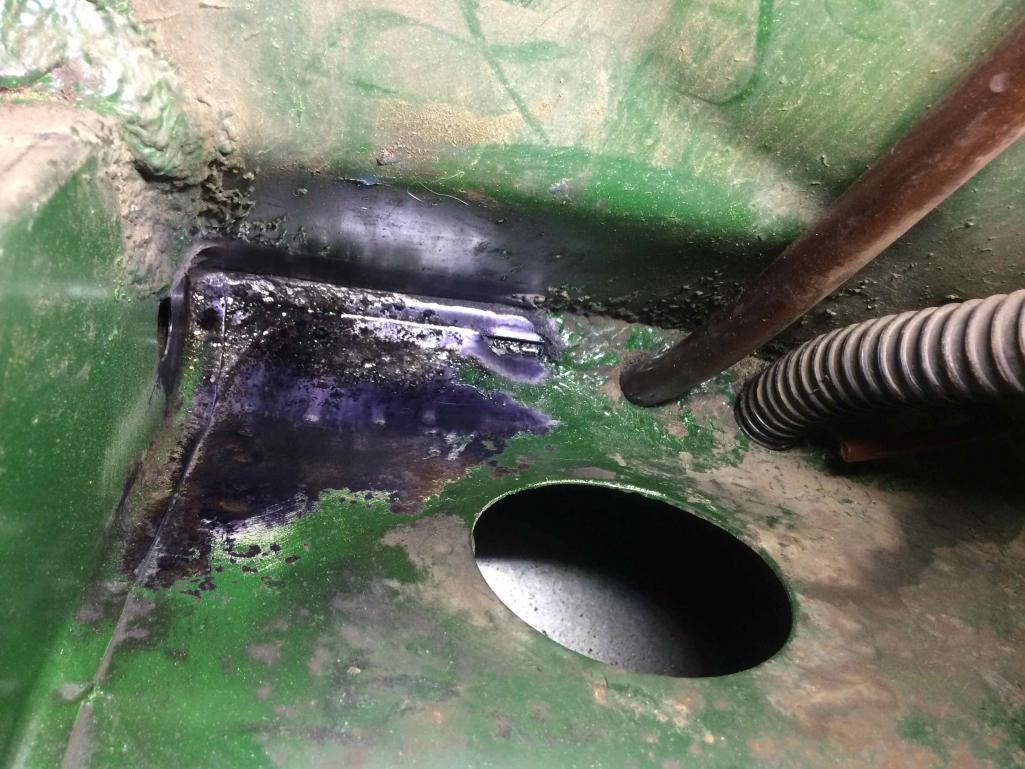 |
|
|
|
| sholman5 |
Oct 19 2020, 03:09 AM
Post
#35
|
|
Kraut burner Group: Members Posts: 197 Joined: 11-September 16 From: Ormond beach, Fl. Member No.: 20,391 Region Association: South East States |
Last picture. It is a drain for any moisture that would happen to find it's way down there, mine has it also.
 |
|
|
|
| Superhawk996 |
Oct 19 2020, 06:27 AM
Post
#36
|
|
914 Guru Group: Members Posts: 7,938 Joined: 25-August 18 From: Woods of N. Idaho Member No.: 22,428 Region Association: Galt's Gulch |
QUOTE(pt_700 @ Oct 19 2020, 12:51 AM) having seen much worse repaired here, i know i'm fortunate. like hearing "yes, it's cancer but, having caught it early, it's very treatable...". That is the right attitude. These cars all rust from the inside out and it's always pretty well hidden in the beginning. Some just rust faster than others. If you didn't have pin holes in that Hell Hole, it isn't uncommon for leaks either at window and glass seals to have allowed water in the cabin. On my car which is much further gone than what you have, I have some pinholes in the rear firewall behind the factory engine pad. Notorious rust spot. On my car, I also have a few pin holes in the driver side firewall / hell hole right about where I thought the shadows were on your car. All these can let water in the cabin. You'd be amazed at how much water can come though a tiny pin hole! You're doing the right stuff. Catch it while you can, neutralize it, seal and paint. You're second round of treatment in the hell hole looks like you've neuatralized way more rust. Good job! That small slit under the gas tank is indeed there on all cars - for drainage as previously stated. It often gets clogged and then doesn't drain properly. Yours looks pretty good. |
|
|
|
| pt_700 |
Oct 19 2020, 08:18 AM
Post
#37
|
|
Senior Member Group: Members Posts: 1,113 Joined: 4-March 10 From: san jose, ca Member No.: 11,430 Region Association: Northern California |
thanks gents! at the time i discovered that i thought the rubber boot over the steering was just old brittle and out of place. this morning at 3am, my mind morphed it into unibody damage from that tow... still a bit suspicious of the alignment of the shaft as it enters the rack. the rack is up against the top of the hole, rather than centered. when that wrecker went underneath the front end to grab the wheels, it pushed the spare tire well in slightly. at the time, easy fix - i just stepped inside.
 |
|
|
|
| pt_700 |
Nov 6 2020, 06:30 PM
Post
#38
|
|
Senior Member Group: Members Posts: 1,113 Joined: 4-March 10 From: san jose, ca Member No.: 11,430 Region Association: Northern California |
took a few weeks off from the 914 while working on other project around the house. have some time on my hands, someone in the department tested positive for covid and i started feeling mild symptoms. have to take a few days off while waiting for test results...
went back to grinding the rust with some different tools. found a more aggressive wire wheel, a flexible drill attachment and the smallest drill in the toolbox. that flexible attachment's pretty handy but, it sure heats up... not a lot of black there, the angle of the light / camera does no favors. i'll take another look tomorrow but, will probably call this good enough and start putting things back together. 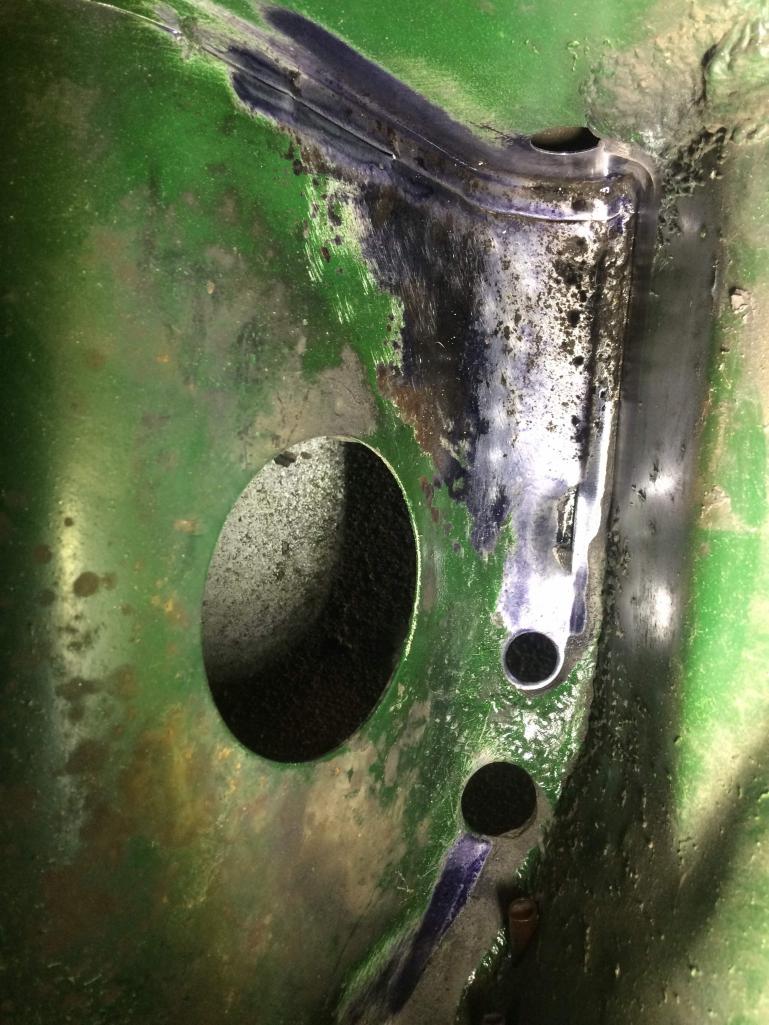 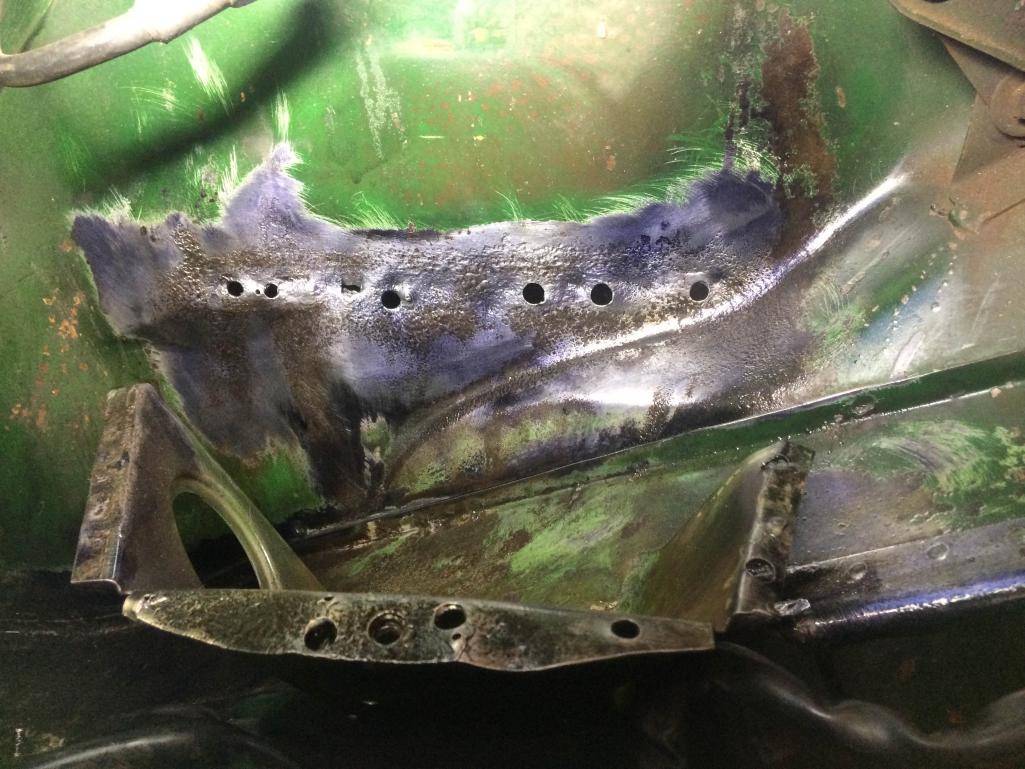 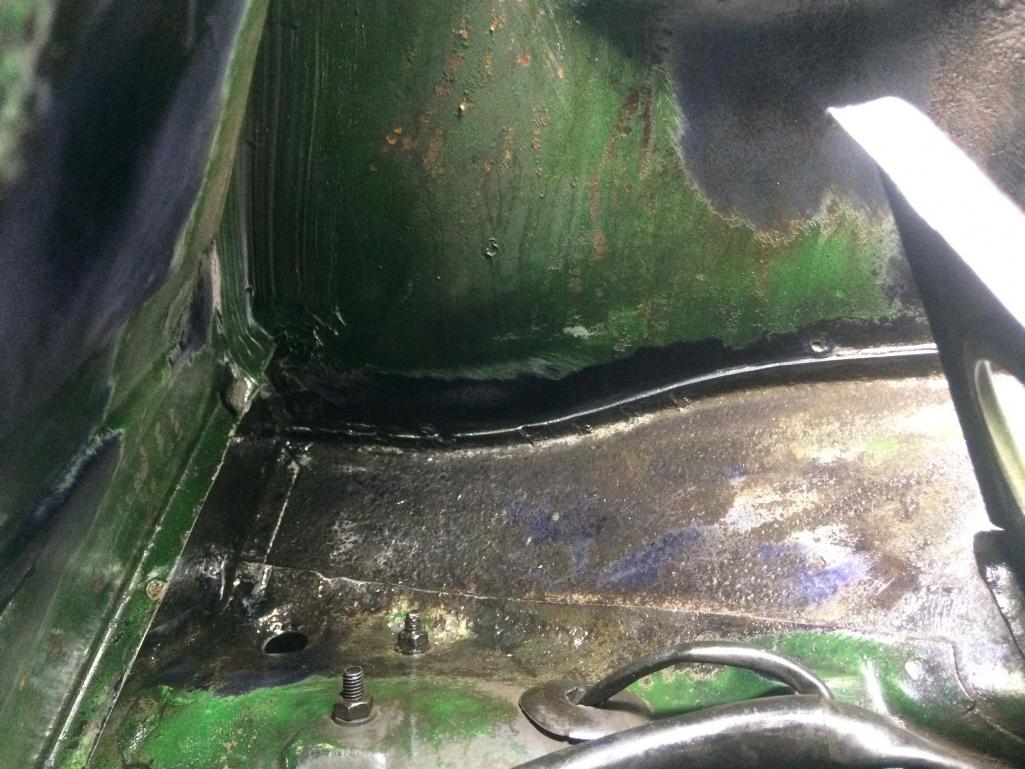 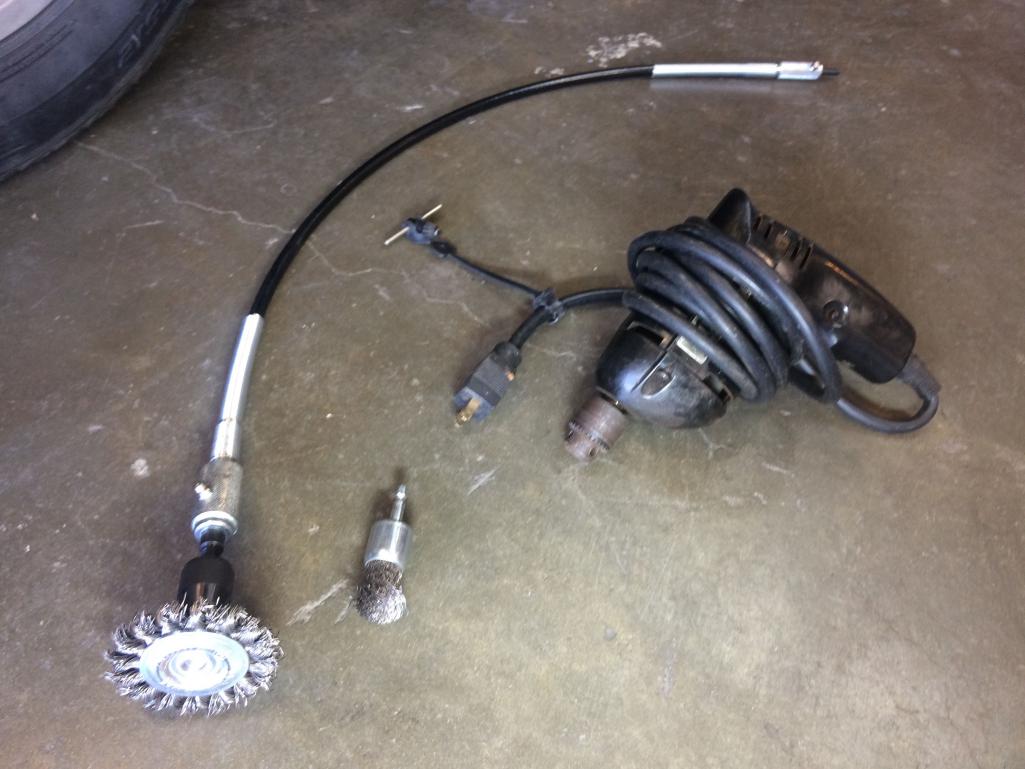 |
|
|
|
| seanpaulmc |
Nov 6 2020, 07:05 PM
Post
#39
|
|
Member Group: Members Posts: 456 Joined: 6-December 16 From: Orlando, FL Member No.: 20,649 Region Association: South East States |
Thank you for posting this. Love seeing the tools! Trying to work up the courage to dig into mine. Yours is in much better shape by comparison.
Thanks again. |
|
|
|
|
1 User(s) are reading this topic (1 Guests and 0 Anonymous Users)
0 Members:

|
Lo-Fi Version | Time is now: 9th July 2026 - 04:37 PM |
Invision Power Board
v9.1.4 © 2026 IPS, Inc.