|
|
|
Porsche, and the Porsche crest are registered trademarks of Dr. Ing. h.c. F. Porsche AG.
This site is not affiliated with Porsche in any way. Its only purpose is to provide an online forum for car enthusiasts. All other trademarks are property of their respective owners. |
|
|

  |

| double-a |
 Nov 22 2020, 04:03 PM Nov 22 2020, 04:03 PM
Post
#1
|
|
Senior Member  Group: Members Posts: 987 Joined: 15-September 03 From: vancouver, wa, usa Member No.: 1,162 Region Association: Pacific Northwest |
by itself, an ambient temperature gauge in the center console seems about as useful as my broken clock or the vague oil temp indicator. but after shifting oil temp duties to a dash triple gauge, with real temperature numbers, i was left with a gaping hole in my center console that could only be filled with cutting-edge 70s technology.
i learned recently that vdo produced ambient temperature gauges in 60mm diameter for marques like mercedes and volvo, so i decided to take a look. at first, the only available options seemed to be NOS gauges in the three-bills range. but i eventually scored a used example in excellent condition on ebay for only $25, though it was missing its sender and mounting bracket. 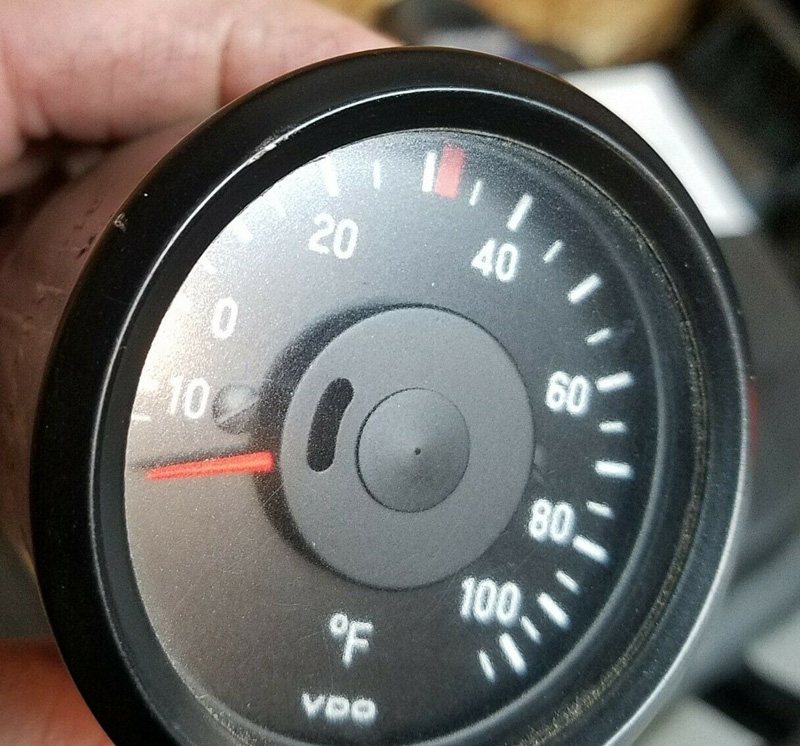 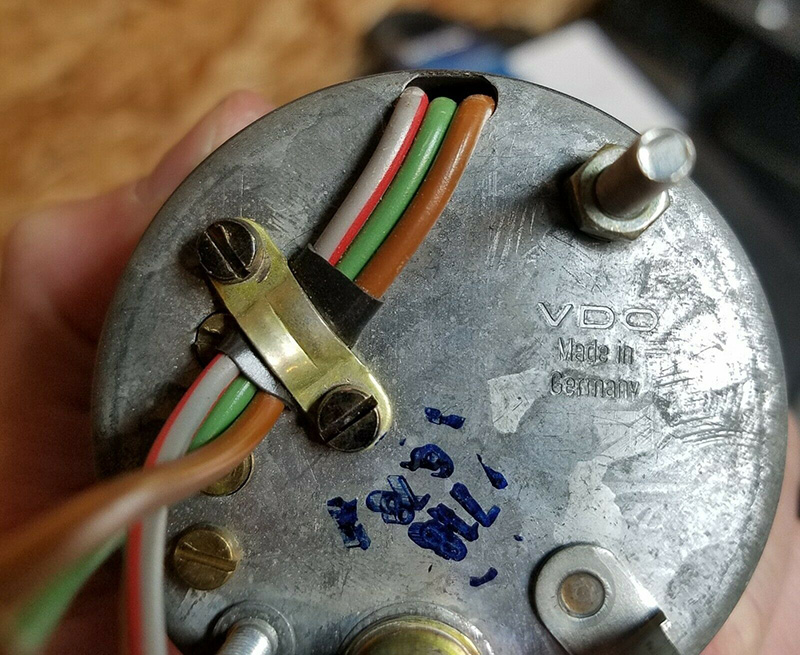 |
   |

 
|
| double-a |
Nov 22 2020, 04:04 PM
Post
#2
|
|
Senior Member Group: Members Posts: 987 Joined: 15-September 03 From: vancouver, wa, usa Member No.: 1,162 Region Association: Pacific Northwest |
a bit of research revealed that the required VDO sender, part #323-087, is actually still available. these new senders feature a slightly different top end — 120 vs the 100 indicated on the gauge, and do not include a bracket.
i bought the sender from Jegs and bench tested it with the gauge using an ice cube and digital thermometer. 32 degrees indicated accurately on the gauge, and when testing my garage's ambient temperature of around 50 degrees the gauge was off by only a fraction of a degree. so far so good, time fabricate a bracket and get it mounted. Attached image(s) 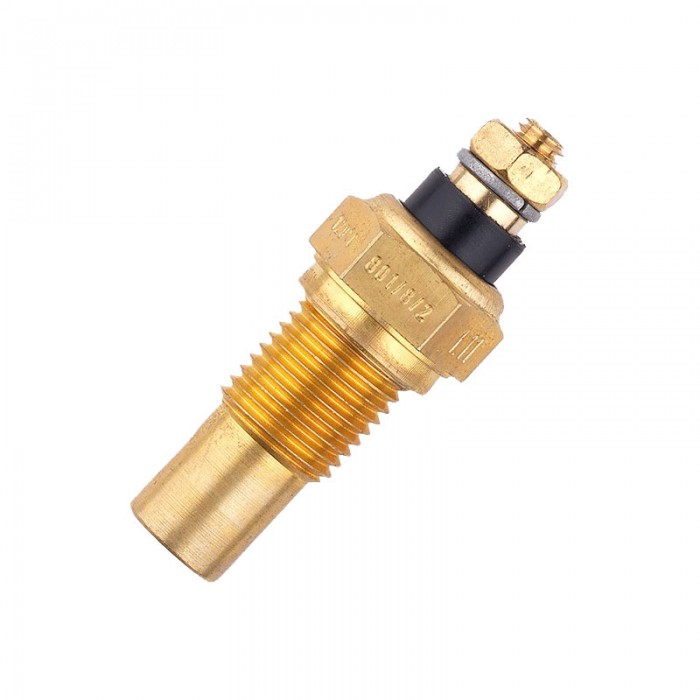
|
|
|
|
| double-a |
Nov 22 2020, 04:05 PM
Post
#3
|
|
Senior Member Group: Members Posts: 987 Joined: 15-September 03 From: vancouver, wa, usa Member No.: 1,162 Region Association: Pacific Northwest |
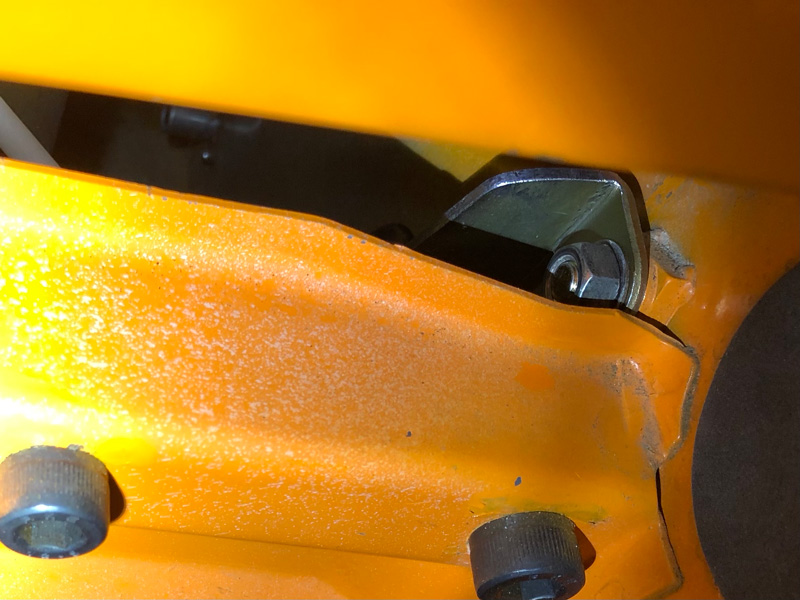
to give the best readings, i decided the sender needed to be installed out of the way and out of the wind. since my car is a '75 with backdated bumpers, the front bumper shock bolt-holes seemed like an obvious, if tricky place to mount the sender. adding it to the driver's side outside bolt would place the sender in the void underneath the driver's light bucket, and give it a good ground connection, as the sender is designed to be grounded through body contact.
digging through my pile of brackets and angles i came across a throttle cable bracket, probably from an old carburetor kit. i hacked the long end off, as well as the ear where the throttle cable mounts, leaving a simple bent bracket with a single mounting hole. after drilling a hole large enough to fit the sender, i was good to go. 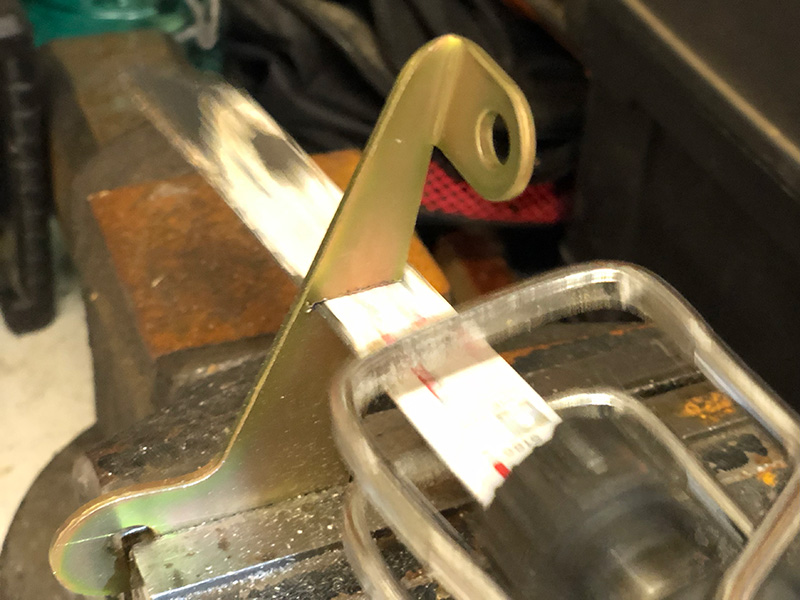 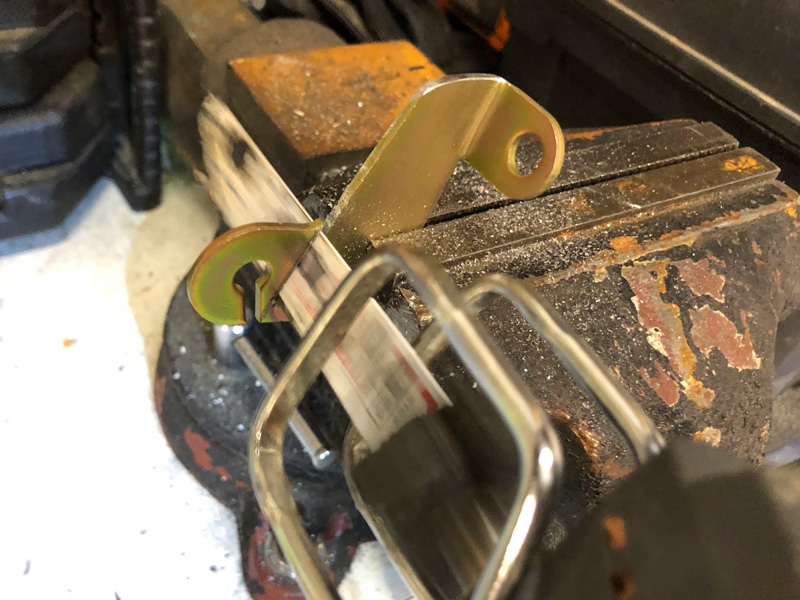  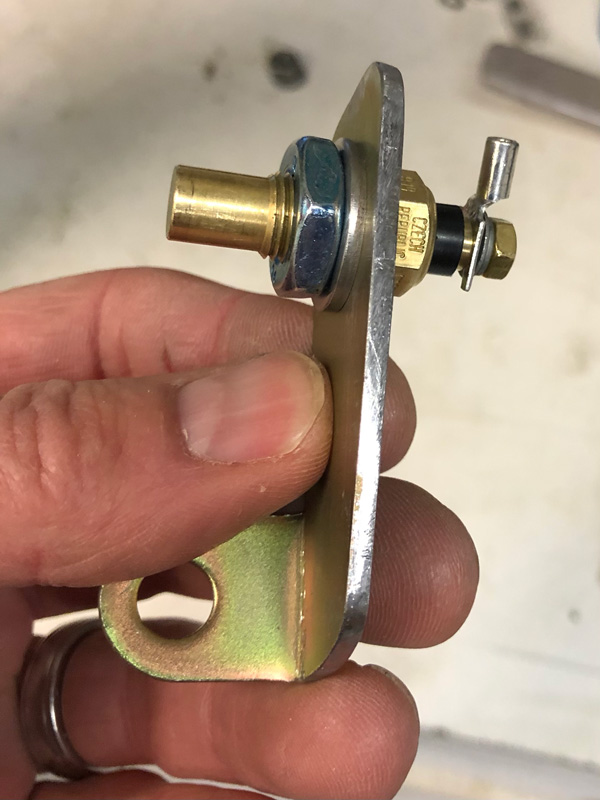 |
|
|
|
| double-a |
Nov 22 2020, 04:06 PM
Post
#4
|
|
Senior Member Group: Members Posts: 987 Joined: 15-September 03 From: vancouver, wa, usa Member No.: 1,162 Region Association: Pacific Northwest |
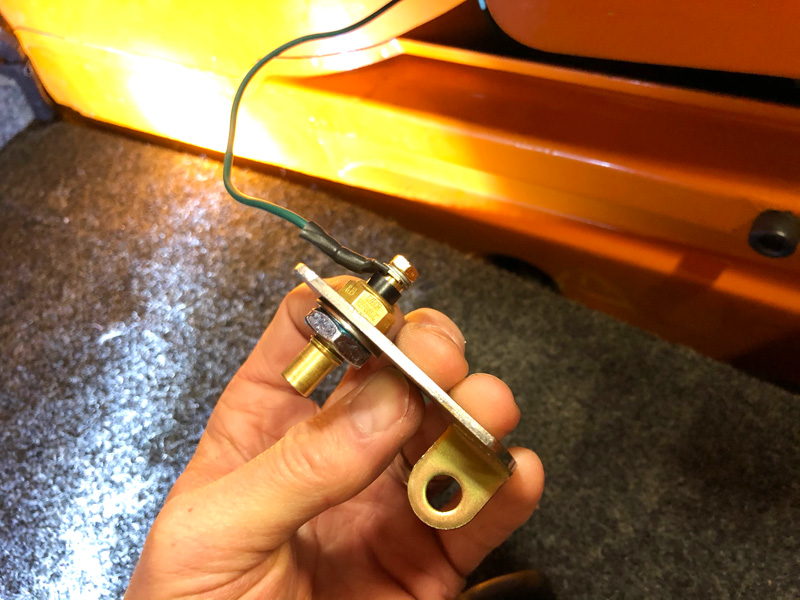
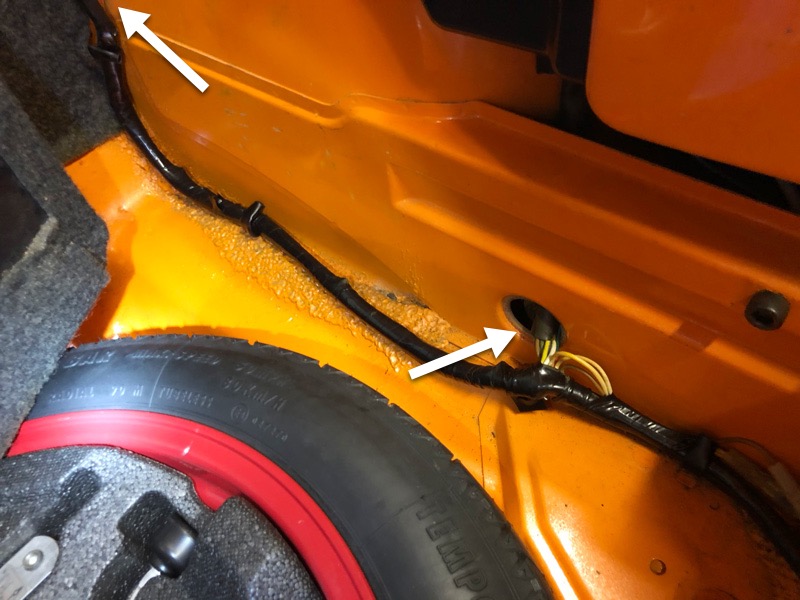
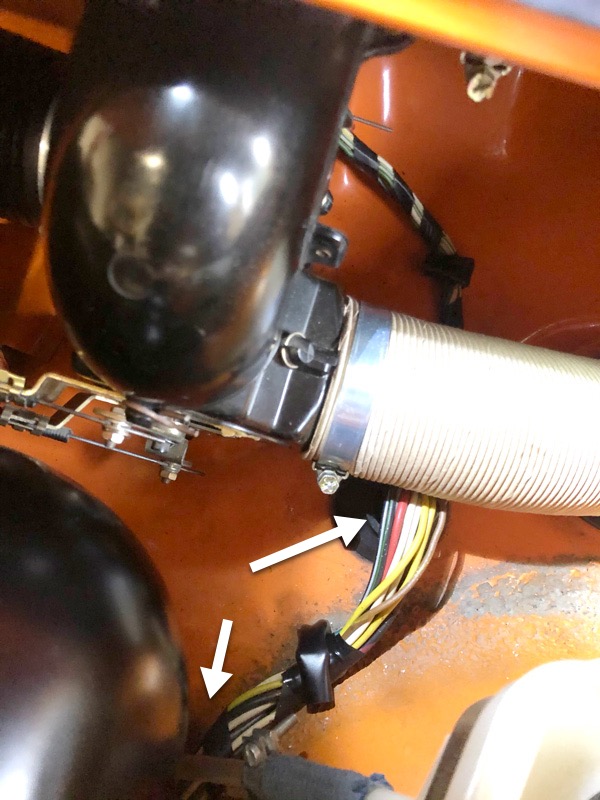
routing the wire from the front trunk was a relatively simple process. after leaving plenty of wire at the sender, i first pulled the wire through the access hole near the bottom of the trunk. then i fished a stiff wire up through the bulkhead grommet and pulled the sender wire in along the harness into the cavity near the fuel tank. next, i ran the wire through the firewall grommet into the driver's side footwell.
     |
|
|
|
| double-a |
Nov 22 2020, 04:07 PM
Post
#5
|
|
Senior Member Group: Members Posts: 987 Joined: 15-September 03 From: vancouver, wa, usa Member No.: 1,162 Region Association: Pacific Northwest |
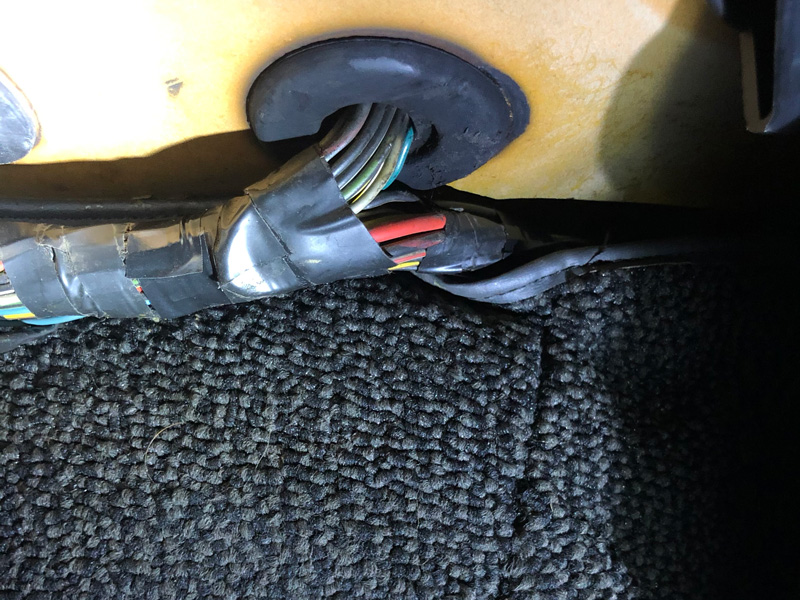
after removing the center console, carpets, and pedal board, i laid the wire next to the harness along the firewall, behind the pedal assembly, and halfway down the tunnel, finishing at the end of the center console gauge harness. with a final check to ensure fitment along the entire run, i taped the new wire against the harness from trunk to cabin, and added a female spade connector to the cabin end of the sender wire.
hooking up the gauge was about as easy as it gets. after adding spade connectors to the ground, 12+ and sender wires, i joined ground and power to the two adjacent gauges, spliced in a jumper to get power to the indicator bulb, and finally added a double-female connector to complete the connection from the gauge to its temperature sender. 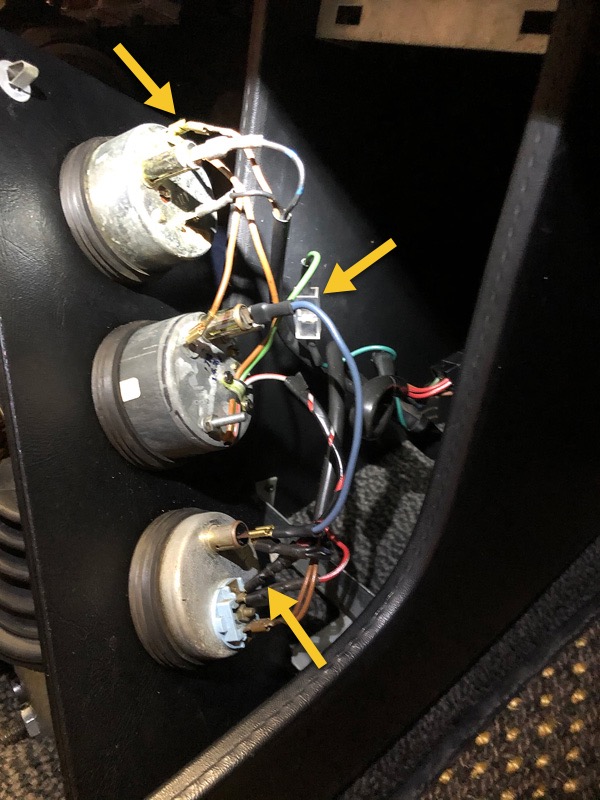 |
|
|
|
| double-a |
Nov 22 2020, 04:07 PM
Post
#6
|
|
Senior Member Group: Members Posts: 987 Joined: 15-September 03 From: vancouver, wa, usa Member No.: 1,162 Region Association: Pacific Northwest |
one final test before reinstalling the interior bits: switching the key to the accessories position caused the ambient temp gauge needle to sweep gracefully upwards as expected.
 adding the outside temp gauge was a fun project that took only a couple of hours. i hope this write-up is helpful to someone. 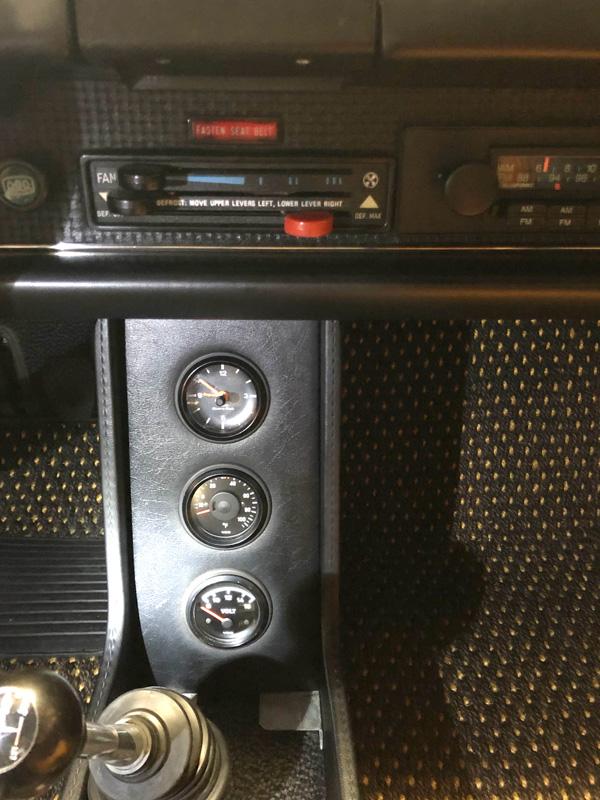 |
|
|
|
| Cairo94507 |
Nov 22 2020, 04:24 PM
Post
#7
|
|
Michael Group: Members Posts: 9,770 Joined: 1-November 08 From: Auburn, CA Member No.: 9,712 Region Association: Northern California |
Very nicely done. For us in the CA East Bay Area, the gauge would need to go up to about 120 degrees so we weren't constantly pegged at 100 degrees. (IMG:style_emoticons/default/wacko.gif)
|
 |
|
| double-a |
Nov 22 2020, 04:42 PM
Post
#8
|
|
Senior Member Group: Members Posts: 987 Joined: 15-September 03 From: vancouver, wa, usa Member No.: 1,162 Region Association: Pacific Northwest |
QUOTE(Cairo94507 @ Nov 22 2020, 02:24 PM)  Very nicely done. For us in the CA East Bay Area, the gauge would need to go up to about 120 degrees so we weren't constantly pegged at 100 degrees. (IMG:style_emoticons/default/wacko.gif) for sure. the 100-degree gauge shows that it'll go to 105 degrees at the top end, but i didn't heat the sender all the way into that range. maybe this summer i'll find out the hard way (IMG:style_emoticons/default/biggrin.gif) the vdo 100 degree seems to be the only temp gauge that is both 60mm and similar in style, with the red/orange needle, as other 914 indicators. i've seen a slightly different ambient temp gauge that reads to 120, but it looked smaller and the needle was white/yellow. 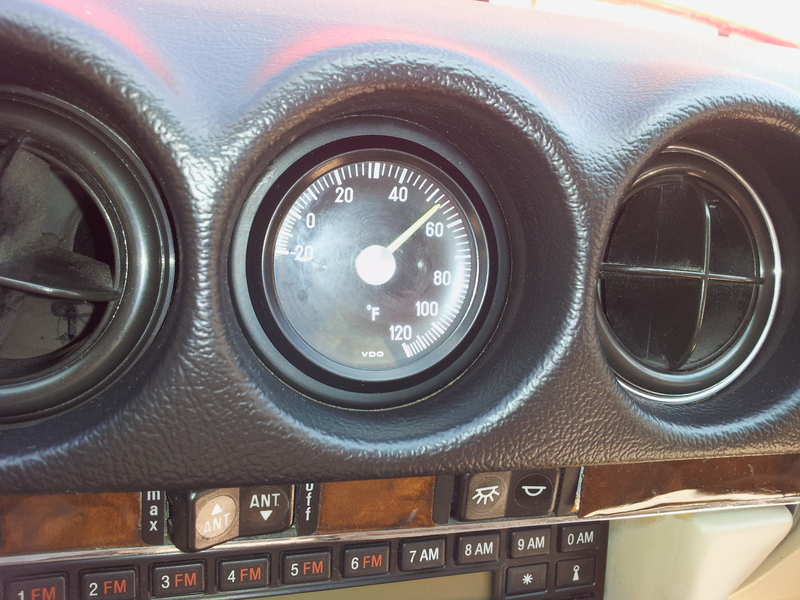 |
|
|
|
| FlacaProductions |
Nov 22 2020, 04:46 PM
Post
#9
|
|
Senior Member Group: Members Posts: 1,590 Joined: 24-November 17 From: LA Member No.: 21,628 Region Association: Southern California |
That's a good one. I had a OAT gauge in my 944 Turbo and the sender was in side the passenger side-view mirror. I was initially skeptical about the location but it was always dead on.
|
|
|
|
| type47fan |
Nov 23 2020, 05:43 PM
Post
#10
|
|
It Looks Better In Person. . . Group: Members Posts: 860 Joined: 17-September 03 From: Carlsbad, CA Member No.: 1,170 Region Association: Southern California |
. . . waiting for installation into my '76 914.
Thanks for the short course installation thread! 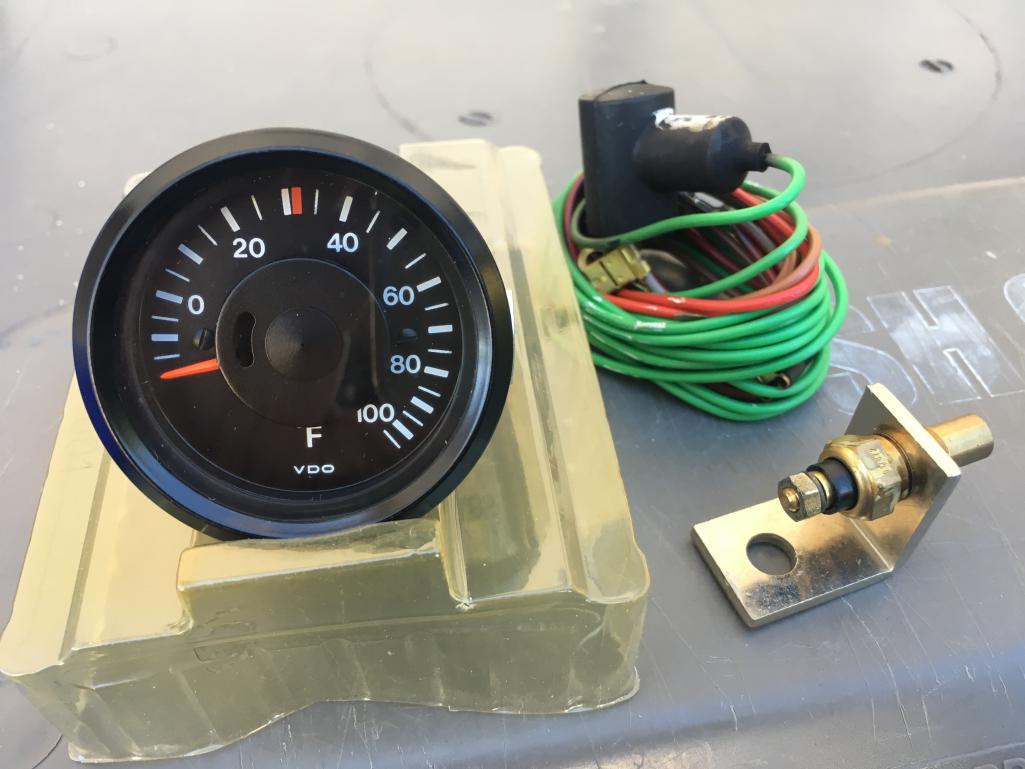 |
|
|
|
| double-a |
Nov 23 2020, 06:03 PM
Post
#11
|
|
Senior Member Group: Members Posts: 987 Joined: 15-September 03 From: vancouver, wa, usa Member No.: 1,162 Region Association: Pacific Northwest |
QUOTE(type47fan @ Nov 23 2020, 03:43 PM) . . . waiting for installation into my '76 914. Thanks for the short course installation thread! you got the entire kit, nice! i'd love to know whether the new vdo 120-degree sender that i got and plugged into my old gauge has the same degree of accuracy as the original 100-degree sender. in short, i wonder if 80 degrees indicates the same from both senders (IMG:style_emoticons/default/idea.gif) |
|
|
|
| Ansbacher |
Nov 23 2020, 06:48 PM
Post
#12
|
|
Senior Member Group: Members Posts: 689 Joined: 4-July 14 From: Tampa Bay, Florida Member No.: 17,589 |
Beautiful install, but a Cylinder Head Temp gauge in that hole would have been far more important and useful. NICE JOB!
Ansbacher |
|
|
|
| double-a |
Nov 23 2020, 06:54 PM
Post
#13
|
|
Senior Member Group: Members Posts: 987 Joined: 15-September 03 From: vancouver, wa, usa Member No.: 1,162 Region Association: Pacific Northwest |
QUOTE(Ansbacher @ Nov 23 2020, 04:48 PM) Beautiful install, but a Cylinder Head Temp gauge in that hole would have been far more important and useful. NICE JOB! Ansbacher i totally agree, but why not have both? as soon as i can find a 60mm CHT i'd like to install it in place of the clock. |
|
|
|
| Montreal914 |
Nov 23 2020, 10:19 PM
Post
#14
|
|
Senior Member Group: Members Posts: 1,560 Joined: 8-August 10 From: Claremont, CA Member No.: 12,023 Region Association: Southern California |
Loving all of this. (IMG:style_emoticons/default/smilie_pokal.gif)
Definitely on my list. |
|
|
|
| 930cabman |
Jan 2 2021, 06:07 PM
Post
#15
|
|
Advanced Member Group: Members Posts: 3,066 Joined: 12-November 20 From: Buffalo Member No.: 24,877 Region Association: North East States |
I am considering installing four 2" gauges in the center console panel. Clock, oil pressure, oil temp and voltmeter. Summit has the group of four for $170. Will mockup tomorrow to see how it looks. Having the original gauges repaired is cost $$
|
|
|
|
| aharder |
Jan 2 2021, 07:14 PM
Post
#16
|
|
Advanced Member Group: Members Posts: 4,394 Joined: 6-September 11 From: Dallas Texas Member No.: 13,524 Region Association: Southwest Region |
I have 4 in my console, Amp, Oil Pressure, Oil Temp and Cylinder Head Temp.
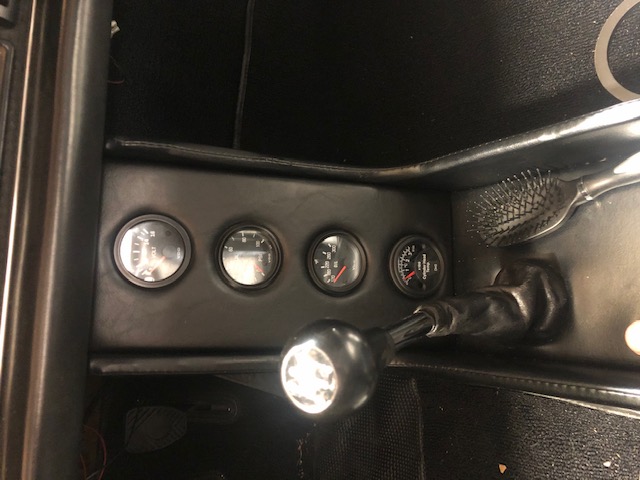 I would like to add ambient temp and an AFM in the future by adding i 1 hole to this layout  5_gage_panel_layout.bmp ( 2.06mb )
Number of downloads: 45
5_gage_panel_layout.bmp ( 2.06mb )
Number of downloads: 45 |
|
|
|
| rgalla9146 |
Jan 3 2021, 07:48 AM
Post
#17
|
|
Advanced Member Group: Members Posts: 4,559 Joined: 23-November 05 From: Paramus NJ Member No.: 5,176 Region Association: None |
Does the small oval 'window' have a function ?
The old outside temp gauges had a freezing temp warning lamp. This old MotoMeter has a red lamp lower center. BTW...... beautiful install Attached thumbnail(s) 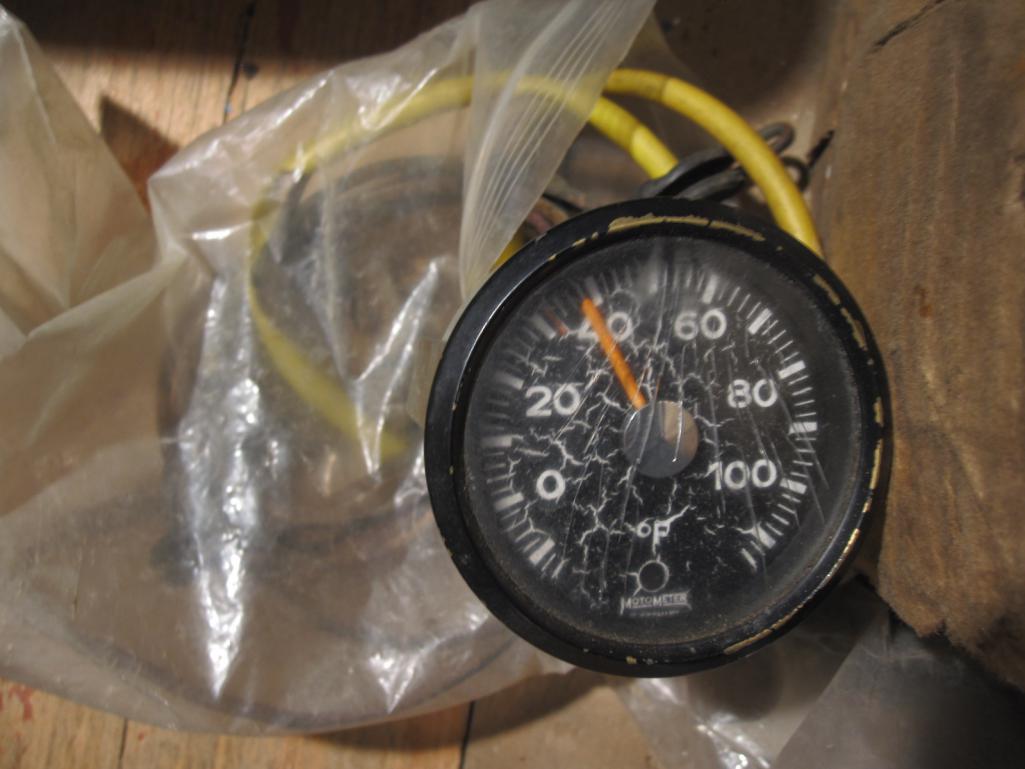
|
|
|
|
| mmichalik |
Jan 3 2021, 11:09 PM
Post
#18
|
|
MikeM Group: Members Posts: 697 Joined: 27-January 16 From: Valley Center, CA Member No.: 19,600 Region Association: Southern California |
Looks very nice. Makes me wish I had one
|
|
|
|
|
1 User(s) are reading this topic (1 Guests and 0 Anonymous Users)
0 Members:

|
Lo-Fi Version | Time is now: 19th May 2024 - 06:46 PM |
Invision Power Board
v9.1.4 © 2024 IPS, Inc.