|
|
|
Porsche, and the Porsche crest are registered trademarks of Dr. Ing. h.c. F. Porsche AG.
This site is not affiliated with Porsche in any way. Its only purpose is to provide an online forum for car enthusiasts. All other trademarks are property of their respective owners. |
|
|

  |

| raynekat |
 Jan 31 2021, 05:48 PM Jan 31 2021, 05:48 PM
Post
#1
|
|
Advanced Member  Group: Members Posts: 2,157 Joined: 30-December 14 From: Coeur d'Alene, Idaho Member No.: 18,263 Region Association: Pacific Northwest |
Installing the 914Rubber fender liners....
They come with rivets for fastening the plastic liners to the mounting brackets. It quickly became apparent that installation was going to be difficult if I used the rivets. The rivets fasten the liner to the mounting brackets and then the brackets use your rocker panel and valance sheet metal bolts to hold the liner in place. So I opted to use speed nuts that sit on the mounting brackets so that hex headed metric screws could be used instead of the rivets. Here was the hardware and bracket ready to bolt into the car. 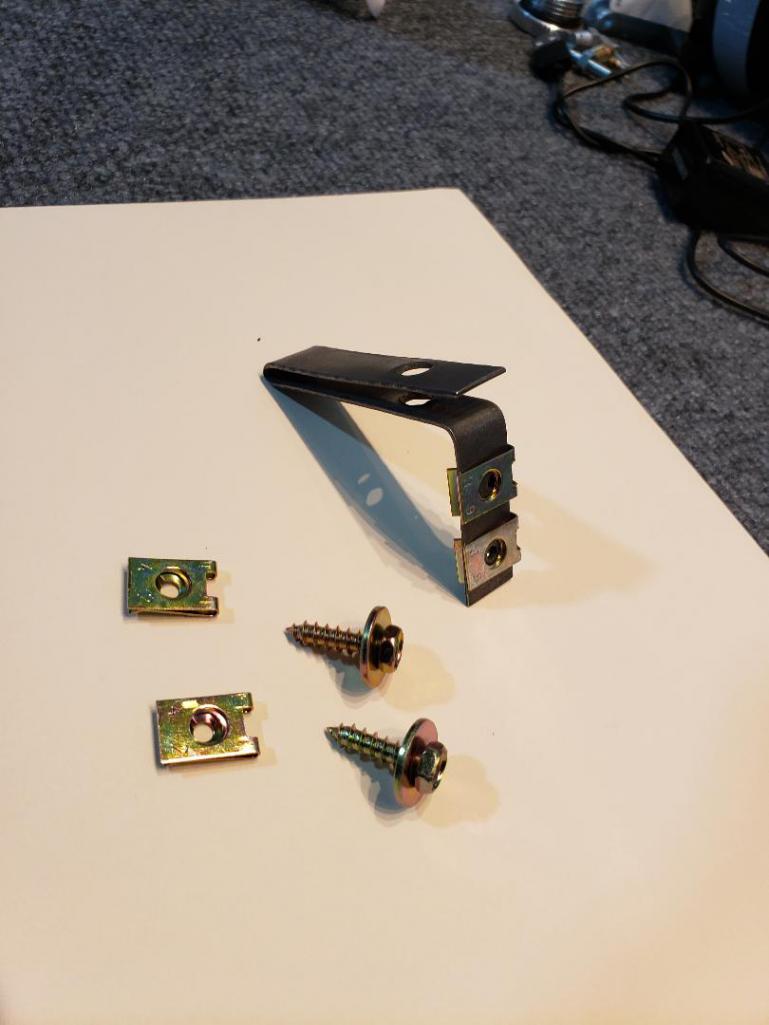 The reason I went this will become apparent pretty quickly. Here's the leading edge (front) that utilizes the valance mounting bolt. In theory you could have put this in as a unit (bracket and liner) as you actually have access to the bolt that mounts the valence. 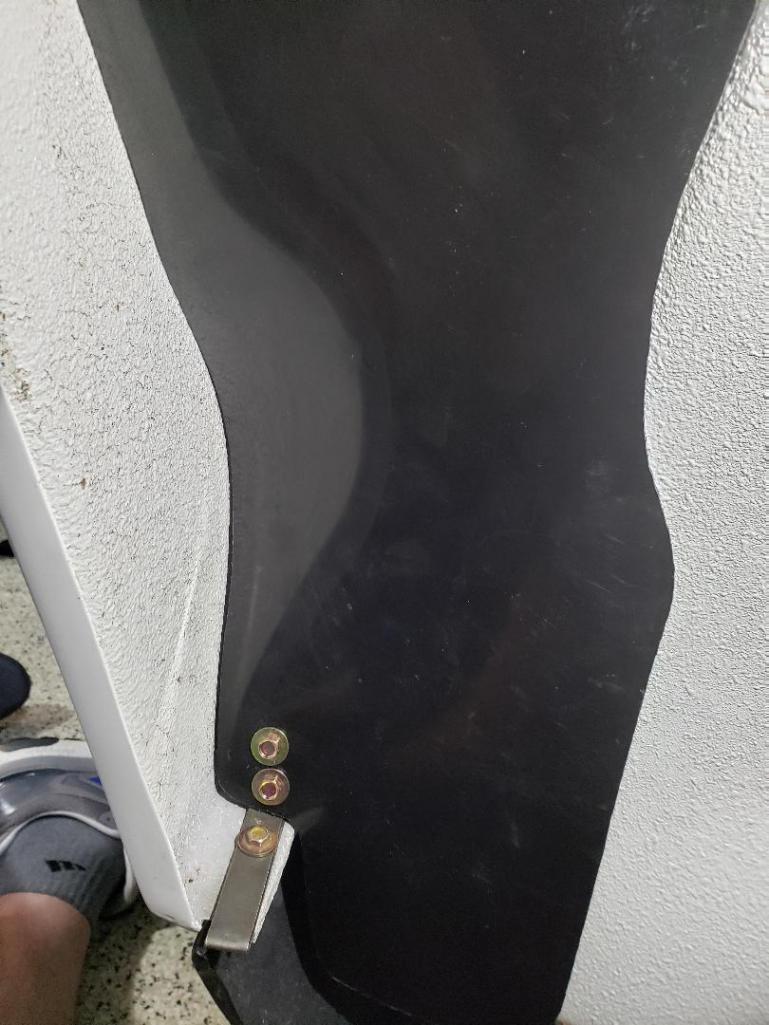 The real problem with the rivet method is mounting the trailing edge (rear) bracket that uses the rocker cover bolt. 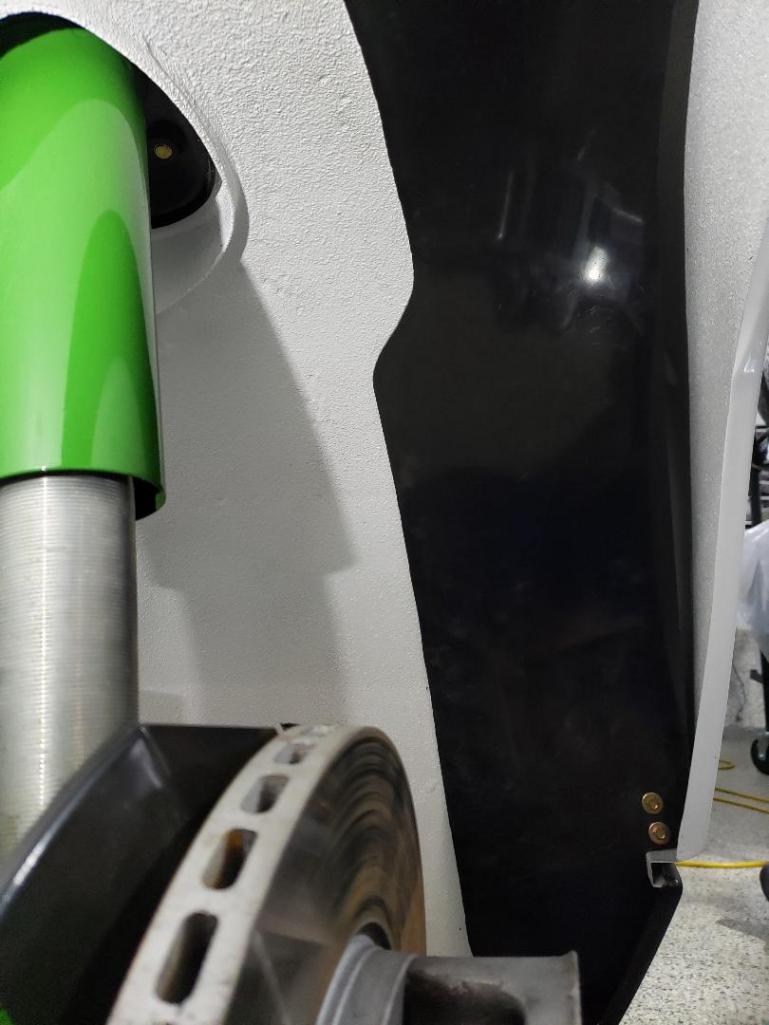 You can't access the bolt to secure the bracket to the rocker cover as it's behind the liner. So with my method you mount the bare bracket first and then fasten the liner to the bracket. Here's a better view of the finished product. No way you're getting your hand in behind the liner to tighten or loosen the bracket with the liner in place. 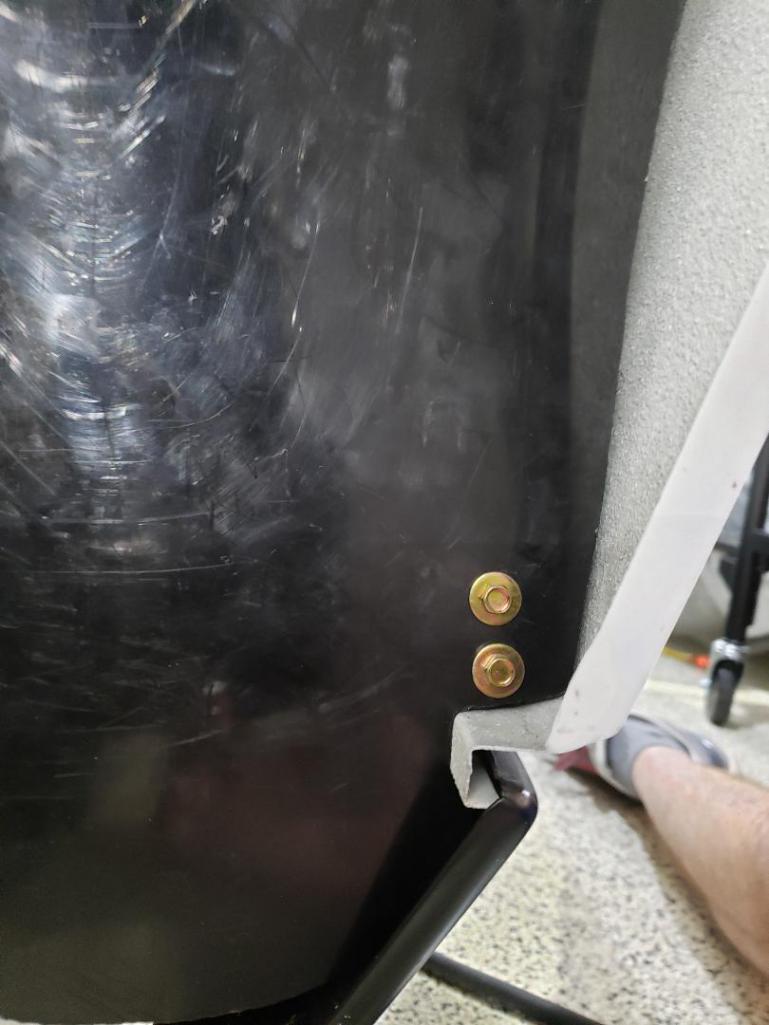 With the speed nut and hex head screws I used, you can easily take the liner off in a matter of minutes without removing the brackets at the valance and rocker panel. Inspection and cleaning is still an easy thing to accomplish. |
   |

 
|
| bkrantz |
Jan 31 2021, 07:42 PM
Post
#2
|
|
914 Guru Group: Members Posts: 7,749 Joined: 3-August 19 From: SW Colorado Member No.: 23,343 Region Association: Rocky Mountains |
Nice work, Doug. And very helpful--I have the liner kit waiting on the shelf.
|
|
|
|
| mb911 |
Jan 31 2021, 08:28 PM
Post
#3
|
|
914 Guru Group: Members Posts: 6,823 Joined: 2-January 09 From: Burlington wi Member No.: 9,892 Region Association: Upper MidWest |
QUOTE(raynekat @ Jan 31 2021, 03:48 PM)  Installing the 914Rubber fender liners.... They come with rivets for fastening the plastic liners to the mounting brackets. It quickly became apparent that installation was going to be difficult if I used the rivets. The rivets fasten the liner to the mounting brackets and then the brackets use your rocker panel and valance sheet metal bolts to hold the liner in place. So I opted to use speed nuts that sit on the mounting brackets so that hex headed metric screws could be used instead of the rivets. Here was the hardware and bracket ready to bolt into the car. The reason I went this will become apparent pretty quickly. Here's the leading edge (front) that utilizes the valance mounting bolt. In theory you could have put this in as a unit (bracket and liner) as you actually have access to the bolt that mounts the valence. The real problem with the rivet method is mounting the trailing edge (rear) bracket that uses the rocker cover bolt. You can't access the bolt to secure the bracket to the rocker cover as it's behind the liner. So with my method you mount the bare bracket first and then fasten the liner to the bracket. Here's a better view of the finished product. No way you're getting your hand in behind the liner to tighten or loosen the bracket with the liner in place. With the speed nut and hex head screws I used, you can easily take the liner off in a matter of minutes without removing the brackets at the valance and rocker panel. Inspection and cleaning is still an easy thing to accomplish. I am making my own this week.. I have yet to figure out how I will affix everything but I like your thinking. |
|
|
|
| FlacaProductions |
Jan 31 2021, 08:54 PM
Post
#4
|
|
Senior Member Group: Members Posts: 1,570 Joined: 24-November 17 From: LA Member No.: 21,628 Region Association: Southern California |
Good work - I have these awaiting install and I'll probably take your lead. Thanks for posting!
|
|
|
|
| 914e |
Feb 1 2021, 03:46 PM
Post
#5
|
|
Member Group: Members Posts: 496 Joined: 21-February 20 From: Arizona Member No.: 23,951 Region Association: Southwest Region |
@raynekat Where did you get the hardware from? and what size?
|
|
|
|
| mb911 |
Feb 1 2021, 03:47 PM
Post
#6
|
|
914 Guru Group: Members Posts: 6,823 Joined: 2-January 09 From: Burlington wi Member No.: 9,892 Region Association: Upper MidWest |
And could you measure the bracket for me please? I want to make my own out of stainless
|
|
|
|
| raynekat |
Feb 2 2021, 02:10 AM
Post
#7
|
|
Advanced Member Group: Members Posts: 2,157 Joined: 30-December 14 From: Coeur d'Alene, Idaho Member No.: 18,263 Region Association: Pacific Northwest |
QUOTE(914e @ Feb 1 2021, 01:46 PM) Hope this helps. It's very nice hardware from Belmetric. speed nuts: https://www.belmetric.com/metric-speed-nuts...inc-p-4446.html hex headed screws: https://www.belmetric.com/yellow-plated-met...inc-p-9477.html |
|
|
|
| raynekat |
Feb 2 2021, 02:12 AM
Post
#8
|
|
Advanced Member Group: Members Posts: 2,157 Joined: 30-December 14 From: Coeur d'Alene, Idaho Member No.: 18,263 Region Association: Pacific Northwest |
QUOTE(mb911 @ Feb 1 2021, 01:47 PM) And could you measure the bracket for me please? I want to make my own out of stainless The L shape is 1.5" on the short side of the L (that's fastened to the liner), and 2.5" on the long side of the L (that's fastened to the valance or rocker panel). The L is about 1/2" wide. |
|
|
|
| raynekat |
Feb 2 2021, 02:18 AM
Post
#9
|
|
Advanced Member Group: Members Posts: 2,157 Joined: 30-December 14 From: Coeur d'Alene, Idaho Member No.: 18,263 Region Association: Pacific Northwest |
Finished up the passenger side of the front fender liner.
No more difficult that the driver side was. One thing I did to make the liner fit a little better was shorten it by about 1". Seemed like the furnished liner was just too long to fit in the desired location. I made a pattern in cardboard of the end that I wanted to shorten and used that to mark the liner 1" shorter. I also shaved the sides of the liner a bit as well. This seemed to allow it to go up into the fender well a little deeper. YMMV (your mileage may vary). Ha Definitely there will likely be some custom fitting, so be patient and don't expect to get these in too quickly. For me, it's a 3 night, 2 beer per night job.....just the way I like it. (IMG:style_emoticons/default/wink.gif) Hopefully these liners will sit up there without rattling too much. 914's never came with fender liners from the factory (duh), so the fender wells are not really made for a liner. There is no way to fasten the top part of the liner without drilling into the trunk area which I really didn't want to do. So you are holding up this upside down C shaped affair only by the bottom attachment points. Not really optimal, but that's what you've got to work with. We'll see how they work. In theory, it's a great idea for our cars. In practice, many times great ideas don't pan out. Time will tell. I've painted the brackets for the rear liners. The rear liners look like they may fit the fender wells better than the fronts already from just holding them up in the rear wells. As soon as my additional hardware arrives from Belmetric, I'll install, take pics and share my thoughts. |
|
|
|
| raynekat |
Feb 2 2021, 09:34 PM
Post
#10
|
|
Advanced Member Group: Members Posts: 2,157 Joined: 30-December 14 From: Coeur d'Alene, Idaho Member No.: 18,263 Region Association: Pacific Northwest |
Finished out the rear fender wells today with the help from the twins. (IMG:style_emoticons/default/biggrin.gif)
Both sides went in fairly easily. I think I shaved the side of one of the liners but didn't have to shorten either of them for installation. Same drill. First painted and drilled the brackets for larger holes for my speed nuts and hex headed screws. Then installed the brackets into the valance screw and rocker panel screw locations. Here's the front or leading edge location for the liner. 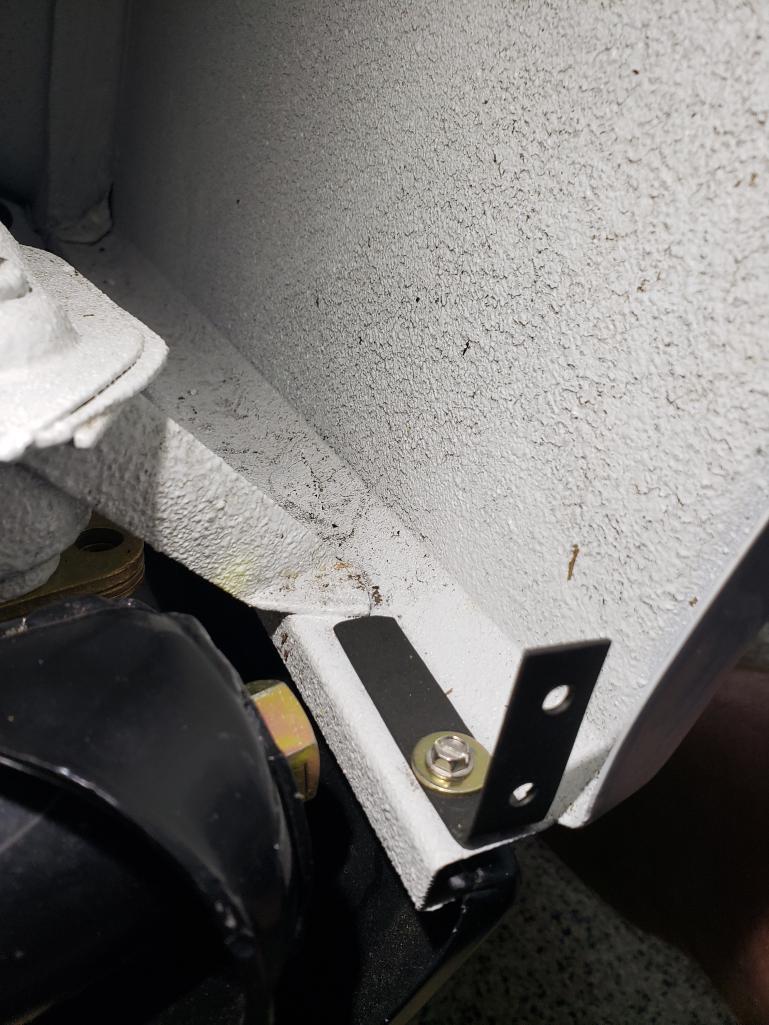 |
|
|
|
| raynekat |
Feb 2 2021, 09:35 PM
Post
#11
|
|
Advanced Member Group: Members Posts: 2,157 Joined: 30-December 14 From: Coeur d'Alene, Idaho Member No.: 18,263 Region Association: Pacific Northwest |
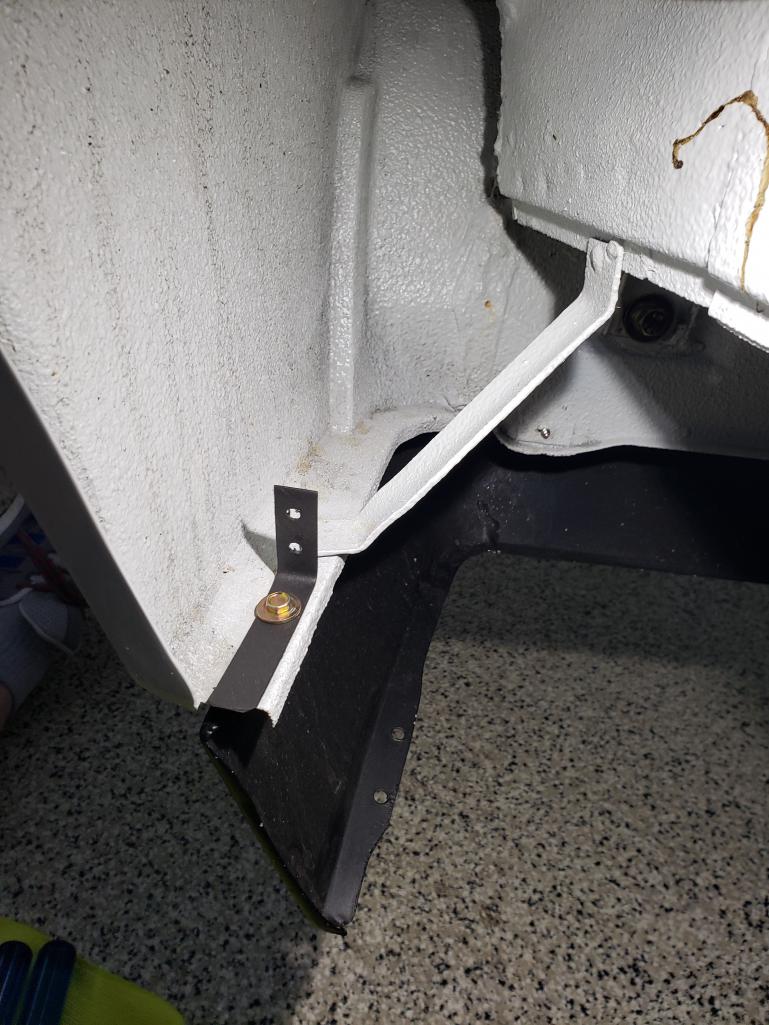
Same drill for the rear or trailing edge of the liner bracket location.
 |
|
|
|
| raynekat |
Feb 2 2021, 09:45 PM
Post
#12
|
|
Advanced Member Group: Members Posts: 2,157 Joined: 30-December 14 From: Coeur d'Alene, Idaho Member No.: 18,263 Region Association: Pacific Northwest |
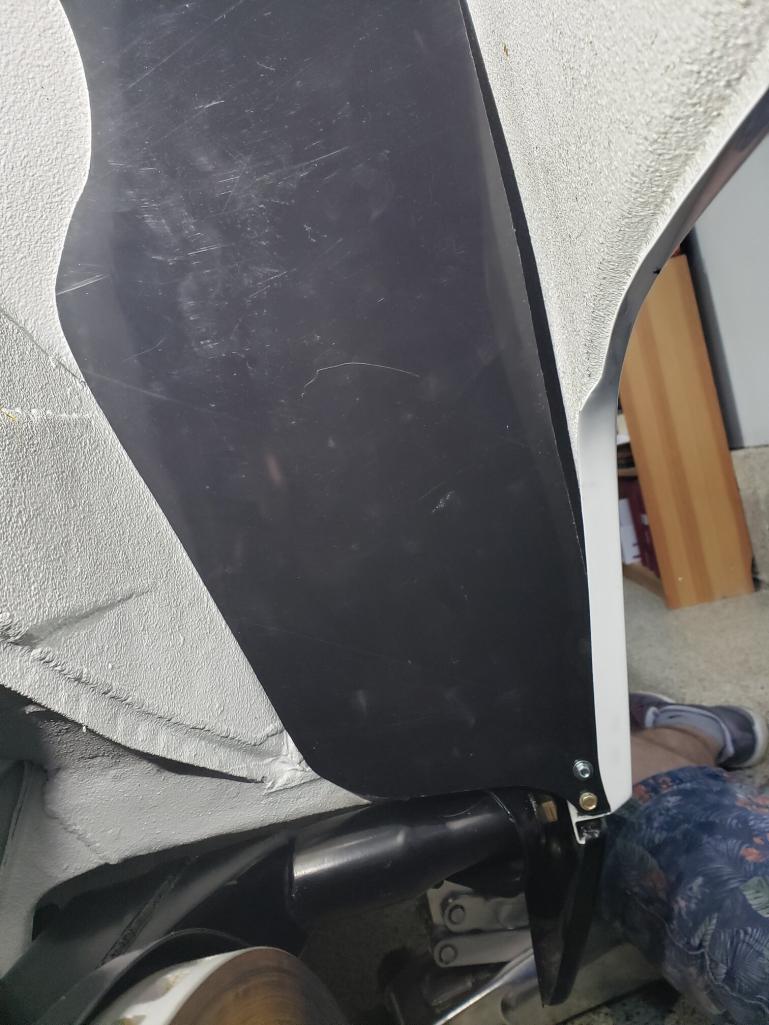
View of the front part of the liner bolted into the bracket.
 View of the rear part of the liner bolted into the bracket. 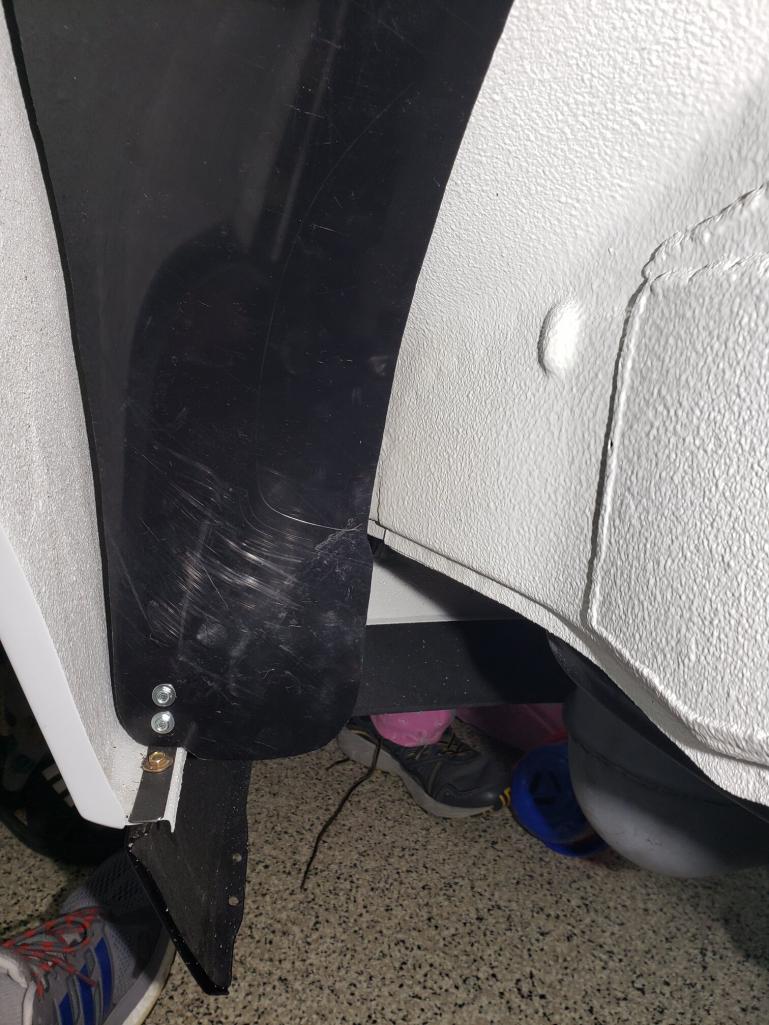 View showing how nicely the liner does shield/protect the fender undersides from dirt, debris, water, mud, etc. 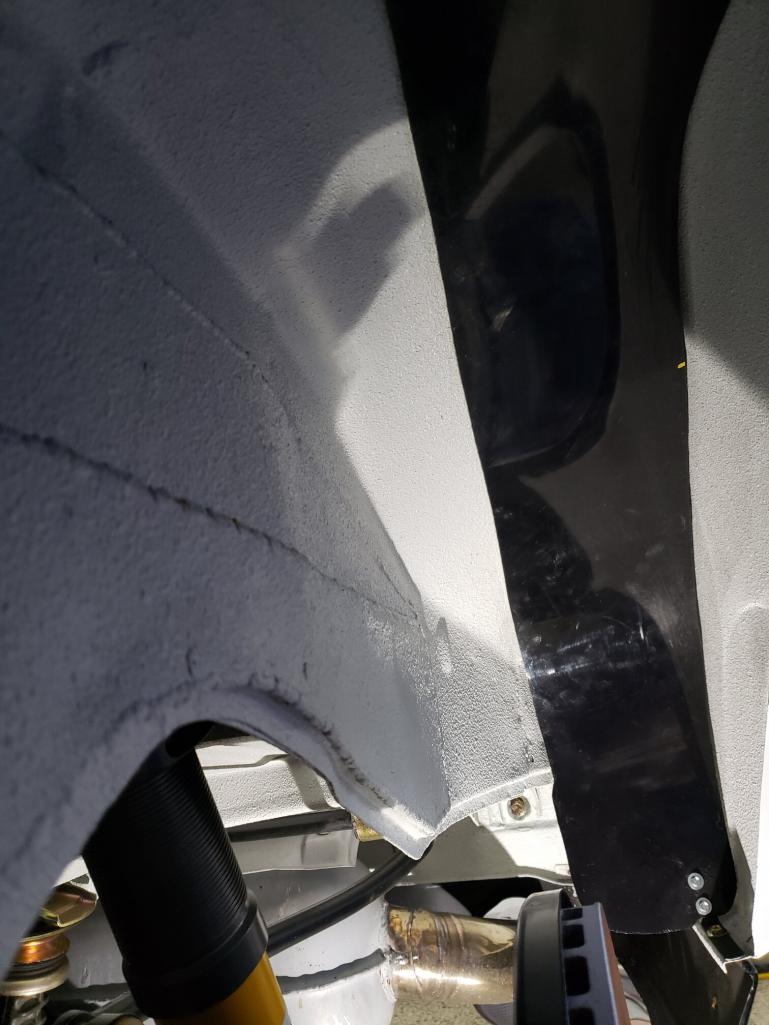 I think overall a pretty good product. They are not inexpensive at $245. But I think they will help keep trash out of the rocker panels and also the hidden recesses back in the far corners of the fender undersides. So that's a good thing to keep our cars from rusting from the undersides out. Yes it is! The brackets needed modding....but not too time intensive. Trimming and painting. The rivets were worthless to me as the hex head screws I used come off in a minute max allowing you to keep the brackets in place. Also there was a bit of trimming on the liners themselves to get a better fit. Each car will be different so that is to expected. |
|
|
|
|
1 User(s) are reading this topic (1 Guests and 0 Anonymous Users)
0 Members:

|
Lo-Fi Version | Time is now: 5th May 2024 - 07:38 AM |
Invision Power Board
v9.1.4 © 2024 IPS, Inc.