|
|
|
Porsche, and the Porsche crest are registered trademarks of Dr. Ing. h.c. F. Porsche AG.
This site is not affiliated with Porsche in any way. Its only purpose is to provide an online forum for car enthusiasts. All other trademarks are property of their respective owners. |
|
|


| worn |
 Feb 24 2021, 10:40 AM Feb 24 2021, 10:40 AM
Post
#1
|
|
can't remember  Group: Members Posts: 3,143 Joined: 3-June 11 From: Madison, WI Member No.: 13,152 Region Association: Upper MidWest |
See last post. Welding and rubber sealant removal coming to the end. Thanks.
Haven't been very active for a couple of years. Partly because the 911 has taken up my time. So I am finally getting around to rust repair on my '76. The floors have rusted through so I have been working on the layer cake that makes up the right side longitudinal, focused on the hell region. The rust has affected both the inner pieces as well as the outer ones, and it is concentrated where all of the pieces come together. 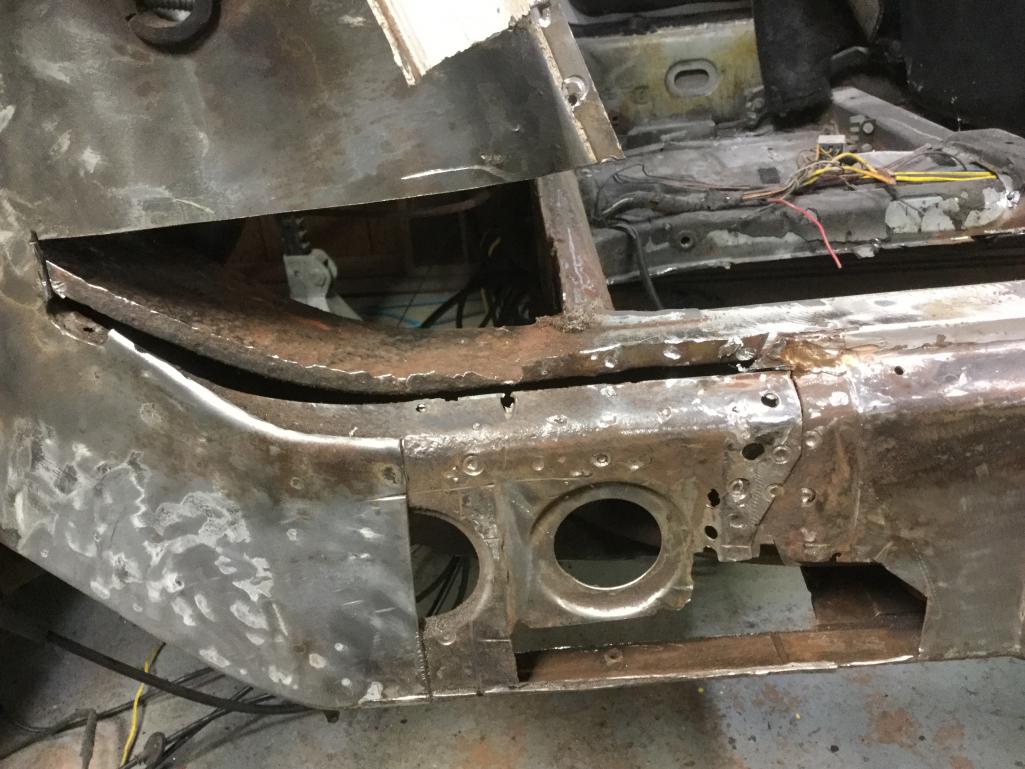 I have cut away the pitted and perforated metal. My question is as follows. I am addressing the problem by restoring each piece to produce a longitudinal as it came from the factory. For example.  In this case I made a piece to restore the tab of the forward inner layer of the outside long. Then I added a piece to restore the rear inner layer piece the overlaps: 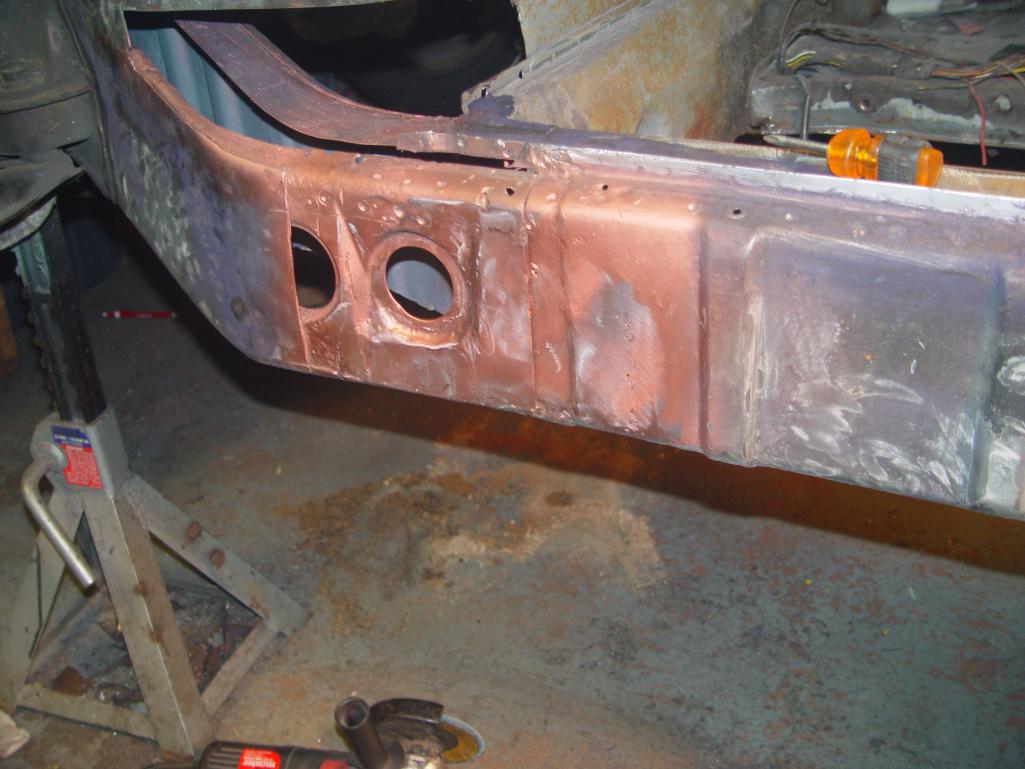 Then I have made a patch for the outer wheel house piece to produce the outer layer. The patches are butt welded to good metal on the original pieces and shaped to reproduce the originals. Here is the question. Is this really best practice? For example, instead of making a bunch of pieces that join together to match the original I could use a single sheet that replaces them all at once. With fewer butt welds and seams. My method so far has been heavily influenced by threads from people I admire here on the world. You folks make nice welds. |
   |

 
|
  |
Replies(1 - 19)
| Root_Werks |
Feb 25 2021, 10:51 AM
Post
#2
|
|
Village Idiot Group: Members Posts: 8,298 Joined: 25-May 04 From: About 5NM from Canada Member No.: 2,105 Region Association: Pacific Northwest |
That is no light project! I have digging into mine to do and hoping it's not bad. You've already done most of the hard work, remove and prep for new metal. Keep the pics coming!
|
 |
|
| SirAndy |
Feb 25 2021, 10:57 AM
Post
#3
|
|
Resident German Group: Admin Posts: 41,600 Joined: 21-January 03 From: Oakland, Kalifornia Member No.: 179 Region Association: Northern California |
QUOTE(worn @ Feb 24 2021, 08:40 AM)  Here is the question. Is this really best practice? For example, instead of making a bunch of pieces that join together to match the original I could use a single sheet that replaces them all at once. With fewer butt welds and seams. My method so far has been heavily influenced by threads from people I admire here on the world. You folks make nice welds. Personally, i like to weld as little as possible. No matter how much care you take to prime the new metal, the welds will leave exposed spots that are starting points for new rust. RD has a lot of replacement metal for your needs: https://www.restoration-design.com/ (IMG:style_emoticons/default/welder.gif) |
|
|
|
| mbseto |
Feb 26 2021, 01:58 PM
Post
#4
|
|
Senior Member Group: Members Posts: 1,253 Joined: 6-August 14 From: Cincy Member No.: 17,743 Region Association: North East States |
In my experience, fitting a patch takes about the same amount of time regardless of the size of the patch. So three small patches might take three times as long as one big patch that covers the whole area.
I also like the idea of minimizing welds, which is what you get from a larger patch. And in these layered areas, avoiding having a weld in one layer lined up with a weld in another layer. Of course I picked up all this from the more experienced guys on this forum. |
|
|
|
| ssuperflyoldguy |
Feb 26 2021, 03:41 PM
Post
#5
|
|
Member Group: Members Posts: 173 Joined: 15-November 15 From: NorCal - East Bay Baby! Member No.: 19,364 Region Association: None |
Use Cold Galvi weld thru primer instead of red - red burns off more than the Galvi when welding close by
|
|
|
|
| Root_Werks |
Feb 26 2021, 05:15 PM
Post
#6
|
|
Village Idiot Group: Members Posts: 8,298 Joined: 25-May 04 From: About 5NM from Canada Member No.: 2,105 Region Association: Pacific Northwest |
QUOTE(mbseto @ Feb 26 2021, 11:58 AM) In my experience, fitting a patch takes about the same amount of time regardless of the size of the patch. So three small patches might take three times as long as one big patch that covers the whole area. I also like the idea of minimizing welds, which is what you get from a larger patch. And in these layered areas, avoiding having a weld in one layer lined up with a weld in another layer. Of course I picked up all this from the more experienced guys on this forum. (IMG:style_emoticons/default/agree.gif) I've learned from others over the years replacing larger pre-made sections can be less work than patching a number of smaller areas. Plus, it just looks cleaner in the end. Grinding.....grinding, ugh. |
|
|
|
| Superhawk996 |
Feb 26 2021, 06:00 PM
Post
#7
|
|
914 Guru Group: Members Posts: 5,723 Joined: 25-August 18 From: Woods of N. Idaho Member No.: 22,428 Region Association: Galt's Gulch |
QUOTE(SirAndy @ Feb 25 2021, 11:57 AM) Personally, i like to weld as little as possible. No matter how much care you take to prime the new metal, the welds will leave exposed spots that are starting points for new rust. RD has a lot of replacement metal for your needs: https://www.restoration-design.com/ (IMG:style_emoticons/default/welder.gif) (IMG:style_emoticons/default/agree.gif) FWIW -- RD panels are Galvaneal. The Zinc that is annealed into the top surface of the panel sheet metal will actually serve as a sacrificial cathode for nearby sheet metal and welds. Not perfect, and protection diminishes with distance from the Galvaneal panel, but, the Zinc in Galvaneal goes a long way toward holding off surface corrosion at the weld sites. |
|
|
|
| worn |
Feb 26 2021, 08:51 PM
Post
#8
|
|
can't remember Group: Members Posts: 3,143 Joined: 3-June 11 From: Madison, WI Member No.: 13,152 Region Association: Upper MidWest |
QUOTE(Root_Werks @ Feb 26 2021, 03:15 PM) QUOTE(mbseto @ Feb 26 2021, 11:58 AM) In my experience, fitting a patch takes about the same amount of time regardless of the size of the patch. So three small patches might take three times as long as one big patch that covers the whole area. I also like the idea of minimizing welds, which is what you get from a larger patch. And in these layered areas, avoiding having a weld in one layer lined up with a weld in another layer. Of course I picked up all this from the more experienced guys on this forum. (IMG:style_emoticons/default/agree.gif) I've learned from others over the years replacing larger pre-made sections can be less work than patching a number of smaller areas. Plus, it just looks cleaner in the end. Grinding.....grinding, ugh. Thanks to all who replied. The way the rust worm turns it seems that all of the rust ends up at the overlap pieces that made up the original. Both inside and outside longitudinal pieces were in turn made up of inner and outer sections. The spot welds produce a wonderfully strong unit. In my case each and every piece has the last couple of inches rusted off. That is why I have started down the road of restoring each end one at a time. Just spent a day in a frozen garage trying to avoid setting my car harts on fire. Making progress. My big problem now is dealing with the moat of metal on either side of the weld beam. Pictures tomorrow but the basic problem comes when trying to grind the welds flat. Bright middle, with dark edges, and then bright surroundings. The area around the weld has shrunk. Any solutions? Thanks folks! |
|
|
|
| worn |
Feb 27 2021, 01:04 PM
Post
#9
|
|
can't remember Group: Members Posts: 3,143 Joined: 3-June 11 From: Madison, WI Member No.: 13,152 Region Association: Upper MidWest |
QUOTE(Superhawk996 @ Feb 26 2021, 04:00 PM) QUOTE(SirAndy @ Feb 25 2021, 11:57 AM) Personally, i like to weld as little as possible. No matter how much care you take to prime the new metal, the welds will leave exposed spots that are starting points for new rust. RD has a lot of replacement metal for your needs: https://www.restoration-design.com/ (IMG:style_emoticons/default/welder.gif) (IMG:style_emoticons/default/agree.gif) FWIW -- RD panels are Galvaneal. The Zinc that is annealed into the top surface of the panel sheet metal will actually serve as a sacrificial cathode for nearby sheet metal and welds. Not perfect, and protection diminishes with distance from the Galvaneal panel, but, the Zinc in Galvaneal goes a long way toward holding off surface corrosion at the weld sites. I have several orders in from RD. One problem is that the rust generally is affecting ends of panels such that I would have to replace 90-95% good metal to get rid of the 5% that is really rotten. I think it was BBrock who suggested the Cu UPol primer. And it does seem to weld nicer than the Zn. I have sets of wire brushes welded to 3 foot quarter in rods to clean the old out of the longs. Cut where there are pits, use a rust converter to turn the rust to ferrite covered with vinyl sealler. That gets a coat of marine epoxy and that gets a coat of 3M cavity treatment wax. But between the layers there are places of clean metal plug welded to clean metal, and that is what is looking like copper. The shop is pretty comfortable: about 50 degrees F when it warms up, but I still have problems with fogging the welding helmet. And I have an extra reading glass lens to fog. So, have to route the warm air away: 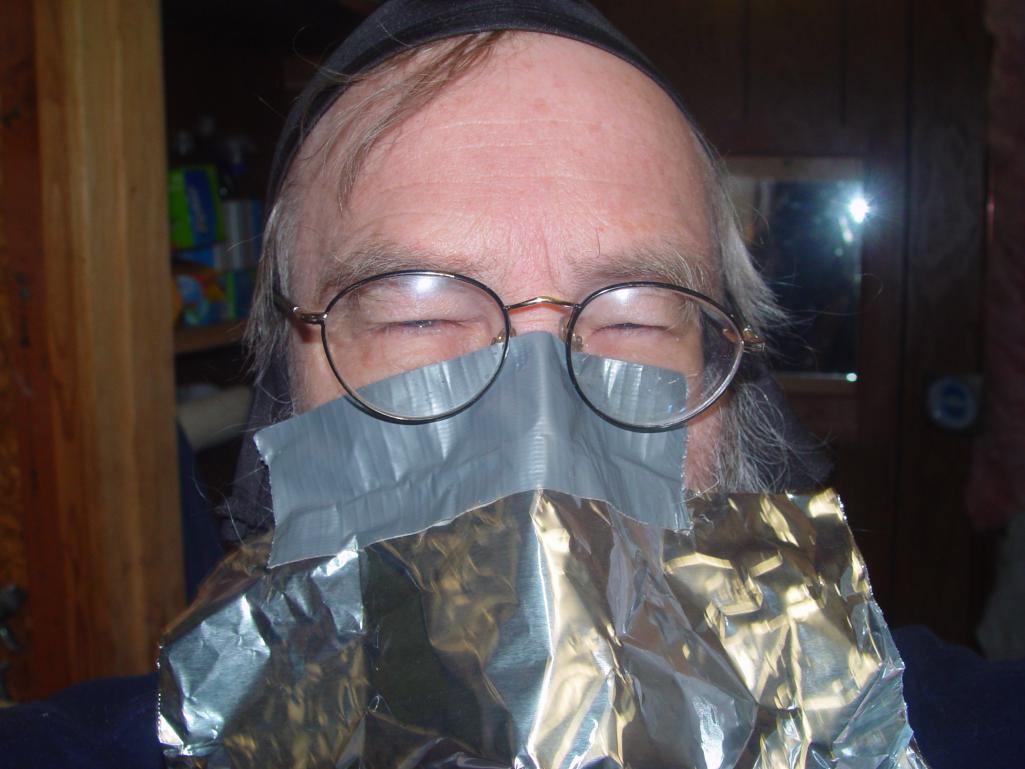 The wheel house sheet metal right behind the battery was perforated, and the RD pressing doesn't seem to reach that far up. 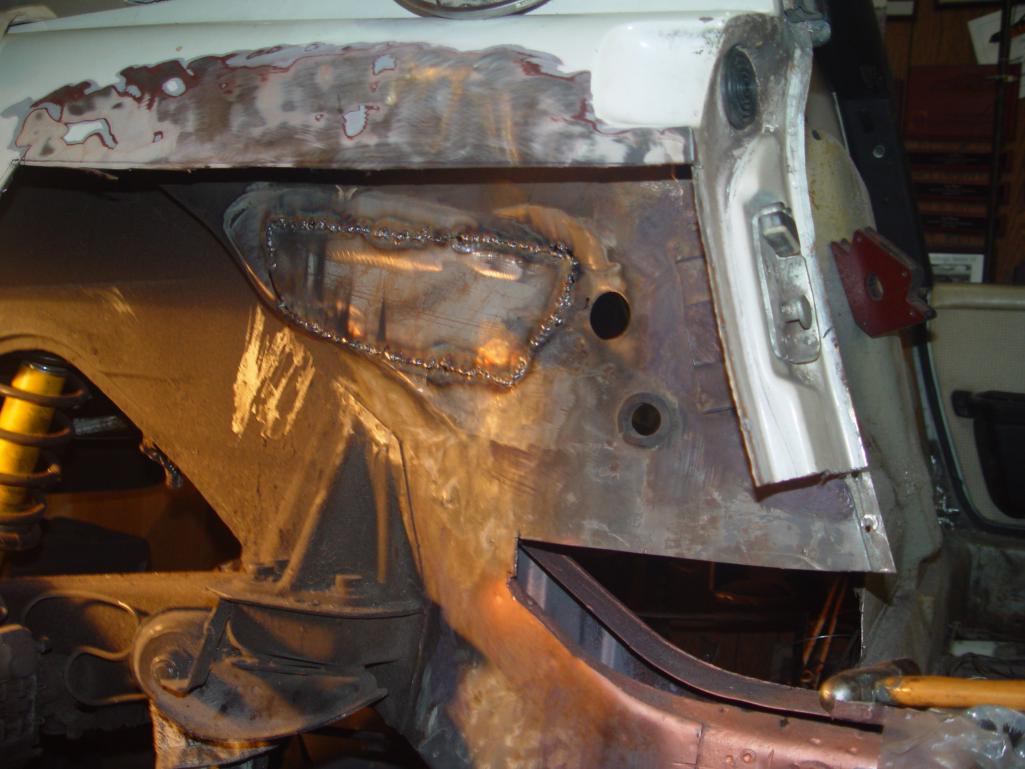 Here is the beginning pretty crude repair, but I will be able to get it from the other side. You can also see the reinforcing piece that lies inside the inner long. That is covered with epoxy. The wax material from three M will be sprayed in as the last step to reduce fire. 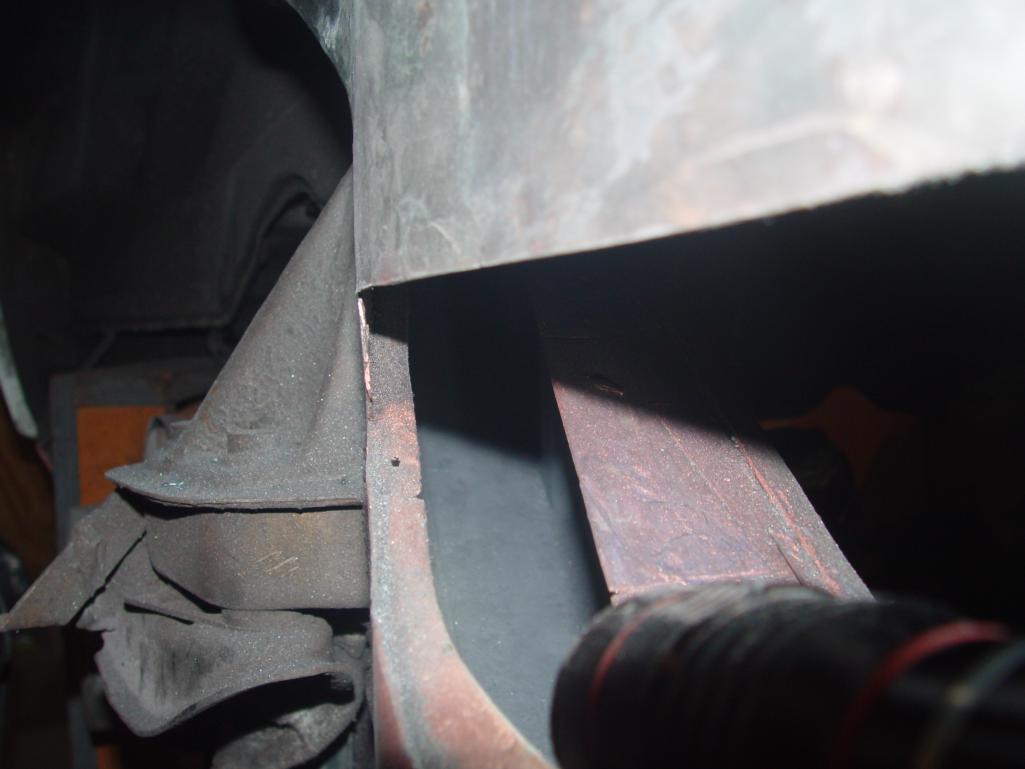 A bit better. The worst part is the slight furrow on either side of the weld in the HAZ. Any suggestions? It is a new to me Hobart 135. I also have a Lincoln I can use, and a TIG. 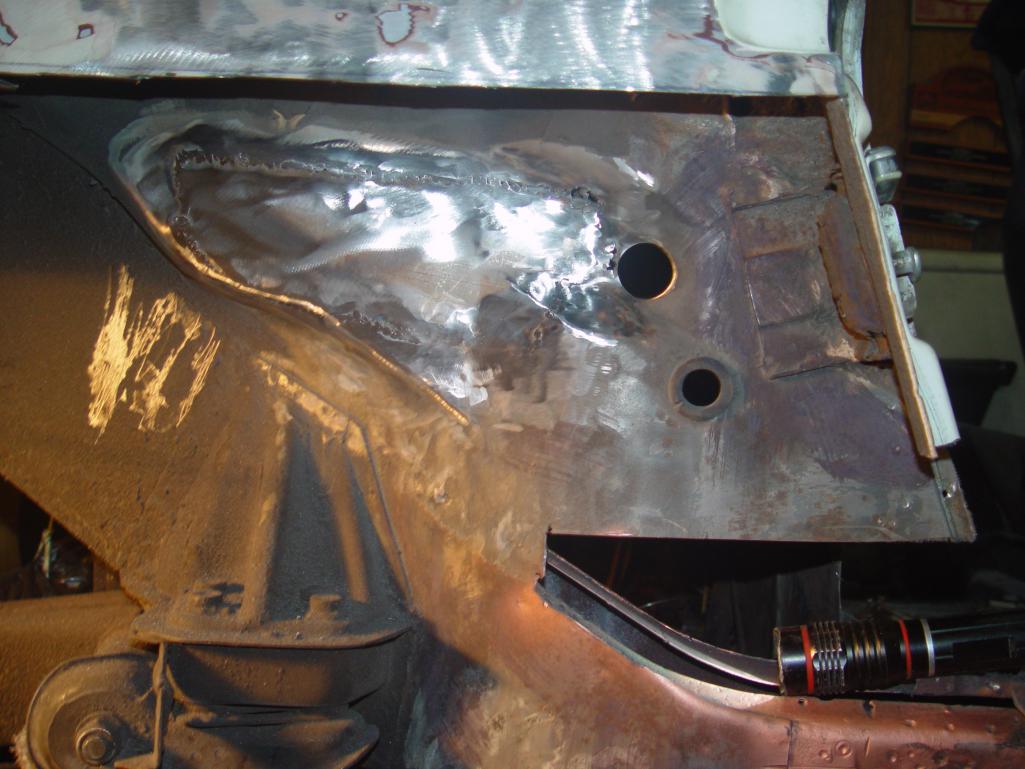 |
|
|
|
| worn |
Feb 27 2021, 01:25 PM
Post
#10
|
|
can't remember Group: Members Posts: 3,143 Joined: 3-June 11 From: Madison, WI Member No.: 13,152 Region Association: Upper MidWest |
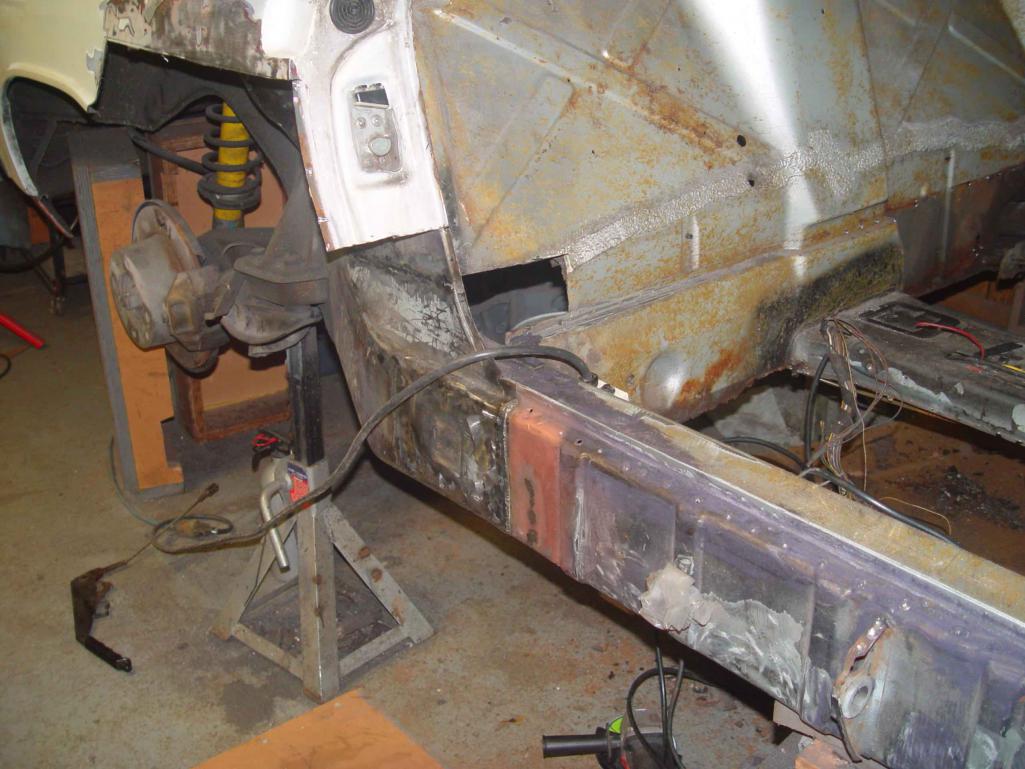
QUOTE(Superhawk996 @ Feb 26 2021, 04:00 PM) FWIW -- RD panels are Galvaneal. The Zinc that is annealed into the top surface of the panel sheet metal will actually serve as a sacrificial cathode for nearby sheet metal and welds. Not perfect, and protection diminishes with distance from the Galvaneal panel, but, the Zinc in Galvaneal goes a long way toward holding off surface corrosion at the weld sites. My childhood summers were spent in a 34 foot wooden boat anywheres from Puget Sound to Uclulet. Dad had zincs on the hull tied into everything metal. I figure I oughta just trail anodes from the bumper. This time of year you can encounter either blowing clouds of snow, or salt up here in the north. Turns everything white either way. Of course the worst parts are inside. The inner long has a U-section on its side made out of heavier metal with corrugation. The lower part has rusted, but the upper two planes are solid. Made a piece out of 14 gauge for that. Welding upside down on my back adds to the fun. Thankfully Harbor Freight has improved their welding blankets. One spark ate through the Carhart, the sweatshirt, the other sweatshirt, the T-shirt, and then rolled along my side to end up underneath me. On the upside we have this. 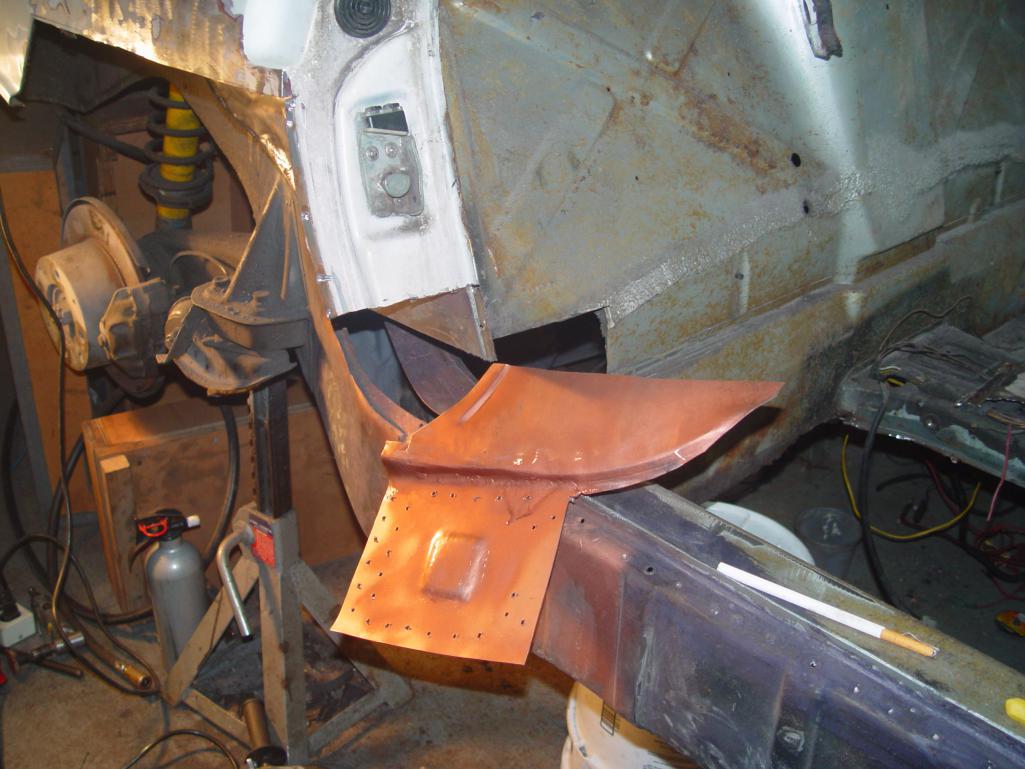 and I quit yesterday with it partway put in. 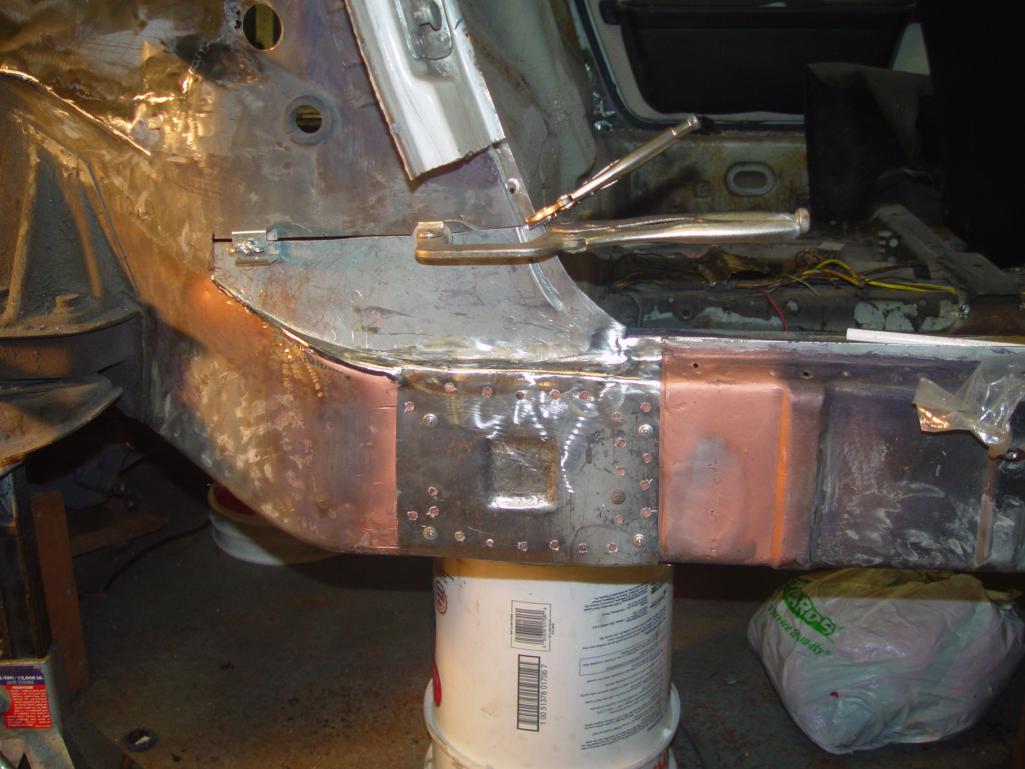 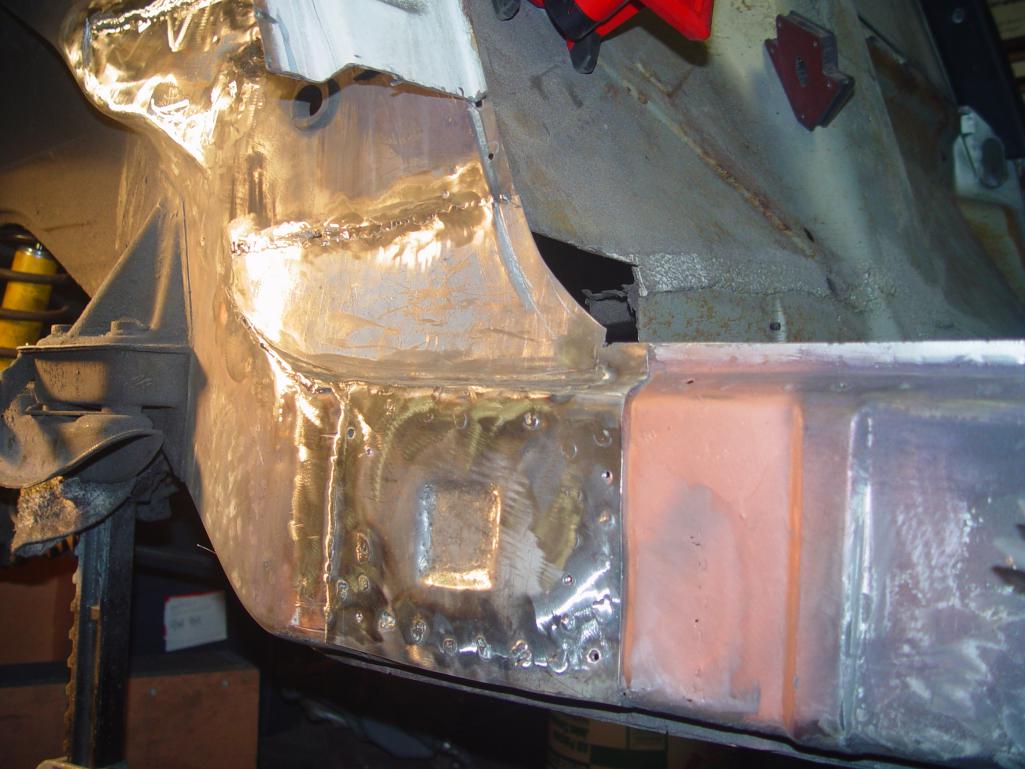 I could have approached things by replacing both inside and outside longs, along with their internal reinforcements, but that would mean removing both inner and outer suspension consoles. I did remove the right side motor mount, but that alignment is a good deal more forgiving in my mind than the suspension parts. As seen in some photos the top of the inner longitudinal member was cut out because of pitting. There are reinforcing pieces inside, and fortunately they were shielded on top by the outermost layer. Thanks for any and all suggestions. I have the RD rear floor, the crossmember and the firewalls yet to install as well as more welding on this onion. It is amazing how monocoque layering creates a sturdy shell |
|
|
|
| jaredmcginness |
Feb 28 2021, 07:45 AM
Post
#11
|
|
... Group: Members Posts: 501 Joined: 12-June 19 From: Baltimore Member No.: 23,209 Region Association: MidAtlantic Region |
Your repair is great! Nice work so far. Keep updating us.
Lots of great advice in here. My only advice, I covered this exact same repair. I used a few new panels (outer long, floors) the rest I made myself. It really went by much faster than I anticipated. I enjoyed it. |
|
|
|
| worn |
Mar 4 2021, 11:29 AM
Post
#12
|
|
can't remember Group: Members Posts: 3,143 Joined: 3-June 11 From: Madison, WI Member No.: 13,152 Region Association: Upper MidWest |
Made some progress this week. Got the wheel house panel in completely. Am experimenting with new techniques to reduce undercutting in the surrounding metal.
 The inner long has a heavy reinforcement section inside. Restoration designs makes it, but it rusted badly only along the lower flange where it flattens out to collect water and sulfuric acid and what ever else causes rust Here it is  I fabricated a repair piece from 14 gauge steel because this piece was thicker than other body parts. Did my best to add the corrugations. This is all welding on my back covered with a welding blanket. Hardly enough room to get my helmet angled to see the weld. But persistence pays off. I did more welding after this but since the longitudinal provides an out layer I left some ugliness be rather than grind everything off. 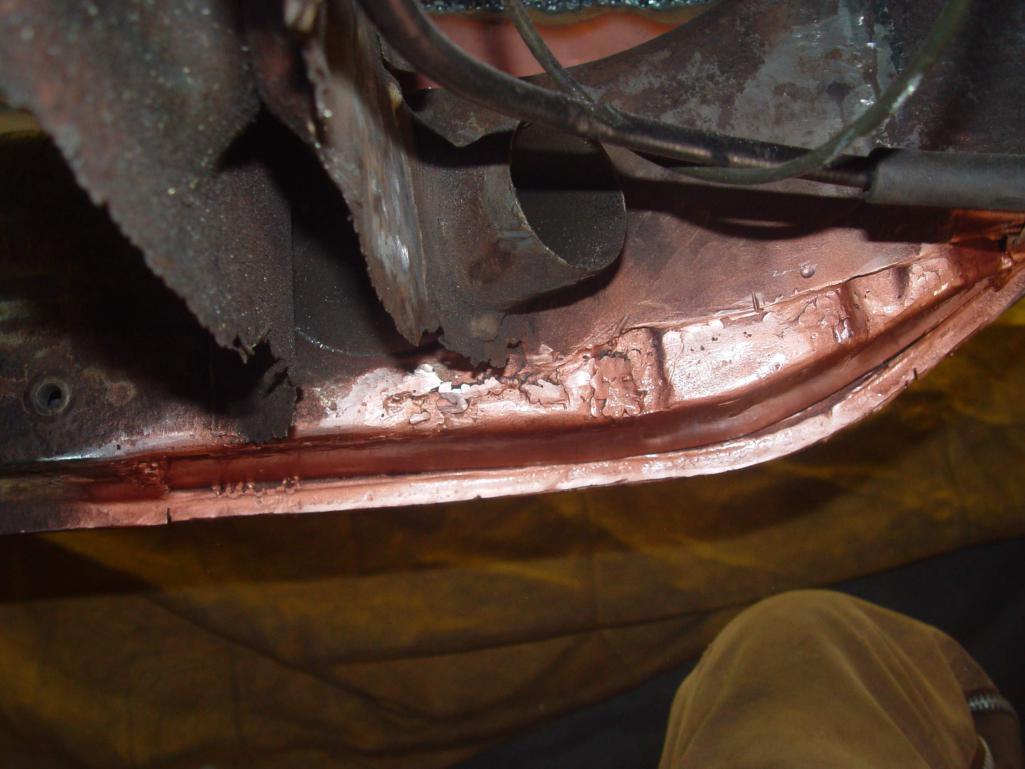 Then of course there are floors to deal with.  |
|
|
|
| worn |
Mar 4 2021, 11:50 AM
Post
#13
|
|
can't remember Group: Members Posts: 3,143 Joined: 3-June 11 From: Madison, WI Member No.: 13,152 Region Association: Upper MidWest |
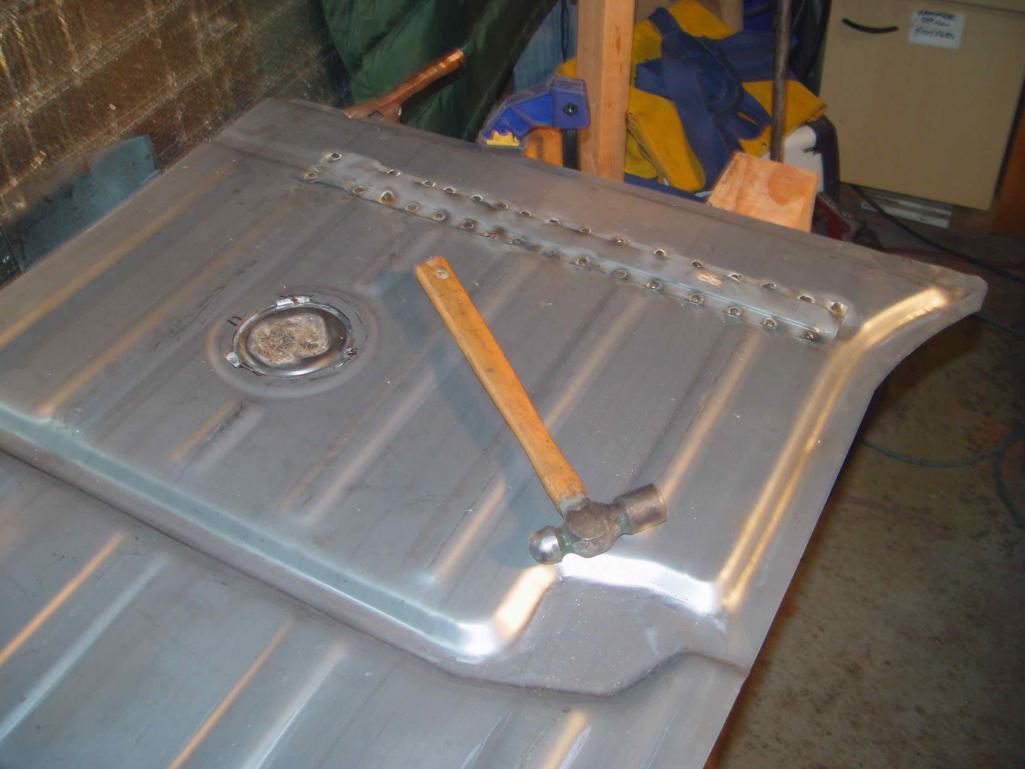
The floor carries many items for use on the new floor. I like the idea of reproducing the holes used during manufacture, and I need to pull out the plugs.
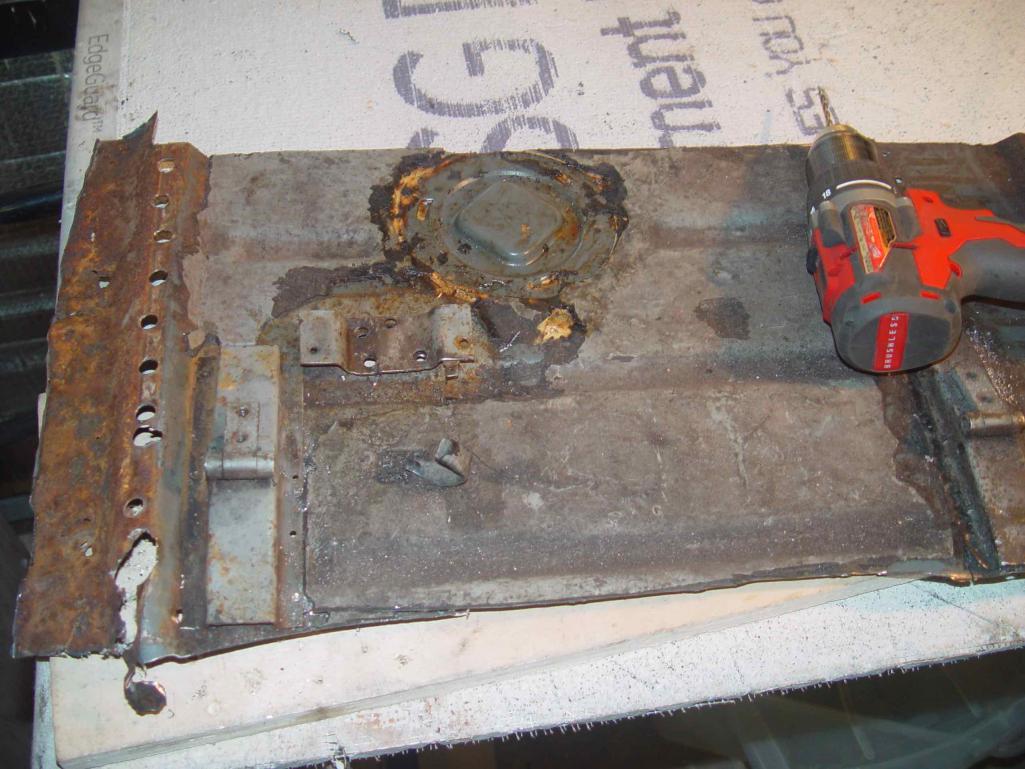 and make new holes for them 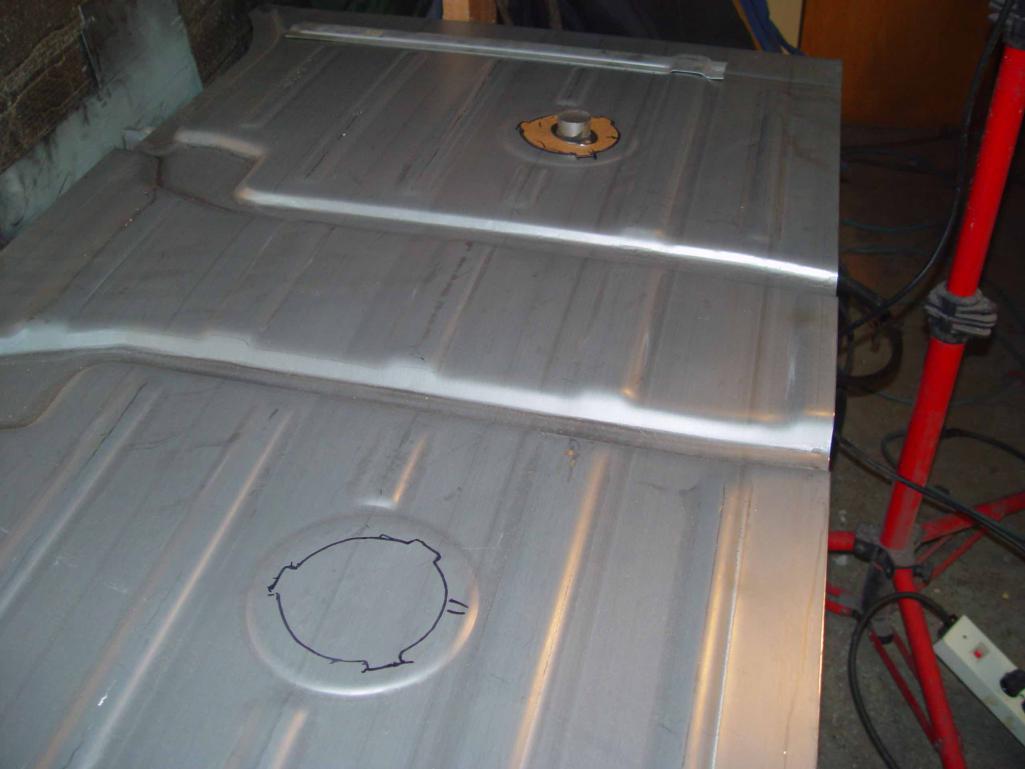 In order to remember where everything goes I have to save the pieces for awhile. Never throw them out till you have finished the project. 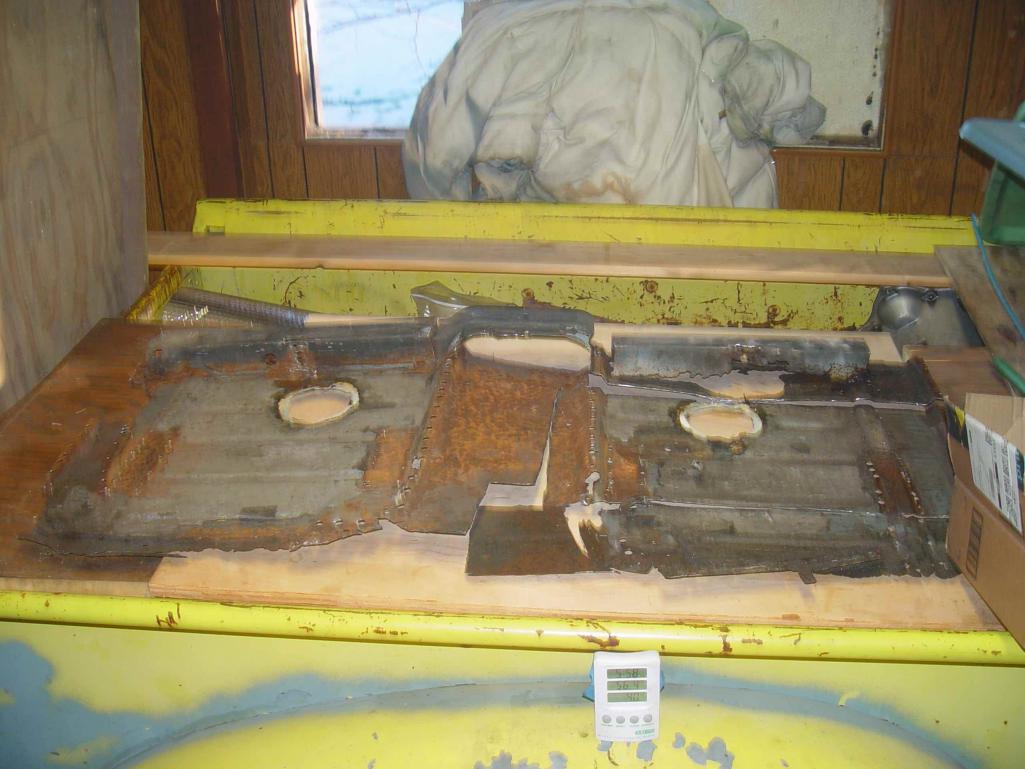 The upside down welding involved solid metal that has been hit with rust converter to deal with surface rust followed by epoxy primer. This is inside the longitudinal. The best I can do is scour it with a wire brush welded on the end of a long shaft and spun with a drill. It won't readily return to its evil oxidizing ways and I will make sure to cover the parts burned off in welding by spraying with a narrow tube. That is what it is. Which means that I am welding my patches onto metal that isn't quite clean. And of course, that isn't pleasant even if the results are OK. You get flares and spatter. I was covered by a welding blanket, but I didn't put a welding sleeve on my left hand and my elbow caught fire. How do I know? I saw smoke rising from the left. |
|
|
|
| worn |
Mar 4 2021, 12:05 PM
Post
#14
|
|
can't remember Group: Members Posts: 3,143 Joined: 3-June 11 From: Madison, WI Member No.: 13,152 Region Association: Upper MidWest |
After spending a few hours on my back on the frozen floor (thank you Carhart) I decided to switch to the new floor. Welded on my seat reinforcements. Suddenly I was the god of welding. Clean galvaneal!
 And for those who think I have been slighting Restoration Design by making patch panels I have this to say. 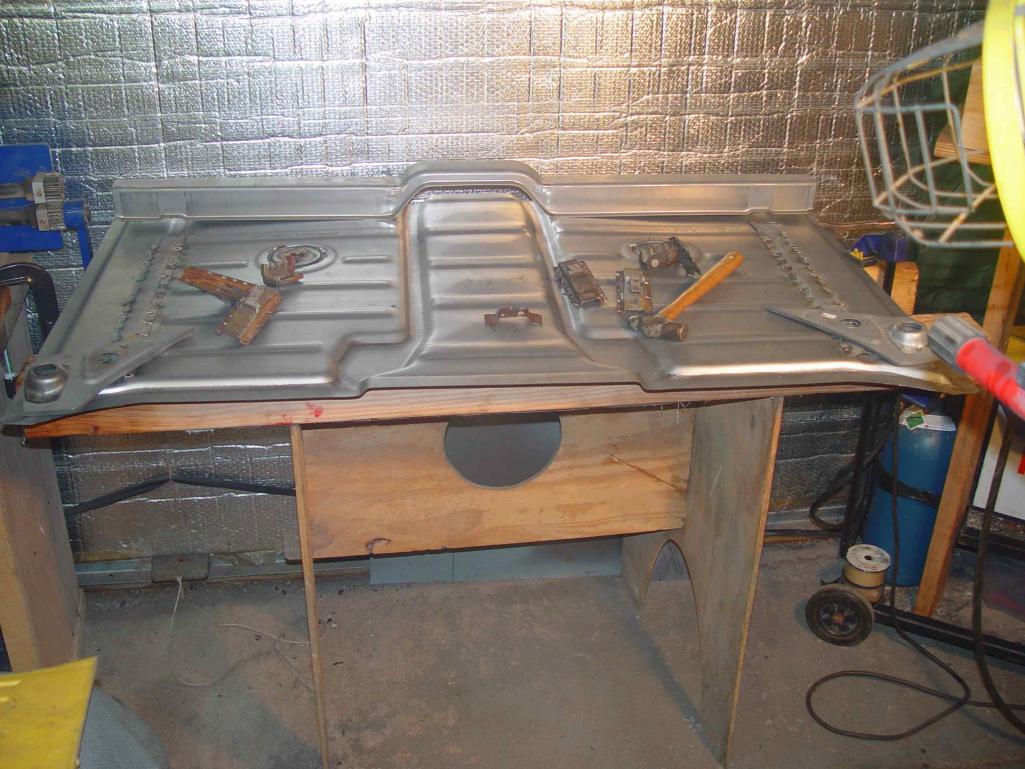 This is about half of the items from my first order. My second order came yesterday and today I ordered more new stuff from RD. They are really nice to work with. While I am at it I want to say nice words about Millennium Technologies. I am having a 911 cylinder over bored and replated, and they have been very nice to work with. |
|
|
|
| worn |
Mar 10 2021, 11:27 AM
Post
#15
|
|
can't remember Group: Members Posts: 3,143 Joined: 3-June 11 From: Madison, WI Member No.: 13,152 Region Association: Upper MidWest |
I have been measuring the door gap after every patch. Found that it was widening and installed the typical brace with a turnbuckle.
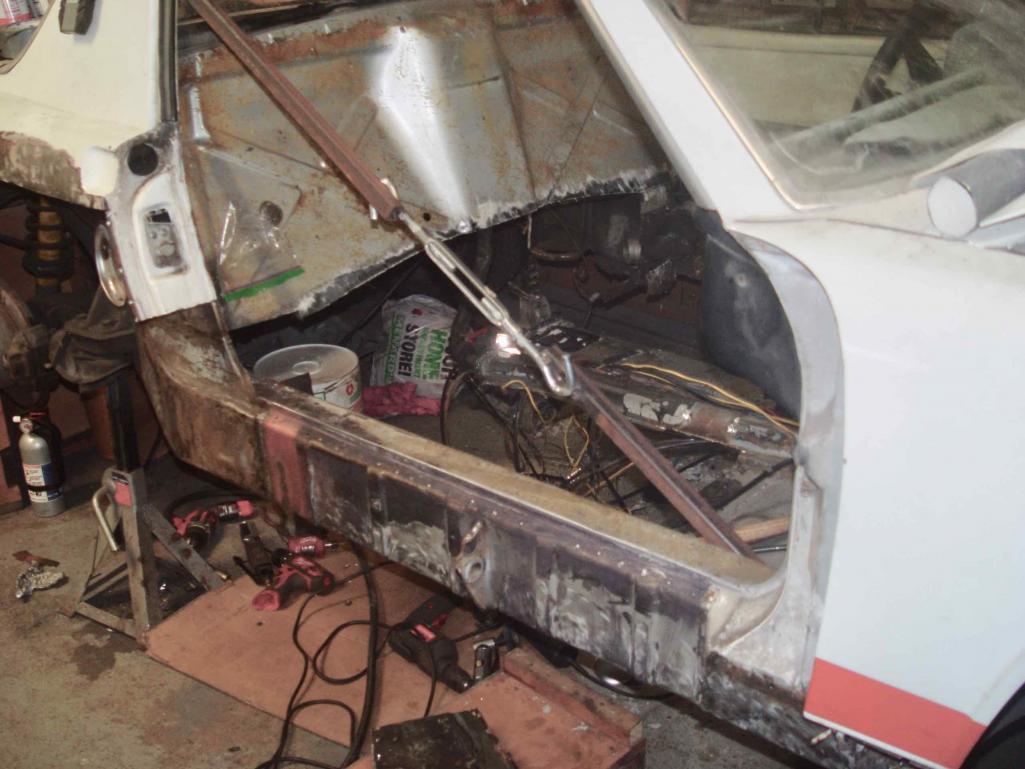 Given the obvious strength of the longitudinal pieces I was surprised that I could move the door gap open and shut by twisting the turnbuckle. I should have known but was surprised to see this: 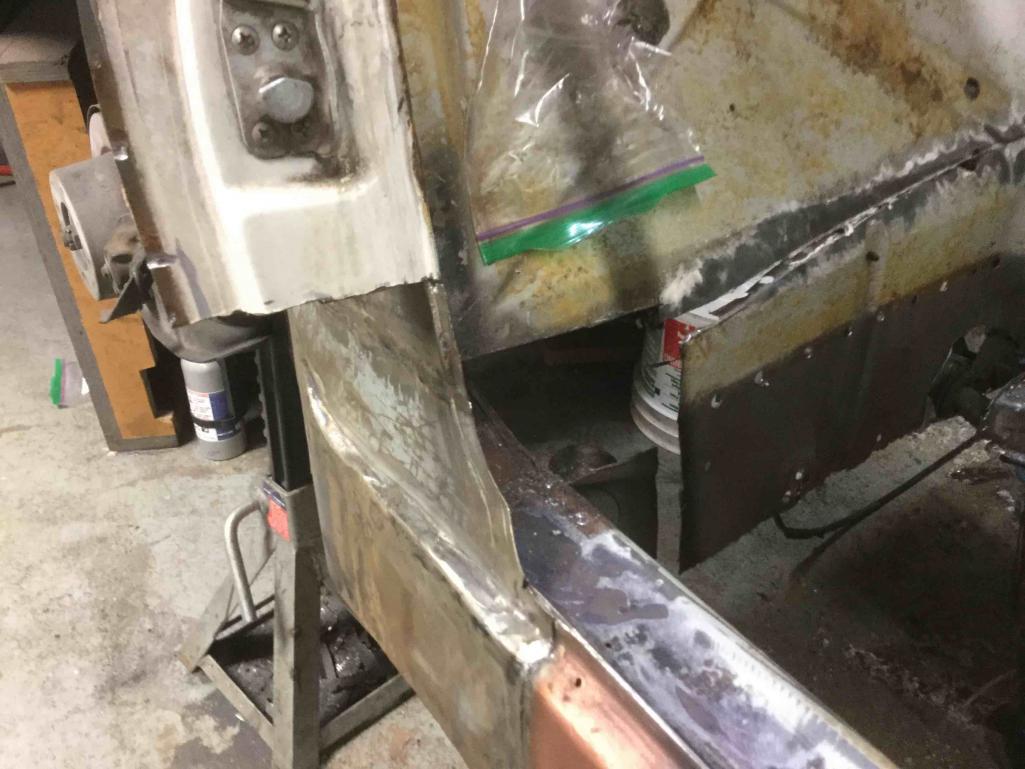 Note how the patch panel is flexing. All of the butressing pieces have been removed. The door latch pillar, the outer fender and the inner and outer firewall pieces normally come together so this thin piece of metal can prevent flexing of the B-pillar and roll bar. Nice to know. The inner reinforcement of the longitudinal has been patched and covered with a patch for the covering inner long piece. All of the layers are also stitched together with plug welds. Rust converter sealer followed by epoxy primer and I am ready to weld in a patch for the top of the inner long. Just under the battery tray. The inner reinforcement was in great shape here, probably shielded by the outer shell. 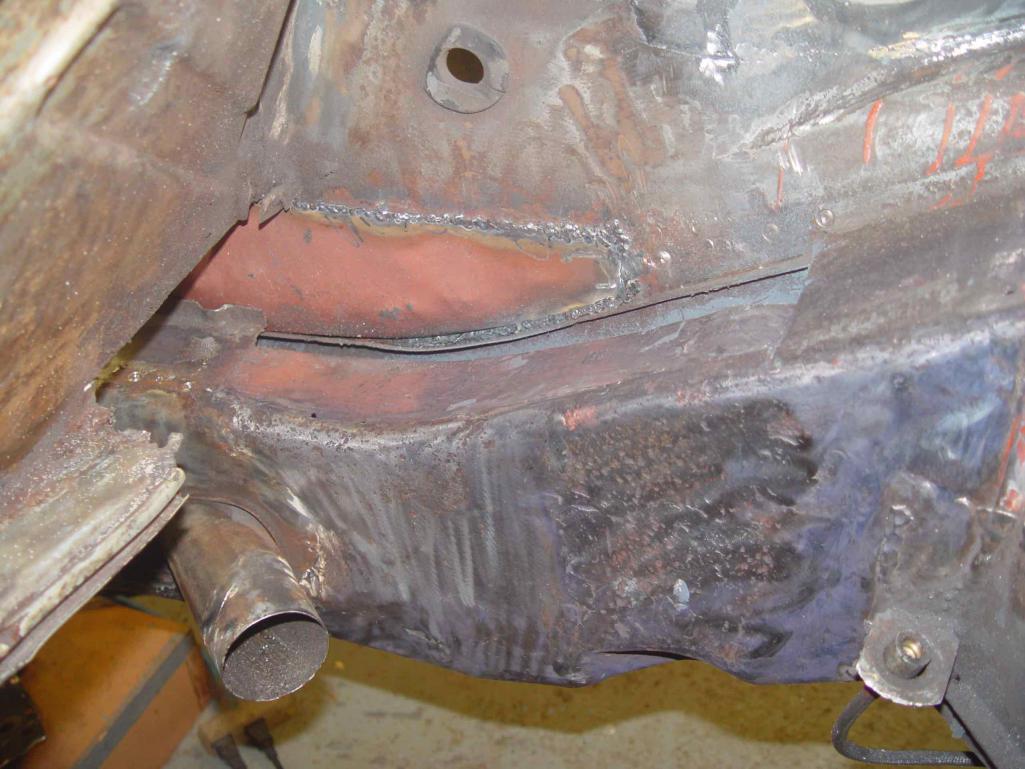 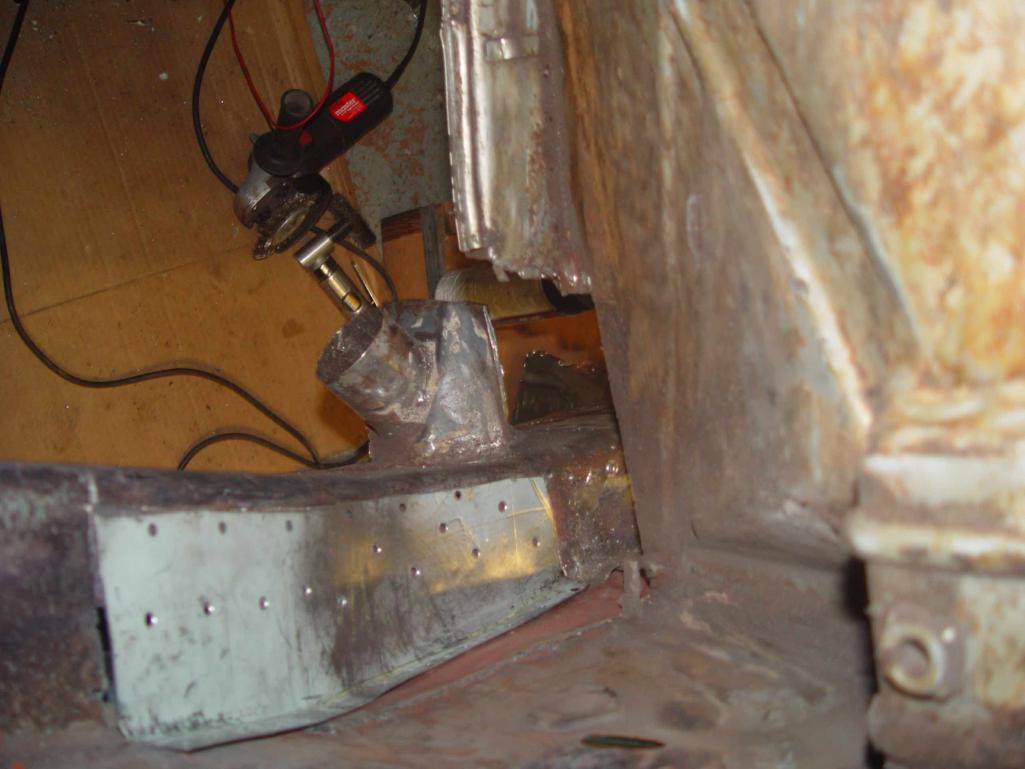 This shot shows something amazing. The air and electric angle grinder tools cost about $10 a piece at Harbor Freight. So I bought enough of them so I don't have to wait to swap wire brushes and abrasive wheels: I have a tool for each. Great but also frightening. Before I close everything up, I spray what I can with this. 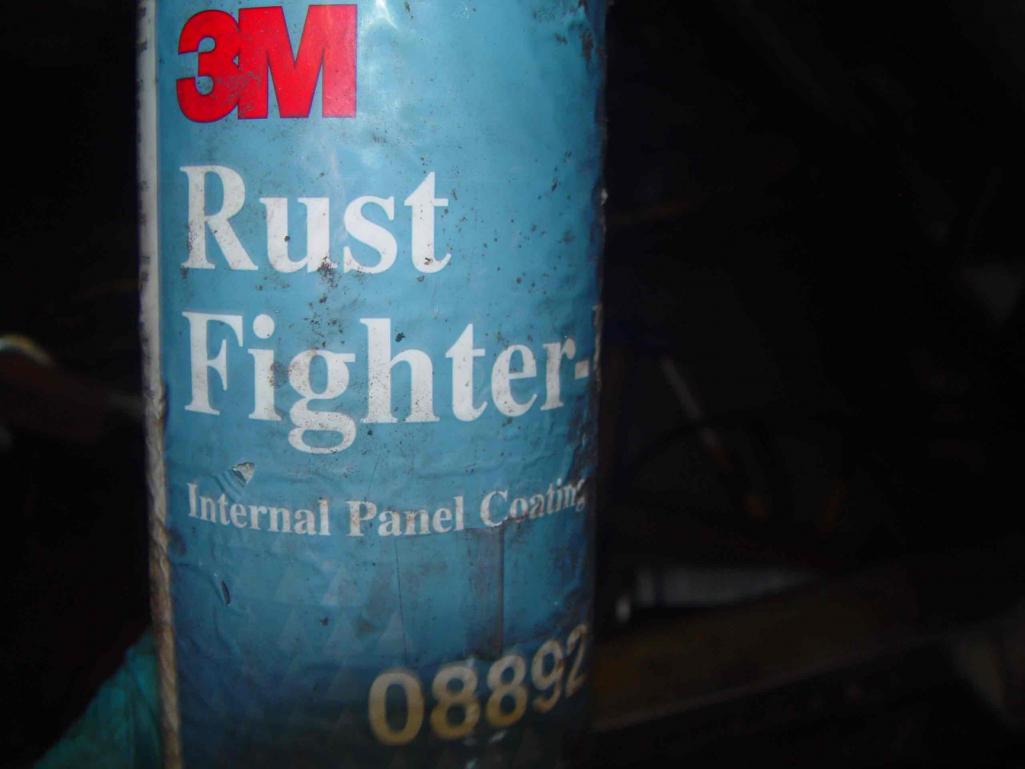 And after some welding and grinding.  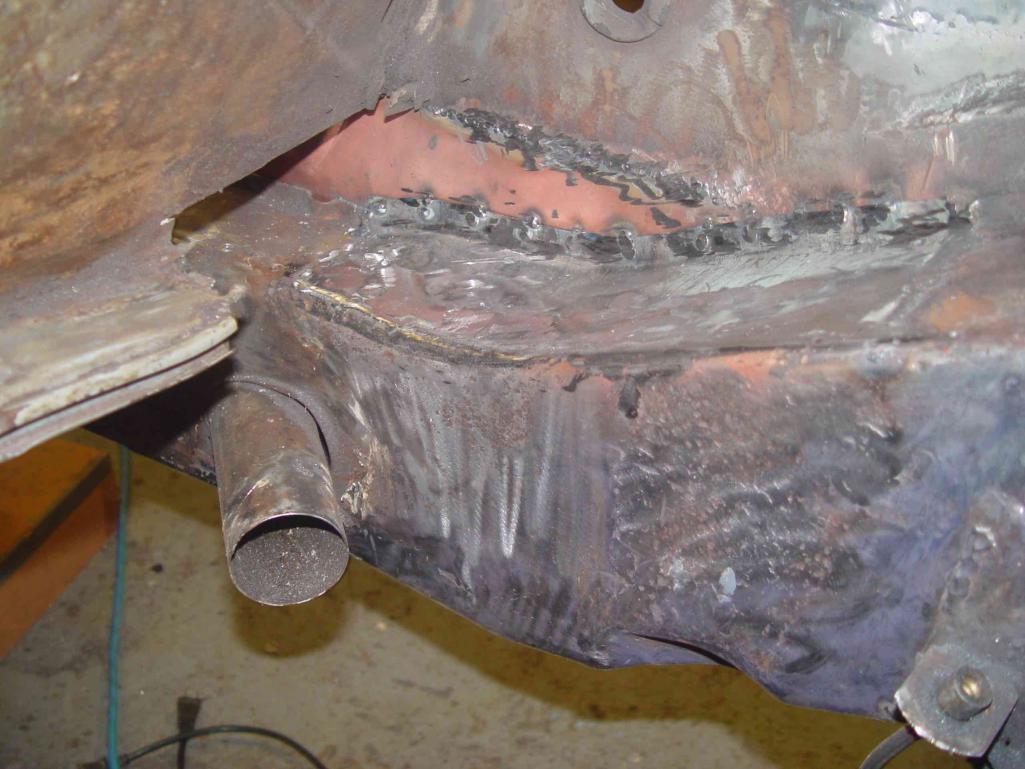 The area under the engine mount is pitted, but I cut off a small square of this piece and it was very solid as the pits though ugly are not very deep. The same was the true for the back of the engine mount. 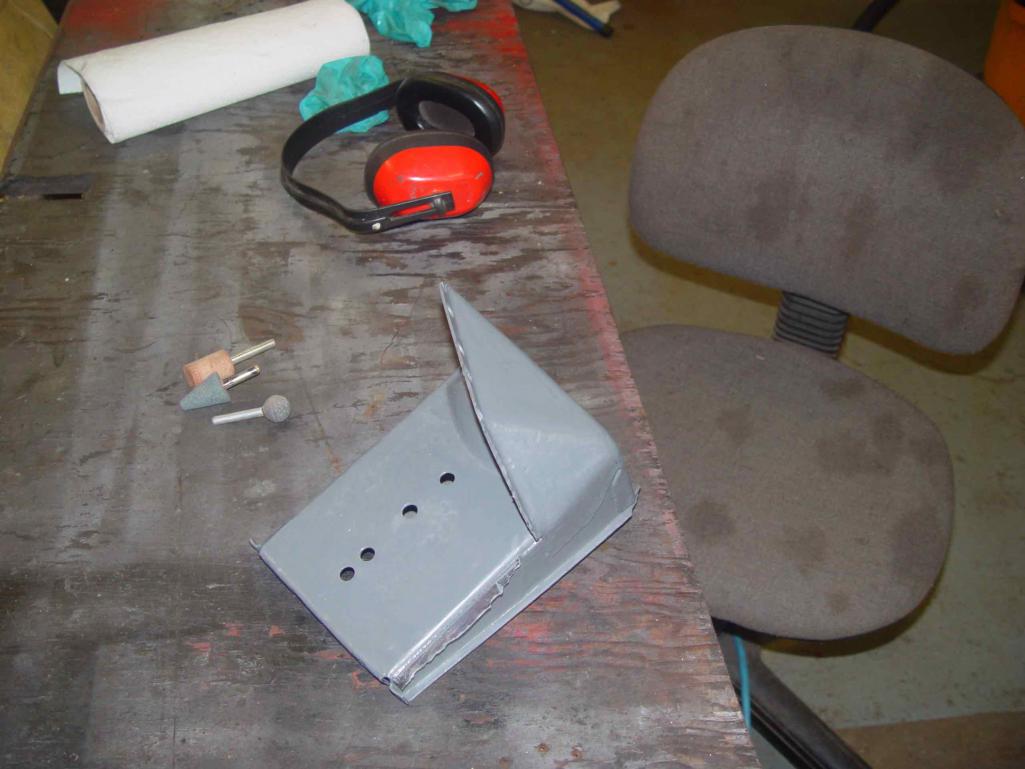 This has been sanded rust converted for the pits and then coated with epoxy primer. Epoxy primer is a miracle for restoration projects. It bonds very well and unlike many other paints is actually waterproof. |
|
|
|
| worn |
Mar 19 2021, 05:52 AM
Post
#16
|
|
can't remember Group: Members Posts: 3,143 Joined: 3-June 11 From: Madison, WI Member No.: 13,152 Region Association: Upper MidWest |
Typically the right side of the car has less rust on the long. An unfortunate surprise is not this time. The car was originally purchased by a Baltimore Colts player, reportedly for his wife. You would think such a person would be able to park the car in a garage, but the rust shows that the car was parked slightly nose upwards in the rain. And of course by 2008 when I bought it, it was just a used car.
Starting the patch from the inside. Cutting away the bad like a layer cake. This shows the inside strengthening piece with the congregation. The diagonal edge is the original end of the piece. I have cut away the captive nut for the seat belt. 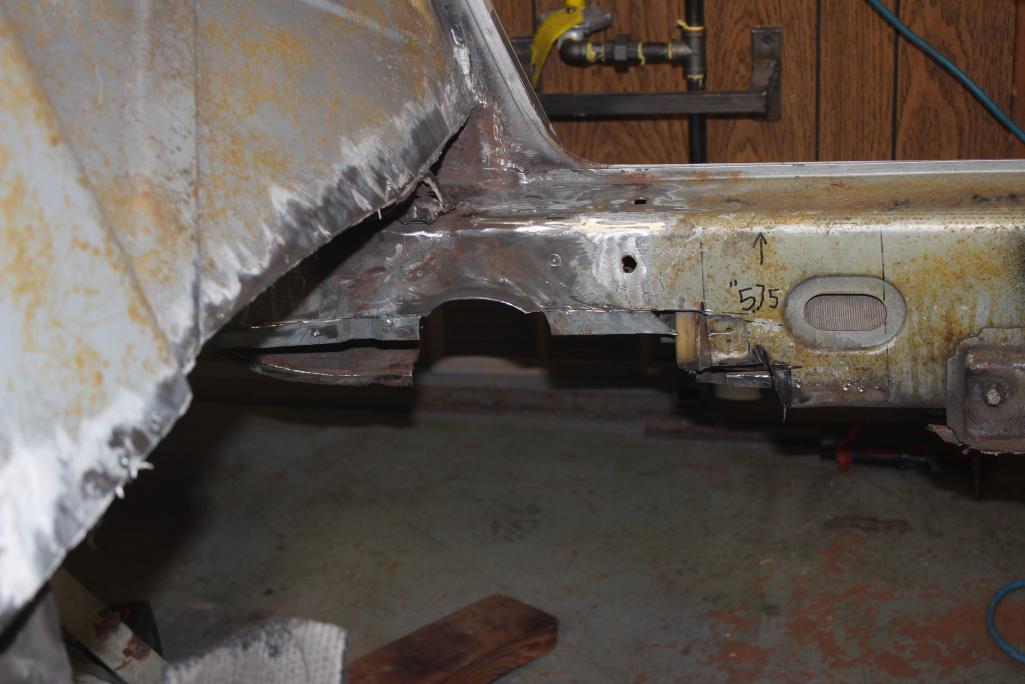 The strengthening piece is thicker than the outside layer of the long. I am using 14 gauge for the inner and 18 gauge for the outer. Both just slightly thicker than the original. 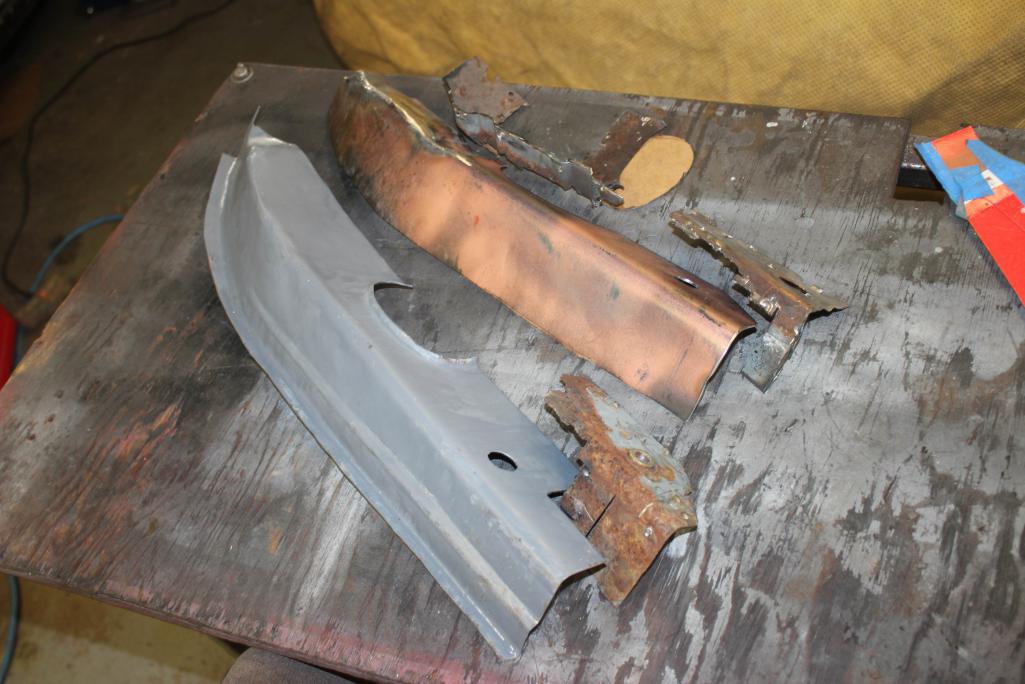 This is mostly done with a hammer and a vise, but I had to cheat a bit at the curved ends and cut and welded to get the deep shape. I maybe could make the thin outer pice by hammer forming, but with the 14 gauge I wouldn't have a chance. They have to nest in order to get the plug welds to be strong. I still have a ways to go to get them right. Then they go back in like a layer cake. |
|
|
|
| worn |
Mar 26 2021, 09:32 AM
Post
#17
|
|
can't remember Group: Members Posts: 3,143 Joined: 3-June 11 From: Madison, WI Member No.: 13,152 Region Association: Upper MidWest |
The inner strengthening piece holds the seat belt point. The metal around the nut had deteriorated so a new strap was fabricated to hold the nut.
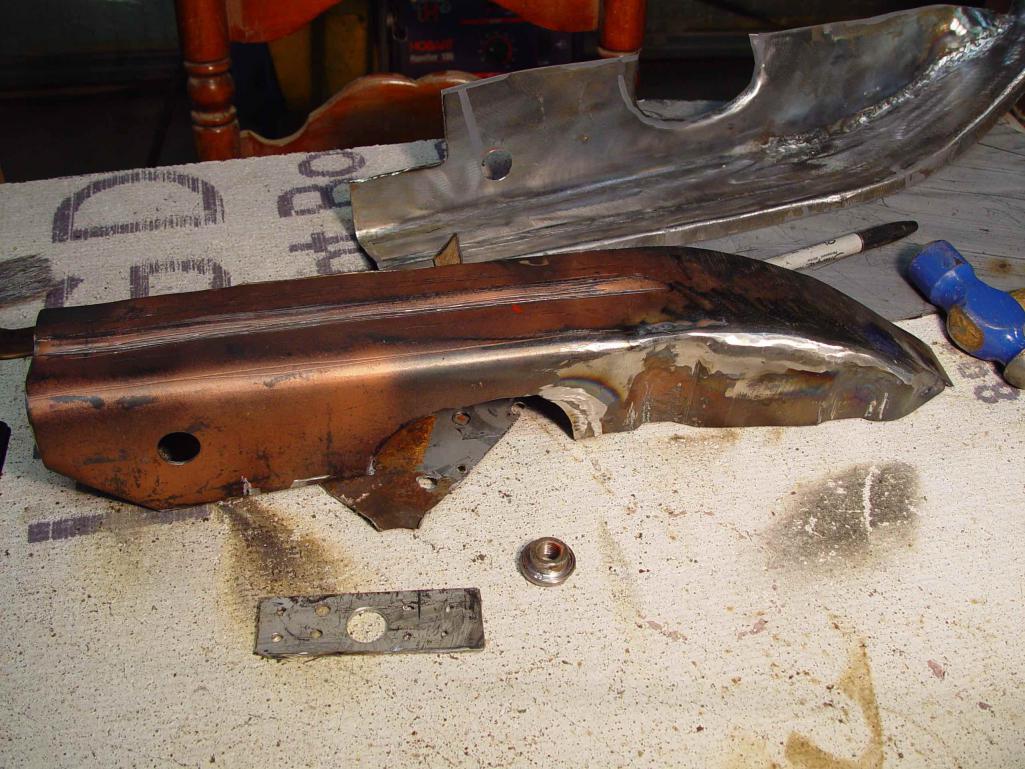 And welded in. 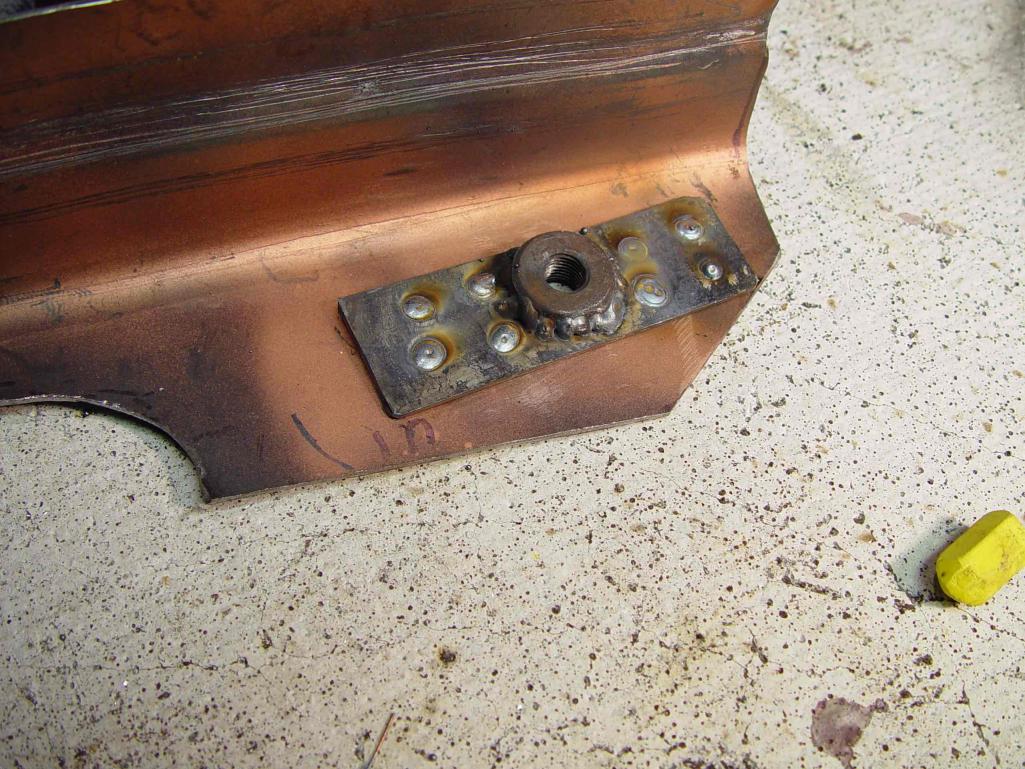 And then the 14 gauge piece goes on with seam welds to the existing inner piece of the inner long. The seam is part way up, and I was glad to get the corrugations to line up. 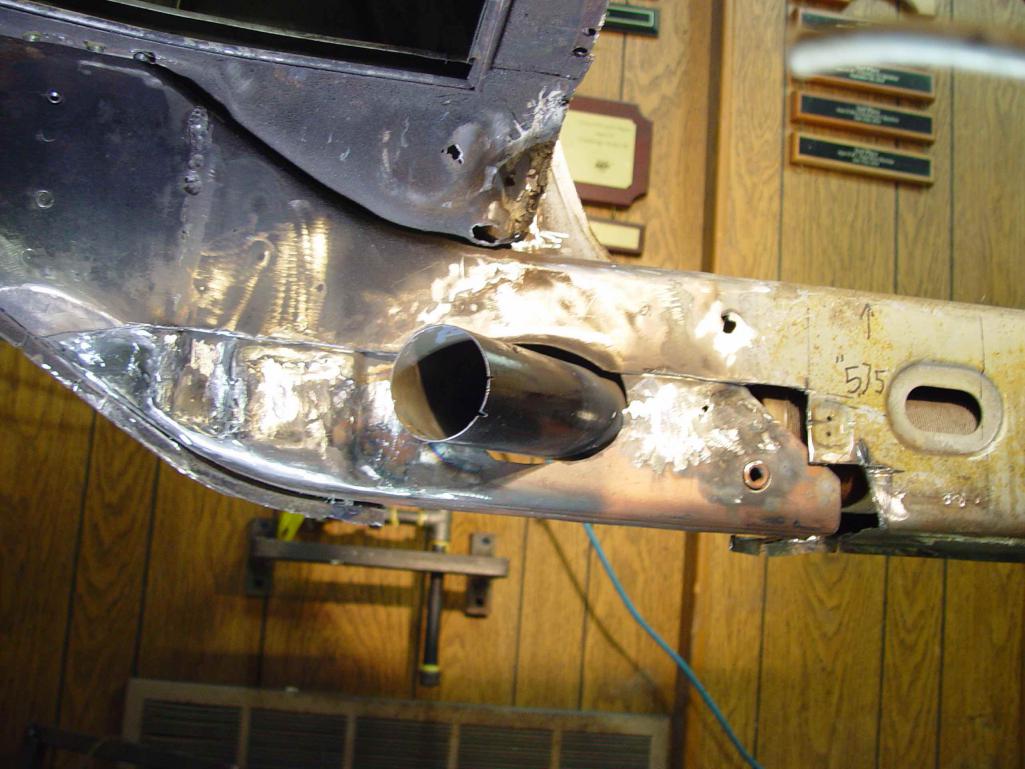 |
|
|
|
| worn |
Mar 26 2021, 09:45 AM
Post
#18
|
|
can't remember Group: Members Posts: 3,143 Joined: 3-June 11 From: Madison, WI Member No.: 13,152 Region Association: Upper MidWest |
The outer shell of the inner long is thinner: 18 gauge is what I am using to match what I think corresponds fairly closely to the original 19 gauge.
Here it is being shoved into place. 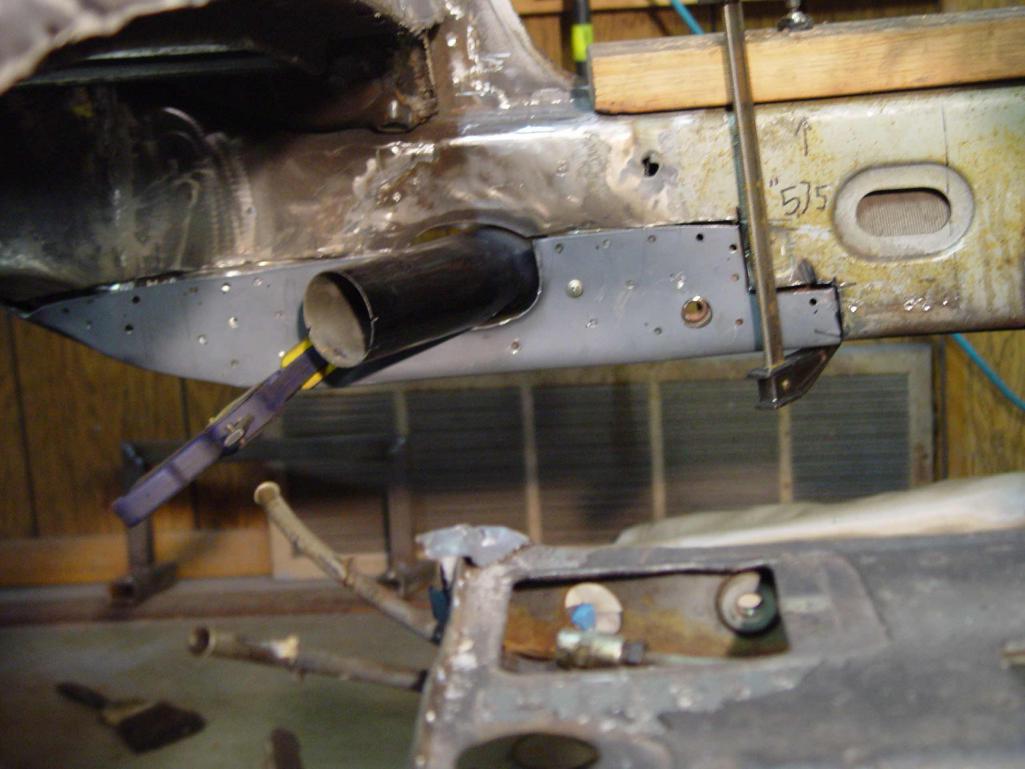 And welding has started to complete this side of the long 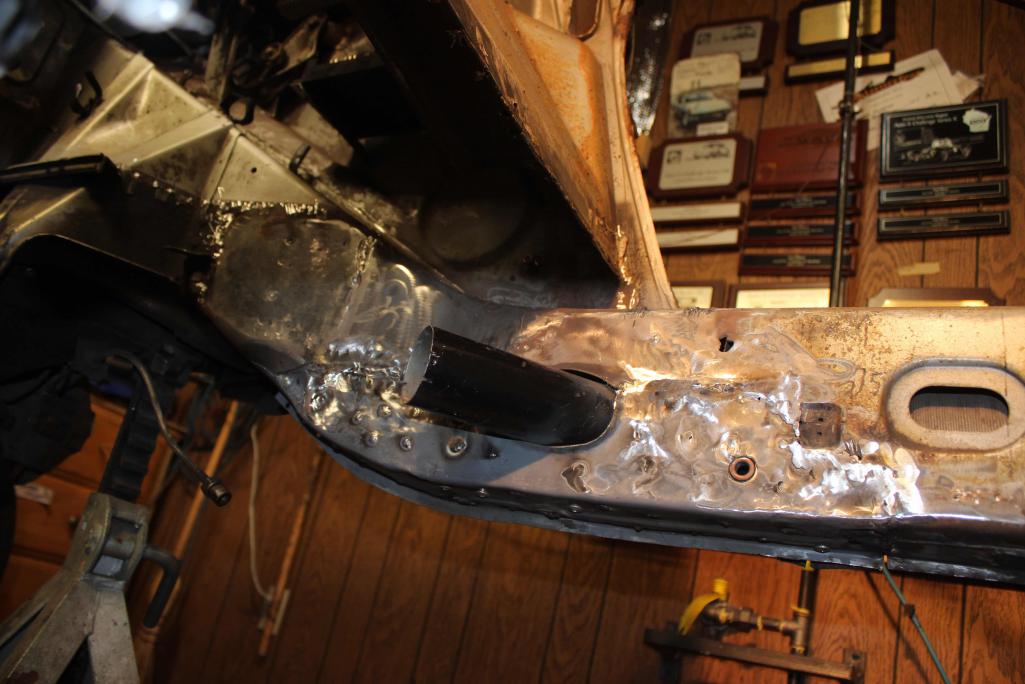 The two parts are supposed to nest together with spot welds joining them. This produces a lot of strength. I used the inner piece as a strong anvil to completely form the outer shell to the inner. This works well, but leaves some small hammer marks. I found perforation in the driver side engine shelf, so I cut half of it away. I am tempted to try to duplicate it with a hammer, but the easier move would be to dial Canada. Also, smarter move even though I find metal forming the most fun of the whole project. Along with welding. The grinding and the dirt and the working upside down: not so fun. Welding upside down in leather and gloves and hood and swathed in a welding blanket is kind of surreal; sort of like sensory deprivation with sparks flying. |
|
|
|
| 930cabman |
Mar 26 2021, 12:15 PM
Post
#19
|
|
Advanced Member Group: Members Posts: 2,992 Joined: 12-November 20 From: Buffalo Member No.: 24,877 Region Association: North East States |
Nice looking work and it appears your project was not tooo bad. Some of these hulks will never be close to original. Keep posting you work and thank you
|
|
|
|
| worn |
Mar 26 2021, 07:54 PM
Post
#20
|
|
can't remember Group: Members Posts: 3,143 Joined: 3-June 11 From: Madison, WI Member No.: 13,152 Region Association: Upper MidWest |
QUOTE(930cabman @ Mar 26 2021, 10:15 AM) Nice looking work and it appears your project was not tooo bad. Some of these hulks will never be close to original. Keep posting you work and thank you Thanks. When you get rust on the left side there are fewer options. Not as many replacement panels for sale. You can buy the outer long, but in my case only the rear part of the panel is damaged at maybe the rearmost two inches. I think I can see the waterline from being parked in the rain. Rust from the inside out shows a slight nose up slant. Didn’t find any debris inside, but the rust was there in specific areas along the undersides. |
|
|
|
|
1 User(s) are reading this topic (1 Guests and 0 Anonymous Users)
0 Members:

|
Lo-Fi Version | Time is now: 16th April 2024 - 10:55 AM |
Invision Power Board
v9.1.4 © 2024 IPS, Inc.