|
|
|
Porsche, and the Porsche crest are registered trademarks of Dr. Ing. h.c. F. Porsche AG.
This site is not affiliated with Porsche in any way. Its only purpose is to provide an online forum for car enthusiasts. All other trademarks are property of their respective owners. |
|
|

  |

| Shivers |
 Mar 27 2021, 08:29 AM Mar 27 2021, 08:29 AM
Post
#21
|
|
Senior Member  Group: Members Posts: 2,338 Joined: 19-October 20 From: La Quinta, CA Member No.: 24,781 Region Association: Southern California |
Nice work.
|
   |

 
|
| FourBlades |
Mar 27 2021, 08:56 AM
Post
#22
|
|
From Wreck to Rockin Group: Members Posts: 2,054 Joined: 3-December 07 From: Brevard, FL Member No.: 8,414 Region Association: South East States |
|
|
|
|
| worn |
Mar 31 2021, 08:47 AM
Post
#23
|
|
can't remember Group: Members Posts: 3,145 Joined: 3-June 11 From: Madison, WI Member No.: 13,152 Region Association: Upper MidWest |
QUOTE(FourBlades @ Mar 27 2021, 06:56 AM)  Yep. Moving to the outside layer cake. I really hoped that the left side would be better, but it is slightly worse. Looks like the Counting Crows hit the nail squarely on the head. It was probably Raining in Baltimore much of this car's life. At any rate this shows three layers of metal. 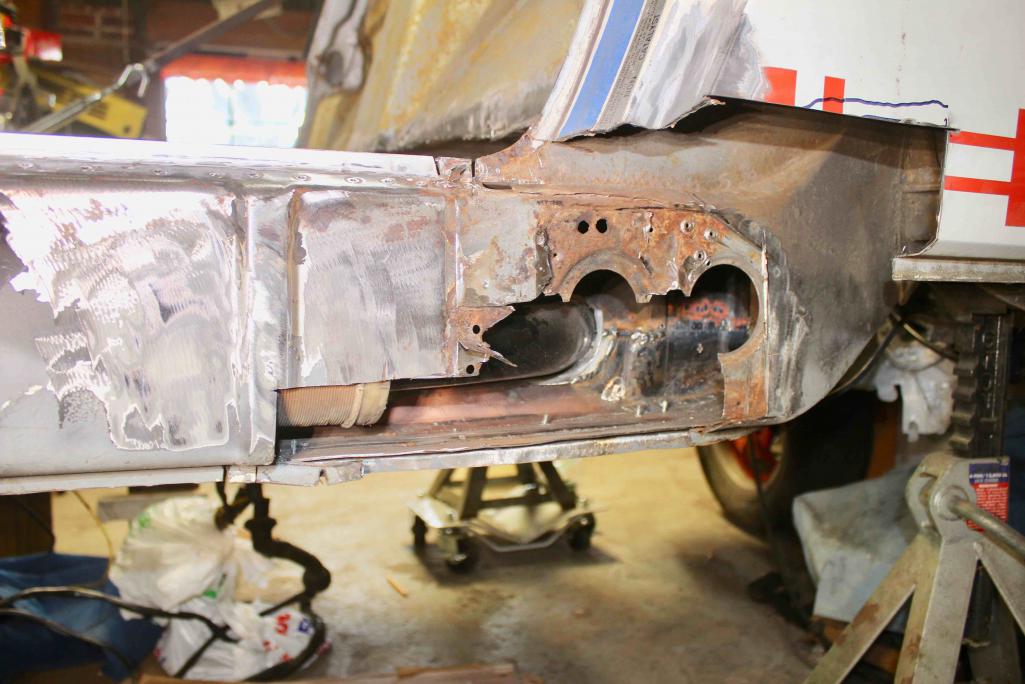 There is the front outer long: rusted at the last two inches. This panel is made by RD, but that is a lot of cutting to patch that little part. In the rear there is the outer layer that goes on to make the wheel house and then a strengthening layer (with the punched large holes. This is made out of stronger steel. Fortunately I have a punch set. Not sure how close a match they are yet. Farther in the hole are the weld back sides of the repair of the inside long. Screws poking in are temporary: have to get them out and finish those plug welds. Question for anyone who might know. Is it possible to replace the jack point without cutting out the fender and sill? I don't see how, but still wonder. |
|
|
|
| worn |
Jan 11 2022, 01:27 PM
Post
#24
|
|
can't remember Group: Members Posts: 3,145 Joined: 3-June 11 From: Madison, WI Member No.: 13,152 Region Association: Upper MidWest |
Been awhile but in the mean time I have been remodeling some rooms, rebuilding the 911 engine, and getting gifts made for x-mas (shaping and grinding Damascus steel kitchen knives).
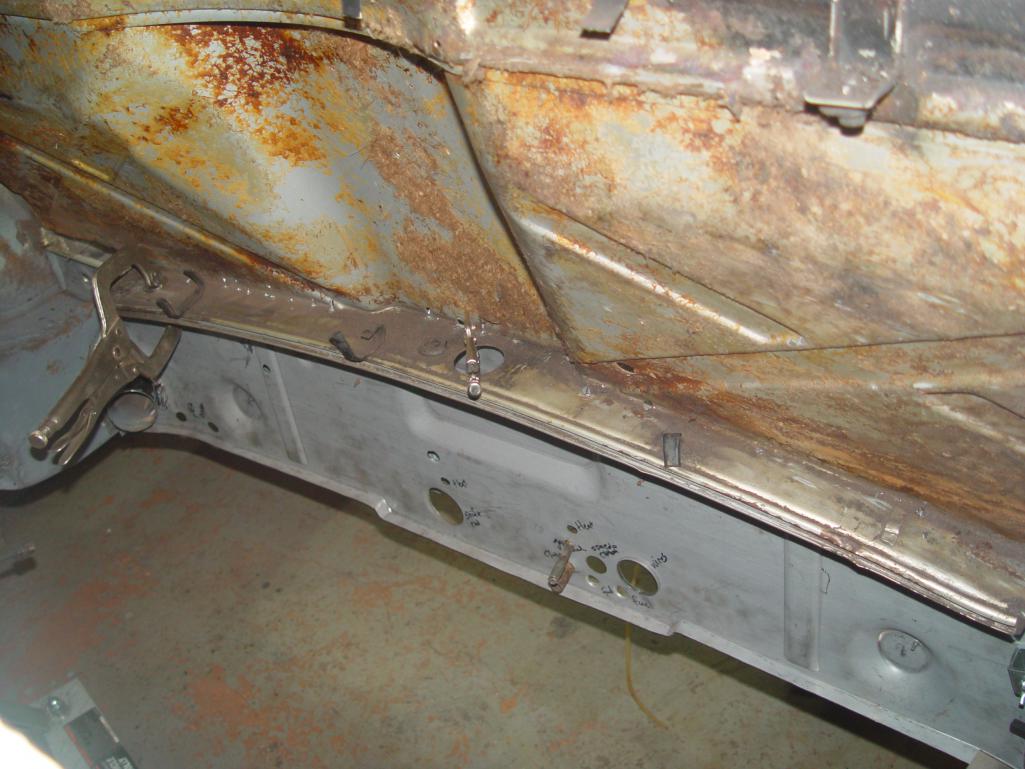
Returning to the left side: 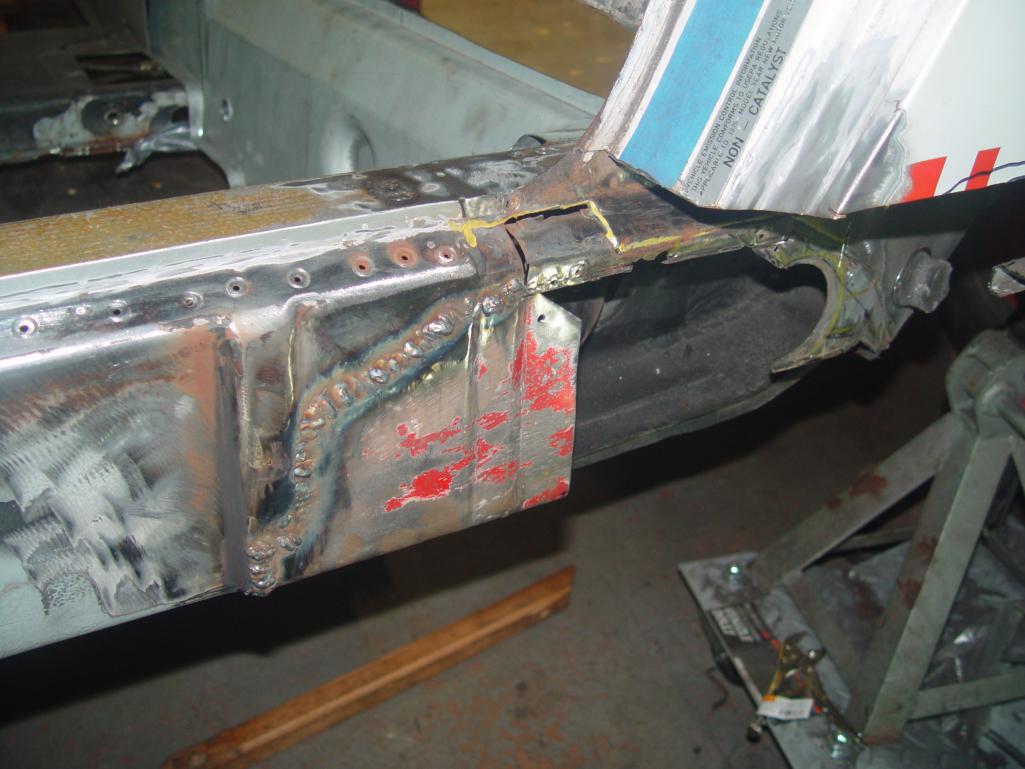 like the right side I worked from inside out. Replacing the rear end of one piece. This inner piece to the rear is overlapping the first patch. As before, I am replacing ends or bottom areas of a large piece. Matching the holes originally there was a PITA and perhaps I should have just them out, but here they are a bit of the ugly. 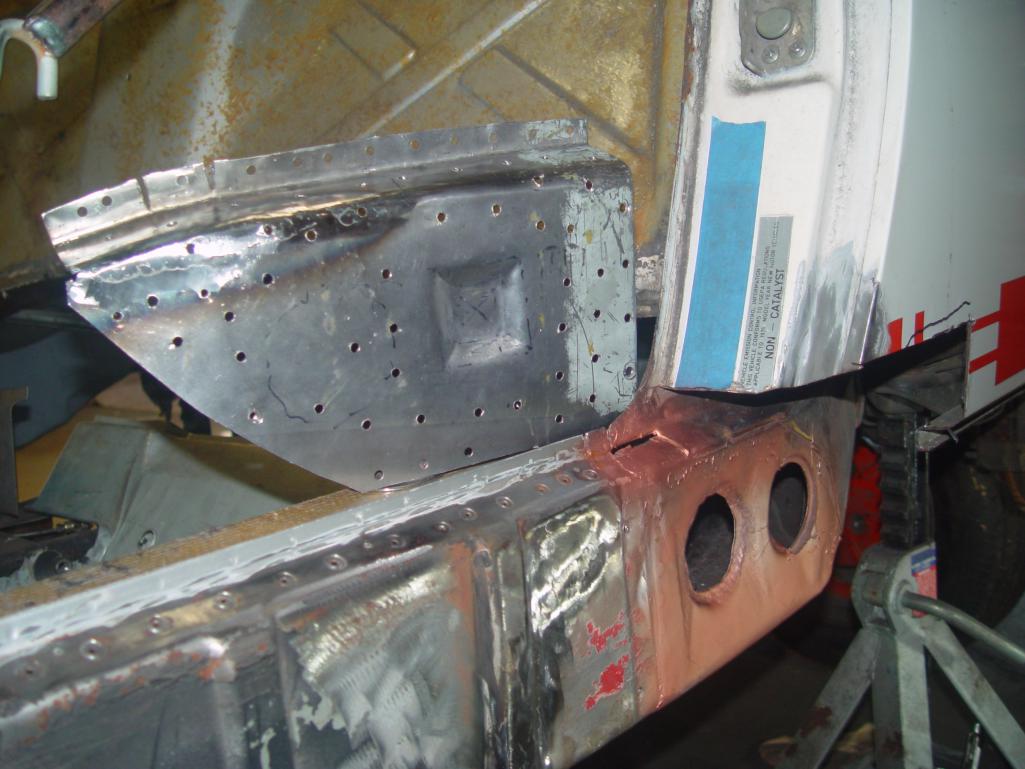 The hole towards the front is behind a depression in the next piece that overlaps. The depression is for the jack point. 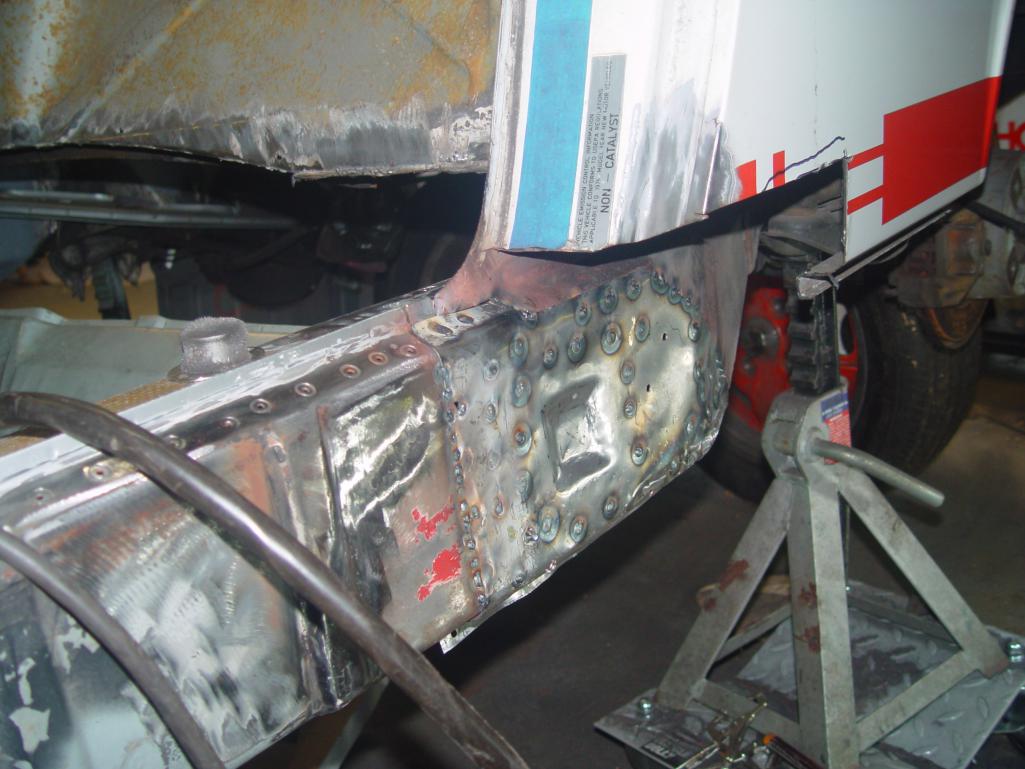 Attached thumbnail(s) 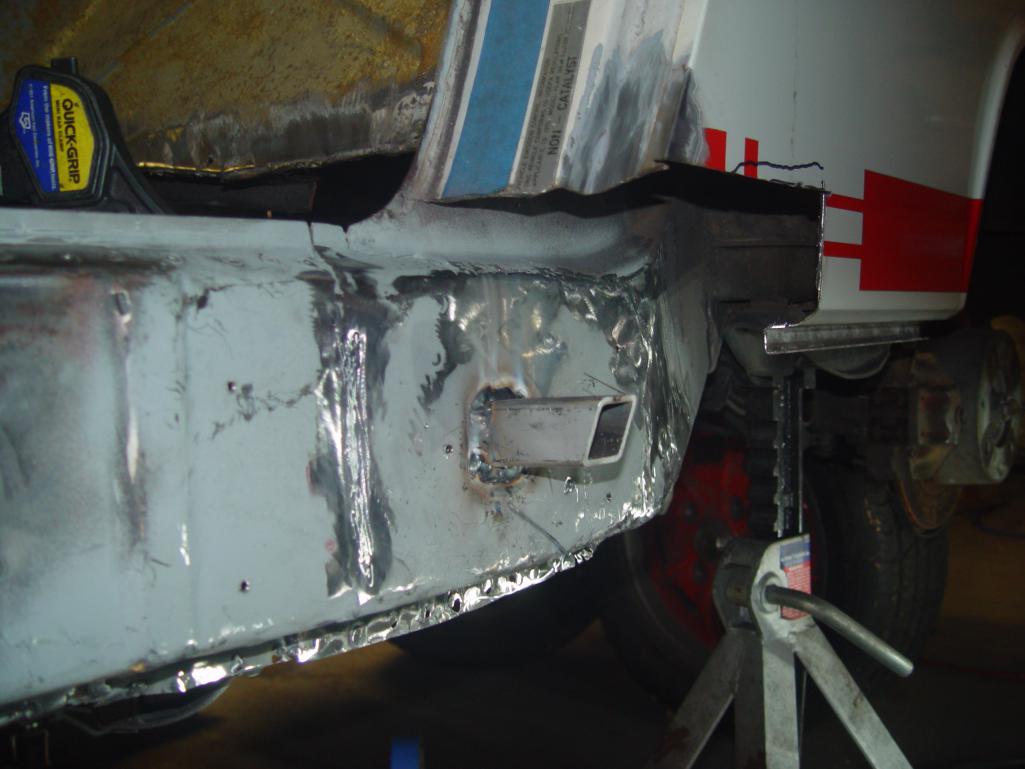
|
|
|
|
| worn |
Jan 11 2022, 01:32 PM
Post
#25
|
|
can't remember Group: Members Posts: 3,145 Joined: 3-June 11 From: Madison, WI Member No.: 13,152 Region Association: Upper MidWest |
The jack point has to be located such that it lines up with the hole in the outer rocker.
 Then yet another layer goes on 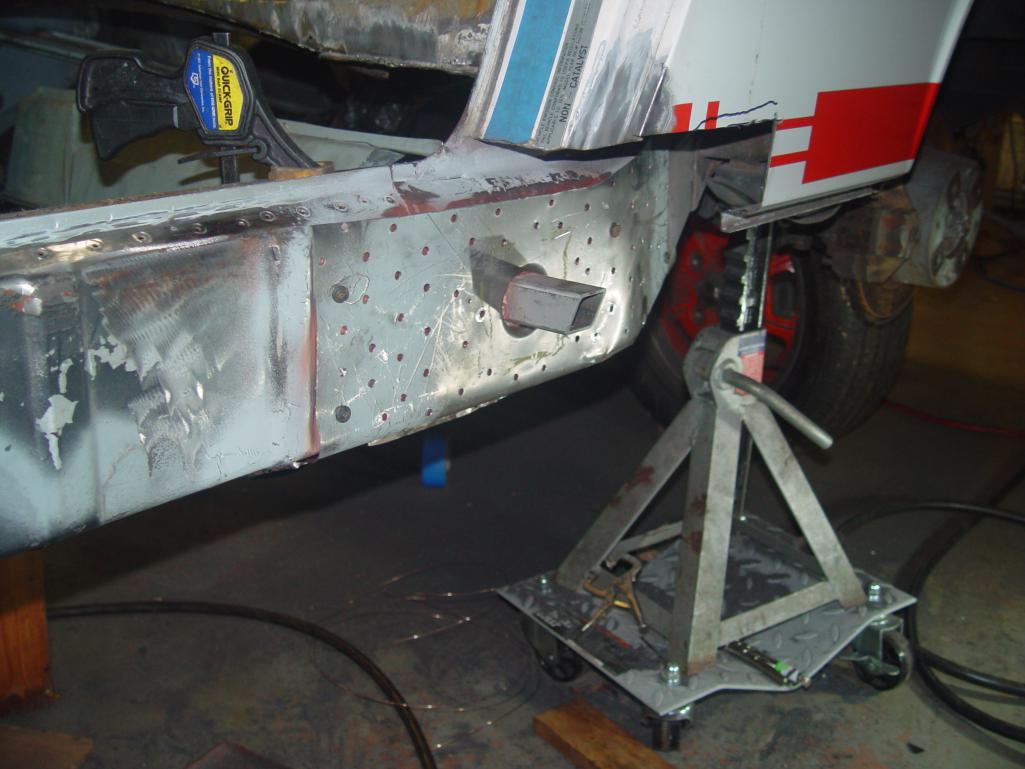 Then a nice pressing from RD. Glad the DeJonges are here for us. 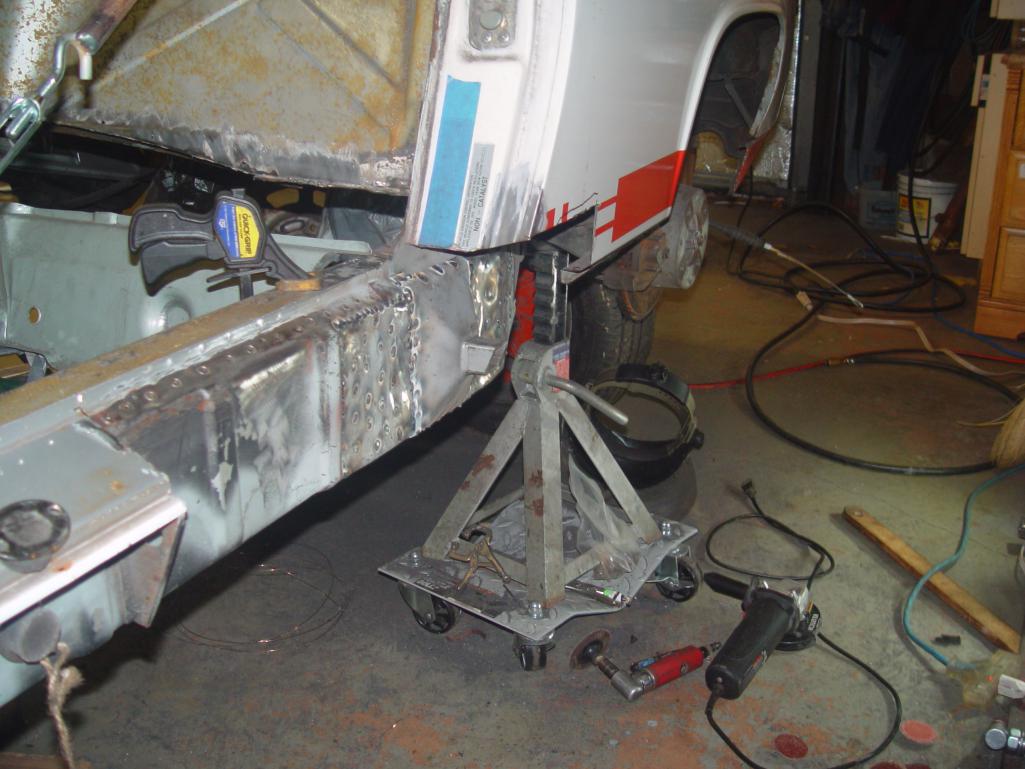 So the left side is seeing some progress. All in an afternoon (at the computer) |
|
|
|
| worn |
Jan 11 2022, 01:36 PM
Post
#26
|
|
can't remember Group: Members Posts: 3,145 Joined: 3-June 11 From: Madison, WI Member No.: 13,152 Region Association: Upper MidWest |
Back to the right side. Spent some time fiddling with bits I didn't like and then welded on the jack point. And fabricated the next layer.
 On it goes 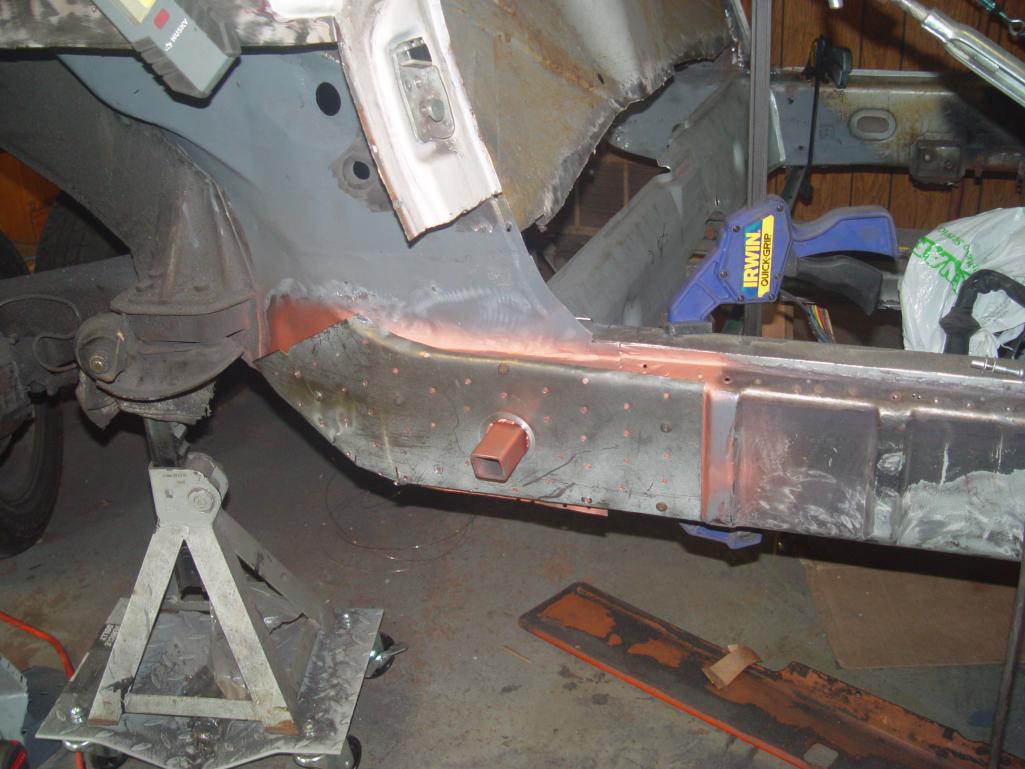 And another perfect pressing  |
|
|
|
| worn |
Jan 11 2022, 01:44 PM
Post
#27
|
|
can't remember Group: Members Posts: 3,145 Joined: 3-June 11 From: Madison, WI Member No.: 13,152 Region Association: Upper MidWest |
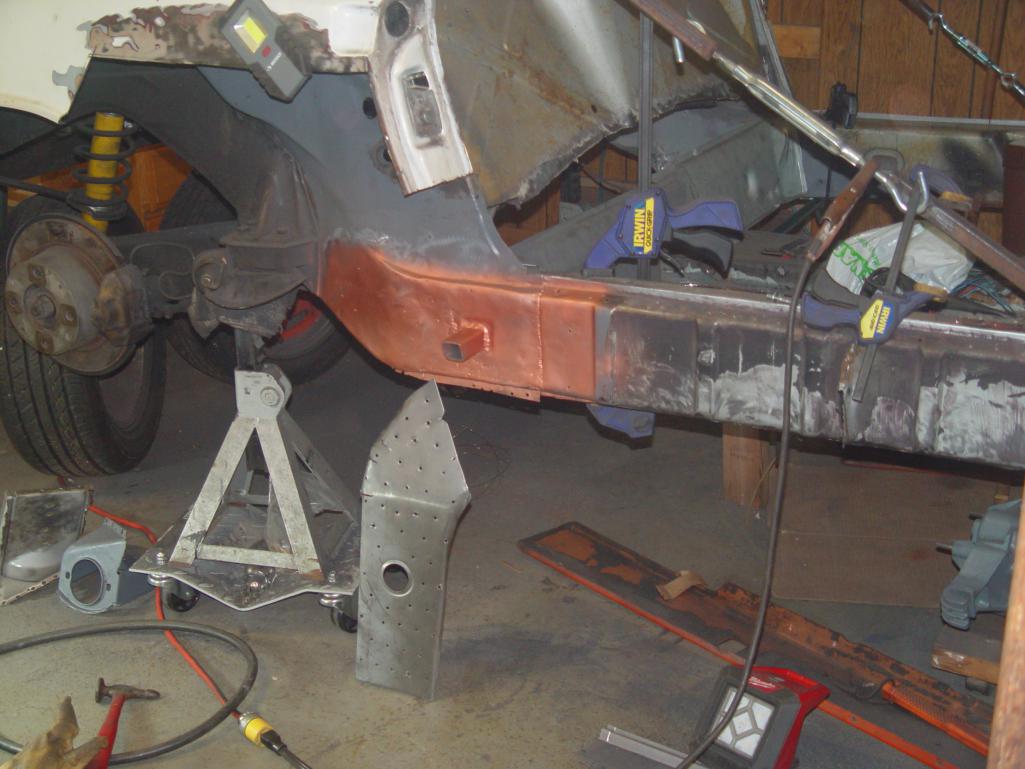
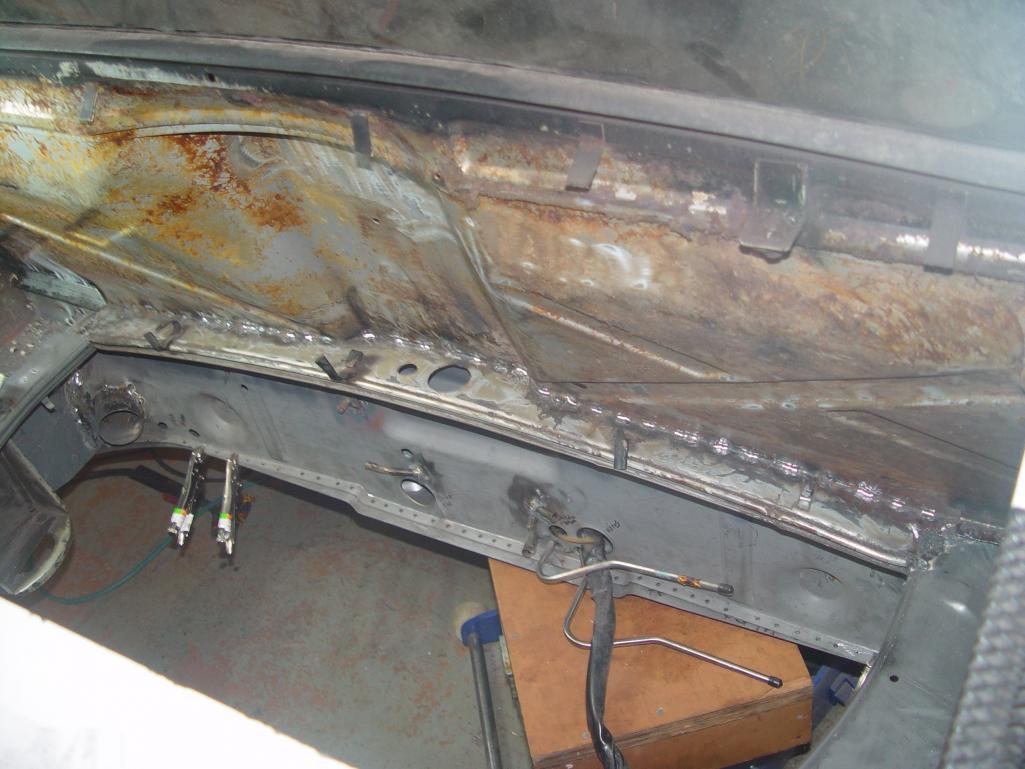
Speaking of RD wonders, here is the rear part of the box beam that connects the longs from side to side.
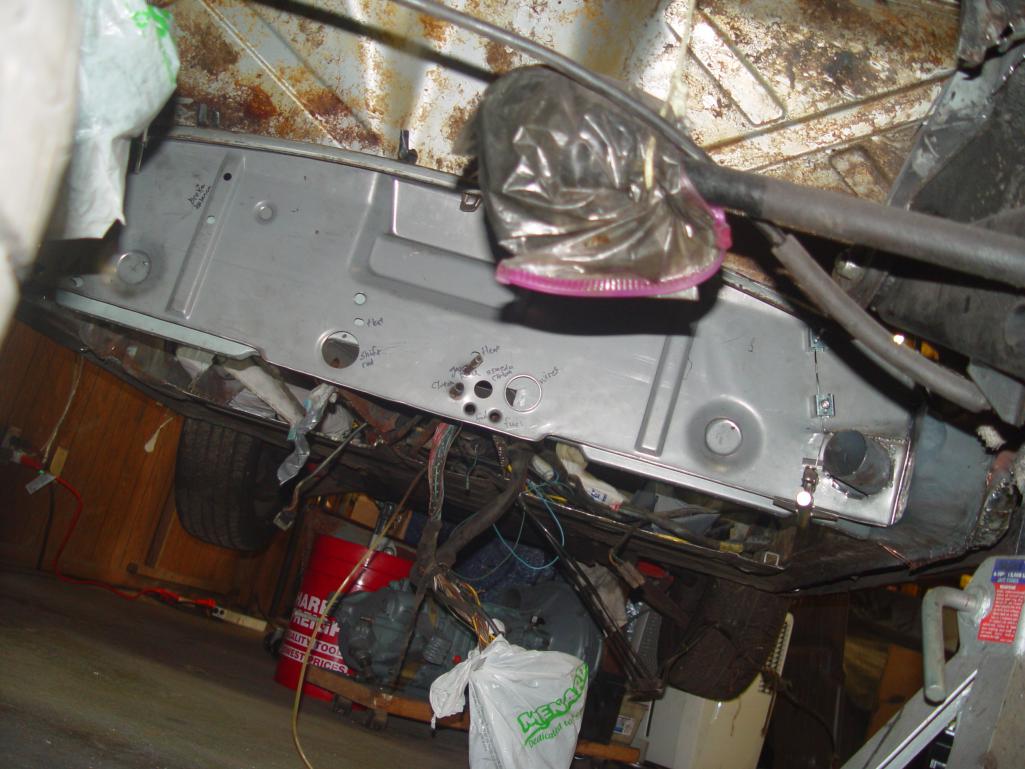  Note the cuts needed to get past the heater tubes. For the parking brake and heater control tubes I took them out and will be brazing them back in. 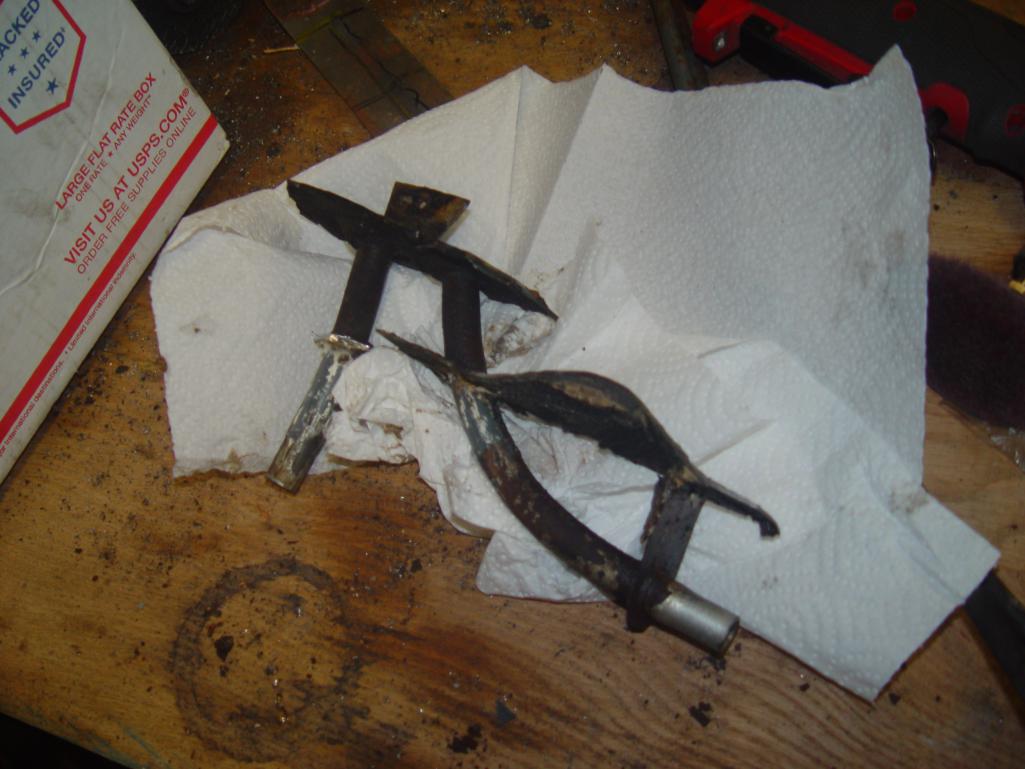 |
|
|
|
| mb911 |
Jan 11 2022, 01:55 PM
Post
#28
|
|
914 Guru Group: Members Posts: 6,806 Joined: 2-January 09 From: Burlington wi Member No.: 9,892 Region Association: Upper MidWest |
QUOTE(worn @ Jan 11 2022, 11:44 AM) Speaking of RD wonders, here is the rear part of the box beam that connects the longs from side to side. Note the cuts needed to get past the heater tubes. For the parking brake and heater control tubes I took them out and will be brazing them back in. That was a killer on mine. Bled through in a few spots and had to get very creative to get the cables through |
|
|
|
| JeffBowlsby |
Jan 11 2022, 02:13 PM
Post
#29
|
|
914 Wiring Harnesses Group: Members Posts: 8,477 Joined: 7-January 03 From: San Ramon CA Member No.: 104 Region Association: None |
QUOTE(worn @ Jan 11 2022, 11:32 AM) The jack point has to be located such that it lines up with the hole in the outer rocker. Then yet another layer goes on Then a nice pressing from RD. Glad the DeJonges are here for us. So the left side is seeing some progress. All in an afternoon (at the computer) I just found this thread. Is this Creamsicle on the Can Am Registry?...and if so what is the VIN? |
|
|
|
| worn |
Jan 11 2022, 07:08 PM
Post
#30
|
|
can't remember Group: Members Posts: 3,145 Joined: 3-June 11 From: Madison, WI Member No.: 13,152 Region Association: Upper MidWest |
QUOTE(JeffBowlsby @ Jan 11 2022, 12:13 PM) I just found this thread. Is this Creamsicle on the Can Am Registry?...and if so what is the VIN? Sorry Jeff, it isn’t a real Creamsicle. Originally owned by a Baltimore Colt who bought it in his college colors of silver and white. Sold to a man who quickly sprayed it white and orange. It is a ‘76. Warren |
|
|
|
| worn |
Jan 11 2022, 07:14 PM
Post
#31
|
|
can't remember Group: Members Posts: 3,145 Joined: 3-June 11 From: Madison, WI Member No.: 13,152 Region Association: Upper MidWest |
QUOTE(mb911 @ Jan 11 2022, 11:55 AM) That was a killer on mine. Bled through in a few spots and had to get very creative to get the cables through I know. I now use silver brazing rod. It comes covered with bright orange flux. Flows really nice. A bit pricey, but so is all of the irritation of fighting uphill. |
|
|
|
| 930cabman |
Jan 12 2022, 09:01 AM
Post
#32
|
|
Advanced Member Group: Members Posts: 3,000 Joined: 12-November 20 From: Buffalo Member No.: 24,877 Region Association: North East States |
Why do we punish ourselves with this crap??
Great looking work and soon she will be back on the road. Thanks for the updates |
|
|
|
| worn |
Jan 12 2022, 09:49 AM
Post
#33
|
|
can't remember Group: Members Posts: 3,145 Joined: 3-June 11 From: Madison, WI Member No.: 13,152 Region Association: Upper MidWest |
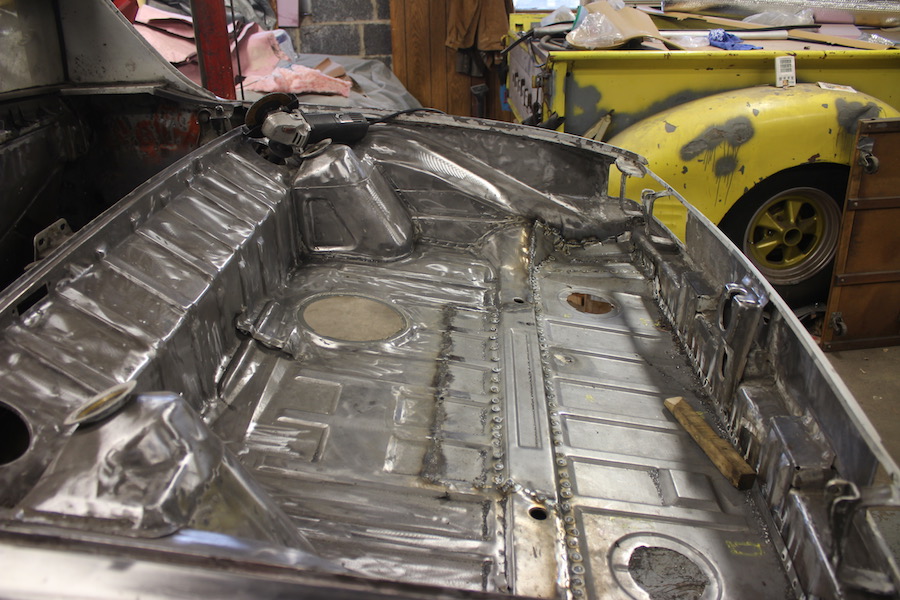
As the Brits would say, I offered up the floor to see what I need to do to get that piece welded in. Looks good , except there is a bit that sticks out towards the middle of the outside firewall.
 I know that I usually have to do some work on the pressings in order to get them to fit right. Or do I need to unbraze some tubes and pull the firewall out? |
|
|
|
| worn |
Mar 13 2022, 10:55 AM
Post
#34
|
|
can't remember Group: Members Posts: 3,145 Joined: 3-June 11 From: Madison, WI Member No.: 13,152 Region Association: Upper MidWest |
QUOTE(worn @ Jan 12 2022, 07:49 AM) I know that I usually have to do some work on the pressings in order to get them to fit right. Or do I need to unbraze some tubes and pull the firewall out? Answer was - Yes. 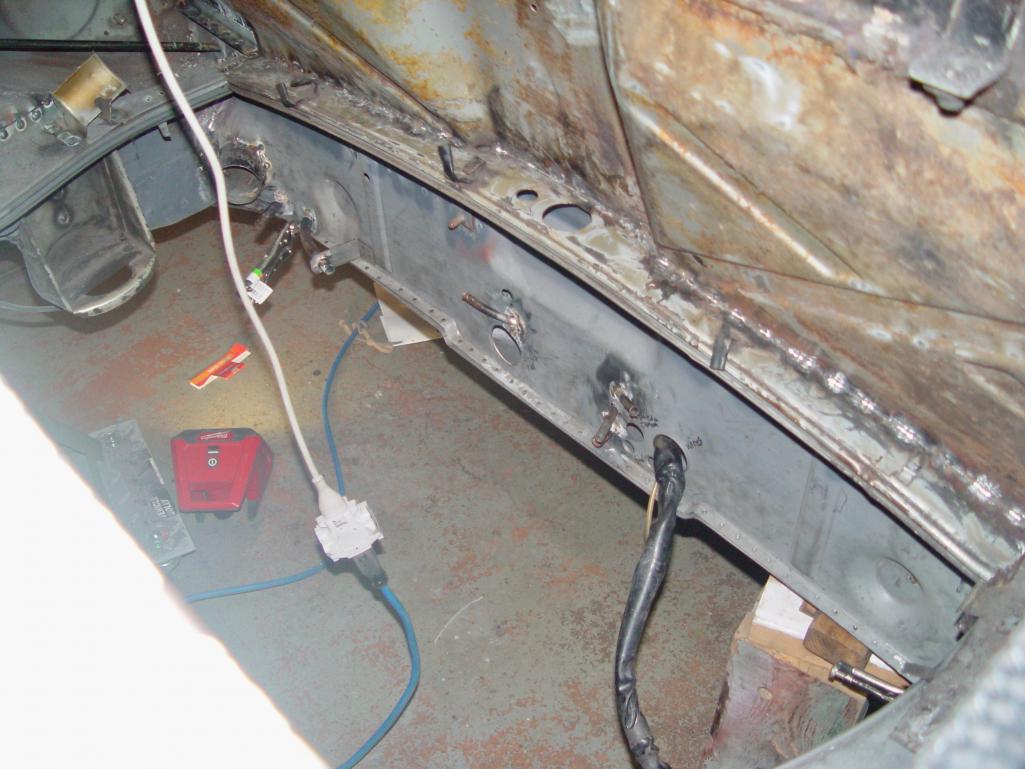 Then I could weld in the floor patch 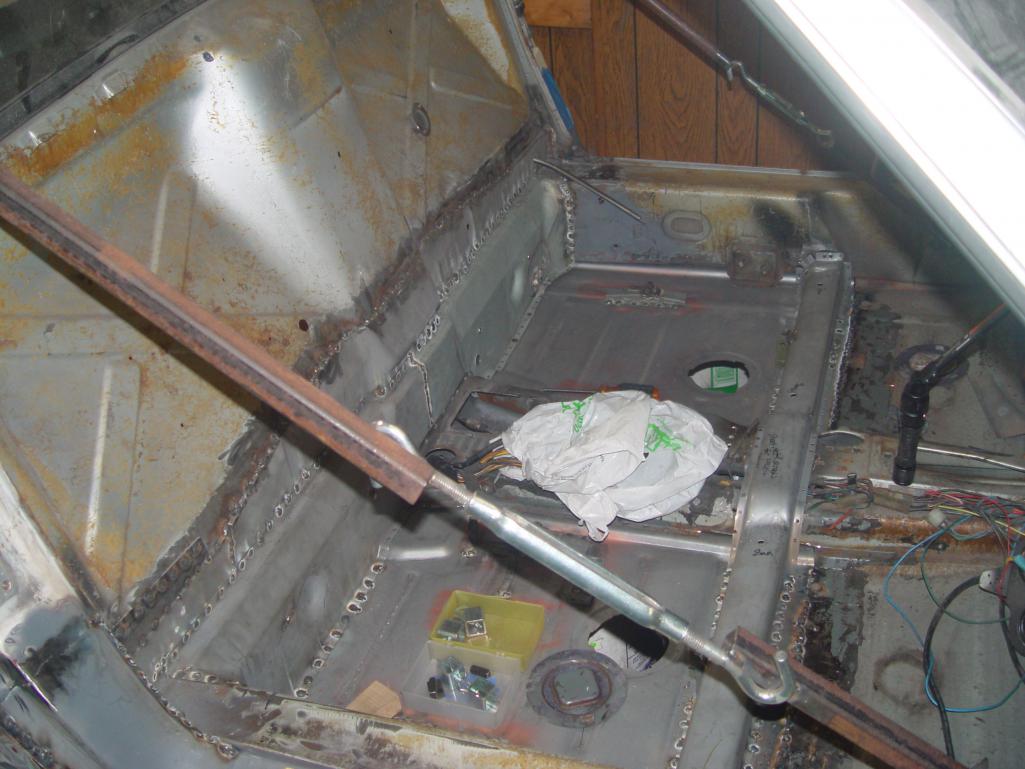 |
|
|
|
| worn |
Apr 6 2022, 02:53 PM
Post
#35
|
|
can't remember Group: Members Posts: 3,145 Joined: 3-June 11 From: Madison, WI Member No.: 13,152 Region Association: Upper MidWest |
I have some advice to those who try this sort of thing. It has probably been mentioned by others: if you are going to paint the car after rust repair, strip the paint first. You never know what you might find underneath. Second piece of advice: Think about ways to get the project up and off the ground higher than jack stands. You can probably get a lot of the cost back on a rotisserie if you sell it afterwards, and in the meantime you get the full benefit.
In my case I found rust underneath the paint that made me get out the welder again. And I also waited too long to get the vehicle up on the lift, although for awhile the lift was occupied by the 911. Here goes the paint.  The wire brush will take away seam sealer - and move it all over the place. 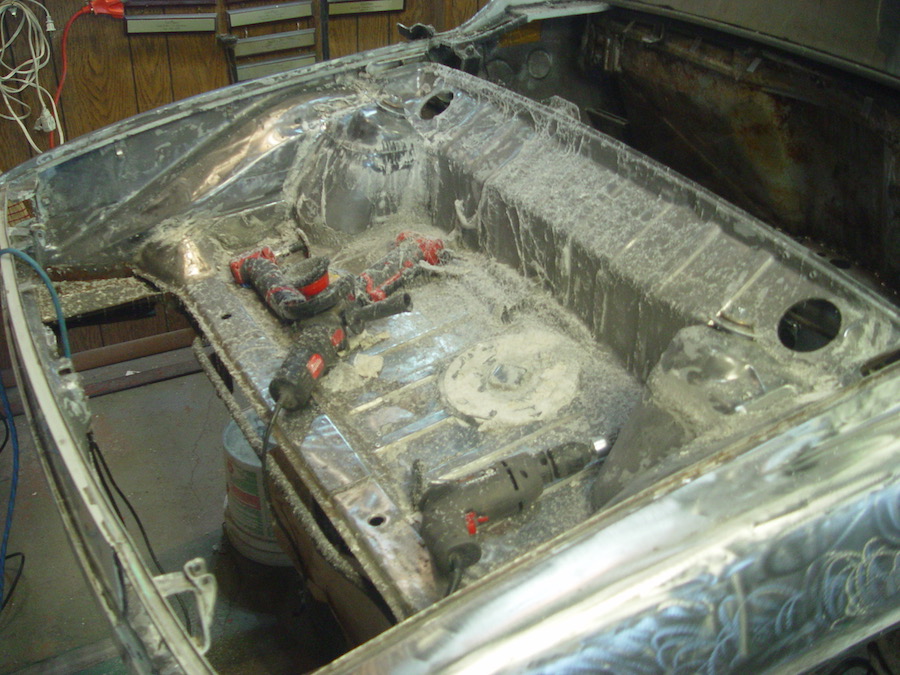 I knew about the trunk floor, and in front I am replacing part of the floor altered by long gone AC. But I didn't know about the sails. Shown with fabricated patches. 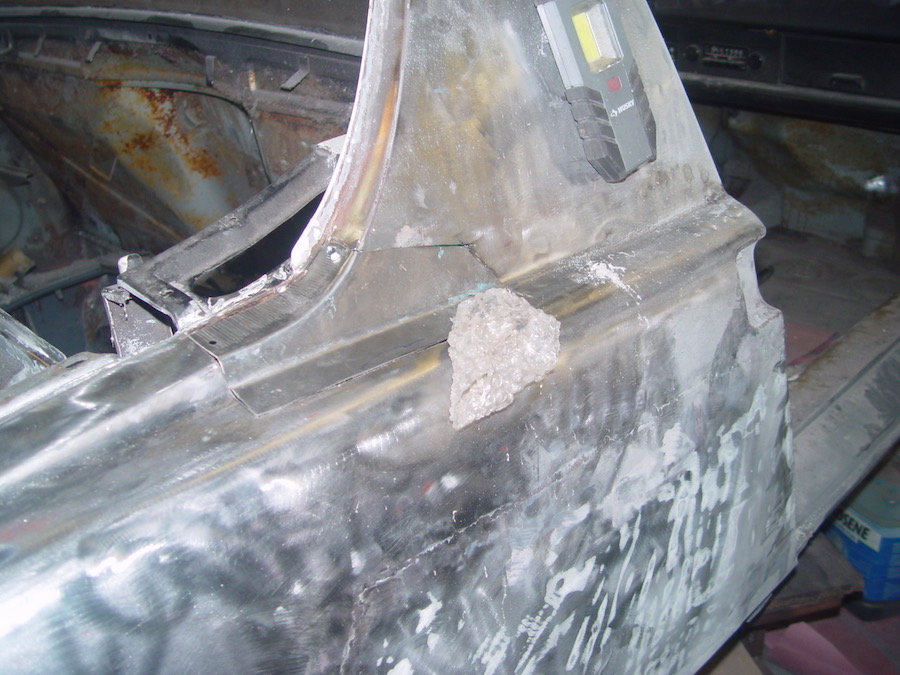 and the driver side. 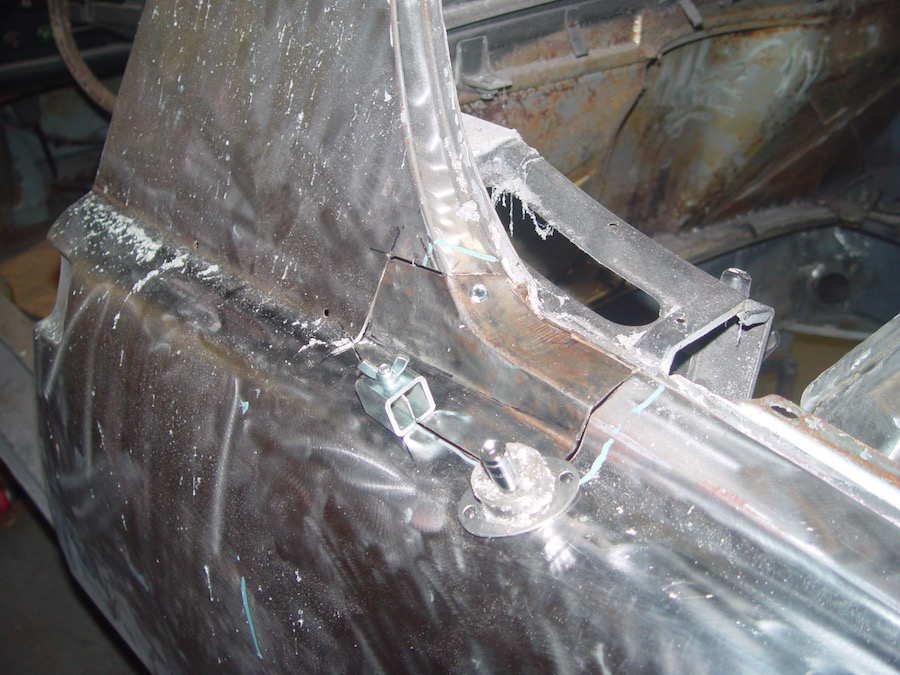 Nor the area around the vents on both sides.  |
|
|
|
| bkrantz |
Apr 6 2022, 08:21 PM
Post
#36
|
|
914 Guru Group: Members Posts: 7,729 Joined: 3-August 19 From: SW Colorado Member No.: 23,343 Region Association: Rocky Mountains |
You're not the only one who got started, found more trouble, and had to back up and go deeper.
And I strongly endorse a rotisserie for any serious body work. Even stuff "on top" is easier when the car can be rolled on its side. |
|
|
|
| worn |
May 23 2022, 09:58 AM
Post
#37
|
|
can't remember Group: Members Posts: 3,145 Joined: 3-June 11 From: Madison, WI Member No.: 13,152 Region Association: Upper MidWest |
The trunk floor supplied by RD is made for the earlier cars. 75-76 models had spring loaded bumpers to withstand small impacts without damage. That means at each side the floor of the trunk steps up. If I just install the new piece as is I will loose considerable trunk space. The reshaping requires that I first flatten out the little ribs pressed into the floor at the sides and then reshape to match the old.
Here is the frame that ties the bumper to the floor and other structures. 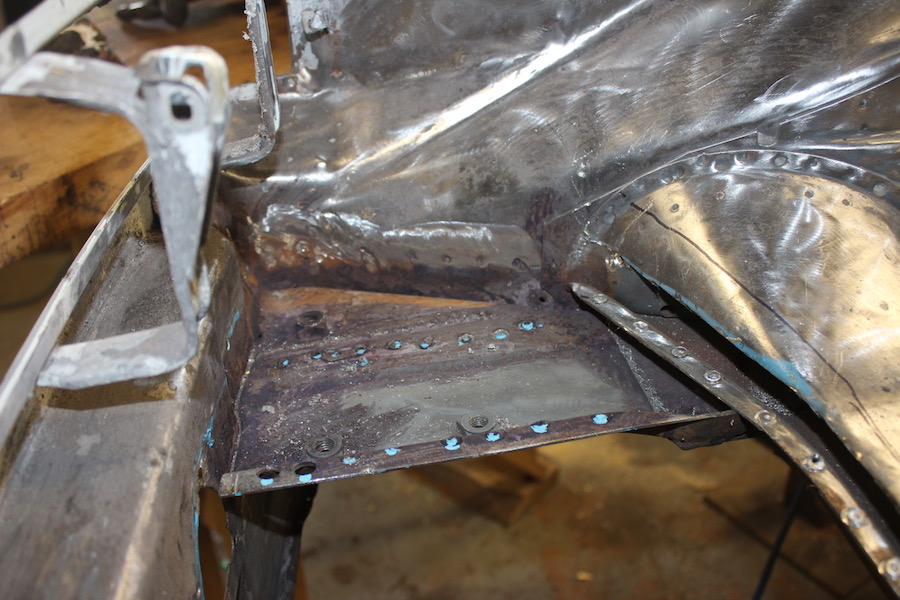 And here is what it looks like outside with the spot welds drilled out 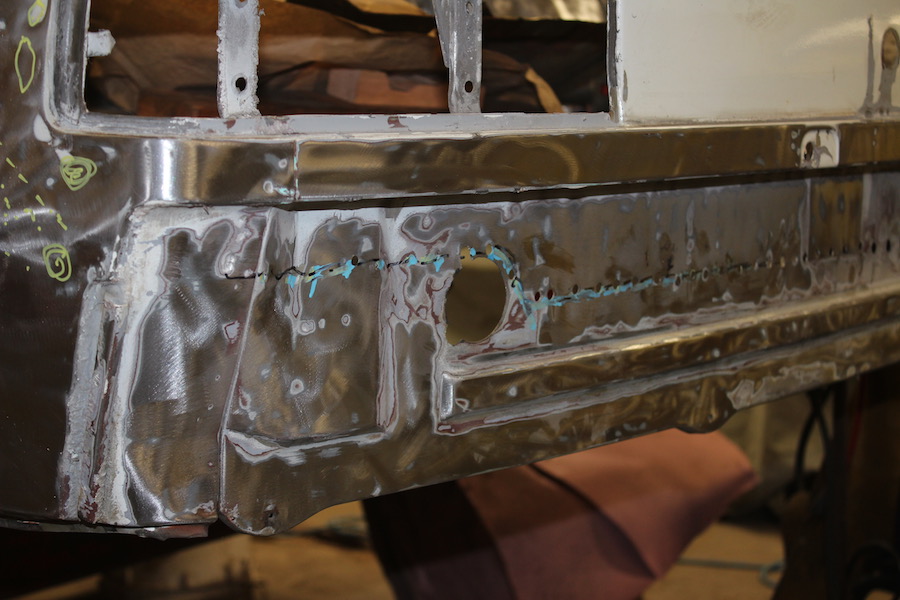 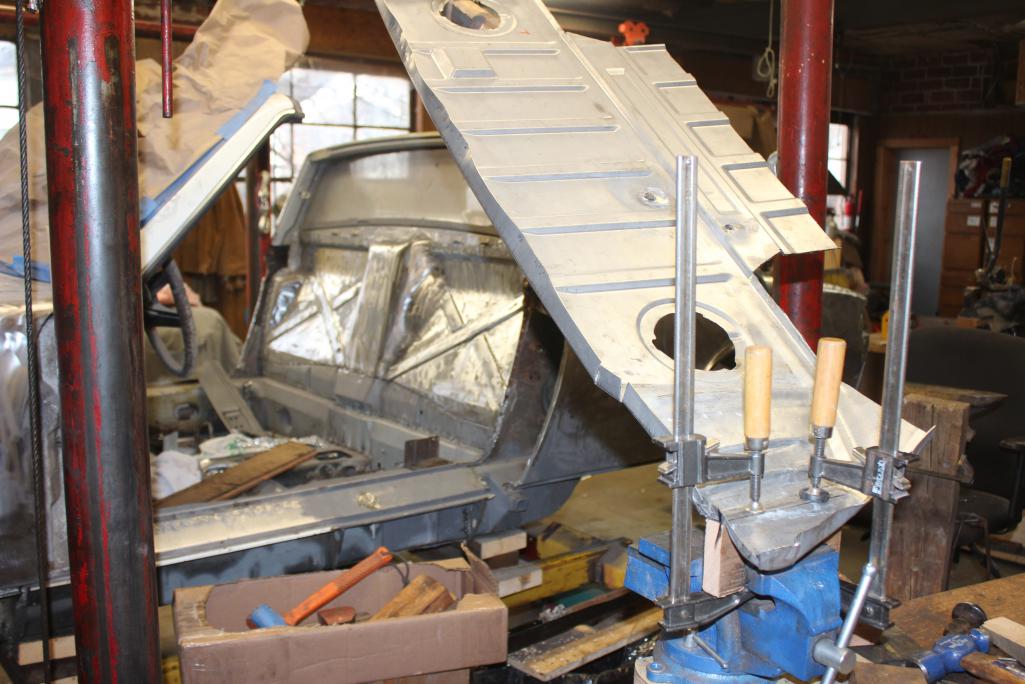 I want to get different parts against the anvil so I had to get a bit funkifized with the string. Here is what it looks like 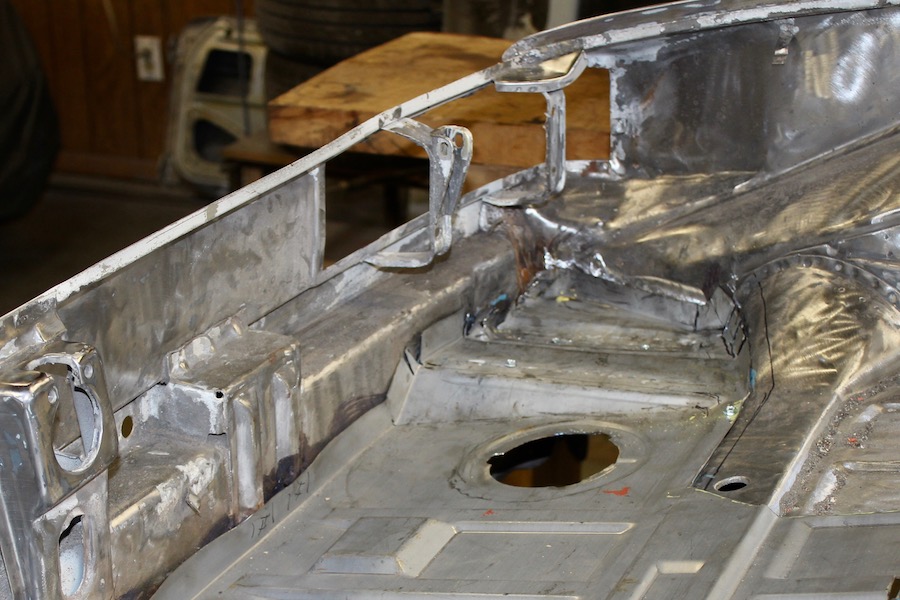 |
|
|
|
| worn |
May 23 2022, 10:05 AM
Post
#38
|
|
can't remember Group: Members Posts: 3,145 Joined: 3-June 11 From: Madison, WI Member No.: 13,152 Region Association: Upper MidWest |
This is the trunk floor after some welding.
 I made several patches out of material left over from trimming the trunk floor, but to use them I had to hammer the ribs flat. I got tired of that and also ran out of scraps so I bought some galvaneal sheet from online metals. Same stuff that Restoration Design uses. Here is the transmission mount reinforcement cut from my new sheet of steel.  |
|
|
|
| worn |
May 23 2022, 10:07 AM
Post
#39
|
|
can't remember Group: Members Posts: 3,145 Joined: 3-June 11 From: Madison, WI Member No.: 13,152 Region Association: Upper MidWest |
I found that rust often lurks behind the rubber seam sealer. So, you don't know until you take it all out.
Guess what these are. 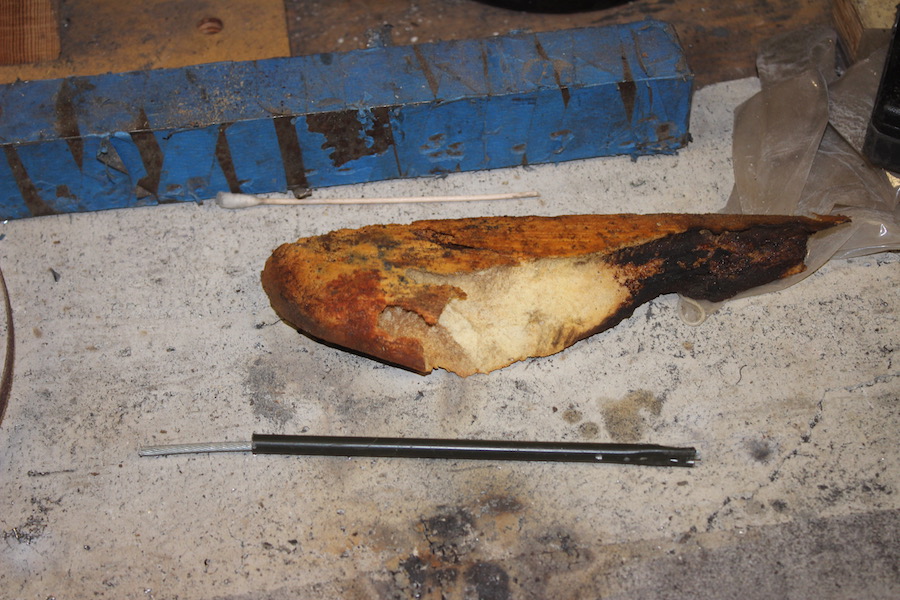 |
|
|
|
| 914werke |
May 23 2022, 10:23 AM
Post
#40
|
|
"I got blisters on me fingers" Group: Members Posts: 9,998 Joined: 22-March 03 From: USofA Member No.: 453 Region Association: Pacific Northwest |
(IMG:style_emoticons/default/welder.gif) (IMG:style_emoticons/default/aktion035.gif) Dedication
|
|
|
|
|
2 User(s) are reading this topic (2 Guests and 0 Anonymous Users)
0 Members:

|
Lo-Fi Version | Time is now: 24th April 2024 - 01:24 AM |
Invision Power Board
v9.1.4 © 2024 IPS, Inc.