|
|
|
Porsche, and the Porsche crest are registered trademarks of Dr. Ing. h.c. F. Porsche AG.
This site is not affiliated with Porsche in any way. Its only purpose is to provide an online forum for car enthusiasts. All other trademarks are property of their respective owners. |
|
|

  |

| flyer86d |
 May 23 2022, 02:20 PM May 23 2022, 02:20 PM
Post
#41
|
|
Member  Group: Members Posts: 422 Joined: 12-January 11 From: Corea, Maine Member No.: 12,585 Region Association: North East States |
Wow! Nice work.
Charlie |
   |

 
|
| brant |
May 23 2022, 06:06 PM
Post
#42
|
|
914 Wizard Group: Members Posts: 11,618 Joined: 30-December 02 From: Colorado Member No.: 47 Region Association: Rocky Mountains |
Great job!!
|
|
|
|
| worn |
May 23 2022, 06:18 PM
Post
#43
|
|
can't remember Group: Members Posts: 3,150 Joined: 3-June 11 From: Madison, WI Member No.: 13,152 Region Association: Upper MidWest |
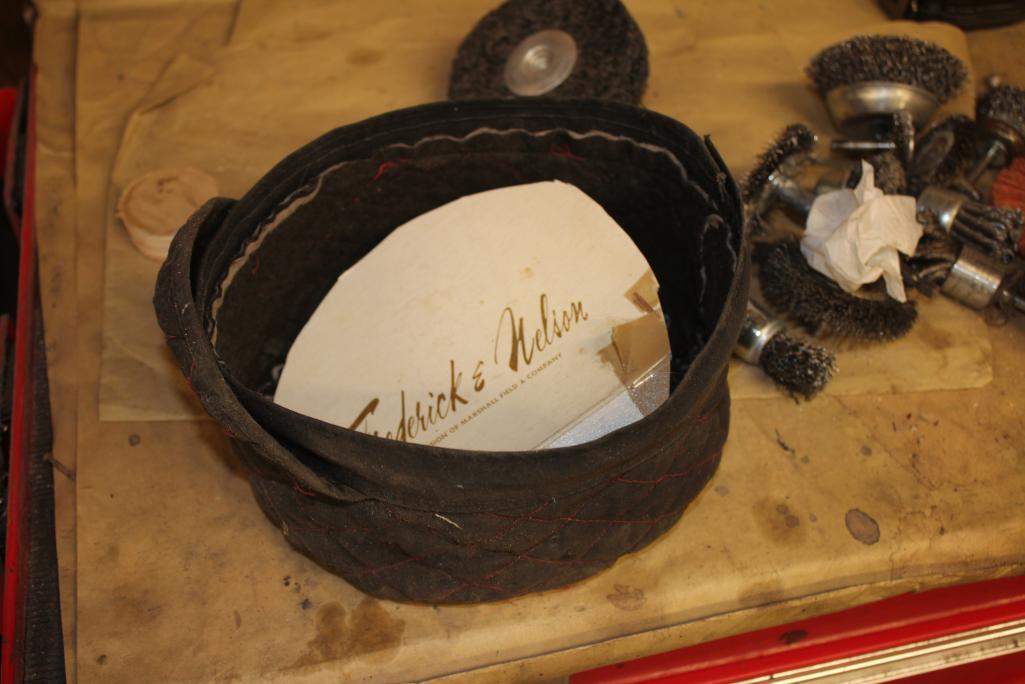
QUOTE(brant @ May 23 2022, 04:06 PM)  Great job!! Thanks folks! The piece of foam is from the very tip of the rear fender, just above the lights. I used a piece of cable and a piece of brake line to make a mini wire brush. In an electric drill you can spin it in either direction, winding or unwinding the cable. Crude, but gets into tight spots. I also discovered that the rubber sealer fears fire. A quick run with the torch and it softens. But it sure will make you dirty in a hurry! More to come. |
|
|
|
| Dion |
May 24 2022, 07:39 AM
Post
#44
|
|
RN Group: Members Posts: 2,764 Joined: 16-September 04 From: Audubon,PA Member No.: 2,766 Region Association: MidAtlantic Region |
Wow, way to go Warren. That was a task. Well done.
|
|
|
|
| worn |
May 25 2022, 10:58 AM
Post
#45
|
|
can't remember Group: Members Posts: 3,150 Joined: 3-June 11 From: Madison, WI Member No.: 13,152 Region Association: Upper MidWest |
Kept hitting my head while backing out of the engine bay. My solution.
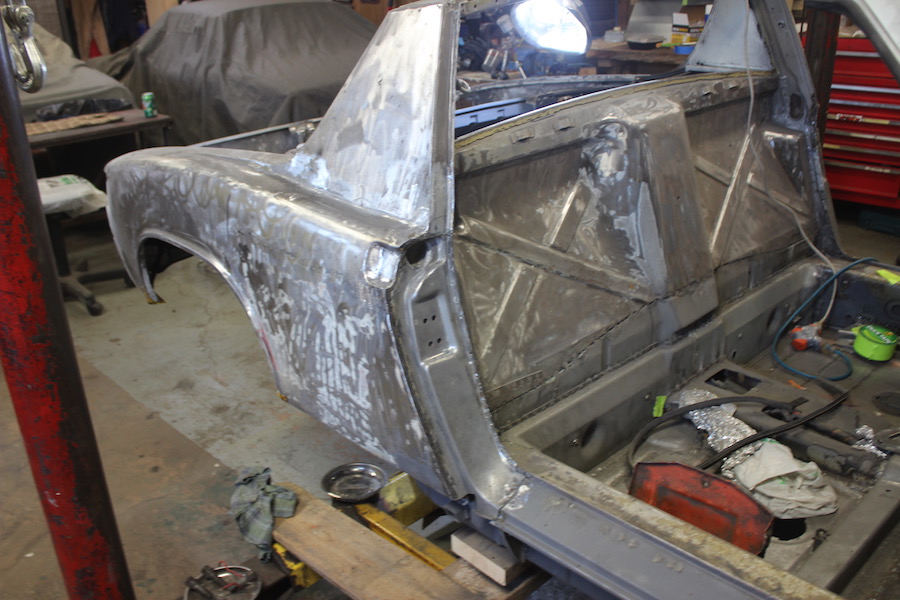
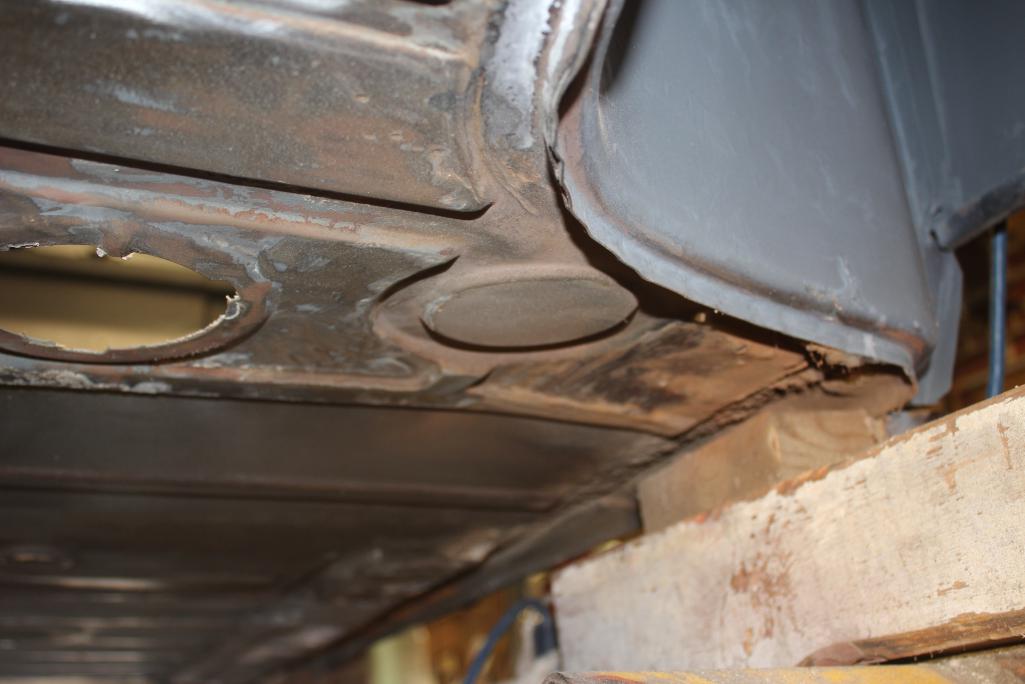
 I finished up the rear with a couple patches where metal was in layers surrounded by failed sealant. My favorite was this one, which spans two pressings - the rear fender overlaps the piece that covers the rear of the trunk. 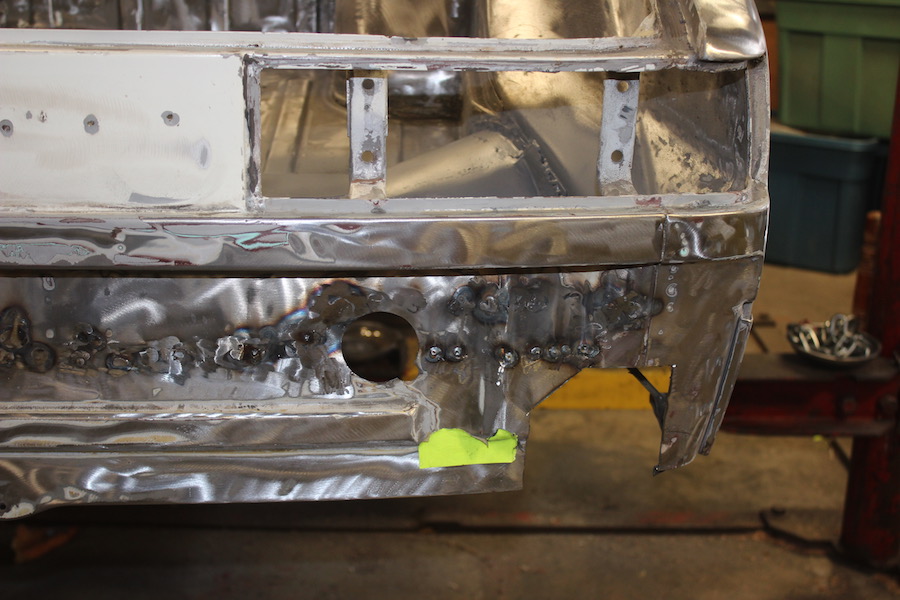 The two pieces were made separately and plug welded together before welding to the car. I flattened some of the left overs from the trunk floor piece and then reshaped. The seam is crooked, but I am not going to fix it. 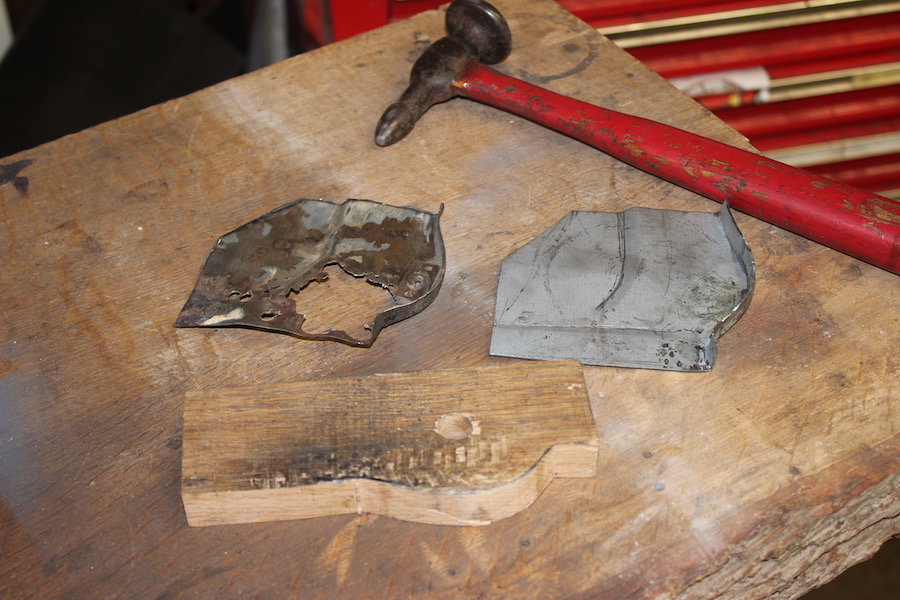 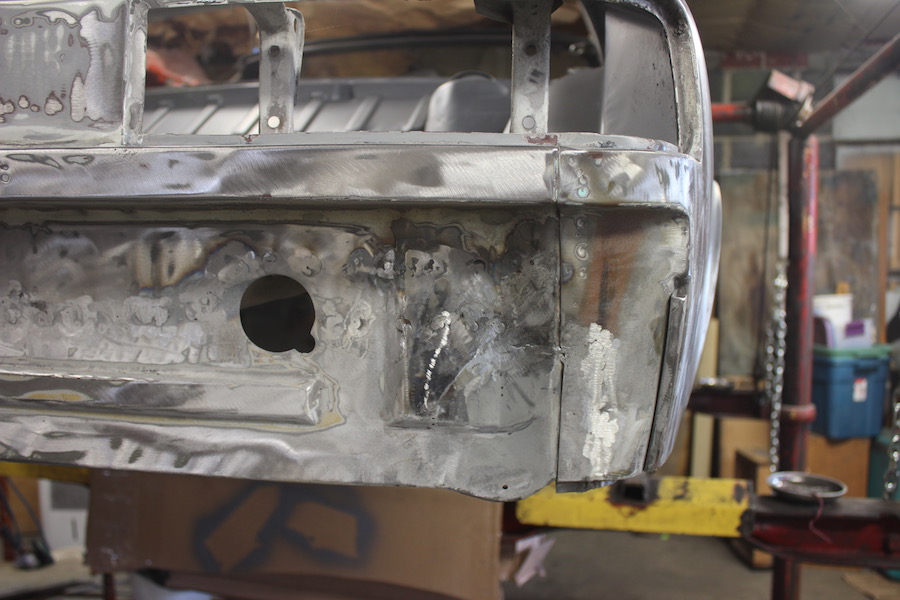 |
|
|
|
| worn |
May 25 2022, 11:04 AM
Post
#46
|
|
can't remember Group: Members Posts: 3,150 Joined: 3-June 11 From: Madison, WI Member No.: 13,152 Region Association: Upper MidWest |
Another hole found. I had to buy the B-pillar pressings twice because I originally thought the rust didn't go all of the way to the top and fixed only the bottom. Had to carefully try to remove the plug welds, which is harder than drilling out spot welds.
This shows the new excavation with earlier fix still present. 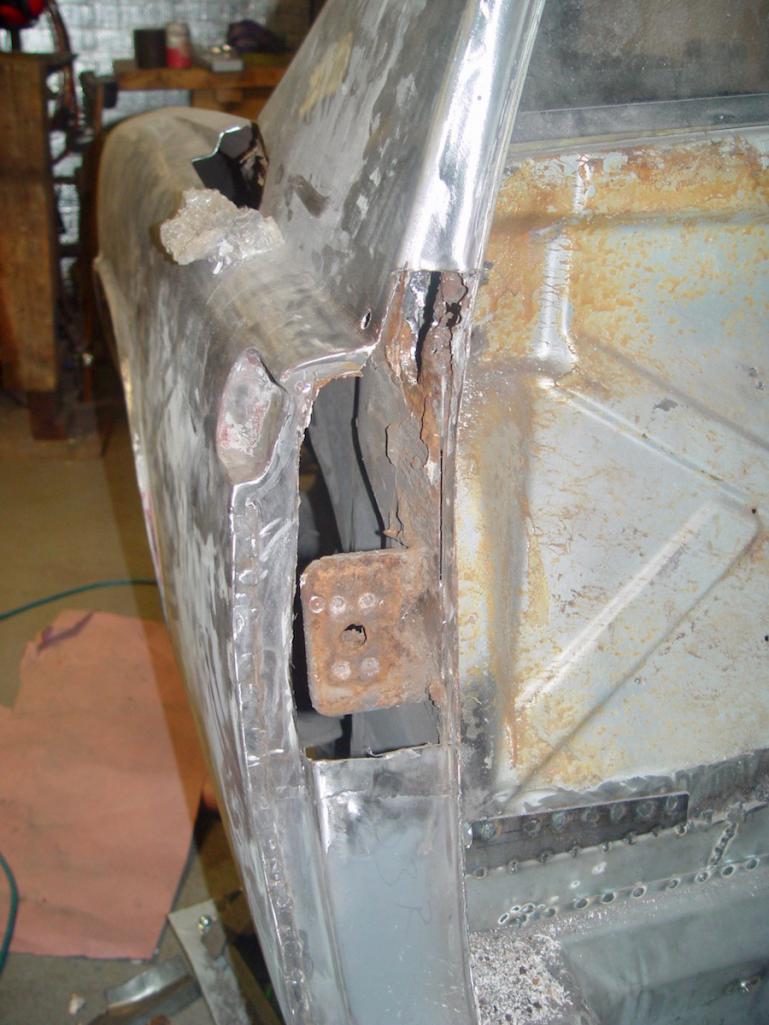 |
|
|
|
| worn |
May 25 2022, 11:17 AM
Post
#47
|
|
can't remember Group: Members Posts: 3,150 Joined: 3-June 11 From: Madison, WI Member No.: 13,152 Region Association: Upper MidWest |
You can buy the B-pillar, but not the piece of the upper inner wheel housing. This goes from the engine bay all of the way through into the cabin. Again I hadn't bought my galvaneal sheet, so I flattened out a piece of trunk scrap.
 You can buy the tube that lets air move in and out of the cabin, but by the time I was done I had carved most of it away. The piece that holds the tube also holds the door latch plate. 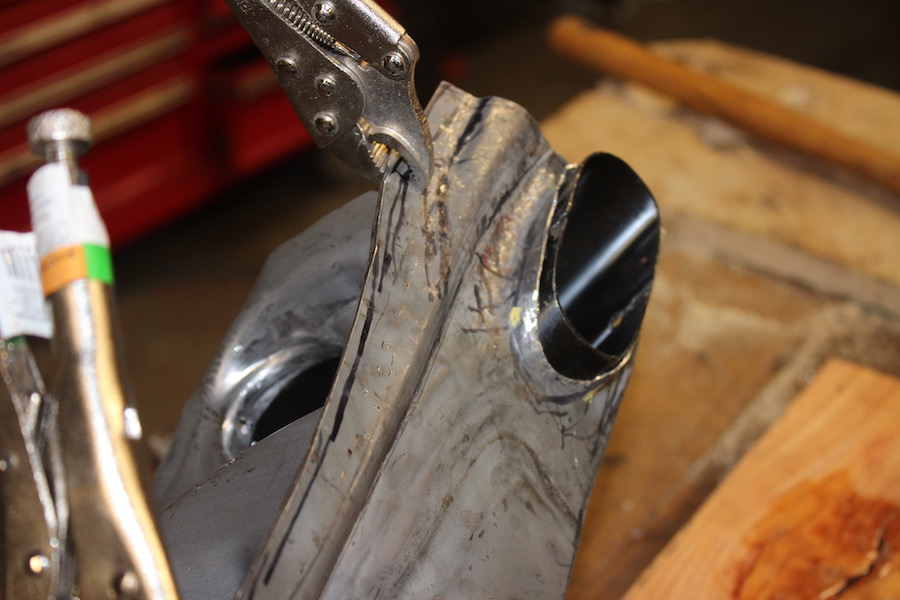 You can buy the piece that holds the door latch along with the nut plate. But, you can't buy the little box that houses the nut plate. I have seen some cars where the factory just used a strapp across the middle of the nut plate. This is a '76 and the box and nut plate were liberally covered in sealer...thus the need for repair (IMG:style_emoticons/default/blink.gif) I used silver bearing brazing rod to attach the tube, but epoxy wold probably be just as good. 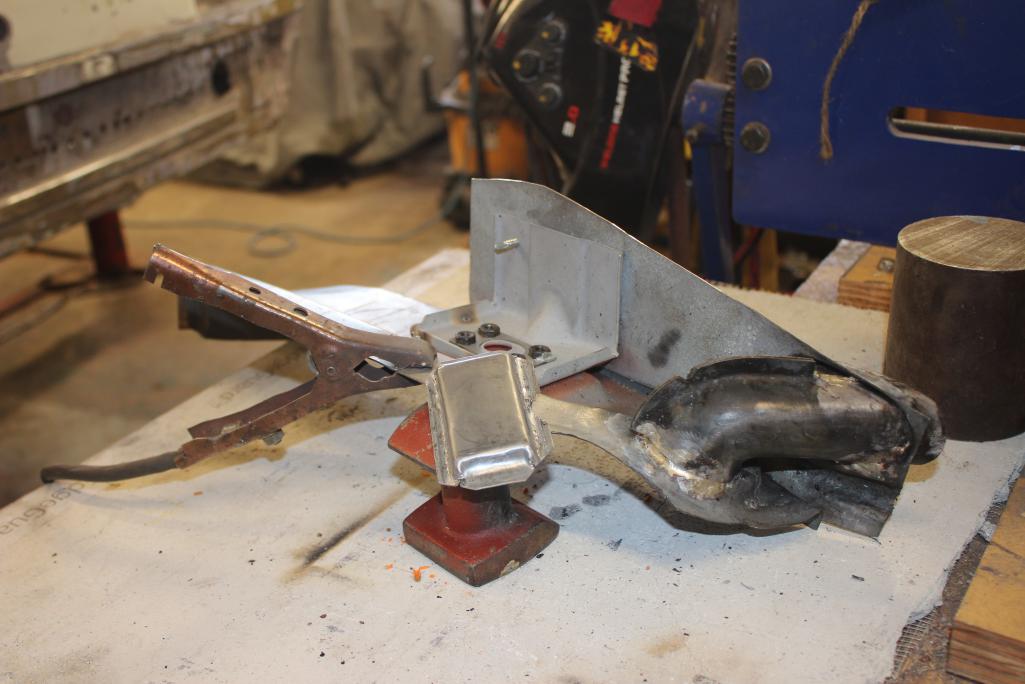 |
|
|
|
| worn |
May 25 2022, 11:26 AM
Post
#48
|
|
can't remember Group: Members Posts: 3,150 Joined: 3-June 11 From: Madison, WI Member No.: 13,152 Region Association: Upper MidWest |
Into the big hole.
 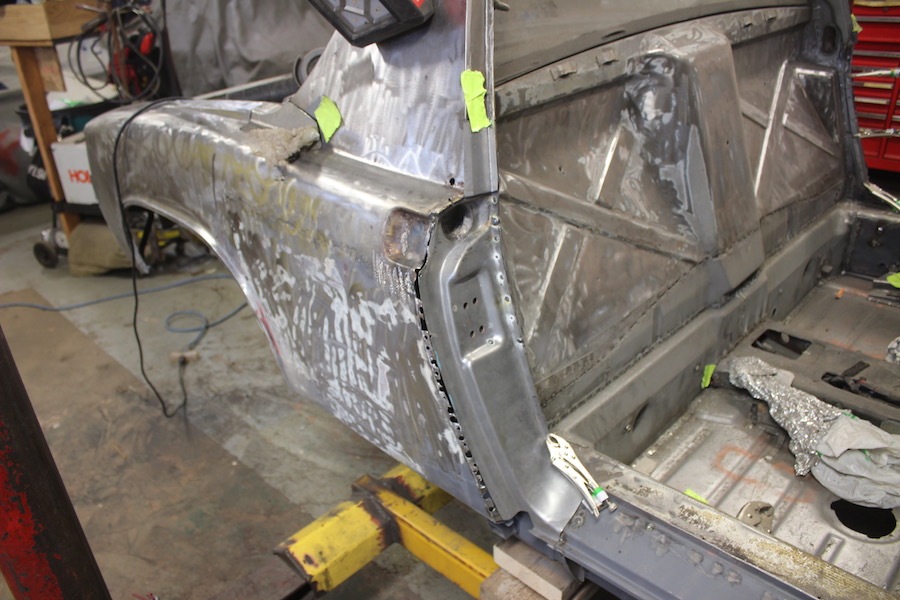  Not shown is the welding the patch inside where it meets that inner fender piece. |
|
|
|
| worn |
May 25 2022, 11:34 AM
Post
#49
|
|
can't remember Group: Members Posts: 3,150 Joined: 3-June 11 From: Madison, WI Member No.: 13,152 Region Association: Upper MidWest |
Why should the driver's side be any different?
 |
|
|
|
| worn |
May 26 2022, 09:47 AM
Post
#50
|
|
can't remember Group: Members Posts: 3,150 Joined: 3-June 11 From: Madison, WI Member No.: 13,152 Region Association: Upper MidWest |
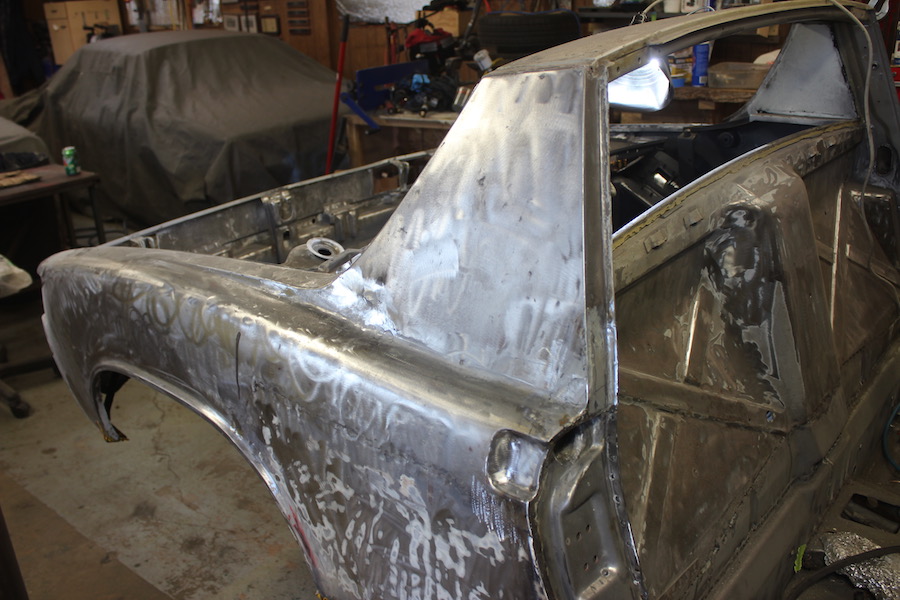
The sail rusted where failed sealer met overlapping metal and rain and road spray. Same on both sides. Patched.
  |
|
|
|
| worn |
May 26 2022, 09:52 AM
Post
#51
|
|
can't remember Group: Members Posts: 3,150 Joined: 3-June 11 From: Madison, WI Member No.: 13,152 Region Association: Upper MidWest |
Got most of the grime out of the front wheel wells, along with the sealer. The rubber sealer fears fire and a propane torch helps. With suitable caution.
At the bow I will be replacing the trunk floor to get rid of the former AC hack. And under the turn signals rust again. Not sure, but this may be the last of the wwelding. Or not. Left outside. 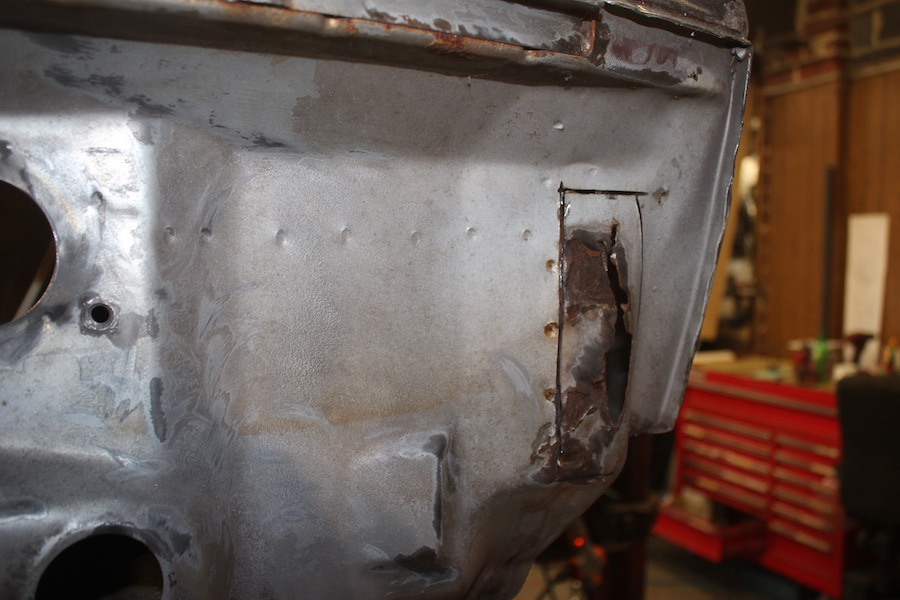 inside 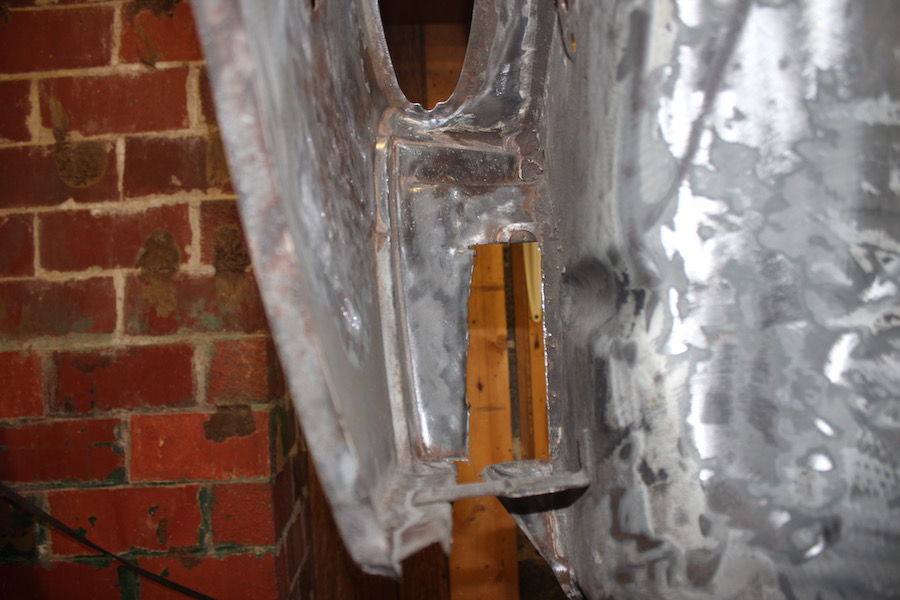 Right side. 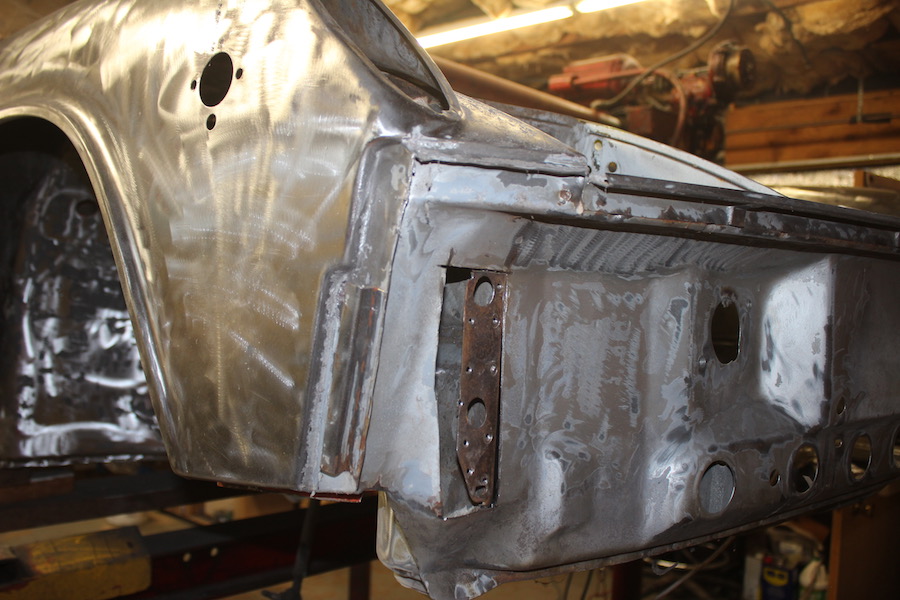 |
|
|
|
| worn |
Jun 2 2022, 06:45 PM
Post
#52
|
|
can't remember Group: Members Posts: 3,150 Joined: 3-June 11 From: Madison, WI Member No.: 13,152 Region Association: Upper MidWest |
I still have some welding to do up in the bow, but summer is here and so is humid air. I have to protect bare metal. I have two questions.
1 I love PPG DP40. I will be putting it on and then working with some small amount of body filler. Then another layer of epoxy. There are places where rust lurks untouchable. Between layers of metal, or in isolated pits. I don’t want to make the good metal into thin foil just to sand out a couple of pits. But, what to do? I have three products that use acids to turn the ferric iron to black ferrous form. This is more stable. I can use them and cover with epoxy. Or, I can just trap the rust away from water and o two with the primer. For those who use epoxy primer, what is your practice? Number the two. I was thinking of covering the wheel wells and underside with Raptor bed liner. Ever notice how antagonistic the names for truck products are? Seems like a good idea, but I saw someone post saying that this is used to hide sins of the DAPO, me in this case. Big deal? Anything better? Thanks! |
|
|
|
| 76-914 |
Jun 2 2022, 08:53 PM
Post
#53
|
|
Repeat Offender & Resident Subaru Antagonist Group: Members Posts: 13,494 Joined: 23-January 09 From: Temecula, CA Member No.: 9,964 Region Association: Southern California |
QUOTE(worn @ Jun 2 2022, 05:45 PM) I still have some welding to do up in the bow, but summer is here and so is humid air. I have to protect bare metal. I have two questions. 1 I love PPG DP40. I will be putting it on and then working with some small amount of body filler. Then another layer of epoxy. There are places where rust lurks untouchable. Between layers of metal, or in isolated pits. I don’t want to make the good metal into thin foil just to sand out a couple of pits. But, what to do? I have three products that use acids to turn the ferric iron to black ferrous form. This is more stable. I can use them and cover with epoxy. Or, I can just trap the rust away from water and o two with the primer. For those who use epoxy primer, what is your practice? Number the two. I was thinking of covering the wheel wells and underside with Raptor bed liner. Ever notice how antagonistic the names for truck products are? Seems like a good idea, but I saw someone post saying that this is used to hide sins of the DAPO, me in this case. Big deal? Anything better? Thanks! Hey Warren, 1st good work my man; 2nd, If your not in a hurry to spray those wheel wells I have a gallon of bed liner I can give you at the RRC but you'd need to source a pint of activator. I traded a flux core unit to a friend a few years back for 2 gallons of bed liner and one pint of activator. It's just been sitting around so LMK if you want it. (IMG:style_emoticons/default/beerchug.gif) |
 |
|
| worn |
Jun 3 2022, 08:16 AM
Post
#54
|
|
can't remember Group: Members Posts: 3,150 Joined: 3-June 11 From: Madison, WI Member No.: 13,152 Region Association: Upper MidWest |
QUOTE(76-914 @ Jun 2 2022, 06:53 PM) QUOTE(worn @ Jun 2 2022, 05:45 PM) I still have some welding to do up in the bow, but summer is here and so is humid air. I have to protect bare metal. I have two questions. 1 I love PPG DP40. I will be putting it on and then working with some small amount of body filler. Then another layer of epoxy. There are places where rust lurks untouchable. Between layers of metal, or in isolated pits. I don’t want to make the good metal into thin foil just to sand out a couple of pits. But, what to do? I have three products that use acids to turn the ferric iron to black ferrous form. This is more stable. I can use them and cover with epoxy. Or, I can just trap the rust away from water and o two with the primer. For those who use epoxy primer, what is your practice? Number the two. I was thinking of covering the wheel wells and underside with Raptor bed liner. Ever notice how antagonistic the names for truck products are? Seems like a good idea, but I saw someone post saying that this is used to hide sins of the DAPO, me in this case. Big deal? Anything better? Thanks! Hey Warren, 1st good work my man; 2nd, If your not in a hurry to spray those wheel wells I have a gallon of bed liner I can give you at the RRC but you'd need to source a pint of activator. I traded a flux core unit to a friend a few years back for 2 gallons of bed liner and one pint of activator. It's just been sitting around so LMK if you want it. (IMG:style_emoticons/default/beerchug.gif) Thank you! A gallon? What color? I have to consider if I may. I am almost at the point where after two years of very slow cleaning and patching the project might actually move along. But I have to pull the plug on it for awhile to get ready for the trip. Any advice beyond that? |
|
|
|
| 76-914 |
Jun 4 2022, 08:01 PM
Post
#55
|
|
Repeat Offender & Resident Subaru Antagonist Group: Members Posts: 13,494 Joined: 23-January 09 From: Temecula, CA Member No.: 9,964 Region Association: Southern California |
QUOTE(worn @ Jun 3 2022, 07:16 AM) QUOTE(76-914 @ Jun 2 2022, 06:53 PM) QUOTE(worn @ Jun 2 2022, 05:45 PM) I still have some welding to do up in the bow, but summer is here and so is humid air. I have to protect bare metal. I have two questions. 1 I love PPG DP40. I will be putting it on and then working with some small amount of body filler. Then another layer of epoxy. There are places where rust lurks untouchable. Between layers of metal, or in isolated pits. I don’t want to make the good metal into thin foil just to sand out a couple of pits. But, what to do? I have three products that use acids to turn the ferric iron to black ferrous form. This is more stable. I can use them and cover with epoxy. Or, I can just trap the rust away from water and o two with the primer. For those who use epoxy primer, what is your practice? Number the two. I was thinking of covering the wheel wells and underside with Raptor bed liner. Ever notice how antagonistic the names for truck products are? Seems like a good idea, but I saw someone post saying that this is used to hide sins of the DAPO, me in this case. Big deal? Anything better? Thanks! Hey Warren, 1st good work my man; 2nd, If your not in a hurry to spray those wheel wells I have a gallon of bed liner I can give you at the RRC but you'd need to source a pint of activator. I traded a flux core unit to a friend a few years back for 2 gallons of bed liner and one pint of activator. It's just been sitting around so LMK if you want it. (IMG:style_emoticons/default/beerchug.gif) Thank you! A gallon? What color? I have to consider if I may. I am almost at the point where after two years of very slow cleaning and patching the project might actually move along. But I have to pull the plug on it for awhile to get ready for the trip. Any advice beyond that? It's black Warren. I used a gallon when I converted to water cooled. Shot it everywhere water might get if I developed a leak. (IMG:style_emoticons/default/beerchug.gif) |
|
|
|
| worn |
Jun 25 2022, 10:09 AM
Post
#56
|
|
can't remember Group: Members Posts: 3,150 Joined: 3-June 11 From: Madison, WI Member No.: 13,152 Region Association: Upper MidWest |
Throughout this project I have found two tools really helpful
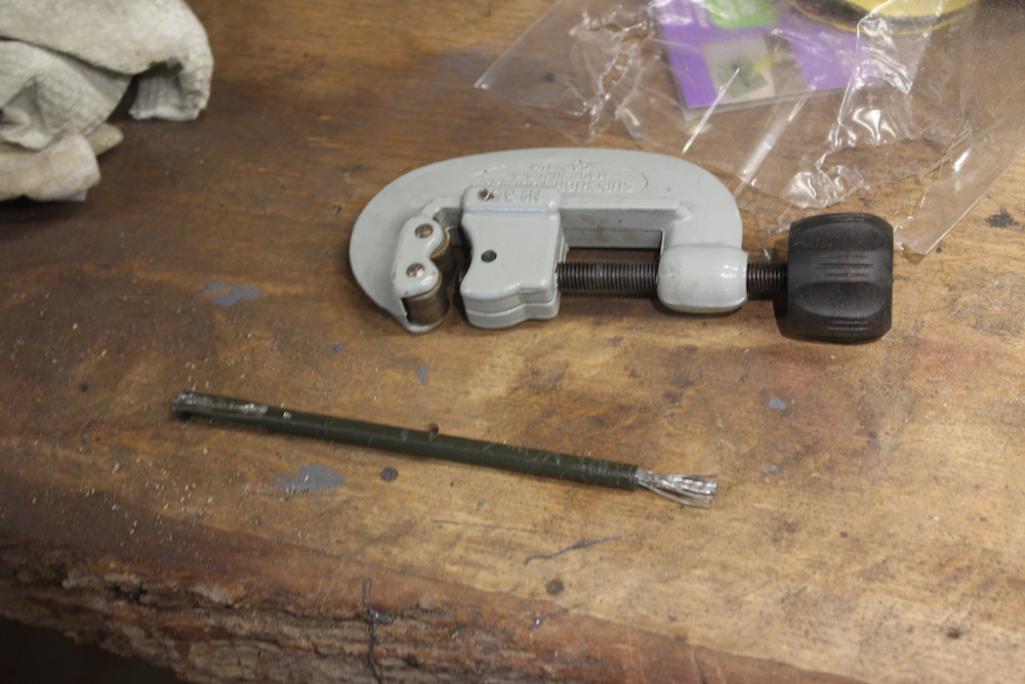
The first is a tube with a clutch cable piece sticking out. It looks like this and  gets into places like this 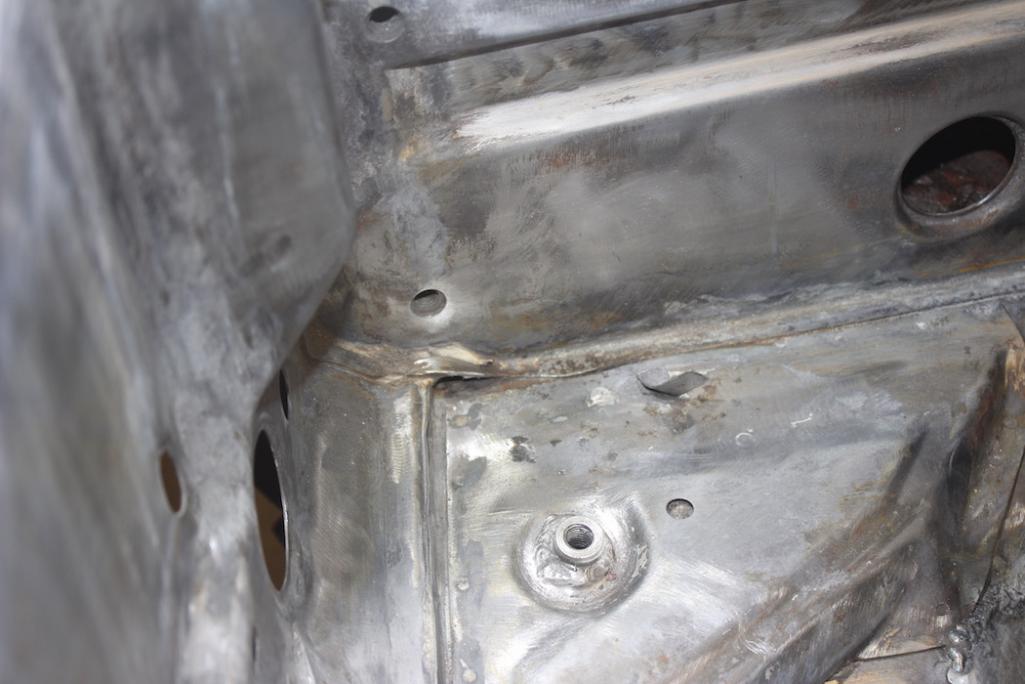 I use the piece of copper pipe as a bearing to guide and push the brush along. The number of holes like this is amazing. That is to say there are a lot of them. Another tool I am fast wearing out is this from Milwaukee. I am not touting the brand but they are the only ones selling something like this. Far more torque than my (cheap) air grinders. I have a dozen air die grinders so that I can choose a bit or sanding disc quickly by just grabbing a different die grinder. The battery powered tools are a bit too pricey for that but Roloc type discs help. You need a lot of batteries if you want to keep at it steady, and the chip will tell you no when the tool heats up. 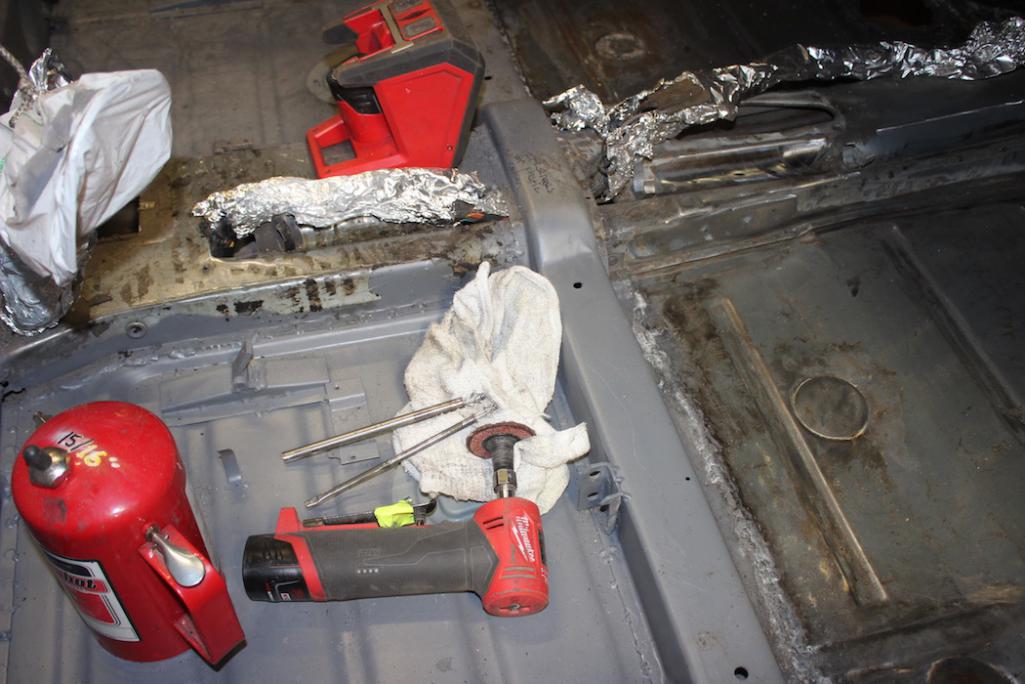 |
|
|
|
| worn |
Jun 25 2022, 10:21 AM
Post
#57
|
|
can't remember Group: Members Posts: 3,150 Joined: 3-June 11 From: Madison, WI Member No.: 13,152 Region Association: Upper MidWest |
A curious thing about the car is the absence of front jack points. Same on both sides of the floor. Absolutely no sign that the floor was ever molested other than the frunk floor for AC. No signs of welding on either side with bare metal showing inside or out.
 This is one of the last 914s ever built. Did the factory just run short of doughnuts that day? |
|
|
|
| worn |
Jun 25 2022, 11:01 AM
Post
#58
|
|
can't remember Group: Members Posts: 3,150 Joined: 3-June 11 From: Madison, WI Member No.: 13,152 Region Association: Upper MidWest |
Here is another shot...ad nauseum I suppose. It shows what you do when the wires wear down. Just use a cutter to remove some of the tube.
 And here is yet another place to use one. As you can see I have moved ahead into the bow. 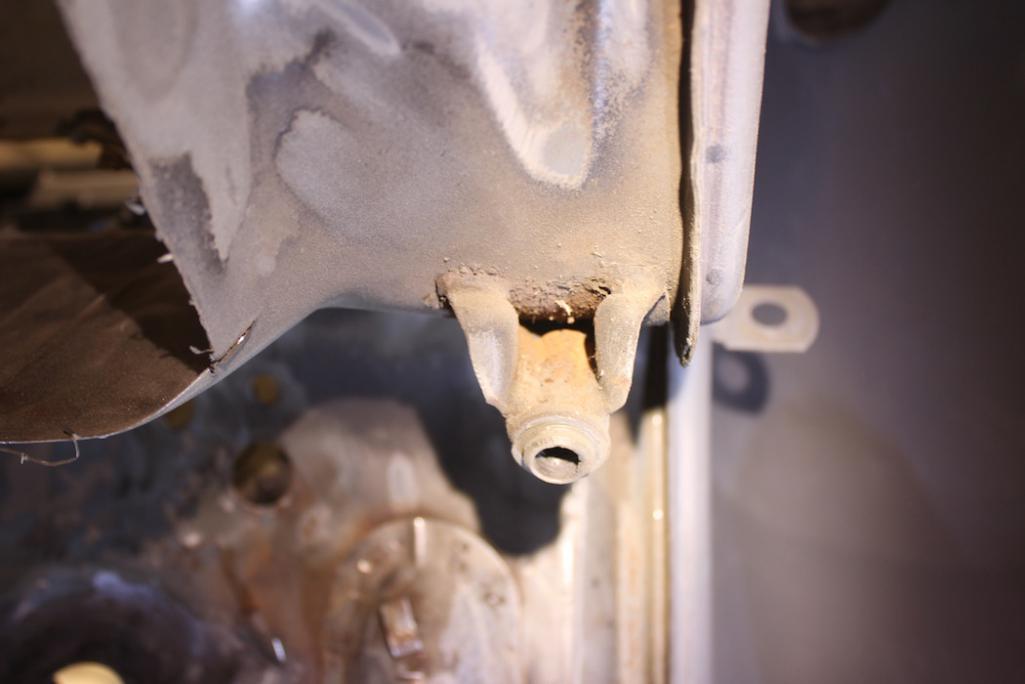 |
|
|
|
| worn |
Jun 25 2022, 11:08 AM
Post
#59
|
|
can't remember Group: Members Posts: 3,150 Joined: 3-June 11 From: Madison, WI Member No.: 13,152 Region Association: Upper MidWest |
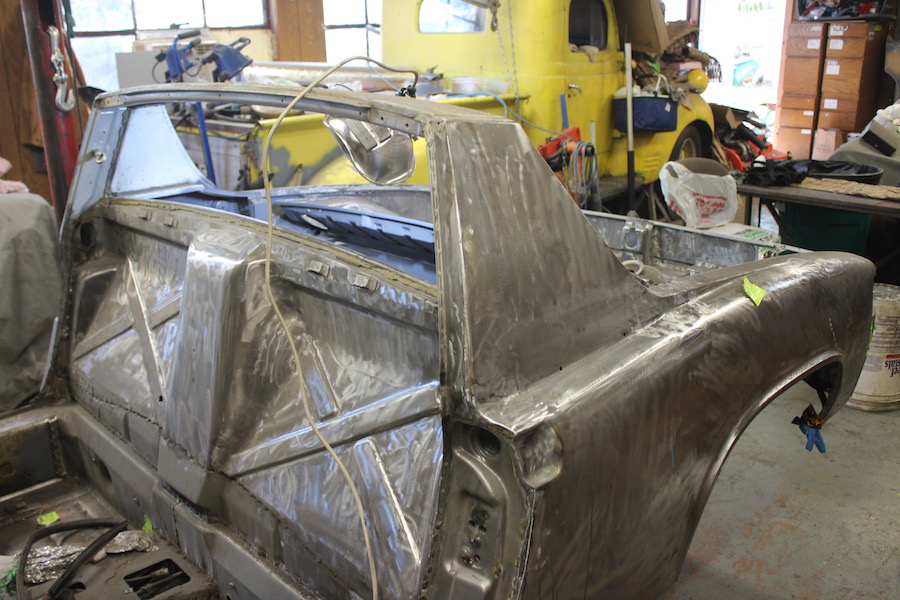
Waited to replace the frunk floor so I could crawl through the hole to clean and sand as needed. Time to finish that part with a new trunk floor patch that RD sells for replacing the AC modified floor.
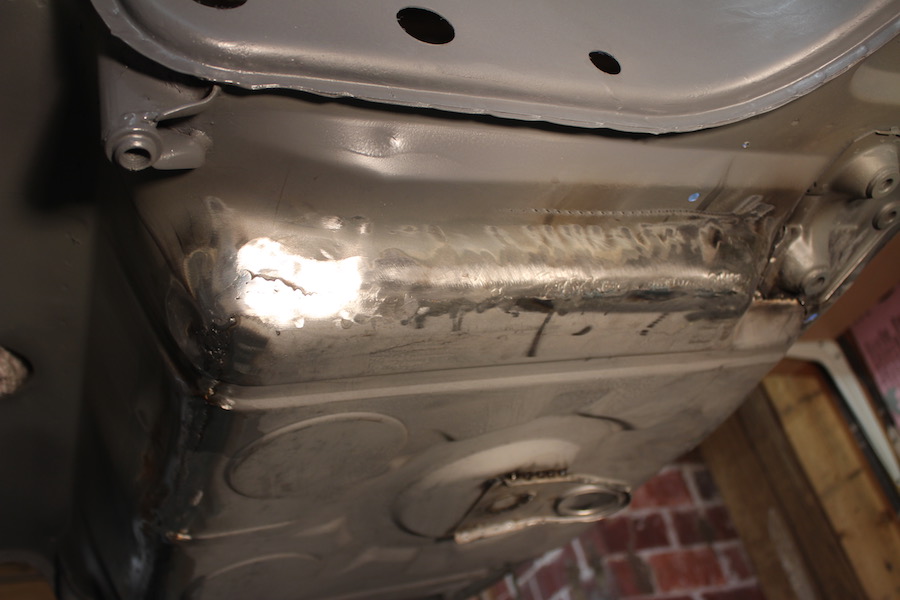 Still have to finish patching the holes at the very front. I hope that I am on the last spool of wire and the last tank of Ar/CO2. 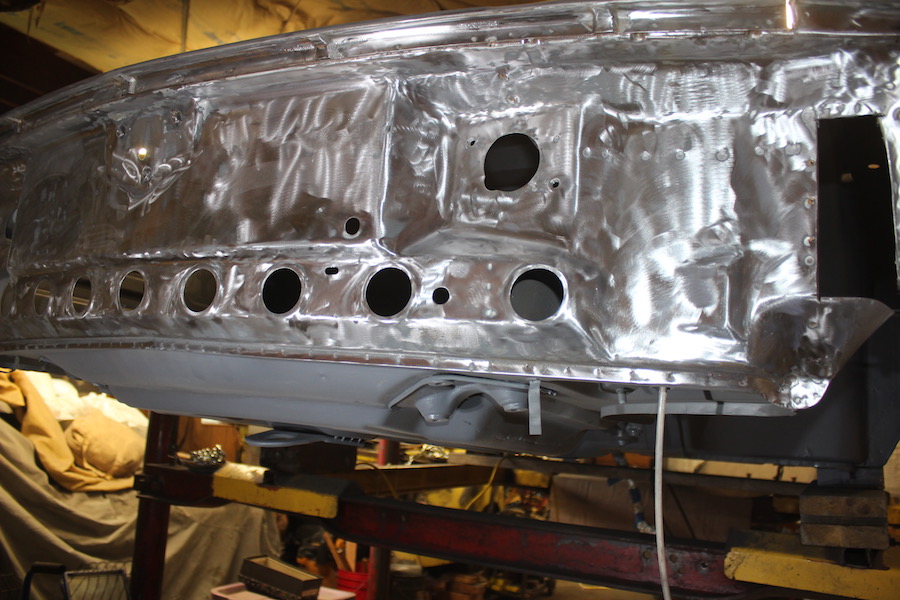 |
|
|
|
| SirAndy |
Jun 25 2022, 11:51 AM
Post
#60
|
|
Resident German Group: Admin Posts: 41,612 Joined: 21-January 03 From: Oakland, Kalifornia Member No.: 179 Region Association: Northern California |
QUOTE(worn @ Jun 25 2022, 09:21 AM) A curious thing about the car is the absence of front jack points. Same on both sides of the floor. Absolutely no sign that the floor was ever molested other than the frunk floor for AC. No signs of welding on either side with bare metal showing inside or out. This is one of the last 914s ever built. Did the factory just run short of doughnuts that day? General consensus is that those donuts aren't jack points but were used to hold the chassis in place on the conveyor belts at the factory. If you look at the backside of that area, there is no support what-so-ever to handle the full weight of the car. You will see the floor pan buckled up there on a *lot* of 914s. (IMG:style_emoticons/default/popcorn[1].gif)  |
|
|
|
|
1 User(s) are reading this topic (1 Guests and 0 Anonymous Users)
0 Members:

|
Lo-Fi Version | Time is now: 3rd May 2024 - 04:44 PM |
Invision Power Board
v9.1.4 © 2024 IPS, Inc.