|
|
|
Porsche, and the Porsche crest are registered trademarks of Dr. Ing. h.c. F. Porsche AG.
This site is not affiliated with Porsche in any way. Its only purpose is to provide an online forum for car enthusiasts. All other trademarks are property of their respective owners. |
|
|

  |

| GeorgeKopf |
 Mar 14 2021, 05:50 PM Mar 14 2021, 05:50 PM
Post
#1
|
|
Member  Group: Members Posts: 260 Joined: 9-February 21 From: Princeton, NJ Member No.: 25,186 Region Association: MidAtlantic Region |
Today marks the official beginning of my 1974 Porsche 914-4 restoration project.
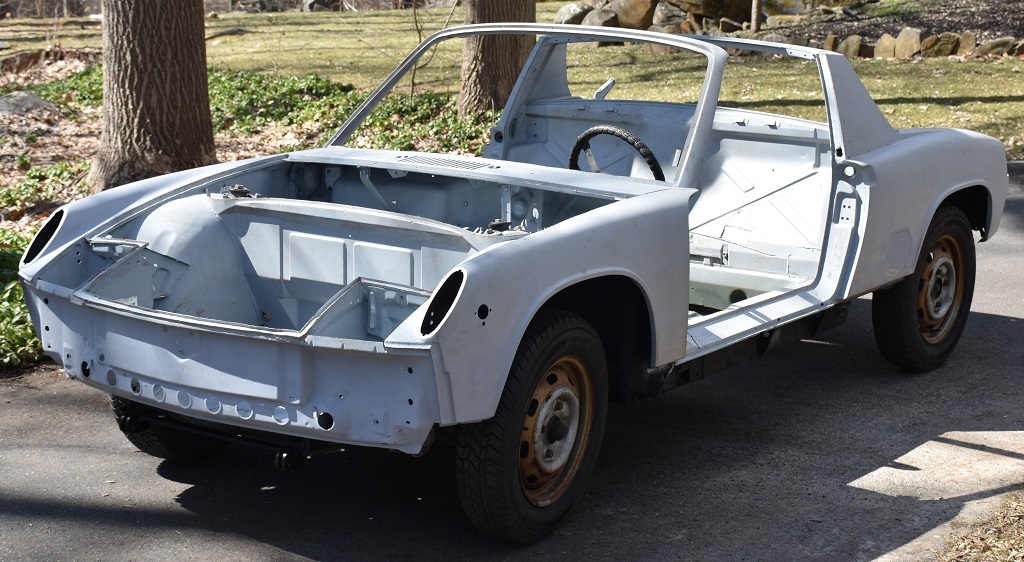 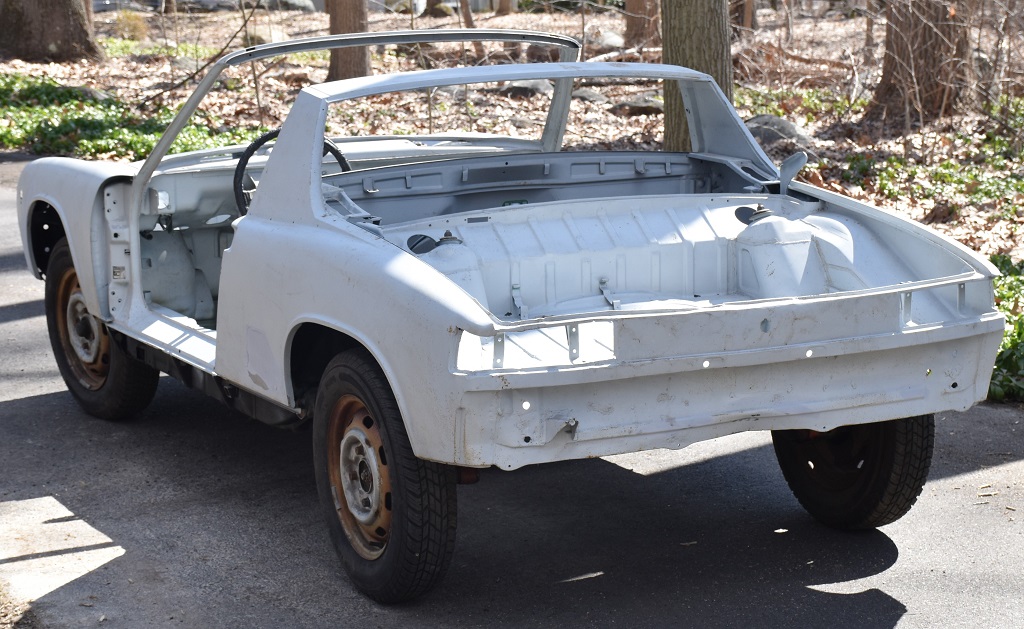 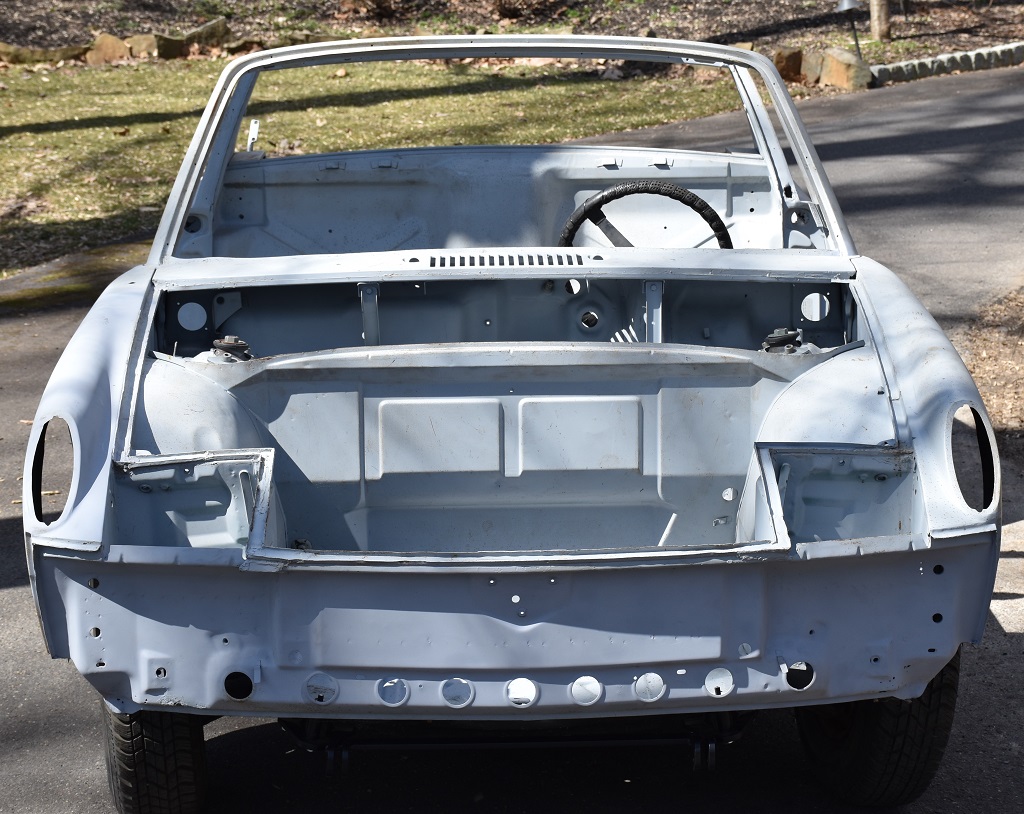 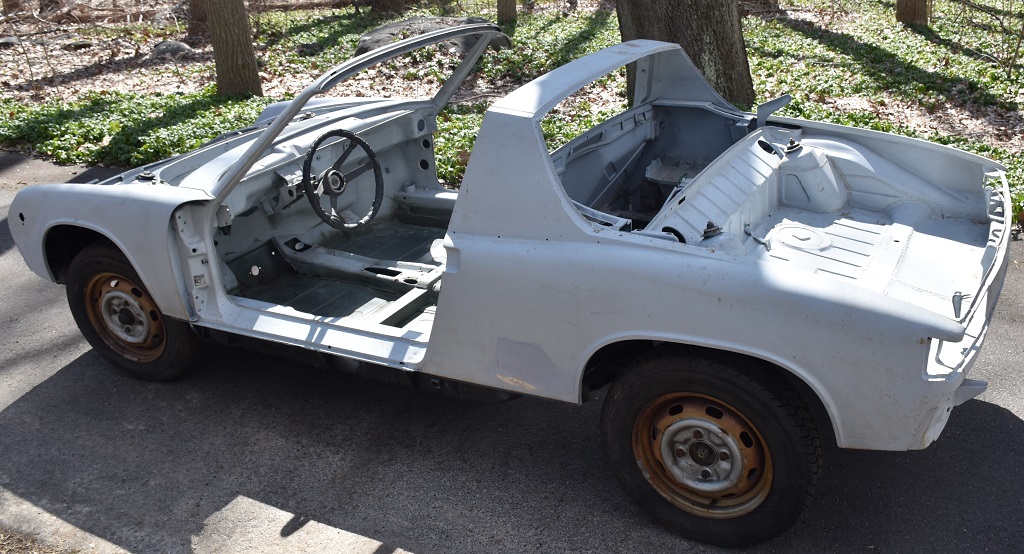 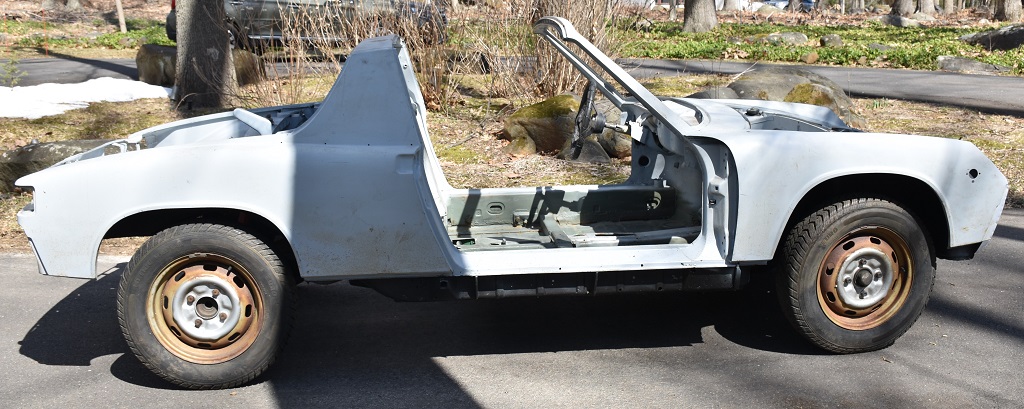  I'm hoping to have the car on the road before its 50 anniversary. |
   |

 
|
| bkrantz |
Mar 14 2021, 07:28 PM
Post
#2
|
|
914 Guru Group: Members Posts: 8,727 Joined: 3-August 19 From: SW Colorado Member No.: 23,343 Region Association: Rocky Mountains |
Enjoy the "ride".
|
|
|
|
| Jamie |
Mar 14 2021, 08:03 PM
Post
#3
|
|
Senior Member Group: Members Posts: 1,213 Joined: 13-October 04 From: Georgetown,KY Member No.: 2,939 Region Association: South East States |
QUOTE(GeorgeKopf @ Mar 14 2021, 03:50 PM)  Today marks the official beginning of my 1974 Porsche 914-4 restoration project. I'm hoping to have the car on the road before its 50 anniversary. Since it's already in primer, are you taking over a project that someone else started? Many of the potential rust areas appear to be in good repair from this distance, so you must be off to a good start. . (IMG:style_emoticons/default/confused24.gif) |
|
|
|
| GeorgeKopf |
Mar 14 2021, 10:15 PM
Post
#4
|
|
Member Group: Members Posts: 260 Joined: 9-February 21 From: Princeton, NJ Member No.: 25,186 Region Association: MidAtlantic Region |
QUOTE(Jamie @ Mar 14 2021, 08:03 PM) QUOTE(GeorgeKopf @ Mar 14 2021, 03:50 PM) Today marks the official beginning of my 1974 Porsche 914-4 restoration project. I'm hoping to have the car on the road before its 50 anniversary. Since it's already in primer, are you taking over a project that someone else started? Many of the potential rust areas appear to be in good repair from this distance, so you must be off to a good start. . (IMG:style_emoticons/default/confused24.gif) Yes. This is a project that has been sold twice since the car was on the road. I just finished taking the brake lines, fuel lines and wiring harness off. Most of the traditional problem areas have been addressed but I'm going to have it media blasted and some final metal work.  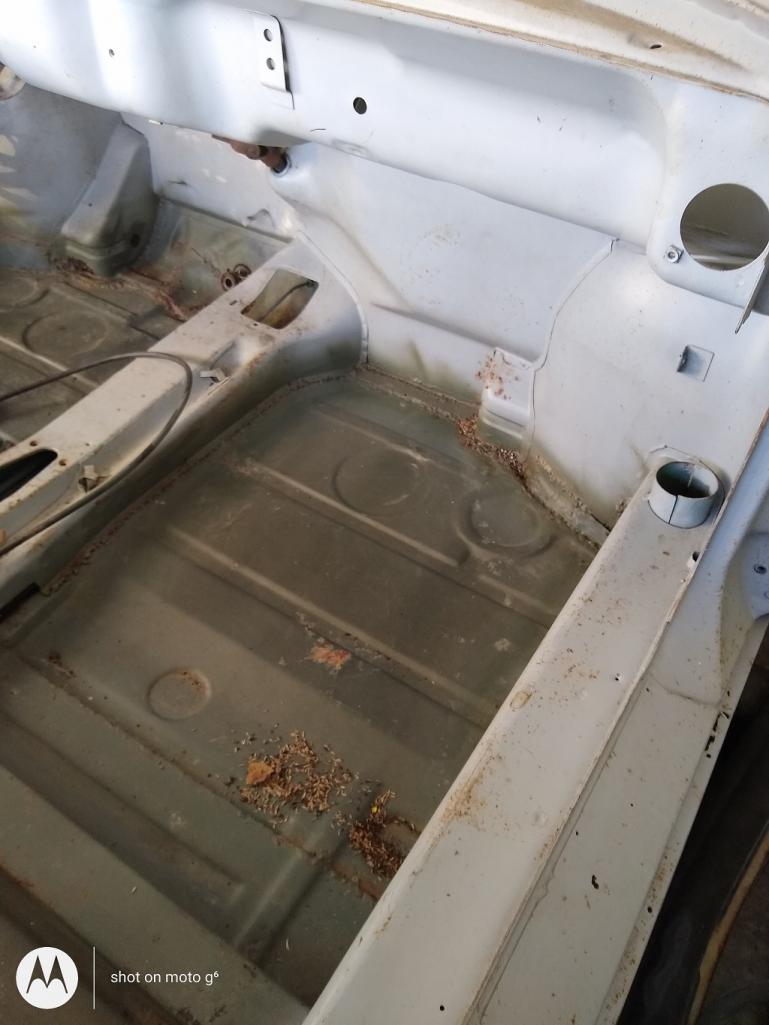 |
|
|
|
| Root_Werks |
Mar 15 2021, 05:24 PM
Post
#5
|
|
Village Idiot Group: Members Posts: 9,012 Joined: 25-May 04 From: About 15NM from Canada Member No.: 2,105 Region Association: Pacific Northwest |
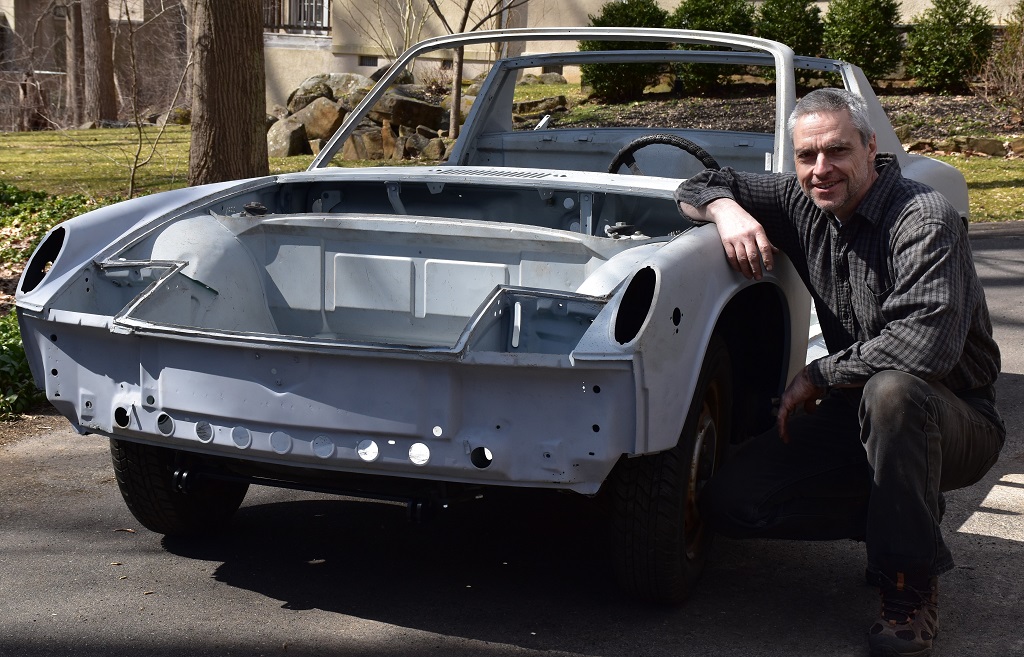
That looks like a good starting 914 to me! You'll only make it better.
|
|
|
|
| GeorgeKopf |
Mar 22 2021, 09:02 AM
Post
#6
|
|
Member Group: Members Posts: 260 Joined: 9-February 21 From: Princeton, NJ Member No.: 25,186 Region Association: MidAtlantic Region |
Prepping the car for the body shop. Added the hood, trunk, engine cover and doors.
Turns out it is a rainbow clown car now. The doors were blue painted black. The hoods are yellow. The dash is red. The body is primer over green. 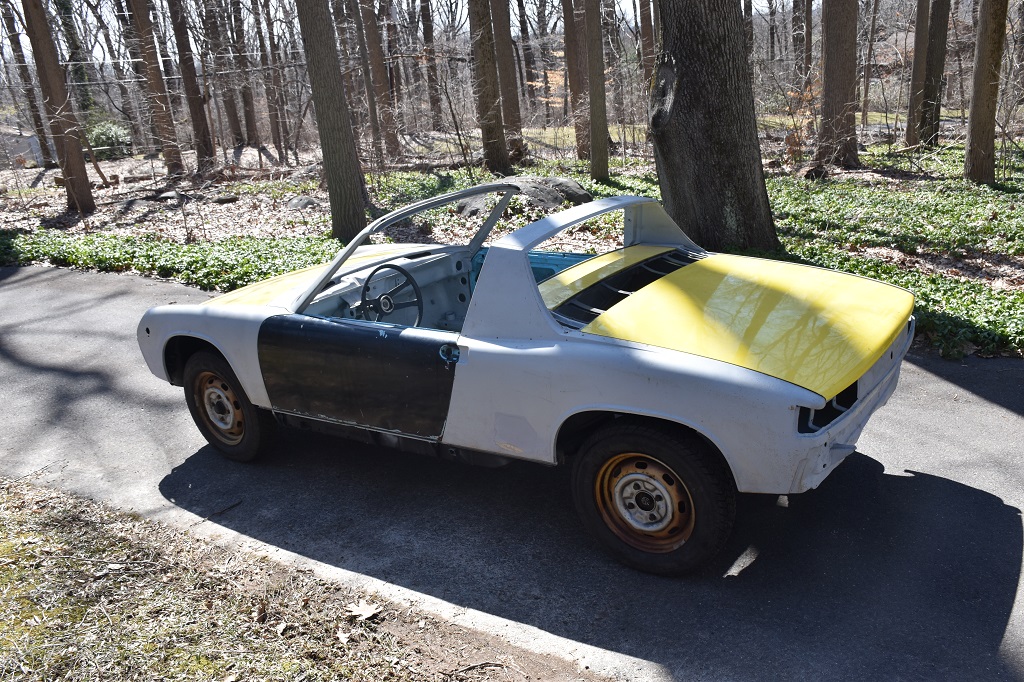 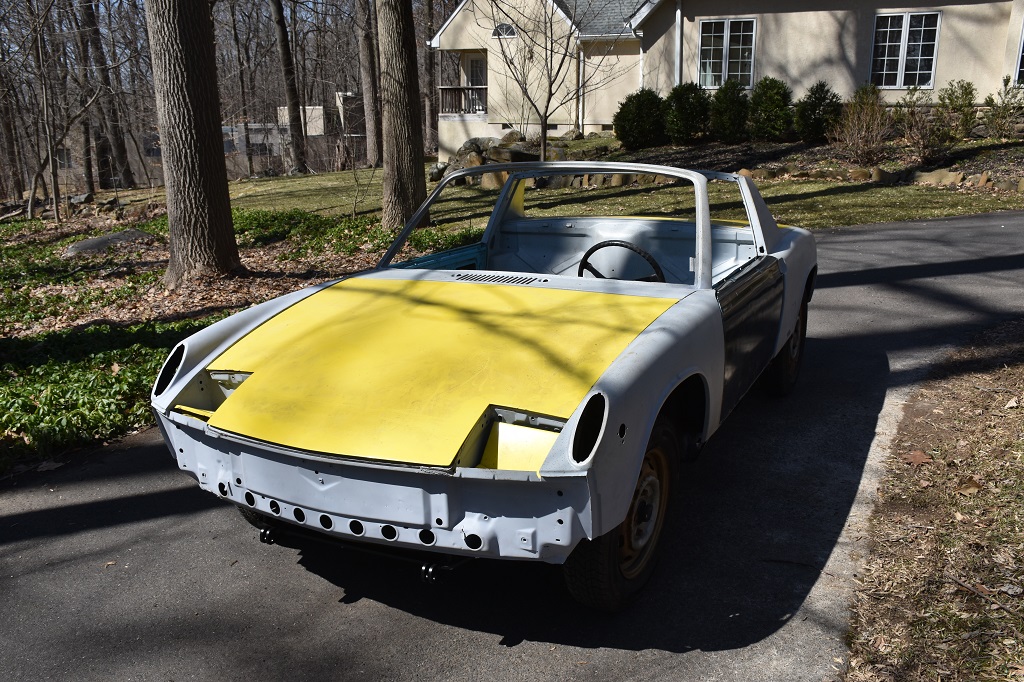 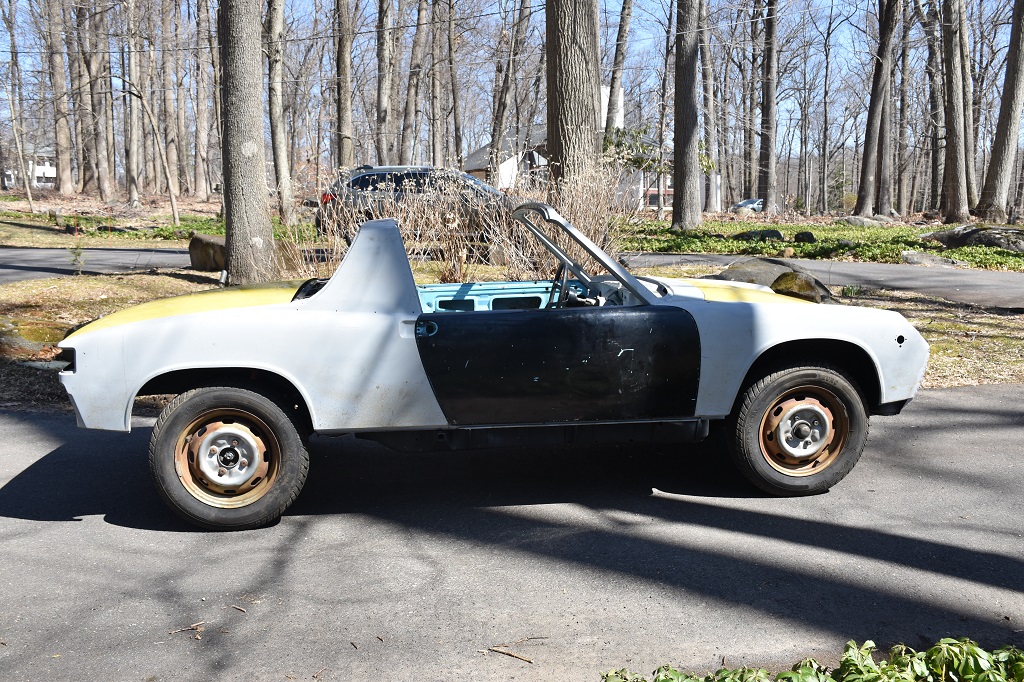   |
|
|
|
| Shivers |
Mar 22 2021, 09:21 AM
Post
#7
|
|
Senior Member Group: Members Posts: 3,449 Joined: 19-October 20 From: La Quinta, CA Member No.: 24,781 Region Association: Southern California |
Looks like a real good start. I'm back to this square with a 74 tub, to repair my 72. Most pieces will end up 72 but with all the up grades that came with the later years. And while I'm here all the suspension bracing and stiffening kits that are proven. You have fun with your build.
|
|
|
|
| GeorgeKopf |
Jul 11 2021, 12:34 AM
Post
#8
|
|
Member Group: Members Posts: 260 Joined: 9-February 21 From: Princeton, NJ Member No.: 25,186 Region Association: MidAtlantic Region |
I dropped the car off at TranslogGT (http://transloggt.com) to have the body dipped at MEC (http://www.mecchemicals.com).
I'll post some pictures once it comes out of the acid bath. In the meantime, I'm collecting parts and polishing the ones I have. Right now working on the wiring harness. (IMG:style_emoticons/default/huh.gif) 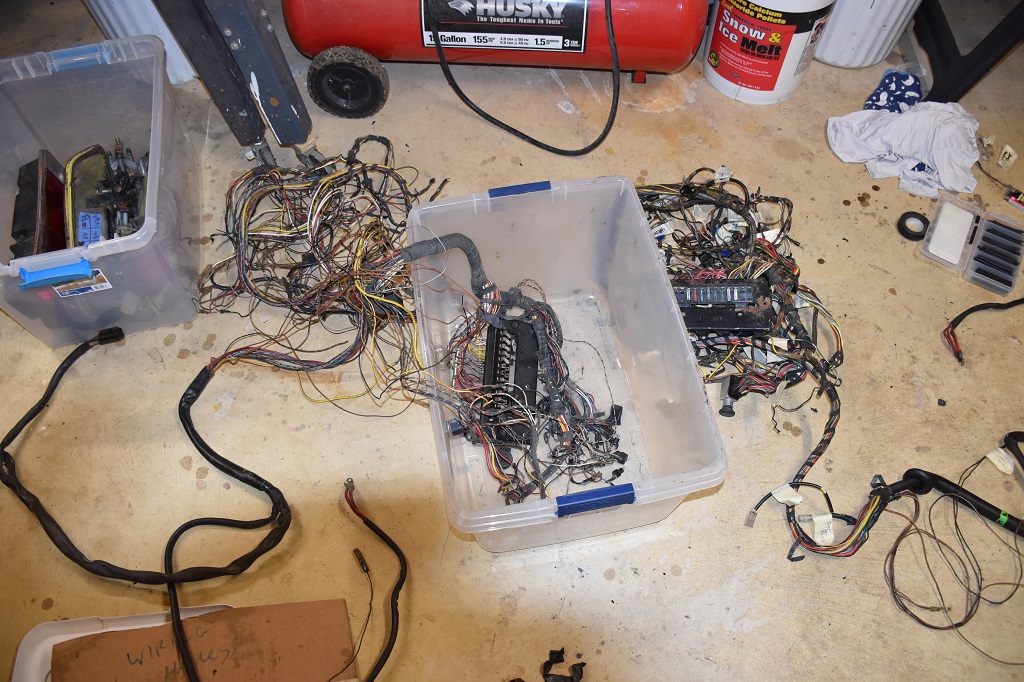 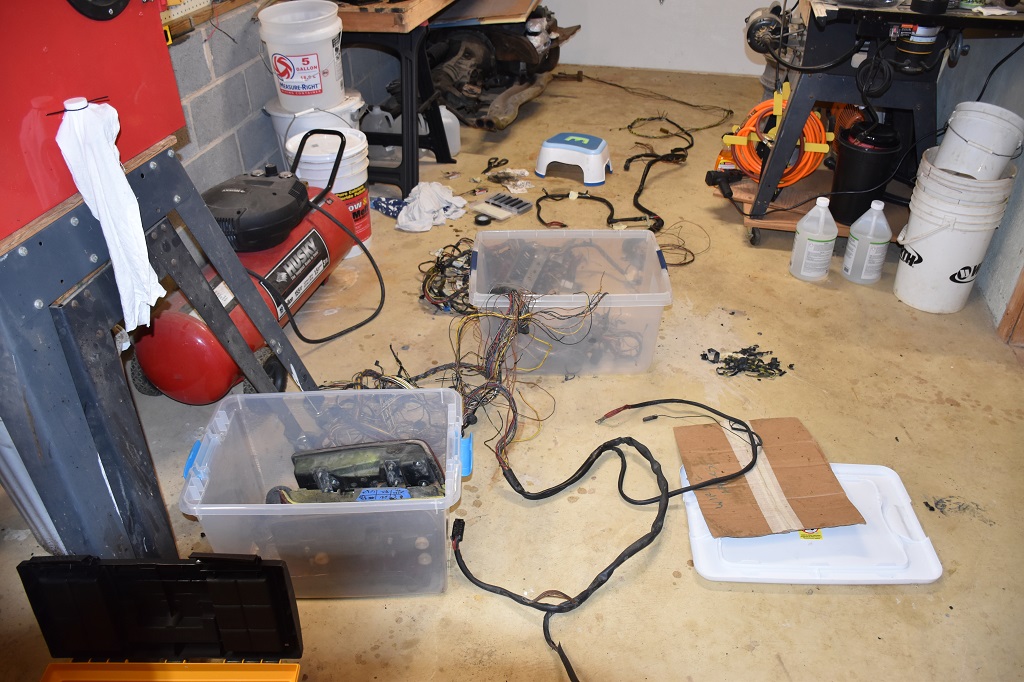 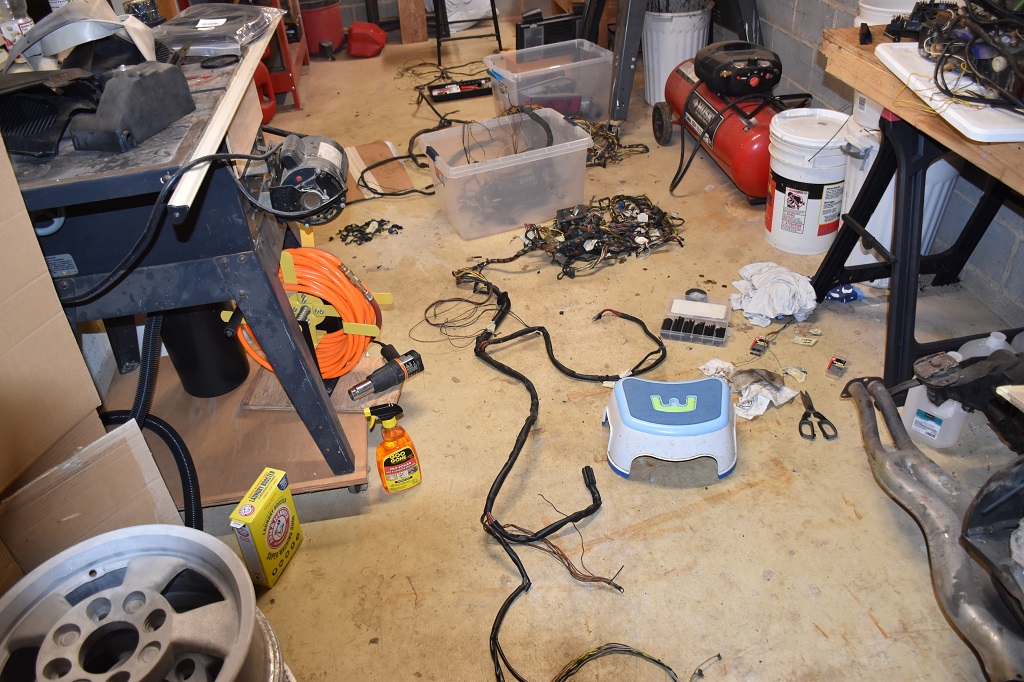 George |
|
|
|
| GeorgeKopf |
Oct 2 2021, 08:26 PM
Post
#9
|
|
Member Group: Members Posts: 260 Joined: 9-February 21 From: Princeton, NJ Member No.: 25,186 Region Association: MidAtlantic Region |
I finished refurbishing my wiring harness. I repaired all of the cut ends, burnt spots, and frayed shielding.
I moved my fuel pump wire to the front trunk area under the gas tank. Found and exposed the wire for the intermittent wipers. I swapped out my wiper switch for one with an extra connector and added a wire from the steering column to the front trunk for an electric washer pump. I wrapped the whole thing in harness tape and labeled every connector. 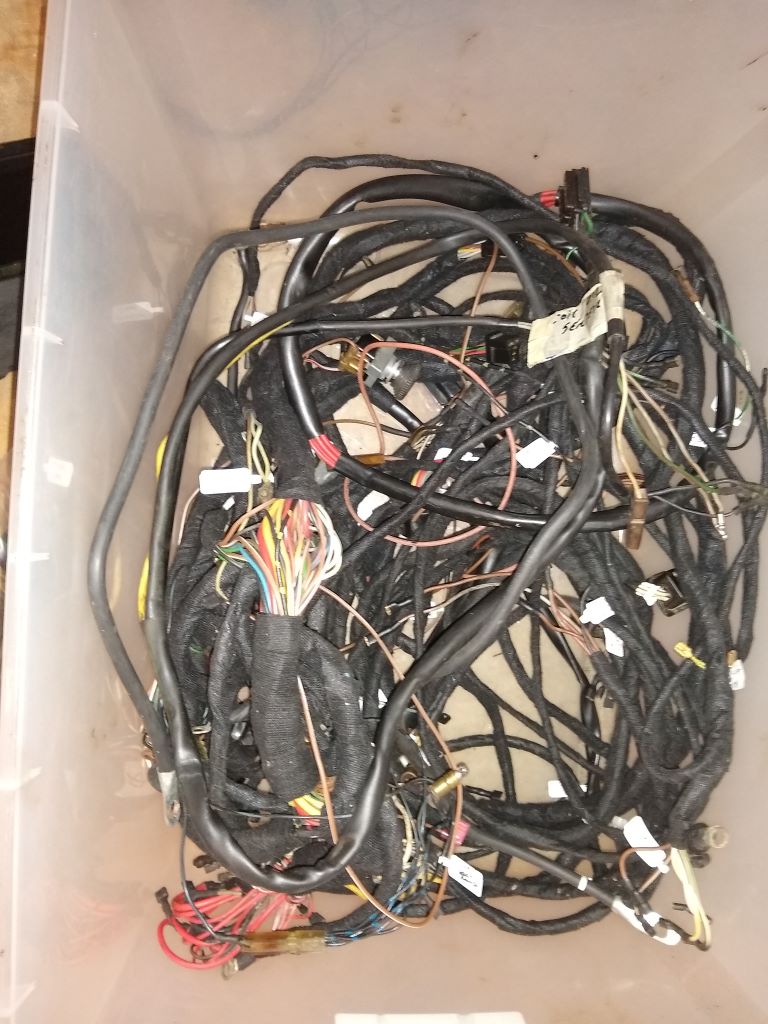 I cleaned my relay board, soldered all of the connections and repotted it. 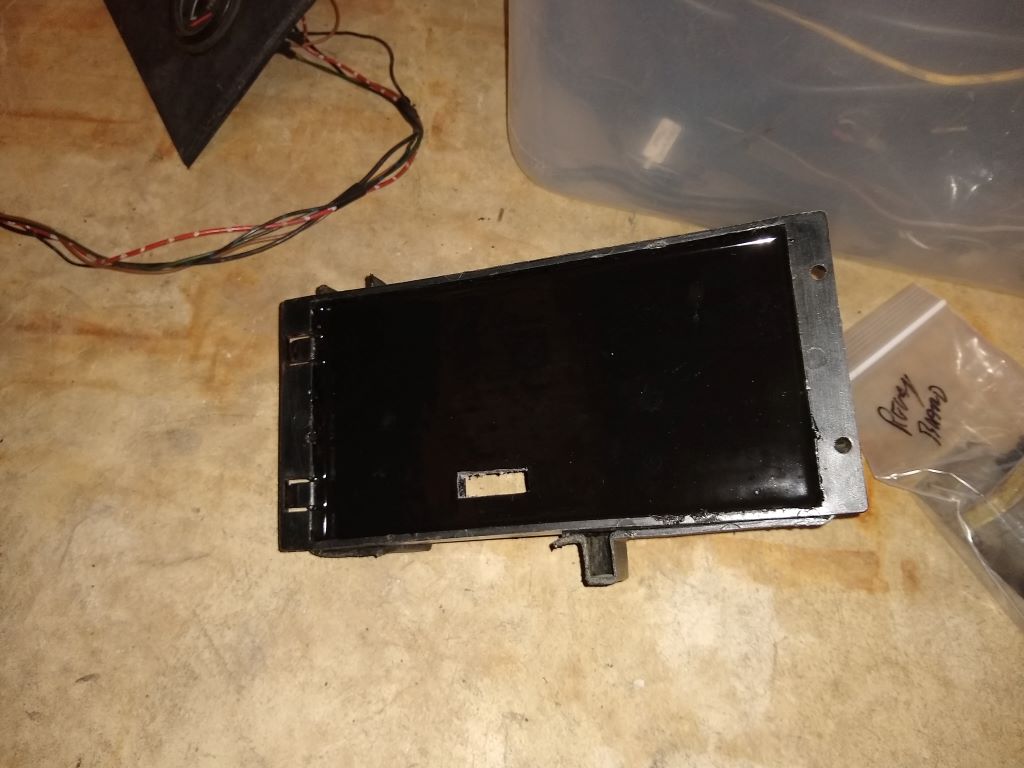 I built a custom wire harness for the center console gauges. 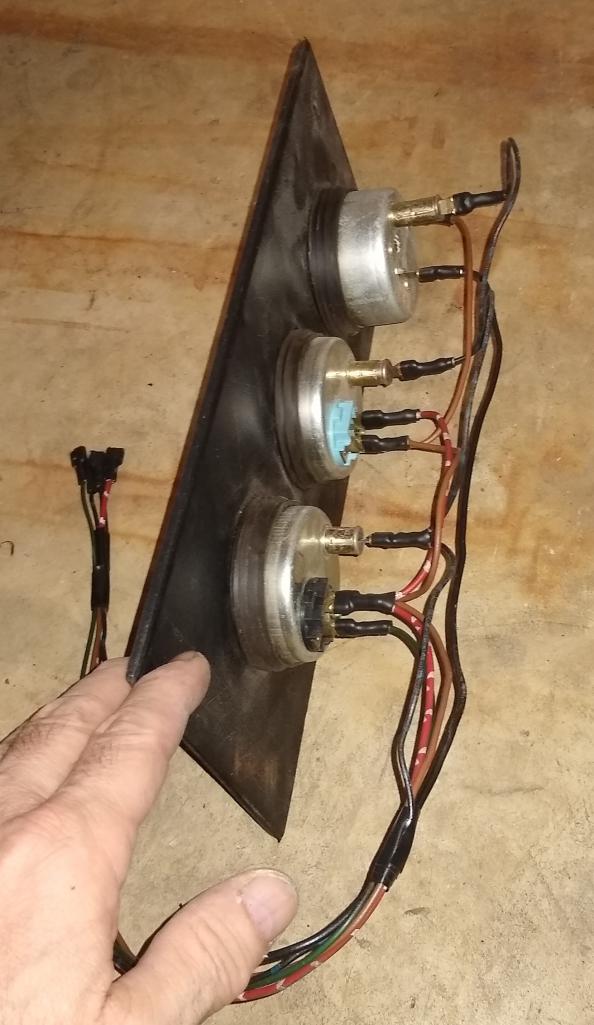 I cleaned and painted my fuse block. 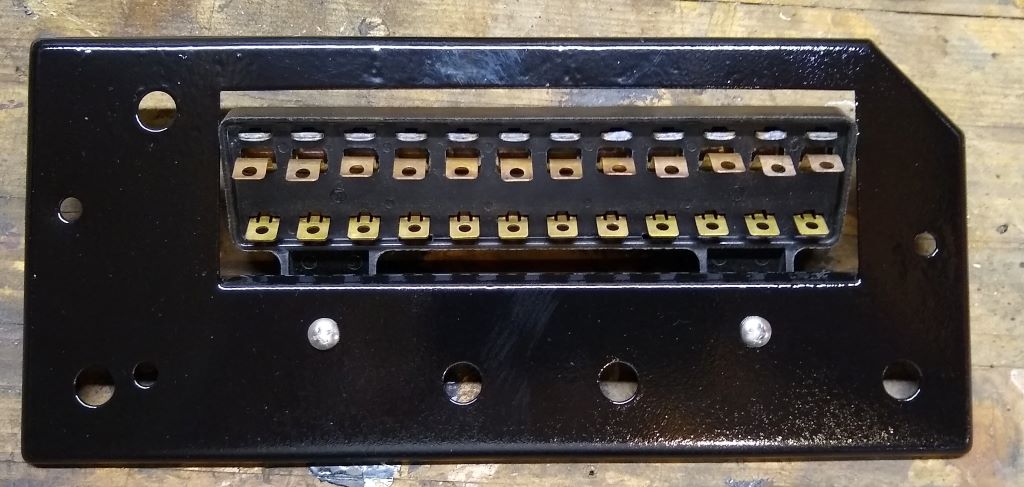 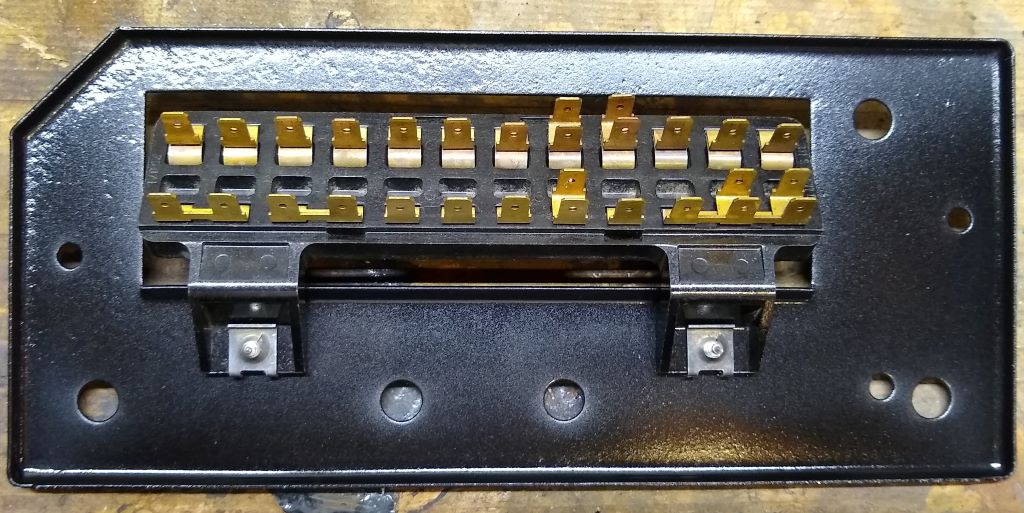 |
|
|
|
| bkrantz |
Oct 2 2021, 08:53 PM
Post
#10
|
|
914 Guru Group: Members Posts: 8,727 Joined: 3-August 19 From: SW Colorado Member No.: 23,343 Region Association: Rocky Mountains |
Nice work! All the hours spent on the wiring harness will pay off later.
|
|
|
|
| Cairo94507 |
Oct 3 2021, 06:34 AM
Post
#11
|
|
Michael Group: Members Posts: 10,678 Joined: 1-November 08 From: Auburn, CA Member No.: 9,712 Region Association: Northern California |
Really nice work that is going to pay huge dividends when reassembly begins. Especially the wiring harness. (IMG:style_emoticons/default/beerchug.gif)
|
|
|
|
| Mikey914 |
Oct 3 2021, 12:24 PM
Post
#12
|
|
The rubber man Group: Members Posts: 12,782 Joined: 27-December 04 From: Hillsboro, OR Member No.: 3,348 Region Association: None |
Nice work. Hopefully most of the work done is good and you won't have to rework much.
Food for thought. With my sons car we used tint able upol truck beadliner on the bottom, rockers and inside where the tar pads would go. Should last forever and deaden the sound some. Might be a thought. Attached thumbnail(s) 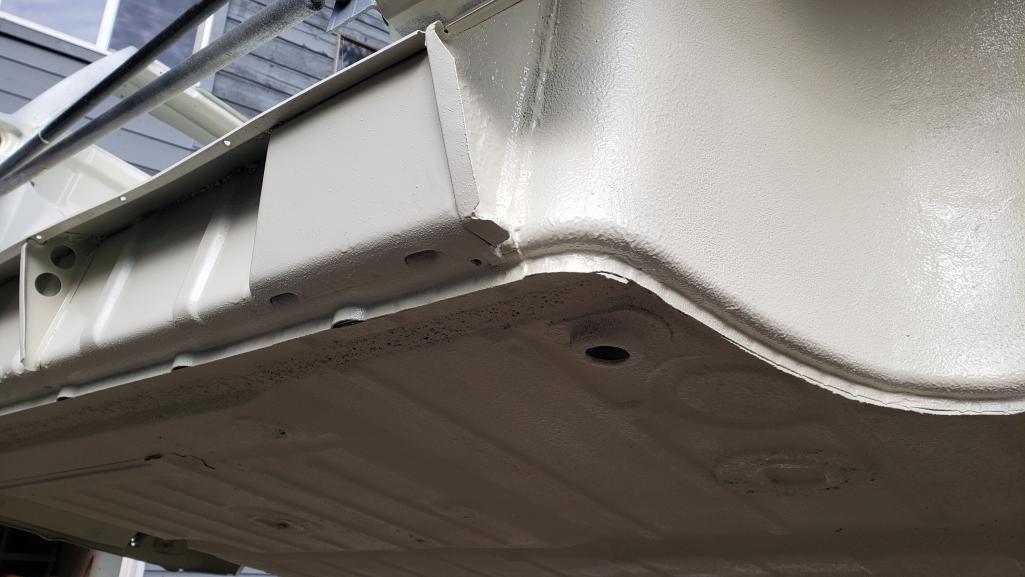
|
|
|
|
| GeorgeKopf |
Oct 16 2021, 09:35 PM
Post
#13
|
|
Member Group: Members Posts: 260 Joined: 9-February 21 From: Princeton, NJ Member No.: 25,186 Region Association: MidAtlantic Region |
Just finished refurbishing my front turn signal housings.
I sand blasted, primer and painted the entire thing enamel gloss black. I made the bulb holders for the euro conversion from aluminum flashing. The inside silver is SpazStix mirror finish. The backside is Rustoleum undercoating black.  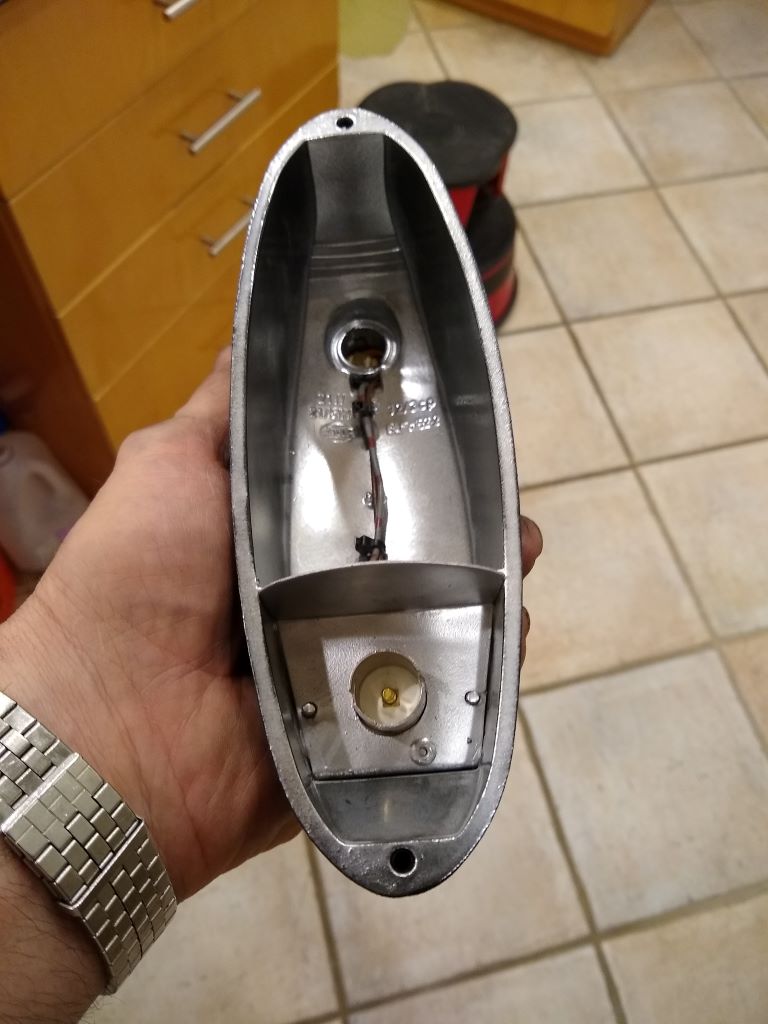 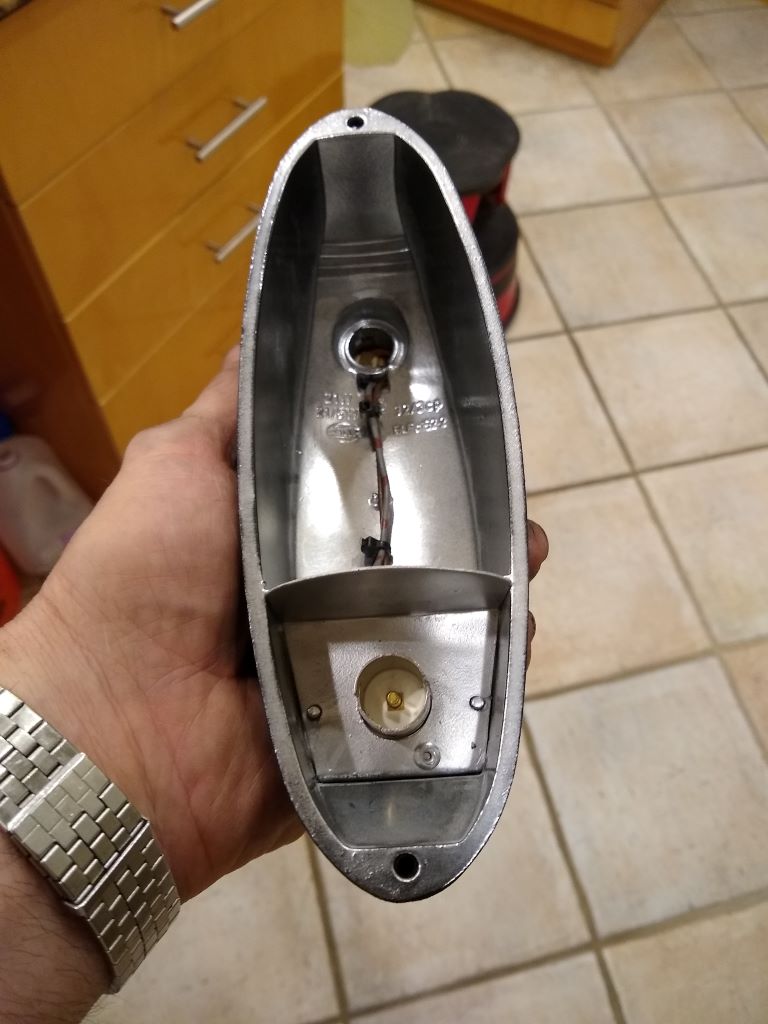 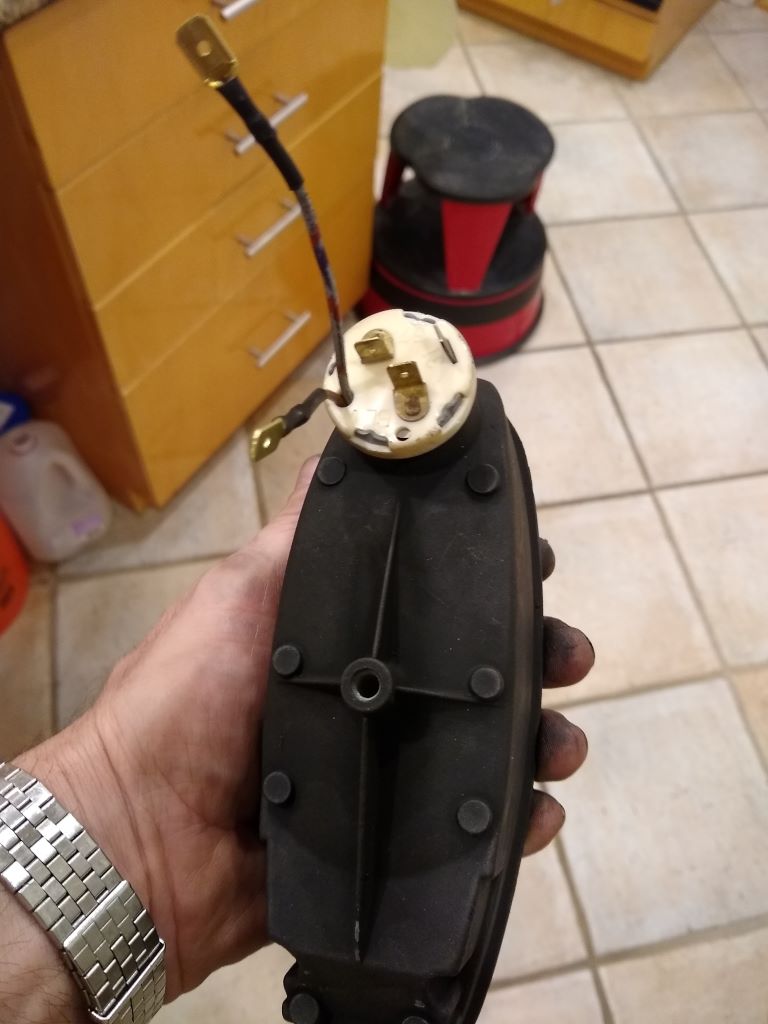 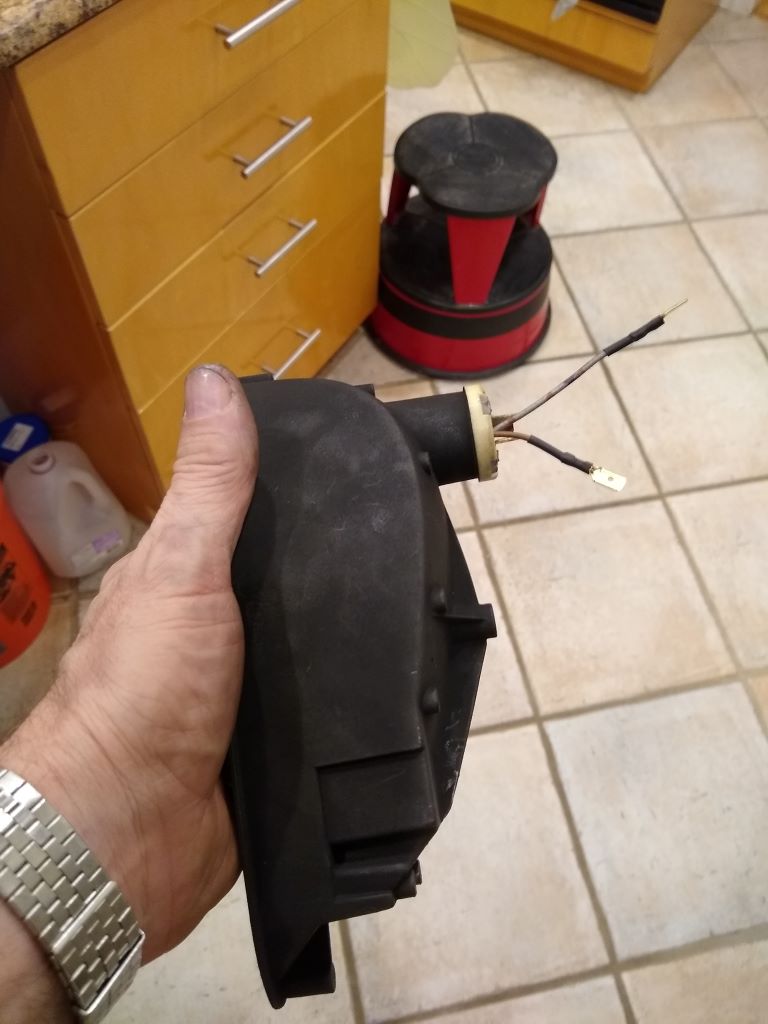 I cobbled together four good housings and figured I'd convert them all in case I messed any up. 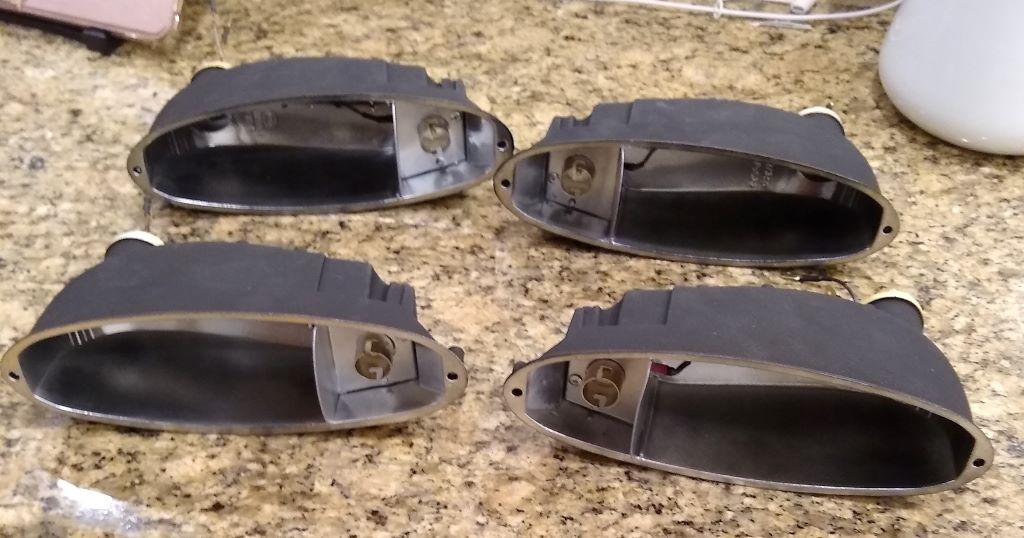 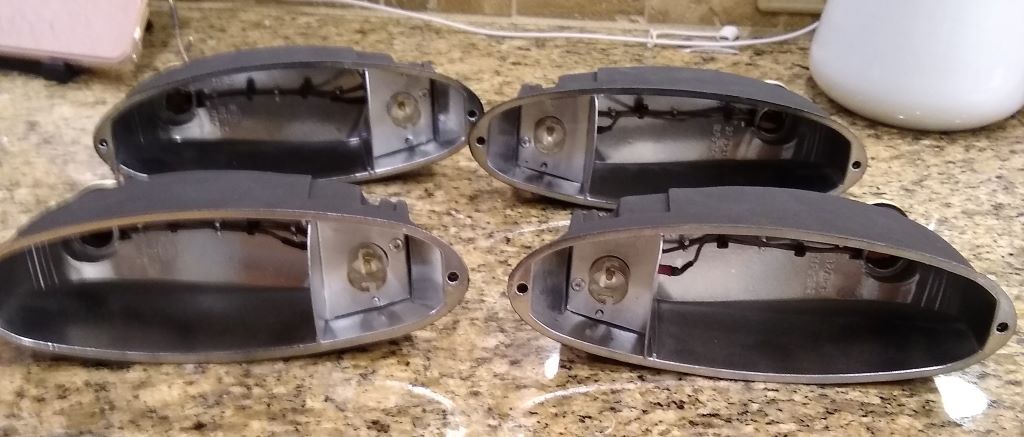 The plan is to attach the puck wires to the new leads, use clear lenses and bi-color led bulbs. George |
|
|
|
| mlindner |
Nov 6 2021, 02:56 PM
Post
#14
|
|
Senior Member Group: Members Posts: 1,789 Joined: 11-November 11 From: Merrimac, WI Member No.: 13,770 Region Association: Upper MidWest |
That looks great George, keep posting. Mark
|
|
|
|
| TRS63 |
Nov 7 2021, 03:39 AM
Post
#15
|
|
Member Group: Members Posts: 326 Joined: 14-September 20 From: Germany - Stuttgart Member No.: 24,690 Region Association: Europe |
Great work making progress on all the parts during bodywork..re-assembly will be way easier!
The picture from the area under the battery tray looks like a very unprofessional repair..I hope there is no surprises under it ! Cheers Antoine |
|
|
|
| StarBear |
Jan 11 2022, 02:30 PM
Post
#16
|
|
Advanced Member Group: Members Posts: 2,318 Joined: 2-September 09 From: NJ Member No.: 10,753 Region Association: North East States |
Ah, just found this. Yeah, probably not ready in time for NE Gathering... Best wishes!
|
|
|
|
| StarBear |
Jan 15 2022, 08:12 AM
Post
#17
|
|
Advanced Member Group: Members Posts: 2,318 Joined: 2-September 09 From: NJ Member No.: 10,753 Region Association: North East States |
@GeorgeKopf Presuming (?) you had metalwork done before priming and dipping, did you do it yourself or have a shop do it? I’m really struggling to find a shop qualified and interested in doing a small job on my driver’s side jack triangle and bit of longitudinal.
(IMG:style_emoticons/default/sad.gif) |
|
|
|
| GeorgeKopf |
Jan 17 2022, 09:48 PM
Post
#18
|
|
Member Group: Members Posts: 260 Joined: 9-February 21 From: Princeton, NJ Member No.: 25,186 Region Association: MidAtlantic Region |
QUOTE(StarBear @ Jan 15 2022, 09:12 AM) @GeorgeKopf Presuming (?) you had metalwork done before priming and dipping, did you do it yourself or have a shop do it? I’m really struggling to find a shop qualified and interested in doing a small job on my driver’s side jack triangle and bit of longitudinal. (IMG:style_emoticons/default/sad.gif) @StarBear I dropped the chassis off at TranslogGT in York PA. They are a Porsche specific body shop and the owner (Tony) has his own 914 project. They're getting my chassis dipped for me at MEC Chemicals in Natty Glo PA. I'll post updates as I get more information. So far they have had the car since this summer. George |
|
|
|
| StarBear |
Jan 18 2022, 08:13 AM
Post
#19
|
|
Advanced Member Group: Members Posts: 2,318 Joined: 2-September 09 From: NJ Member No.: 10,753 Region Association: North East States |
QUOTE(GeorgeKopf @ Jan 17 2022, 10:48 PM) QUOTE(StarBear @ Jan 15 2022, 09:12 AM) @GeorgeKopf Presuming (?) you had metalwork done before priming and dipping, did you do it yourself or have a shop do it? I’m really struggling to find a shop qualified and interested in doing a small job on my driver’s side jack triangle and bit of longitudinal. (IMG:style_emoticons/default/sad.gif) @StarBear I dropped the chassis off at TranslogGT in York PA. They are a Porsche specific body shop and the owner (Tony) has his own 914 project. They're getting my chassis dipped for me at MEC Chemicals in Natty Glo PA. I'll post updates as I get more information. So far they have had the car since this summer. George Thanks, George. So few capable body shops left any more. |
|
|
|
| GeorgeKopf |
Feb 26 2022, 07:41 PM
Post
#20
|
|
Member Group: Members Posts: 260 Joined: 9-February 21 From: Princeton, NJ Member No.: 25,186 Region Association: MidAtlantic Region |
Bare naked 914!
The chassis just came back from the chemical dip. 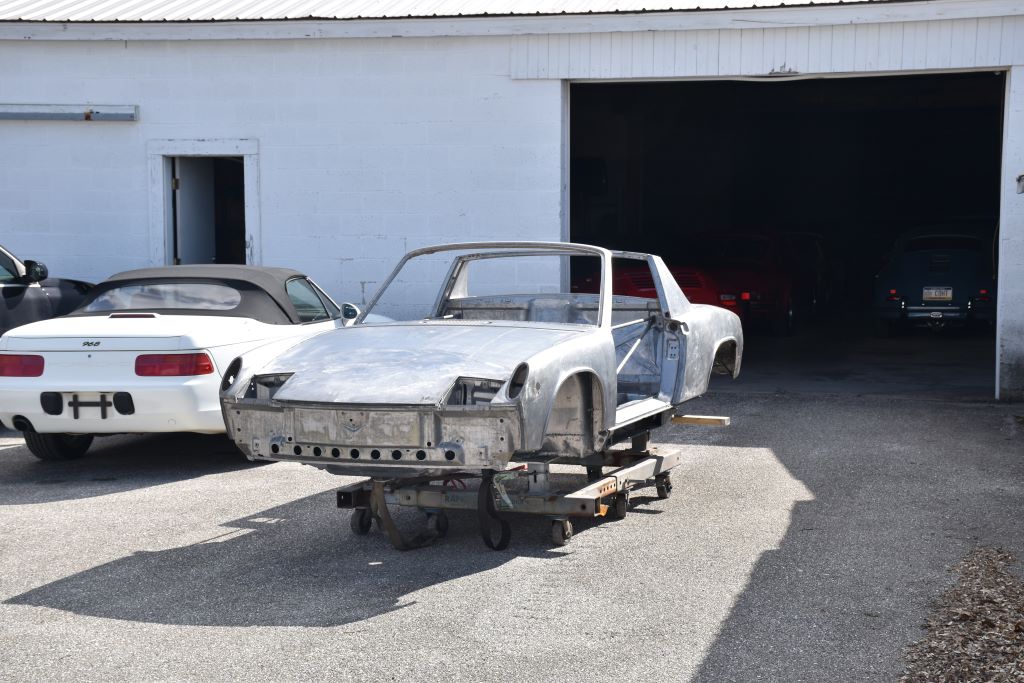 First the good news. All four quarter panels are smooth and straight. 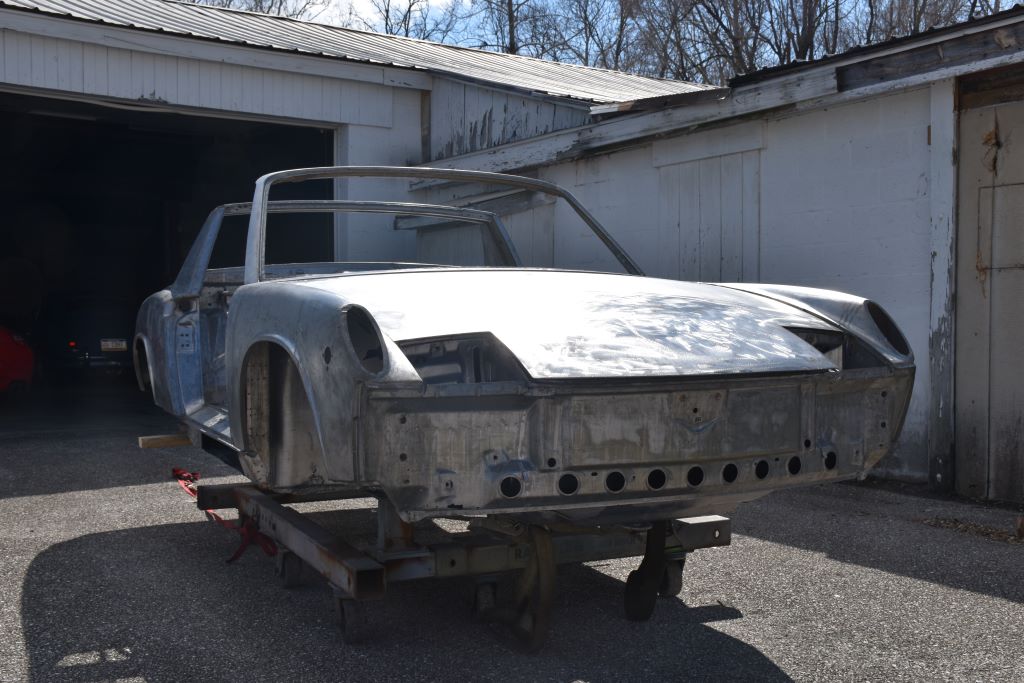 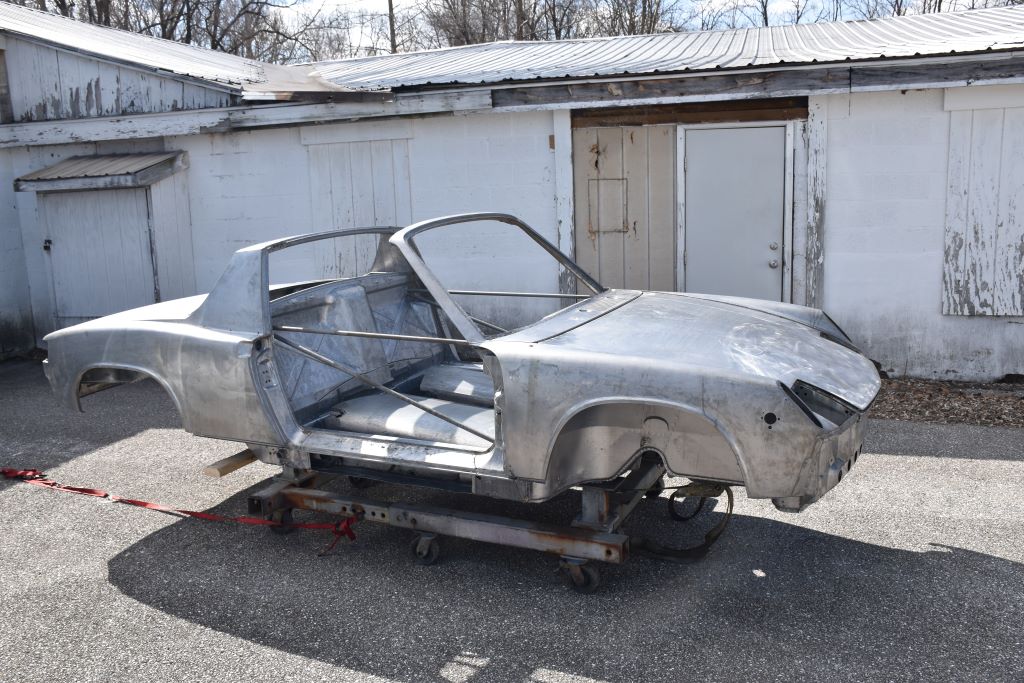 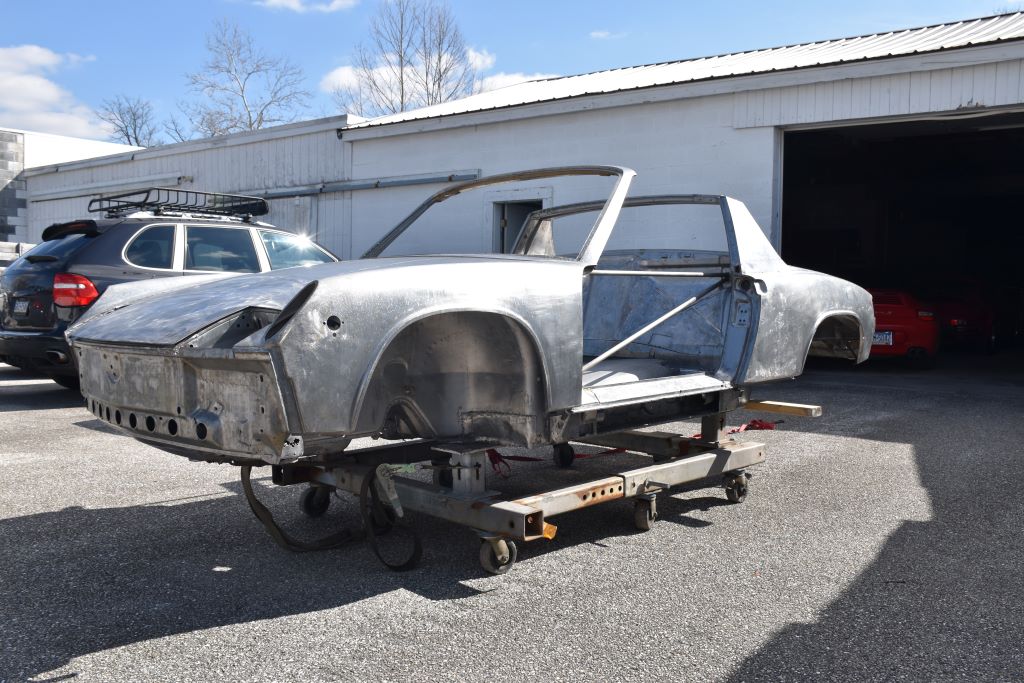 Both the front and rear trunk lids look really good.  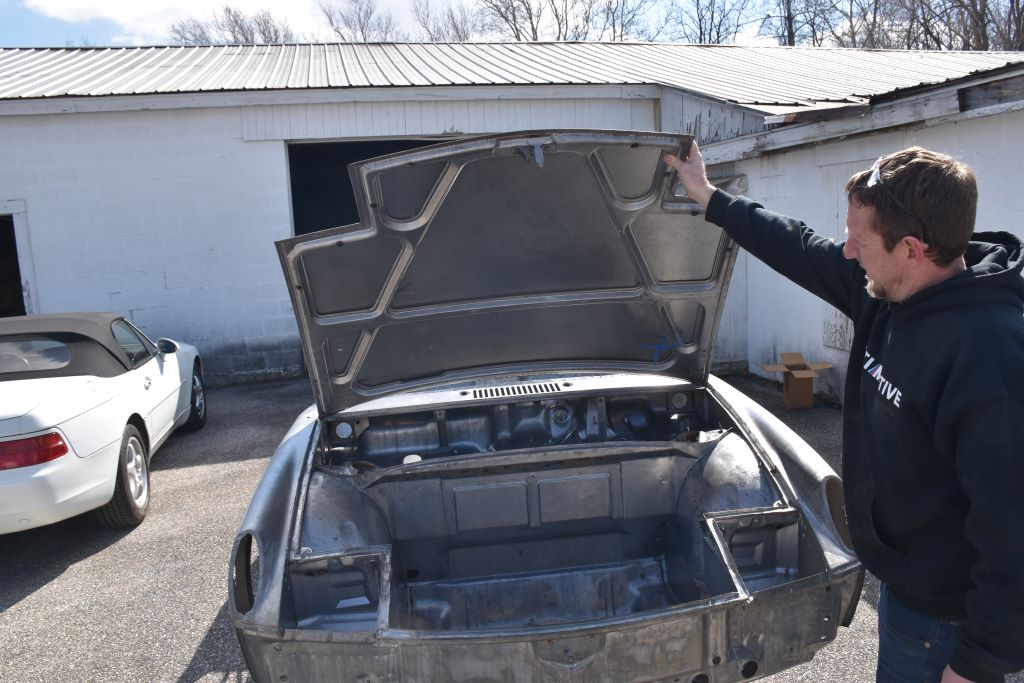 The doors look really good.  It is fairly obvious that this chassis has never been hit. The rest is just what you would expect to find. The hell hole and the driver side. 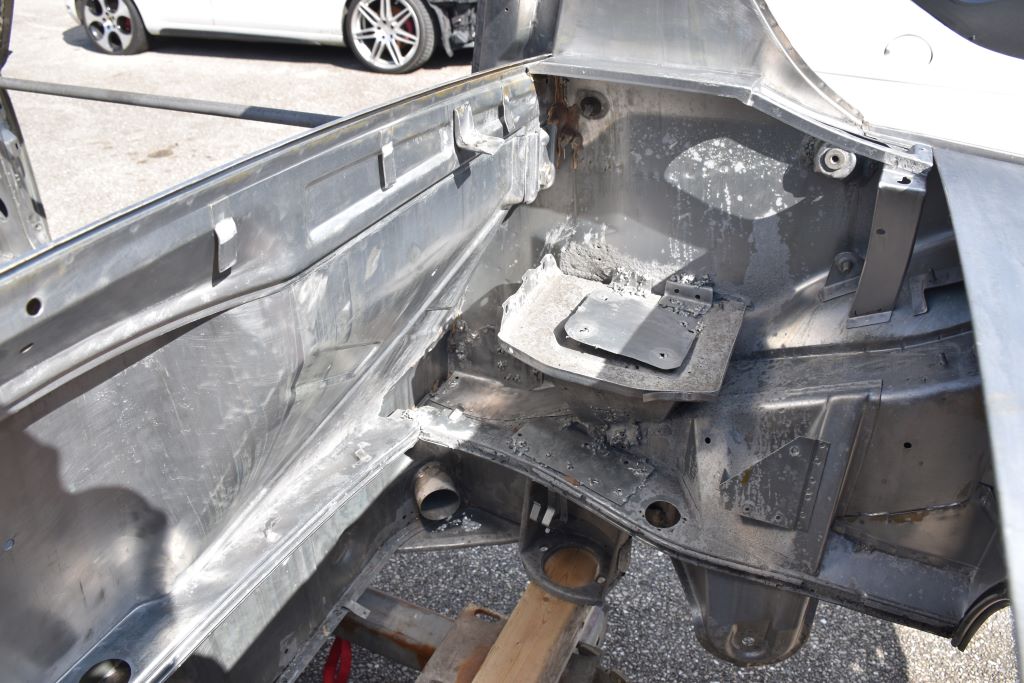 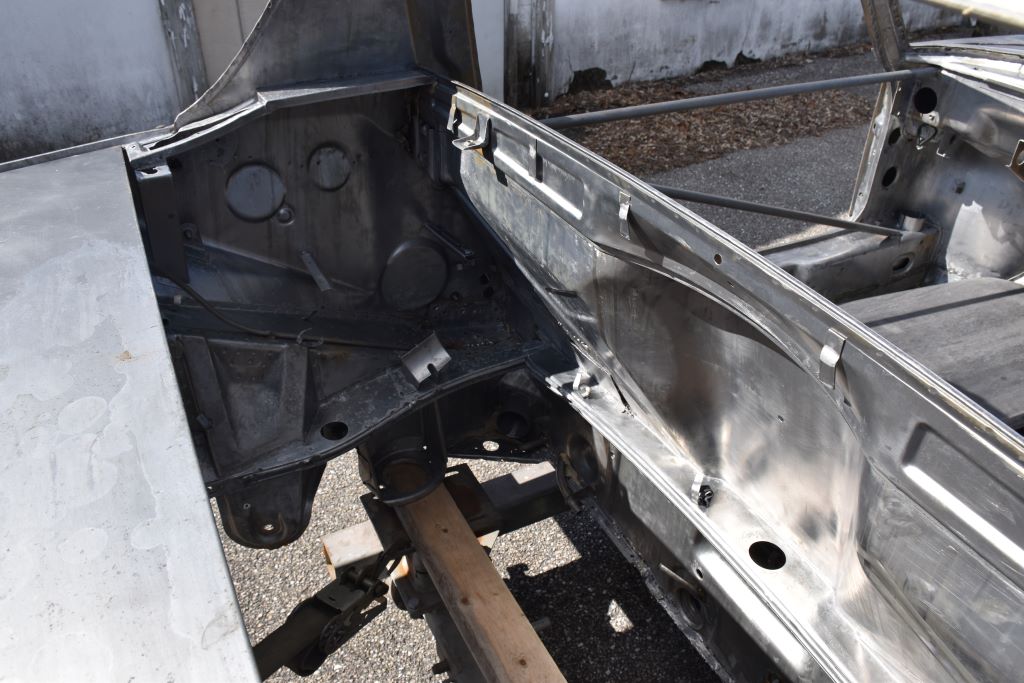 The trunk pans. 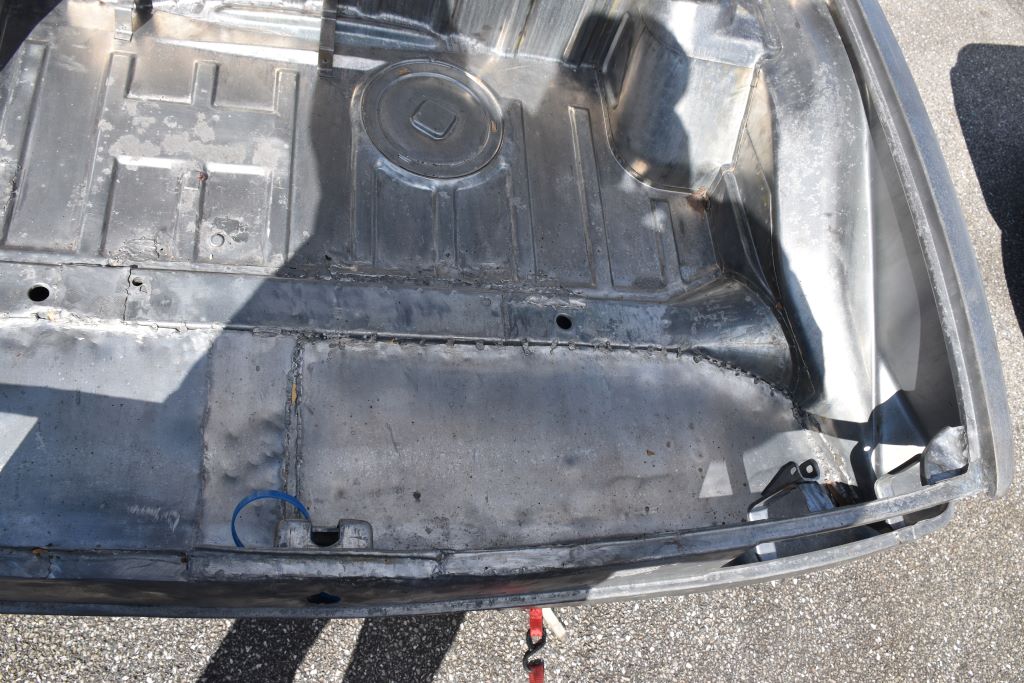 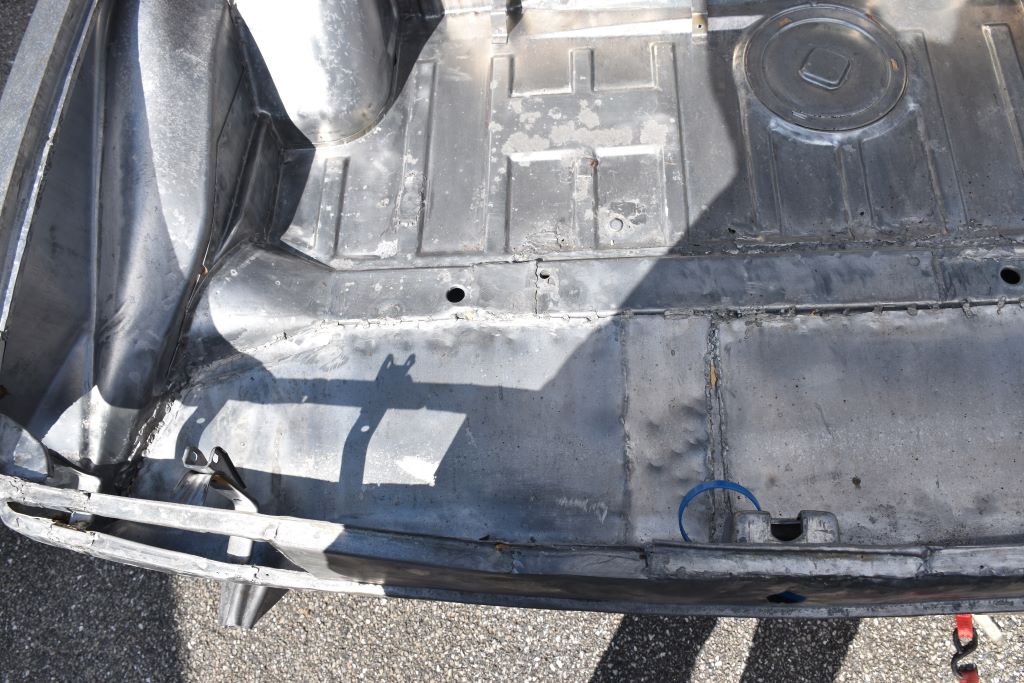 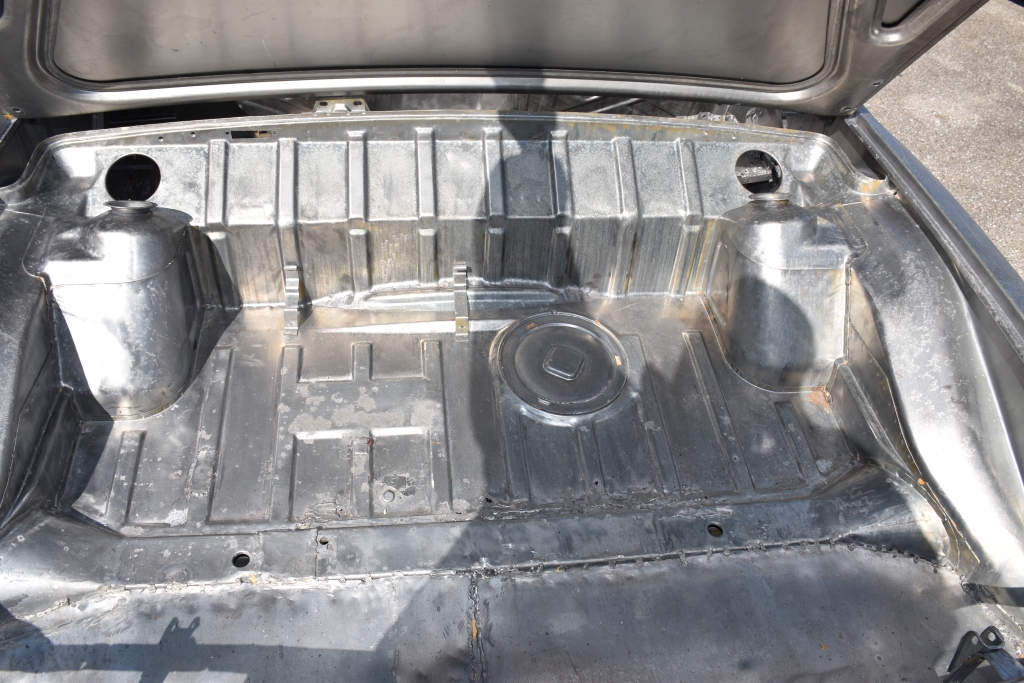 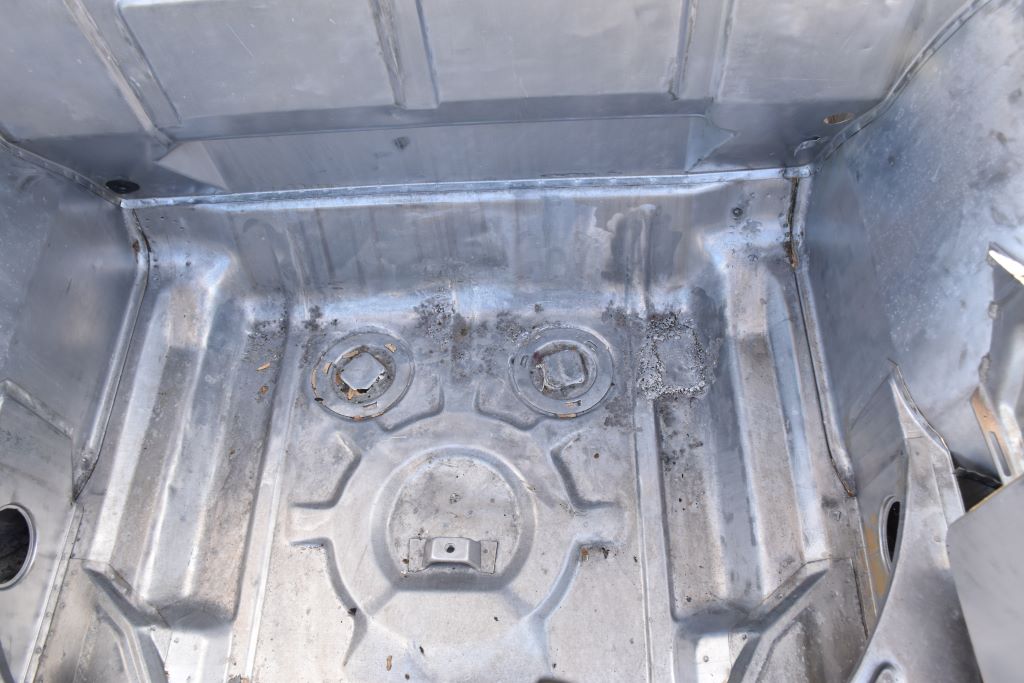 The headlight cavities.  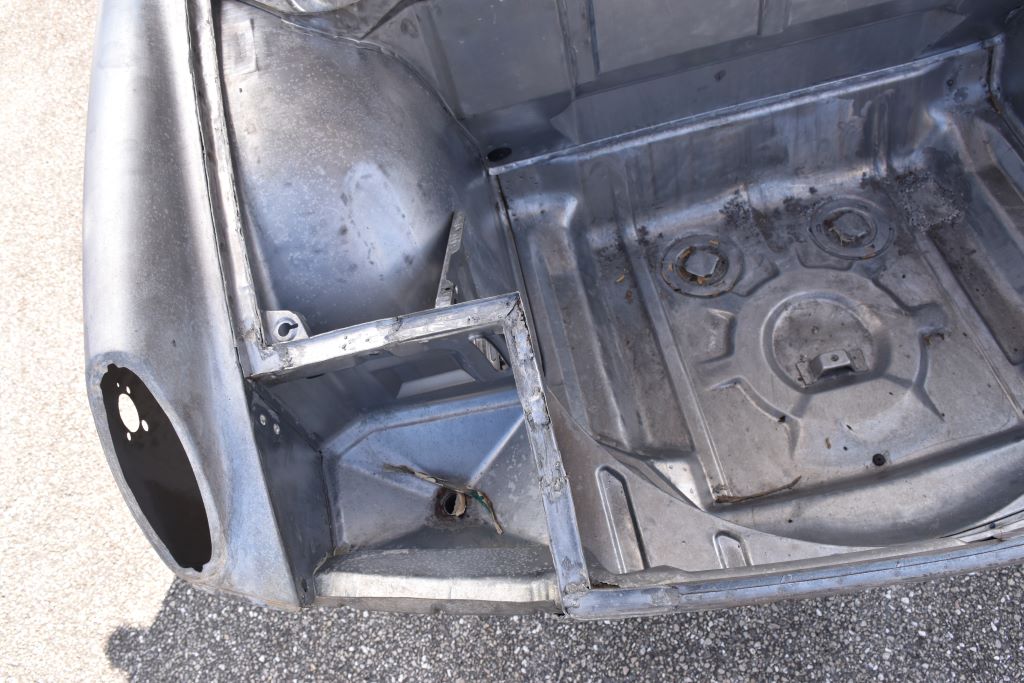 Wheel wells 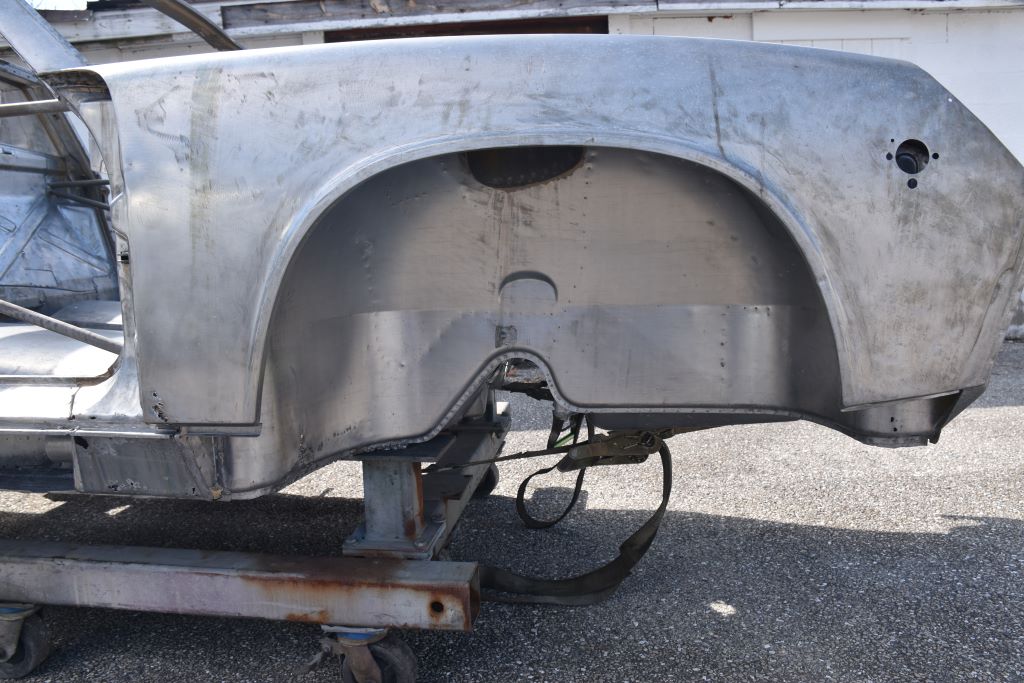 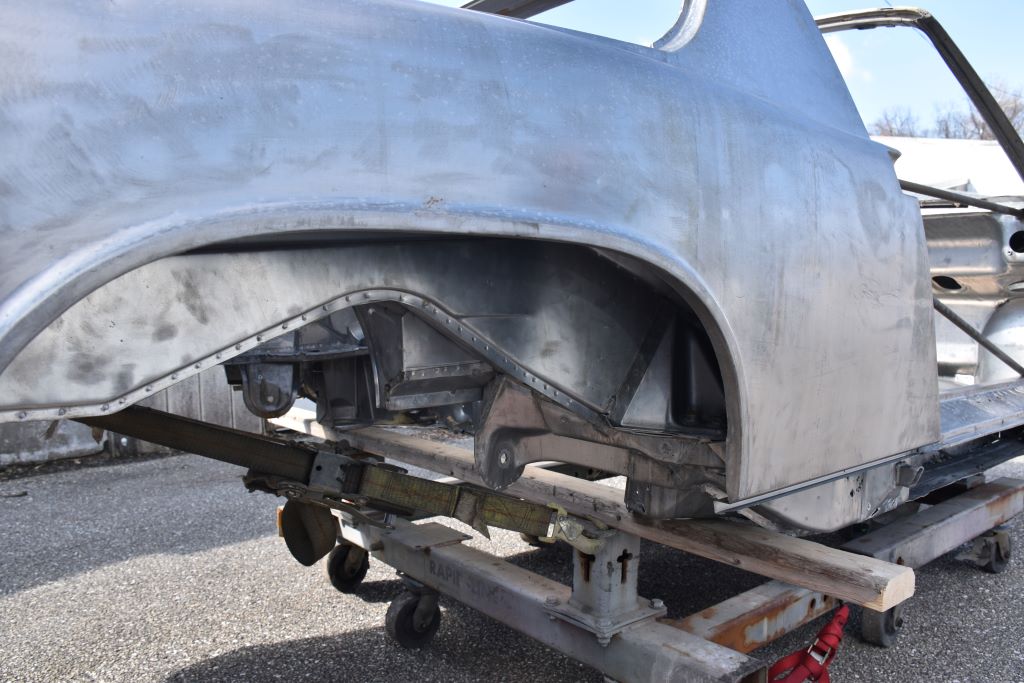 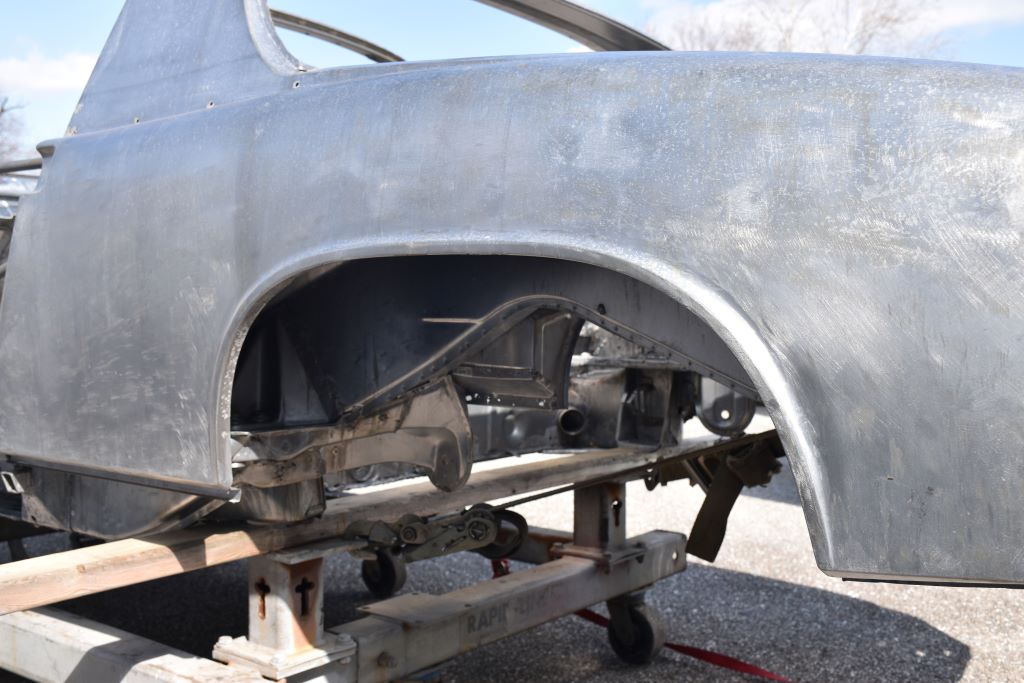 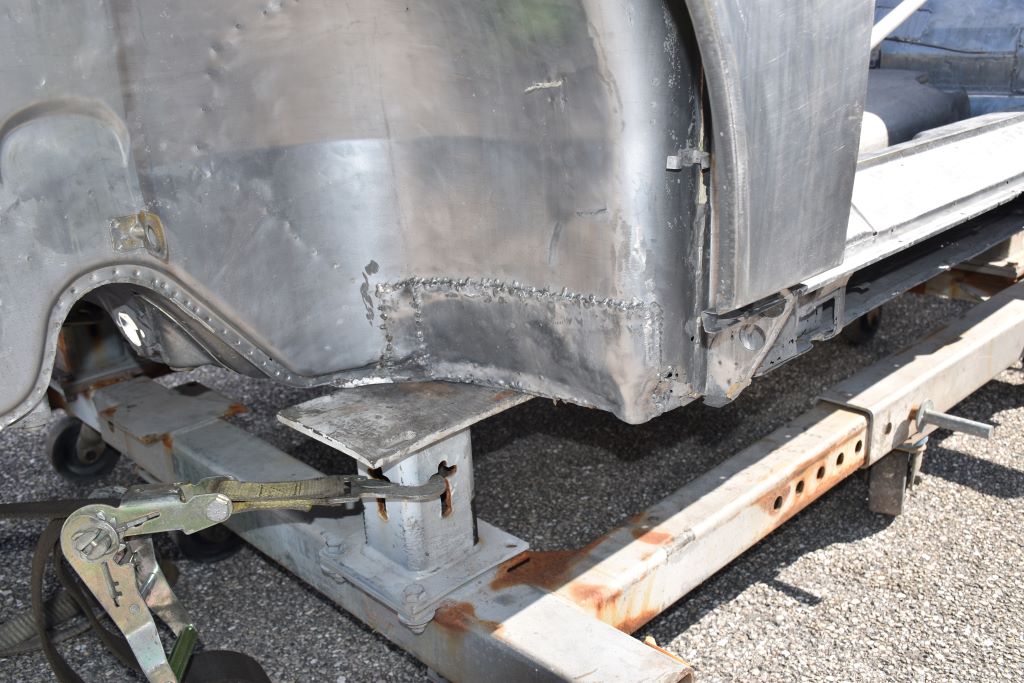 Rear end  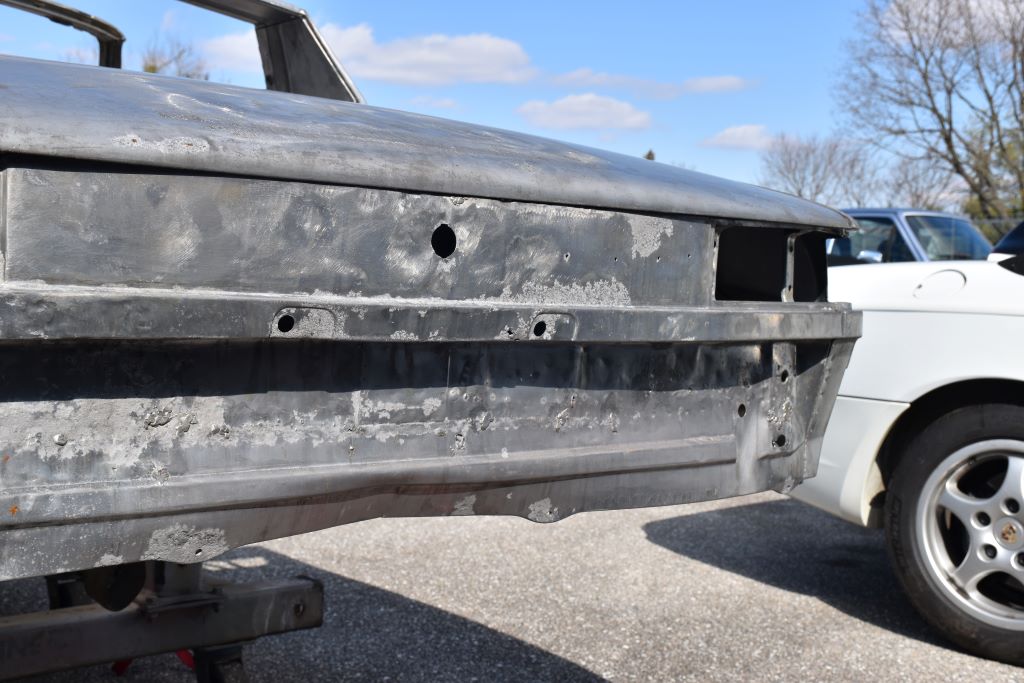 Gas tank cavity 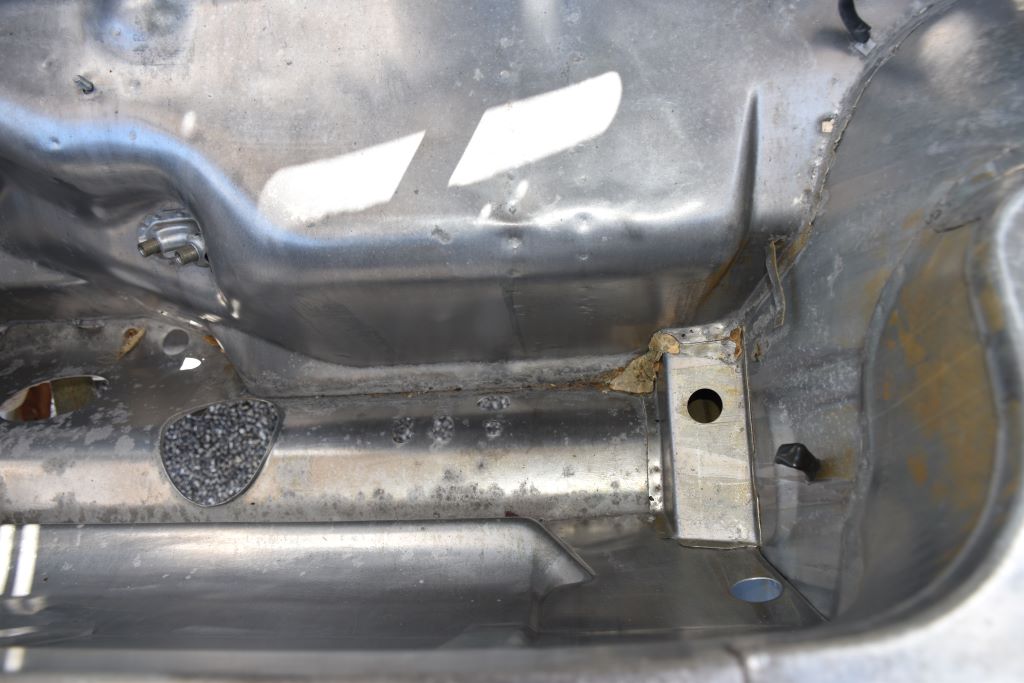 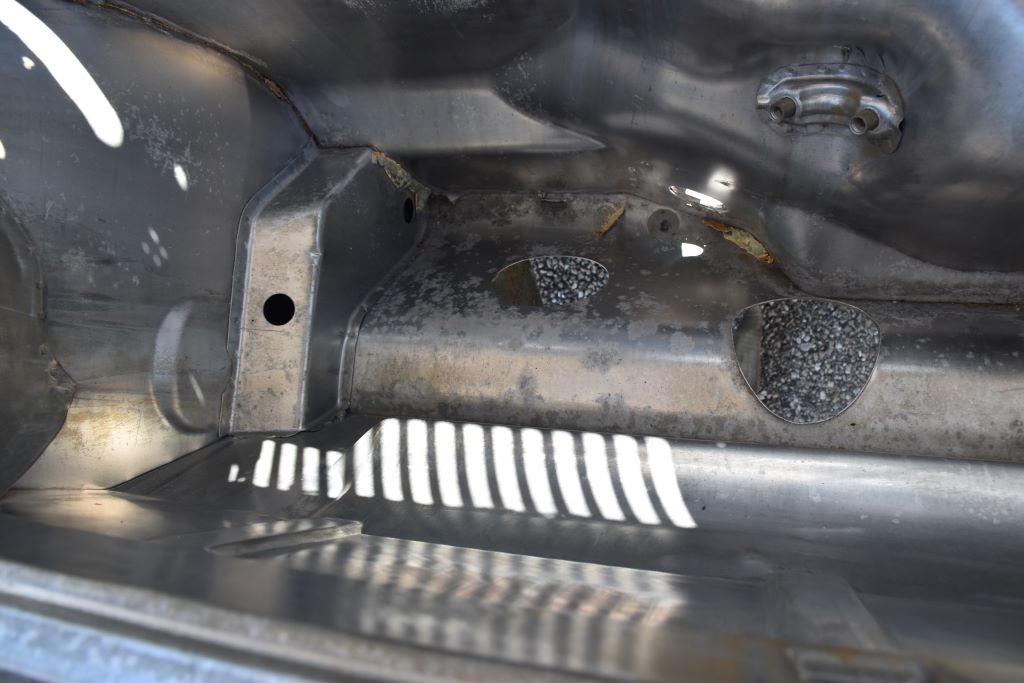 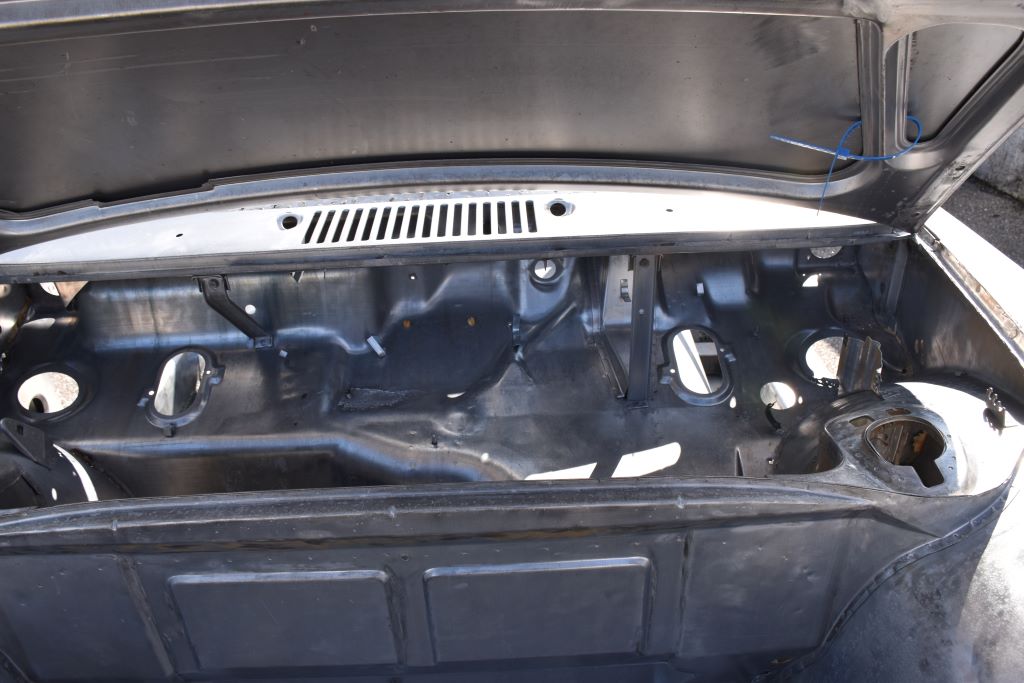 Longitudinals 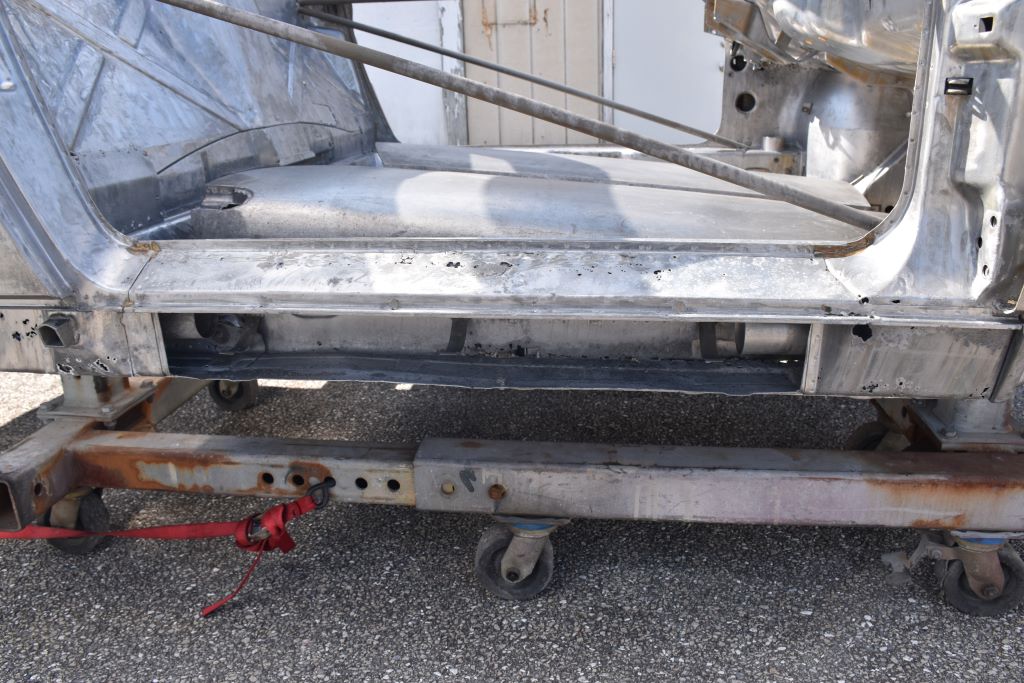 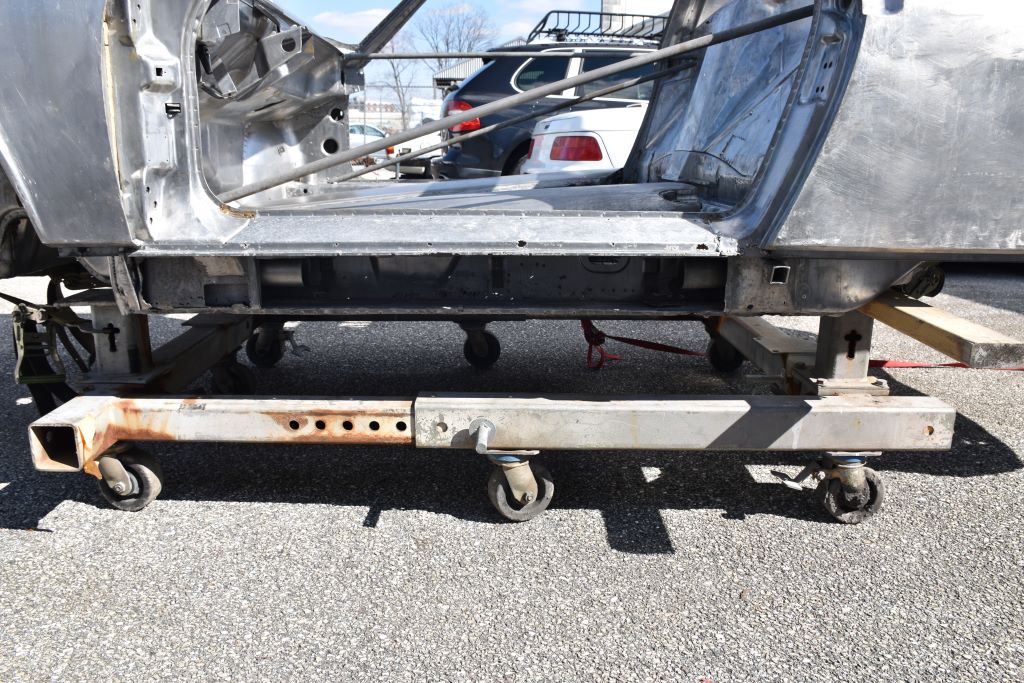 There is a bit of work to untwist some pretty crappy welding by the previous owners and a bunch of areas that need some repair. It could have been much worse. The chassis is now in the hands of Tony at Translog GT in York PA. All in all, I'm delighted!!! (IMG:style_emoticons/default/cheer.gif) (IMG:style_emoticons/default/aktion035.gif) |
|
|
|
|
3 User(s) are reading this topic (3 Guests and 0 Anonymous Users)
0 Members:

|
Lo-Fi Version | Time is now: 24th June 2026 - 01:15 PM |
Invision Power Board
v9.1.4 © 2026 IPS, Inc.