|
|
|
Porsche, and the Porsche crest are registered trademarks of Dr. Ing. h.c. F. Porsche AG.
This site is not affiliated with Porsche in any way. Its only purpose is to provide an online forum for car enthusiasts. All other trademarks are property of their respective owners. |
|
|

  |

| roundtwo |
 Jun 13 2021, 06:48 PM Jun 13 2021, 06:48 PM
Post
#1
|
|
Member  Group: Members Posts: 371 Joined: 9-February 20 From: Petaluma, CA Member No.: 23,905 Region Association: Central California |
Trying to get prepped for all my welding needs. Id like to Pre-fit the rear sway bar so I can determine exactly we’re to mount the bushing mount backing plates. I want to be sure they’re perpendicular to the sway bar in just the right spot
1. See first pick. Do I install the bushings in the drop links first and then install the ball ends? Or, do I install the ball cups on the balls and then have them pressed into the drop links? Any tips on how to get these hard bushings into the drop links? 2. Do I simply replace the new shock base metal rod labeled #1 with #2. See second pic I’ve read the rear sway bar mounts instructions on the Pelican Parts web site. Very helpful- He just doesn’t cover the actual sway bar assembly. Bar is 16mm. Installing on a 1970. Many thanks. 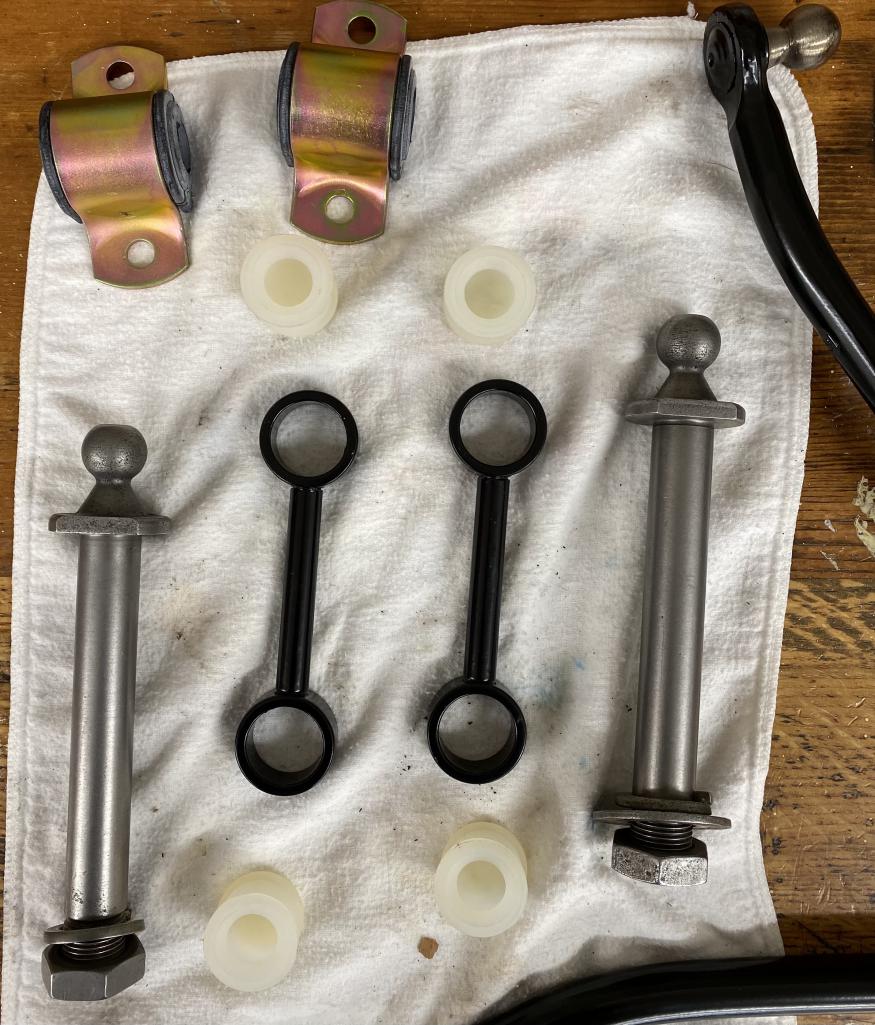 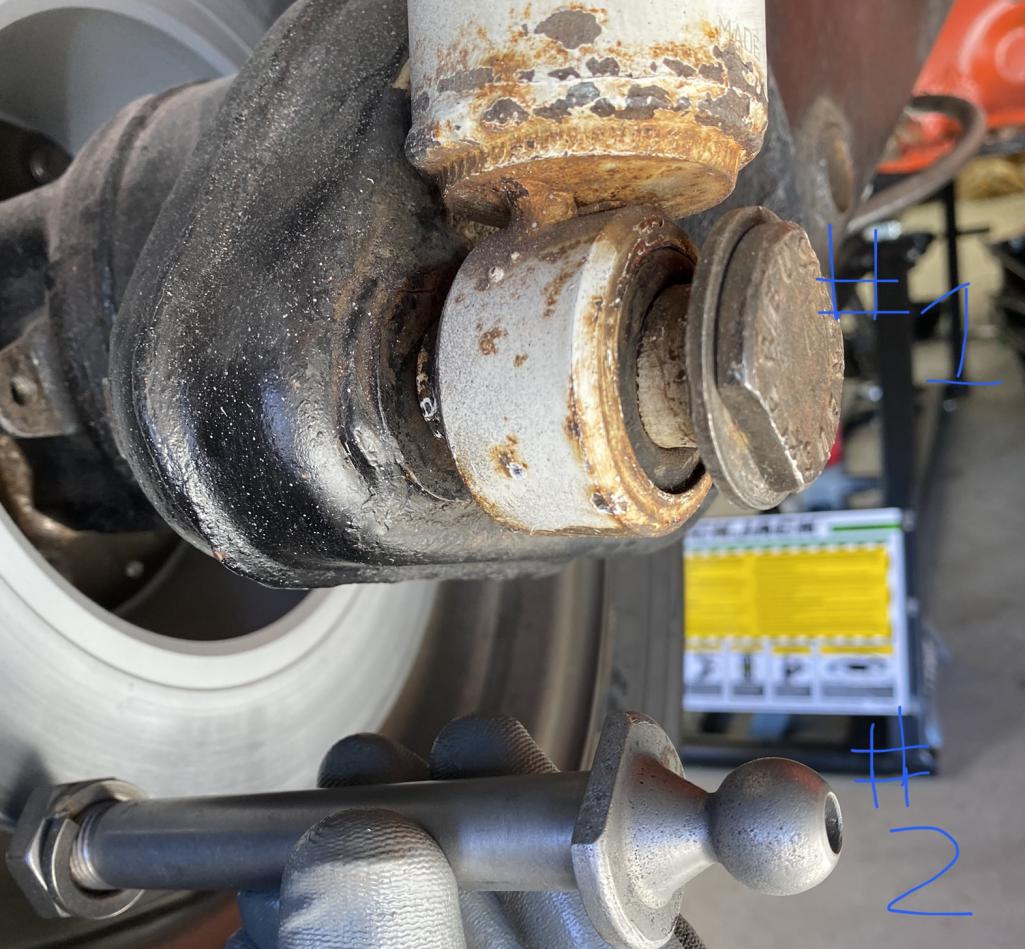 |
   |

 
|
| roundtwo |
Jun 13 2021, 06:50 PM
Post
#2
|
|
Member Group: Members Posts: 371 Joined: 9-February 20 From: Petaluma, CA Member No.: 23,905 Region Association: Central California |
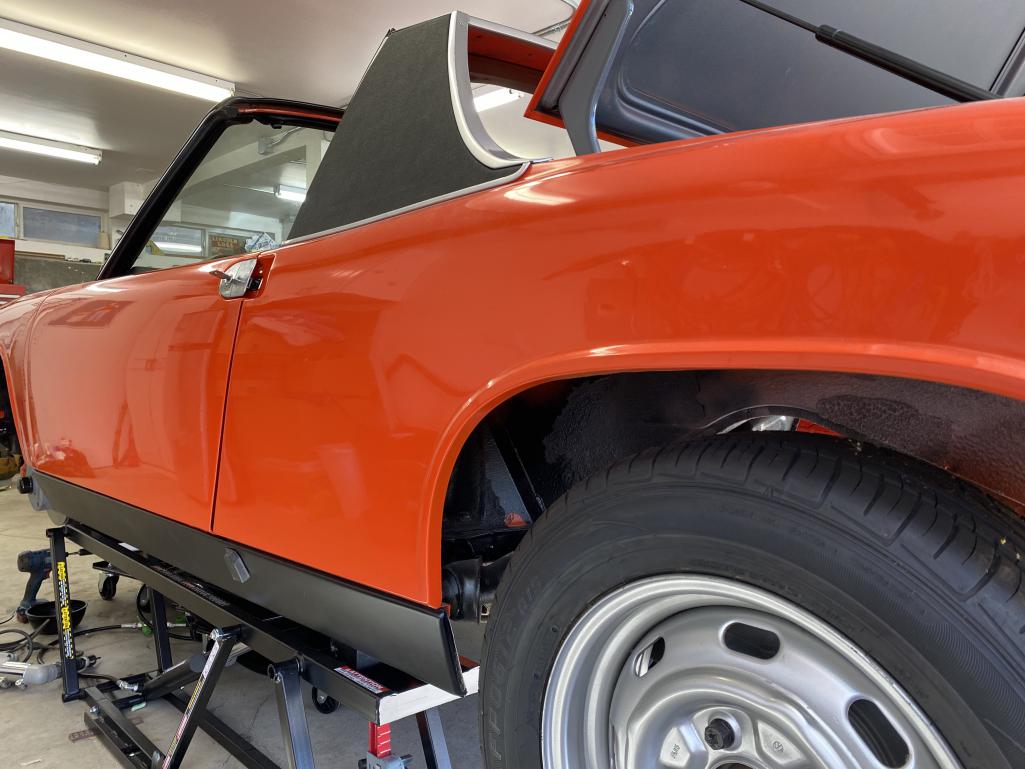
Adding sway bar on this build
 |
|
|
|
| ClayPerrine |
Jun 13 2021, 07:07 PM
Post
#3
|
|
Life's been good to me so far..... Group: Admin Posts: 16,567 Joined: 11-September 03 From: Hurst, TX. Member No.: 1,143 Region Association: NineFourteenerVille |
The big bolt with the ball end replaces the lower shock mount bolt.
The drop links need the bushings inserted with one facing each way. The bushings fit over the bar and the bar bolts to the sway bar plates under the back end. If the car didn't come from the factory with a sway bar, then the plates won't be there and have to be welded onto the chassis. https://914rubber.com/914ltd-early-rear-swa...unt-bracket-set (IMG:http://www.914world.com/bbs2/uploads_offsite/cdna3.zoeysite.com-1143-1623632826.1.jpg) Not my car.... (IMG:http://www.914world.com/bbs2/uploads/post-10825-1563835013.jpg) Check and see if you have the brackets. If not, just order a pair and get them welded on. Clay |
|
|
|
| bkrantz |
Jun 13 2021, 07:38 PM
Post
#4
|
|
914 Guru Group: Members Posts: 8,742 Joined: 3-August 19 From: SW Colorado Member No.: 23,343 Region Association: Rocky Mountains |
I put the bushings into the drop links first (used my hydraulic press), and then squeezed the links onto the trailing arms and sway bars, with a large clamp.
|
|
|
|
| barefoot |
Jun 14 2021, 11:12 AM
Post
#5
|
|
Senior Member Group: Members Posts: 1,531 Joined: 19-March 13 From: Charleston SC Member No.: 15,673 Region Association: South East States |
QUOTE(bkrantz @ Jun 13 2021, 09:38 PM)  I put the bushings into the drop links first (used my hydraulic press), and then squeezed the links onto the trailing arms and sway bars, with a large clamp. Soak the bushings in boiling water then they go in easy |
|
|
|
| ClayPerrine |
Jun 14 2021, 12:21 PM
Post
#6
|
|
Life's been good to me so far..... Group: Admin Posts: 16,567 Joined: 11-September 03 From: Hurst, TX. Member No.: 1,143 Region Association: NineFourteenerVille |
QUOTE(bkrantz @ Jun 13 2021, 08:38 PM) I put the bushings into the drop links first (used my hydraulic press), and then squeezed the links onto the trailing arms and sway bars, with a large clamp. I just use a huge pair of channel locks to push the links onto the balls. Clay |
|
|
|
| NARP74 |
Jun 14 2021, 12:41 PM
Post
#7
|
|
Senior Member Group: Members Posts: 1,480 Joined: 29-July 20 From: Colorado, USA, Earth Member No.: 24,549 Region Association: Rocky Mountains |
I just went through this, mine had the mounting brackets which made it easier. I did everything on the car which made it harder. Do as much on the bench as possible. I used boiling water and then a little liquid soap and pressed them on. I removed the muffler to give me as much room as possible. Good luck...
|
 |
|
| roundtwo |
Jun 14 2021, 07:39 PM
Post
#8
|
|
Member Group: Members Posts: 371 Joined: 9-February 20 From: Petaluma, CA Member No.: 23,905 Region Association: Central California |
Appreciate all the secrets!
Able to get in the shock mounts in easily. Have the plates/ backing plates on the bench after locating the destination pretty darn close on the sheet metal. That’s where the fun ended. Trying to press in the bushings was a disaster. Even with preheating the bushings, Lots of slippery stuff on the press the bushings kept mushrooming, distorting in shape wanting to crease on themselves. I Tried putting the perfect size socket in the balm cup to keep its shape during pressing. A no go! |
|
|
|
| 76-914 |
Jun 14 2021, 08:55 PM
Post
#9
|
|
Repeat Offender & Resident Subaru Antagonist Group: Members Posts: 13,920 Joined: 23-January 09 From: Temecula, CA Member No.: 9,964 Region Association: Southern California |
Do like Clay said. A giant pair of channel locks and it helps to lube the metal ball ends. I used glycerin. I didn't need to heat them in water but it won't hurt if you do. (IMG:style_emoticons/default/beerchug.gif)
|
|
|
|
| roundtwo |
Jun 14 2021, 10:43 PM
Post
#10
|
|
Member Group: Members Posts: 371 Joined: 9-February 20 From: Petaluma, CA Member No.: 23,905 Region Association: Central California |
QUOTE(76-914 @ Jun 14 2021, 07:55 PM) Do like Clay said. A giant pair of channel locks and it helps to lube the metal ball ends. I used glycerin. I didn't need to heat them in water but it won't hurt if you do. (IMG:style_emoticons/default/beerchug.gif) I haven't made it that far. My hurdle is getting the cup bushings into the drop links. Good to know when I make it to the next step. Thanks y'all , Todd |
|
|
|
| LefthandRev |
Dec 22 2021, 03:58 PM
Post
#11
|
|
Member Group: Members Posts: 87 Joined: 9-August 21 From: Seattle, WA Member No.: 25,787 Region Association: Pacific Northwest |
I used a heat gun, a dull flat head screwdriver, and a bench vice to get them started.
Open-side of the bushing first. Hold the heat gun, warm up the bushing. No higher than 200F, or you start to bubble the silicone. Push the lip through the ring and work it in slowly until about 90% (or all if you can manage) is started through the ring. Pull the drop-arm out of the vice and with luck, the bushing will not pop off. Now, put the bushing into the vice along the thin portion and tighten it down. Using your screwdriver, inside it into the bushing and pull the lip of the bushing outward through the ring of the arm until it's fully seated. Rinse, wash, repeat, curse, repeat, curse, repeat, curse... |
|
|
|
| 914werke |
Dec 22 2021, 04:53 PM
Post
#12
|
|
"I got blisters on me fingers" Group: Members Posts: 11,710 Joined: 22-March 03 From: USofA Member No.: 453 Region Association: Pacific Northwest |
QUOTE(76-914 @ Jun 14 2021, 06:55 PM) . I used glycerin. I didn't need to heat them in water but it won't hurt if you do. (IMG:style_emoticons/default/beerchug.gif) Good Call! Its worth repeating, use of a bit of lube is helpful but do not use a petroleum based grease (I see this too often) Glycerin or plain 'ol dish soap will do the trick! |
|
|
|
| TRP |
Oct 18 2025, 11:19 PM
Post
#13
|
|
Member Group: Members Posts: 424 Joined: 2-September 23 From: Morgan Hill, CA Member No.: 27,559 Region Association: None |
QUOTE(LefthandRev @ Dec 22 2021, 02:58 PM) I used a heat gun, a dull flat head screwdriver, and a bench vice to get them started. Open-side of the bushing first. Hold the heat gun, warm up the bushing. No higher than 200F, or you start to bubble the silicone. Push the lip through the ring and work it in slowly until about 90% (or all if you can manage) is started through the ring. Pull the drop-arm out of the vice and with luck, the bushing will not pop off. Now, put the bushing into the vice along the thin portion and tighten it down. Using your screwdriver, inside it into the bushing and pull the lip of the bushing outward through the ring of the arm until it's fully seated. Rinse, wash, repeat, curse, repeat, curse, repeat, curse... This is a pretty old thread, but this worked like a charm. Thank you! Ted |
|
|
|
| wonkipop |
Oct 19 2025, 12:08 AM
Post
#14
|
|
914 Guru Group: Members Posts: 5,639 Joined: 6-May 20 From: north antarctica Member No.: 24,231 Region Association: NineFourteenerVille |
QUOTE(TRP @ Oct 18 2025, 11:19 PM) QUOTE(LefthandRev @ Dec 22 2021, 02:58 PM) I used a heat gun, a dull flat head screwdriver, and a bench vice to get them started. Open-side of the bushing first. Hold the heat gun, warm up the bushing. No higher than 200F, or you start to bubble the silicone. Push the lip through the ring and work it in slowly until about 90% (or all if you can manage) is started through the ring. Pull the drop-arm out of the vice and with luck, the bushing will not pop off. Now, put the bushing into the vice along the thin portion and tighten it down. Using your screwdriver, inside it into the bushing and pull the lip of the bushing outward through the ring of the arm until it's fully seated. Rinse, wash, repeat, curse, repeat, curse, repeat, curse... This is a pretty old thread, but this worked like a charm. Thank you! Ted you wont regret a front and rear sway bar install on your 1.8 if thats what you have done. (IMG:style_emoticons/default/beerchug.gif) (IMG:style_emoticons/default/beerchug.gif) (IMG:style_emoticons/default/beerchug.gif) grins from ear to ear. after all its a 1.8 and going around corners insanely flat is just about it --------if you know what i mean -------but its grins and grins and more grins. (IMG:style_emoticons/default/biggrin.gif) (IMG:style_emoticons/default/beerchug.gif) i have a 1.8 with the factory sway bars original. the first owner knew what he (or was it she?) was doing when they ticked the box on a base spec 74 1.8. that and the obscure but very practical storage box. who needs a console with all those guages. they just make you worry you are about to blow the engine up or cause the fan belt to flick off. and time, well you got a wrist watch for worrying about that. but you got to have somewhere to chuck your cigs or your hand bag. (IMG:style_emoticons/default/biggrin.gif) seriously the original owners on mine sure had taste in spades ticking that one "performance" box. |
|
|
|
| TRP |
Oct 19 2025, 09:12 PM
Post
#15
|
|
Member Group: Members Posts: 424 Joined: 2-September 23 From: Morgan Hill, CA Member No.: 27,559 Region Association: None |
Today I wrapped up the rear sway bar today. This week I will finish the front swaybar install. Should be awesome. (IMG:style_emoticons/default/smile.gif)
|
|
|
|
|
1 User(s) are reading this topic (1 Guests and 0 Anonymous Users)
0 Members:

|
Lo-Fi Version | Time is now: 28th July 2026 - 07:41 AM |
Invision Power Board
v9.1.4 © 2026 IPS, Inc.