|
|
|
Porsche, and the Porsche crest are registered trademarks of Dr. Ing. h.c. F. Porsche AG.
This site is not affiliated with Porsche in any way. Its only purpose is to provide an online forum for car enthusiasts. All other trademarks are property of their respective owners. |
|
|

  |

| Puebloswatcop |
 Jun 11 2025, 06:19 PM Jun 11 2025, 06:19 PM
Post
#1061
|
|
Senior Member  Group: Members Posts: 1,690 Joined: 27-December 14 From: Mineola, Texas Member No.: 18,258 Region Association: Southwest Region |
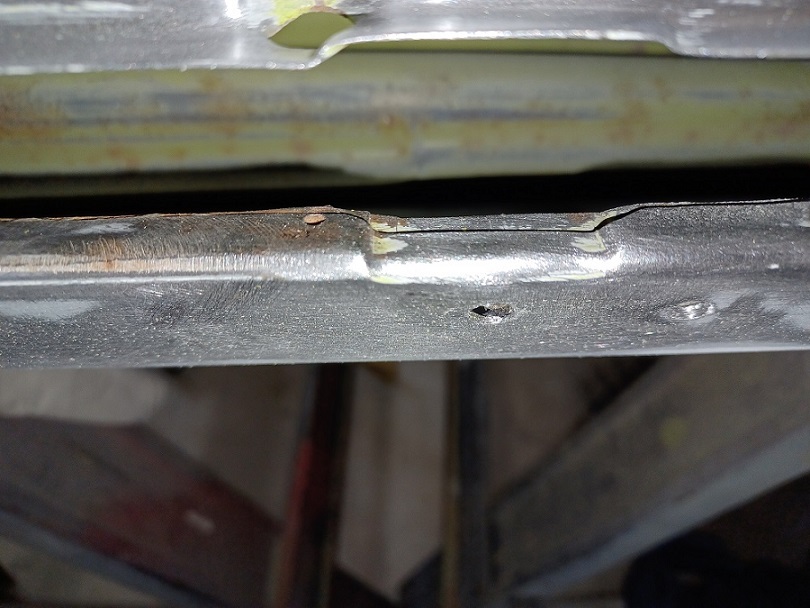
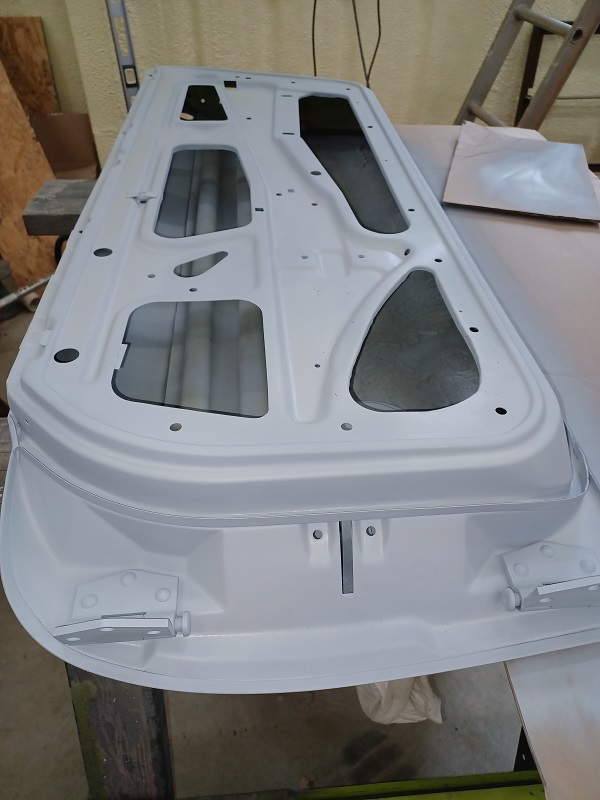
There are several nooks and crannises for rust and other garbage to hide in these doors, like inside the window channel at the top of the door.
 |
   |

 
|
| Puebloswatcop |
Jun 11 2025, 06:24 PM
Post
#1062
|
|
Senior Member Group: Members Posts: 1,690 Joined: 27-December 14 From: Mineola, Texas Member No.: 18,258 Region Association: Southwest Region |
There is no way to reach every seam on these doors, short of tearing them completely apart. Since the door was structually sound, I used a wire wheel to get aas many of these places as clean as I could. In the end, I am pretty happy with the door at this point, but then I thought more about how I can treat existing rust and prevent future issues.
  |
|
|
|
| Puebloswatcop |
Jun 11 2025, 06:30 PM
Post
#1063
|
|
Senior Member Group: Members Posts: 1,690 Joined: 27-December 14 From: Mineola, Texas Member No.: 18,258 Region Association: Southwest Region |
So I broke out the Ospho. My father in law swore by this stuff when he was restoring cars and he lived near the ocean. So I decided to treat the hard to reach areas.
 |
|
|
|
| Puebloswatcop |
Jun 11 2025, 06:35 PM
Post
#1064
|
|
Senior Member Group: Members Posts: 1,690 Joined: 27-December 14 From: Mineola, Texas Member No.: 18,258 Region Association: Southwest Region |
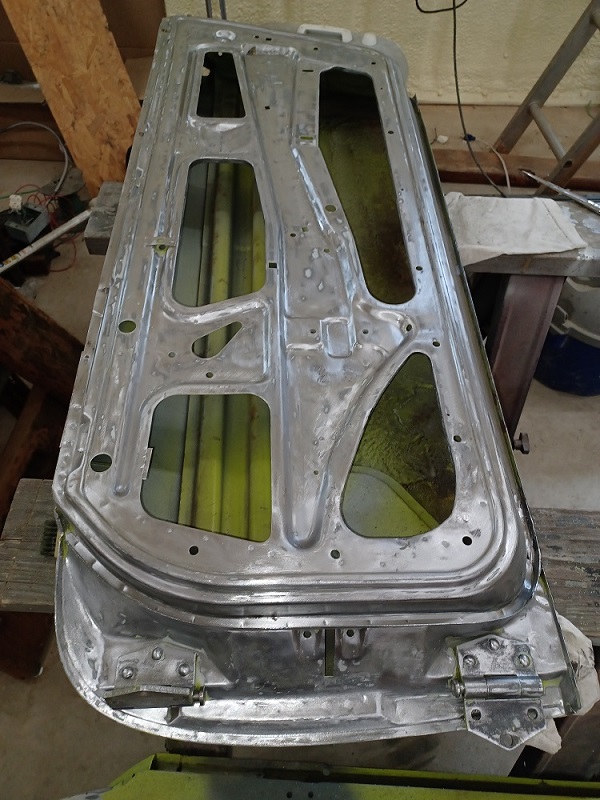
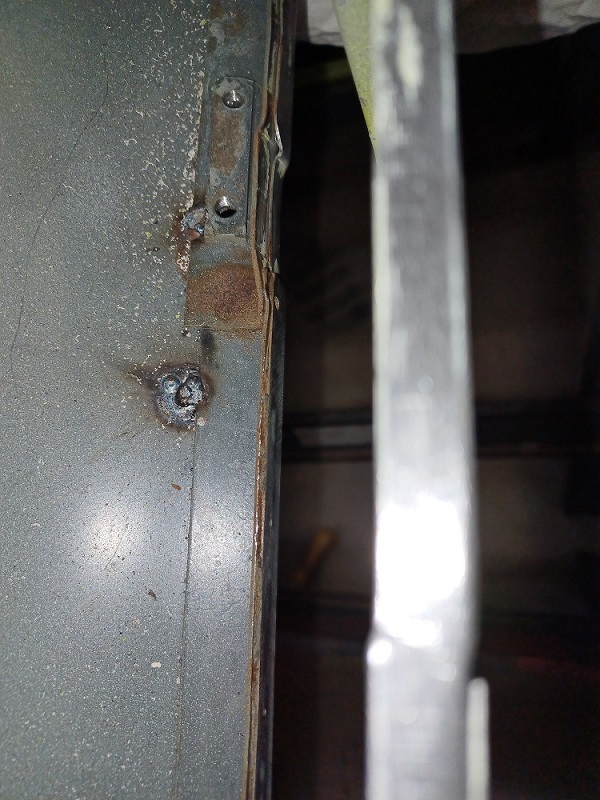
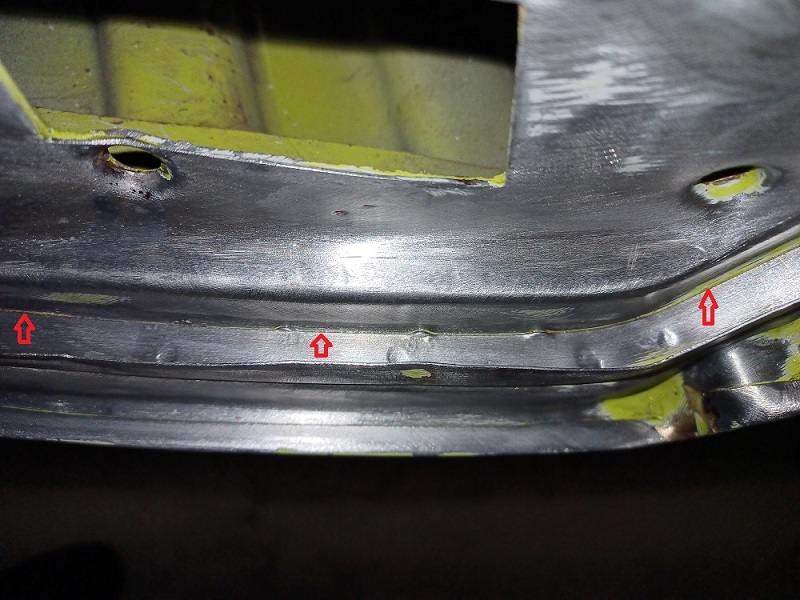
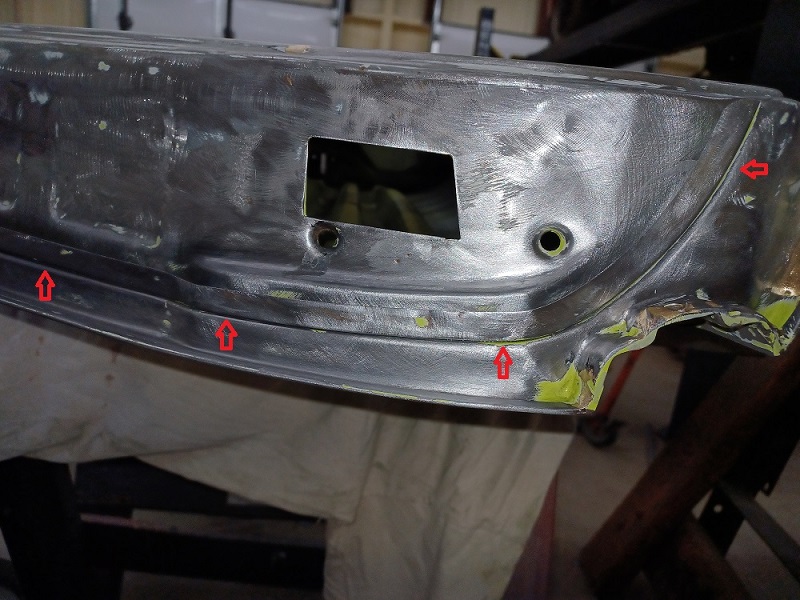
I started by getting it into the seam where the door skin is attached to the door frame at the bottm of the door, Then I did all of the front and rear seams and the area that I repaired where the mirror mounts are. I also painted it into the seem at the window channel.
  |
|
|
|
| Puebloswatcop |
Jun 11 2025, 06:40 PM
Post
#1065
|
|
Senior Member Group: Members Posts: 1,690 Joined: 27-December 14 From: Mineola, Texas Member No.: 18,258 Region Association: Southwest Region |
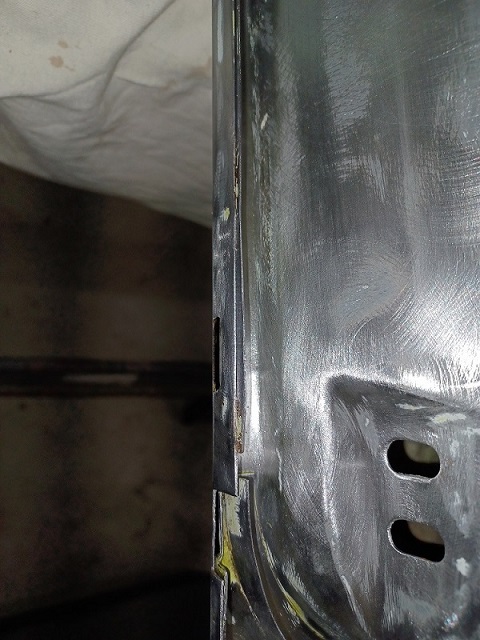
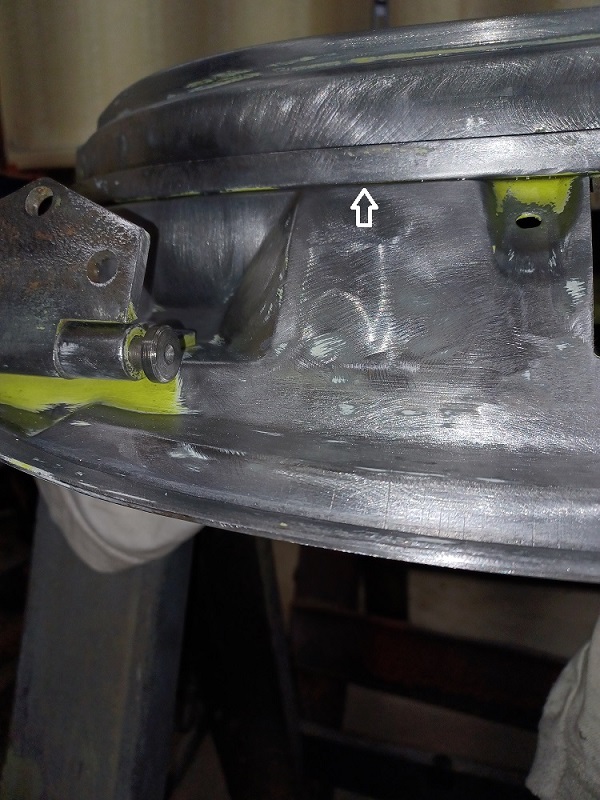
Lastly I put it into the channels at the front and rear of the door where the door seal goes. I painted it in from both the inside and outside seams of the channel to make sure I got good penetration all the way under the channel. I give that 24 hrs to dry and then I'll go back and put a fine bead of seam sealer along the channels to keep any water out od all of the seams.
   |
|
|
|
| BillC |
Jun 11 2025, 07:14 PM
Post
#1066
|
|
Senior Member Group: Members Posts: 699 Joined: 24-April 15 From: Silver Spring, MD Member No.: 18,667 Region Association: MidAtlantic Region |
That's a great way to treat your doors. I really like Ospho.
However, I recommend that, before you put seam sealer on them, you go over all the seams with a heat gun or torch and make sure they are completely dried out. I have read too many stories of people who dipped their cars to remove the rust and then had their paint fail months later, because there was still liquid in the seams. This includes cars that were allowed to dry for at least a month. Years ago, I had some parts dipped and, because I had heard those stories, I went over the seams with a propane torch, just enough to heat the metal. Even though I had let the parts sit a week, I still heard some sizzling as the last little bits of fluid boiled out. |
|
|
|
| friethmiller |
Jun 11 2025, 09:27 PM
Post
#1067
|
|
Senior Member Group: Members Posts: 1,101 Joined: 10-February 19 From: Austin, TX Member No.: 22,863 Region Association: Southwest Region |
Excellent work, Kevin. Ospho works well for getting in the cracks. I recommend trying Rust Bullet’s Metal Blast. It’s even better, IMHO!
|
|
|
|
| Puebloswatcop |
Jun 12 2025, 08:47 AM
Post
#1068
|
|
Senior Member Group: Members Posts: 1,690 Joined: 27-December 14 From: Mineola, Texas Member No.: 18,258 Region Association: Southwest Region |
QUOTE(BillC @ Jun 11 2025, 08:14 PM)  That's a great way to treat your doors. I really like Ospho. However, I recommend that, before you put seam sealer on them, you go over all the seams with a heat gun or torch and make sure they are completely dried out. I have read too many stories of people who dipped their cars to remove the rust and then had their paint fail months later, because there was still liquid in the seams. This includes cars that were allowed to dry for at least a month. Years ago, I had some parts dipped and, because I had heard those stories, I went over the seams with a propane torch, just enough to heat the metal. Even though I had let the parts sit a week, I still heard some sizzling as the last little bits of fluid boiled out. Thanks for the info Bill. I didn't think about that. Guess the torch will get a workout this morning. |
|
|
|
| Puebloswatcop |
Jun 12 2025, 08:48 AM
Post
#1069
|
|
Senior Member Group: Members Posts: 1,690 Joined: 27-December 14 From: Mineola, Texas Member No.: 18,258 Region Association: Southwest Region |
QUOTE(friethmiller @ Jun 11 2025, 10:27 PM) Excellent work, Kevin. Ospho works well for getting in the cracks. I recommend trying Rust Bullet’s Metal Blast. It’s even better, IMHO! Is it available locally Fred? |
|
|
|
| Puebloswatcop |
Jun 12 2025, 03:31 PM
Post
#1070
|
|
Senior Member Group: Members Posts: 1,690 Joined: 27-December 14 From: Mineola, Texas Member No.: 18,258 Region Association: Southwest Region |
After taking Bill's advice, I blew out the channels and seams with compressed air and then used the torch to heat things up to insure all the Ospho was dry. I then painted the inner surface of the door with 2 coats of self etching primer.
  |
|
|
|
| Puebloswatcop |
Jun 13 2025, 08:26 PM
Post
#1071
|
|
Senior Member Group: Members Posts: 1,690 Joined: 27-December 14 From: Mineola, Texas Member No.: 18,258 Region Association: Southwest Region |
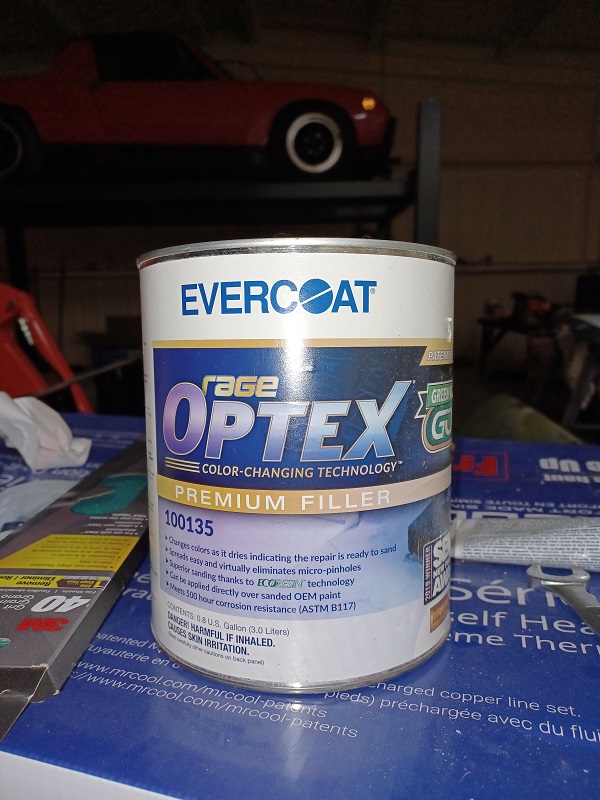
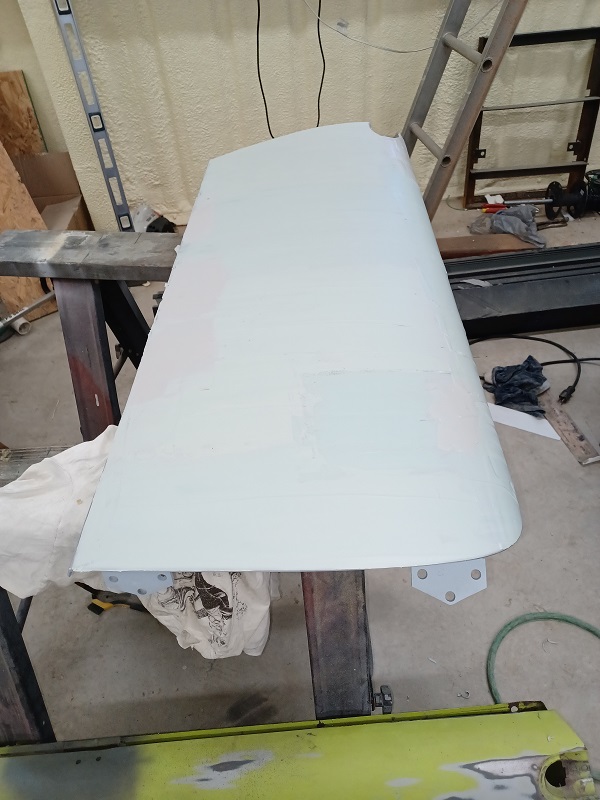
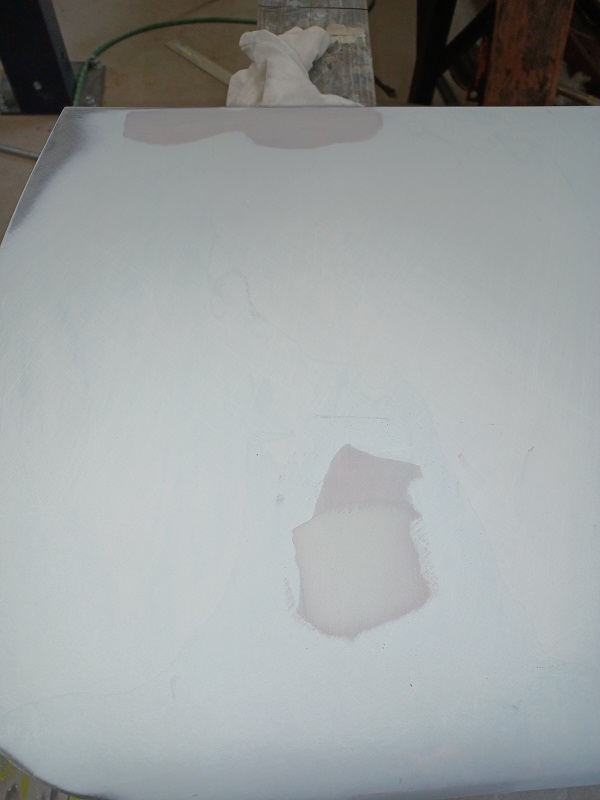
Today I skim coated the door. I have been using Evercoat Optex. One thing I like about it is that it changes colors as it dries. When it reaches a greenish gray color you know it has dried enough to sand. It does start to set up rather quickly though, so I do sections of the work so I don't waste product.
 |
|
|
|
| Puebloswatcop |
Jun 13 2025, 08:30 PM
Post
#1072
|
|
Senior Member Group: Members Posts: 1,690 Joined: 27-December 14 From: Mineola, Texas Member No.: 18,258 Region Association: Southwest Region |
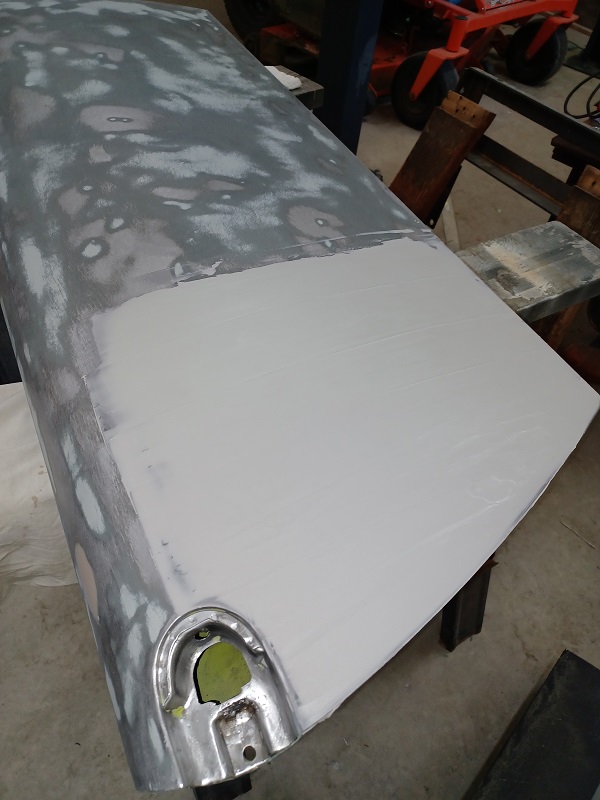
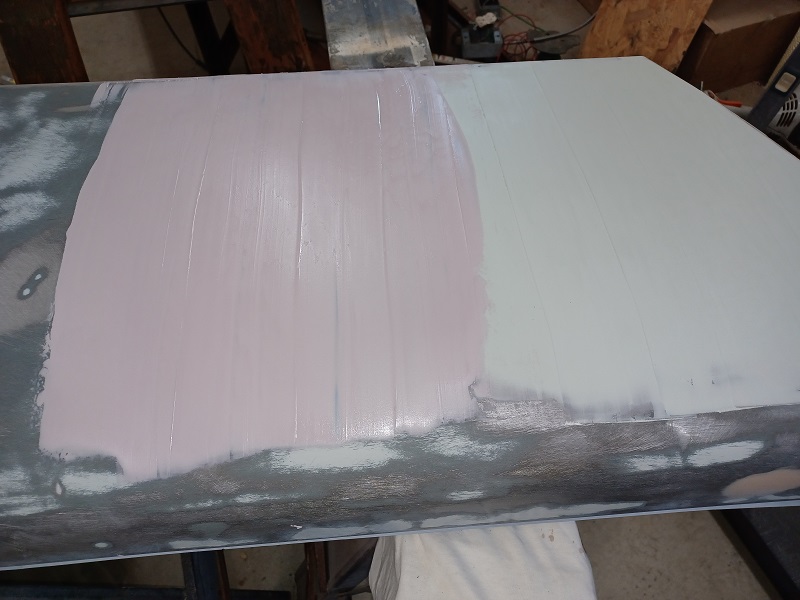
Here is a couple of pics to show how it changes. The first section was done earlier in the day. I let it set up while I ran to town. When I got back I did the remainder of the door ( in sections) so the second picture shows the difference in the filler when wet and when completely dry.
  |
|
|
|
| Puebloswatcop |
Jun 13 2025, 08:34 PM
Post
#1073
|
|
Senior Member Group: Members Posts: 1,690 Joined: 27-December 14 From: Mineola, Texas Member No.: 18,258 Region Association: Southwest Region |
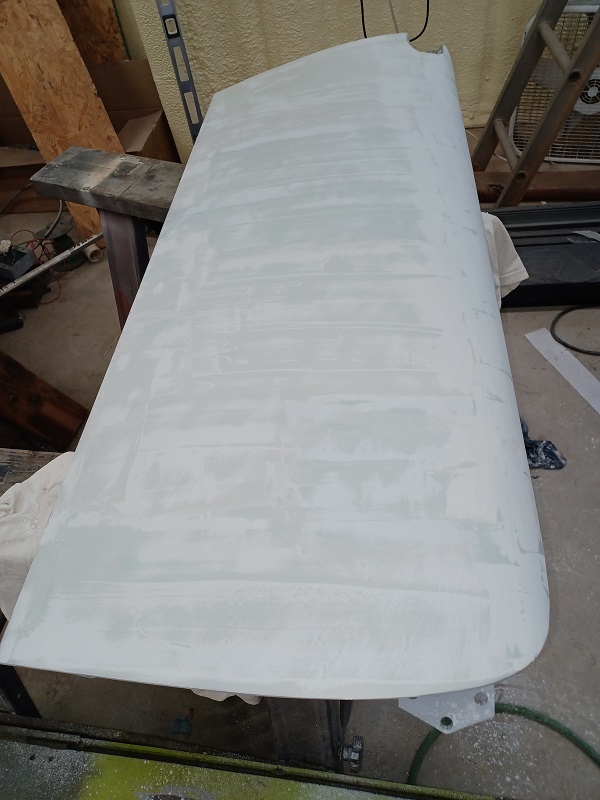
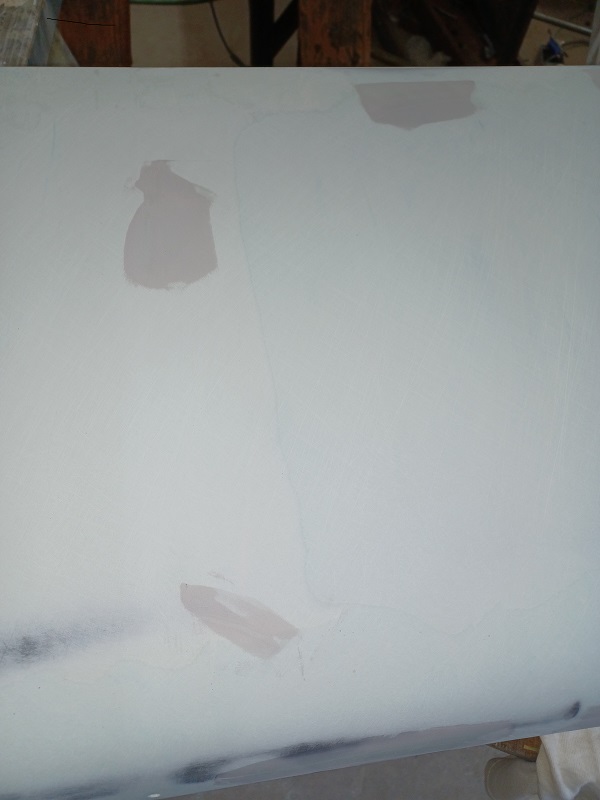
I finished coating the entire door and you can see there are still some pink colored areas that are drying. After about 30 minutes though it was ready to sand. It was still a bit soft in the high spots, making it easy to sand those away.
  |
|
|
|
| Puebloswatcop |
Jun 13 2025, 08:38 PM
Post
#1074
|
|
Senior Member Group: Members Posts: 1,690 Joined: 27-December 14 From: Mineola, Texas Member No.: 18,258 Region Association: Southwest Region |
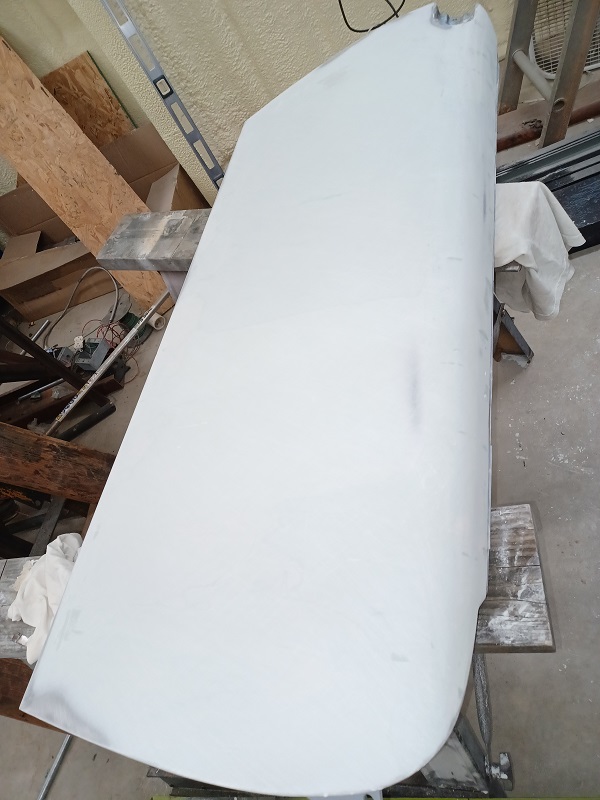
I was going to quit at that point, but I figured what the heck, I was having fun watching the transformation. So I kept sanding. I used an 18 inch sanding block with 80 grit and got most of the door sanded out. I did have a couple of low spots, so tomorrow I will go back in and re-fill those feather them in and then switch to 100 grit.
  |
|
|
|
| friethmiller |
Jun 14 2025, 07:55 AM
Post
#1075
|
|
Senior Member Group: Members Posts: 1,101 Joined: 10-February 19 From: Austin, TX Member No.: 22,863 Region Association: Southwest Region |
QUOTE(Puebloswatcop @ Jun 12 2025, 08:48 AM) QUOTE(friethmiller @ Jun 11 2025, 10:27 PM) Excellent work, Kevin. Ospho works well for getting in the cracks. I recommend trying Rust Bullet’s Metal Blast. It’s even better, IMHO! Is it available locally Fred? Not sure. I get mine off Amazon. |
|
|
|
| friethmiller |
Jun 14 2025, 08:05 AM
Post
#1076
|
|
Senior Member Group: Members Posts: 1,101 Joined: 10-February 19 From: Austin, TX Member No.: 22,863 Region Association: Southwest Region |
QUOTE(Puebloswatcop @ Jun 13 2025, 08:38 PM) I was going to quit at that point, but I figured what the heck, I was having fun watching the transformation. So I kept sanding. I used an 18 inch sanding block with 80 grit and got most of the door sanded out. I did have a couple of low spots, so tomorrow I will go back in and re-fill those feather them in and then switch to 100 grit. This is how I do my panels (IMG:style_emoticons/default/aktion035.gif). Saves so much time on doors and hoods especially since you can remove and put them on a stand. Once reinstalled, work across the panels with a long block for flatness. You might need more filler to do this. But what you're doing now is the way to go, IMO. BTW, I'm doing my body work later after I've repaired and roughed in all the doors and hoods. I can't wait for my 2-3 minutes of working time with the filler in August. Going to need to get a mini-frig to keep the bondo cool out in the shed. |
|
|
|
| Puebloswatcop |
Jun 14 2025, 10:50 AM
Post
#1077
|
|
Senior Member Group: Members Posts: 1,690 Joined: 27-December 14 From: Mineola, Texas Member No.: 18,258 Region Association: Southwest Region |
QUOTE(friethmiller @ Jun 14 2025, 09:05 AM) QUOTE(Puebloswatcop @ Jun 13 2025, 08:38 PM) I was going to quit at that point, but I figured what the heck, I was having fun watching the transformation. So I kept sanding. I used an 18 inch sanding block with 80 grit and got most of the door sanded out. I did have a couple of low spots, so tomorrow I will go back in and re-fill those feather them in and then switch to 100 grit. This is how I do my panels (IMG:style_emoticons/default/aktion035.gif). Saves so much time on doors and hoods especially since you can remove and put them on a stand. Once reinstalled, work across the panels with a long block for flatness. You might need more filler to do this. But what you're doing now is the way to go, IMO. BTW, I'm doing my body work later after I've repaired and roughed in all the doors and hoods. I can't wait for my 2-3 minutes of working time with the filler in August. Going to need to get a mini-frig to keep the bondo cool out in the shed. I know what you mean Fred. I am lucky enough now to have a temperature of 75 degrees to work in. Even at that, it only allows me between 5 and 10 minutes work time to skim the filler. thats what caused one of my low spots, I made the mistake of going back over one spot and ended up pulling some of the filler out. Nothing that can't be corrected. I would offer you a space in the shop to work on it, but the distance is a bit prohibitive....lol |
|
|
|
| Puebloswatcop |
Jun 16 2025, 03:07 PM
Post
#1078
|
|
Senior Member Group: Members Posts: 1,690 Joined: 27-December 14 From: Mineola, Texas Member No.: 18,258 Region Association: Southwest Region |
Time to get those low spots and other scratches and such filled in.
 |
|
|
|
| Puebloswatcop |
Jun 16 2025, 03:09 PM
Post
#1079
|
|
Senior Member Group: Members Posts: 1,690 Joined: 27-December 14 From: Mineola, Texas Member No.: 18,258 Region Association: Southwest Region |
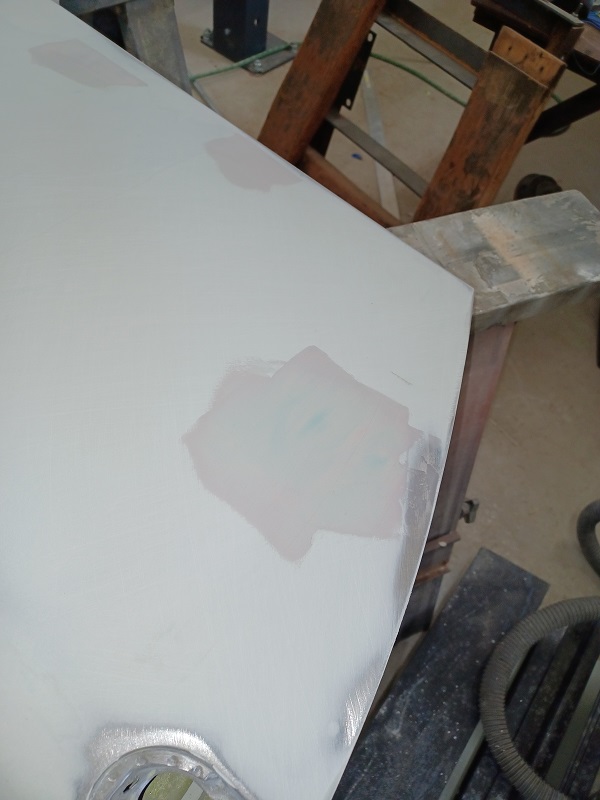
There were about a half dozen low spots and scratches in the last fill. One of them I had to fill twice to bring it level...
  |
|
|
|
| Puebloswatcop |
Jun 16 2025, 03:12 PM
Post
#1080
|
|
Senior Member Group: Members Posts: 1,690 Joined: 27-December 14 From: Mineola, Texas Member No.: 18,258 Region Association: Southwest Region |
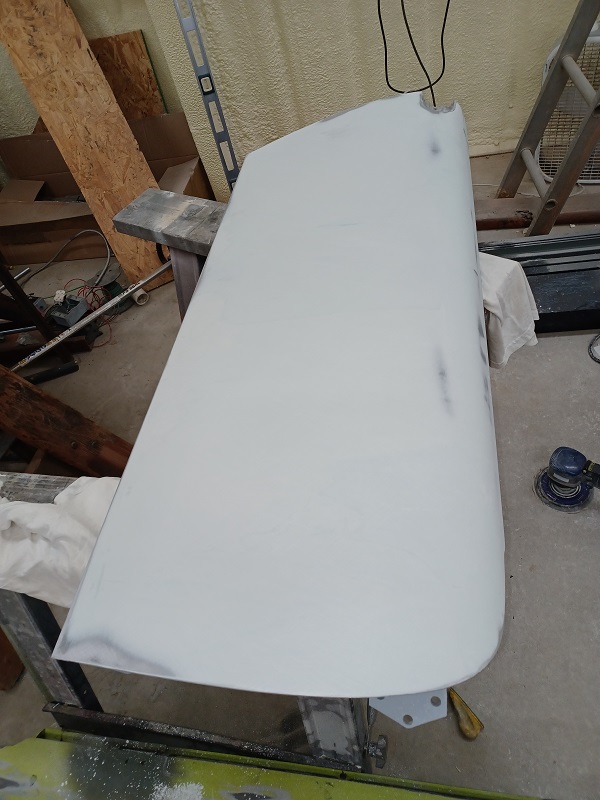
After filling each one and one twice the hole door was sanded with 80 Grit, then 120 grit,
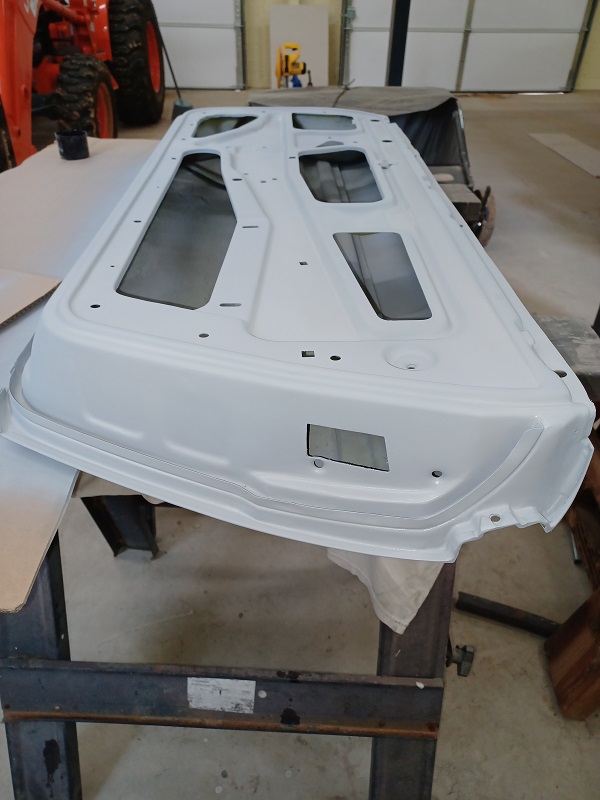
Then I hit it with high build primer to fill in some of the deeper scratches and protectthe door from rust. 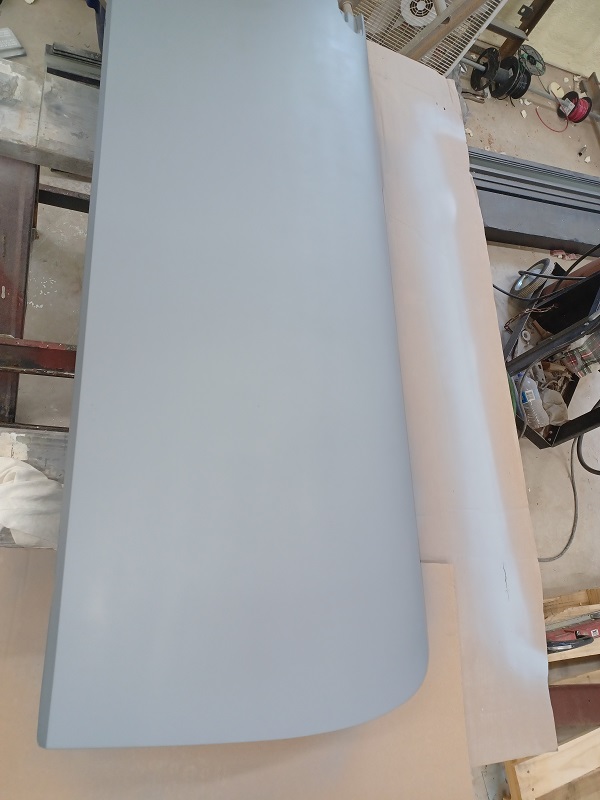 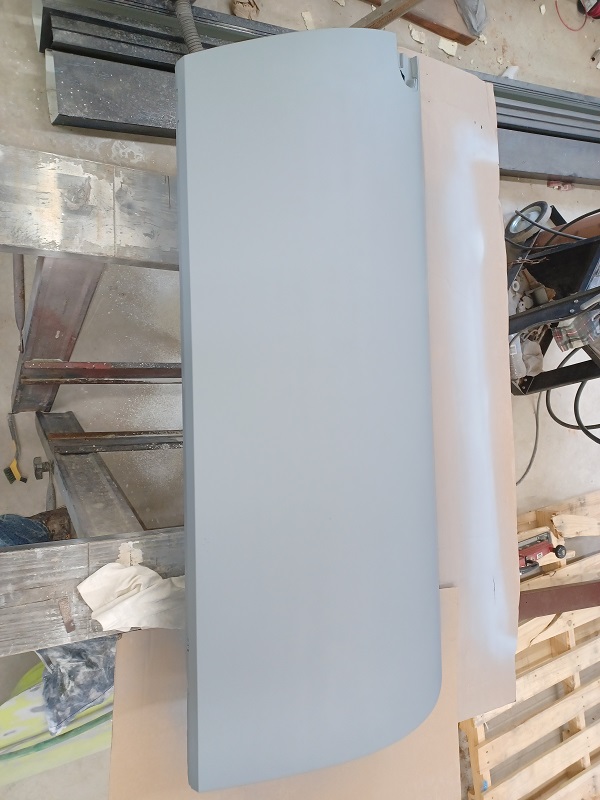 |
|
|
|
|
1 User(s) are reading this topic (1 Guests and 0 Anonymous Users)
0 Members:

|
Lo-Fi Version | Time is now: 14th December 2025 - 07:40 PM |
Invision Power Board
v9.1.4 © 2025 IPS, Inc.