|
|
|
Porsche, and the Porsche crest are registered trademarks of Dr. Ing. h.c. F. Porsche AG.
This site is not affiliated with Porsche in any way. Its only purpose is to provide an online forum for car enthusiasts. All other trademarks are property of their respective owners. |
|
|

  |

| Puebloswatcop |
 Jun 18 2025, 04:18 PM Jun 18 2025, 04:18 PM
Post
#1081
|
|
Senior Member  Group: Members Posts: 1,690 Joined: 27-December 14 From: Mineola, Texas Member No.: 18,258 Region Association: Southwest Region |
Finished one door until wet sanding time. I sealed all of the seams for the Door Seal channel.
   |
   |

 
|
| Puebloswatcop |
Jun 18 2025, 04:23 PM
Post
#1082
|
|
Senior Member Group: Members Posts: 1,690 Joined: 27-December 14 From: Mineola, Texas Member No.: 18,258 Region Association: Southwest Region |
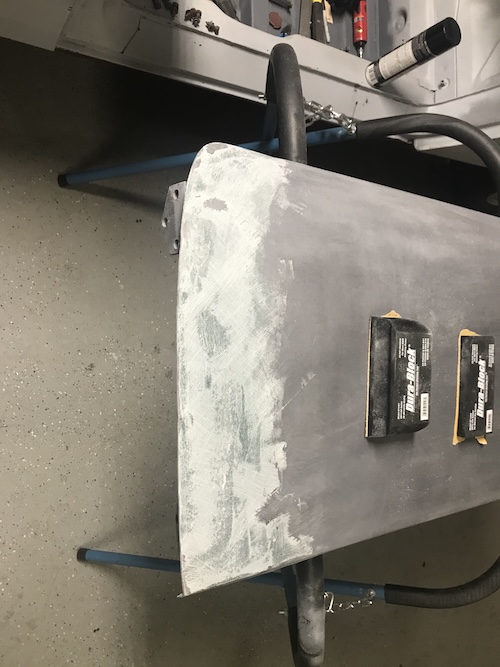
Then I decided I needed a bit of a change of pace, but still get more body work done.
I turned to a rear bumper I recently purchased from another member here. It had a crease under where the bumper tit goes on the passenger side. It is completely covered by the tit, but I wanted to try and get as much of the crease out as I could. 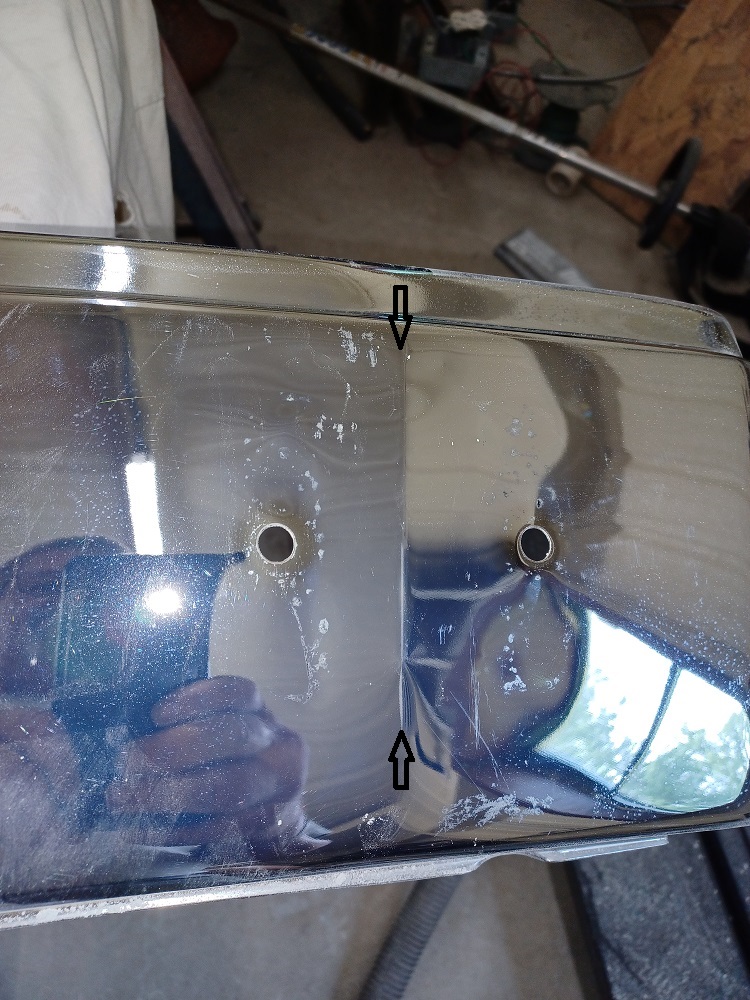 |
|
|
|
| Puebloswatcop |
Jun 18 2025, 04:27 PM
Post
#1083
|
|
Senior Member Group: Members Posts: 1,690 Joined: 27-December 14 From: Mineola, Texas Member No.: 18,258 Region Association: Southwest Region |
I started by trying to hammer the raised portion of the crease down, using a hard rubber mallet. the support on the back of the bumper covers over where the crease is, so there is no way to access it for a dolly on the back side compounding the difficulty of trying to flatten it out. After about an hour, it was about 50% gone though.
 |
|
|
|
| Puebloswatcop |
Jun 18 2025, 04:32 PM
Post
#1084
|
|
Senior Member Group: Members Posts: 1,690 Joined: 27-December 14 From: Mineola, Texas Member No.: 18,258 Region Association: Southwest Region |
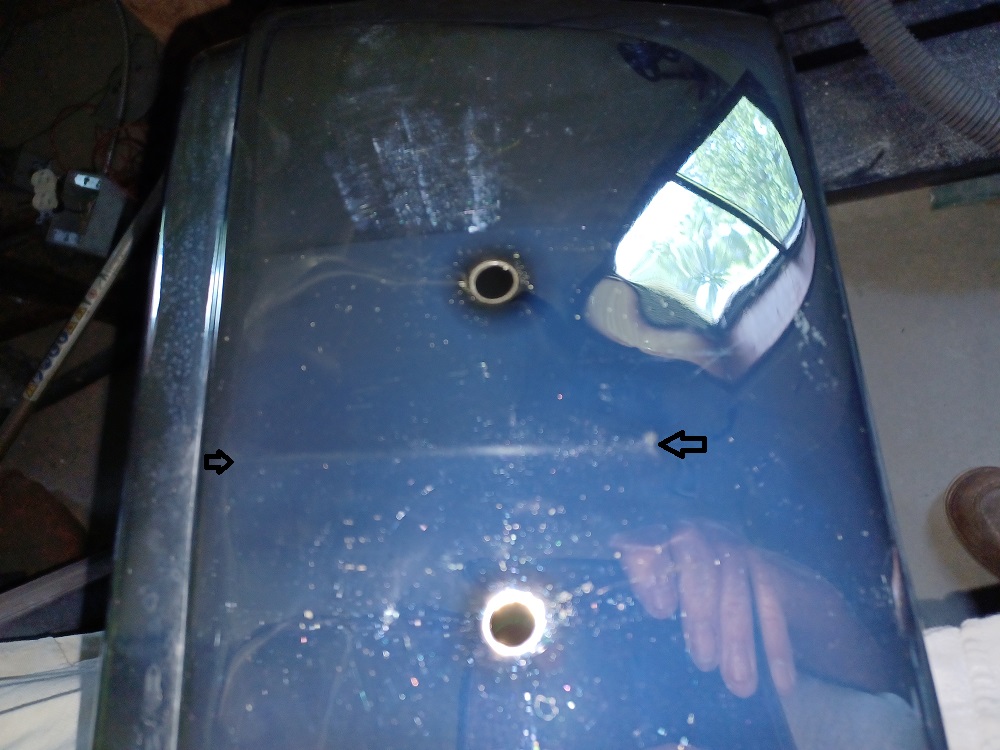
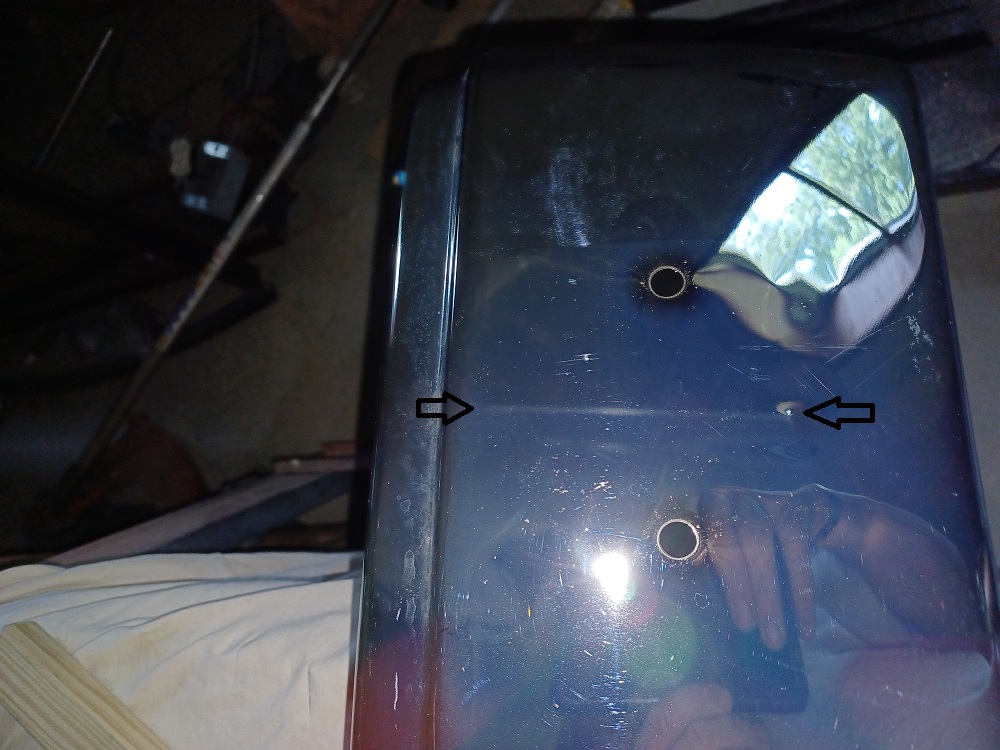
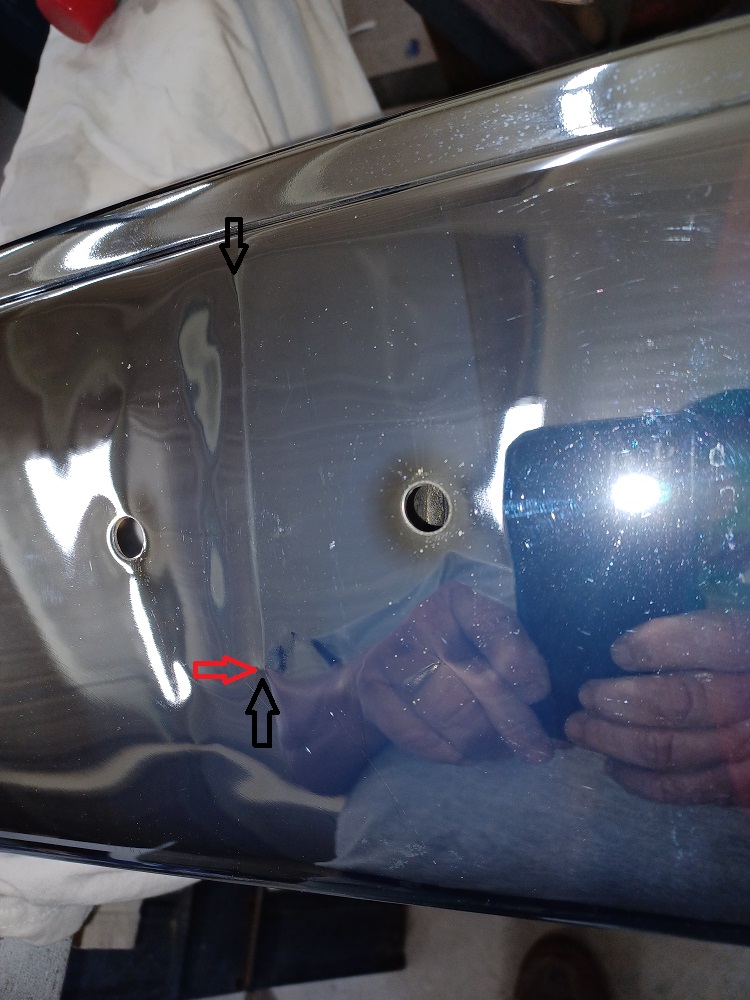
I keot working on it for about another 2 hours not only working the crease, but trying to re-shape the low spots on each side of the crease caused a lot by beating the crease out without the ability to back it with a dolly. I got most of the low areas out using heat and ice to shrink the metal a bit. I also used a piece of 1 X 2 wood to help raise it as best I could from the back side. Still not finished, but well on its way. The black arrows show where the crease begins and ends. The red arrow is where there is a sharp raised tiny bump that won't hammer out with the hard rubber mallet. I hade to use a metal hammer on the chrome, but it may come down to that.
  |
|
|
|
| Puebloswatcop |
Jun 19 2025, 06:04 PM
Post
#1085
|
|
Senior Member Group: Members Posts: 1,690 Joined: 27-December 14 From: Mineola, Texas Member No.: 18,258 Region Association: Southwest Region |
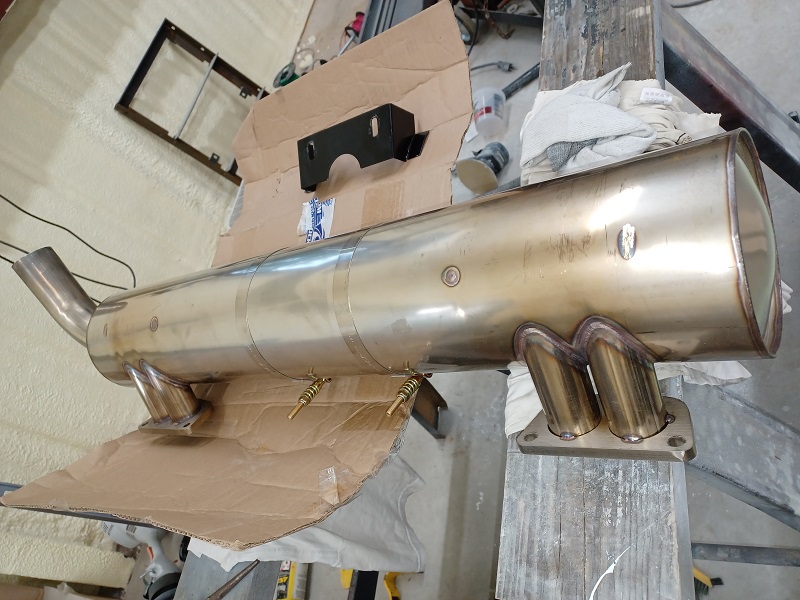
UPS delivered this a couple of days ago. I finally got around to opening it. Thanks BillC, its a beautiful piece, an MB911 stainless muffler.
 |
|
|
|
| Puebloswatcop |
Jun 19 2025, 06:22 PM
Post
#1086
|
|
Senior Member Group: Members Posts: 1,690 Joined: 27-December 14 From: Mineola, Texas Member No.: 18,258 Region Association: Southwest Region |
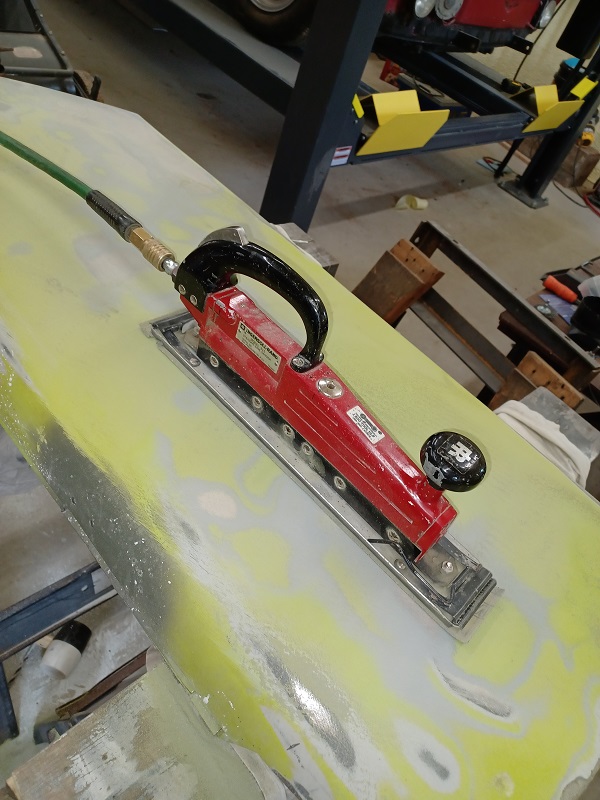
Now its back to body work, on the driver's side door. I started to remove all of the paint using a air powered long board with 36 grit sand paper...
  |
|
|
|
| Puebloswatcop |
Jun 19 2025, 06:25 PM
Post
#1087
|
|
Senior Member Group: Members Posts: 1,690 Joined: 27-December 14 From: Mineola, Texas Member No.: 18,258 Region Association: Southwest Region |
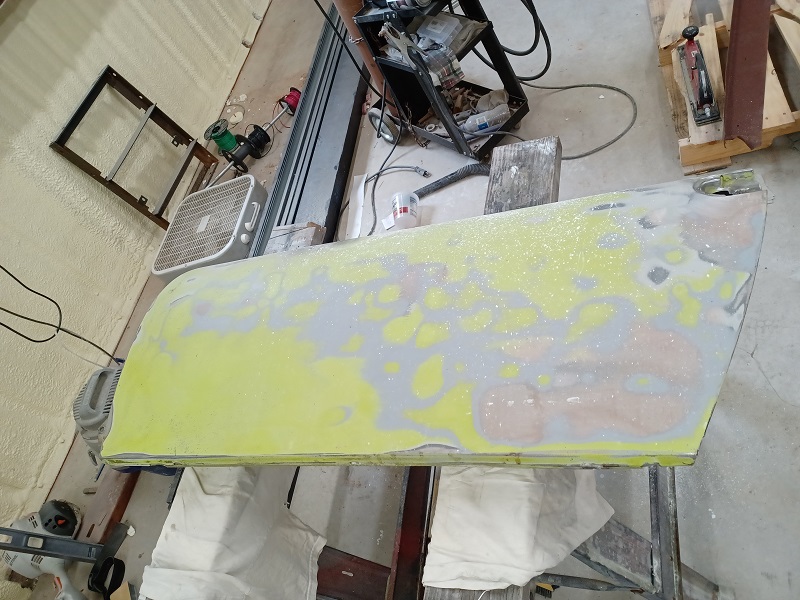
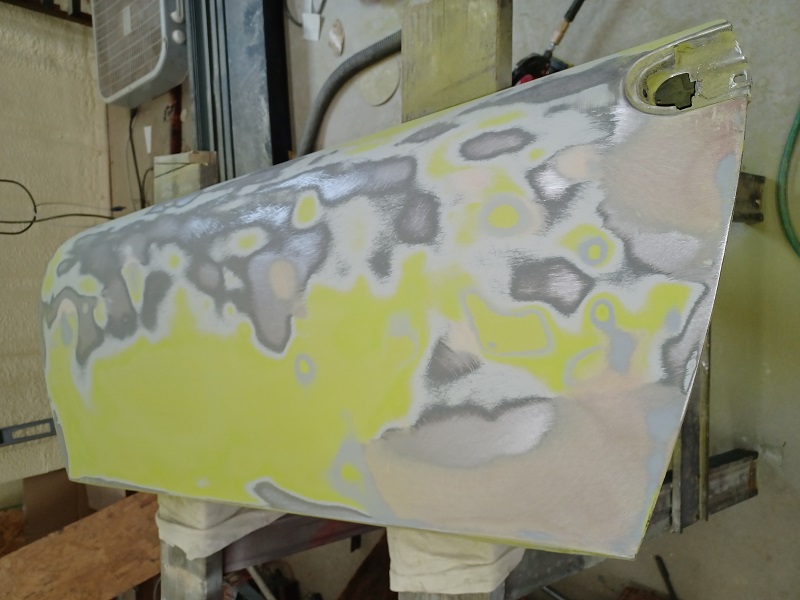
As I started to sand through I found there were 5 layers of paint on the door and could see some obvious issues with damage to the door, nothing serious, just a lot of dings, it looked like someone left it on the driving range at a golf course....
  |
|
|
|
| Puebloswatcop |
Jun 19 2025, 06:30 PM
Post
#1088
|
|
Senior Member Group: Members Posts: 1,690 Joined: 27-December 14 From: Mineola, Texas Member No.: 18,258 Region Association: Southwest Region |
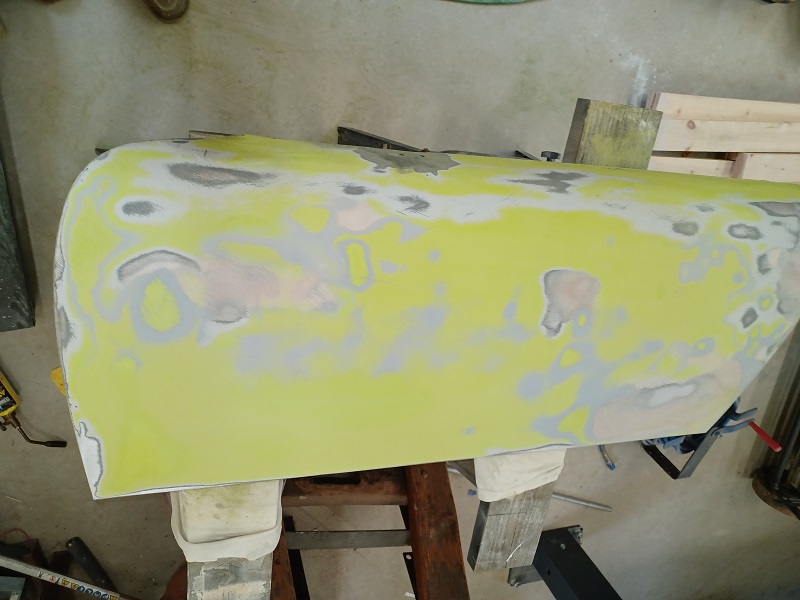
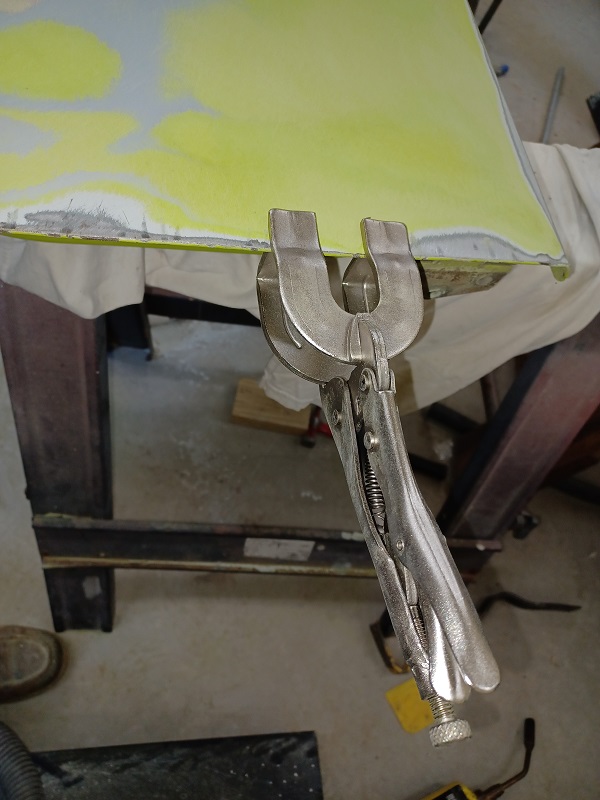
Another problem I discovered, the entire front edge of the door was bent outward. Tou can see the edge in clean metal follwed by un-touched paint. Someone obviously broke the door strap and the door was allowed to open past its limit for quite some time. I used a set of welding clamps to try to take some of the bend out, with limited success...
  |
|
|
|
| Puebloswatcop |
Jun 19 2025, 06:35 PM
Post
#1089
|
|
Senior Member Group: Members Posts: 1,690 Joined: 27-December 14 From: Mineola, Texas Member No.: 18,258 Region Association: Southwest Region |
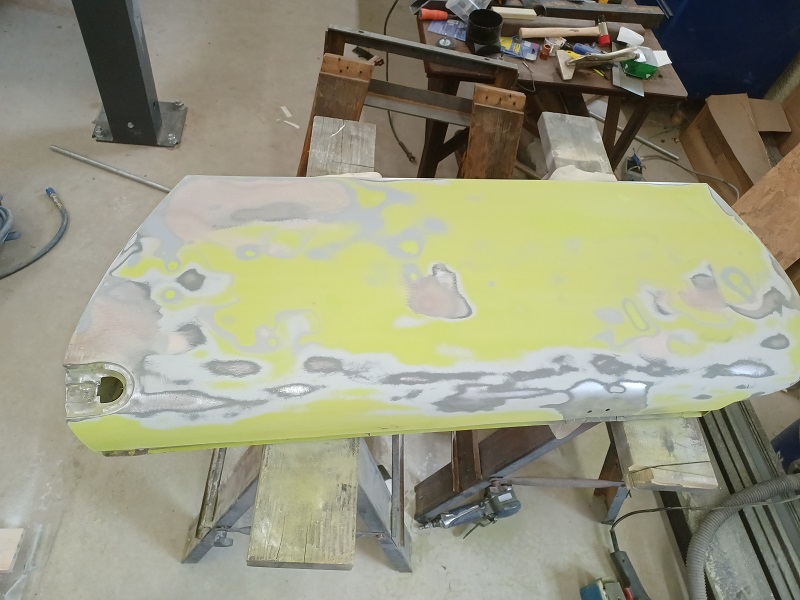
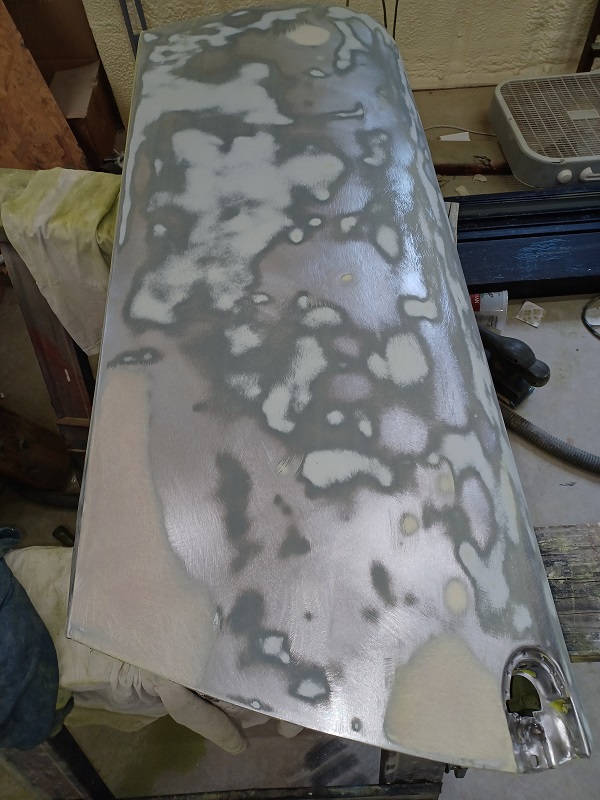
What I also discovered was that the leading edge bend, weakened the door skin, making it very flexible, so sanding the paint off became very difficult as the skin flexed. I will have to address this before preping the door for paint. If anyone has any ideas to take the bend out and stiffen the door skin, I could use some advice here. But after about 3 hours, I finally have the outer door skin stripped ....
 |
|
|
|
| Puebloswatcop |
Jun 19 2025, 06:48 PM
Post
#1090
|
|
Senior Member Group: Members Posts: 1,690 Joined: 27-December 14 From: Mineola, Texas Member No.: 18,258 Region Association: Southwest Region |
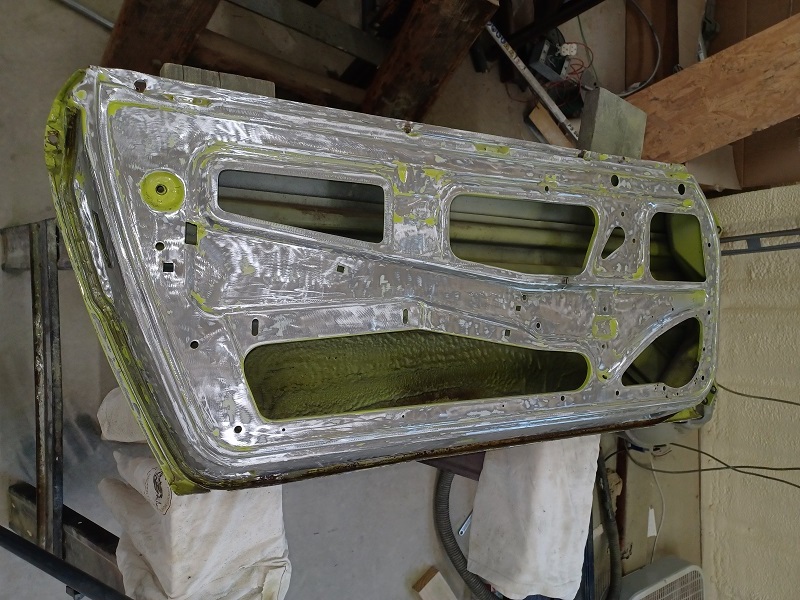
After another couple of hours I had about 80% of the inside face of the door stripped. There were a couple of minor issues, a small crack in a metal edge, and a chunk missing where the DAPO put the mandatory '70s door speaker. I will have to form a section to repair that, then weld about 10 screw holes in. But I think that will be part of tomorrows work. It's (IMG:style_emoticons/default/beer3.gif) time
 |
|
|
|
| friethmiller |
Jun 20 2025, 07:20 AM
Post
#1091
|
|
Senior Member Group: Members Posts: 1,101 Joined: 10-February 19 From: Austin, TX Member No.: 22,863 Region Association: Southwest Region |
Kevin,
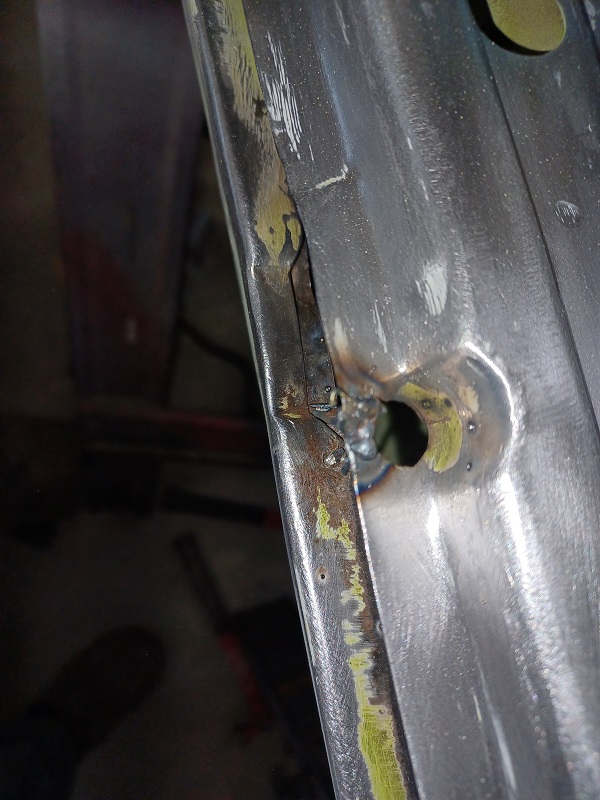
Inspect your holes! (IMG:style_emoticons/default/biggrin.gif) I found a crack in the center square hole where one of the retaining nuts goes. I ground this weld down with the 4 1/2 but still need to get in there with a flat file to re-create the corner. Now that I'm looking at this photo again, I see a potential crack on the other side. Damn! These type repairs save the cussing later on after everything is painted. Keep up the good work! 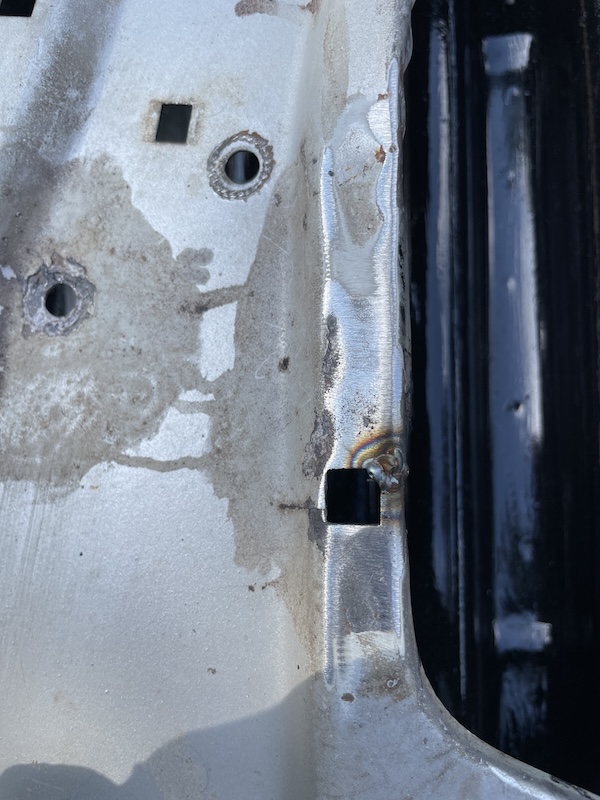 |
|
|
|
| friethmiller |
Jun 20 2025, 11:02 AM
Post
#1092
|
|
Senior Member Group: Members Posts: 1,101 Joined: 10-February 19 From: Austin, TX Member No.: 22,863 Region Association: Southwest Region |
Kevin, On my last car I had a lot of damage on the front of my driver side door from it catching on the front fender. I used fiberglass filer just in this area before the skim-coat to help reinforce things. It did the trick for me. Something to consider.
 |
|
|
|
| Puebloswatcop |
Jun 20 2025, 12:46 PM
Post
#1093
|
|
Senior Member Group: Members Posts: 1,690 Joined: 27-December 14 From: Mineola, Texas Member No.: 18,258 Region Association: Southwest Region |
QUOTE(friethmiller @ Jun 20 2025, 08:20 AM)  Kevin, Inspect your holes! (IMG:style_emoticons/default/biggrin.gif) I found a crack in the center square hole where one of the retaining nuts goes. I ground this weld down with the 4 1/2 but still need to get in there with a flat file to re-create the corner. Now that I'm looking at this photo again, I see a potential crack on the other side. Damn! These type repairs save the cussing later on after everything is painted. Keep up the good work! Yep. Inspect, clean nd inspect again. I had the same thing. welded the cracks and some of the holes, but decided to leave the sliver of metal out that the PO had cut since it isnt going to effect the structural inegrity of the door. |
|
|
|
| Puebloswatcop |
Jun 20 2025, 12:50 PM
Post
#1094
|
|
Senior Member Group: Members Posts: 1,690 Joined: 27-December 14 From: Mineola, Texas Member No.: 18,258 Region Association: Southwest Region |
QUOTE(friethmiller @ Jun 20 2025, 12:02 PM) Kevin, On my last car I had a lot of damage on the front of my driver side door from it catching on the front fender. I used fiberglass filer just in this area before the skim-coat to help reinforce things. It did the trick for me. Something to consider. That was my first thought, using fill, but in the center of the door skin I am afraid it will leave a lot of flex in the skin. When you did yours, did it help tighten up the center of the skin when you filled the front edge? Or, do you think I should continue to try to take some of the bend out in hopes that it will stiffen up the door skin? your thoughts? |
|
|
|
| friethmiller |
Jun 20 2025, 01:28 PM
Post
#1095
|
|
Senior Member Group: Members Posts: 1,101 Joined: 10-February 19 From: Austin, TX Member No.: 22,863 Region Association: Southwest Region |
QUOTE(Puebloswatcop @ Jun 20 2025, 01:50 PM) That was my first thought, using fill, but in the center of the door skin I am afraid it will leave a lot of flex in the skin. When you did yours, did it help tighten up the center of the skin when you filled the front edge? Or, do you think I should continue to try to take some of the bend out in hopes that it will stiffen up the door skin? your thoughts? Center of the door skin? That's sounds like oil-canning. It won't help that. You'll need to do some heat-shrinking to tightening everything up. Do you need to borrow my disk? If you have a gas welder, that'll work too. |
|
|
|
| Puebloswatcop |
Jun 20 2025, 05:48 PM
Post
#1096
|
|
Senior Member Group: Members Posts: 1,690 Joined: 27-December 14 From: Mineola, Texas Member No.: 18,258 Region Association: Southwest Region |
QUOTE(friethmiller @ Jun 20 2025, 02:28 PM) QUOTE(Puebloswatcop @ Jun 20 2025, 01:50 PM) That was my first thought, using fill, but in the center of the door skin I am afraid it will leave a lot of flex in the skin. When you did yours, did it help tighten up the center of the skin when you filled the front edge? Or, do you think I should continue to try to take some of the bend out in hopes that it will stiffen up the door skin? your thoughts? Center of the door skin? That's sounds like oil-canning. It won't help that. You'll need to do some heat-shrinking to tightening everything up. Do you need to borrow my disk? If you have a gas welder, that'll work too. I actually just bought a disk. So I guess I'll put it to use. Thanks for your feedback. |
|
|
|
| Puebloswatcop |
Jun 20 2025, 06:08 PM
Post
#1097
|
|
Senior Member Group: Members Posts: 1,690 Joined: 27-December 14 From: Mineola, Texas Member No.: 18,258 Region Association: Southwest Region |
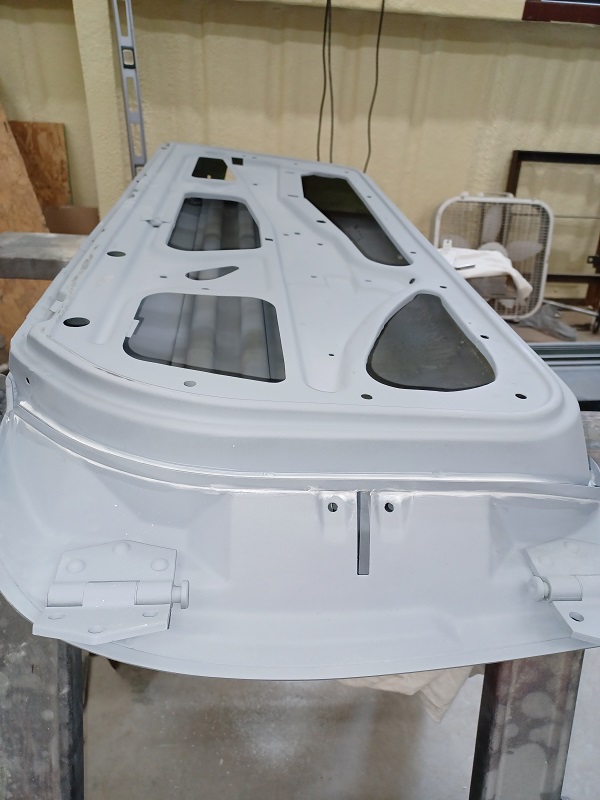
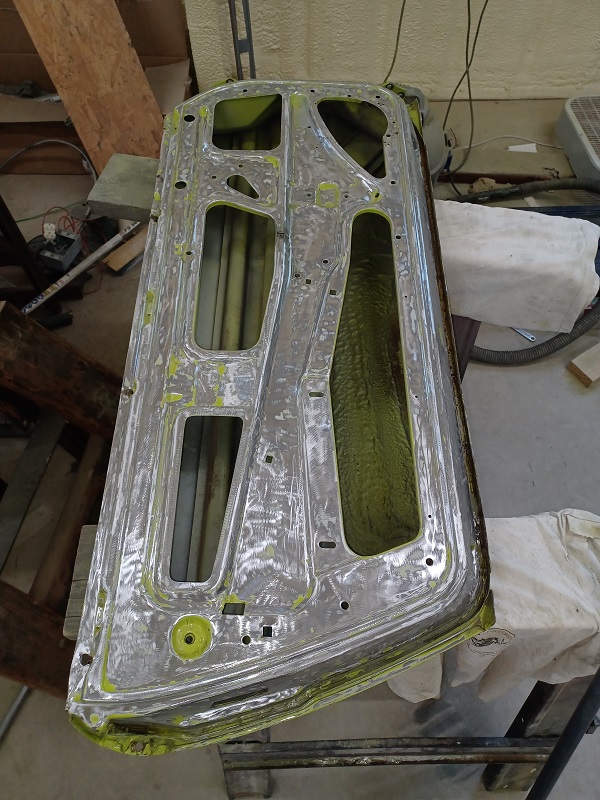
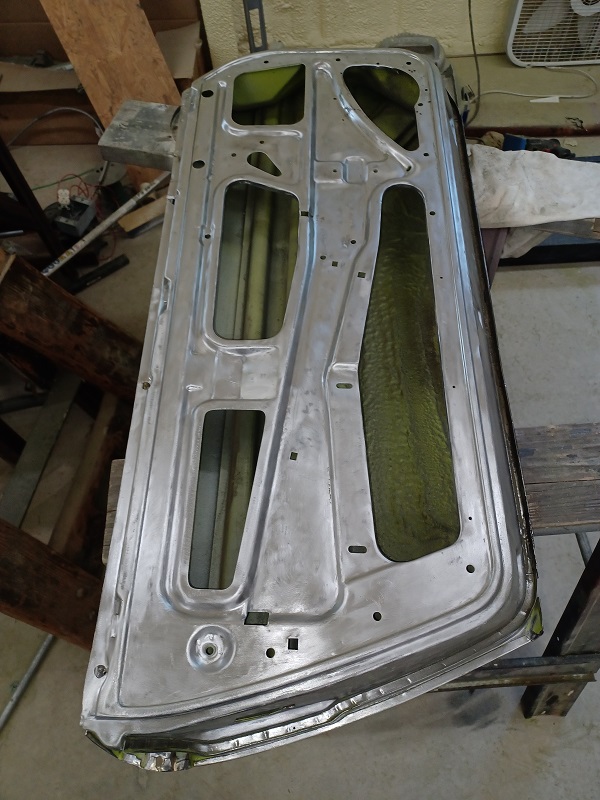
Started off my day finishing off the inner door surface. Here is what it looked like when I started, and then again 3 hours later
  |
|
|
|
| Puebloswatcop |
Jun 20 2025, 06:11 PM
Post
#1098
|
|
Senior Member Group: Members Posts: 1,690 Joined: 27-December 14 From: Mineola, Texas Member No.: 18,258 Region Association: Southwest Region |
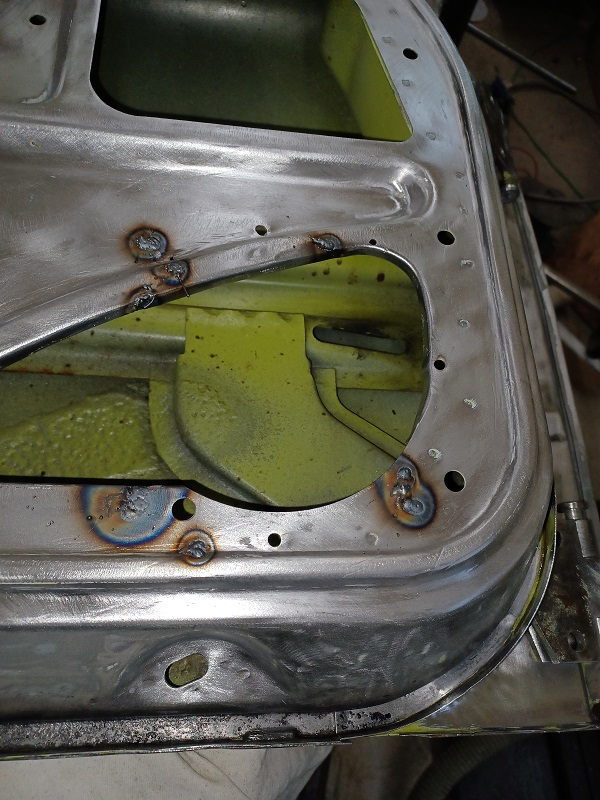
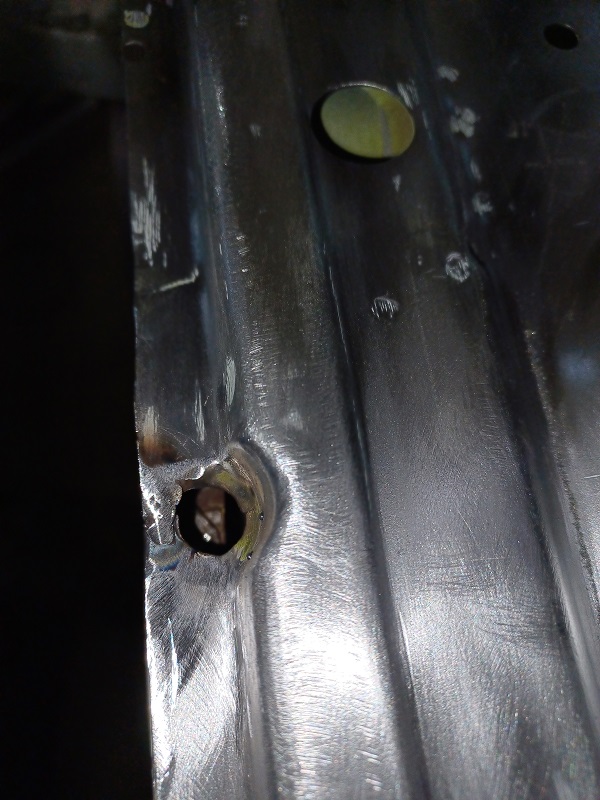
Surprisingly, all of the seal channels were in pretty good shape. So then it was time to close up some of the added holes and fix a crack in the upper part of the inner door frame
  |
|
|
|
| Puebloswatcop |
Jun 20 2025, 06:18 PM
Post
#1099
|
|
Senior Member Group: Members Posts: 1,690 Joined: 27-December 14 From: Mineola, Texas Member No.: 18,258 Region Association: Southwest Region |
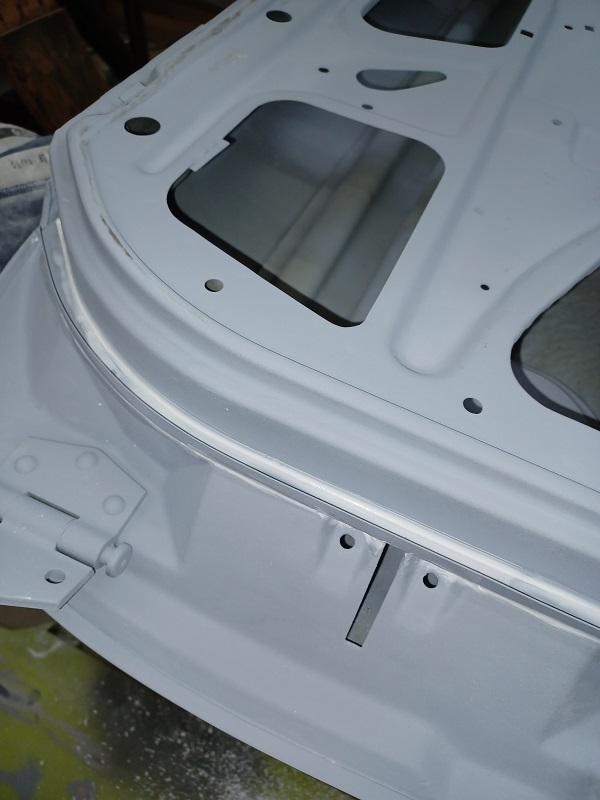
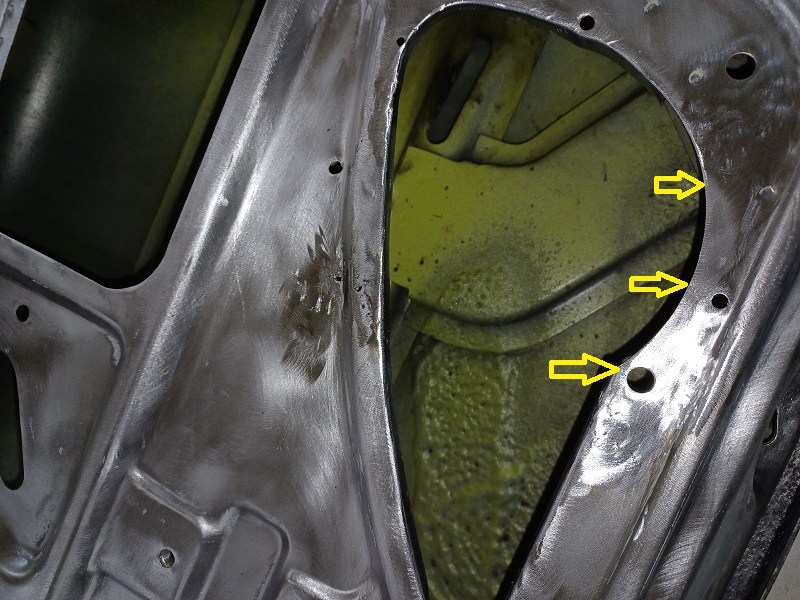
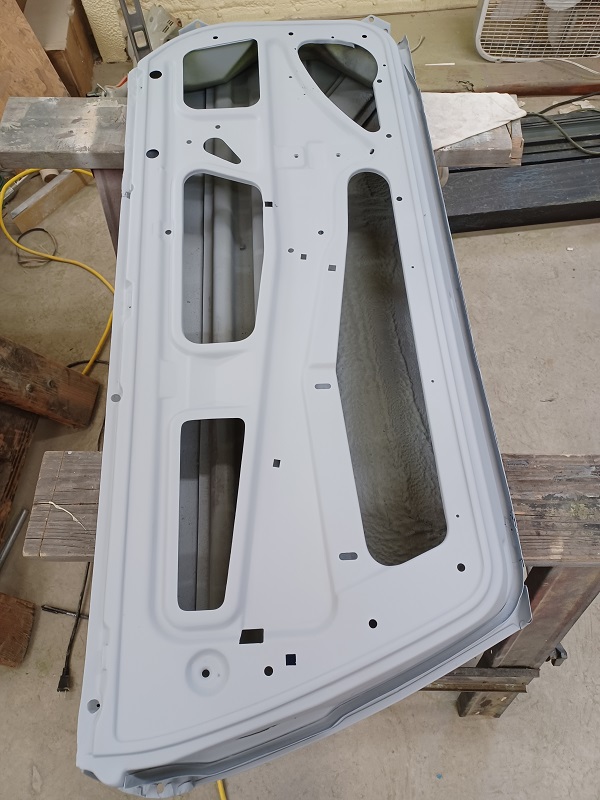
Then sand and grind all of the welds to blend in. The arrows in the first picture show the portion where the PO cut it to put the speakers in. It was a small sliver of metal in a non-crical spot so I decided not to re-build it.
  |
|
|
|
| Puebloswatcop |
Jun 21 2025, 06:21 PM
Post
#1100
|
|
Senior Member Group: Members Posts: 1,690 Joined: 27-December 14 From: Mineola, Texas Member No.: 18,258 Region Association: Southwest Region |
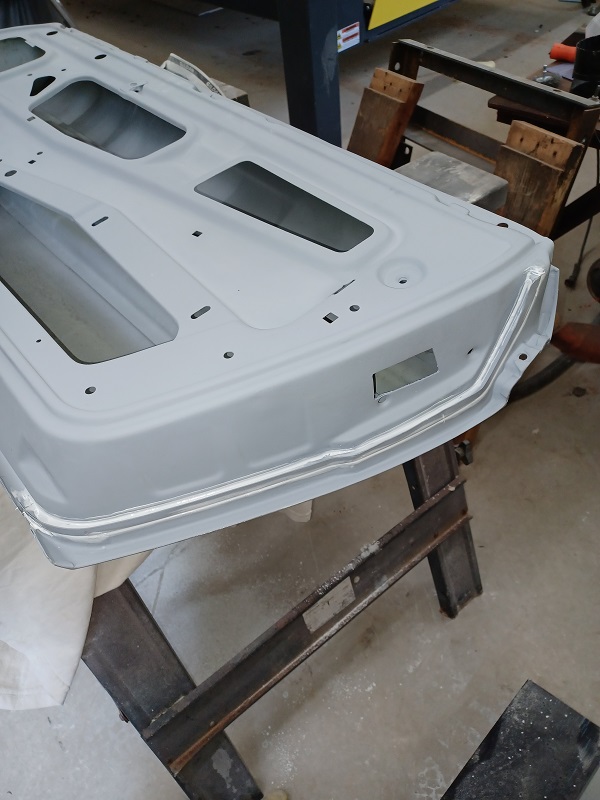
Didn't get a lot done today, But I managed to get the inner surfaces of the Driver's door painted in primer.
 |
|
|
|
|
1 User(s) are reading this topic (1 Guests and 0 Anonymous Users)
0 Members:

|
Lo-Fi Version | Time is now: 14th December 2025 - 07:40 PM |
Invision Power Board
v9.1.4 © 2025 IPS, Inc.