|
|
|
Porsche, and the Porsche crest are registered trademarks of Dr. Ing. h.c. F. Porsche AG.
This site is not affiliated with Porsche in any way. Its only purpose is to provide an online forum for car enthusiasts. All other trademarks are property of their respective owners. |
|
|

  |

| Puebloswatcop |
 Jul 15 2025, 02:23 PM Jul 15 2025, 02:23 PM
Post
#1161
|
|
Senior Member  Group: Members Posts: 1,690 Joined: 27-December 14 From: Mineola, Texas Member No.: 18,258 Region Association: Southwest Region |
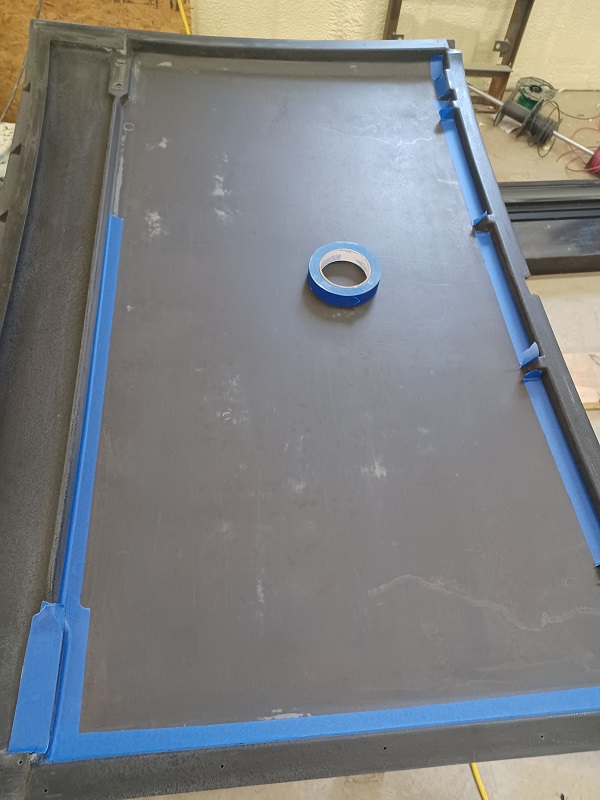
Wanted to finish the roof off today, But it's questionable as to if the weather will cooperate. So I started masking off the areas that I dont want to get texture on. Mainly the area where the headliner is glued in.
  |
   |

 
|
| Puebloswatcop |
Jul 15 2025, 02:25 PM
Post
#1162
|
|
Senior Member Group: Members Posts: 1,690 Joined: 27-December 14 From: Mineola, Texas Member No.: 18,258 Region Association: Southwest Region |
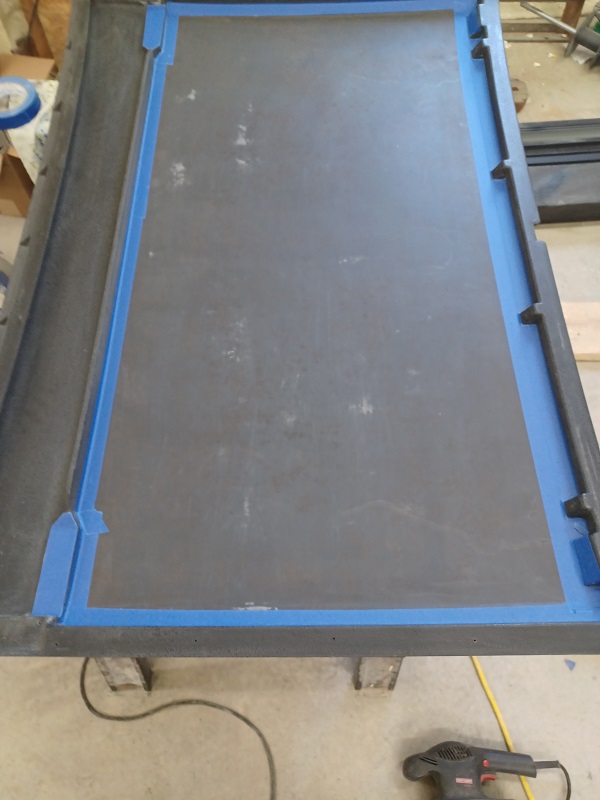
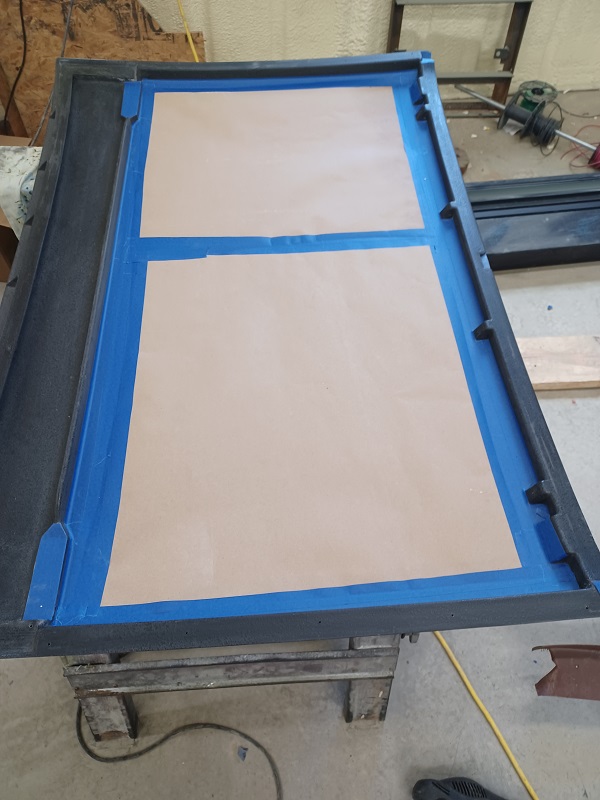
After trimming the tape I finished with heavy duty paper to finish covering the top.
 |
|
|
|
| friethmiller |
Jul 15 2025, 02:26 PM
Post
#1163
|
|
Senior Member Group: Members Posts: 1,101 Joined: 10-February 19 From: Austin, TX Member No.: 22,863 Region Association: Southwest Region |
QUOTE(Puebloswatcop @ Jul 15 2025, 03:23 PM)  ... it's questionable as to if the weather will cooperate. I hear ya there. I just painted the bottom of the engine hood. Hope it doesn't rain before this paint dries (IMG:style_emoticons/default/unsure.gif) |
|
|
|
| Puebloswatcop |
Jul 15 2025, 02:30 PM
Post
#1164
|
|
Senior Member Group: Members Posts: 1,690 Joined: 27-December 14 From: Mineola, Texas Member No.: 18,258 Region Association: Southwest Region |
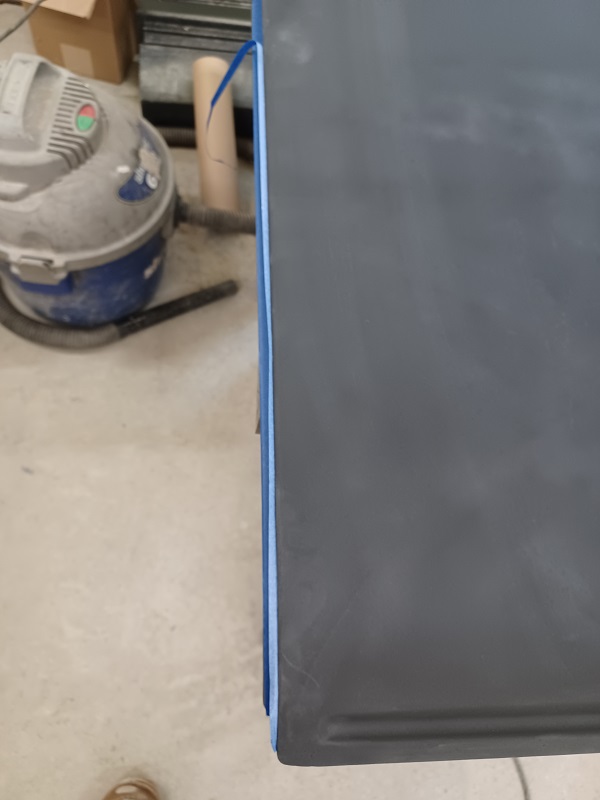
Then I taped in the front seal channel and trimed the tape. To insure that texture didn't get into any part of the channel, I tucked some 1/2 inch foam rod into the channel.
   |
|
|
|
| Puebloswatcop |
Jul 15 2025, 02:37 PM
Post
#1165
|
|
Senior Member Group: Members Posts: 1,690 Joined: 27-December 14 From: Mineola, Texas Member No.: 18,258 Region Association: Southwest Region |
I went out to set up the high dollar, heavy duty, part hanger and after I got it done I am afraid it might rain and the humidity is way to high to shoot on the texture.
So I'll have to try again tommorow. Probably better that way anyway, because I think I will shoot some adhesion promoter on it before the texture.  |
|
|
|
| Puebloswatcop |
Jul 15 2025, 06:17 PM
Post
#1166
|
|
Senior Member Group: Members Posts: 1,690 Joined: 27-December 14 From: Mineola, Texas Member No.: 18,258 Region Association: Southwest Region |
QUOTE(friethmiller @ Jul 15 2025, 03:26 PM) QUOTE(Puebloswatcop @ Jul 15 2025, 03:23 PM) ... it's questionable as to if the weather will cooperate. I hear ya there. I just painted the bottom of the engine hood. Hope it doesn't rain before this paint dries (IMG:style_emoticons/default/unsure.gif) This unpredictable weather and darned humidity are killing me. We went to dinner since I wasn't going to shoot the roof, now its clear as a bell. But I'm stuffed so I will check in the morning. (IMG:style_emoticons/default/beer3.gif) |
|
|
|
| Puebloswatcop |
Jul 18 2025, 03:45 PM
Post
#1167
|
|
Senior Member Group: Members Posts: 1,690 Joined: 27-December 14 From: Mineola, Texas Member No.: 18,258 Region Association: Southwest Region |
Today I decided rain or shine, cool or hot I was going to get the targa top textured today.
I decided to go with Upol's Raptor bedliner. Its easy to mix, you just add the can of hardener to the can of spray on mixture, shake it for 2-3 minutes and its ready to shoot. It shoots really well with their variable spray gun, when you get the texture pattern you want, you lock it down and as long as you keep a consistant distance, it lays on very even. 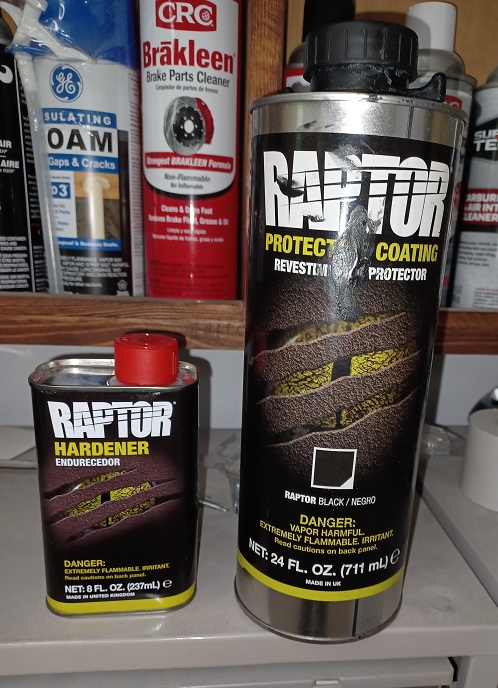 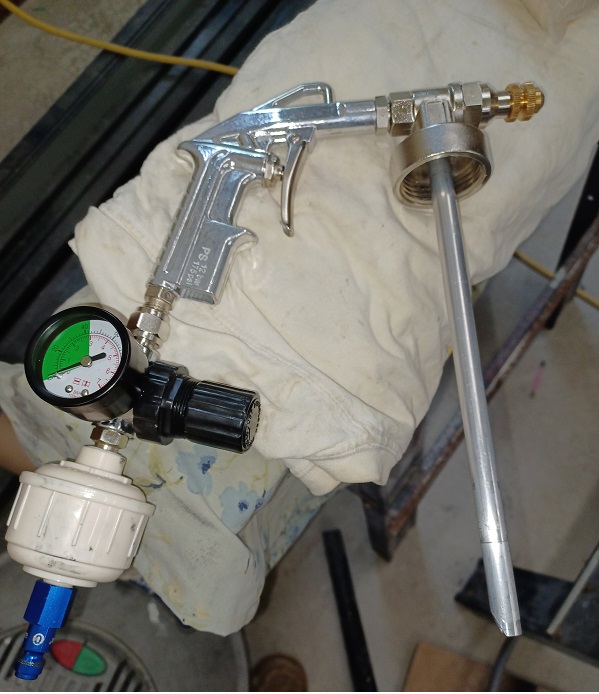 |
|
|
|
| Puebloswatcop |
Jul 18 2025, 03:49 PM
Post
#1168
|
|
Senior Member Group: Members Posts: 1,690 Joined: 27-December 14 From: Mineola, Texas Member No.: 18,258 Region Association: Southwest Region |
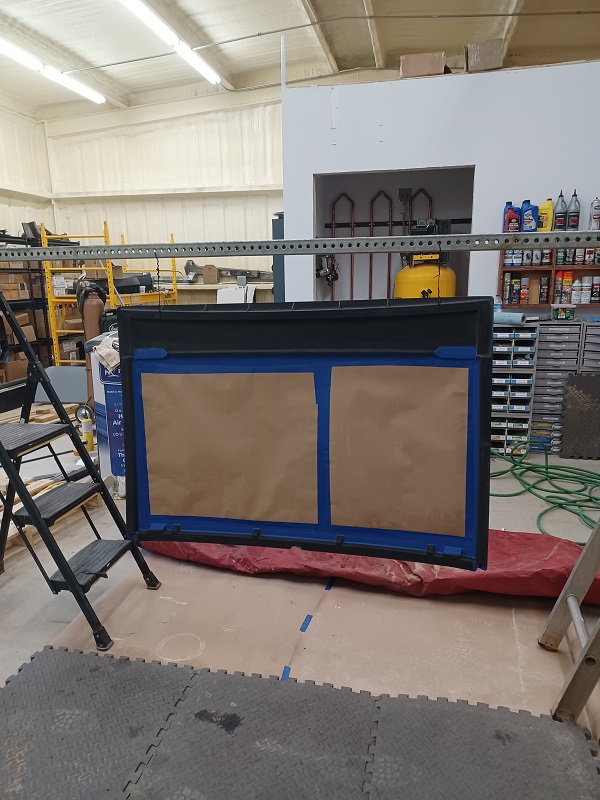
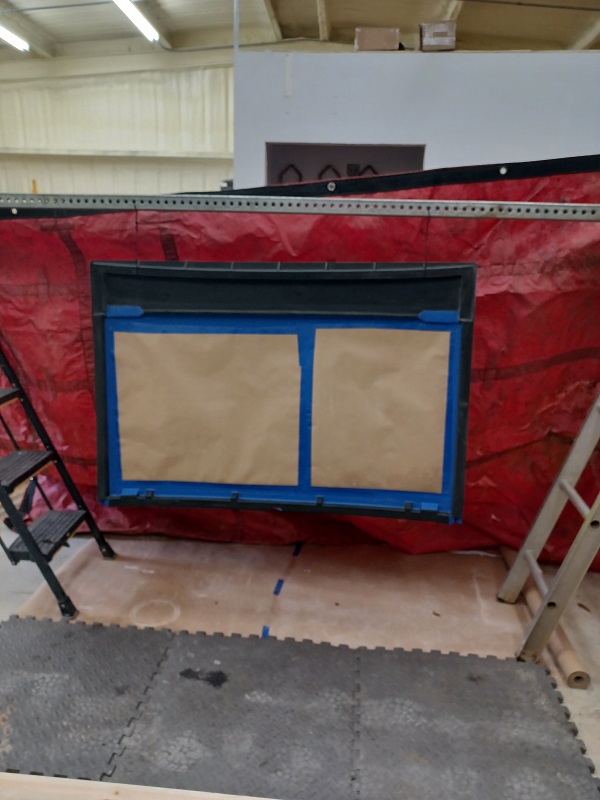
Since I had to shoot in the new shop, I set up a kind of temporary paint are. I papered the floor and then hung an old truckers tarp to contai the over-spray. I really don't want this stuff on my unfinished floor.
  |
|
|
|
| Puebloswatcop |
Jul 18 2025, 03:56 PM
Post
#1169
|
|
Senior Member Group: Members Posts: 1,690 Joined: 27-December 14 From: Mineola, Texas Member No.: 18,258 Region Association: Southwest Region |
I sprayed the under side first. That way I could make any adjustments and get used to shooting the product, before shooting the most visible part, the outside surface. The real tough part was turning the part around to dhoot the other side. The unistrut is heavy and the roof makes it heavier, but I got it turned without dipping any of my body into the fresh coat.
  |
|
|
|
| Puebloswatcop |
Jul 18 2025, 03:58 PM
Post
#1170
|
|
Senior Member Group: Members Posts: 1,690 Joined: 27-December 14 From: Mineola, Texas Member No.: 18,258 Region Association: Southwest Region |
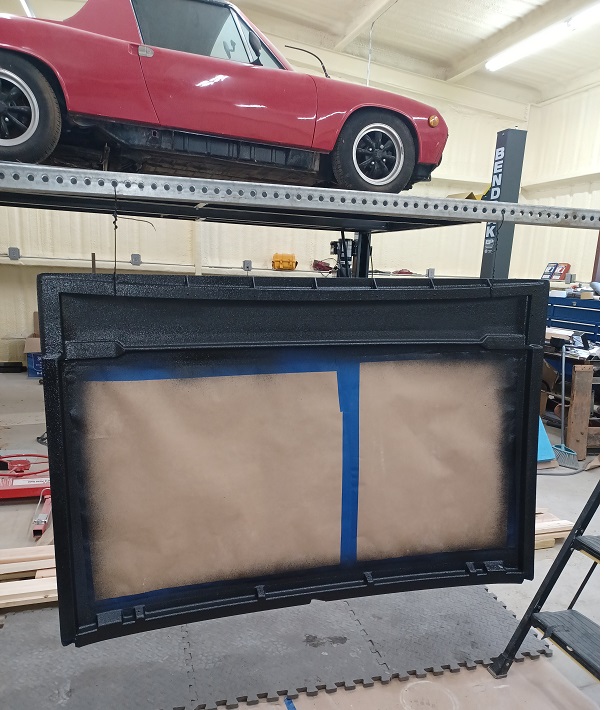
I was pleased at how the pattern laid on, so i was ready to shoot the outer surface...
  |
|
|
|
| Puebloswatcop |
Jul 18 2025, 04:01 PM
Post
#1171
|
|
Senior Member Group: Members Posts: 1,690 Joined: 27-December 14 From: Mineola, Texas Member No.: 18,258 Region Association: Southwest Region |
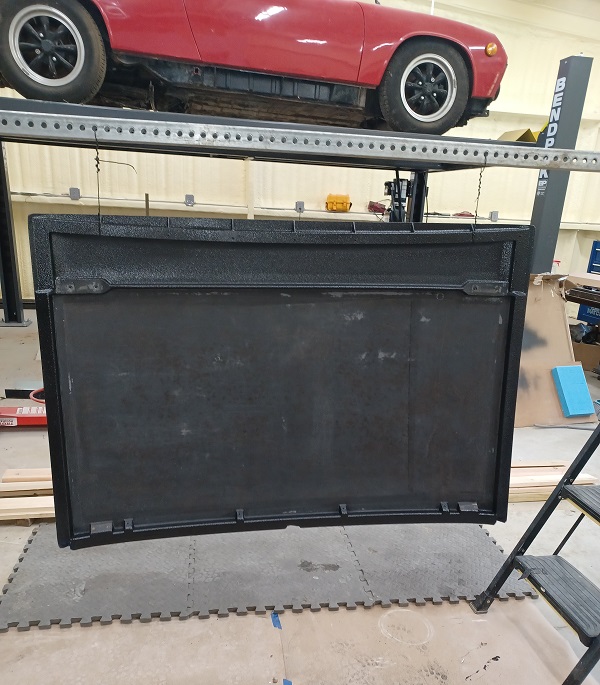
Then i stripped all of the masking off the inside. I'll give it at least 24 hours to cure before re-installing all of the hardware and trim. The instructions for the UPOL product advise you to wear gloves.... I didn't have any, so by the time I was done shaking up the product, spraying and cleaning the gun, my hands have black material all over , and it doesn't wash off, so I will take heed and wear gloves next time.
 |
|
|
|
| Puebloswatcop |
Jul 20 2025, 08:20 PM
Post
#1172
|
|
Senior Member Group: Members Posts: 1,690 Joined: 27-December 14 From: Mineola, Texas Member No.: 18,258 Region Association: Southwest Region |
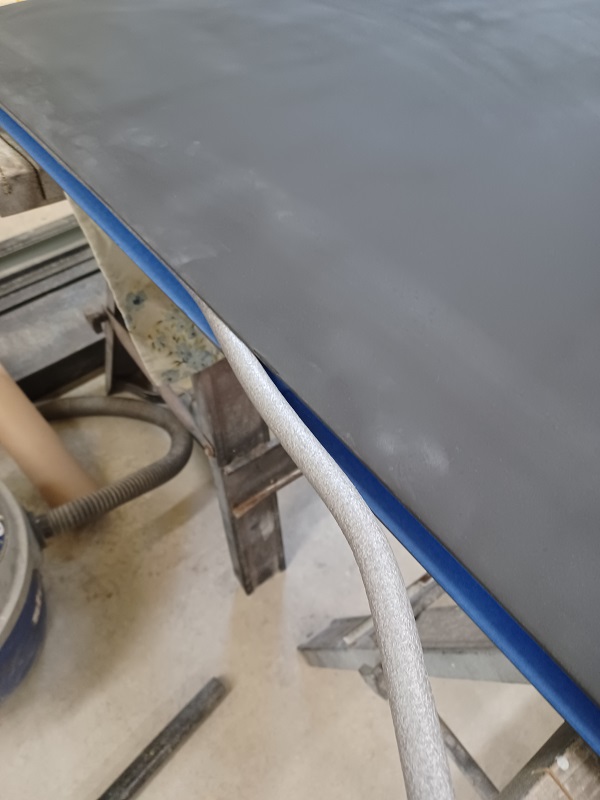
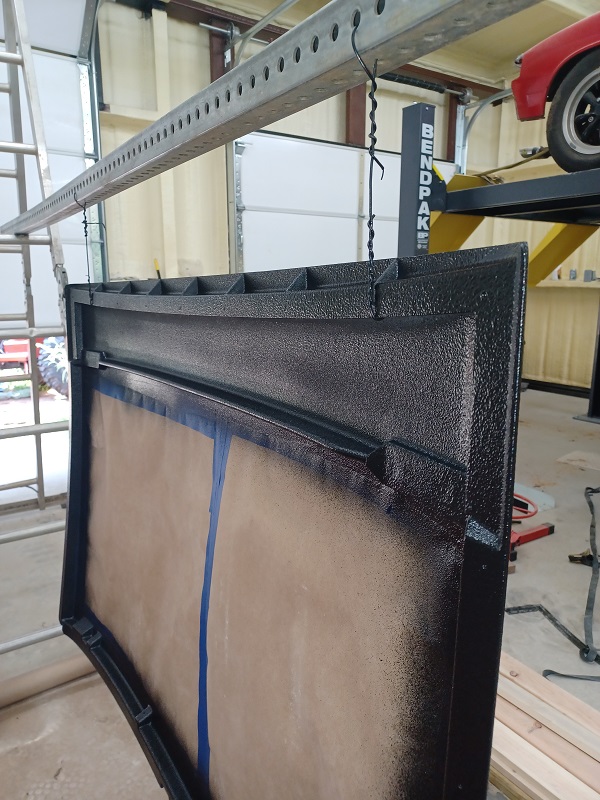
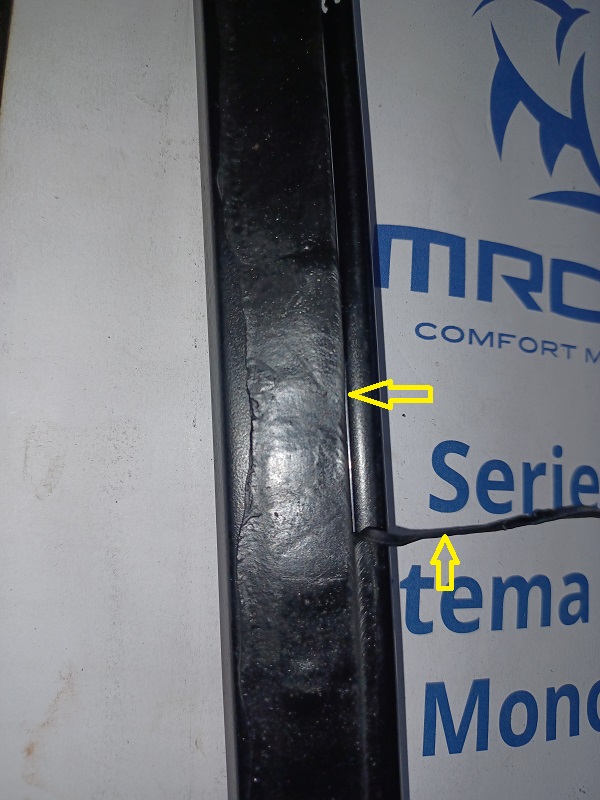
The butyl tape that goes between the side channels and the top came today, so I decided to install the side rails for the side seals. Unfortunately the butyl tape was thicker than I thought it would be so I had to improvise by stretching it length wise. Photo #1 shows the underside of the channel, you can see it has a shallow trench to hold the butyl tape.
I apologize for the poor quality pictures, but black on black is hard to get good detail, especially with my cell phone camera. Photo #2 shows the stretched butyl tape in the underside of the channel.   |
|
|
|
| Puebloswatcop |
Jul 20 2025, 08:29 PM
Post
#1173
|
|
Senior Member Group: Members Posts: 1,690 Joined: 27-December 14 From: Mineola, Texas Member No.: 18,258 Region Association: Southwest Region |
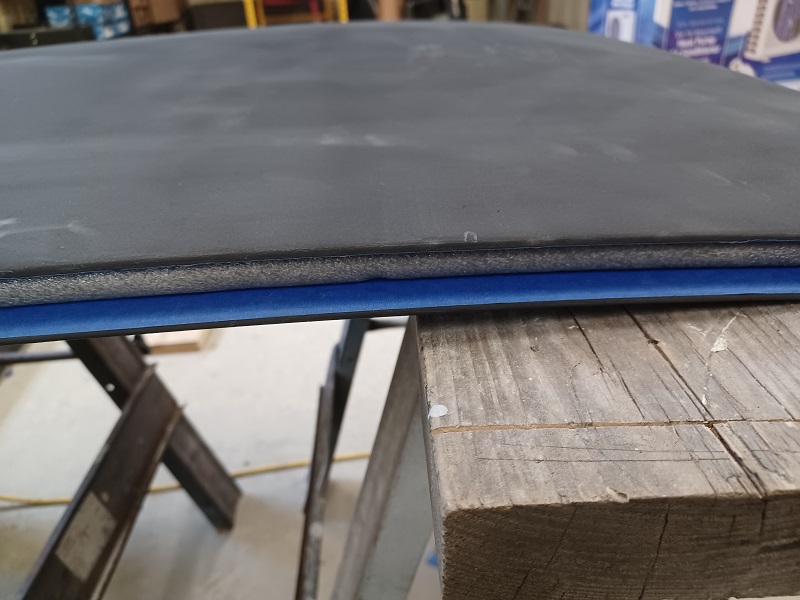
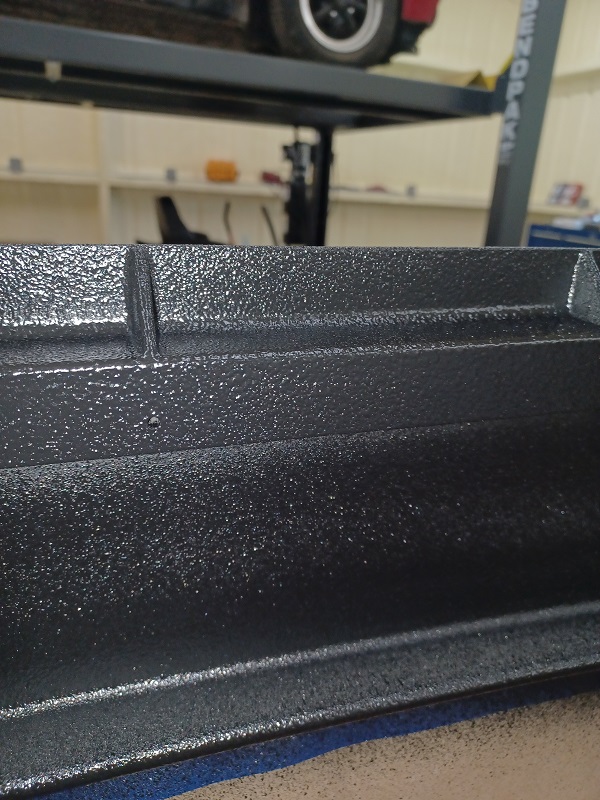
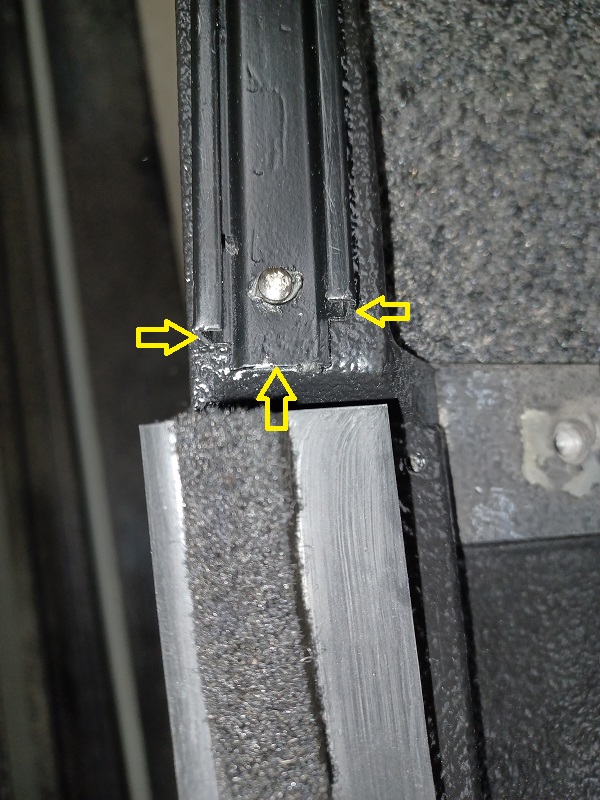
I wanted to insure that the butyl tape filled the under side of the channel in the low area, but wasn't oozing over and out the sides. I figured out that if I put the backing paper back over the butyl strip and rolled it with a smooth round object, in this case a 3/8 socket extension, I could roll it out to fill the groove and then trim off the excess. I did this in the shop with a temp of about 78 degrees, so the Butyl wasn't to soft or to hard. The key is to put the backing tape that the butyl tape was attached to as it does not stick, it will however stick to the tool... In the 2nd picture you can see how it will roll out over the sides if the channel. The arrow on the left is before rolling, the arrow on the right is after it is rolled.
  |
|
|
|
| Puebloswatcop |
Jul 20 2025, 08:36 PM
Post
#1174
|
|
Senior Member Group: Members Posts: 1,690 Joined: 27-December 14 From: Mineola, Texas Member No.: 18,258 Region Association: Southwest Region |
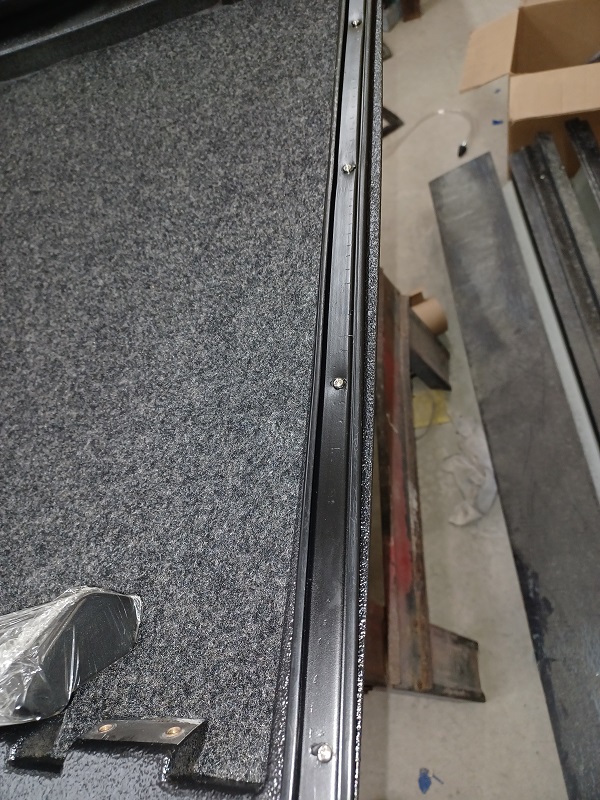
After rolling the Butyl out along the entire lenth of the channel, I trimmed it to fit inside the center low spot. You only want it about a milimeter higher than the sides when finished, so I ended up rolling and trimming twice to get what I wanted. The butyl has to be room temp for the trimming or it will stick right back together. In the first pick you can see how I trimmed it just inside the raised side portion. Then just repeat on the other side. When its finished the butyl tape will be in that low groove and just about 1-2 mm proud so it will have something to seal to the top itself, creating a good water tight seal.
  |
|
|
|
| Puebloswatcop |
Jul 20 2025, 08:41 PM
Post
#1175
|
|
Senior Member Group: Members Posts: 1,690 Joined: 27-December 14 From: Mineola, Texas Member No.: 18,258 Region Association: Southwest Region |
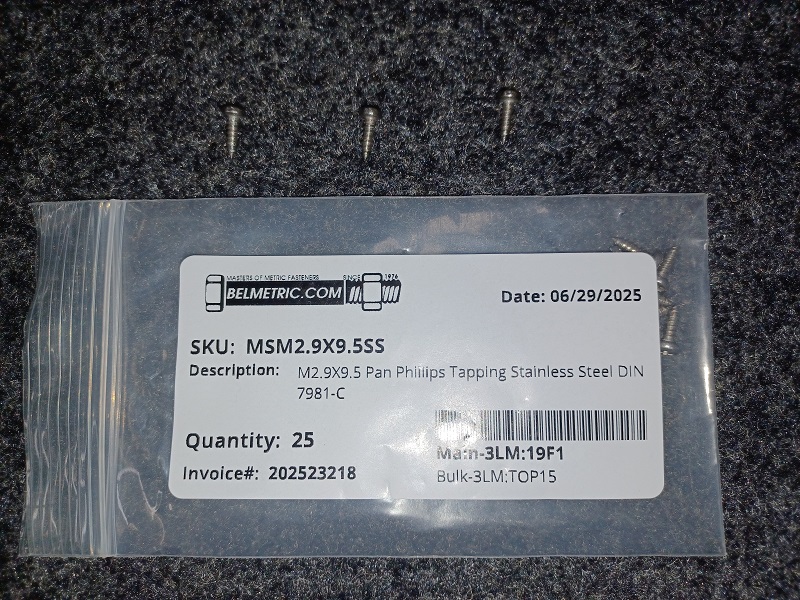
Once done with the butyl sealant, its time to put the channels back onto the top. I bought all new hardware in stainless steel so, no more rust issues. the side channels take m2.9 X 9 mm panhead screws. Of course from Bel Metric, its the only place to shop hardware.
 |
|
|
|
| Puebloswatcop |
Jul 20 2025, 08:45 PM
Post
#1176
|
|
Senior Member Group: Members Posts: 1,690 Joined: 27-December 14 From: Mineola, Texas Member No.: 18,258 Region Association: Southwest Region |
I had my channels marked originally as to which side they came off of, but of course when I painted them I removed the tape markings. But its easy enough, the end that is straight cut goes to the front of the targa top and the odd shaped end goes to the rear.
  |
|
|
|
| Puebloswatcop |
Jul 20 2025, 08:48 PM
Post
#1177
|
|
Senior Member Group: Members Posts: 1,690 Joined: 27-December 14 From: Mineola, Texas Member No.: 18,258 Region Association: Southwest Region |
The good thing is that once you get the 2 end screws in the other three will all be aligned. I also used the screw markings in the metal from the factory mounting, so it should align where it needs to be, so hopefully it will be fairly easy to get a good seal on the window when the rubber is installed.
 |
|
|
|
| friethmiller |
Jul 21 2025, 07:50 AM
Post
#1178
|
|
Senior Member Group: Members Posts: 1,101 Joined: 10-February 19 From: Austin, TX Member No.: 22,863 Region Association: Southwest Region |
Looking good! (IMG:style_emoticons/default/popcorn[1].gif)
|
|
|
|
| Puebloswatcop |
Aug 4 2025, 06:26 PM
Post
#1179
|
|
Senior Member Group: Members Posts: 1,690 Joined: 27-December 14 From: Mineola, Texas Member No.: 18,258 Region Association: Southwest Region |
Just got back from another trip to Colorado. My daughter has been gracious enough to let me leave a lot of my Porsche Parts, Chevy Parts and my Harley at the house I sold her. Figured I would go up and pick up as much as I could fit on my truck and trailer.
I forgot exactly how much I had left behind. Still have a truck load of parts and 1 more 914 to bring down. 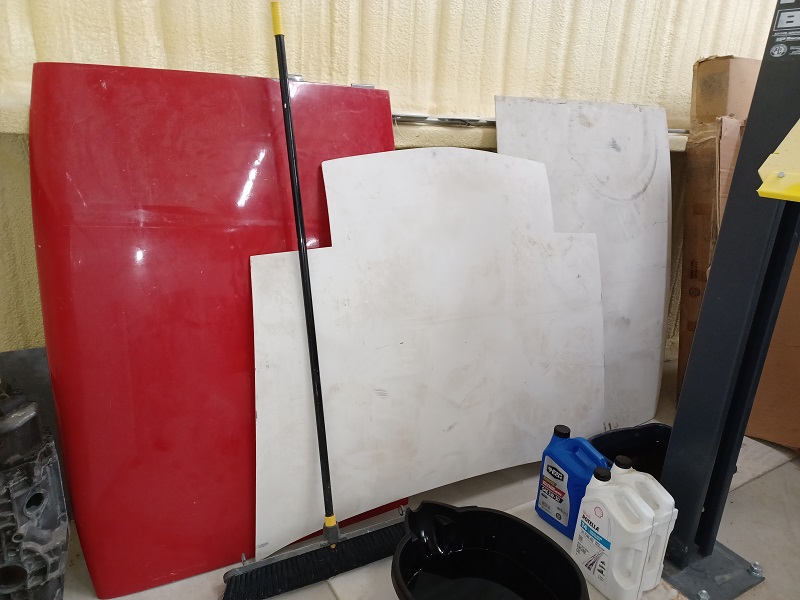 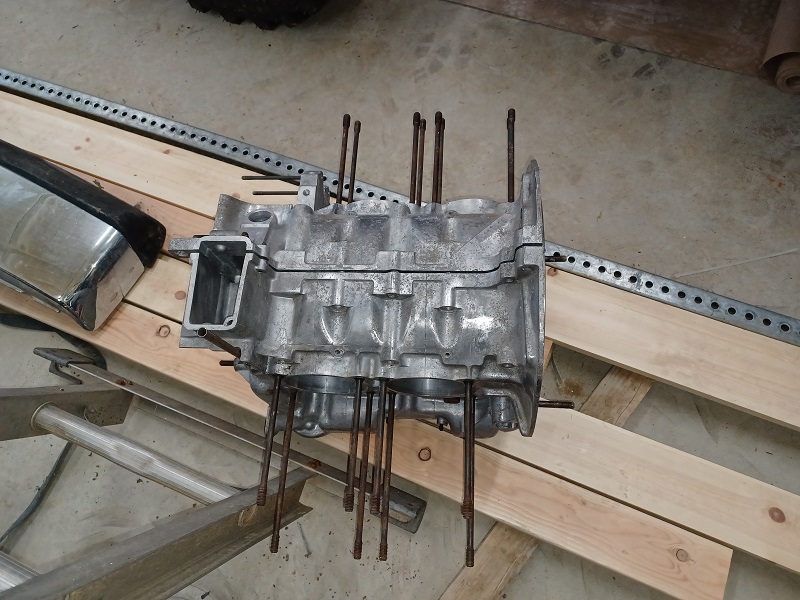   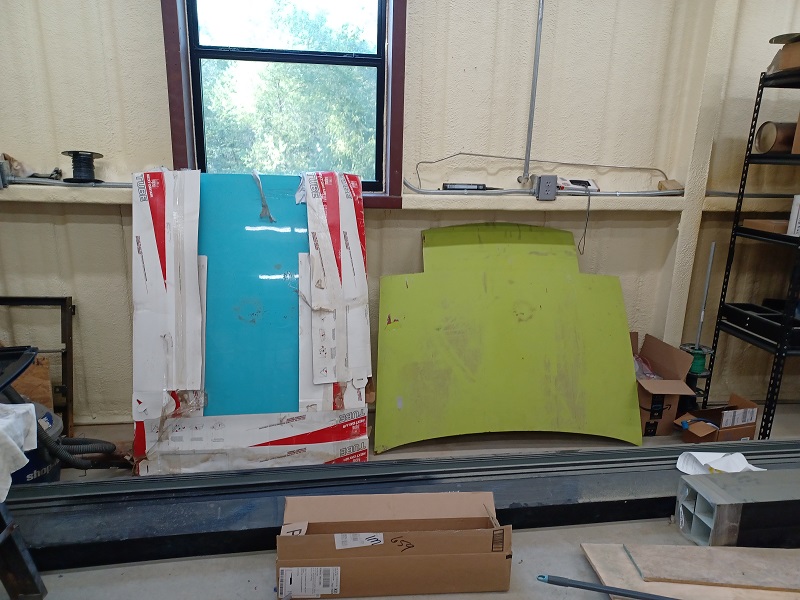 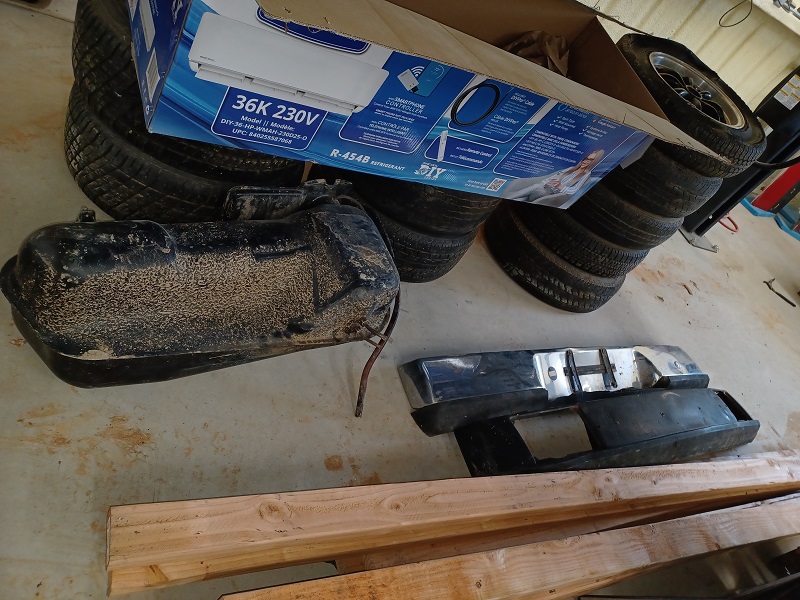  |
|
|
|
| bkrantz |
Aug 4 2025, 08:25 PM
Post
#1180
|
|
914 Guru Group: Members Posts: 8,548 Joined: 3-August 19 From: SW Colorado Member No.: 23,343 Region Association: Rocky Mountains |
Pretty good haul.
|
|
|
|
|
1 User(s) are reading this topic (1 Guests and 0 Anonymous Users)
0 Members:

|
Lo-Fi Version | Time is now: 11th December 2025 - 02:46 AM |
Invision Power Board
v9.1.4 © 2025 IPS, Inc.