|
|
|
Porsche, and the Porsche crest are registered trademarks of Dr. Ing. h.c. F. Porsche AG.
This site is not affiliated with Porsche in any way. Its only purpose is to provide an online forum for car enthusiasts. All other trademarks are property of their respective owners. |
|
|

  |

| Puebloswatcop |
 Aug 5 2025, 07:30 AM Aug 5 2025, 07:30 AM
Post
#1181
|
|
Senior Member  Group: Members Posts: 1,690 Joined: 27-December 14 From: Mineola, Texas Member No.: 18,258 Region Association: Southwest Region |
QUOTE(bkrantz @ Aug 4 2025, 09:25 PM)  Pretty good haul. Thanks Bob. Problem is, there is still one more shell and a bunch of other parts up there. I'm starting to feel like I will never get it all here. |
   |

 
|
| Puebloswatcop |
Aug 8 2025, 08:10 AM
Post
#1182
|
|
Senior Member Group: Members Posts: 1,690 Joined: 27-December 14 From: Mineola, Texas Member No.: 18,258 Region Association: Southwest Region |
Back to the targa top... I decided to go with the new material I ordered from 914 Rubber. It is thick, and nicely cut. All I had to do was to cut out the gaps where the front targa pad gets installed. Then I masked off everything that I didn't want glue on.
I researched a lot of spray on glue products and finally settled on using the Permatex Heavy Duty Headliner adhisive. It is important that the adhesive hold up in high heat, which the Permatex says it does. 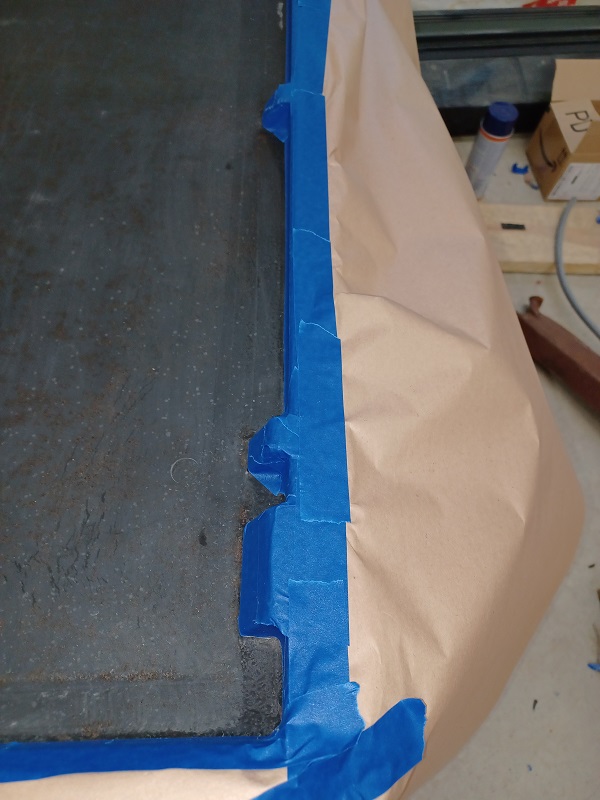 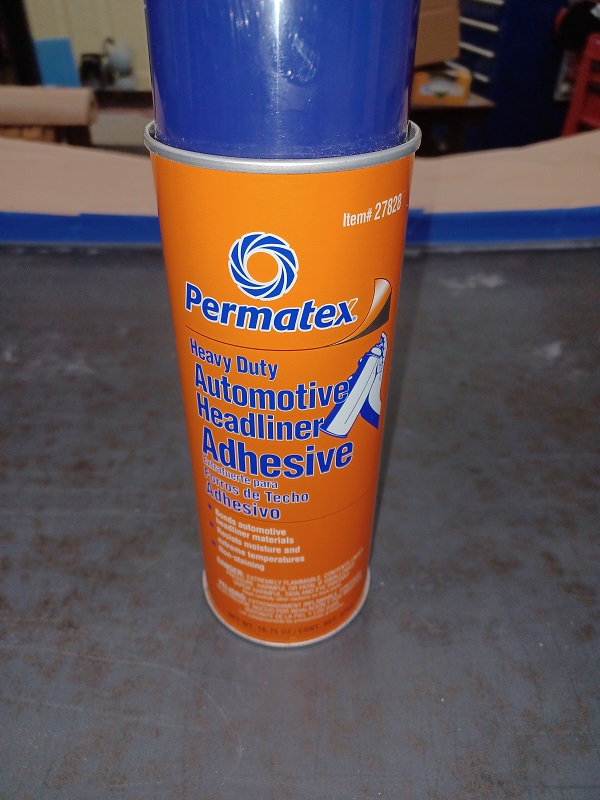 |
|
|
|
| Puebloswatcop |
Aug 8 2025, 08:21 AM
Post
#1183
|
|
Senior Member Group: Members Posts: 1,690 Joined: 27-December 14 From: Mineola, Texas Member No.: 18,258 Region Association: Southwest Region |
After a final trim of the masking. I sprayed just a small portion of the roof and a corresponding swath of the headliner. It is a good idea to mark the headliner as to how it aligns with the roof, so it does not get installed upside down or backwards (end to end)
I decided to glue it in sections since I didn't have anyone to help. The initial alignment is extremely important. If it goes in out of alignment, pulling it up is a @#%$*!. I got no more than 1/2 inch and realized it was not correct. Getting it out was horrible and very time consuming, so as not to damage the headliner. A little touch up spray and I got it started, making sure to get the alignment correct. 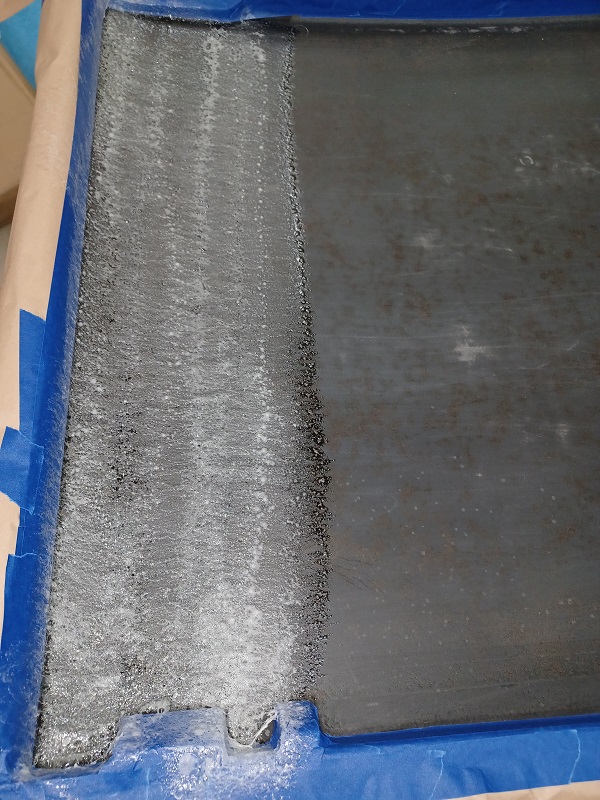 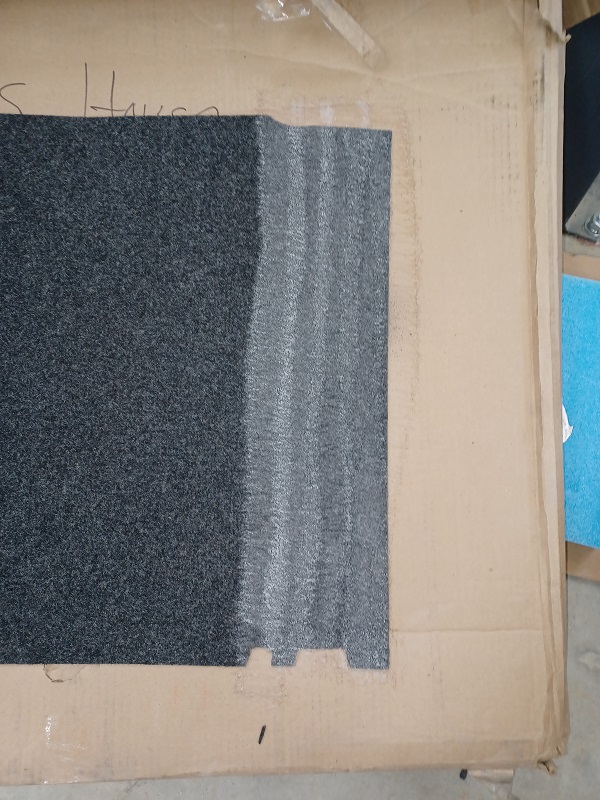 |
|
|
|
| BillJ |
Aug 8 2025, 08:26 AM
Post
#1184
|
|
Senior Member Group: Members Posts: 1,355 Joined: 4-March 13 From: charlotte, NC Member No.: 15,610 Region Association: None |
QUOTE(Puebloswatcop @ Aug 8 2025, 10:10 AM) Back to the targa top... I decided to go with the new material I ordered from 914 Rubber. It is thick, and nicely cut. All I had to do was to cut out the gaps where the front targa pad gets installed. Then I masked off everything that I didn't want glue on. I researched a lot of spray on glue products and finally settled on using the Permatex Heavy Duty Headliner adhisive. It is important that the adhesive hold up in high heat, which the Permatex says it does. I like that same one. It sprays fairly nicely and has held up wherever I have used it |
|
|
|
| Puebloswatcop |
Aug 8 2025, 08:30 AM
Post
#1185
|
|
Senior Member Group: Members Posts: 1,690 Joined: 27-December 14 From: Mineola, Texas Member No.: 18,258 Region Association: Southwest Region |
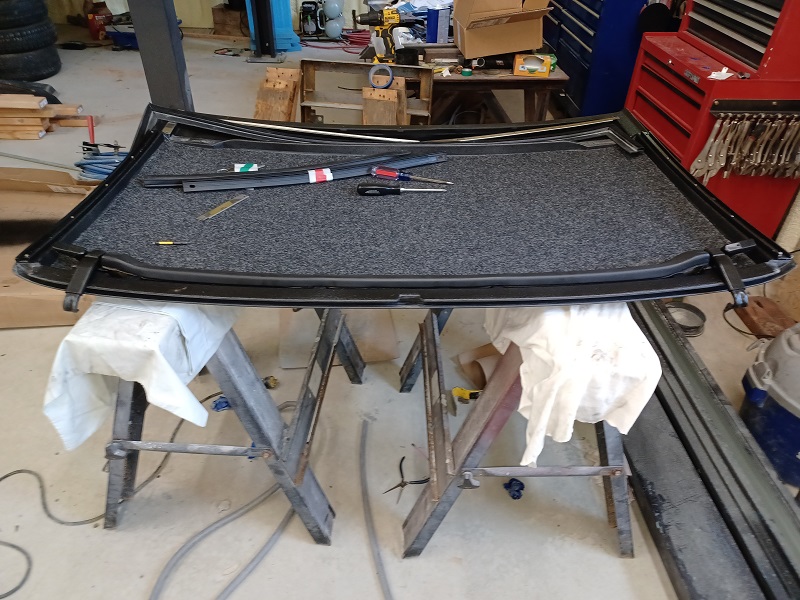
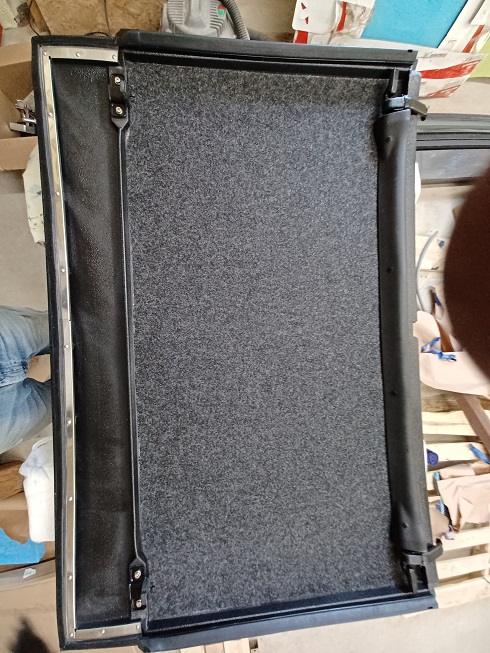
After getting the first six inches or so attached and smoothed out, it is a matter of repeating the process until the whole liner is glued in. A couple of things I learned...
Make sure the alignment is correct. Spray both surfaces with two coats of glue, first spraying one direction, then spraying the other direction accross where you sprayed the first coat, allow 5 minutes between coats and five minutes for the glue to "tack" before you lay the two surfaces together. Also, make sure to cover anything you don't want spray on, including the headliner you have already glued in place. If you spray glue in an unitended place chances are it will be a permanent mistake that you won't be able to remove. 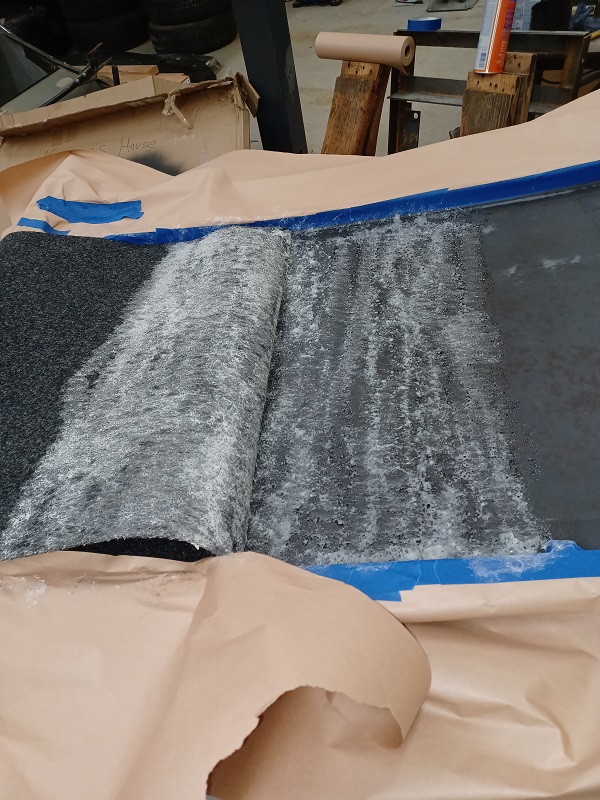 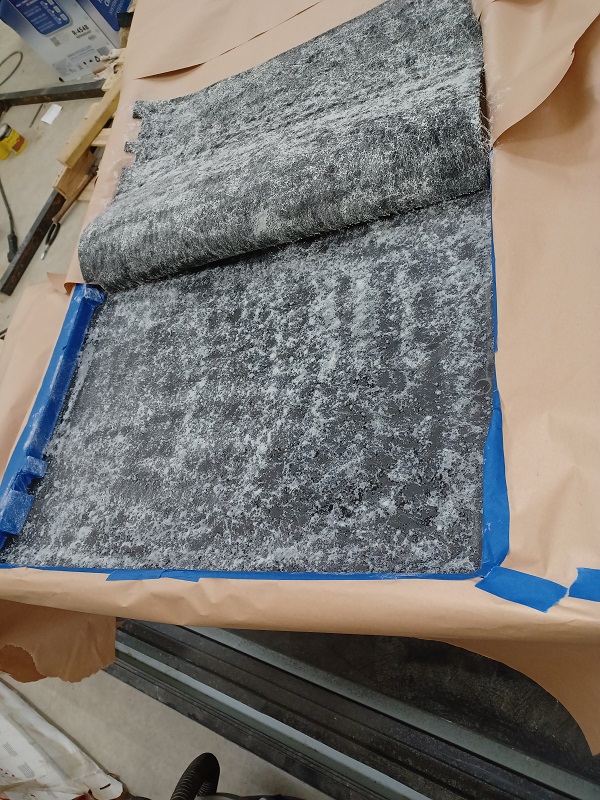 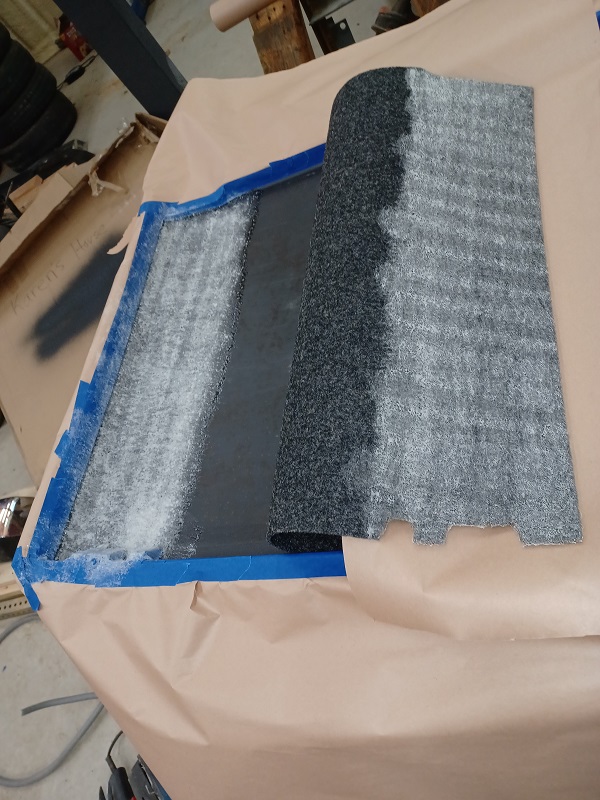 |
|
|
|
| Puebloswatcop |
Aug 8 2025, 08:36 AM
Post
#1186
|
|
Senior Member Group: Members Posts: 1,690 Joined: 27-December 14 From: Mineola, Texas Member No.: 18,258 Region Association: Southwest Region |
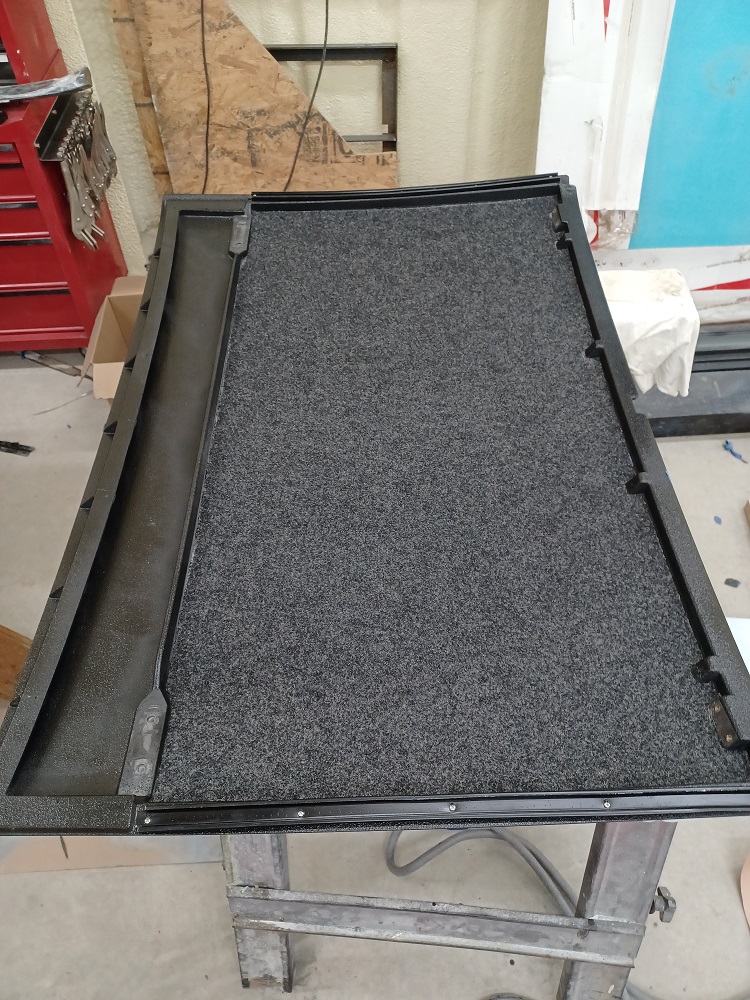
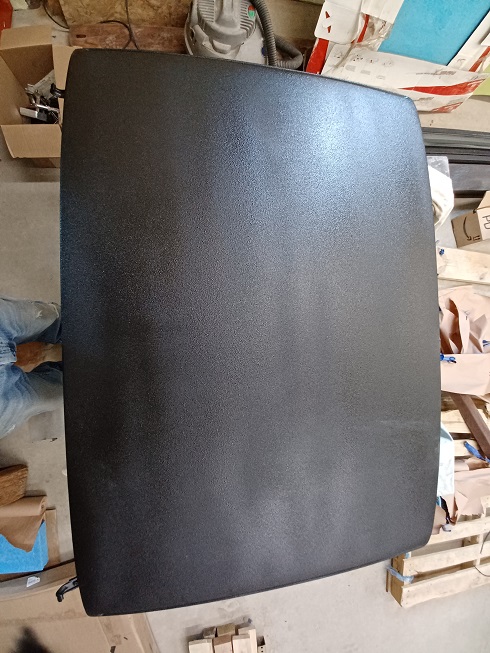
If all goes well, it really comes out nice. Much better than the old headliner that was drooping down over my head. One thing I would recommend is hijack a helper if you can. Grab a couple of beers and the process would be much easier. My wife is usually willing to help with most things, but the glue vapors make her sick and she doesn't drink beer.
 |
|
|
|
| friethmiller |
Aug 8 2025, 08:39 AM
Post
#1187
|
|
Senior Member Group: Members Posts: 1,101 Joined: 10-February 19 From: Austin, TX Member No.: 22,863 Region Association: Southwest Region |
Very nice, Kevin! I need the charcoal one like this. 914rubber is out. Keep up the good work, sir! (IMG:style_emoticons/default/beerchug.gif)
P.S. I think I used the same stuff. Went back and found an old photo of my headliner restoration. 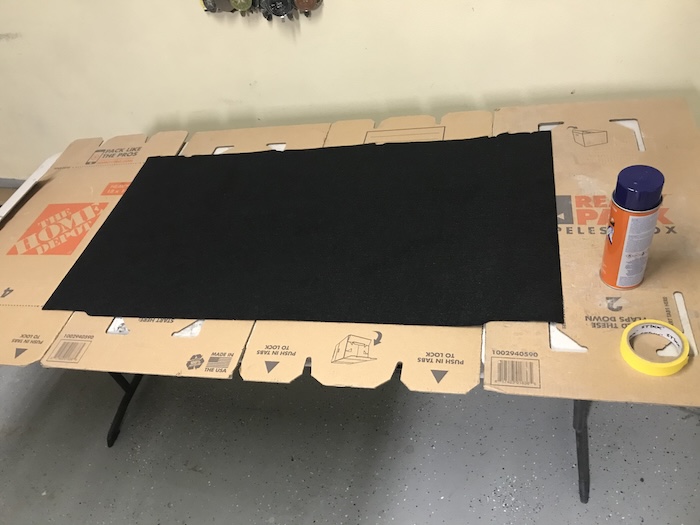 |
 |
|
| Puebloswatcop |
Aug 8 2025, 03:16 PM
Post
#1188
|
|
Senior Member Group: Members Posts: 1,690 Joined: 27-December 14 From: Mineola, Texas Member No.: 18,258 Region Association: Southwest Region |
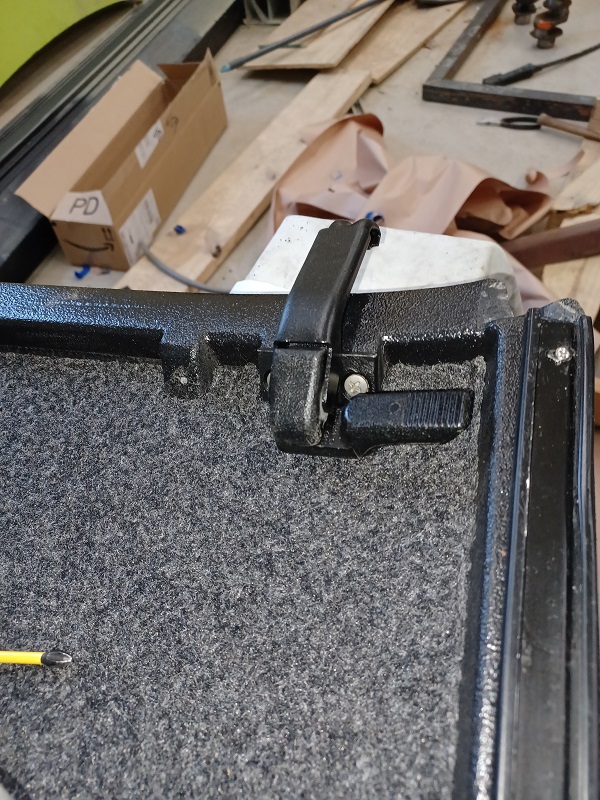
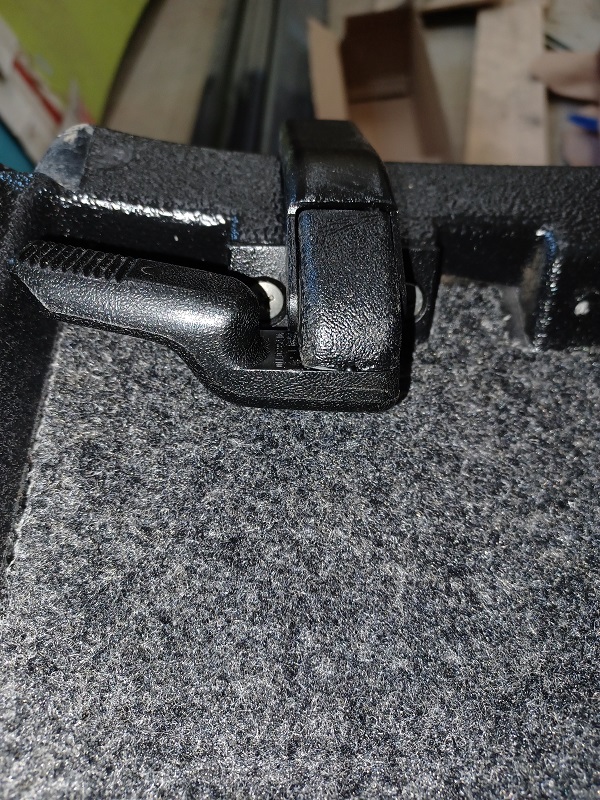
Time to finish the reassembly of the targa top. First was to install the front latches.
  |
|
|
|
| Puebloswatcop |
Aug 8 2025, 03:17 PM
Post
#1189
|
|
Senior Member Group: Members Posts: 1,690 Joined: 27-December 14 From: Mineola, Texas Member No.: 18,258 Region Association: Southwest Region |
Then the front pad
  |
|
|
|
| Puebloswatcop |
Aug 8 2025, 03:26 PM
Post
#1190
|
|
Senior Member Group: Members Posts: 1,690 Joined: 27-December 14 From: Mineola, Texas Member No.: 18,258 Region Association: Southwest Region |
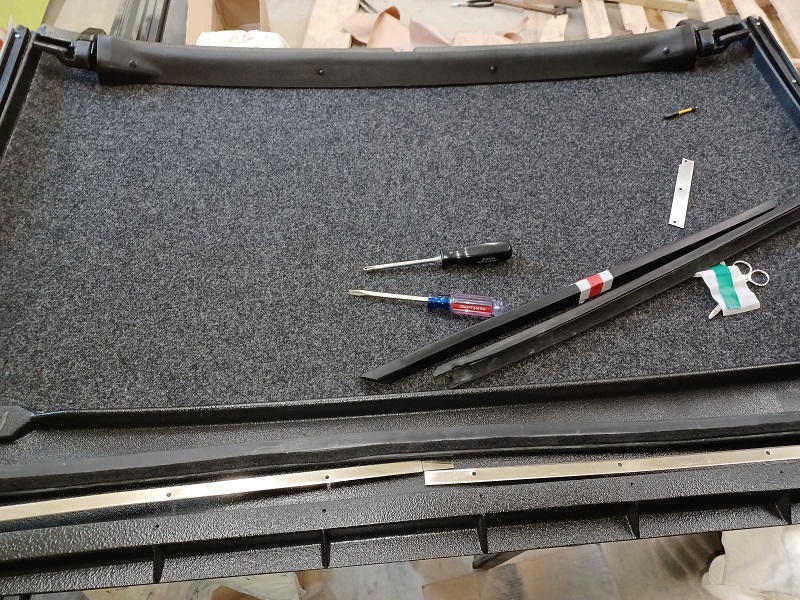
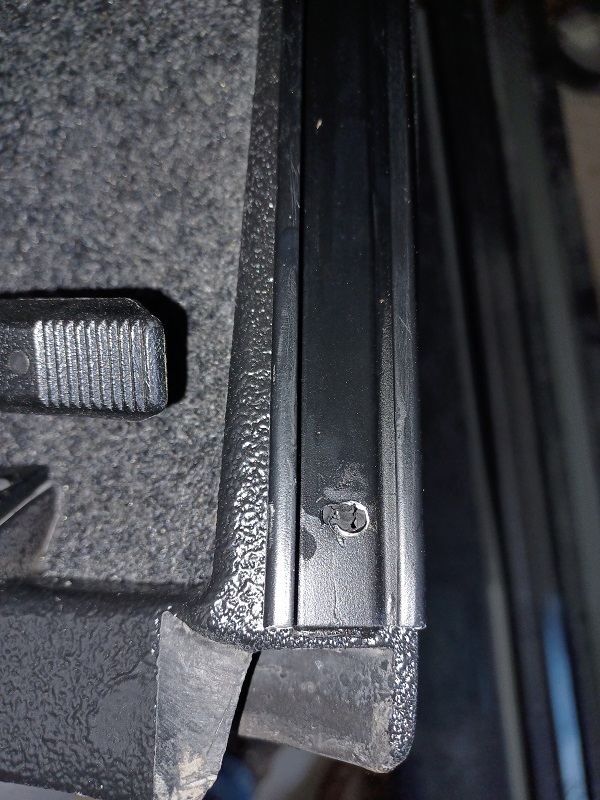
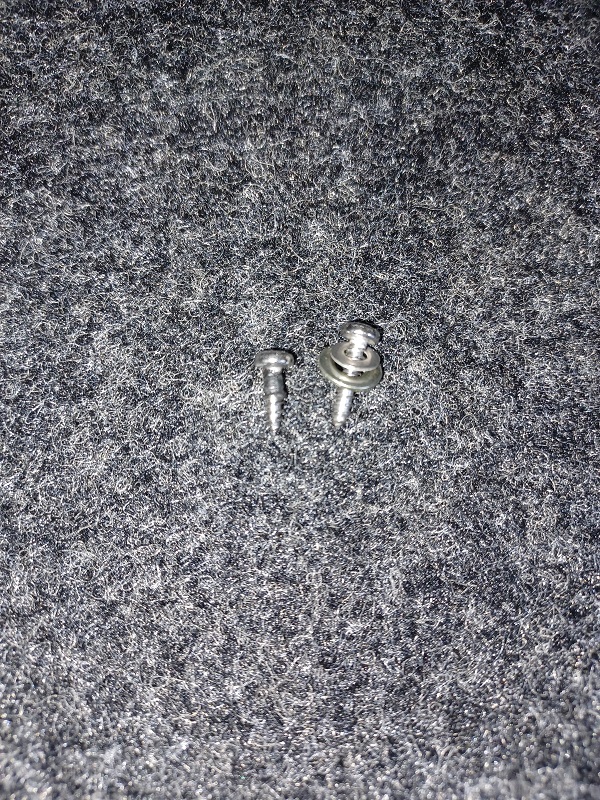
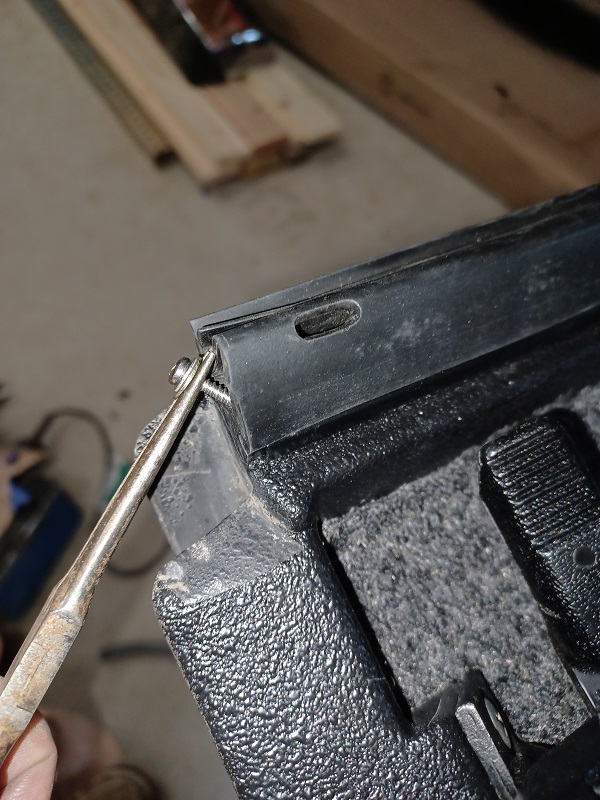
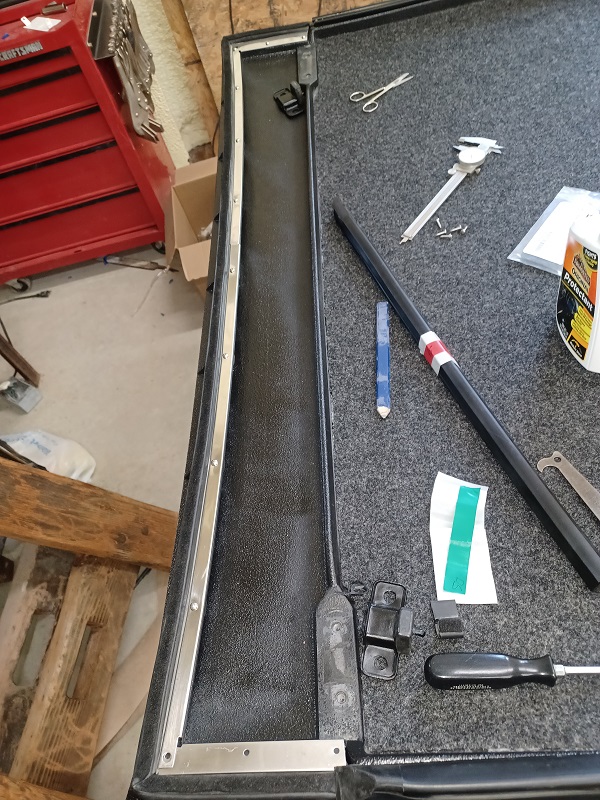
Next came the side seals. Before installing the seals , remember to remove the front screw from the channel that the seal sets in. After installing the seal the longer screw with washers will be installed. I replaced all of the hardware with new stainless screws, no more rust here. Getting the screws into the seals is a bit of a trick. I used a very small set of needle nose pliers to get them inside the seals. Then you have to fish around with the screw until you feel the screw go into the hole before you can screw it in. To install the seals I lubed the channel with armor all and then slid the rubber into the channel from back to front. I found it was easier to slide it in if you put a straight slot screw driver through the hole at the front end of the seal. (In factory seals there is a coresponding hole in the opposite side of the seal) Then you can gently pull on the screw driver while someone pushes the seal in from the rear of the channel.
   |
|
|
|
| Puebloswatcop |
Aug 8 2025, 03:40 PM
Post
#1191
|
|
Senior Member Group: Members Posts: 1,690 Joined: 27-December 14 From: Mineola, Texas Member No.: 18,258 Region Association: Southwest Region |
Then the rear seal. When I went to put it in it seemed to fit so that the actual sealing surface was setting off of the surface of the top, I compared it to the original seal and discovered the the flat portion of the seal was about 1/8 of an inch wider on the new seal. Once I trimmed the 1/8 inch off of the new seal, the fit was perfect. The last part of installing the rear seal was to trim the front of the seal where it tucks under the side seal.
 |
|
|
|
| Puebloswatcop |
Aug 8 2025, 03:45 PM
Post
#1192
|
|
Senior Member Group: Members Posts: 1,690 Joined: 27-December 14 From: Mineola, Texas Member No.: 18,258 Region Association: Southwest Region |
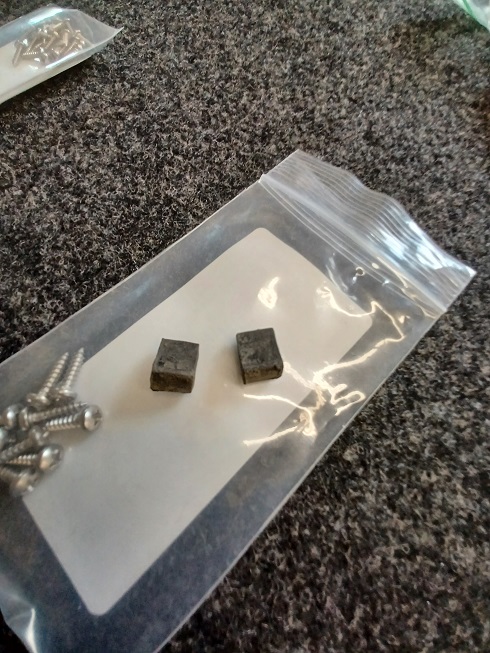
The last part of installint the seals was to install the rubber plugs that go inside the front end of the side seals.
   |
|
|
|
| Puebloswatcop |
Aug 8 2025, 03:50 PM
Post
#1193
|
|
Senior Member Group: Members Posts: 1,690 Joined: 27-December 14 From: Mineola, Texas Member No.: 18,258 Region Association: Southwest Region |
Then I installed the rear targa top latch points and the targa top was complete. I may have to add another coat of paint to the outside of the top, since it looks like I left paint streaks when it was painted the first time.
  |
|
|
|
| friethmiller |
Aug 9 2025, 11:49 AM
Post
#1194
|
|
Senior Member Group: Members Posts: 1,101 Joined: 10-February 19 From: Austin, TX Member No.: 22,863 Region Association: Southwest Region |
Kevin,
To get rid of those lines, I’d run another coat of paint at 90 degrees to this, and then back the gun out to about 12-18 inches away and spray a light drop coat across the whole panel. Can go diagonal on this - as well if you want. |
|
|
|
| Puebloswatcop |
Aug 9 2025, 05:20 PM
Post
#1195
|
|
Senior Member Group: Members Posts: 1,690 Joined: 27-December 14 From: Mineola, Texas Member No.: 18,258 Region Association: Southwest Region |
Thanks for the input Fred. I was thinking the same thing on the 90 degree thing, of course then I would probably and up with streaks that go the other way....lol. The drop coat should take care of that. Thanks for sharing your thoughts
|
|
|
|
| Literati914 |
Aug 10 2025, 09:38 AM
Post
#1196
|
|
Advanced Member Group: Members Posts: 2,173 Joined: 16-November 06 From: Dallas, TX Member No.: 7,222 Region Association: Southwest Region |
QUOTE(Puebloswatcop @ Aug 8 2025, 04:45 PM) The last part of installint the seals was to install the rubber plugs that go inside the front end of the side seals. I have a set of these seals on order to re-do the (new) seals that I put on my car about a year ago [I cut them ever so slightly too short apparently which allows moisture in]. - where are these end plugs coming from? I do not remember them being a part of any kit or offered from the usual places. |
|
|
|
| Puebloswatcop |
Aug 10 2025, 07:21 PM
Post
#1197
|
|
Senior Member Group: Members Posts: 1,690 Joined: 27-December 14 From: Mineola, Texas Member No.: 18,258 Region Association: Southwest Region |
QUOTE(Literati914 @ Aug 10 2025, 10:38 AM) QUOTE(Puebloswatcop @ Aug 8 2025, 04:45 PM) The last part of installint the seals was to install the rubber plugs that go inside the front end of the side seals. I have a set of these seals on order to re-do the (new) seals that I put on my car about a year ago [I cut them ever so slightly too short apparently which allows moisture in]. - where are these end plugs coming from? I do not remember them being a part of any kit or offered from the usual places. Hey Doug, Are you talking about the Targa Top side seals? So, mine were factory seals that I reconditioned, so they were correct factory length. I would think if the replacent parts are made correctly, you should not have to cut them at all. I think where people go wrong when they install these using the pull in method, they stretch. then you kind of have to push them back from each end to make sure they have rebounded to the correct position. When you get the new seals shoot me a pm and I can get you the overall length of the factory seals for comparison. As for the end plugs, I have never seen them sold anywhere either. They just happened to be in the factory seals. I guess if you can find anyone with a top that has the factory seals on it, you might be able to get a set... If not, I figure you could make them out of RTV. If you are going to ditch the old seals you are replacing, cut about 1/2 inch off one and fill that part of the seal with RTV and then just pop it out once its cured and plug your new seals with the RTV plugs you just made. Darn maybe we can patent them....lol |
|
|
|
| Puebloswatcop |
Aug 13 2025, 08:20 AM
Post
#1198
|
|
Senior Member Group: Members Posts: 1,690 Joined: 27-December 14 From: Mineola, Texas Member No.: 18,258 Region Association: Southwest Region |
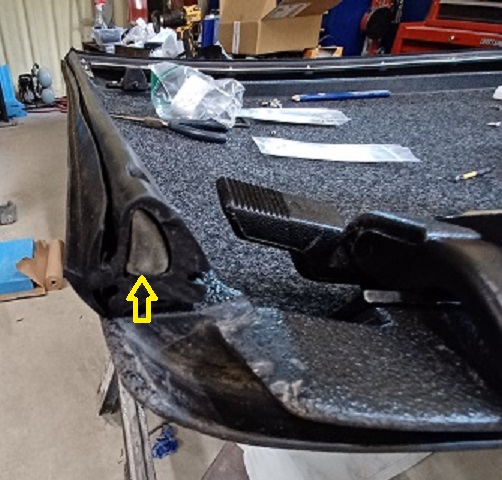
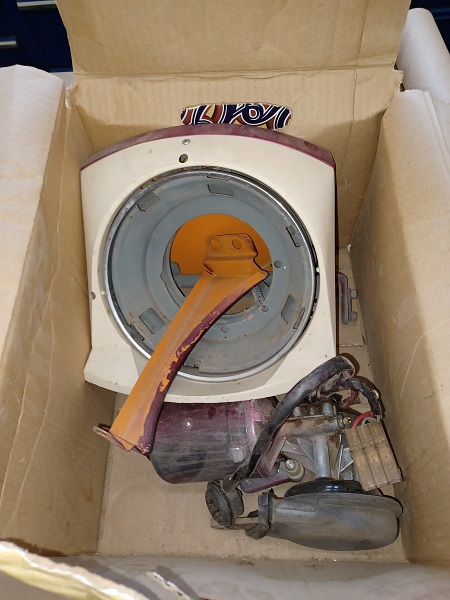
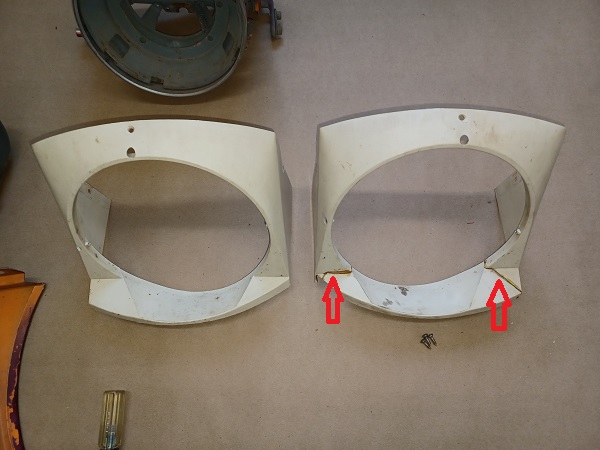
Next I decided to work on both sides of the headlight assemblies. They are actually in pretty good shape with just minor areas of rust. In the case of these assemblies, the PO decided that over-spray on everthing was okay.
  |
|
|
|
| Puebloswatcop |
Aug 13 2025, 08:25 AM
Post
#1199
|
|
Senior Member Group: Members Posts: 1,690 Joined: 27-December 14 From: Mineola, Texas Member No.: 18,258 Region Association: Southwest Region |
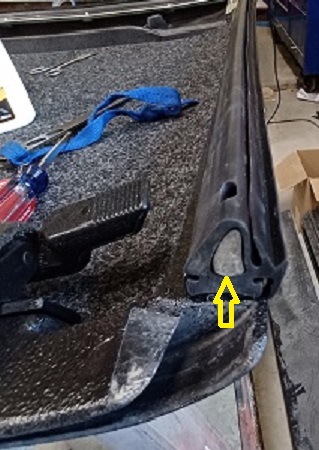
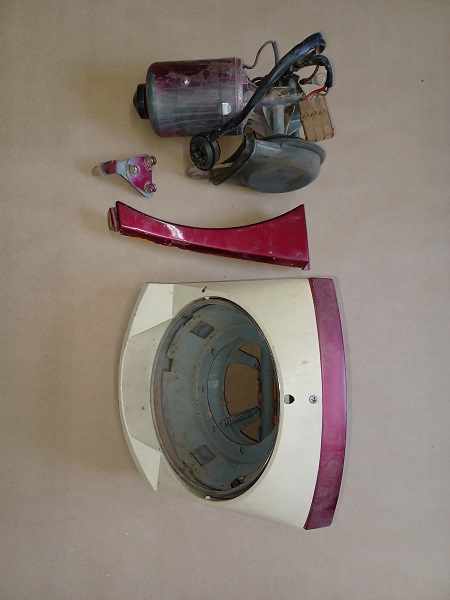
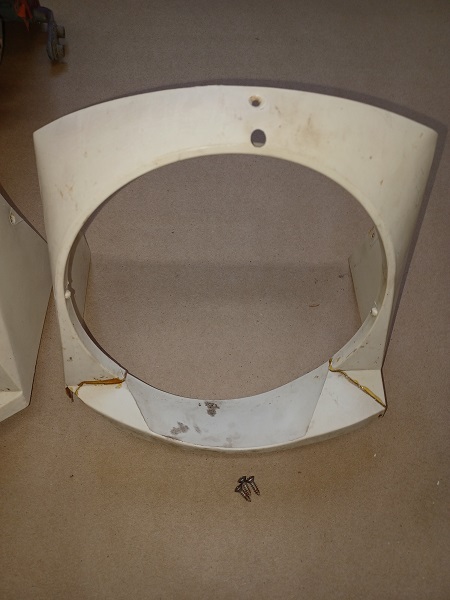
I started by removing the headlight surround. It only has 3 oval head phillips screws holding it in place. The left one was in great shape, but the right was a different story. It appeared that it had been broken at one point and the PO glued it back together. Whatever glue they used ha yellowed badly.
   |
|
|
|
| friethmiller |
Aug 13 2025, 08:25 AM
Post
#1200
|
|
Senior Member Group: Members Posts: 1,101 Joined: 10-February 19 From: Austin, TX Member No.: 22,863 Region Association: Southwest Region |
QUOTE(Puebloswatcop @ Aug 13 2025, 09:20 AM) Next I decided to work on both sides of the headlight assemblies. They are actually in pretty good shape with just minor areas of rust. In the case of these assemblies, the PO decided that over-spray on everthing was okay. Get out the Lacquer Thinner and tooth brushes!! (IMG:style_emoticons/default/wacko.gif) |
|
|
|
|
2 User(s) are reading this topic (2 Guests and 0 Anonymous Users)
0 Members:

|
Lo-Fi Version | Time is now: 10th December 2025 - 08:50 AM |
Invision Power Board
v9.1.4 © 2025 IPS, Inc.