|
|
|
Porsche, and the Porsche crest are registered trademarks of Dr. Ing. h.c. F. Porsche AG.
This site is not affiliated with Porsche in any way. Its only purpose is to provide an online forum for car enthusiasts. All other trademarks are property of their respective owners. |
|
|

  |

| Puebloswatcop |
 Aug 13 2025, 08:28 AM Aug 13 2025, 08:28 AM
Post
#1201
|
|
Senior Member  Group: Members Posts: 1,690 Joined: 27-December 14 From: Mineola, Texas Member No.: 18,258 Region Association: Southwest Region |
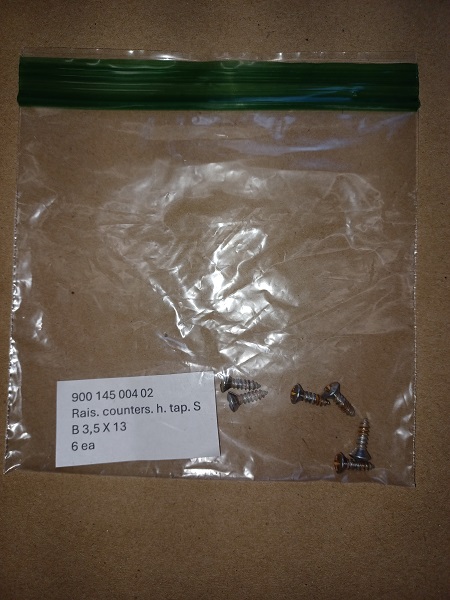
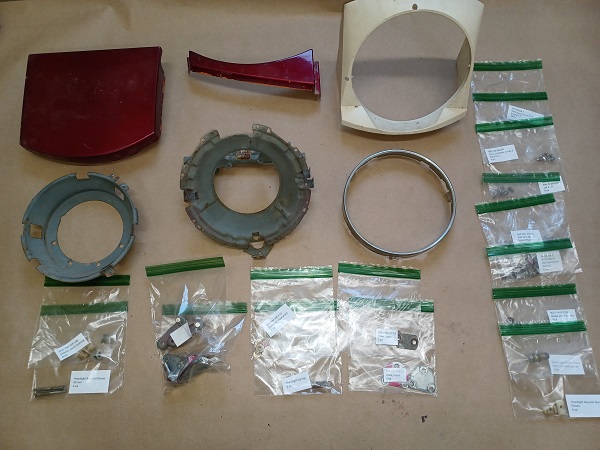
As I removed each item, I bagged and labled all of the hardware by part number and the total quantity of that item throughout the entire car.
 |
   |

 
|
| friethmiller |
Aug 13 2025, 08:28 AM
Post
#1202
|
|
Senior Member Group: Members Posts: 1,101 Joined: 10-February 19 From: Austin, TX Member No.: 22,863 Region Association: Southwest Region |
QUOTE(Puebloswatcop @ Aug 13 2025, 09:25 AM)  I started by removing the headlight surround. It only has 3 oval head phillips screws holding it in place. The left one was in great shape, but the right was a different story. It appeared that it had been broken at one point and the PO glued it back together. Whatever glue they used ha yellowed badly. 914rubber sells these. No brainer. Don't waste your time on this broken plastic. [I say this as I repair a broken-down, plastic front valance]. |
 |
|
| Puebloswatcop |
Aug 13 2025, 08:31 AM
Post
#1203
|
|
Senior Member Group: Members Posts: 1,690 Joined: 27-December 14 From: Mineola, Texas Member No.: 18,258 Region Association: Southwest Region |
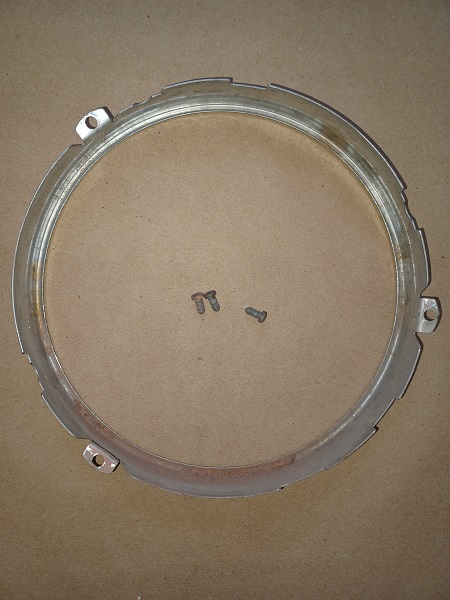
Then I removed the 3 screws holding on the chrome headlight trim ring.
   |
|
|
|
| Puebloswatcop |
Aug 13 2025, 08:33 AM
Post
#1204
|
|
Senior Member Group: Members Posts: 1,690 Joined: 27-December 14 From: Mineola, Texas Member No.: 18,258 Region Association: Southwest Region |
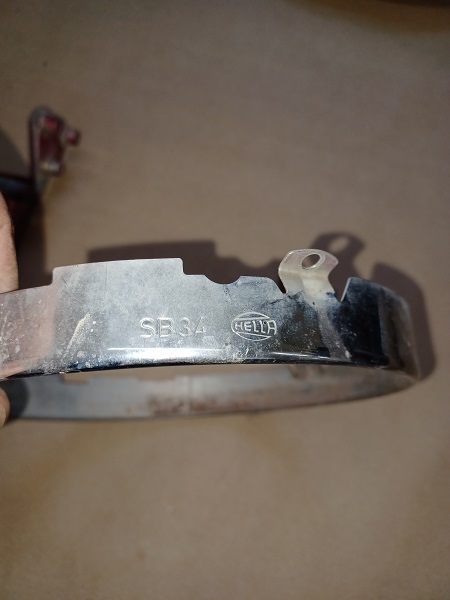
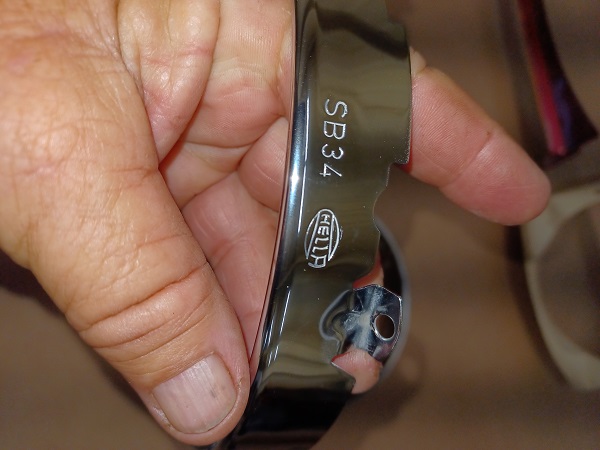
The ring is certainly original Hella. Not in too bad of shape considering it is 55 years old.
  |
|
|
|
| Puebloswatcop |
Aug 13 2025, 08:40 AM
Post
#1205
|
|
Senior Member Group: Members Posts: 1,690 Joined: 27-December 14 From: Mineola, Texas Member No.: 18,258 Region Association: Southwest Region |
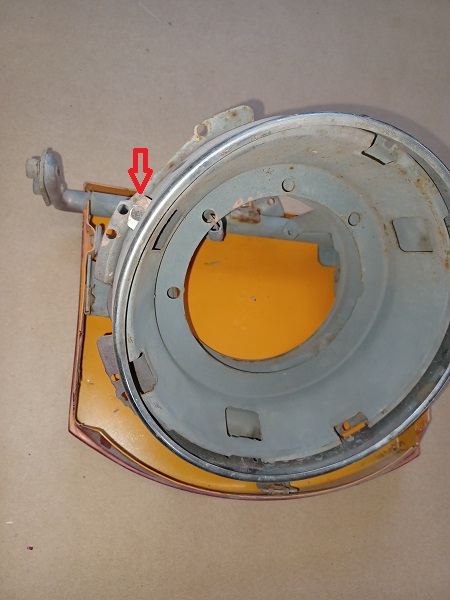
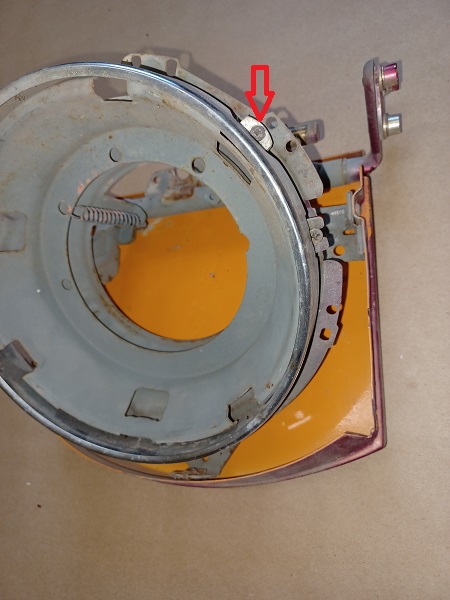
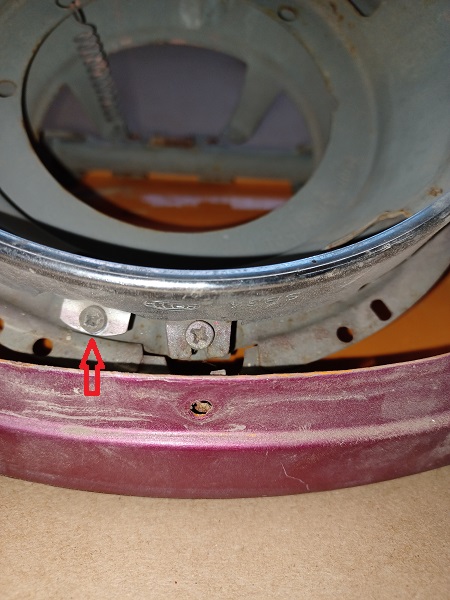
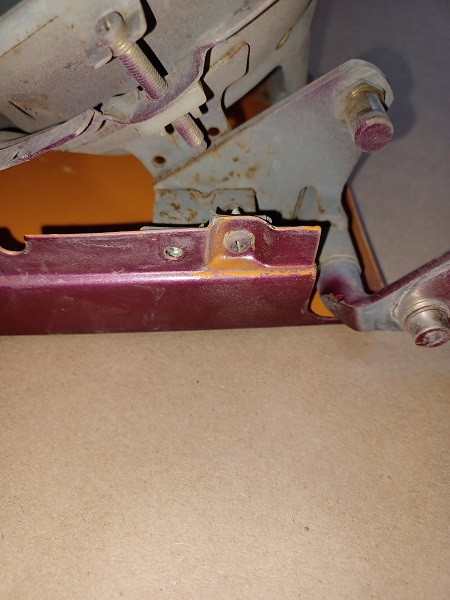
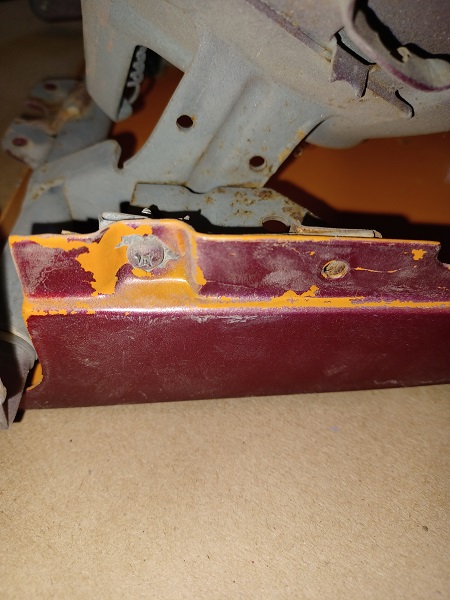
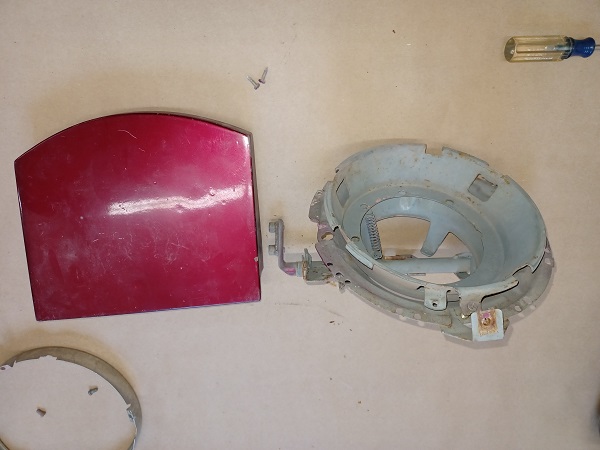
Next was to remove the headlight cover. There are 2 screws holding it place although there are 5 screw holes on it. I'll have to do some research on why only 2 screws were used. As you can see the PO must have used a rattle can to paint the awful red color on the car. Not only did they get overspray everywhere, but then they missed entire areas that needed painting.
   |
|
|
|
| Puebloswatcop |
Aug 13 2025, 08:48 AM
Post
#1206
|
|
Senior Member Group: Members Posts: 1,690 Joined: 27-December 14 From: Mineola, Texas Member No.: 18,258 Region Association: Southwest Region |
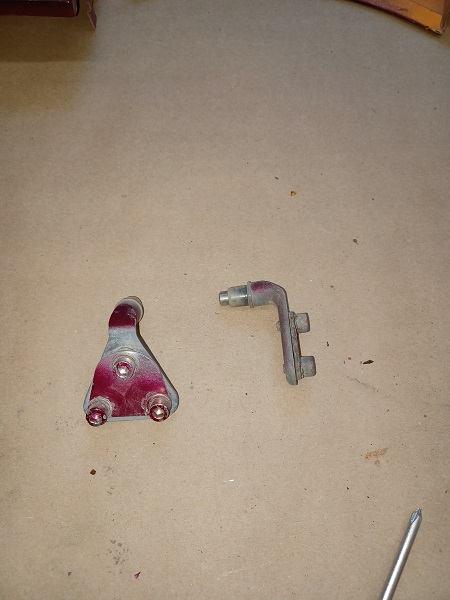
Now comes all of the little parts that have to be removed from the buckets so it can be stripped and taken to the powder coater. Removed and bagged all of the parts from the pivot brackets.
   |
|
|
|
| Puebloswatcop |
Aug 13 2025, 08:53 AM
Post
#1207
|
|
Senior Member Group: Members Posts: 1,690 Joined: 27-December 14 From: Mineola, Texas Member No.: 18,258 Region Association: Southwest Region |
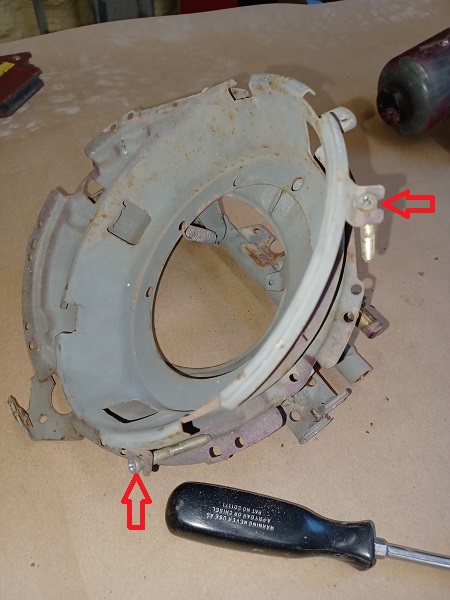
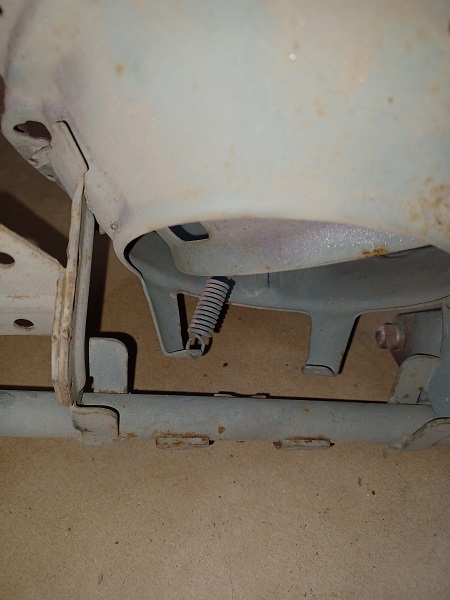
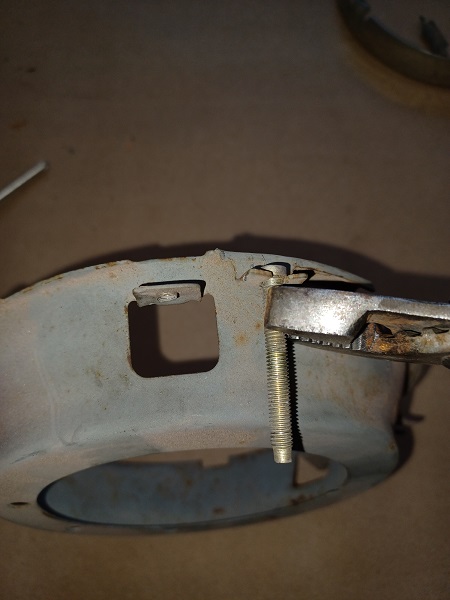
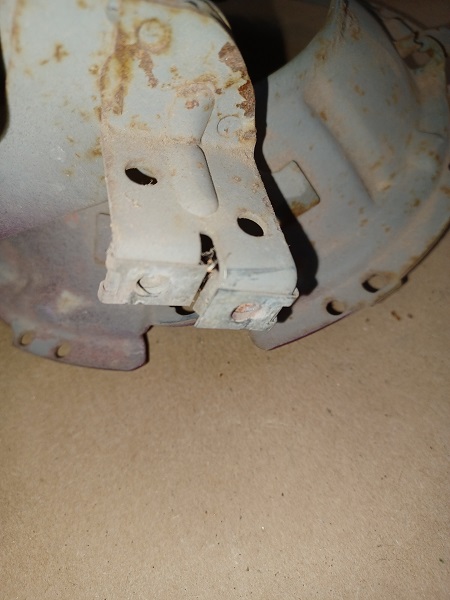
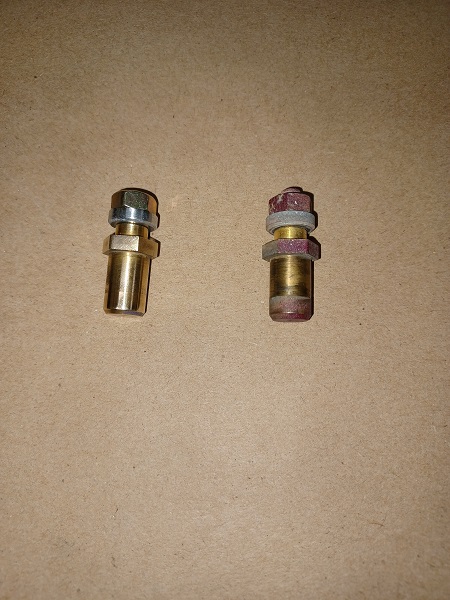
Then came the headlight aiming screw parts. There are 2 adjustment scres and one spring that need to be removed. The screws are inserted to 2 brackets on the bucket. In order to pull the screws off, I just used a pair of pliers and using the bucket as a fulcrum point, pulled them out.
   |
|
|
|
| Puebloswatcop |
Aug 13 2025, 08:59 AM
Post
#1208
|
|
Senior Member Group: Members Posts: 1,690 Joined: 27-December 14 From: Mineola, Texas Member No.: 18,258 Region Association: Southwest Region |
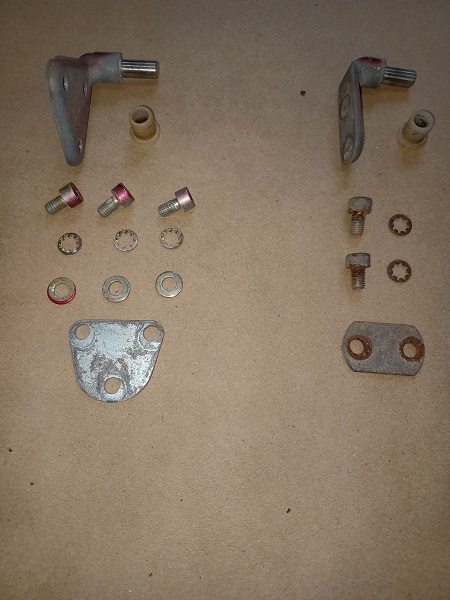
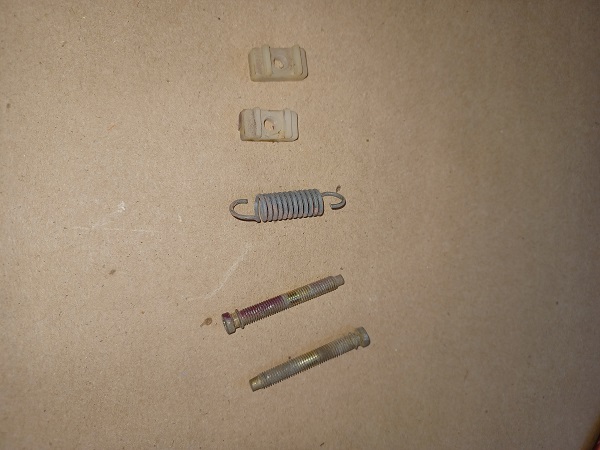
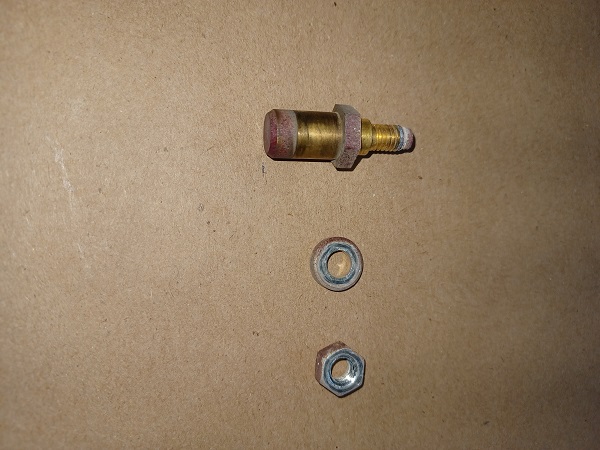
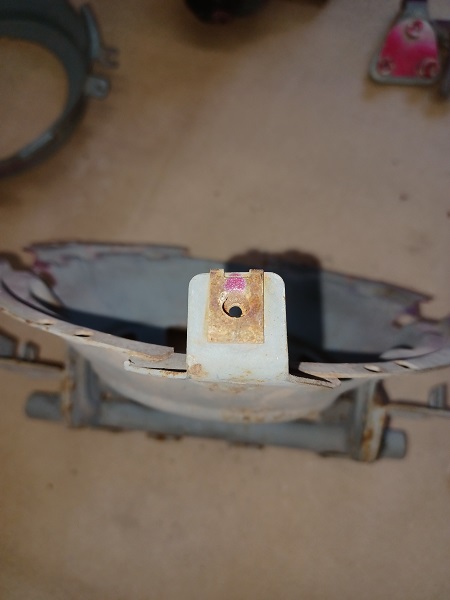
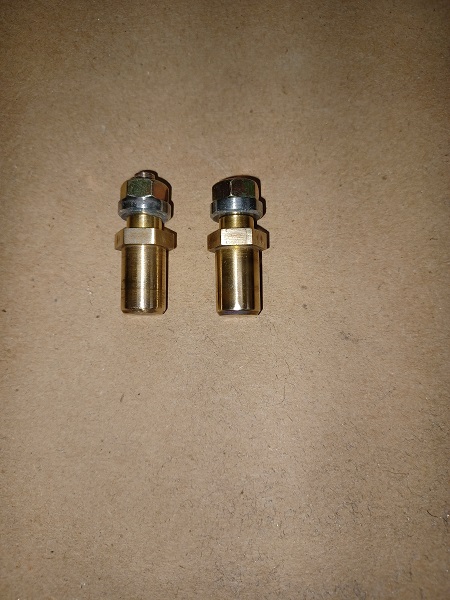
Last but not least, remove the plastic adjuster nuts from the inner bucket. Here is a picture of all of the hardware that hold the inner bucket inside the outer buck and allows for headlight adjustment.
  |
|
|
|
| Puebloswatcop |
Aug 13 2025, 09:05 AM
Post
#1209
|
|
Senior Member Group: Members Posts: 1,690 Joined: 27-December 14 From: Mineola, Texas Member No.: 18,258 Region Association: Southwest Region |
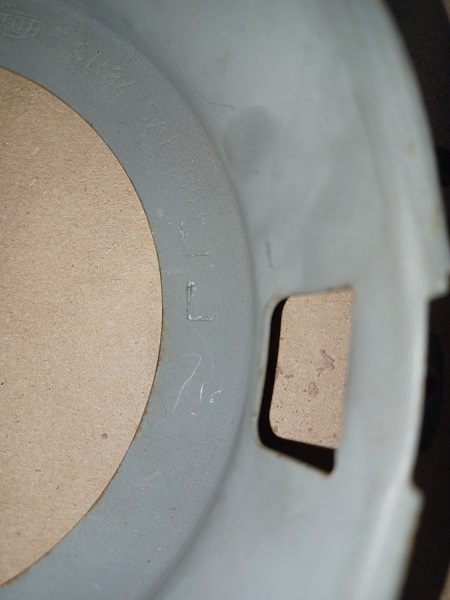
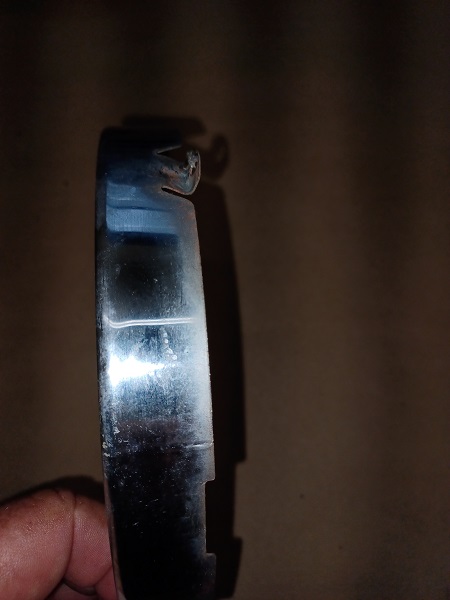
By now the inner bucket should be comletely stripped of all hardware. Although the inner buckets appear to be interchangeable the outer buckets are not. So just in case and because I am anal about the parts, I marked the inner buckets with the respective sides, using a steel letter set.
  |
|
|
|
| Puebloswatcop |
Aug 13 2025, 09:11 AM
Post
#1210
|
|
Senior Member Group: Members Posts: 1,690 Joined: 27-December 14 From: Mineola, Texas Member No.: 18,258 Region Association: Southwest Region |
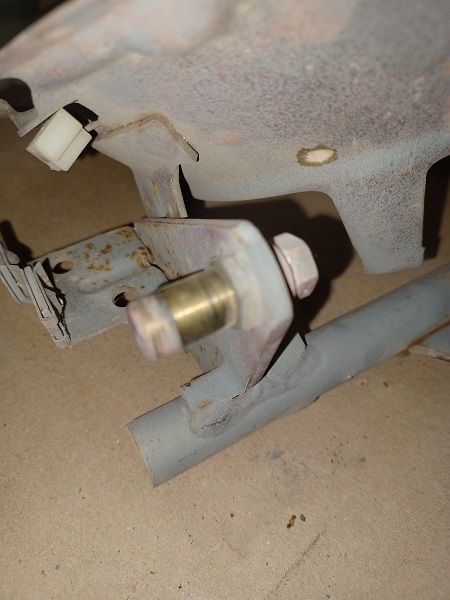
On to the outer (main) bucket assembly. it has a number of part attached to it, including the pivot bolt. EAsily removed with a 10 mm wrench, the washer is a special washer, so i was careful not to set it down and lose it.
  |
|
|
|
| Puebloswatcop |
Aug 13 2025, 09:15 AM
Post
#1211
|
|
Senior Member Group: Members Posts: 1,690 Joined: 27-December 14 From: Mineola, Texas Member No.: 18,258 Region Association: Southwest Region |
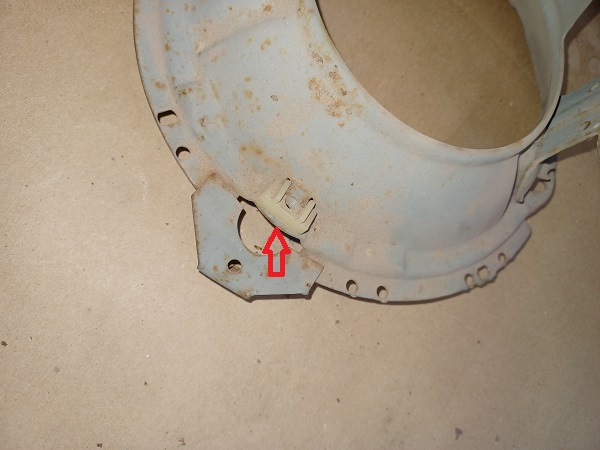
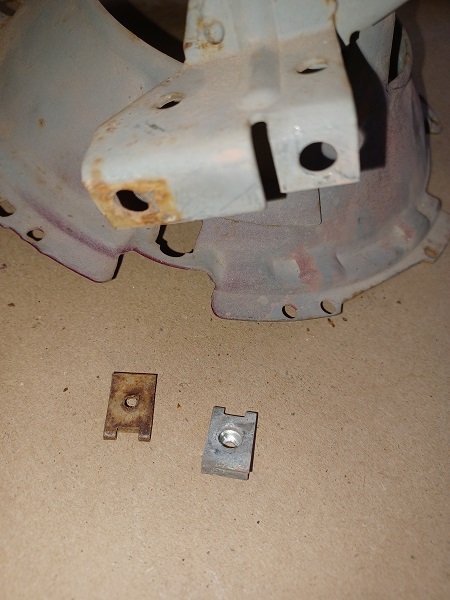
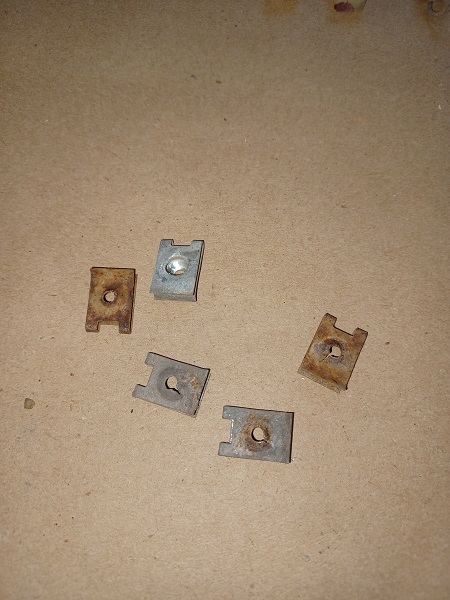
Then there are the pesky speed nuts. There are a total of 5. two on each side of the buckett, and one at the top.
    |
|
|
|
| Puebloswatcop |
Aug 13 2025, 09:17 AM
Post
#1212
|
|
Senior Member Group: Members Posts: 1,690 Joined: 27-December 14 From: Mineola, Texas Member No.: 18,258 Region Association: Southwest Region |
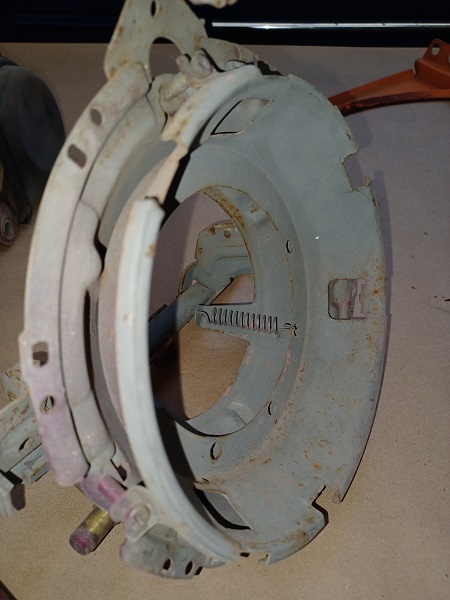
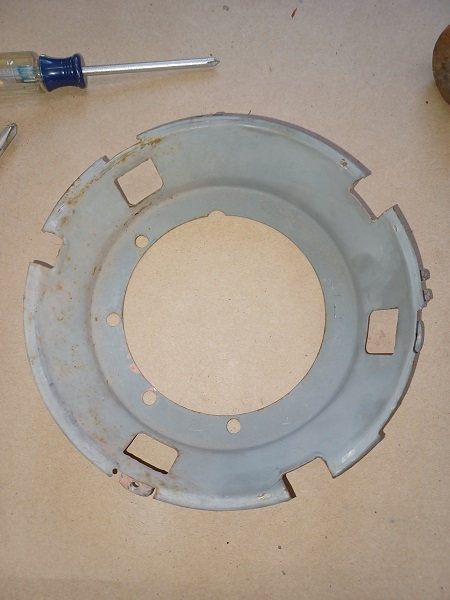
In the end, this is what one bucket looks like after being stripped down to all of its individual components.
 |
|
|
|
| Puebloswatcop |
Aug 13 2025, 02:55 PM
Post
#1213
|
|
Senior Member Group: Members Posts: 1,690 Joined: 27-December 14 From: Mineola, Texas Member No.: 18,258 Region Association: Southwest Region |
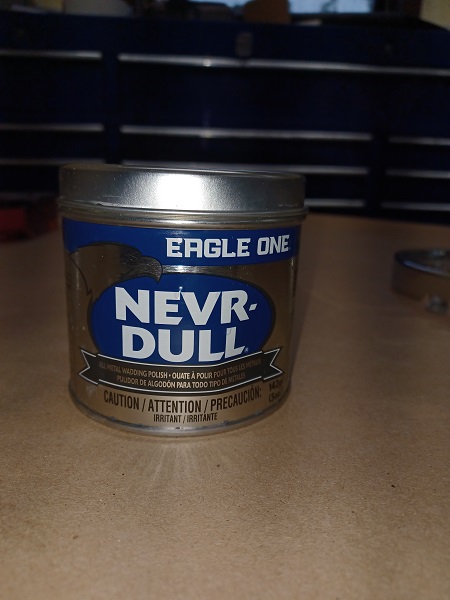
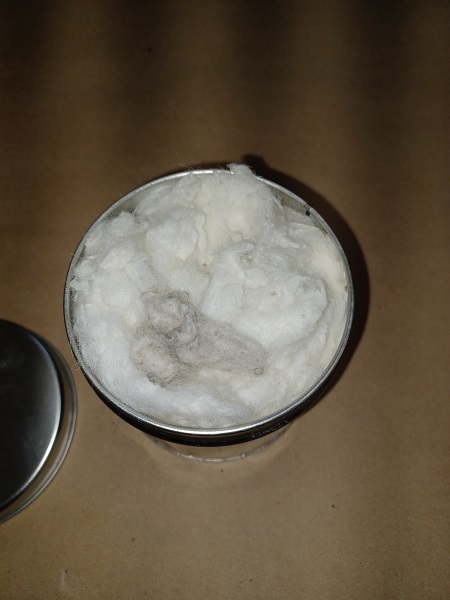
Today I too a little bit of time to clean some of the headlight components. I know some of you guys out there remember this product. My dad always had some in the garage. To this day I can remember the smell of it. I actually was looking for a different product, but they were sold out, So I grabbed a can of Dad's old go too.
  |
|
|
|
| Puebloswatcop |
Aug 13 2025, 03:00 PM
Post
#1214
|
|
Senior Member Group: Members Posts: 1,690 Joined: 27-December 14 From: Mineola, Texas Member No.: 18,258 Region Association: Southwest Region |
I decided to try it on the chrome trim rings first. I was really amazed at how well it worked, there was very little that it didn't take off, but 4-0 steel wool helped that along.
  |
|
|
|
| Puebloswatcop |
Aug 13 2025, 03:03 PM
Post
#1215
|
|
Senior Member Group: Members Posts: 1,690 Joined: 27-December 14 From: Mineola, Texas Member No.: 18,258 Region Association: Southwest Region |
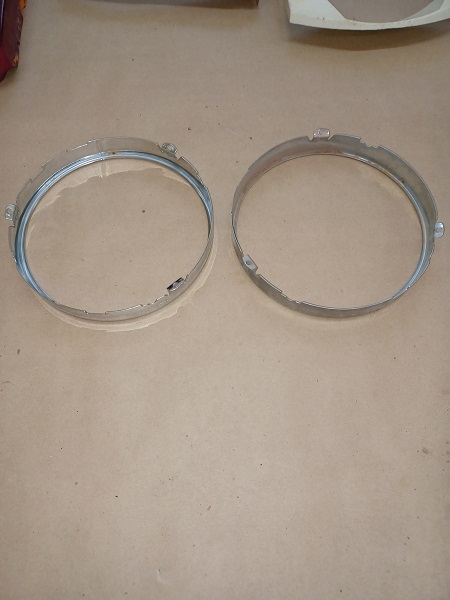
You can reall see the difference between the one that was polished and the one that wasnt. Even the reflection on the table top shows a big difference in the reflectivity after cleaning,
  |
|
|
|
| Puebloswatcop |
Aug 13 2025, 03:09 PM
Post
#1216
|
|
Senior Member Group: Members Posts: 1,690 Joined: 27-December 14 From: Mineola, Texas Member No.: 18,258 Region Association: Southwest Region |
The pivot hardware for the bucket was a PITA. They were covered with oversoray from the PO. I found that Brake cleaner, Steel Wool and a paper towel does do a pretty good job removing the nasty stuff off of the metal surfsces.
   |
|
|
|
| Puebloswatcop |
Aug 14 2025, 04:58 PM
Post
#1217
|
|
Senior Member Group: Members Posts: 1,690 Joined: 27-December 14 From: Mineola, Texas Member No.: 18,258 Region Association: Southwest Region |
Today was the day for headlight motor work. The DAPO oversprayed the crap out of both motors. I think they were probably high when they painted the car. As you can see, not much was spared in the paint tirade.
  As disassembly begins, the first thing was the actuator rods, they look like they had been in a saltwater bath on the exposed end, I tried steel wool to get it off, but there is too much oxidation. Cleaned it up for now, but will be sending these to the re-plater. I also ordered all new bushings, they should be here by the weekend. Most of the hardware was pretty clean though and just needed a bit of refreshing.    The black cups that conceal the actuator arms were chipped where the articulating arm is. The all seem to be like this and I'm not sure why. The actuator isn't close to rubbing on them. Either way these will be media blasted and then go to be powder coated. On the back side there is a rubber seal that needs to be removed before blasting.   I cleaned the entire unit using 4/0 steel wool and brake cleaner. things still had a pink tinge to them, so I followed that up with brake cleaner and a white rag. repeated that process until the rag didn't turn pink anymore.   I removed the wiring from the three way plug, and clead the overspray that even found it's way into the plug. then cleaned the terminals, before replace theh wires into the plug. I know I have new plugs somewhere, But I can't find them, so these will stay for now and I'll replace them when I find them.   4 Hrs later and both motors have been cleaned. For now I re-assembled them with the old parts so they don't get lost, when the new parts come in and the parts that are going to the powder coater come back, I will do a final re-assembly.    |
|
|
|
| bkrantz |
Aug 14 2025, 07:28 PM
Post
#1218
|
|
914 Guru Group: Members Posts: 8,546 Joined: 3-August 19 From: SW Colorado Member No.: 23,343 Region Association: Rocky Mountains |
At least the DAPO chose an interesting color.
|
|
|
|
| Puebloswatcop |
Aug 15 2025, 07:04 AM
Post
#1219
|
|
Senior Member Group: Members Posts: 1,690 Joined: 27-December 14 From: Mineola, Texas Member No.: 18,258 Region Association: Southwest Region |
QUOTE(bkrantz @ Aug 14 2025, 08:28 PM) At least the DAPO chose an interesting color. (IMG:style_emoticons/default/barf.gif) |
|
|
|
| Puebloswatcop |
Aug 19 2025, 01:52 PM
Post
#1220
|
|
Senior Member Group: Members Posts: 1,690 Joined: 27-December 14 From: Mineola, Texas Member No.: 18,258 Region Association: Southwest Region |
Haven't gotten much done on the first twin over the last 3 days. Instead I was prepping the shop floor, well at least half of it, so I could paint the floor....so the Porsche has a noce clean place to live.
 |
|
|
|
|
1 User(s) are reading this topic (1 Guests and 0 Anonymous Users)
0 Members:

|
Lo-Fi Version | Time is now: 10th December 2025 - 08:50 AM |
Invision Power Board
v9.1.4 © 2025 IPS, Inc.