

 First of the Texas Twins, First Build |
|
|

|
Porsche, and the Porsche crest are registered trademarks of Dr. Ing. h.c. F. Porsche AG.
This site is not affiliated with Porsche in any way. Its only purpose is to provide an online forum for car enthusiasts. All other trademarks are property of their respective owners. |
|
|
  |
| Puebloswatcop |
 Oct 14 2026, 09:20 AM
Post
#1301
|
|
Senior Member  Group: Members Posts: 1,779 Joined: 27-December 14 From: Mineola, Texas Member No.: 18,258 Region Association: Southwest Region  |
QUOTE(bkrantz @ Oct 13 2026, 08:43 PM)  Keep up the good attitude and take your time. I almost enjoyed the process of running new wires, and making the few planned wire changes, like moving the fuel pump to the front. Thanks Bob. You and several other here in the world have given me a great deal of inspiration for my project. I really appreciate and value yours and everyone elses advice and support. (IMG:style_emoticons/default/beerchug.gif) |
   |

 
|
| Puebloswatcop |
Oct 14 2026, 07:19 PM
Post
#1302
|
|
Senior Member Group: Members Posts: 1,779 Joined: 27-December 14 From: Mineola, Texas Member No.: 18,258 Region Association: Southwest Region |
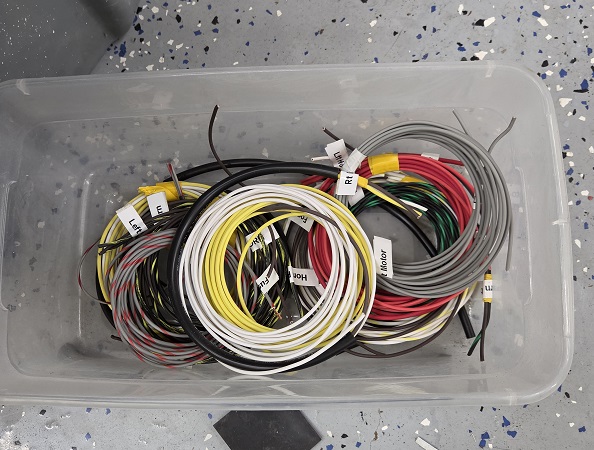
Spent the last couple of days measuring and cutting all new wire for the front lighting and horns. It is long and tedious work, But when I am done, I will have two complete 1973 harnesses, with my personal modifications that I want for upgrades in each of my cars.
 For a change of pace, today I moved to the rear lighting wires. Got all of the circuit wires pulled for the right tail light assembly. I came up short on some of the wire color combos that were needed, so got those ordered as well. I also ordered the new main front harness rubber Grommets. Pretty good progress for a one armed man. 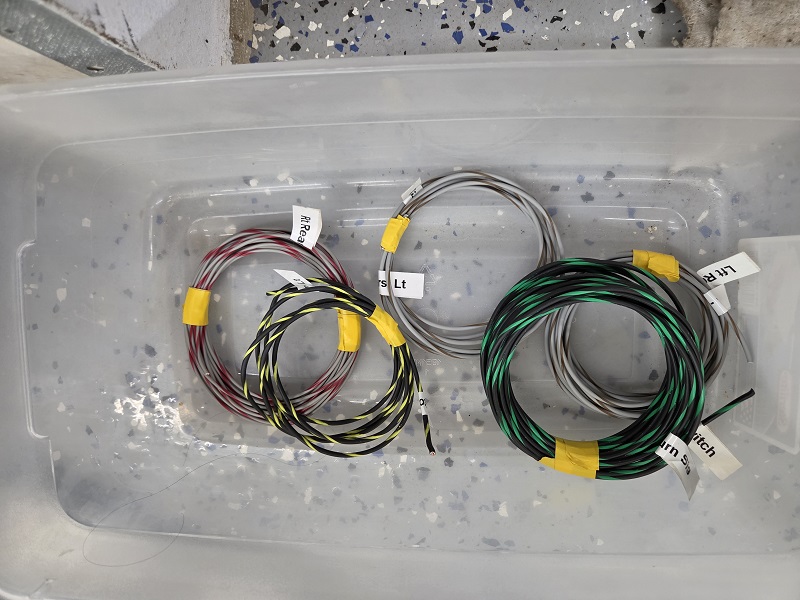 |
|
|
|
| Puebloswatcop |
Oct 18 2026, 08:13 PM
Post
#1303
|
|
Senior Member Group: Members Posts: 1,779 Joined: 27-December 14 From: Mineola, Texas Member No.: 18,258 Region Association: Southwest Region |
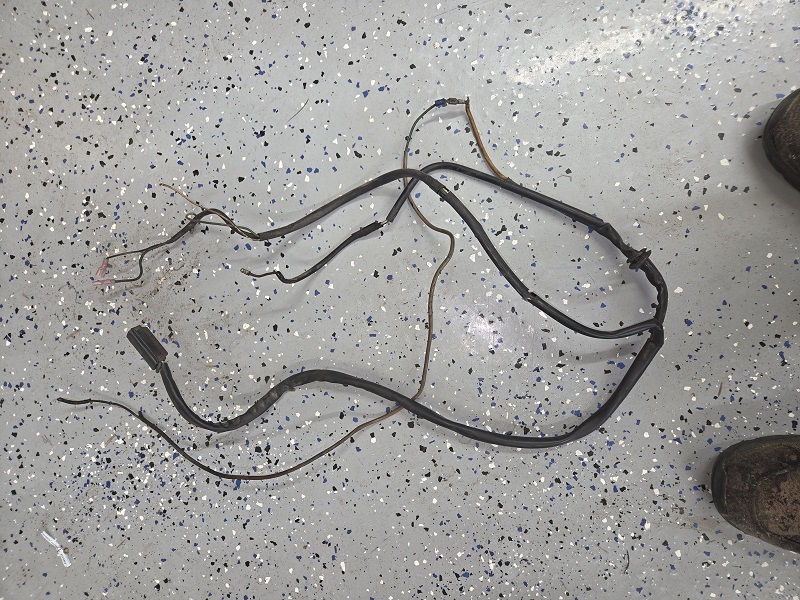
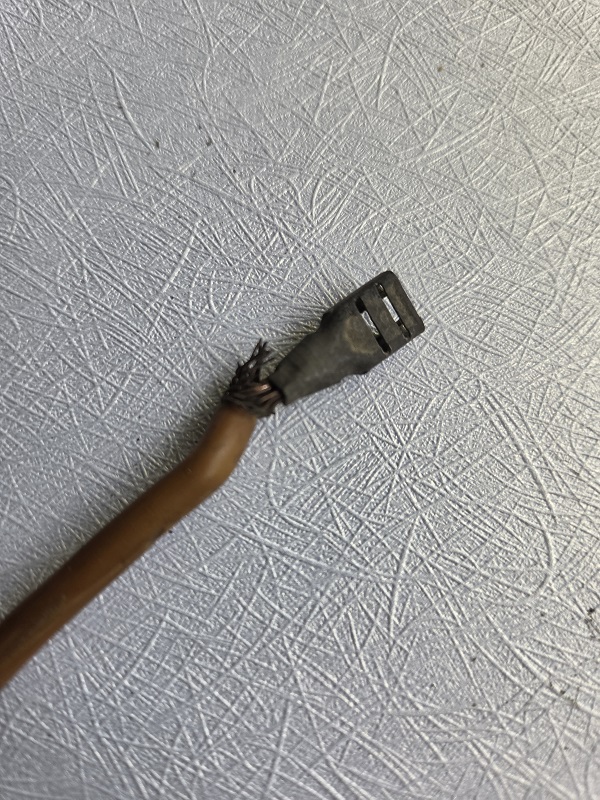
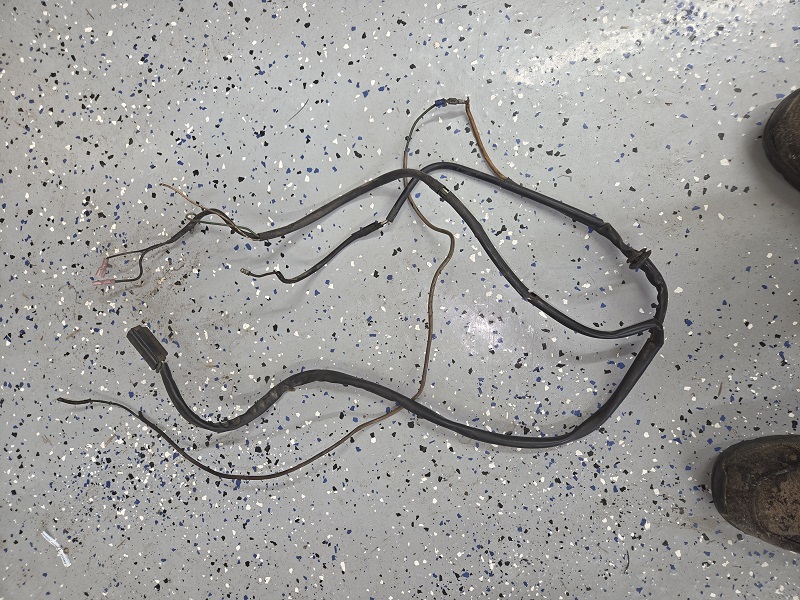
I had to order a few things to start re-assembly of the main harness, so figured I would work on the ignition harness. Besides, I wanted to actually start and finish a project so could see some progress. The harness is from my '73 2.0 and as you can see its in pretty bad shape. All of the protective sheathing is brittle and cracked and most of the connectors are either broken off or near that point. The connector on the wire to the starter solenoid is not even the correct style, so I will fix that as well
  |
|
|
|
| Puebloswatcop |
Oct 18 2026, 08:20 PM
Post
#1304
|
|
Senior Member Group: Members Posts: 1,779 Joined: 27-December 14 From: Mineola, Texas Member No.: 18,258 Region Association: Southwest Region |
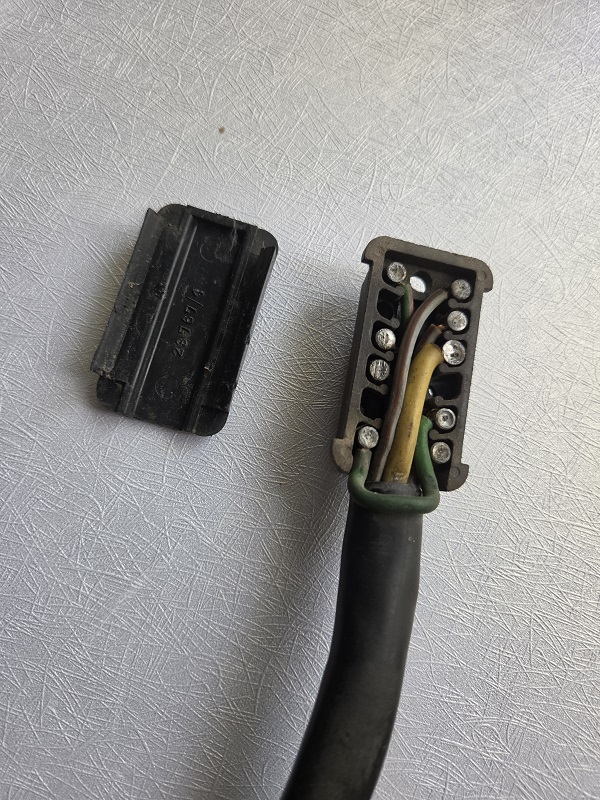
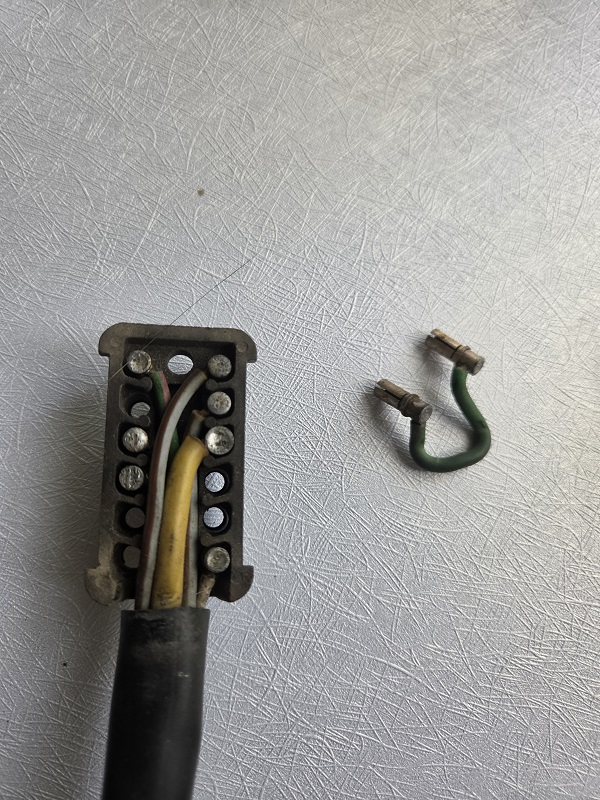
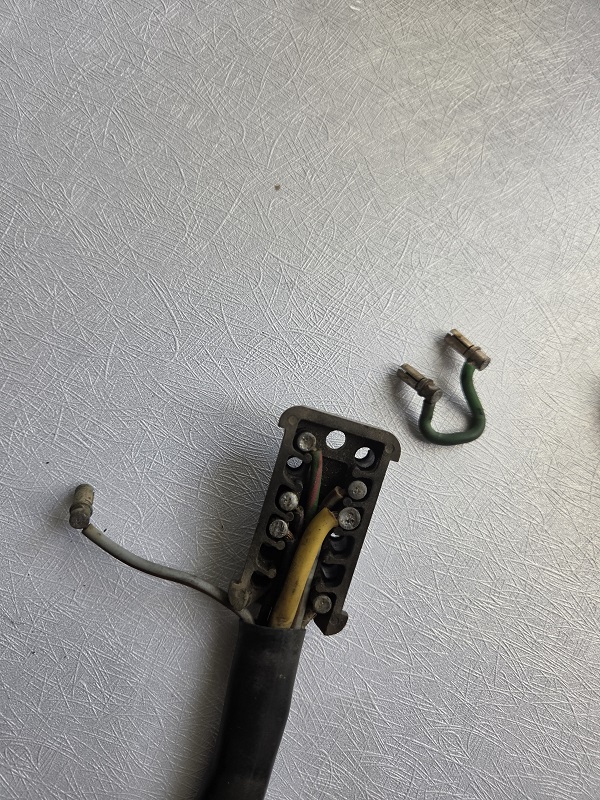
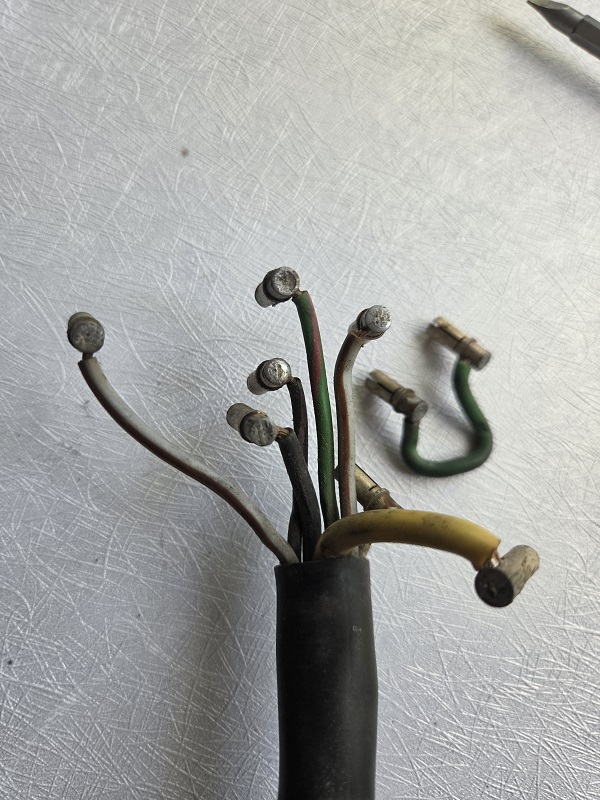
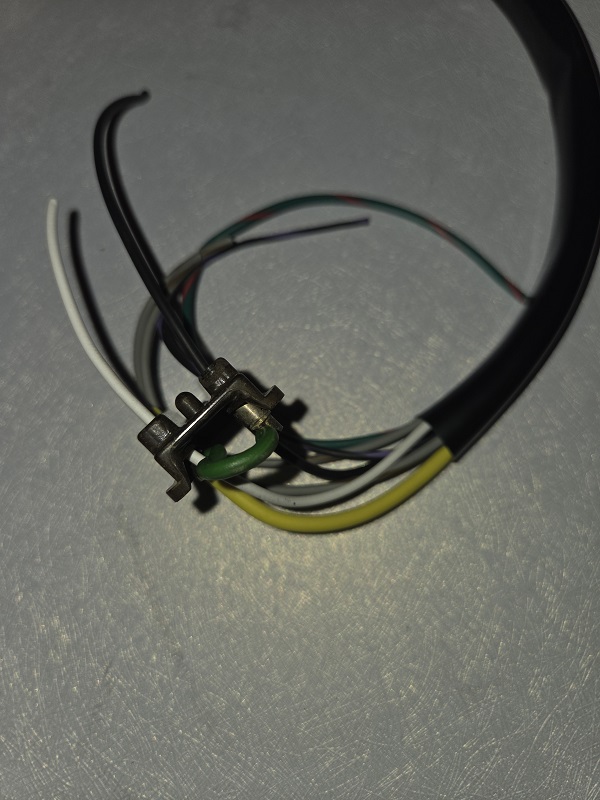
I will be replacing the entire harness and all of it's components. So I started by dis-assembling the 12 point connector. I've only included a few pictures here, but I photographed it after each wire was removed. Even though I have a good schematic, I figured it wouldn't hurt to have pics to back it up.
    |
|
|
|
| Puebloswatcop |
Oct 18 2026, 08:28 PM
Post
#1305
|
|
Senior Member Group: Members Posts: 1,779 Joined: 27-December 14 From: Mineola, Texas Member No.: 18,258 Region Association: Southwest Region |
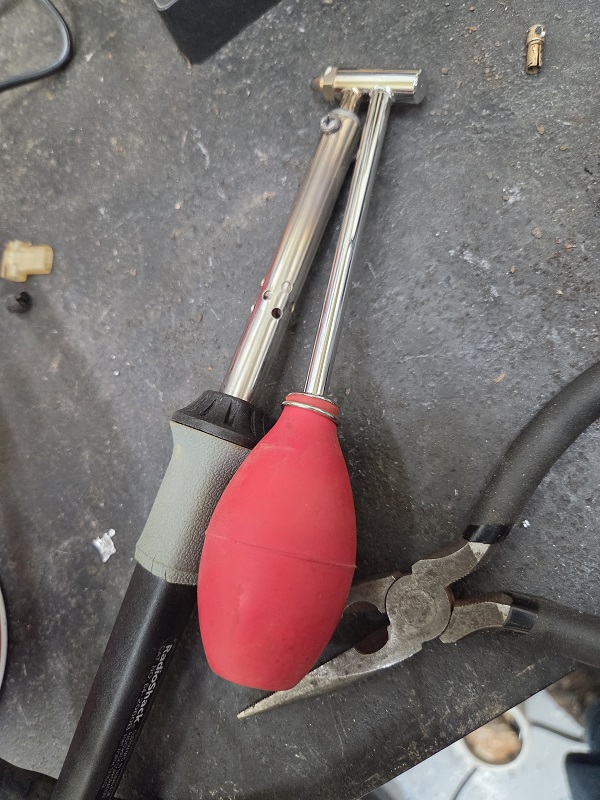
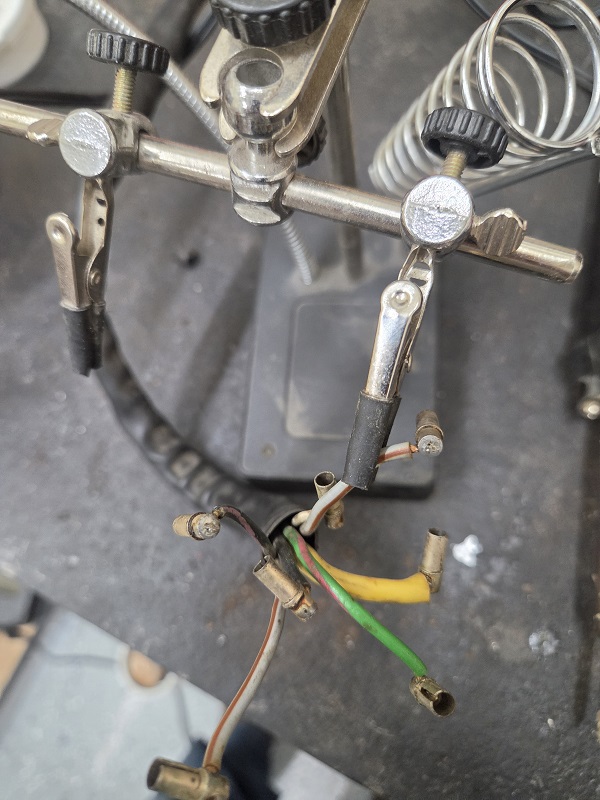
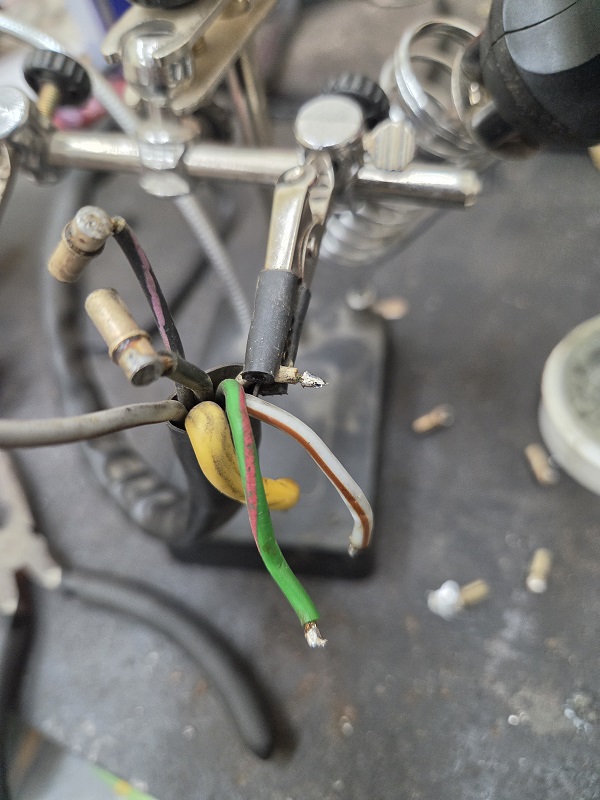
Removing the sockets in the 12 pin connector is pretty straight forward. Un-solder each socket, removing not only the wire, but as much of the solder as I could, so when I put them back on, I will have a fairly clean hole to put the wire back in. I just so happen to have an actual de-soldering tool that I usually use on electronic boards. It worked quite well, heat the solder, pull the wire and suck the solder out of the connector.
   |
|
|
|
| Puebloswatcop |
Oct 18 2026, 08:36 PM
Post
#1306
|
|
Senior Member Group: Members Posts: 1,779 Joined: 27-December 14 From: Mineola, Texas Member No.: 18,258 Region Association: Southwest Region |
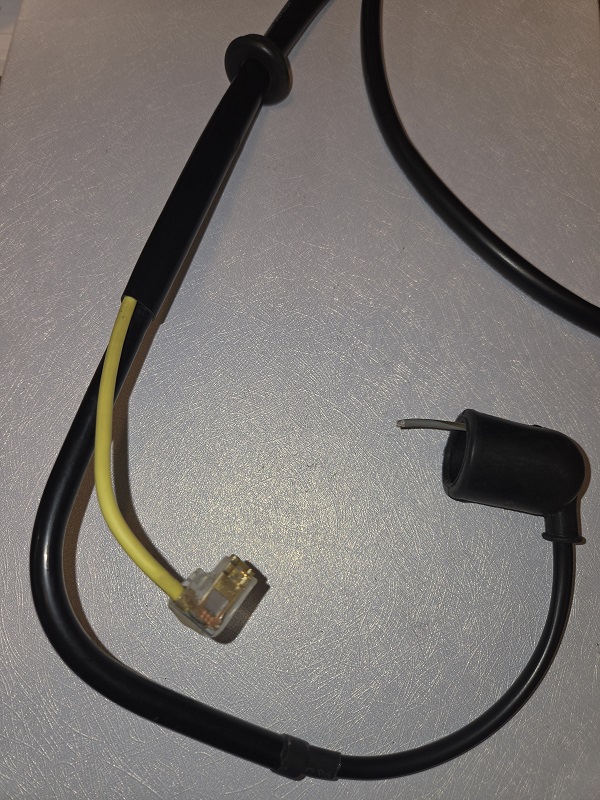
Then it was a matter of cutting the proper AWG wire to the proper lengths as well as cutting the appropriate size tubing, so that it would go right back into the car, and match up. One thing I am doing to insure what should be a long living harness is to not only double crimp the connectors, but then soldering the connectors on the wire as well. Here is a pic of the starter and reverse switch wiring. All new connectors and boot.
 |
|
|
|
| Puebloswatcop |
Oct 18 2026, 08:42 PM
Post
#1307
|
|
Senior Member Group: Members Posts: 1,779 Joined: 27-December 14 From: Mineola, Texas Member No.: 18,258 Region Association: Southwest Region |
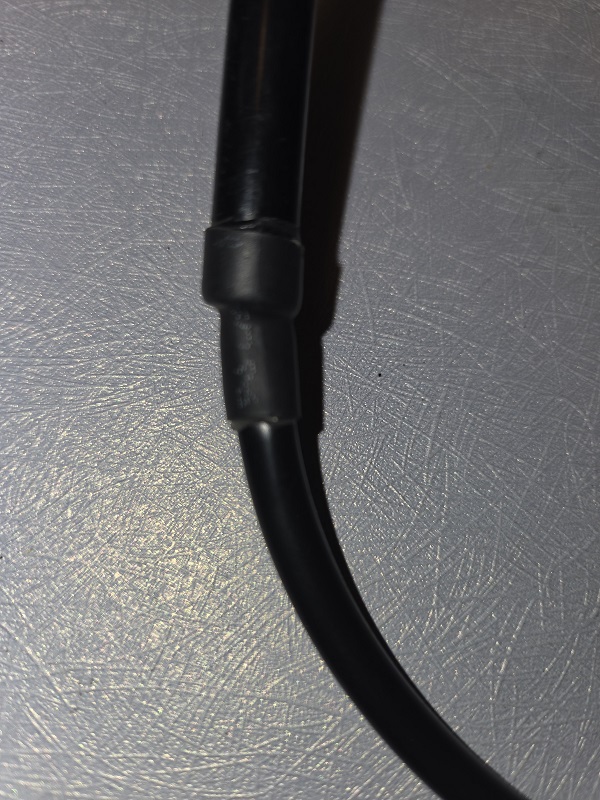
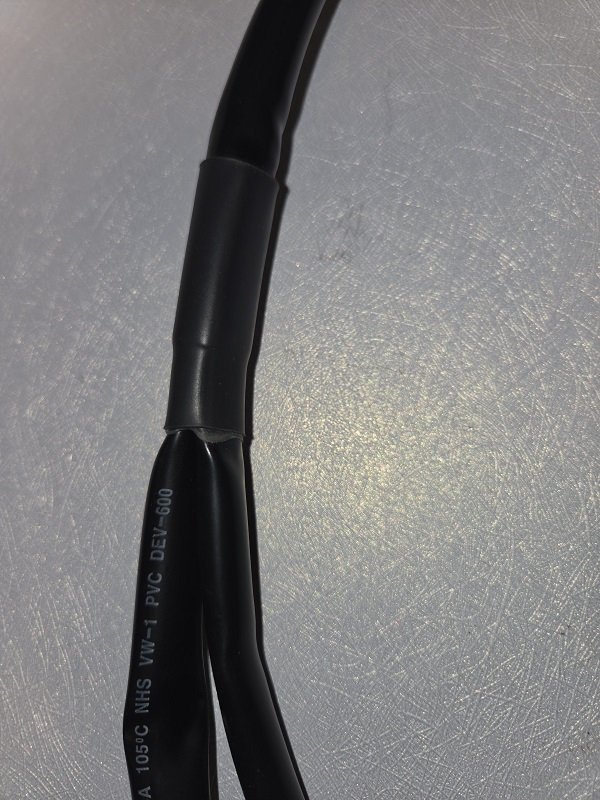
One thing I see on all of the old harnesses is the tubing comes apart at all of the junctions. To avoid that issue I make sure the smaller tubing is inserted into the larger tube and the heat shrink the joints using self adhesive heat shrink. The joints come out very strong. It also helps keep oil, water, and other trash out of the inside of the harness.
  |
|
|
|
| Puebloswatcop |
Oct 18 2026, 08:44 PM
Post
#1308
|
|
Senior Member Group: Members Posts: 1,779 Joined: 27-December 14 From: Mineola, Texas Member No.: 18,258 Region Association: Southwest Region |
too late to finish the harness tonight, so I'll go back at it tomorrow. Watching NASCAR, football and drinking beer (IMG:style_emoticons/default/beer3.gif) took up too much work time.
 |
|
|
|
| Puebloswatcop |
Oct 19 2026, 02:41 PM
Post
#1309
|
|
Senior Member Group: Members Posts: 1,779 Joined: 27-December 14 From: Mineola, Texas Member No.: 18,258 Region Association: Southwest Region |
As promised, I finished the Ignition Harness today. First order of business was to address the wiring that goes inside of the 12 pole housing. Each wire had to be measured so they would all fit into the housing in the right place, no extra and definitly not too short.
This was a 3 handed job. Luckily I have a little soldering station my wife bought me for Christmas several years ago. Made it pretty easy to hold the wire in the terminal, leaving two hands to solder them in place. Then of course comes stuffing them back into the plug housing. It took me a couple of times re-arrainging the wires to get them in flat enough to get the cover back on. 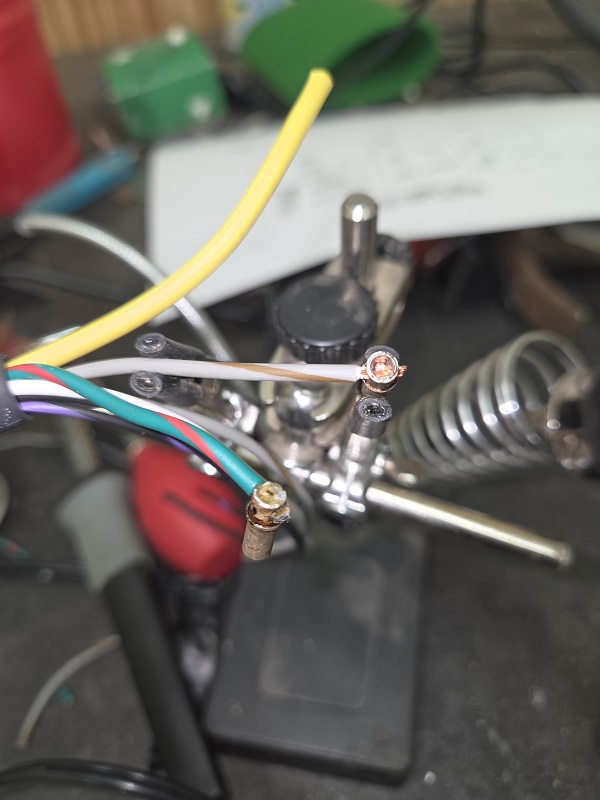 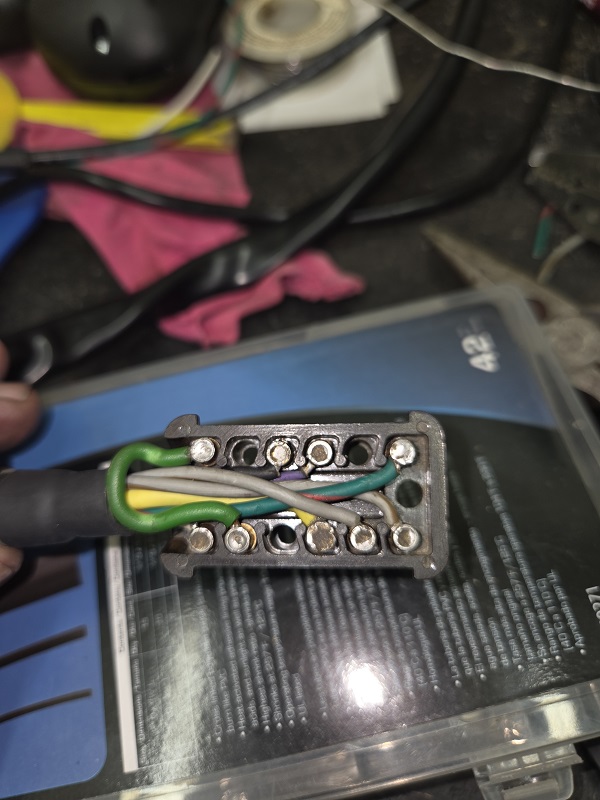 |
|
|
|
| Puebloswatcop |
Oct 19 2026, 02:49 PM
Post
#1310
|
|
Senior Member Group: Members Posts: 1,779 Joined: 27-December 14 From: Mineola, Texas Member No.: 18,258 Region Association: Southwest Region |
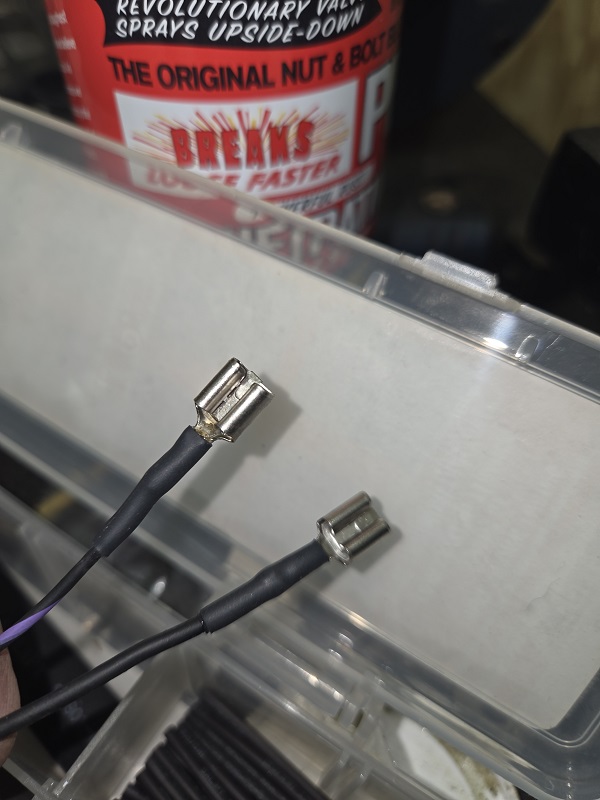
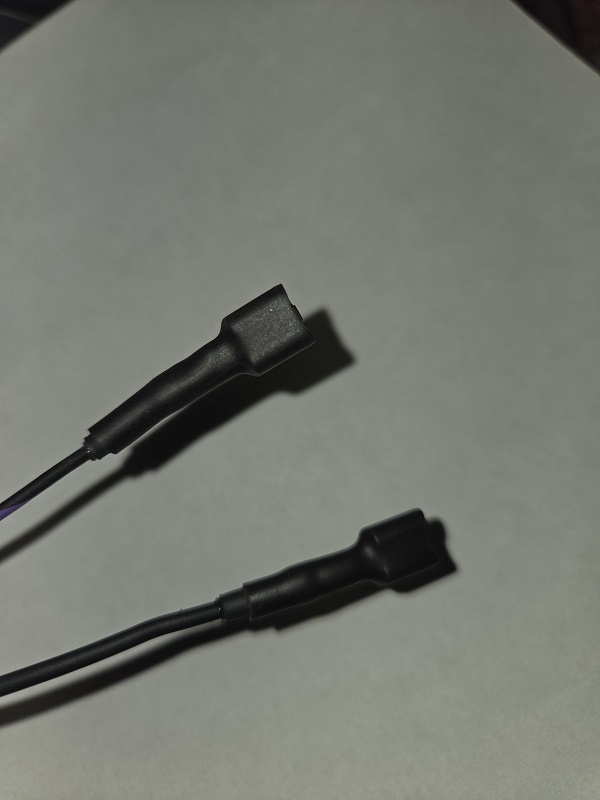
Then crimped and soldered all of the ends on the rest of the harness. each spade was double covered in heat shrink. Not only for protection from shorts, but you know how some people are about just grabbing wires and pulling. First the neck of the connector was covered with adhesive lined heat shrink that went about a half inch up the wire, and then the entire connector was covered again with the same heat shrink . These wires should never pull out of the connectors.
  |
|
|
|
| Puebloswatcop |
Oct 19 2026, 02:58 PM
Post
#1311
|
|
Senior Member Group: Members Posts: 1,779 Joined: 27-December 14 From: Mineola, Texas Member No.: 18,258 Region Association: Southwest Region |
The transmission reverse terminals were also heat shrunk, however the heat shrink did not go nearly as far up the wire. I tried doing that but just soldering the wires into the terminals caused the heat shrink to, well, shrink. so I had to cut it down short to slide it back far enough. Purchased all new connectors for that as well.
So all of the connectors have some sort of protection on them. I do have the original flag connector covers that were installed at the factory, but since I will never be doing a concours competition, I went with a new style, mainly because the factory ones look like (IMG:style_emoticons/default/stromberg.gif) 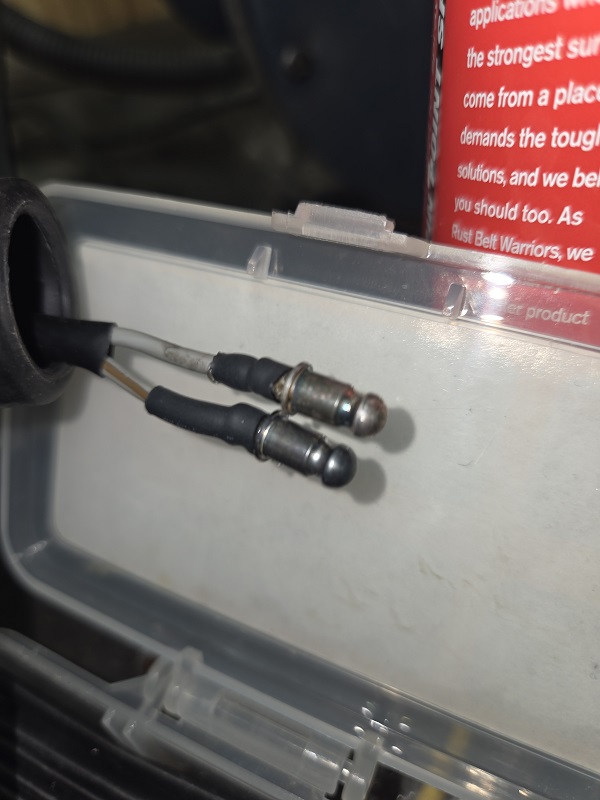 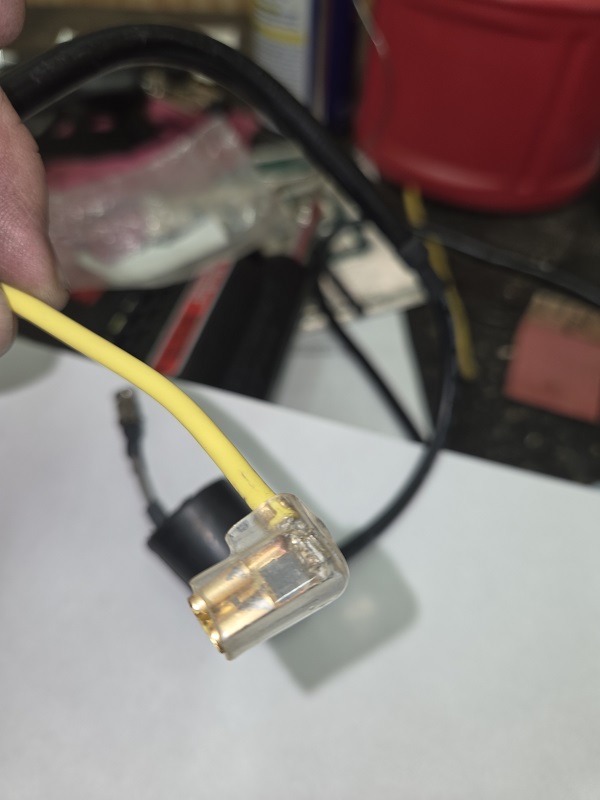 |
|
|
|
| Puebloswatcop |
Oct 19 2026, 03:02 PM
Post
#1312
|
|
Senior Member Group: Members Posts: 1,779 Joined: 27-December 14 From: Mineola, Texas Member No.: 18,258 Region Association: Southwest Region |
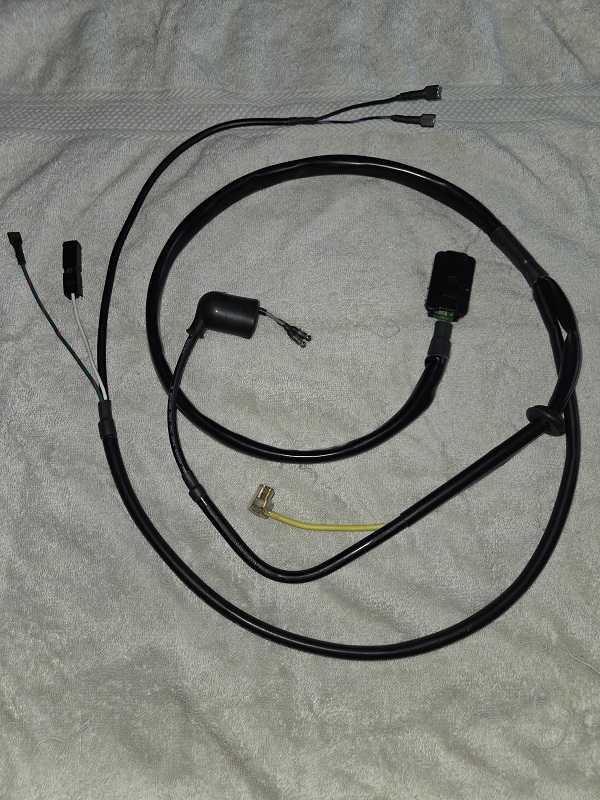
So here is a side by side before and after of the harness. I think I know which one will go back into the car.
  |
|
|
|
|
15 User(s) are reading this topic (14 Guests and 0 Anonymous Users)
1 Members: bob164

|
Lo-Fi Version | Time is now: 20th October 2026 - 05:23 AM |
Invision Power Board
v9.1.4 © 2026 IPS, Inc.