|
|
|
Porsche, and the Porsche crest are registered trademarks of Dr. Ing. h.c. F. Porsche AG.
This site is not affiliated with Porsche in any way. Its only purpose is to provide an online forum for car enthusiasts. All other trademarks are property of their respective owners. |
|
|

  |

| Puebloswatcop |
 Nov 13 2021, 06:34 PM Nov 13 2021, 06:34 PM
Post
#141
|
|
Senior Member  Group: Members Posts: 1,690 Joined: 27-December 14 From: Mineola, Texas Member No.: 18,258 Region Association: Southwest Region |
To end the day I welded the inside of the seam for the rear passenger fender flare.
 |
   |

 
|
| Puebloswatcop |
Nov 14 2021, 03:26 PM
Post
#142
|
|
Senior Member Group: Members Posts: 1,690 Joined: 27-December 14 From: Mineola, Texas Member No.: 18,258 Region Association: Southwest Region |
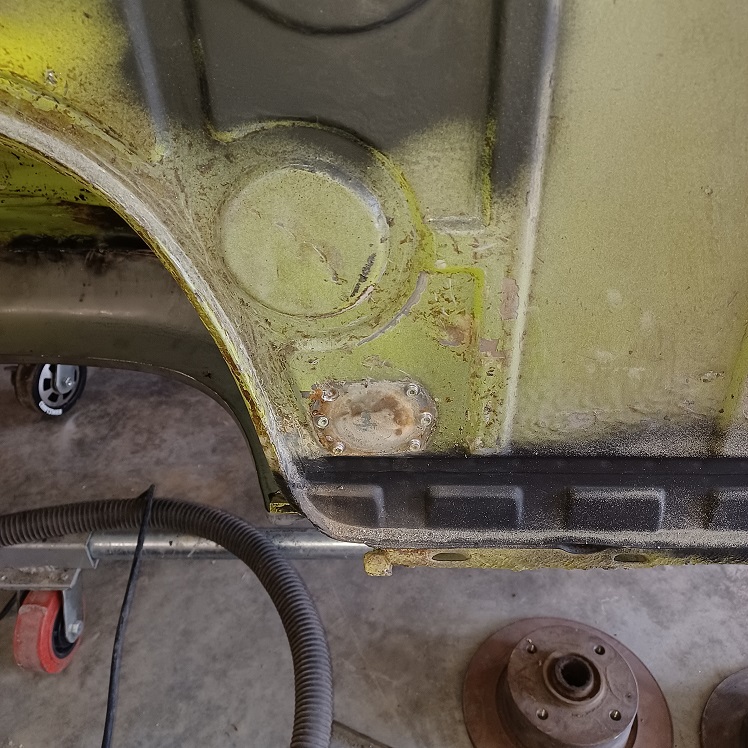
Today I decided to remove the front jacking donuts. The passenger side came off very cleanly,
 |
|
|
|
| Puebloswatcop |
Nov 14 2021, 03:29 PM
Post
#143
|
|
Senior Member Group: Members Posts: 1,690 Joined: 27-December 14 From: Mineola, Texas Member No.: 18,258 Region Association: Southwest Region |
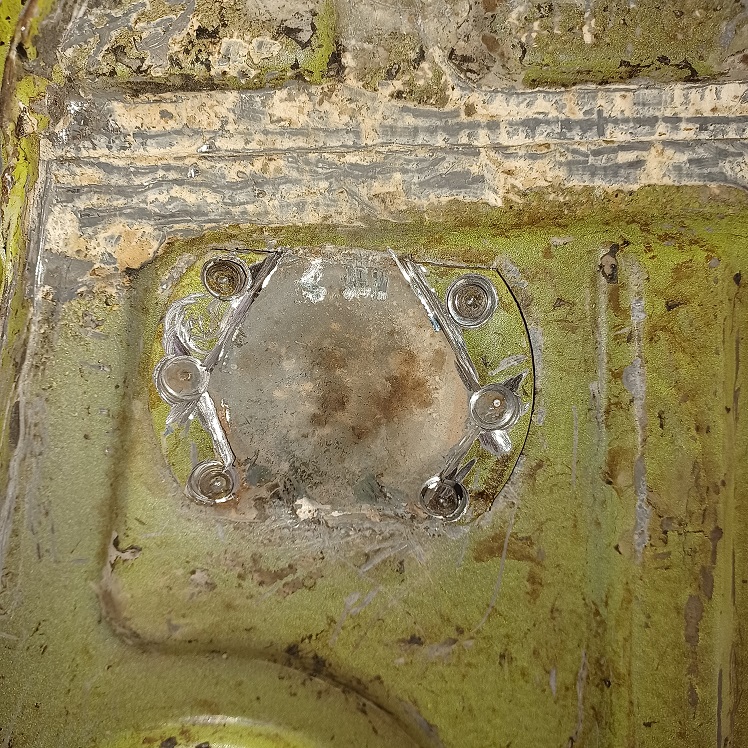
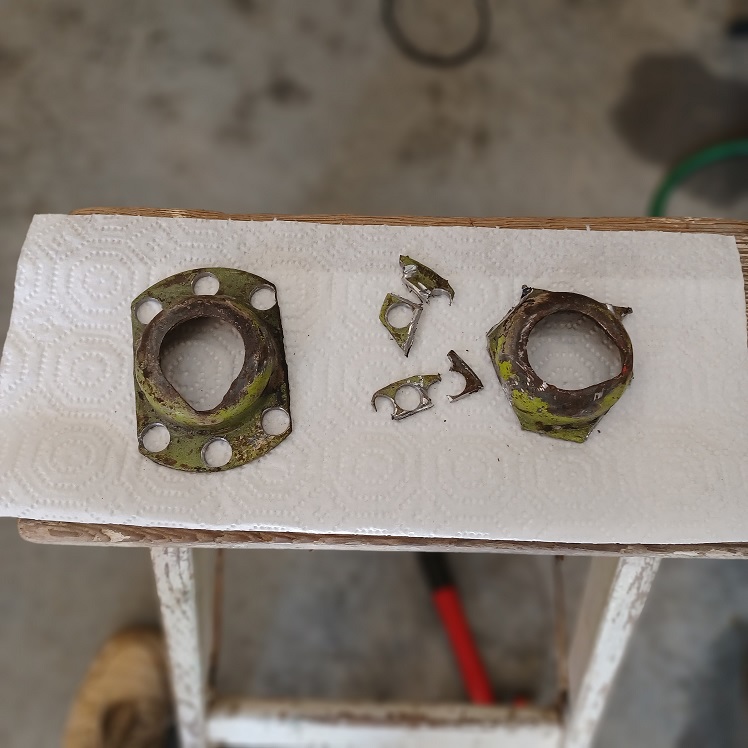
The drivers side wouldnt go peacefully. It became a war of wills. (IMG:style_emoticons/default/ar15.gif) (IMG:style_emoticons/default/sawzall-smiley.gif)
   |
|
|
|
| Puebloswatcop |
Nov 14 2021, 03:31 PM
Post
#144
|
|
Senior Member Group: Members Posts: 1,690 Joined: 27-December 14 From: Mineola, Texas Member No.: 18,258 Region Association: Southwest Region |
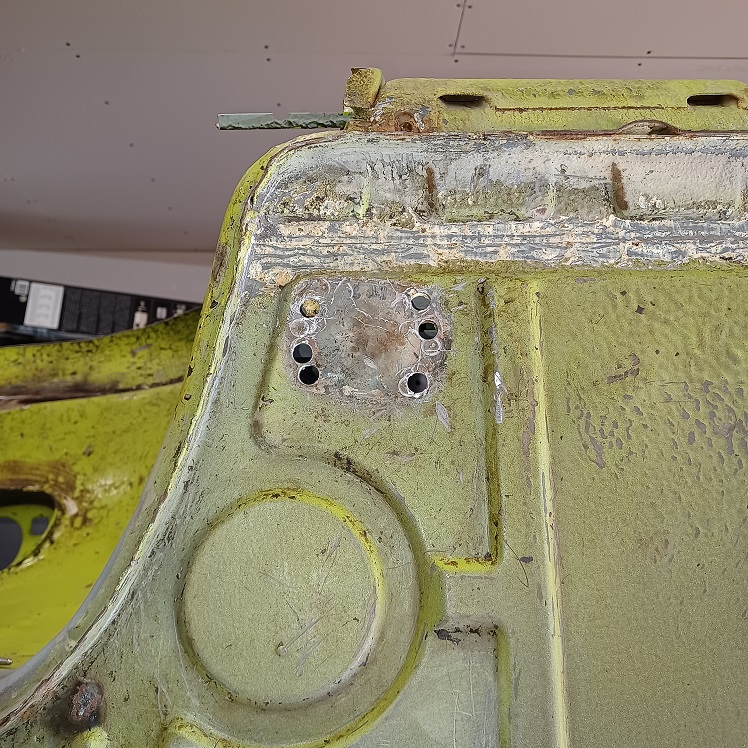
All done I will call it a victory, however when it comes to re-install them I will most likely have to weld the passenger side from the inside
 |
|
|
|
| Puebloswatcop |
Nov 14 2021, 03:36 PM
Post
#145
|
|
Senior Member Group: Members Posts: 1,690 Joined: 27-December 14 From: Mineola, Texas Member No.: 18,258 Region Association: Southwest Region |
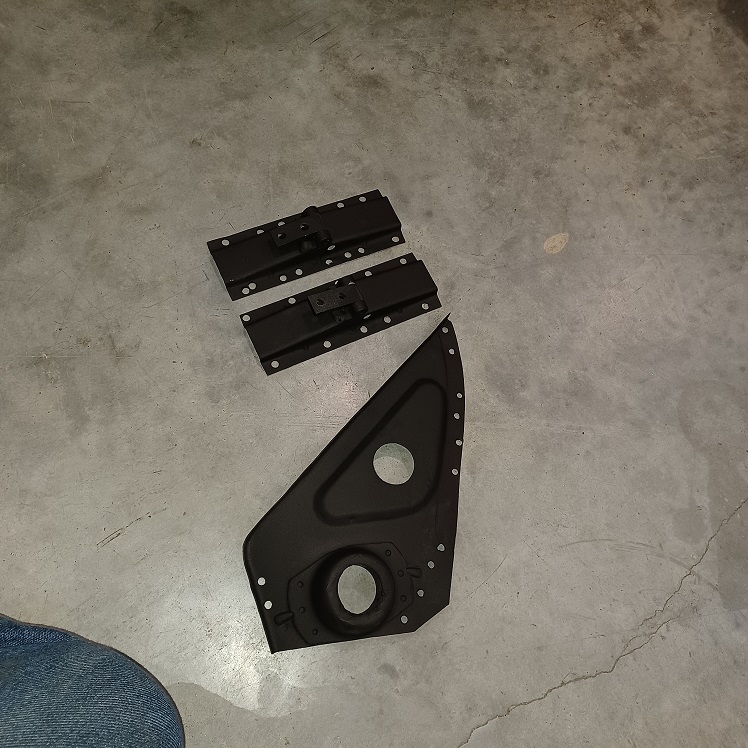
Also found a box of parts that need cleaning and painting. The seat hinges I found have only surface rust so I blasted them. The left rear Jacking point is in pretty good shape as well with just a scrape on the donut, I haven't decided if I will replace it so blasted it as well.
   |
|
|
|
| Puebloswatcop |
Nov 14 2021, 03:38 PM
Post
#146
|
|
Senior Member Group: Members Posts: 1,690 Joined: 27-December 14 From: Mineola, Texas Member No.: 18,258 Region Association: Southwest Region |
A coat of primer to help prevent rust for now and then put the parts away.
 |
|
|
|
| Puebloswatcop |
Nov 17 2021, 05:36 PM
Post
#147
|
|
Senior Member Group: Members Posts: 1,690 Joined: 27-December 14 From: Mineola, Texas Member No.: 18,258 Region Association: Southwest Region |
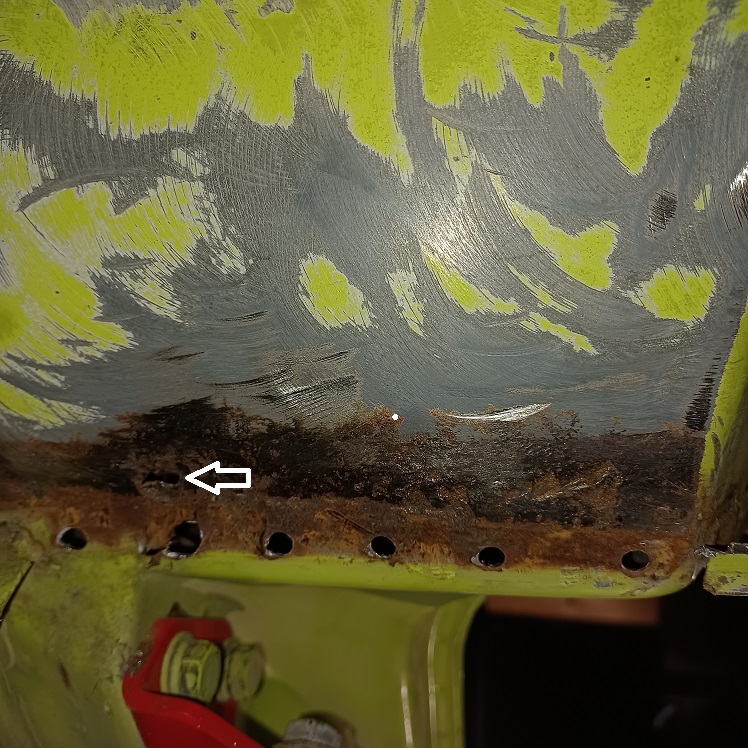
While chipping away loose seam sealer on the beloved passenger side I found a pocket of rust in the door sill, right at the front where it connects to the bottom of the door frame. The channel where the outer rocker attaches was rusted through in spots.
 |
|
|
|
| Puebloswatcop |
Nov 17 2021, 05:38 PM
Post
#148
|
|
Senior Member Group: Members Posts: 1,690 Joined: 27-December 14 From: Mineola, Texas Member No.: 18,258 Region Association: Southwest Region |
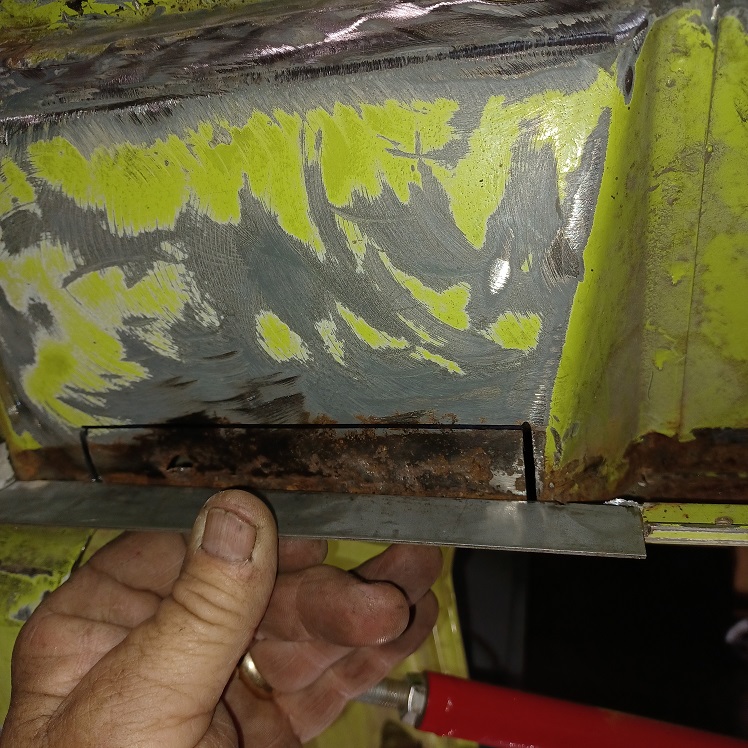
After removing the rusted portion, this is what I found on the lower door frame... was hoping it wasnt rusted too badly, but aside from the holes I left when drilling out the spot welds there were pinholes rusted through.
 |
|
|
|
| Puebloswatcop |
Nov 17 2021, 05:58 PM
Post
#149
|
|
Senior Member Group: Members Posts: 1,690 Joined: 27-December 14 From: Mineola, Texas Member No.: 18,258 Region Association: Southwest Region |
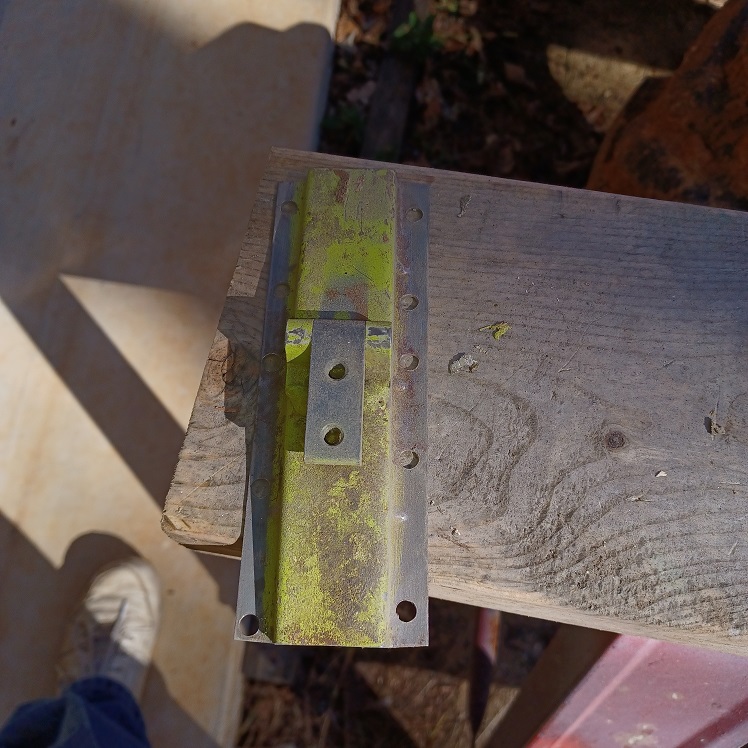
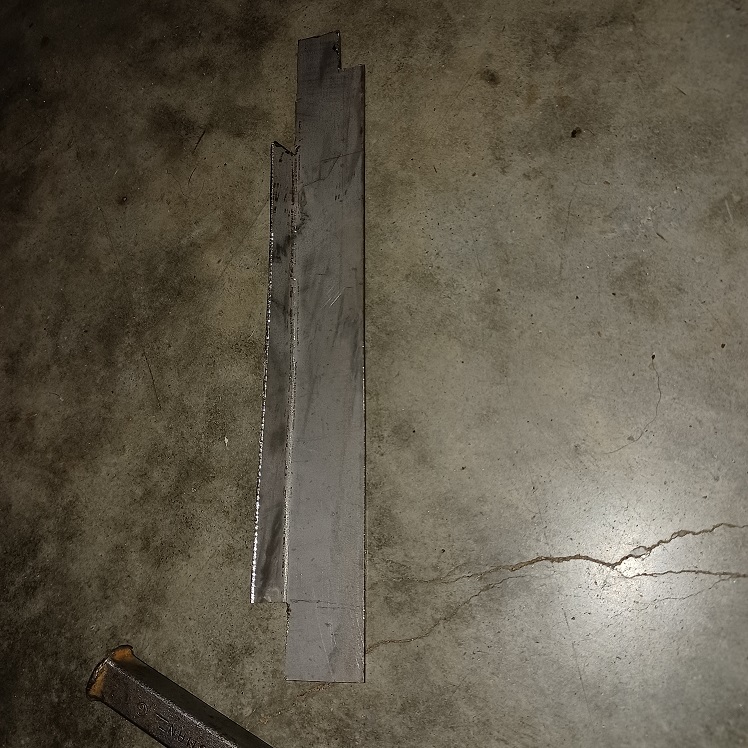
I started off by cutting a piece of sheet metal to reform the section of channel that had been cut out, and marked what I hoped would be a large enough area to get back to fresh metal on the lower door frame...
 |
|
|
|
| Puebloswatcop |
Nov 17 2021, 06:02 PM
Post
#150
|
|
Senior Member Group: Members Posts: 1,690 Joined: 27-December 14 From: Mineola, Texas Member No.: 18,258 Region Association: Southwest Region |
I don't have a metal bender, so bending the channel was a bit of a challenge, two metal clamp vise grips and bending in small increments got me to a satisfatory bend for the mounting lip, but then I couldnt bend the edge of the channel, so decided I would do that after mounting the repair piece to the body.
  |
|
|
|
| Puebloswatcop |
Nov 17 2021, 06:07 PM
Post
#151
|
|
Senior Member Group: Members Posts: 1,690 Joined: 27-December 14 From: Mineola, Texas Member No.: 18,258 Region Association: Southwest Region |
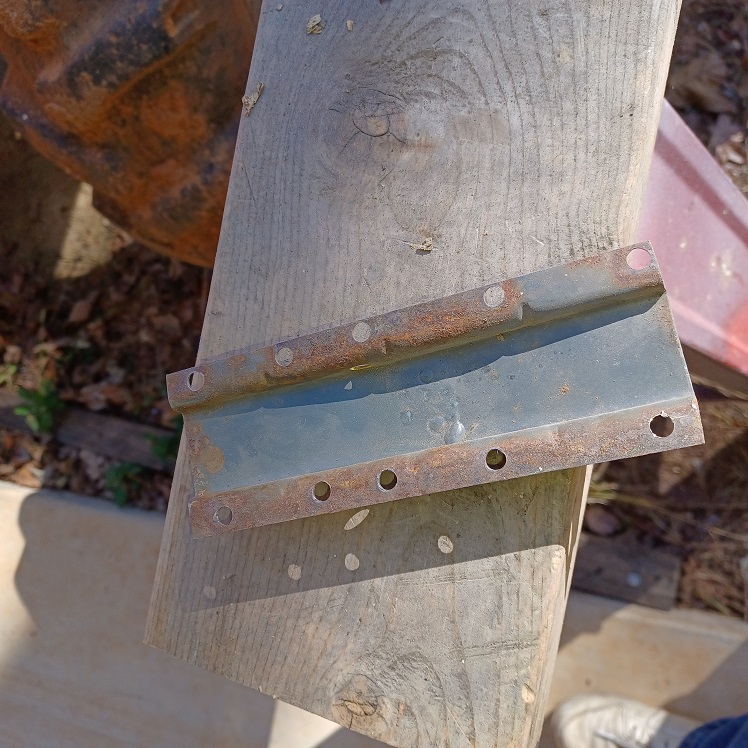
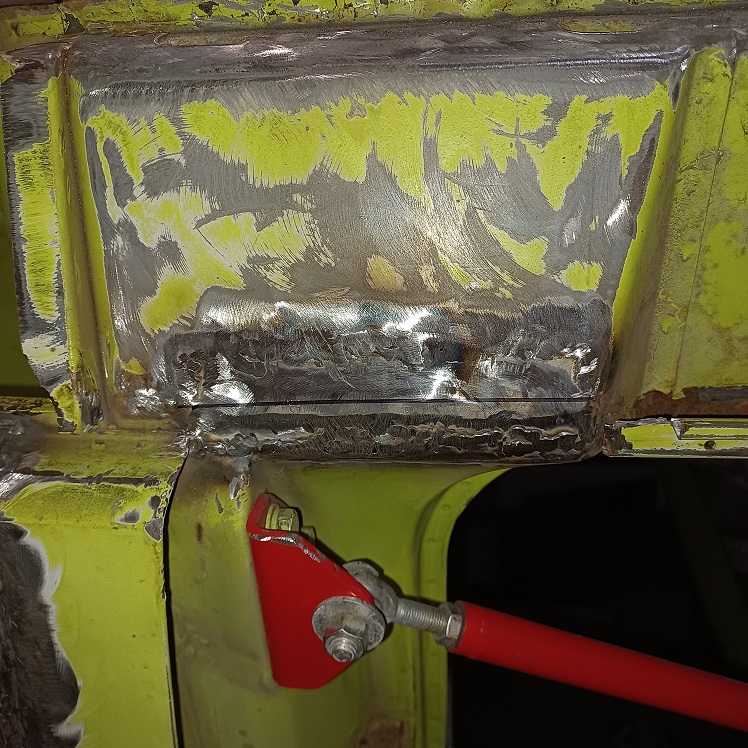
After cutting out the rusted area and welding in the patch piece, I was feeling pretty good about things until I went to mount the channel repair, I was very aggrivated that when I did the weld of the patch piece, I got way to much heat into the piece while welding it in and it was badly warped....
 |
|
|
|
| Puebloswatcop |
Nov 17 2021, 06:14 PM
Post
#152
|
|
Senior Member Group: Members Posts: 1,690 Joined: 27-December 14 From: Mineola, Texas Member No.: 18,258 Region Association: Southwest Region |
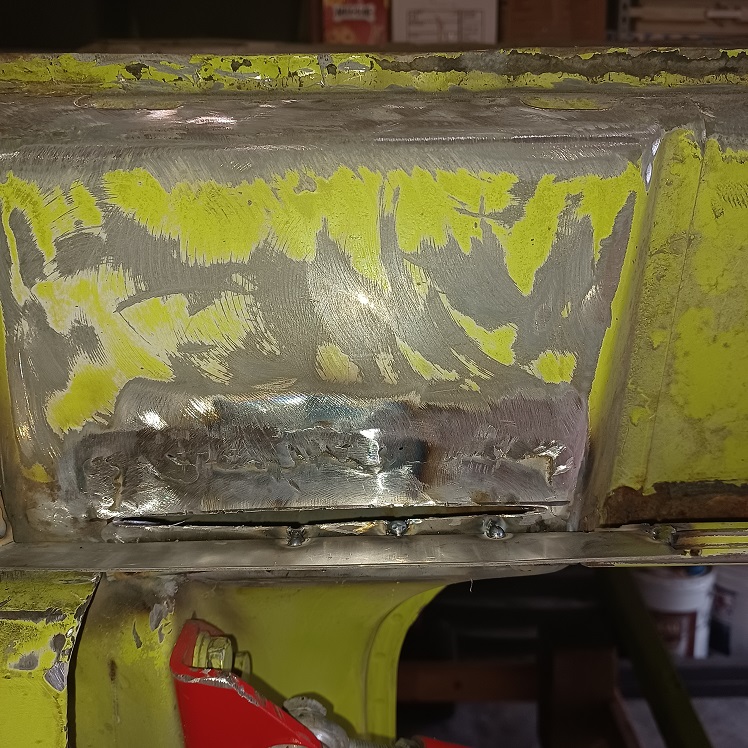
(IMG:style_emoticons/default/mad.gif) So I recut the patched area and pulled out the bottom portion to match up where the channel mounts up, and then re-cut the the patch for the lower door frame.
  |
|
|
|
| Puebloswatcop |
Nov 17 2021, 06:26 PM
Post
#153
|
|
Senior Member Group: Members Posts: 1,690 Joined: 27-December 14 From: Mineola, Texas Member No.: 18,258 Region Association: Southwest Region |
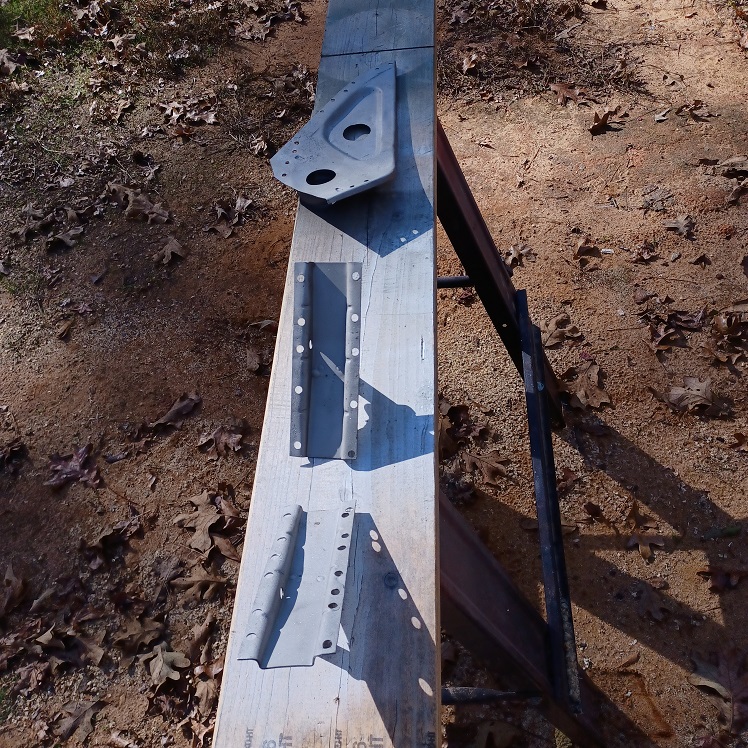
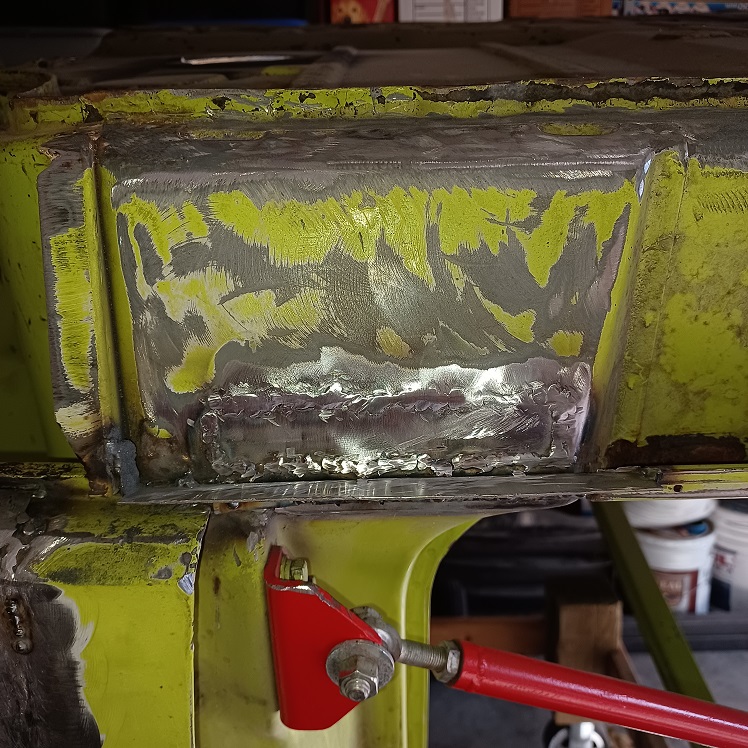
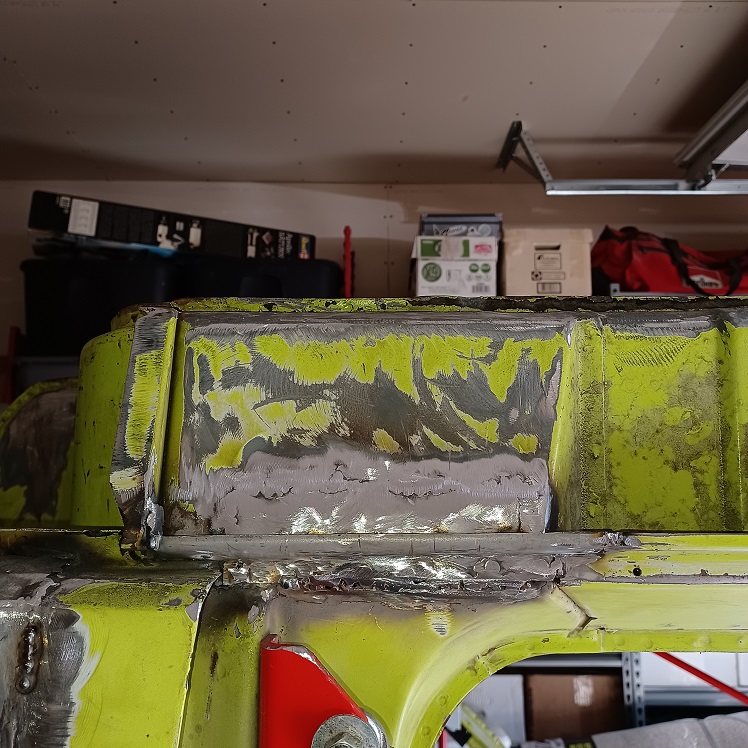
So, after repeating the entire process, the repair is done, now just to smooth out the weld lines. The channel bend was fairly easy after it was welded in place, however I think I will look at a small bender, to make things easier for the second of the twins.
 |
|
|
|
| Puebloswatcop |
Nov 17 2021, 06:42 PM
Post
#154
|
|
Senior Member Group: Members Posts: 1,690 Joined: 27-December 14 From: Mineola, Texas Member No.: 18,258 Region Association: Southwest Region |
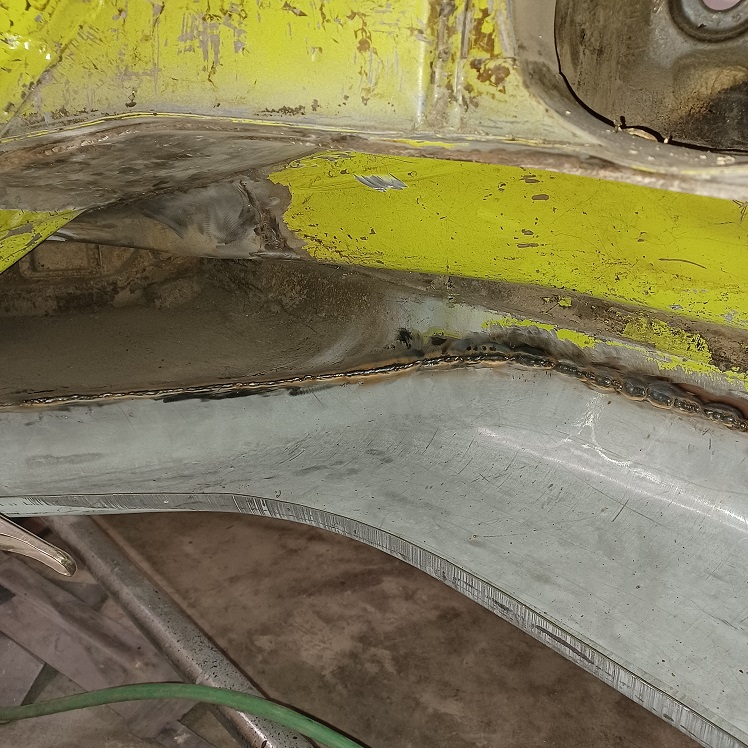
Then I decided to wind down by finishing the rear fender flare. So I smoothed out the weld line and finished welding the ends. Instead of cutting all of the bottom edges of the original fenders out I welded the flares to them for added strength and rigidity.
Attached image(s)  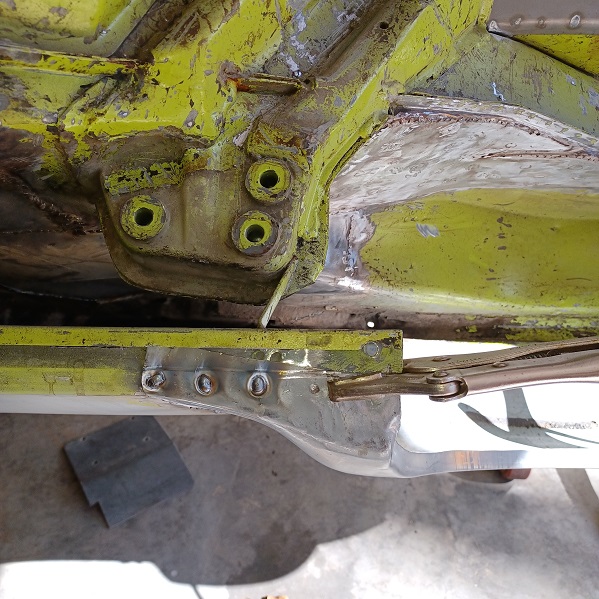 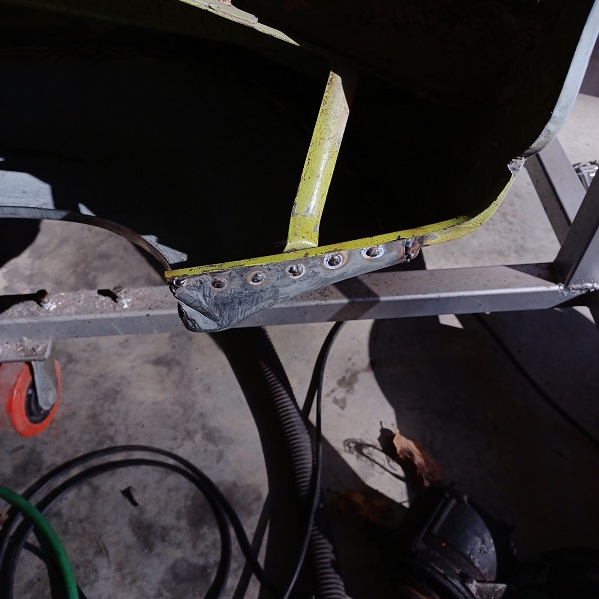 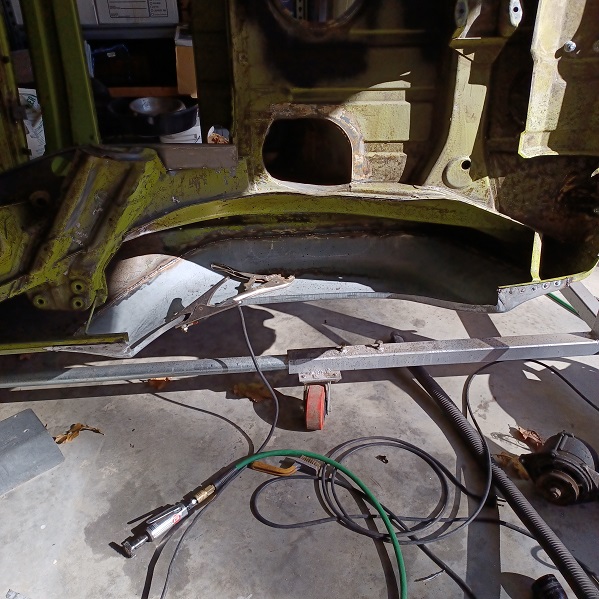
|
|
|
|
| seanpaulmc |
Nov 20 2021, 08:31 AM
Post
#155
|
|
Member Group: Members Posts: 399 Joined: 6-December 16 From: Orlando, FL Member No.: 20,649 Region Association: South East States |
Very nice progress. Keep the updates coming. (IMG:style_emoticons/default/cheer.gif)
|
|
|
|
| Puebloswatcop |
Nov 21 2021, 12:13 PM
Post
#156
|
|
Senior Member Group: Members Posts: 1,690 Joined: 27-December 14 From: Mineola, Texas Member No.: 18,258 Region Association: Southwest Region |
After the frustrating day with the channel repair, yesterday I decided to take a day off of body work, but made it another parts cleaning day. The project of the day was to dismantle, clean, grease and re-assemble the shifter.
It was filthy and the grease in it was hardened, Not surprising after all of these years. 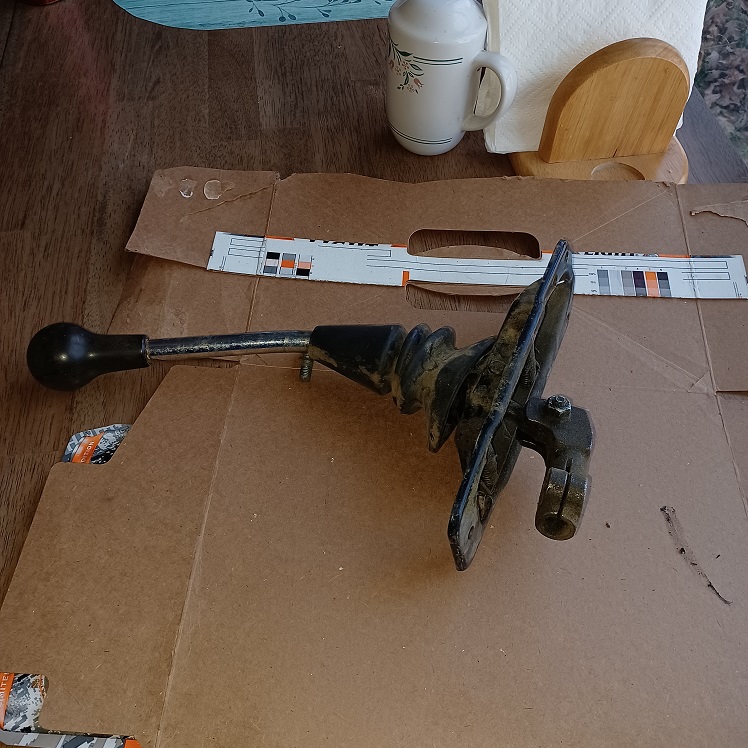 |
|
|
|
| Puebloswatcop |
Nov 21 2021, 12:15 PM
Post
#157
|
|
Senior Member Group: Members Posts: 1,690 Joined: 27-December 14 From: Mineola, Texas Member No.: 18,258 Region Association: Southwest Region |
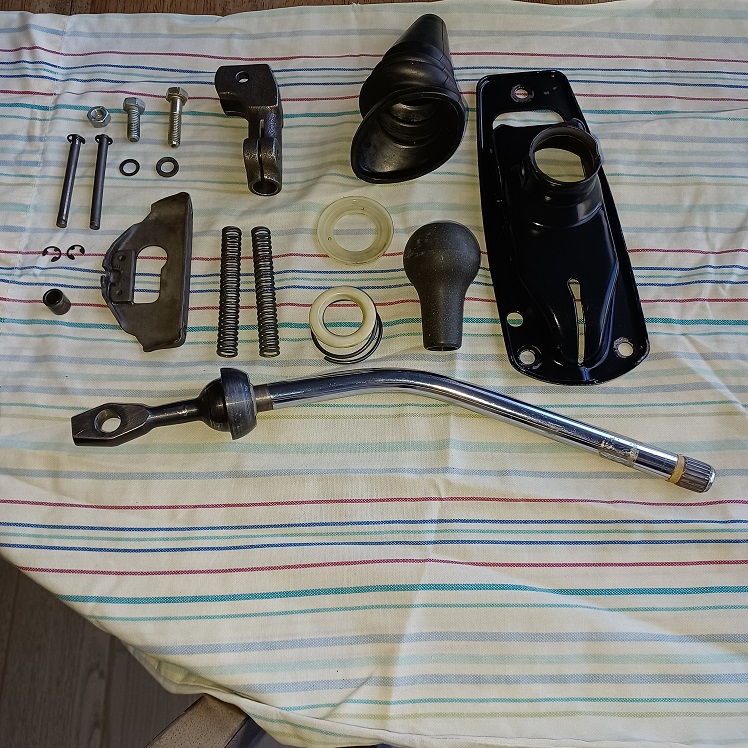
Dissasembled the entire thing, cleaned and inspected the all the parts and was somewhat surprised that there was very little wear to any of it. I was also surprised that when my wife saw the greasy mess on her breakfast nook table that she didn't throw me out....she is pretty tolerant as long as I don't make a big mess....
 |
|
|
|
| Puebloswatcop |
Nov 21 2021, 12:24 PM
Post
#158
|
|
Senior Member Group: Members Posts: 1,690 Joined: 27-December 14 From: Mineola, Texas Member No.: 18,258 Region Association: Southwest Region |
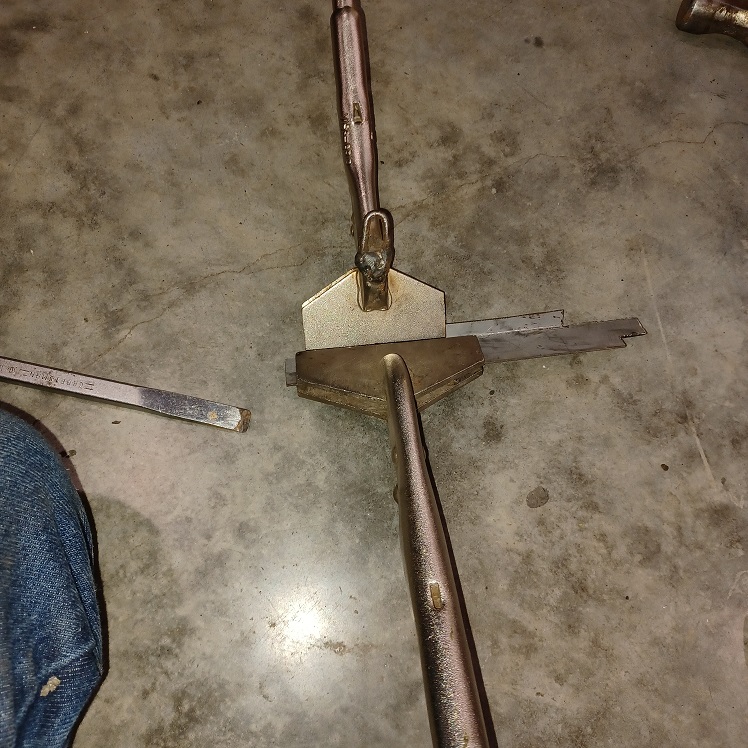
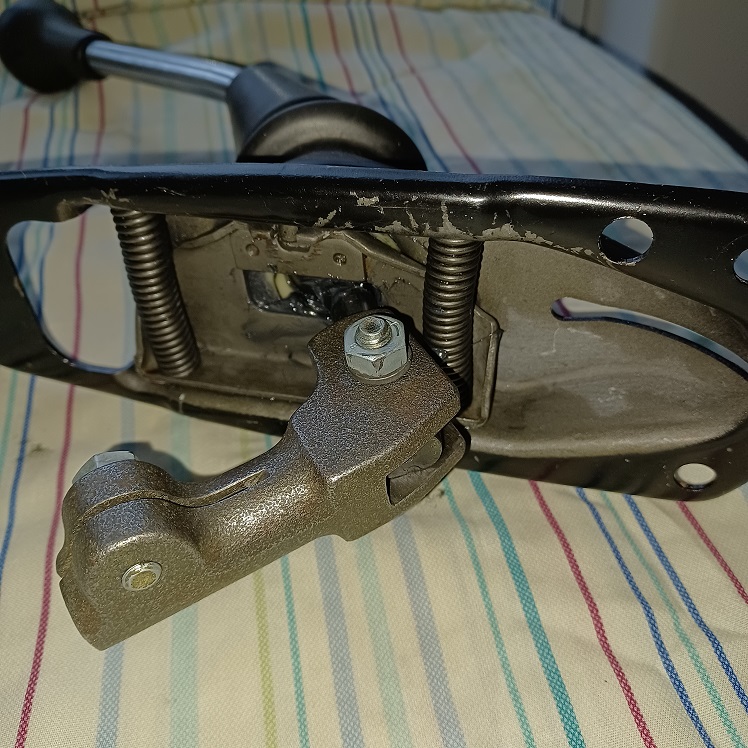
Dis-assembly is rather simple, however re-assebly was a bit more touchy. I made and attempted to use a tool that was in the Porsche Manual to put the springs back in...I ended up shooting springs all over the place. Disovered if I used the pin to get one end of the spring in, bend the spring to a horseshoe shape and get the other end on a punch that was slightly smaller than the rod then I could bend the spring pack straight a little at a time intil the pin was all the way through.... sorry I couldn't get a picture of that, because it was like I needed three hands to get the job done.
 |
|
|
|
| Puebloswatcop |
Nov 21 2021, 12:29 PM
Post
#159
|
|
Senior Member Group: Members Posts: 1,690 Joined: 27-December 14 From: Mineola, Texas Member No.: 18,258 Region Association: Southwest Region |
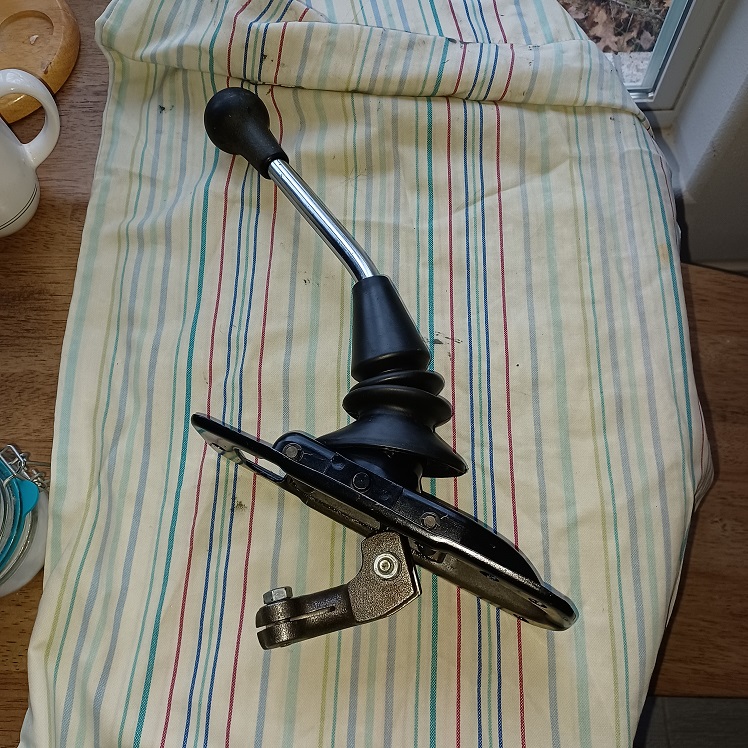
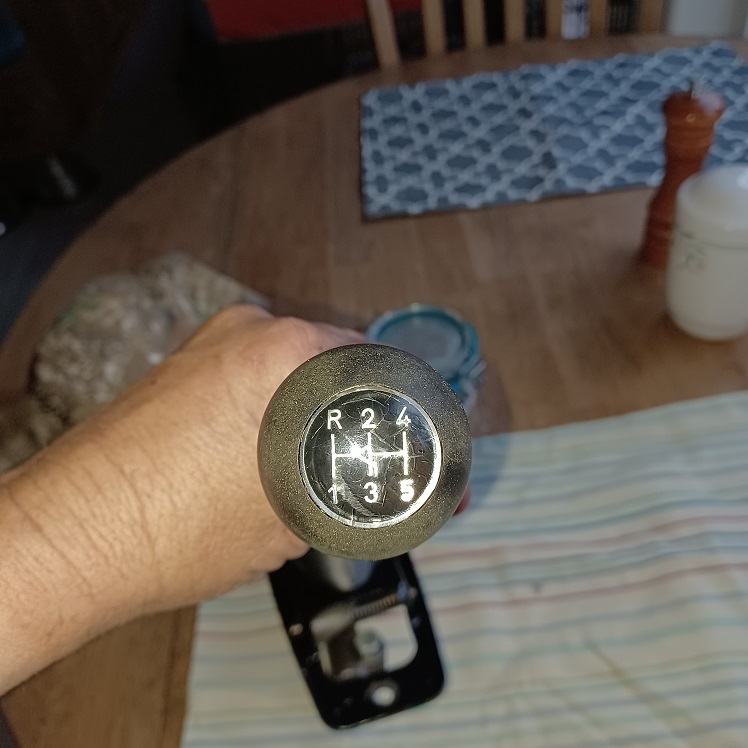
After several attempts though, it is all back together. Also the original shift knob is in remarkably good condition. There are a couple of scratches, but really not bad, If anyone has any info on how to rub the scratches out and polish the clear epoxy, Id love to hear them, maybe I can get the scratches out...
  |
|
|
|
| Puebloswatcop |
Nov 26 2021, 05:58 PM
Post
#160
|
|
Senior Member Group: Members Posts: 1,690 Joined: 27-December 14 From: Mineola, Texas Member No.: 18,258 Region Association: Southwest Region |
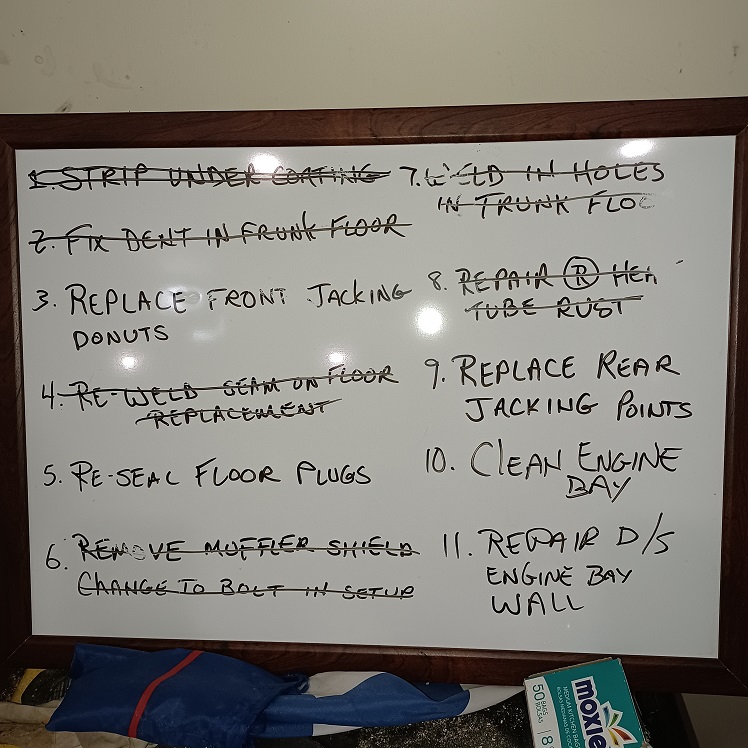
This is where I left off before the Thanksgiving break:
 |
|
|
|
|
1 User(s) are reading this topic (1 Guests and 0 Anonymous Users)
0 Members:

|
Lo-Fi Version | Time is now: 12th December 2025 - 05:13 PM |
Invision Power Board
v9.1.4 © 2025 IPS, Inc.