|
|
|
Porsche, and the Porsche crest are registered trademarks of Dr. Ing. h.c. F. Porsche AG.
This site is not affiliated with Porsche in any way. Its only purpose is to provide an online forum for car enthusiasts. All other trademarks are property of their respective owners. |
|
|

  |

| Puebloswatcop |
 Nov 26 2021, 06:02 PM Nov 26 2021, 06:02 PM
Post
#161
|
|
Senior Member  Group: Members Posts: 1,690 Joined: 27-December 14 From: Mineola, Texas Member No.: 18,258 Region Association: Southwest Region |
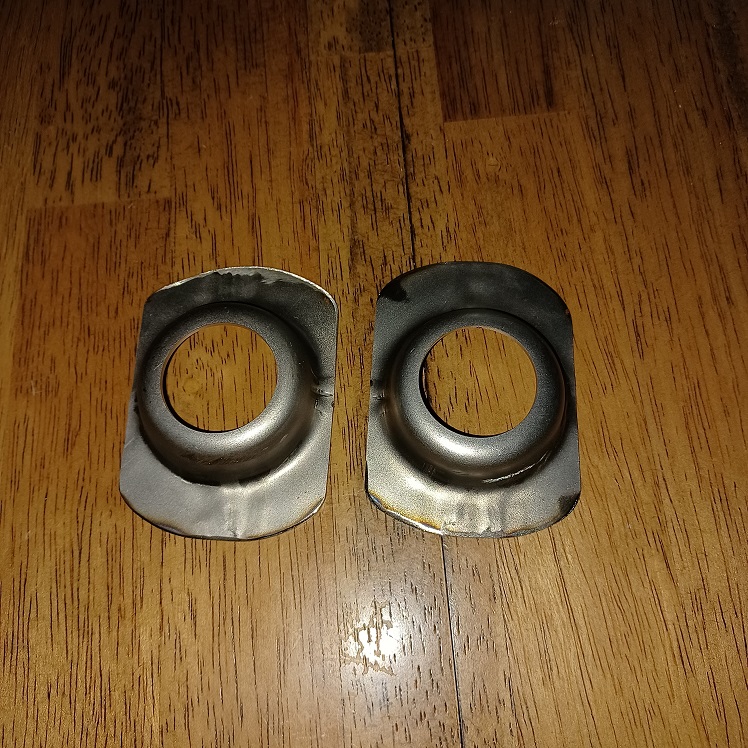
And upon returning from the holiday, a pleasant surprise....My front jacking donuts arrived. Guess I know where I'll start tomorrow... (IMG:style_emoticons/default/welder.gif)
 |
   |

 
|
| Puebloswatcop |
Nov 28 2021, 03:20 PM
Post
#162
|
|
Senior Member Group: Members Posts: 1,690 Joined: 27-December 14 From: Mineola, Texas Member No.: 18,258 Region Association: Southwest Region |
Well I didn't get to work on the twin yesterday due to some honey do's that needed attention. So today I decided to do a few things, first was installing the front jacksing donuts. So I drilled the donut flanges and sanded them down to untreated metal in prep for welding.
 |
|
|
|
| Puebloswatcop |
Nov 28 2021, 03:24 PM
Post
#163
|
|
Senior Member Group: Members Posts: 1,690 Joined: 27-December 14 From: Mineola, Texas Member No.: 18,258 Region Association: Southwest Region |
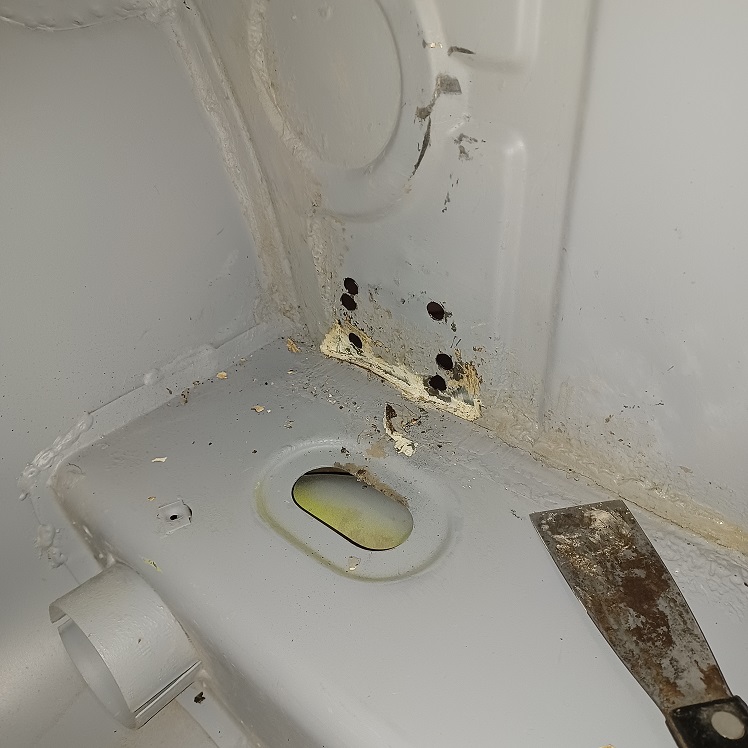
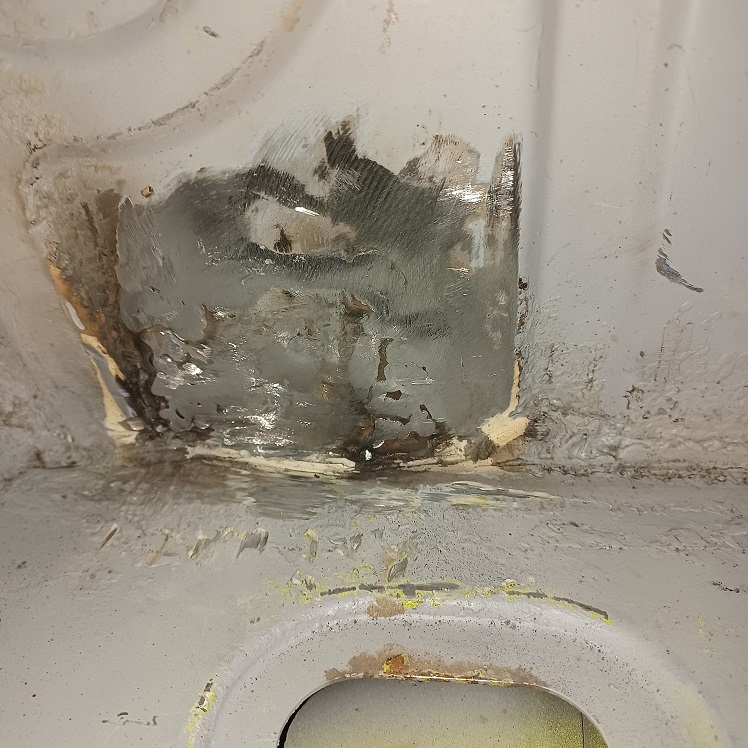
Figured I would start with the passenger side, where I had to drill through the floor to get the old donut off. Preping the outside under the car was easy, just sand it down to bare metal, the inside though i had to not only sand it, but had to remove some of the seam sealer in order to close up the holes.
  |
|
|
|
| Puebloswatcop |
Nov 28 2021, 03:27 PM
Post
#164
|
|
Senior Member Group: Members Posts: 1,690 Joined: 27-December 14 From: Mineola, Texas Member No.: 18,258 Region Association: Southwest Region |
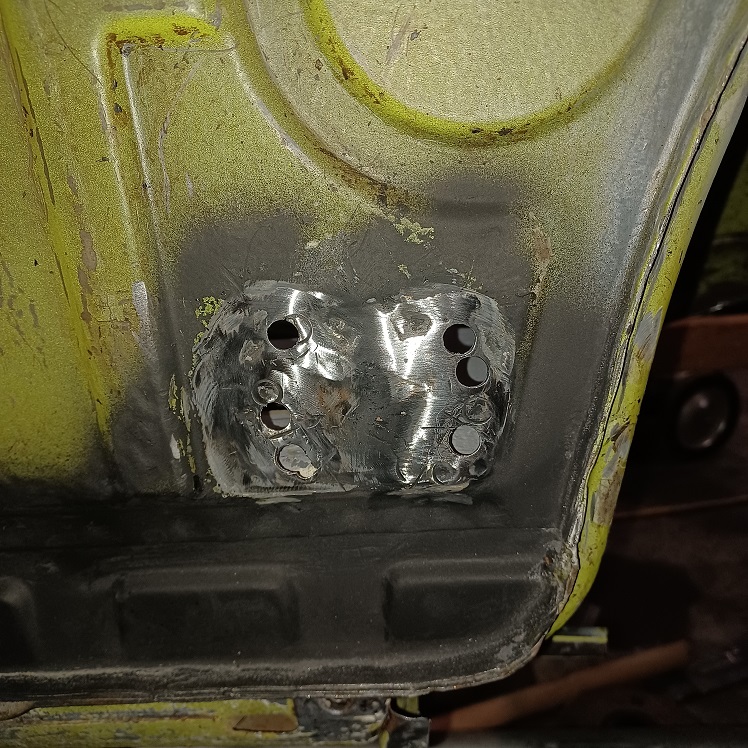
I started from the inside of the car and welded each hole starting on the donut and then working the weld into the center until the holes waere all filled in.
 |
|
|
|
| Puebloswatcop |
Nov 28 2021, 03:30 PM
Post
#165
|
|
Senior Member Group: Members Posts: 1,690 Joined: 27-December 14 From: Mineola, Texas Member No.: 18,258 Region Association: Southwest Region |
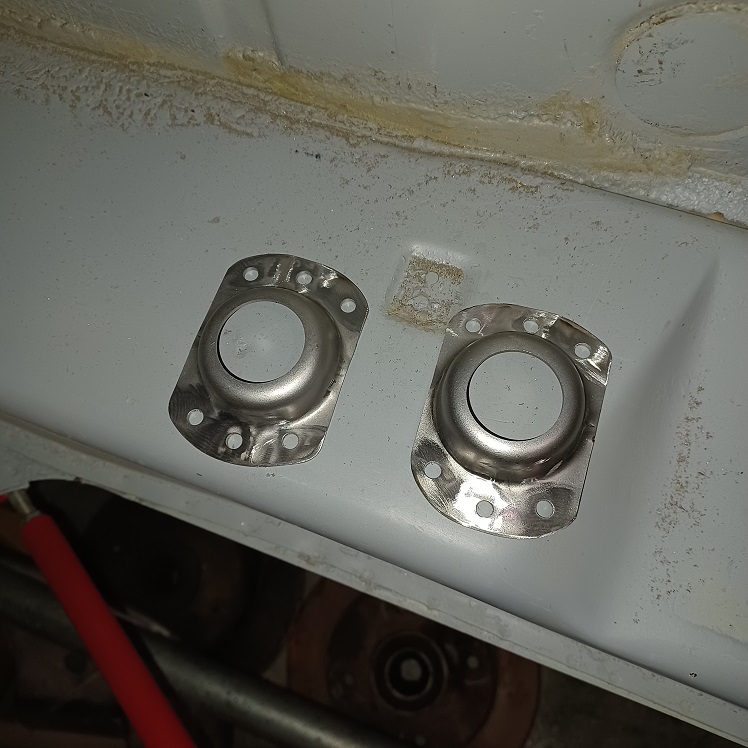
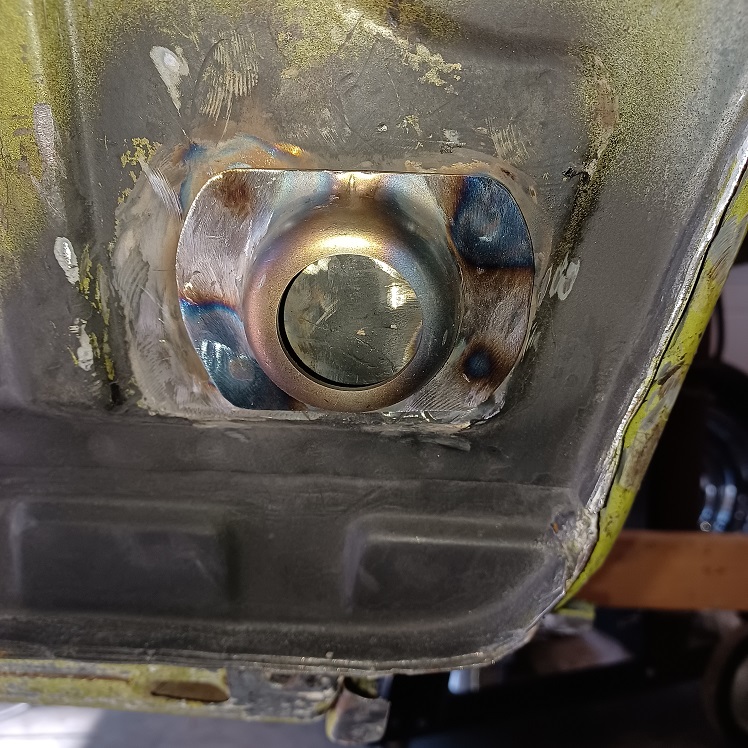
Then I went to the under side of the car and welded through the holes in the donut to insure a very strong bond and then ground everything smooth.
  |
|
|
|
| Puebloswatcop |
Nov 28 2021, 03:33 PM
Post
#166
|
|
Senior Member Group: Members Posts: 1,690 Joined: 27-December 14 From: Mineola, Texas Member No.: 18,258 Region Association: Southwest Region |
With the hard one finished I moved over and installed the driver's side donut. Much easier since I didnt have to drill through the floor.
  |
|
|
|
| Puebloswatcop |
Nov 28 2021, 03:37 PM
Post
#167
|
|
Senior Member Group: Members Posts: 1,690 Joined: 27-December 14 From: Mineola, Texas Member No.: 18,258 Region Association: Southwest Region |
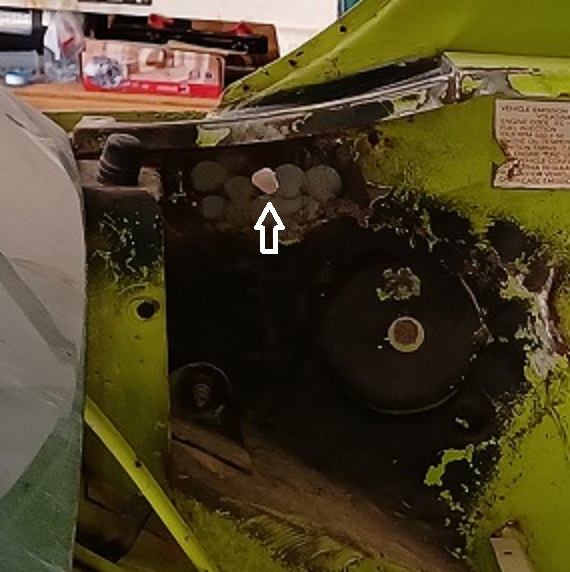
So it was on to filling the hole that the PO used in the drivers side engine compartment wall to bolt the trunk hinge to. Replacing the trunk hinge mount would have been so cheap and easy, but no....we have to drill a half inch hole.
 |
|
|
|
| Puebloswatcop |
Nov 28 2021, 03:43 PM
Post
#168
|
|
Senior Member Group: Members Posts: 1,690 Joined: 27-December 14 From: Mineola, Texas Member No.: 18,258 Region Association: Southwest Region |
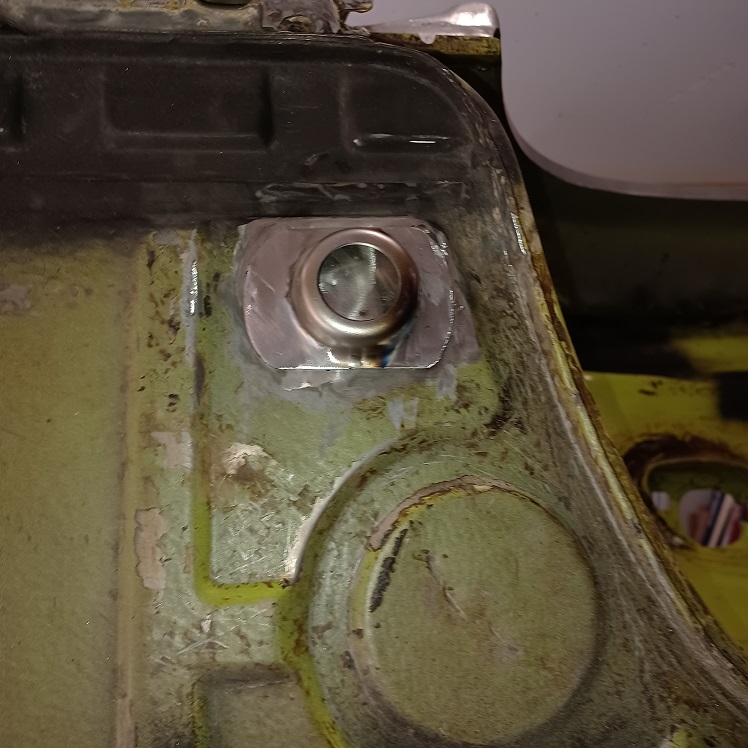
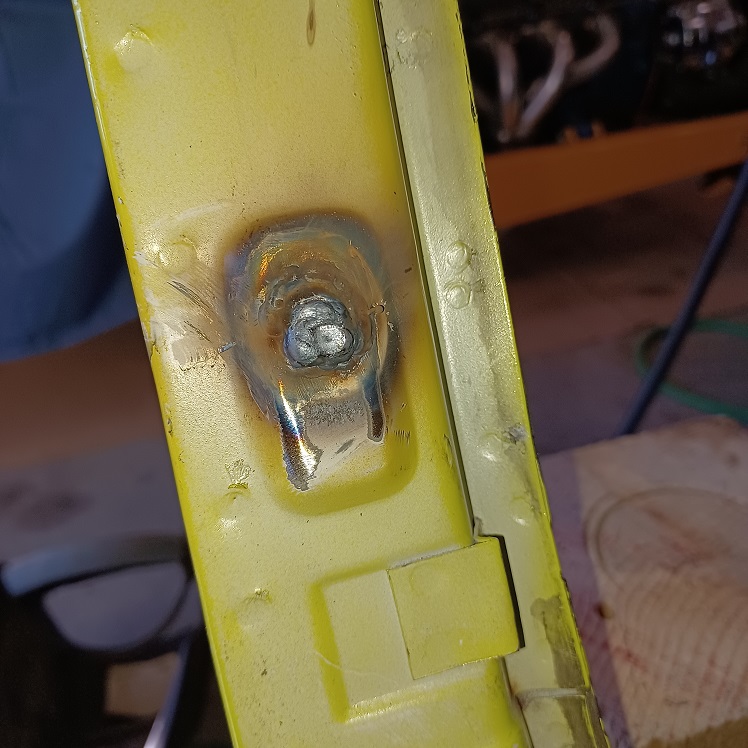
I formed a half inch piece of metal and welded it in to fill the hole (white arrow). The drivers side has previous crash damage as well. but without a way to hammer it any straighter, I decided to fill a large dent that was left behind while I was at it, (red arrow).
Obviously there is allot more to address on this wall, but at least there is no longer a gaping hole. Sorry, but I forgot to take the picture before putting some primer on to hold off the rust. 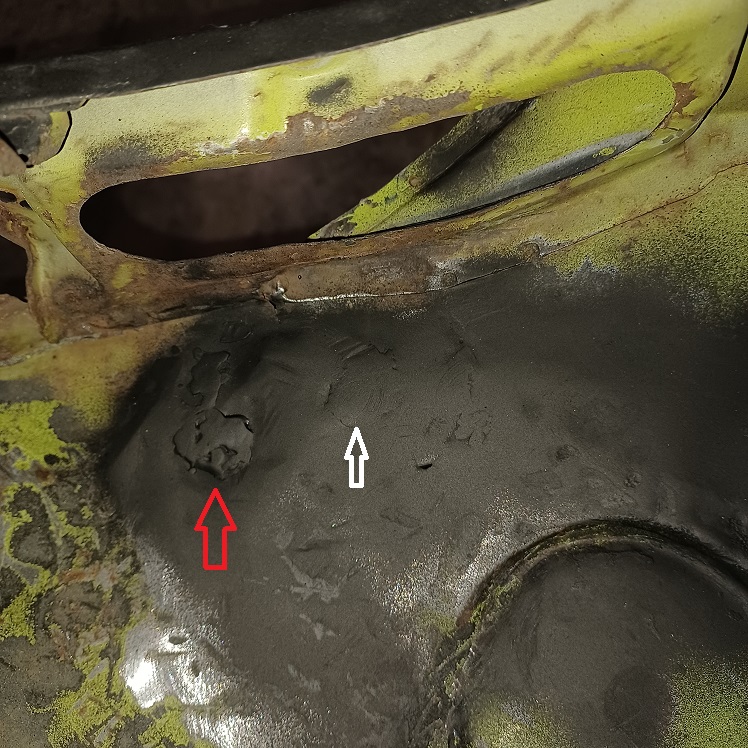 |
|
|
|
| wonkipop |
Nov 28 2021, 03:44 PM
Post
#169
|
|
914 Guru Group: Members Posts: 5,291 Joined: 6-May 20 From: north antarctica Member No.: 24,231 Region Association: NineFourteenerVille |
QUOTE(Puebloswatcop @ Nov 28 2021, 03:37 PM)  So it was on to filling the hole that the PO used in the drivers side engine compartment wall to bolt the trunk hing to. Replacing the trunk hinge mount would have been so cheap and easy, but no....we have to drill a half inch hole. @Puebloswatcop whats that emission sticker say i can see in your image. i can't quite make it out with resolution, but i think i can see EC. if so, is it EC-A or is it EC-B. is it EPA and caifornia certified or does it say EPA certified. and whats the vin date on the car. if you don't mind me asking? nice work fixing the car up. (IMG:style_emoticons/default/beerchug.gif) |
|
|
|
| Puebloswatcop |
Nov 28 2021, 03:48 PM
Post
#170
|
|
Senior Member Group: Members Posts: 1,690 Joined: 27-December 14 From: Mineola, Texas Member No.: 18,258 Region Association: Southwest Region |
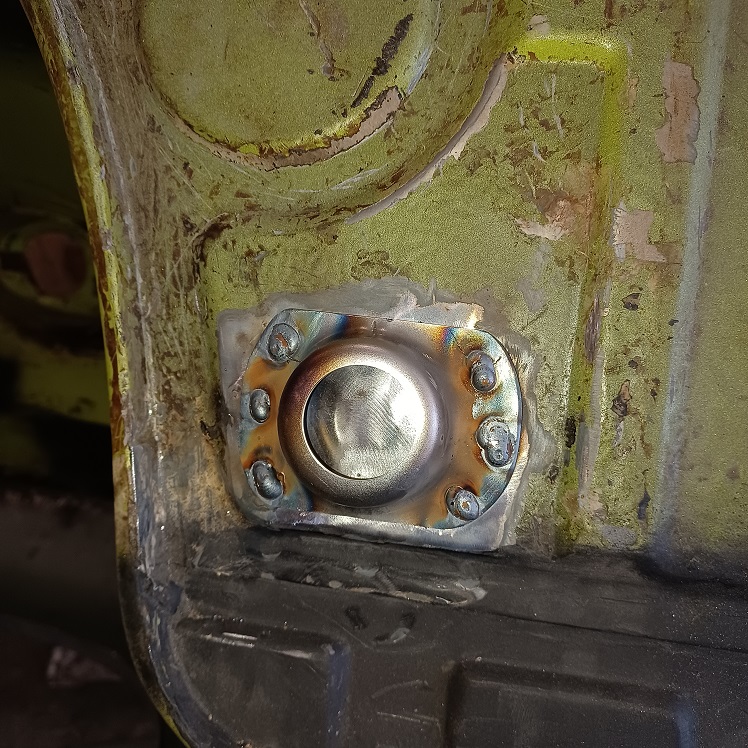
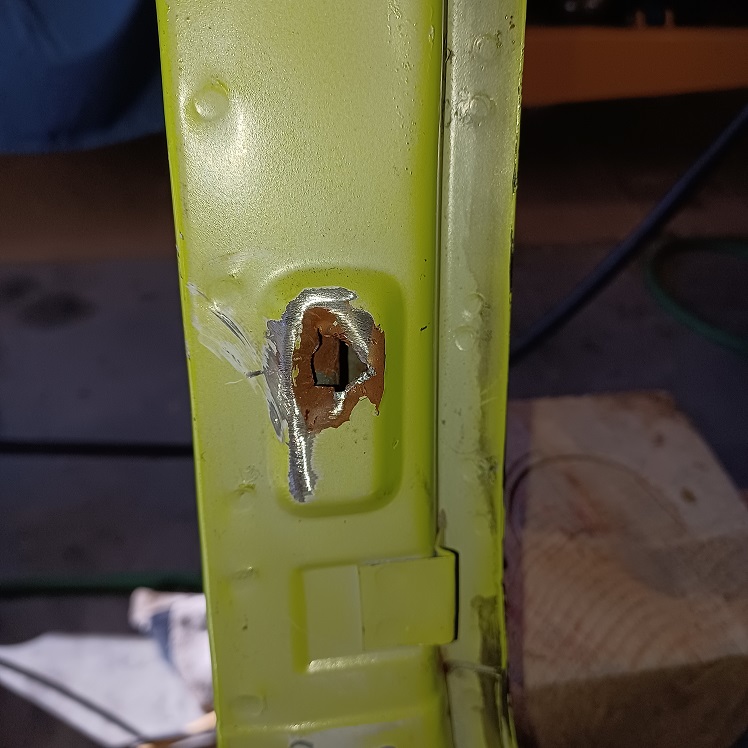
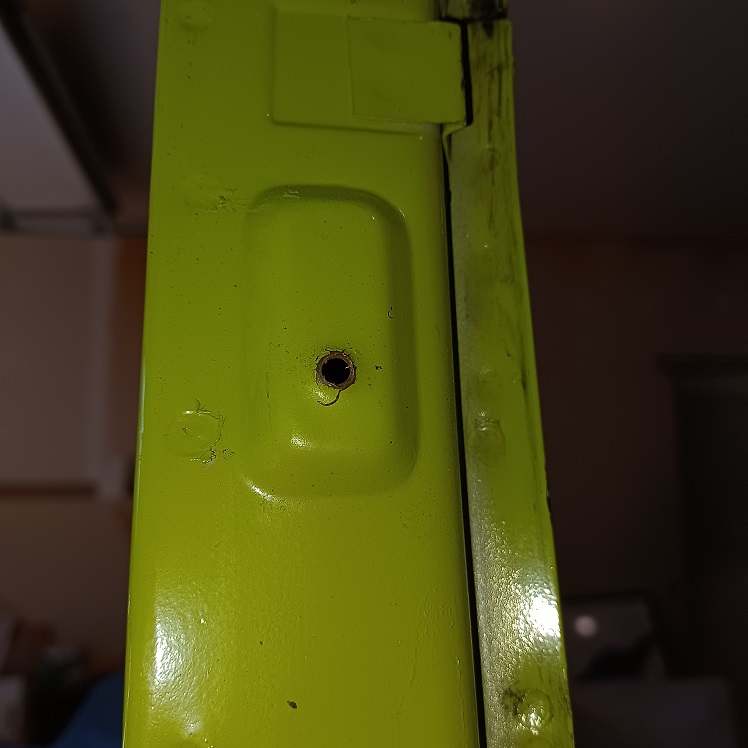
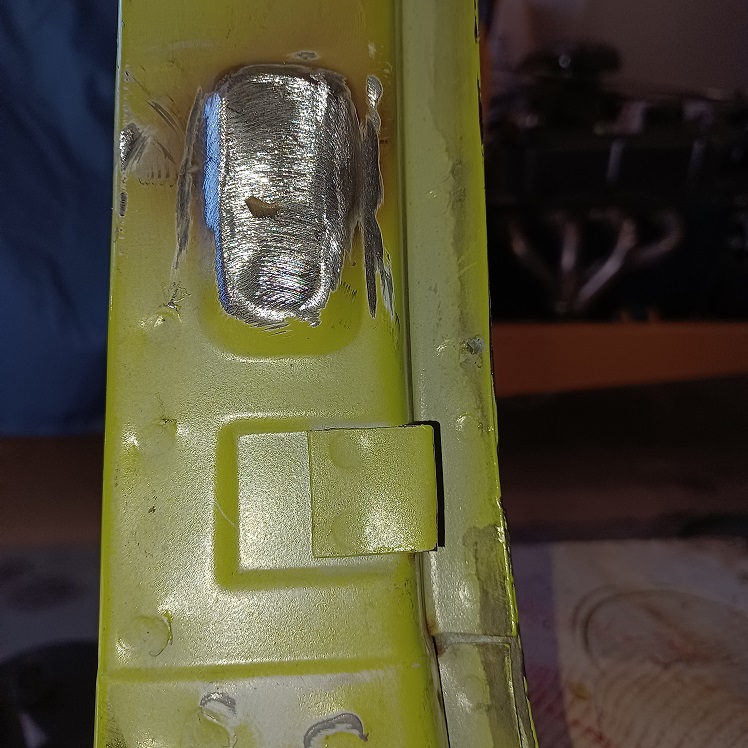
Figured that while I was in the mood to weld stupid stuff, I would fix a hole that was in the drivers side of the windshield frame, I believe this is where the sun visor mounts. The first piture is what the driver's side looked like and the second is the passenger side and what the hole should look like.
  |
|
|
|
| Puebloswatcop |
Nov 28 2021, 03:50 PM
Post
#171
|
|
Senior Member Group: Members Posts: 1,690 Joined: 27-December 14 From: Mineola, Texas Member No.: 18,258 Region Association: Southwest Region |
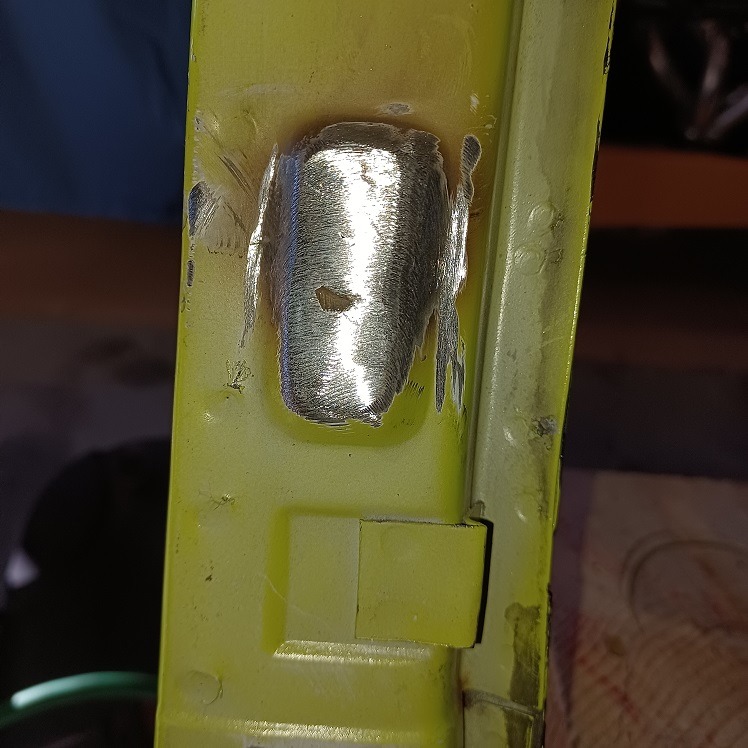
It took a few passes of welding and grinding to eliminate any thin spots.
  |
|
|
|
| Puebloswatcop |
Nov 28 2021, 03:51 PM
Post
#172
|
|
Senior Member Group: Members Posts: 1,690 Joined: 27-December 14 From: Mineola, Texas Member No.: 18,258 Region Association: Southwest Region |
But I think this will do the trick....
 |
|
|
|
| Puebloswatcop |
Nov 28 2021, 03:53 PM
Post
#173
|
|
Senior Member Group: Members Posts: 1,690 Joined: 27-December 14 From: Mineola, Texas Member No.: 18,258 Region Association: Southwest Region |
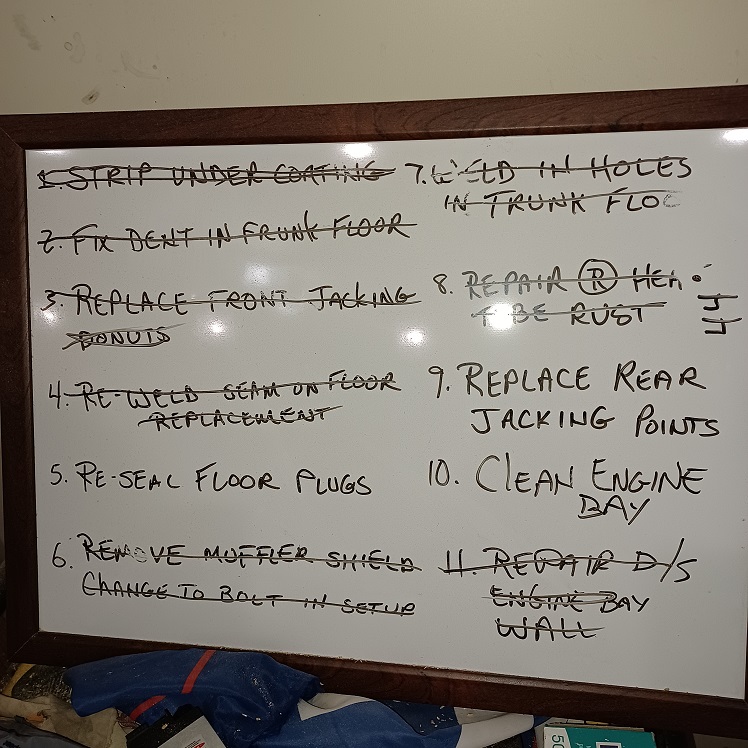
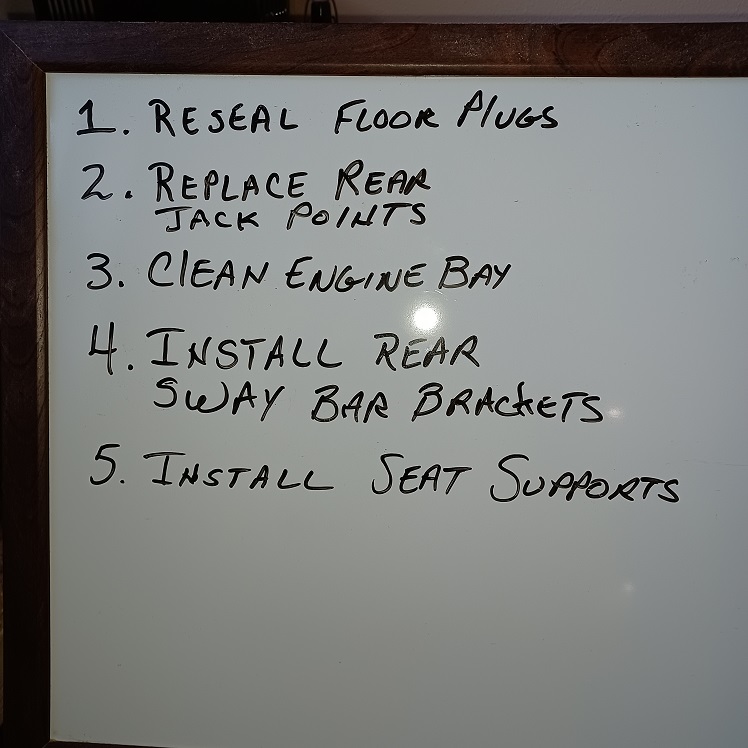
And at the end of the day I got to scratch a couple more tasks off of the white board (IMG:style_emoticons/default/beer.gif)
 |
|
|
|
| Puebloswatcop |
Nov 28 2021, 04:01 PM
Post
#174
|
|
Senior Member Group: Members Posts: 1,690 Joined: 27-December 14 From: Mineola, Texas Member No.: 18,258 Region Association: Southwest Region |
QUOTE(wonkipop @ Nov 28 2021, 03:44 PM) QUOTE(Puebloswatcop @ Nov 28 2021, 03:37 PM) So it was on to filling the hole that the PO used in the drivers side engine compartment wall to bolt the trunk hing to. Replacing the trunk hinge mount would have been so cheap and easy, but no....we have to drill a half inch hole. @Puebloswatcop whats that emission sticker say i can see in your image. i can't quite make it out with resolution, but i think i can see EC. if so, is it EC-A or is it EC-B. is it EPA and caifornia certified or does it say EPA certified. and whats the vin date on the car. if you don't mind me asking? nice work fixing the car up. (IMG:style_emoticons/default/beerchug.gif) Here is a pick of the emissions sticker and the vin plate: It is a EC-A 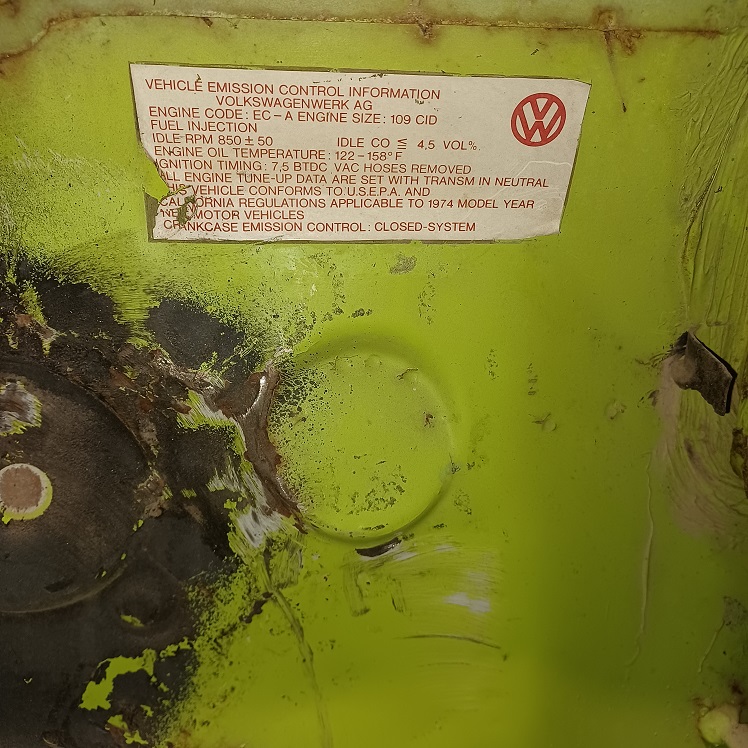 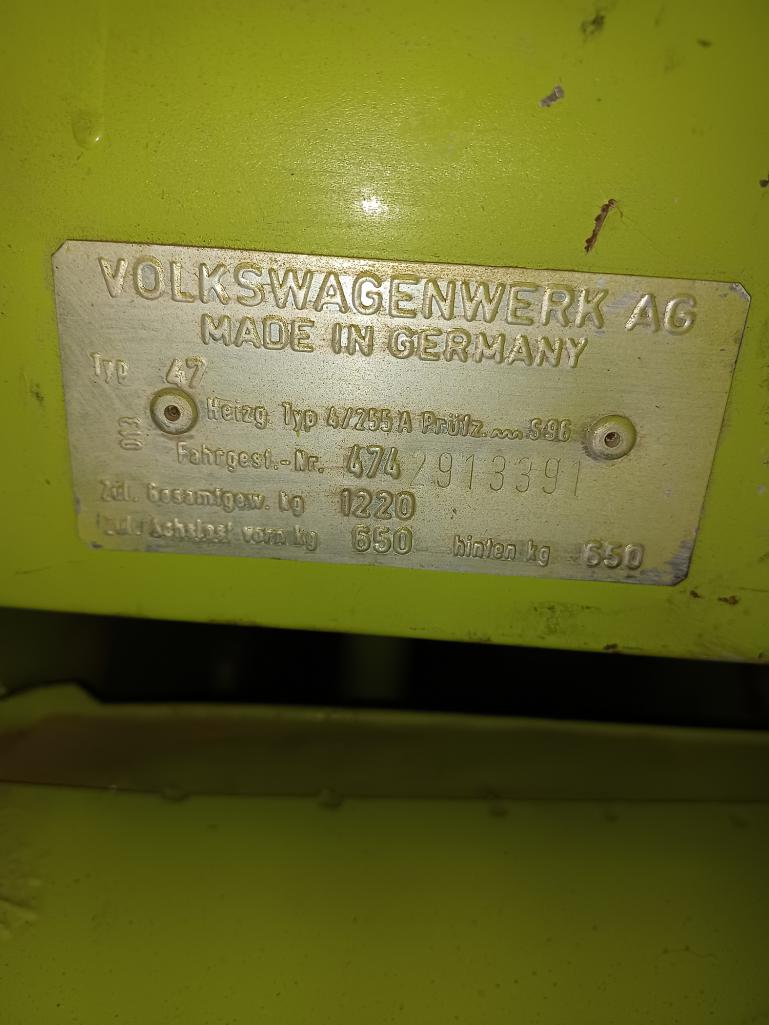 |
|
|
|
| Puebloswatcop |
Dec 2 2021, 02:29 PM
Post
#175
|
|
Senior Member Group: Members Posts: 1,690 Joined: 27-December 14 From: Mineola, Texas Member No.: 18,258 Region Association: Southwest Region |
Started off the week by re-writing my white board so I could plan for the week. Went to town to get some supplies and my truck decided the ABS system no longer wanted to work. So for half the week, nothing got done on the 914. (IMG:style_emoticons/default/sad.gif)
 |
|
|
|
| Puebloswatcop |
Dec 2 2021, 02:36 PM
Post
#176
|
|
Senior Member Group: Members Posts: 1,690 Joined: 27-December 14 From: Mineola, Texas Member No.: 18,258 Region Association: Southwest Region |
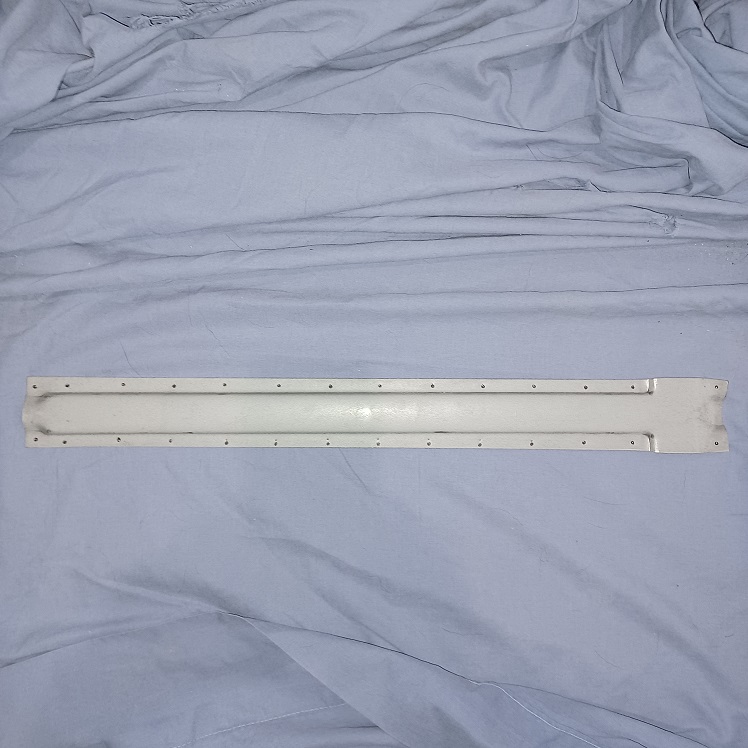
But today I figured I would get on it fist thing this morning. I decided I would start off with the seat mount supports that go on the underside of the car. These are Restoration Design pieces that I got from 9146C (Rob) when I went to pick up the rotisserie. Thanks Rob.
Initially these come with no holes, so I drilled holes so I could rosette weld them in. I wanted to use the spacing of the welds from the factory, but old Hans must have been hung over that day. Some of the welds were 1/2 inch aprt and some were 4 inches...lol...So I decided to space them 1.5 inches apart. I think that will give me plenty of bonding and support. 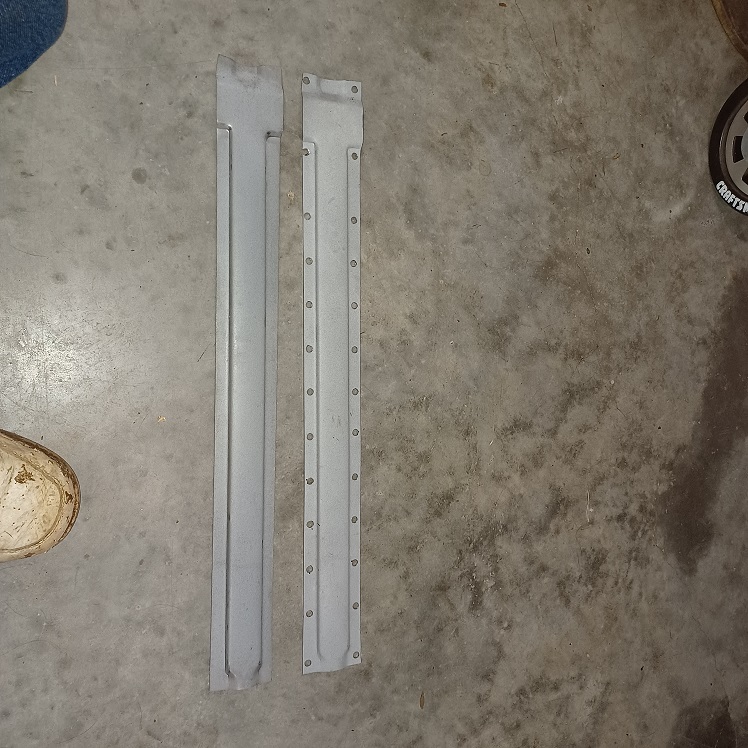 |
|
|
|
| Puebloswatcop |
Dec 2 2021, 02:38 PM
Post
#177
|
|
Senior Member Group: Members Posts: 1,690 Joined: 27-December 14 From: Mineola, Texas Member No.: 18,258 Region Association: Southwest Region |
Repeated the process for the other side...Thank goodness I have a drill press.
 |
|
|
|
| Puebloswatcop |
Dec 2 2021, 02:41 PM
Post
#178
|
|
Senior Member Group: Members Posts: 1,690 Joined: 27-December 14 From: Mineola, Texas Member No.: 18,258 Region Association: Southwest Region |
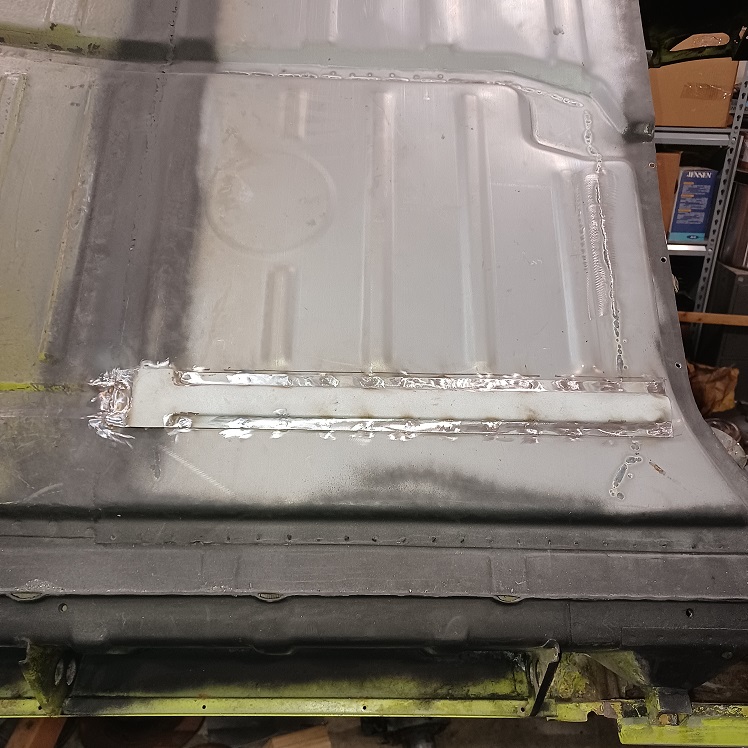
Then I marked the body of the car so I could sand where the welds would go. I didnt want to sand entire areas because of the protectant that is on the panel.
 |
|
|
|
| Puebloswatcop |
Dec 2 2021, 02:42 PM
Post
#179
|
|
Senior Member Group: Members Posts: 1,690 Joined: 27-December 14 From: Mineola, Texas Member No.: 18,258 Region Association: Southwest Region |
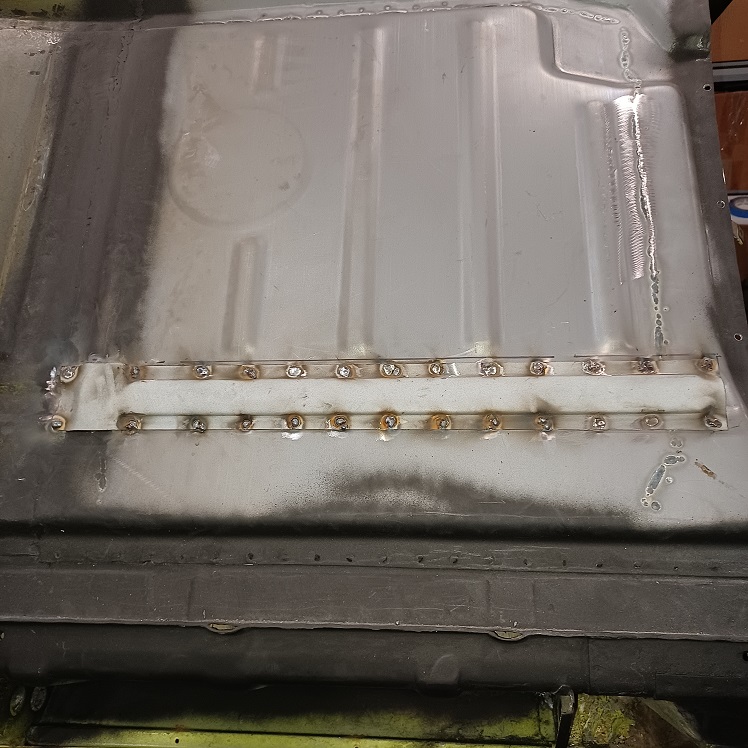
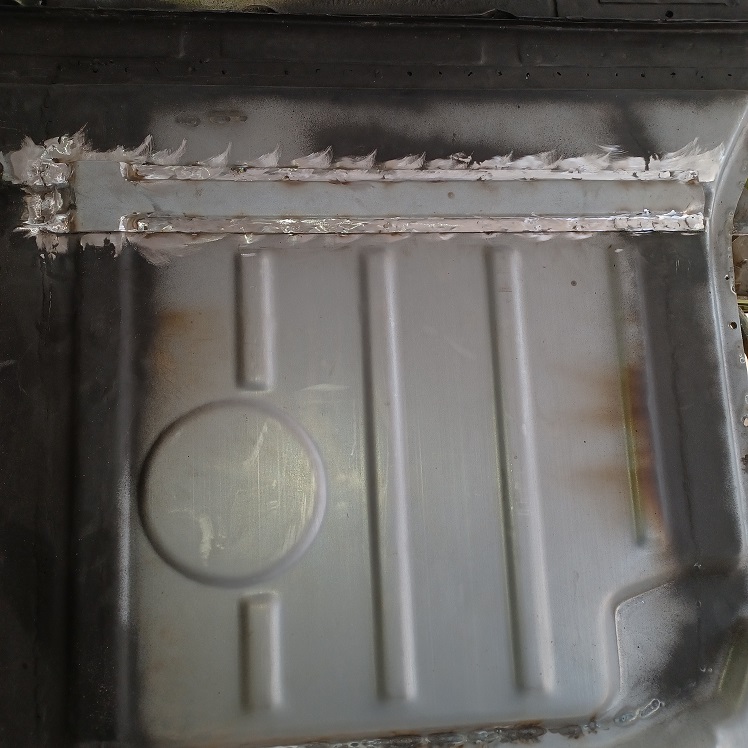
Then welded them in place....
 |
|
|
|
| Puebloswatcop |
Dec 2 2021, 02:45 PM
Post
#180
|
|
Senior Member Group: Members Posts: 1,690 Joined: 27-December 14 From: Mineola, Texas Member No.: 18,258 Region Association: Southwest Region |
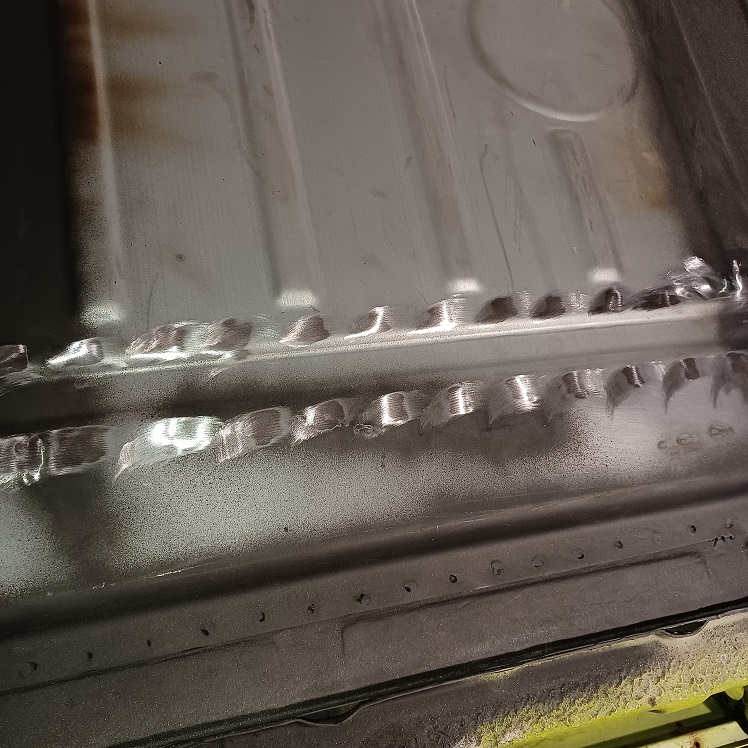
After welding them in, I went back an ground them flush so it would look more like factory spot welds
  |
|
|
|
|
1 User(s) are reading this topic (1 Guests and 0 Anonymous Users)
0 Members:

|
Lo-Fi Version | Time is now: 12th December 2025 - 05:13 PM |
Invision Power Board
v9.1.4 © 2025 IPS, Inc.