|
|
|
Porsche, and the Porsche crest are registered trademarks of Dr. Ing. h.c. F. Porsche AG.
This site is not affiliated with Porsche in any way. Its only purpose is to provide an online forum for car enthusiasts. All other trademarks are property of their respective owners. |
|
|

  |

| Puebloswatcop |
 Dec 11 2021, 05:32 PM Dec 11 2021, 05:32 PM
Post
#221
|
|
Senior Member  Group: Members Posts: 1,690 Joined: 27-December 14 From: Mineola, Texas Member No.: 18,258 Region Association: Southwest Region |
Last but not least for the day, I had to find a place for all the small parts I un-boxed. So I labled several of the storge bin drawers and started filling them up....
and now it is (IMG:style_emoticons/default/beer3.gif) time 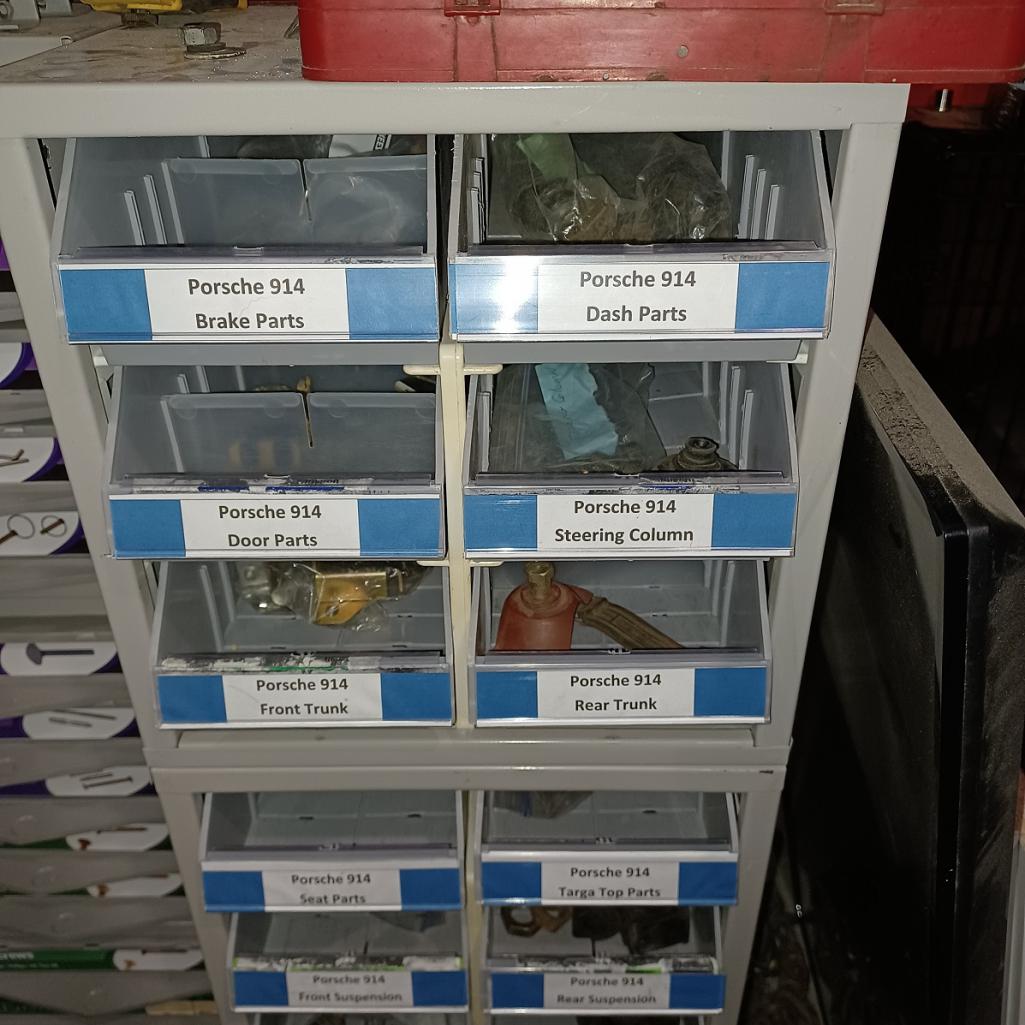 |
   |

 
|
| bkrantz |
Dec 11 2021, 09:44 PM
Post
#222
|
|
914 Guru Group: Members Posts: 8,552 Joined: 3-August 19 From: SW Colorado Member No.: 23,343 Region Association: Rocky Mountains |
Well, that beats my boxes of ziplock bags!
|
|
|
|
| Puebloswatcop |
Dec 12 2021, 07:40 AM
Post
#223
|
|
Senior Member Group: Members Posts: 1,690 Joined: 27-December 14 From: Mineola, Texas Member No.: 18,258 Region Association: Southwest Region |
QUOTE(bkrantz @ Dec 11 2021, 09:44 PM)  Well, that beats my boxes of ziplock bags! I don't know Bob, you had all your stuff bagged and tagged and very orderly. Unfortunately mine wasn't done as it came off of the car, so now I am spending an inordinate amount of time sorting things out. I was just lucky enough to get these hardware drawer sets when the local hardware store upgraded. They sold off the old stuff for $2.00 per set, perfect timing. |
|
|
|
| Puebloswatcop |
Dec 16 2021, 06:31 PM
Post
#224
|
|
Senior Member Group: Members Posts: 1,690 Joined: 27-December 14 From: Mineola, Texas Member No.: 18,258 Region Association: Southwest Region |
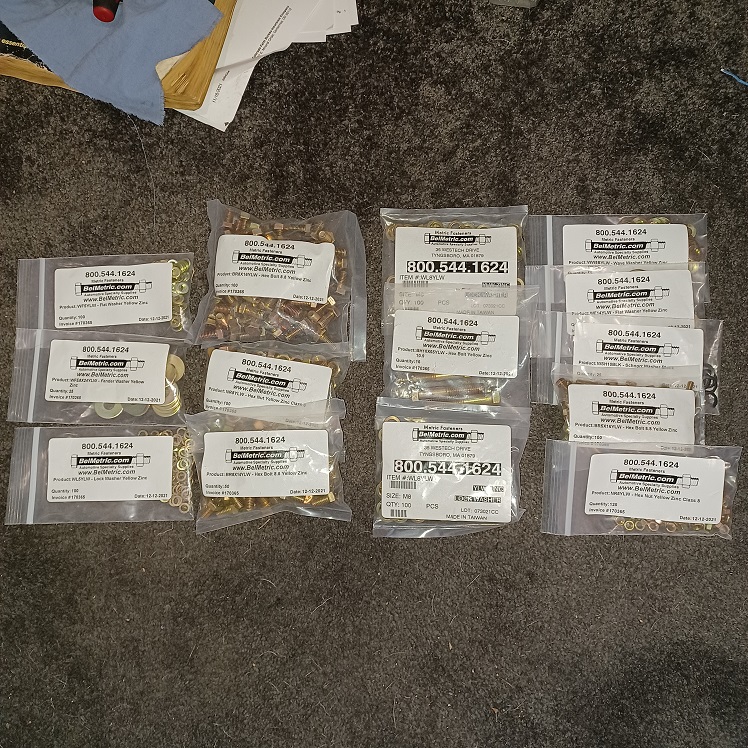
Today started off with a nice surprise delivery from Belmetric. My goal is to replace as much of the old hardware with new things
 |
|
|
|
| Puebloswatcop |
Dec 16 2021, 06:37 PM
Post
#225
|
|
Senior Member Group: Members Posts: 1,690 Joined: 27-December 14 From: Mineola, Texas Member No.: 18,258 Region Association: Southwest Region |
So I started breaking it down into baggies by what any one area required, so for instance
all hardware required for the sway bar was bagged together. I figure that way when I start to reassemble this car, all I have to do is pull out the bag of new hardware. I also did each item twice, so when I start my second car I will already have the hardware in order. 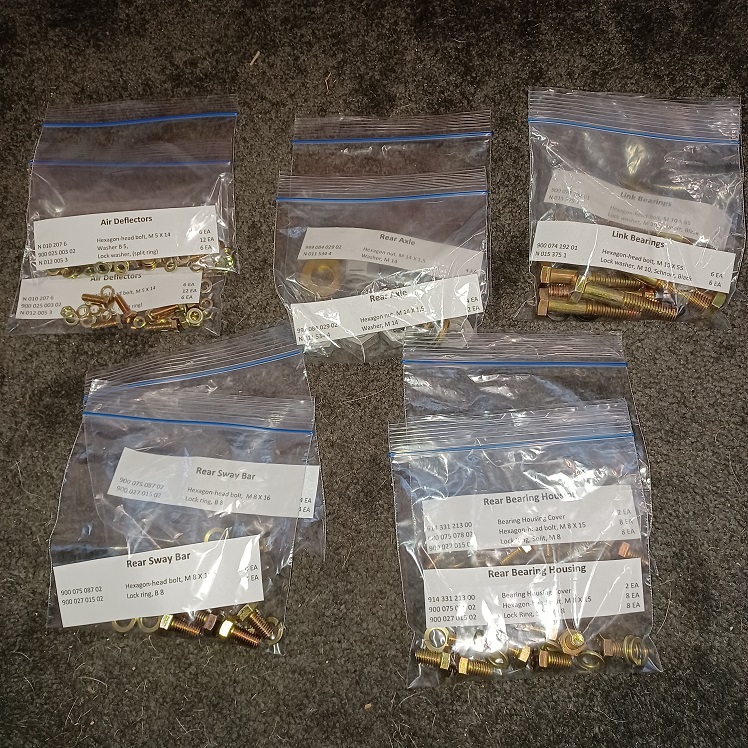 |
|
|
|
| Puebloswatcop |
Dec 16 2021, 06:41 PM
Post
#226
|
|
Senior Member Group: Members Posts: 1,690 Joined: 27-December 14 From: Mineola, Texas Member No.: 18,258 Region Association: Southwest Region |
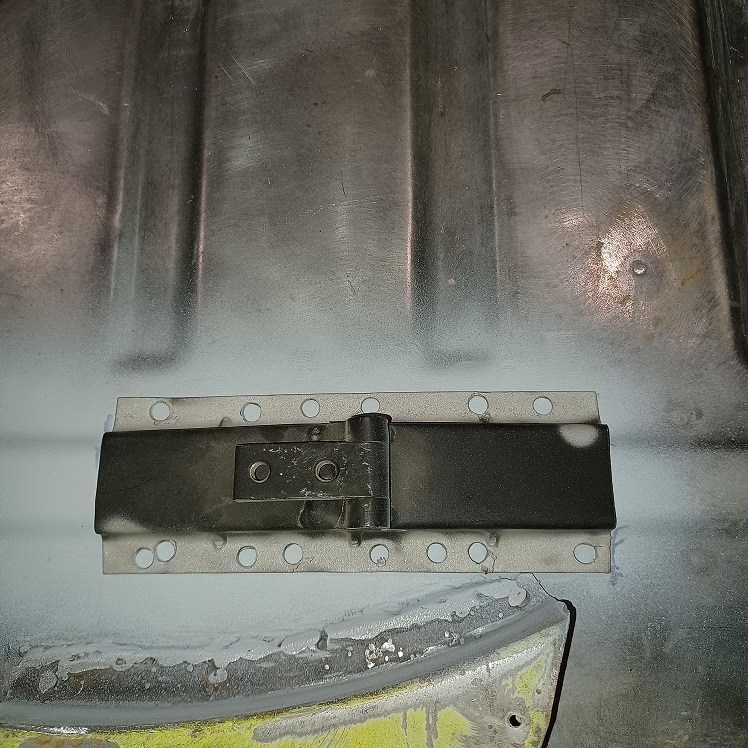
Then I started to put the seat mounts back into the car. I will have to order two new ones since I cand find the second set.....After prepping the mount and the floor, I sprayed those areas with weld through primer, since they will never see the light of day again.
 |
|
|
|
| Puebloswatcop |
Dec 16 2021, 06:46 PM
Post
#227
|
|
Senior Member Group: Members Posts: 1,690 Joined: 27-December 14 From: Mineola, Texas Member No.: 18,258 Region Association: Southwest Region |
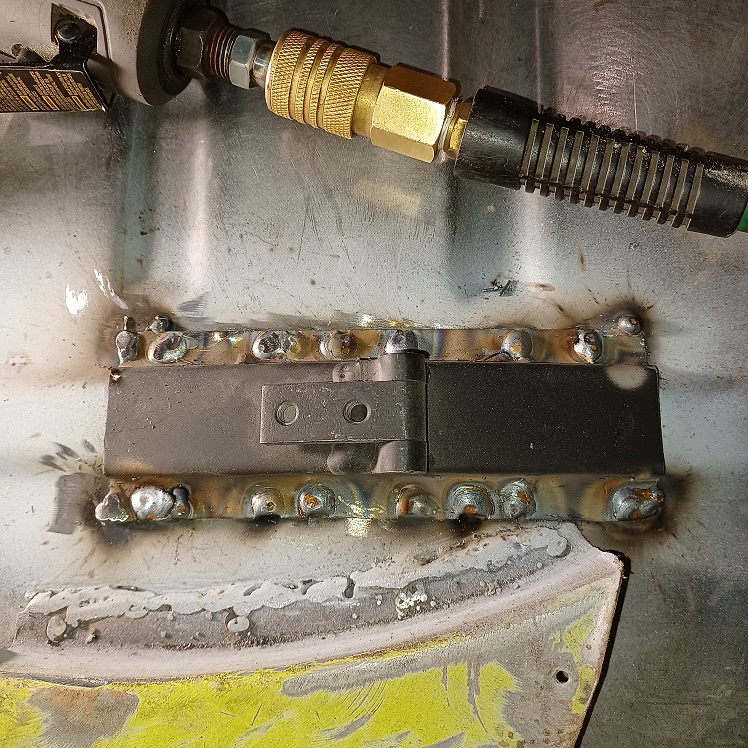
Positioned the mount using the seat rails and then welded the mount in....one down three to go. While I was doing this I had another local 914er stop by. Randy and I chatted for over an hour as he looked at my project car. It was hard not to be distracted by the beautiful signal orange 914 he drove in with and parked right where I could see it....Great to meet another 914 enthusiast.
  |
|
|
|
| Literati914 |
Dec 17 2021, 08:09 PM
Post
#228
|
|
Advanced Member Group: Members Posts: 2,174 Joined: 16-November 06 From: Dallas, TX Member No.: 7,222 Region Association: Southwest Region |
This is impressive stuff… love the new hardware, how much was that order if you don’t mind me asking? I may go that route instead of trying to clean every little bit up. Also, what’s your sandblasting set up? Mine is slow, tedious, loud and generally sucks.. may need an upgrade of some sort. I’d farm it out but there doesn’t seem to be anyone who does blasting without powder coating.
. |
|
|
|
| Puebloswatcop |
Dec 17 2021, 08:31 PM
Post
#229
|
|
Senior Member Group: Members Posts: 1,690 Joined: 27-December 14 From: Mineola, Texas Member No.: 18,258 Region Association: Southwest Region |
[quote name='Literati914' date='Dec 17 2021, 08:09 PM' post='2967781']
This is impressive stuff… love the new hardware, how much was that order if you don’t mind me asking? I may go that route instead of trying to clean every little bit up. Also, what’s your sandblasting set up? Mine is slow, tedious, loud and generally sucks.. may need an upgrade of some sort. I’d farm it out but there doesn’t seem to be anyone who does blasting without powder coating. I found that cleaning was way to time consuming, unless it is a specialized 914 piece of hardware. I am buying for two cars, so this order was about $130.00. But that also gives me extra. I use Bel Metric, and they seem to have most everything we need for our 914s. If it is a specialized piece I blast them and then use Finishing and Plating services in Kenosha WI (https://www.fpswi.com/) to plate the items...nice folks and reasonable pricing. As for my blasting, I just use my blast cabinet that came from Harbor Freight. Mine too is noisy, but only because my compressor is in the garage near where I am working, until I get my shop built, then the compressor will be isolated. used to clean all of my parts as well, but some just benefit from a bit more attention. Feel free to contact me if you have more questions or just want to talk 914's |
|
|
|
| 76-914 |
Dec 17 2021, 09:06 PM
Post
#230
|
|
Repeat Offender & Resident Subaru Antagonist Group: Members Posts: 13,828 Joined: 23-January 09 From: Temecula, CA Member No.: 9,964 Region Association: Southern California |
QUOTE(Puebloswatcop @ Dec 11 2021, 03:05 PM) Then I spent about 30 minutes blasting all the rust and dirt away. Now the only problem is it needs rebuilding. Does anyone know where or even if I can find a rebuild kit for it? The subject of rebuilding a MC causes quite stir with this crowd. I'm surprised that the Peanut Gallery didn't gasp and cry FOUL. (IMG:style_emoticons/default/shades.gif) I can't help but think they've never rebuilt one. I rebuilt several MC's years ago when I was strapped for cash. To answer your question; I'm not aware of a vendor that sells those. I would want to know that the rebuild kit wasn't some Chinese POS. I save all of those end caps also and they do come in handy from time to time. If you end up buying another MC keep the old one as a template for your clutch adapter plate that bolts on the pedal cluster. You would need to enlarge the center hole to allow a 19mm MC. if you're buying your own. If you're going the Tilton route disregard. Stay after it and keep posting. (IMG:style_emoticons/default/beerchug.gif) |
|
|
|
| Puebloswatcop |
Dec 18 2021, 09:11 AM
Post
#231
|
|
Senior Member Group: Members Posts: 1,690 Joined: 27-December 14 From: Mineola, Texas Member No.: 18,258 Region Association: Southwest Region |
QUOTE(76-914 @ Dec 17 2021, 09:06 PM) QUOTE(Puebloswatcop @ Dec 11 2021, 03:05 PM) Then I spent about 30 minutes blasting all the rust and dirt away. Now the only problem is it needs rebuilding. Does anyone know where or even if I can find a rebuild kit for it? The subject of rebuilding a MC causes quite stir with this crowd. I'm surprised that the Peanut Gallery didn't gasp and cry FOUL. (IMG:style_emoticons/default/shades.gif) I can't help but think they've never rebuilt one. I rebuilt several MC's years ago when I was strapped for cash. To answer your question; I'm not aware of a vendor that sells those. I would want to know that the rebuild kit wasn't some Chinese POS. I save all of those end caps also and they do come in handy from time to time. If you end up buying another MC keep the old one as a template for your clutch adapter plate that bolts on the pedal cluster. You would need to enlarge the center hole to allow a 19mm MC. if you're buying your own. If you're going the Tilton route disregard. Stay after it and keep posting. (IMG:style_emoticons/default/beerchug.gif) Thanks for your reply, I too have rebuilt many master cylinders over the years without any issues, so I don't see it as an issue. However I agree that I would never rebuild anything with junk chinese parts. At this point I plan to upgrade to a 19 mm MC, but I hate to just throw away any original parts of a 914. Also, thanks for the encouragement. I love being retired as now I can give my cars allot of undivided attention. (IMG:style_emoticons/default/beerchug.gif) |
|
|
|
| Puebloswatcop |
Dec 18 2021, 04:08 PM
Post
#232
|
|
Senior Member Group: Members Posts: 1,690 Joined: 27-December 14 From: Mineola, Texas Member No.: 18,258 Region Association: Southwest Region |
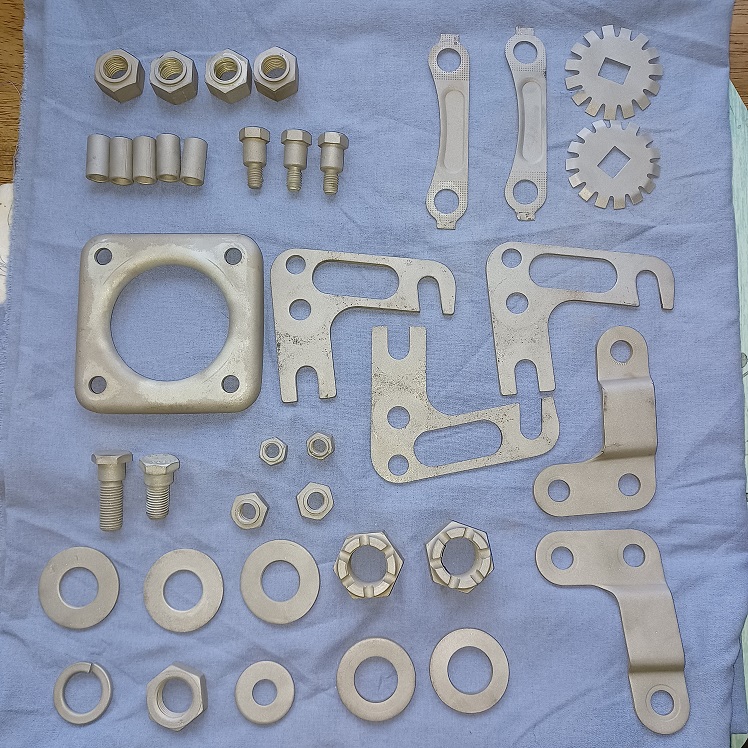
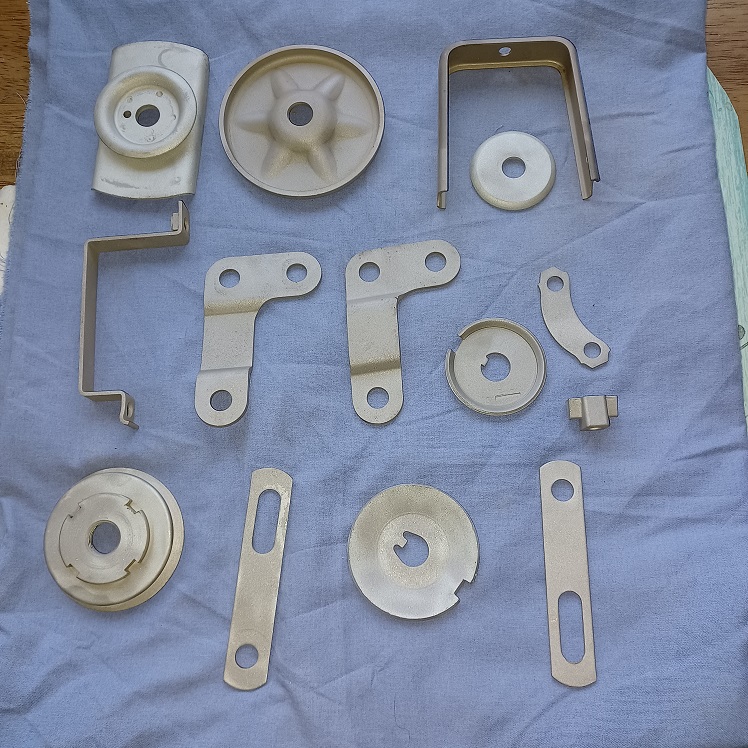
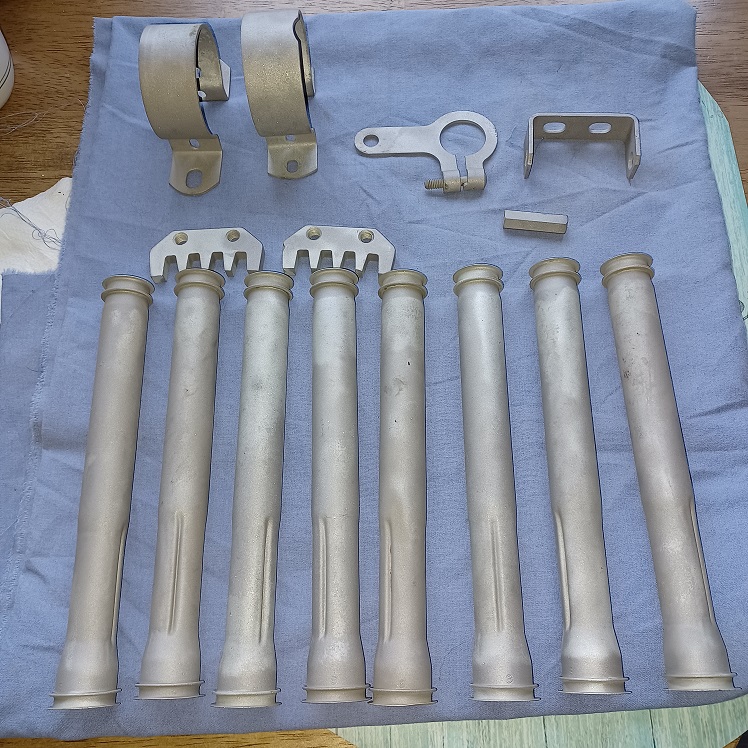
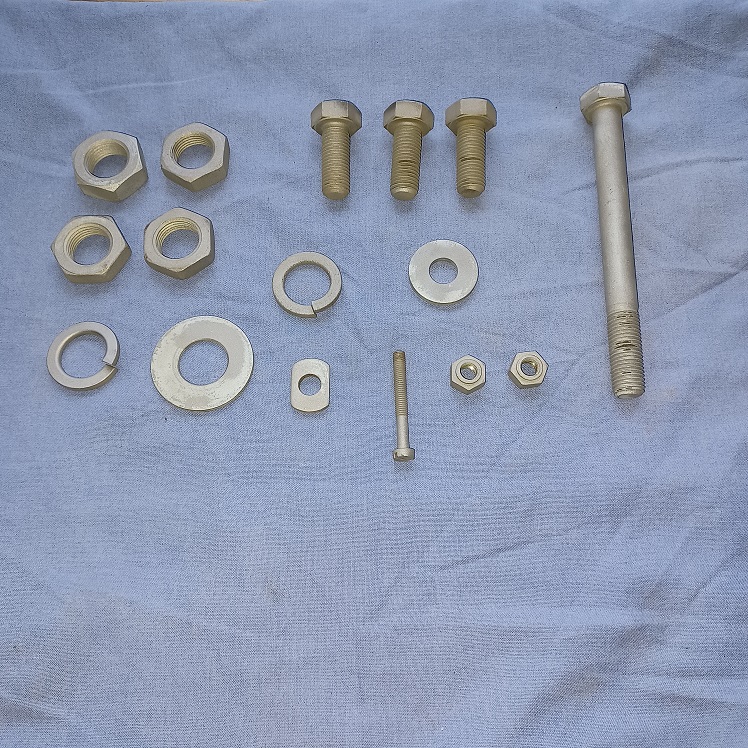
So, since today is dreary and rainy, I decided to get the first batch of parts cleaned and blasted to go to FPS for replating. Most of the pieces are 914 specific, but some is the hader to find nuts and bolts.
    |
|
|
|
| Puebloswatcop |
Dec 19 2021, 04:11 PM
Post
#233
|
|
Senior Member Group: Members Posts: 1,690 Joined: 27-December 14 From: Mineola, Texas Member No.: 18,258 Region Association: Southwest Region |
Since we are starting a new week, I decided to quit putting off the jobs that I really didn't want to tackle. One of those being the front trunk seal channels where they meet the Cowling and then into that narrow channel where the fender meets. The driver's side isnt real bad, so I think I can get away with tack welding the pin holes, unless I run ito rotted metal. After pealing back the Seam Sealer it appears that there is mostly surface rust. There has been part of the channel already replaced previously, so it is pretty solid. I will tack up where it wasn't quite welded right, and clean it up and apply ospho and see how it turns out.
 |
|
|
|
| Puebloswatcop |
Dec 19 2021, 04:17 PM
Post
#234
|
|
Senior Member Group: Members Posts: 1,690 Joined: 27-December 14 From: Mineola, Texas Member No.: 18,258 Region Association: Southwest Region |
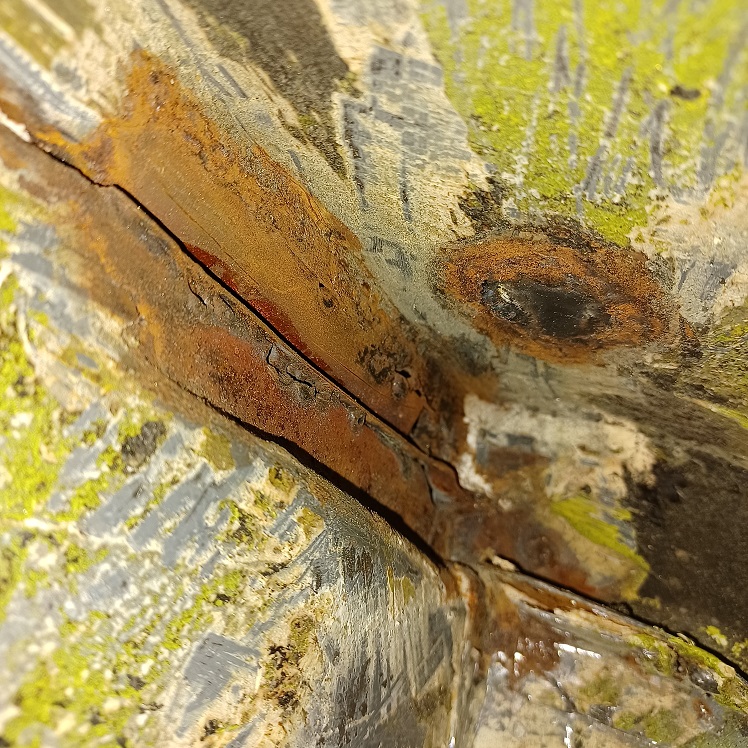
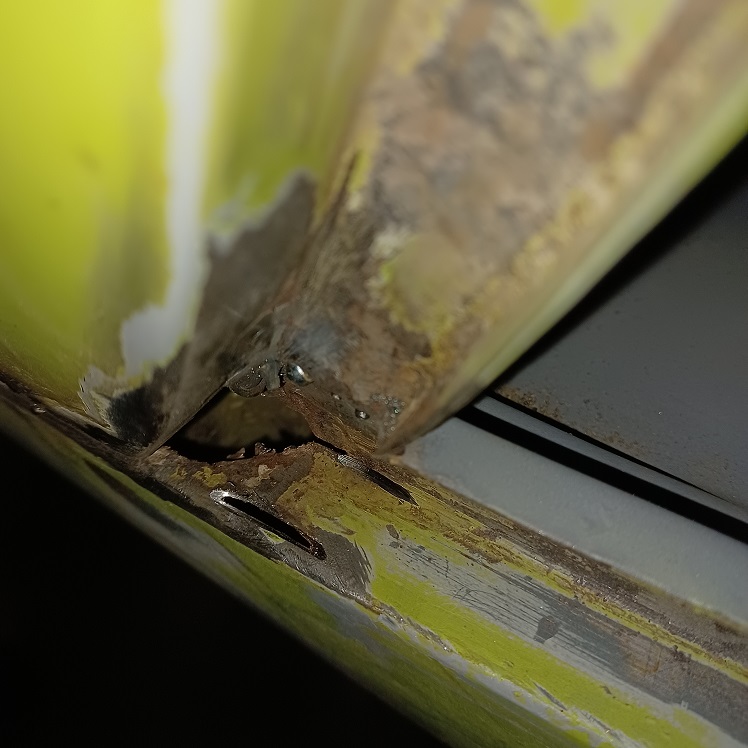
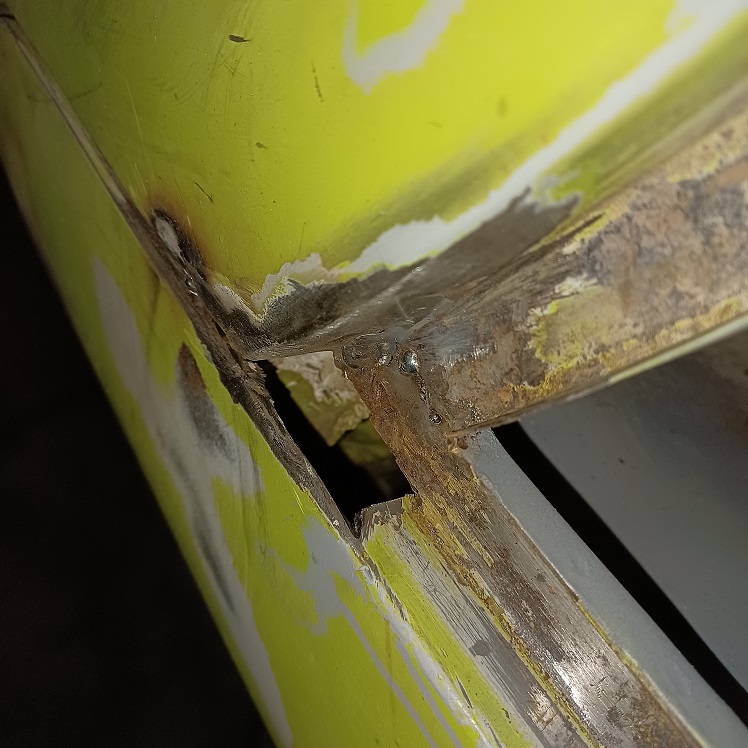
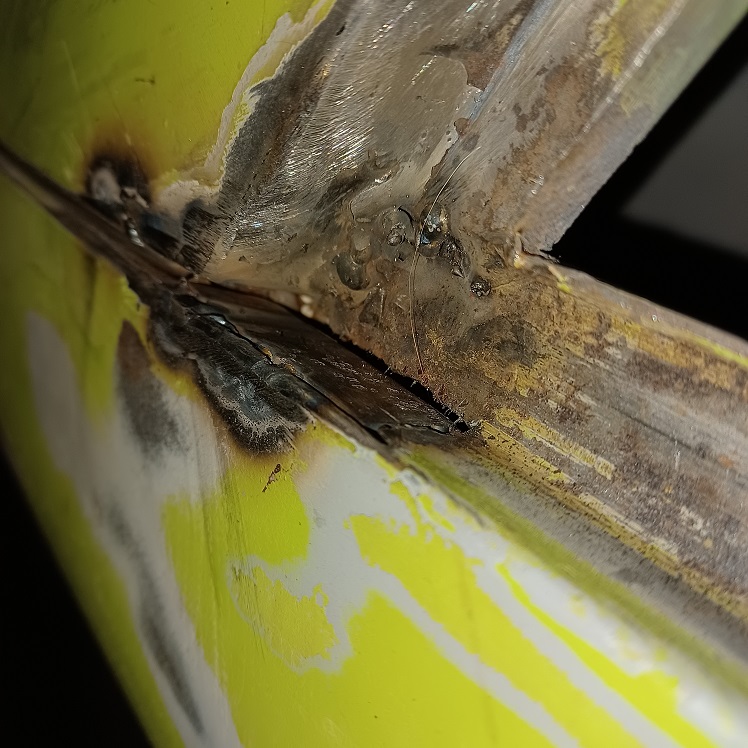
The passenger side was a different story (IMG:style_emoticons/default/barf.gif) . Luckily the rust damage is limited to the actual fender flange, but cutting it out without damaging the cowell is going to be a PIA. I have looked at it from the top and from the wheel well and there just isn't a good way to get at the damaged area.......Hmmmm.....
Top View 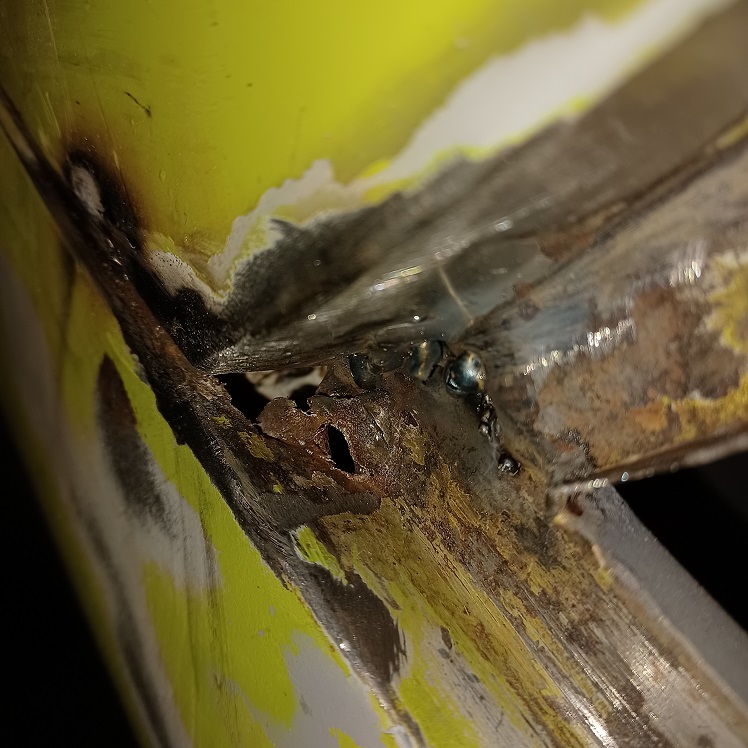 Wheel Well View 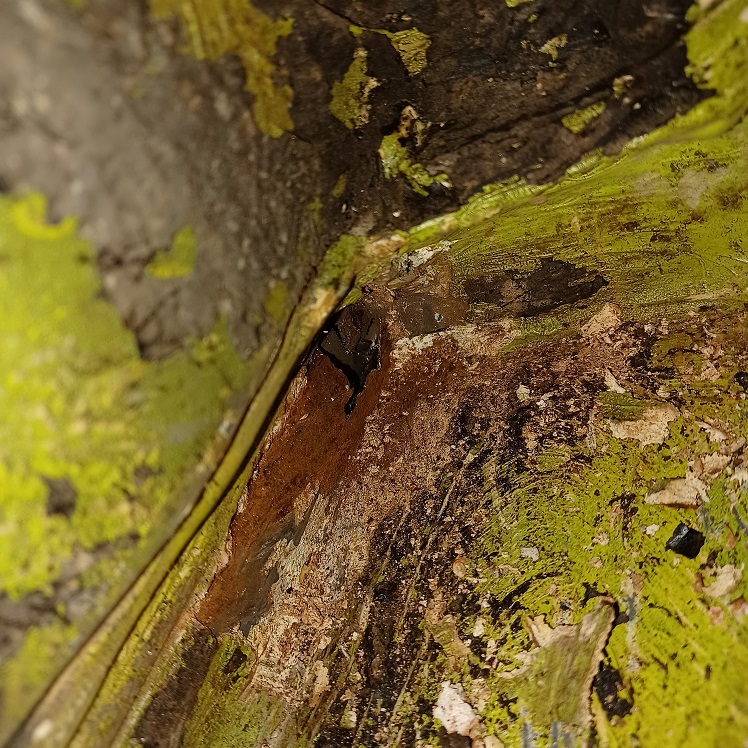 |
|
|
|
| Puebloswatcop |
Dec 19 2021, 04:22 PM
Post
#235
|
|
Senior Member Group: Members Posts: 1,690 Joined: 27-December 14 From: Mineola, Texas Member No.: 18,258 Region Association: Southwest Region |
So I went at it from both ways...Sometimes using air tools and sometimes the old fashioned way...
  |
|
|
|
| Puebloswatcop |
Dec 19 2021, 04:27 PM
Post
#236
|
|
Senior Member Group: Members Posts: 1,690 Joined: 27-December 14 From: Mineola, Texas Member No.: 18,258 Region Association: Southwest Region |
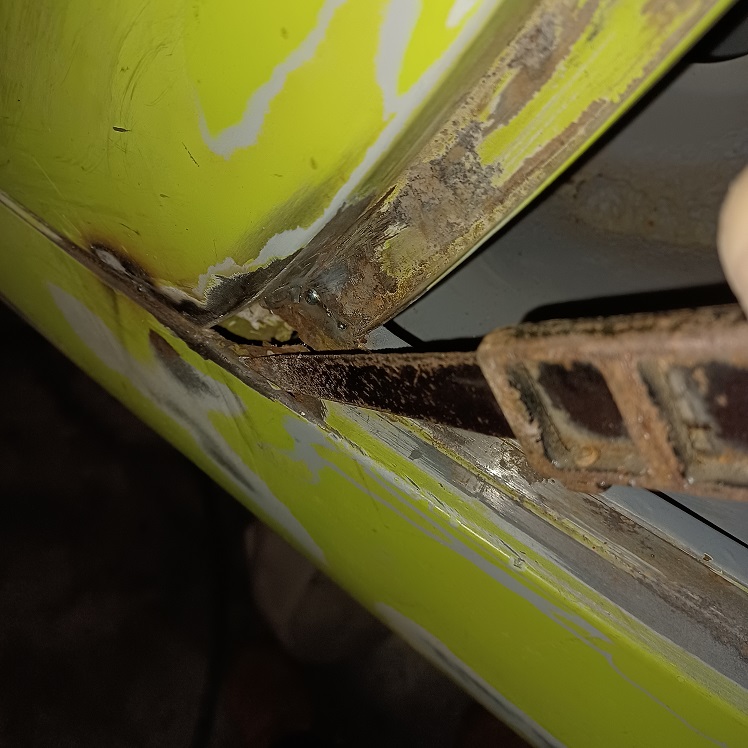
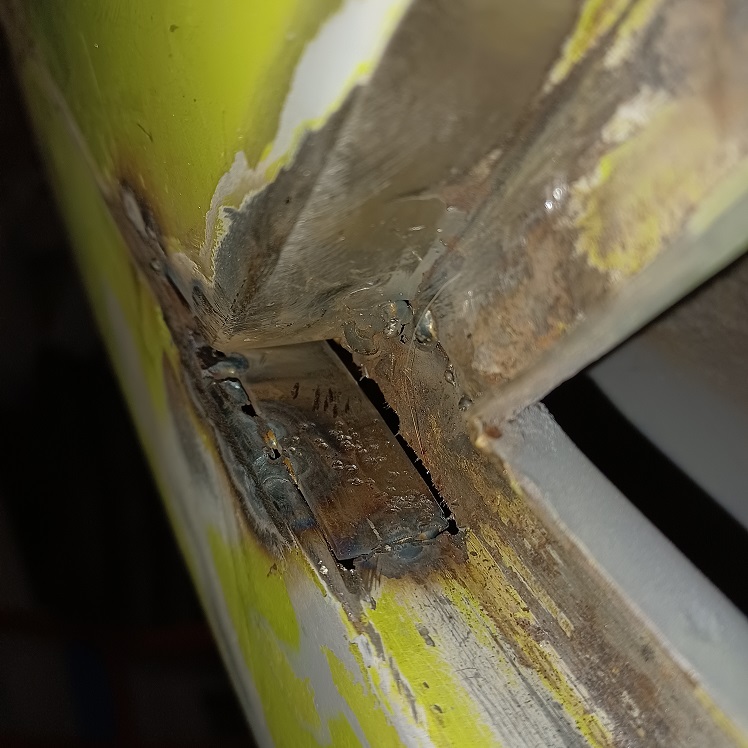
The good thing is I only had to cut back about three inches to get to good metal. But the hole looks gruesome:
  |
|
|
|
| Puebloswatcop |
Dec 19 2021, 04:31 PM
Post
#237
|
|
Senior Member Group: Members Posts: 1,690 Joined: 27-December 14 From: Mineola, Texas Member No.: 18,258 Region Association: Southwest Region |
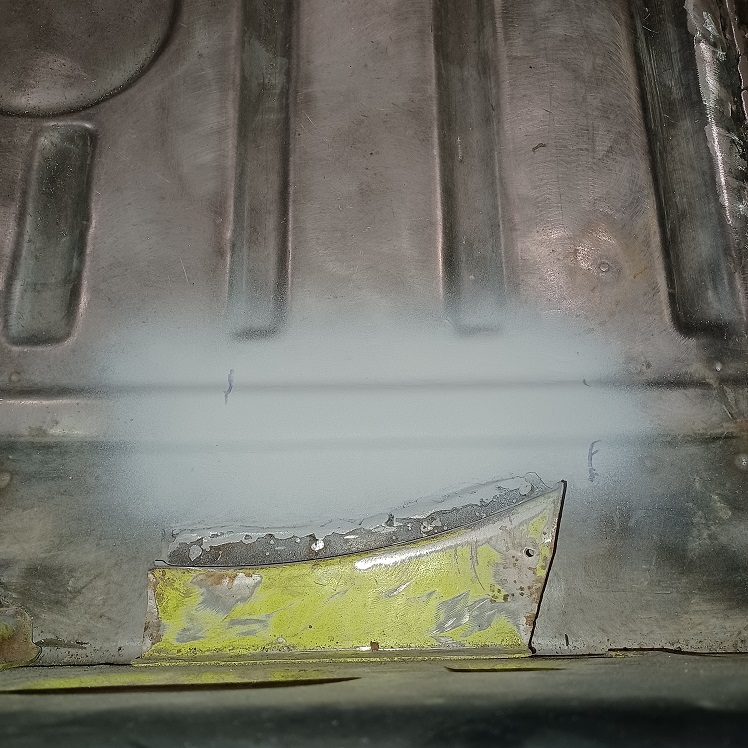
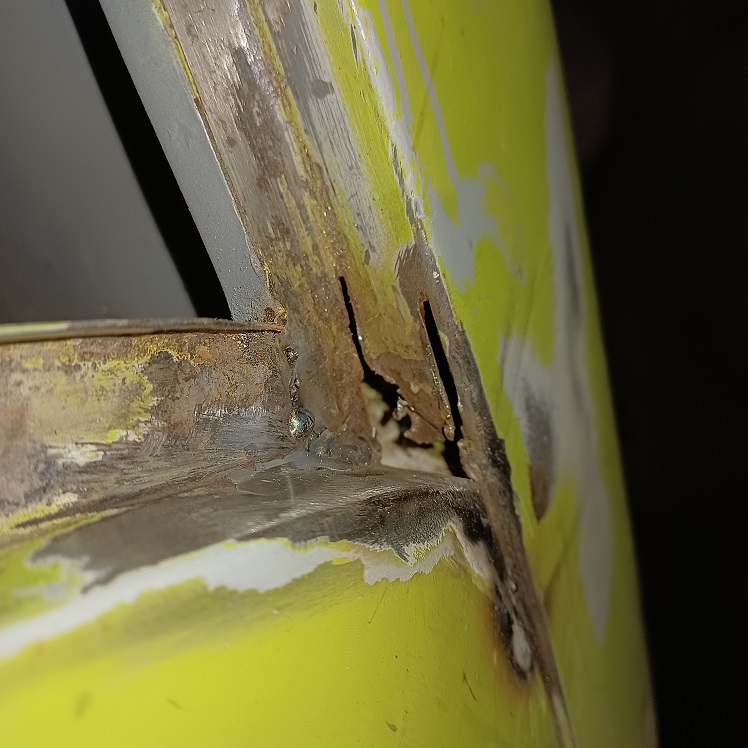
After cutting a corresponding size piece of sheet metal to fit the hole, I added a tab so that it covers up the hole that was left in the factory where the three panels come together that they filled with tons of seam sealer.
  |
|
|
|
| Puebloswatcop |
Dec 19 2021, 04:32 PM
Post
#238
|
|
Senior Member Group: Members Posts: 1,690 Joined: 27-December 14 From: Mineola, Texas Member No.: 18,258 Region Association: Southwest Region |
Got the patch welded in from the wheel well side, now just a little bit of dressing up from the visible side and that dreaded repair will be done
Attached image(s) 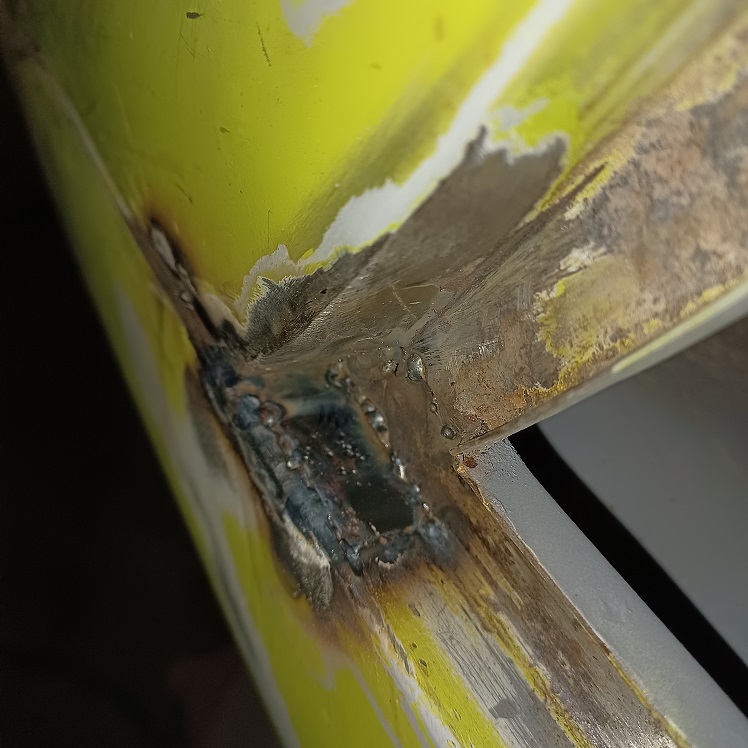
|
|
|
|
| Puebloswatcop |
Dec 20 2021, 07:05 PM
Post
#239
|
|
Senior Member Group: Members Posts: 1,690 Joined: 27-December 14 From: Mineola, Texas Member No.: 18,258 Region Association: Southwest Region |
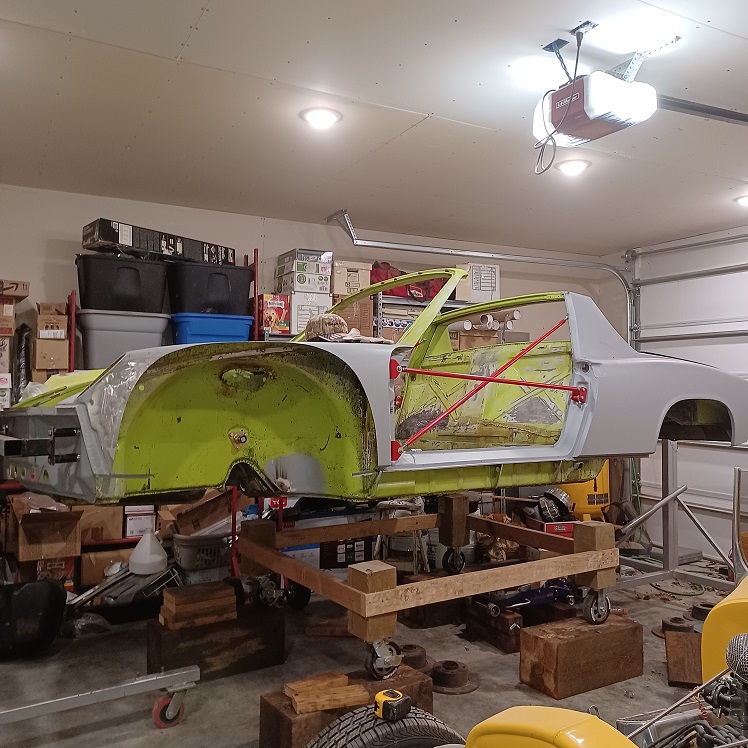
Woke up to a cold and rainy day here inTexas....So decided to fill in the gaping hole where the drivers side fender was cut to accomodate the fender flare.
 |
|
|
|
| Puebloswatcop |
Dec 20 2021, 07:10 PM
Post
#240
|
|
Senior Member Group: Members Posts: 1,690 Joined: 27-December 14 From: Mineola, Texas Member No.: 18,258 Region Association: Southwest Region |
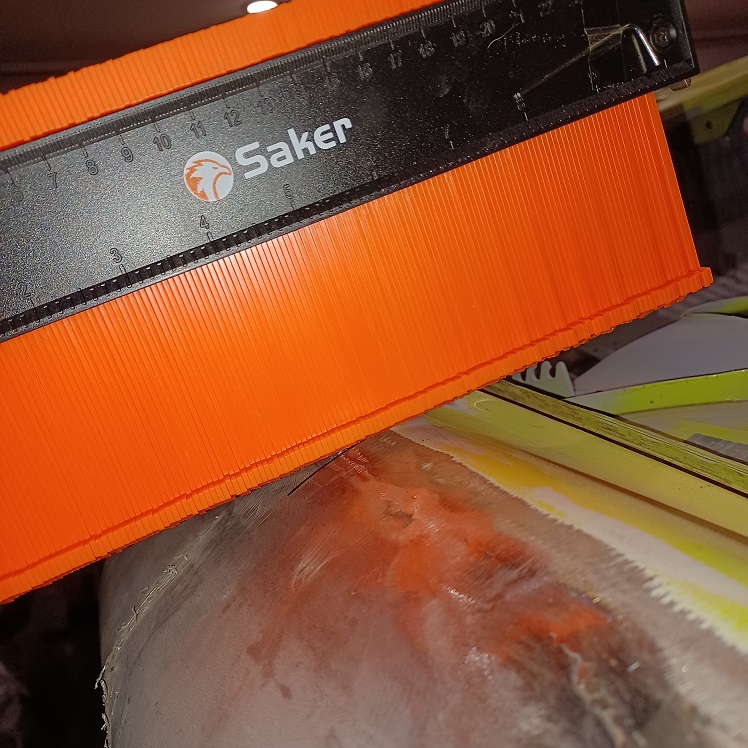
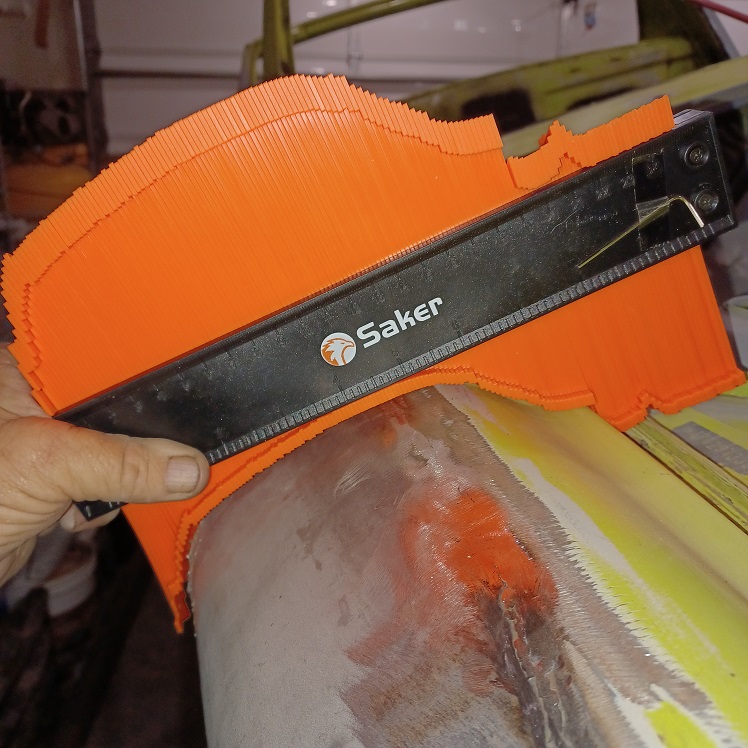
After a couple of hours of test fits, realignments and cutting and trimming, I finally got to a point that I was happy with the fit. But to be sure, I guaged the passenger side with a flexible template. I did this using the front firewall and carried the straight line from the center of the passenger fender over to the center of the drivers side.
  |
|
|
|
|
2 User(s) are reading this topic (2 Guests and 0 Anonymous Users)
0 Members:

|
Lo-Fi Version | Time is now: 15th December 2025 - 05:00 PM |
Invision Power Board
v9.1.4 © 2025 IPS, Inc.