|
|
|
Porsche, and the Porsche crest are registered trademarks of Dr. Ing. h.c. F. Porsche AG.
This site is not affiliated with Porsche in any way. Its only purpose is to provide an online forum for car enthusiasts. All other trademarks are property of their respective owners. |
|
|

  |

| Puebloswatcop |
 Dec 27 2021, 06:24 PM Dec 27 2021, 06:24 PM
Post
#261
|
|
Senior Member  Group: Members Posts: 1,690 Joined: 27-December 14 From: Mineola, Texas Member No.: 18,258 Region Association: Southwest Region |
Alas I put the cutoff wheel to the metal and cut the hole (IMG:style_emoticons/default/sawzall-smiley.gif) ...Every time I do this it always looks like the cut out portion is so much larger than it should be until I fit the fender.
 |
   |

 
|
| Puebloswatcop |
Dec 27 2021, 06:29 PM
Post
#262
|
|
Senior Member Group: Members Posts: 1,690 Joined: 27-December 14 From: Mineola, Texas Member No.: 18,258 Region Association: Southwest Region |
After cutting the fender I needed to attend to some other issues up in the fender well. For one thing there was still allot of the undercoating in there. I also didn't like the looks of the welds on the frame stiffener. Also up inside the fender is the bracing that goes up to the sail panel of the roll bar. It was obviously damaged in the prior accident and for some reason was not adequately straightened.
 |
|
|
|
| Puebloswatcop |
Dec 27 2021, 06:31 PM
Post
#263
|
|
Senior Member Group: Members Posts: 1,690 Joined: 27-December 14 From: Mineola, Texas Member No.: 18,258 Region Association: Southwest Region |
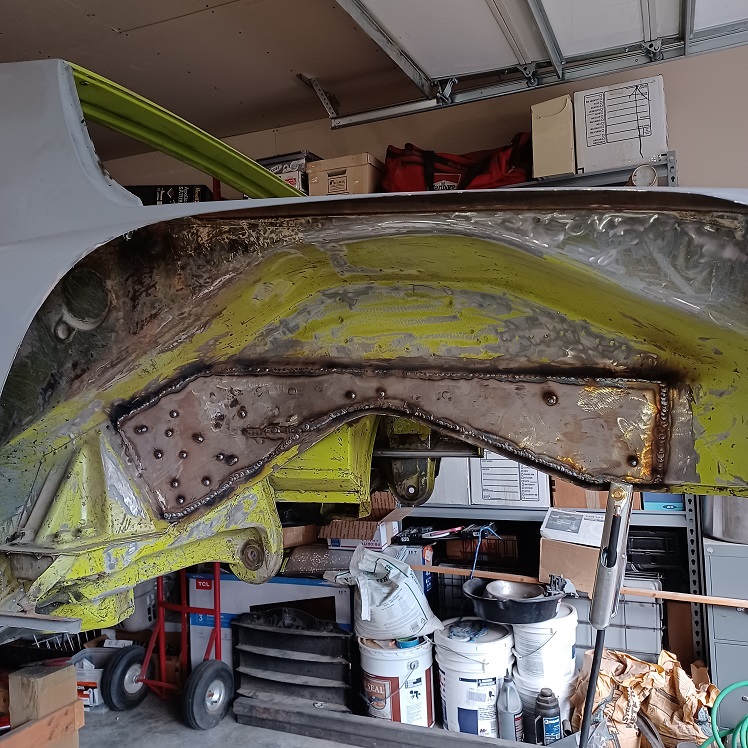
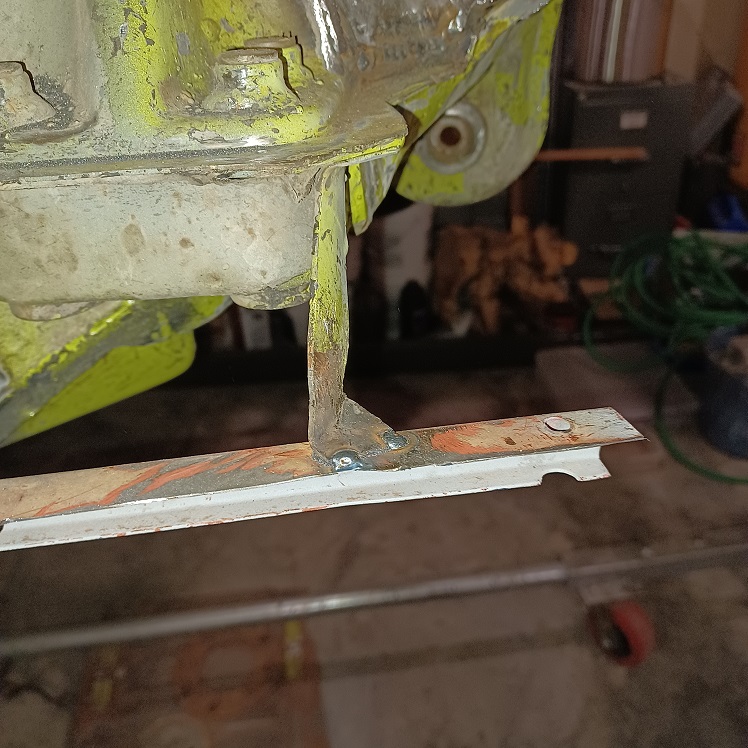
I re-welded the stiffener that was already there, and added a second piece while things were accessible.
  |
|
|
|
| Puebloswatcop |
Dec 27 2021, 06:36 PM
Post
#264
|
|
Senior Member Group: Members Posts: 1,690 Joined: 27-December 14 From: Mineola, Texas Member No.: 18,258 Region Association: Southwest Region |
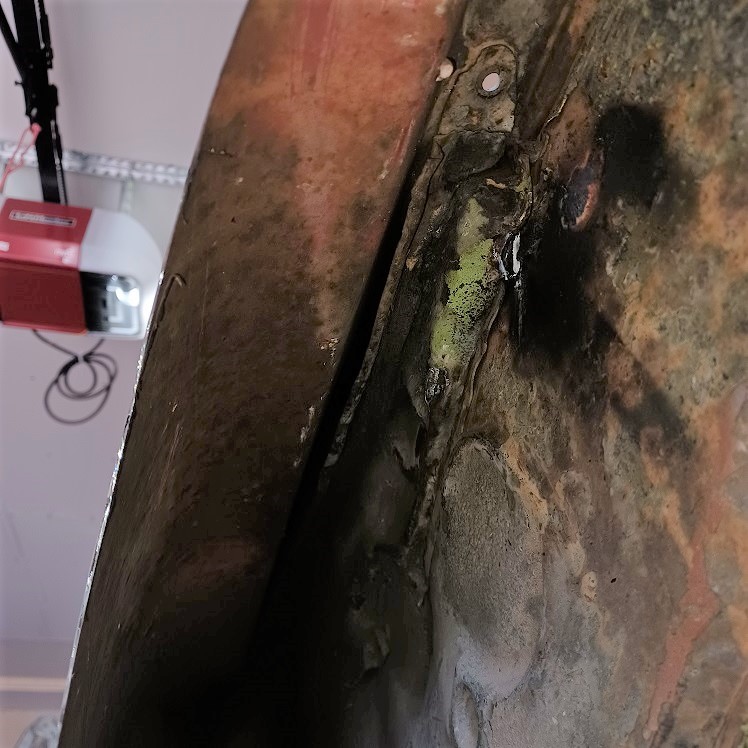
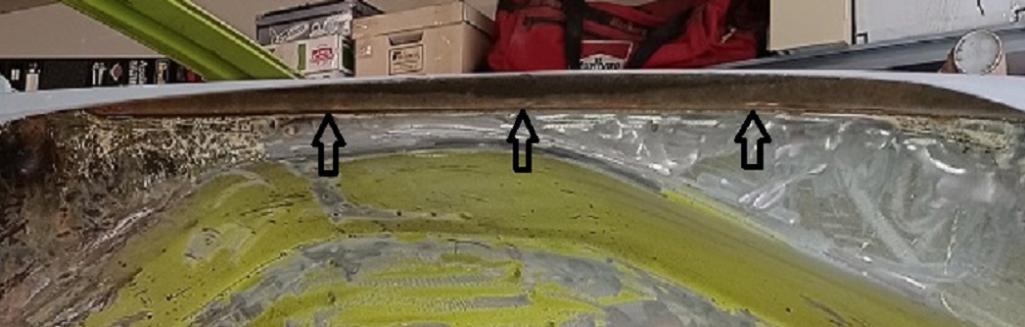
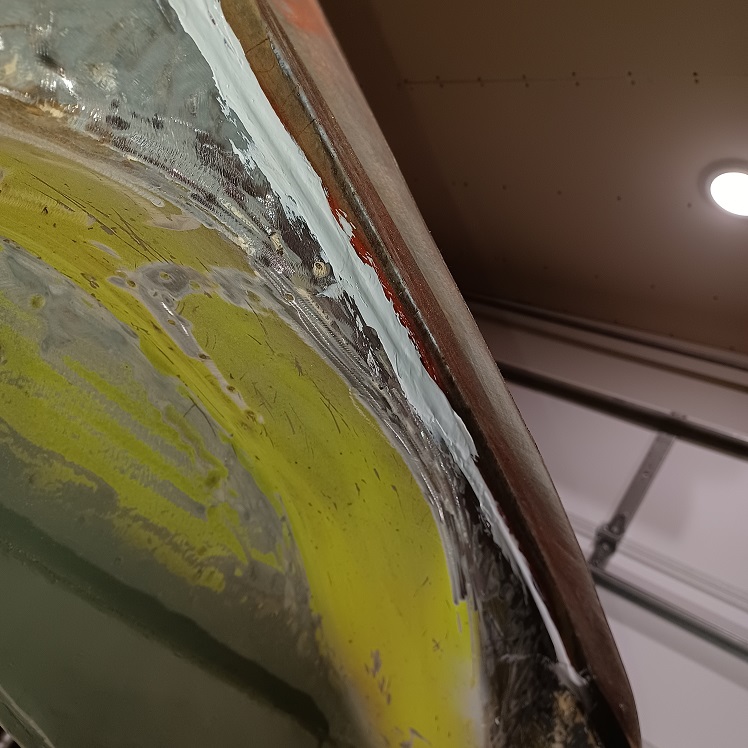
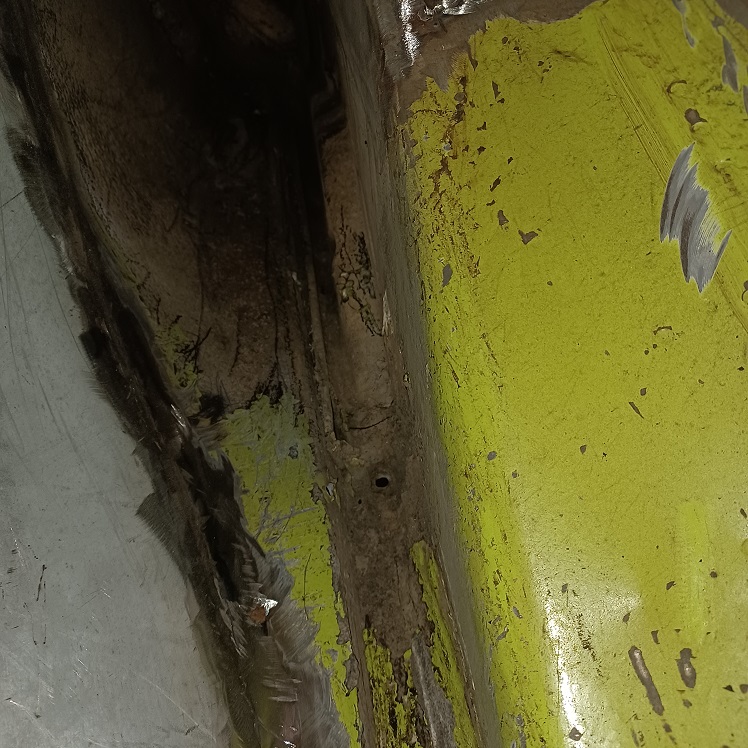
I also found that when the repairs were made from the previous crash, that they never put seem sealer in the joint when they put the new fender on. This left a long crack where water could easily enter the rear trunk and is obviously a ripe spot for new rust damage. So I will clean it up, coat with Ospho so even deep in the gap is protected and then add seam sealer.
 |
|
|
|
| Puebloswatcop |
Dec 27 2021, 06:38 PM
Post
#265
|
|
Senior Member Group: Members Posts: 1,690 Joined: 27-December 14 From: Mineola, Texas Member No.: 18,258 Region Association: Southwest Region |
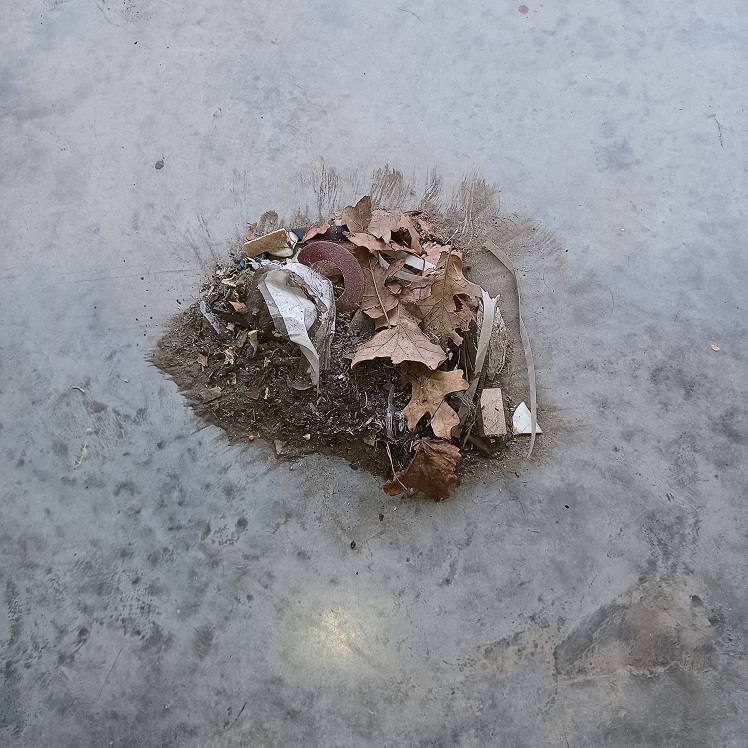
At the end of the day, I think I lightened the car by about 5 lbs of dirt, undercoating, metal filings and other garbage....lol
 |
|
|
|
| Puebloswatcop |
Dec 28 2021, 03:12 PM
Post
#266
|
|
Senior Member Group: Members Posts: 1,690 Joined: 27-December 14 From: Mineola, Texas Member No.: 18,258 Region Association: Southwest Region |
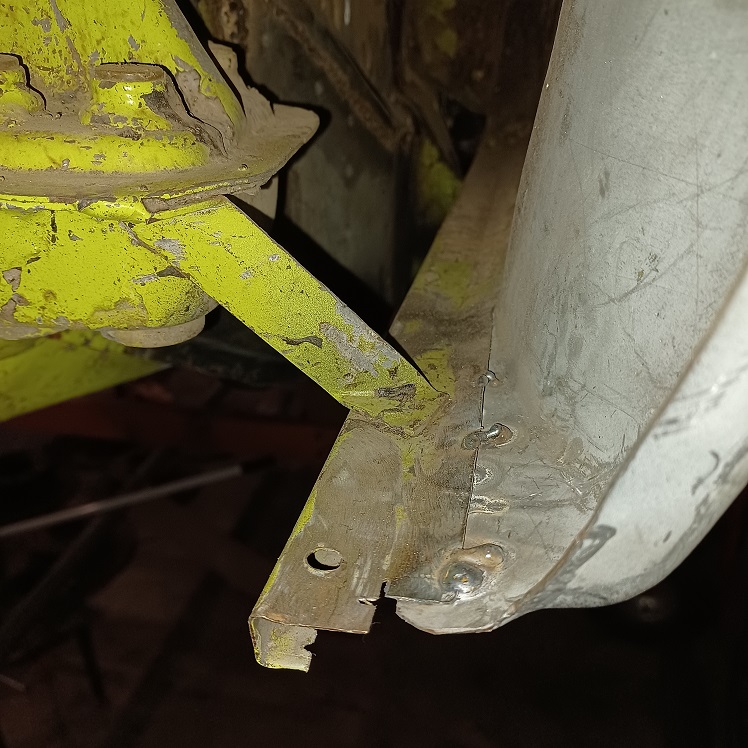
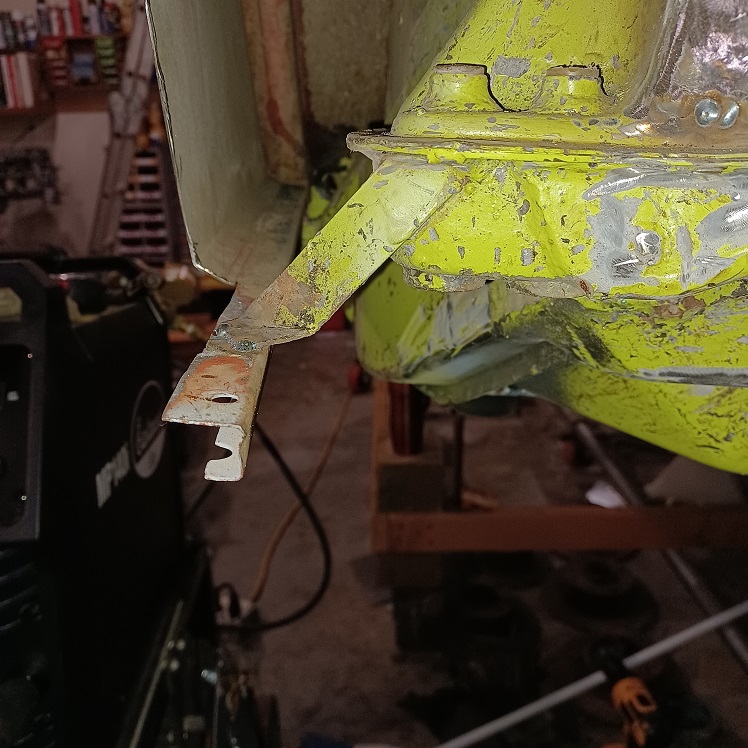
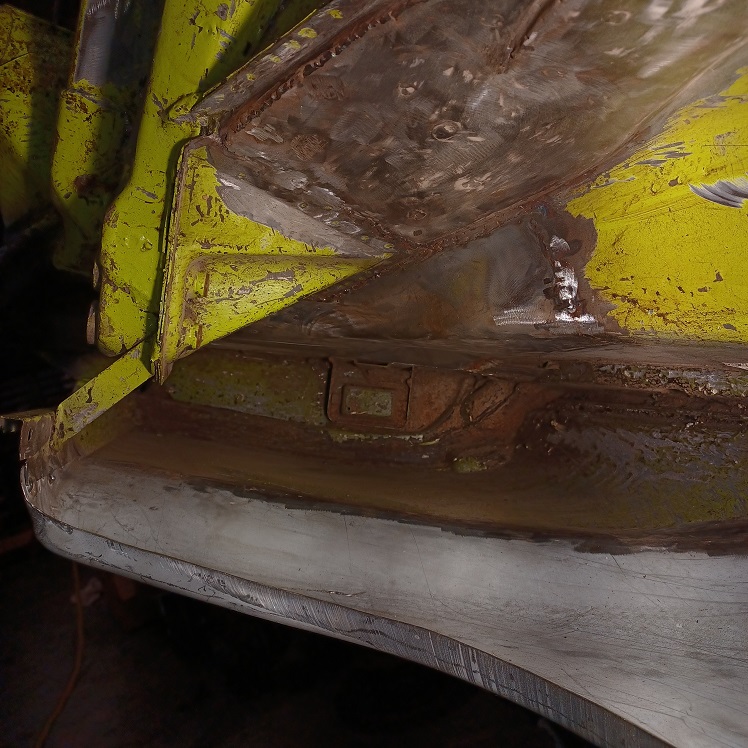
Today I spent the day still working in the left rear fender well cleaning up what the PO's body shop did, or failed to do... Here is the left rear fender brace, and you can see it doesn't look anything like the right rear brace...
  |
|
|
|
| Puebloswatcop |
Dec 28 2021, 03:15 PM
Post
#267
|
|
Senior Member Group: Members Posts: 1,690 Joined: 27-December 14 From: Mineola, Texas Member No.: 18,258 Region Association: Southwest Region |
So I cut it away from the fender and got it straightened and then re-attached it, matching the measurement from the other side.
  |
|
|
|
| Puebloswatcop |
Dec 28 2021, 03:20 PM
Post
#268
|
|
Senior Member Group: Members Posts: 1,690 Joined: 27-December 14 From: Mineola, Texas Member No.: 18,258 Region Association: Southwest Region |
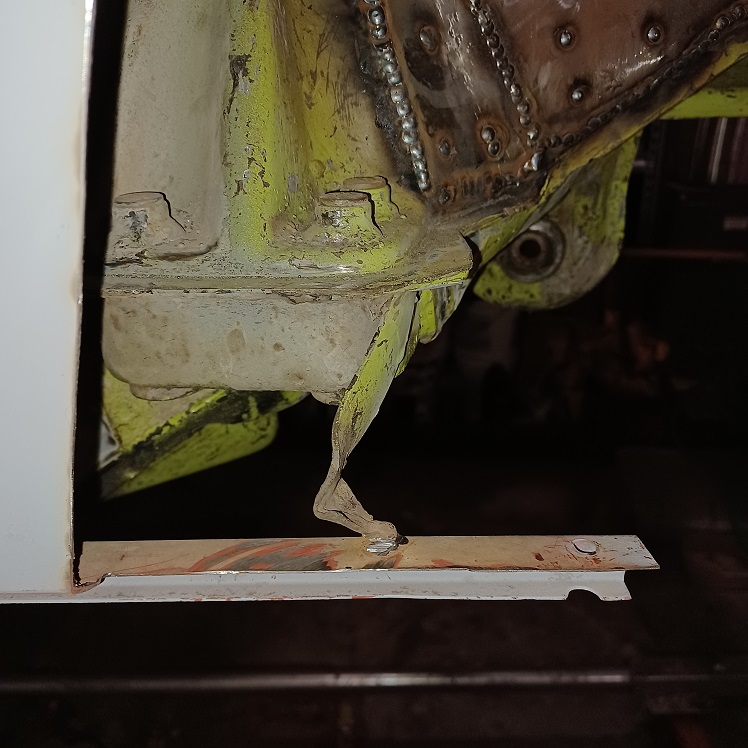
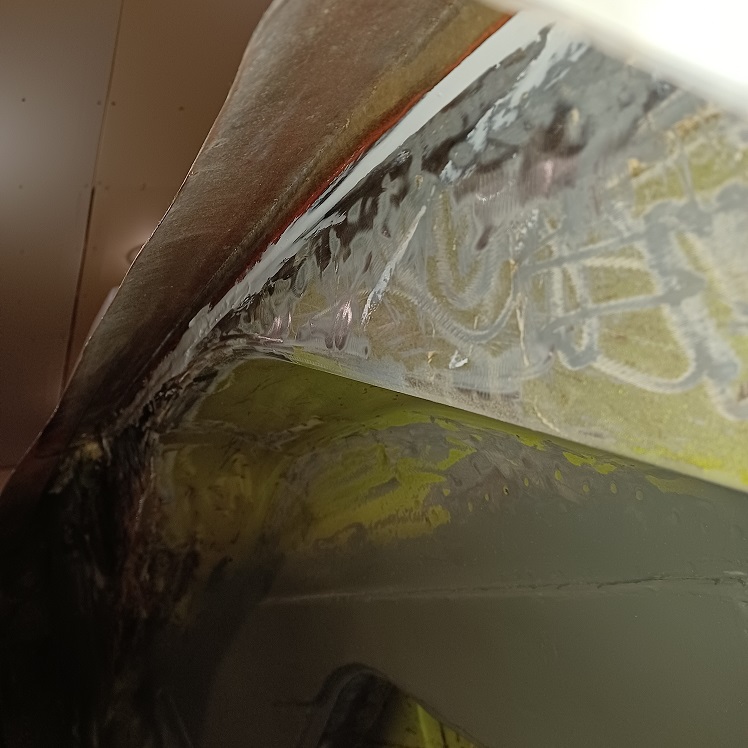
Then after cleaning the seam where the fender mates up to the trunk, I decided to apply the sealer. I used Tiger Seal from Upol. I was not very happy with the product, as it was like pushing concrete through a garden hose, but I think the tube may be old, so I have a call in to Upol, to discuss the issue, will let everyone know what I hear back.
  |
|
|
|
| Puebloswatcop |
Dec 28 2021, 03:24 PM
Post
#269
|
|
Senior Member Group: Members Posts: 1,690 Joined: 27-December 14 From: Mineola, Texas Member No.: 18,258 Region Association: Southwest Region |
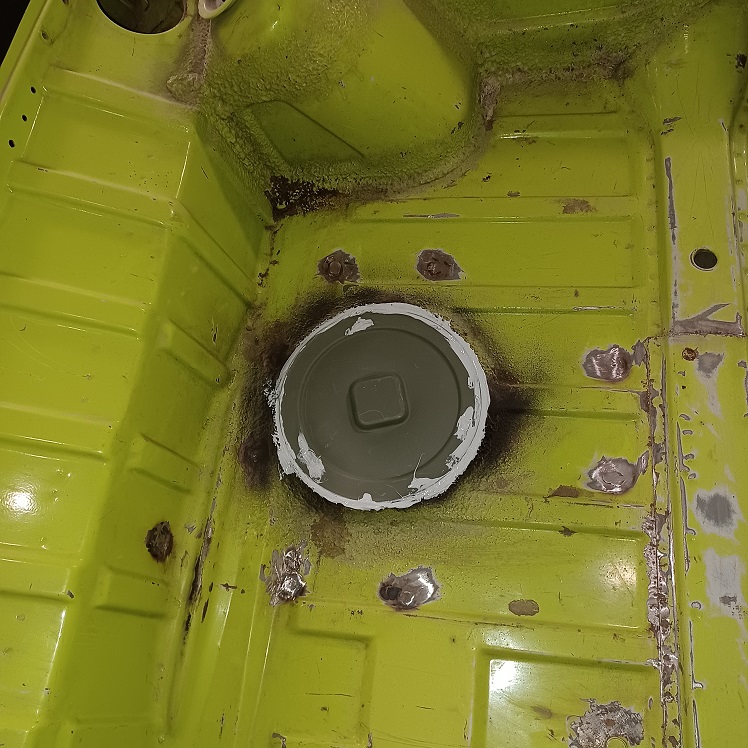
And since I had the tube open and not wanting to waste $22.00....I sealed the floor plugs also, Nothing like two fisting the gun to get the sealant to come out of the tube. (IMG:style_emoticons/default/WTF.gif)
   |
|
|
|
| Puebloswatcop |
Dec 28 2021, 03:26 PM
Post
#270
|
|
Senior Member Group: Members Posts: 1,690 Joined: 27-December 14 From: Mineola, Texas Member No.: 18,258 Region Association: Southwest Region |
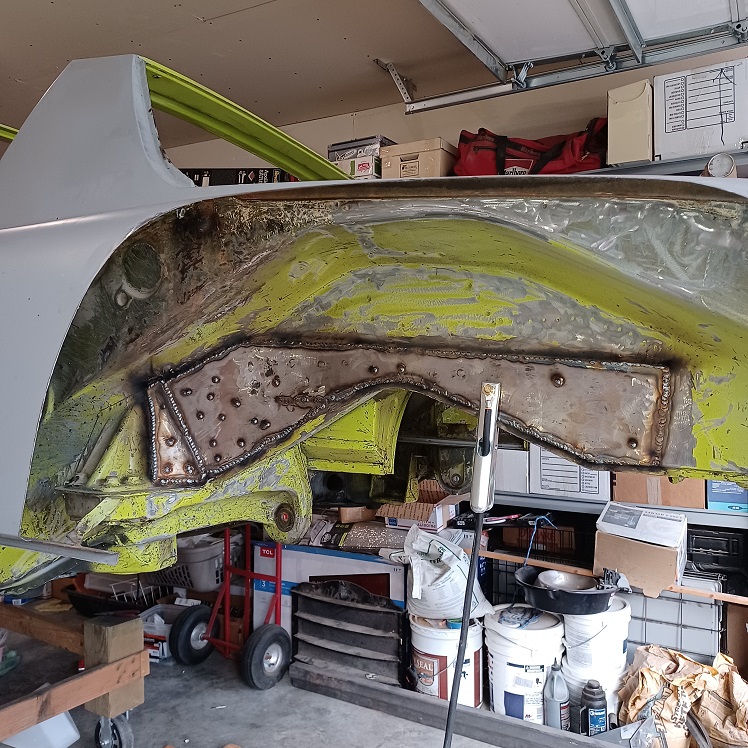
Since I was aggrivated with the seam sealer, I finshed cleaning up the welds on the frame stiffeners and shot it with a coat of acid etch spray paint...Then called it a day...
 |
|
|
|
| Puebloswatcop |
Dec 30 2021, 05:29 PM
Post
#271
|
|
Senior Member Group: Members Posts: 1,690 Joined: 27-December 14 From: Mineola, Texas Member No.: 18,258 Region Association: Southwest Region |
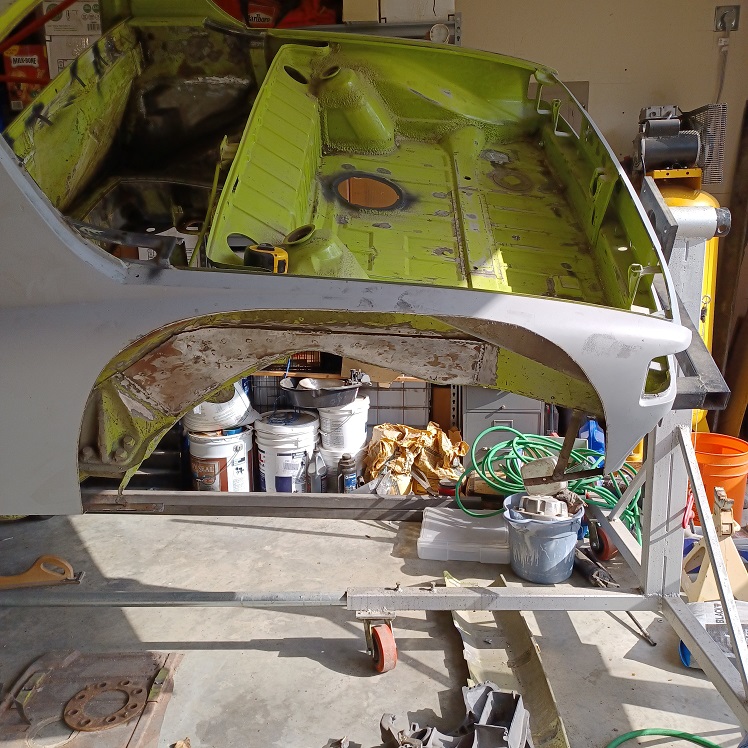
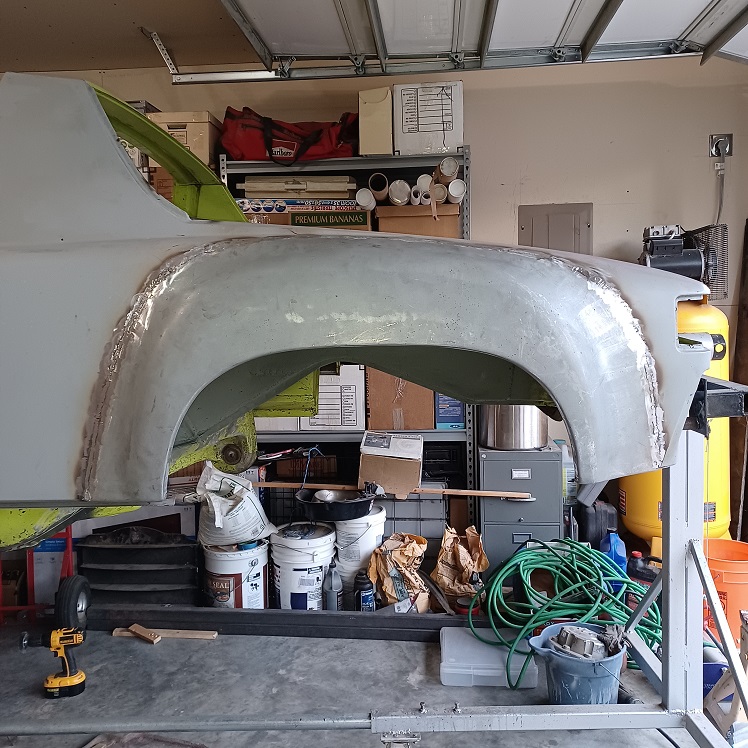
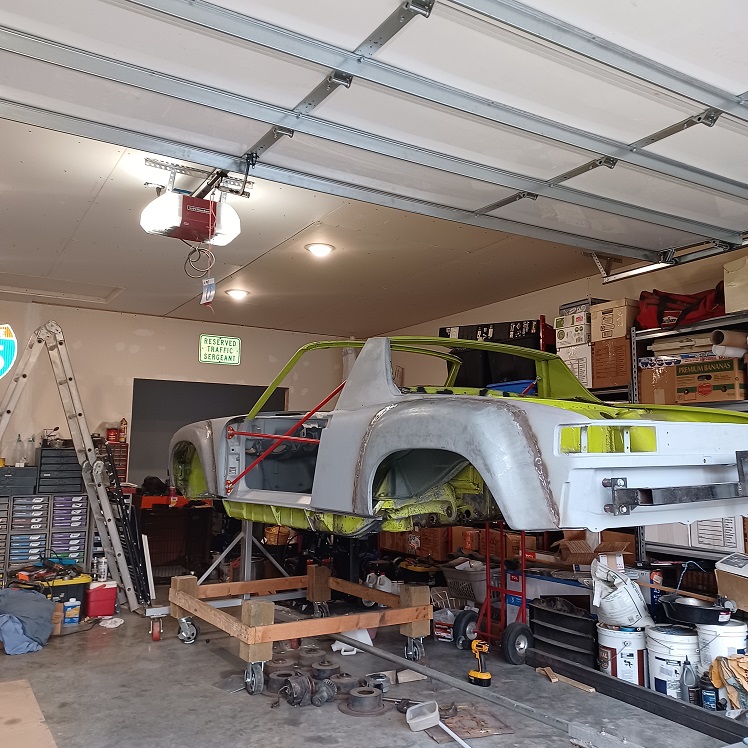
okay, today I decided to complete installing the new fenders. I'm not sure why but this one gave me nothing but problems. It didn't want to line up and had some pretty sizable gaps and other areas that I had to make additional cuts to. When I measured it a couple days ago, it was 1 cm wider in the measurement..... By the time I finished installing it ( 6 hours of cut and fit) It came out with the exact same measurements as the passenger side....I think it was a matter of luck more than anything.
 |
|
|
|
| Puebloswatcop |
Dec 30 2021, 05:31 PM
Post
#272
|
|
Senior Member Group: Members Posts: 1,690 Joined: 27-December 14 From: Mineola, Texas Member No.: 18,258 Region Association: Southwest Region |
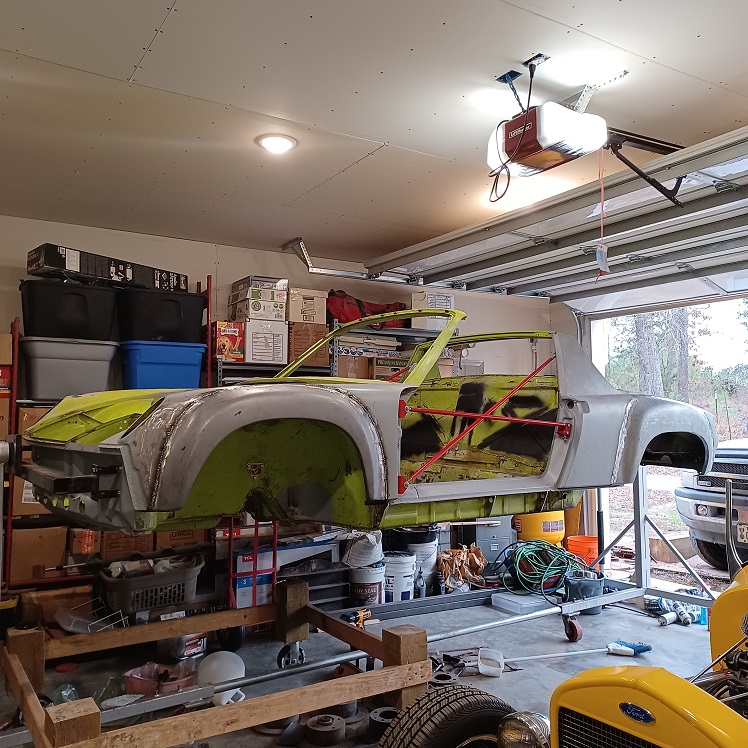
So my beloved 914 is officially now a wide body....
  |
|
|
|
| 9146C |
Dec 30 2021, 06:39 PM
Post
#273
|
|
Member Group: Members Posts: 228 Joined: 14-September 19 From: US Member No.: 23,460 Region Association: None |
Looks great Kevin! Well done!
|
|
|
|
| Puebloswatcop |
Dec 30 2021, 07:04 PM
Post
#274
|
|
Senior Member Group: Members Posts: 1,690 Joined: 27-December 14 From: Mineola, Texas Member No.: 18,258 Region Association: Southwest Region |
QUOTE(9146C @ Dec 30 2021, 06:39 PM)  Looks great Kevin! Well done! Thanks Rob, Not sure why this fender was such a PITA but took a couple of breaks so I didnt beat it into place with a BF Hammer. (IMG:style_emoticons/default/smash.gif) |
|
|
|
| bkrantz |
Dec 30 2021, 09:03 PM
Post
#275
|
|
914 Guru Group: Members Posts: 8,554 Joined: 3-August 19 From: SW Colorado Member No.: 23,343 Region Association: Rocky Mountains |
Nice work--and the wide looks good!
|
|
|
|
| Puebloswatcop |
Dec 31 2021, 07:42 AM
Post
#276
|
|
Senior Member Group: Members Posts: 1,690 Joined: 27-December 14 From: Mineola, Texas Member No.: 18,258 Region Association: Southwest Region |
QUOTE(bkrantz @ Dec 30 2021, 09:03 PM) Nice work--and the wide looks good! Thanks Bob. I am certainly glad that part is over.... |
|
|
|
| Puebloswatcop |
Dec 31 2021, 05:35 PM
Post
#277
|
|
Senior Member Group: Members Posts: 1,690 Joined: 27-December 14 From: Mineola, Texas Member No.: 18,258 Region Association: Southwest Region |
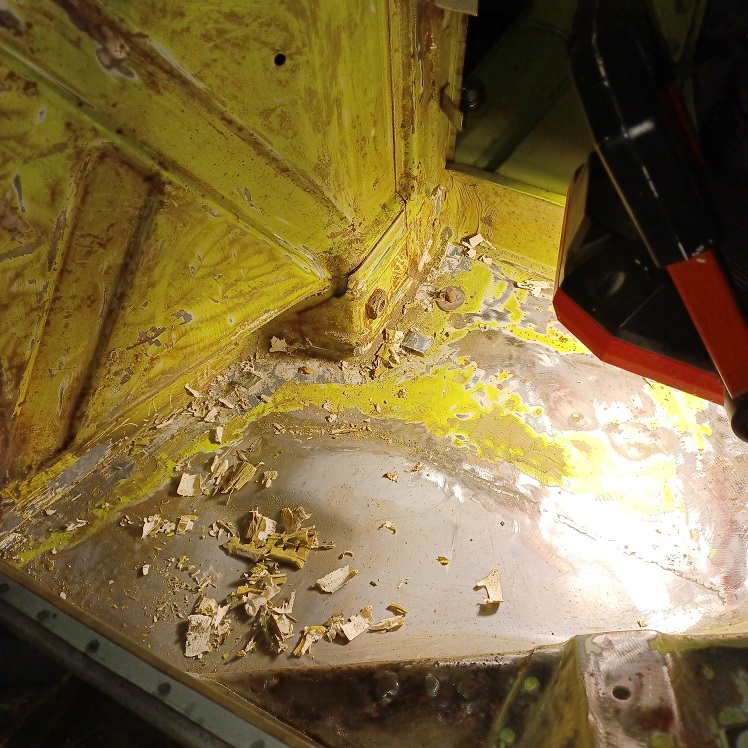
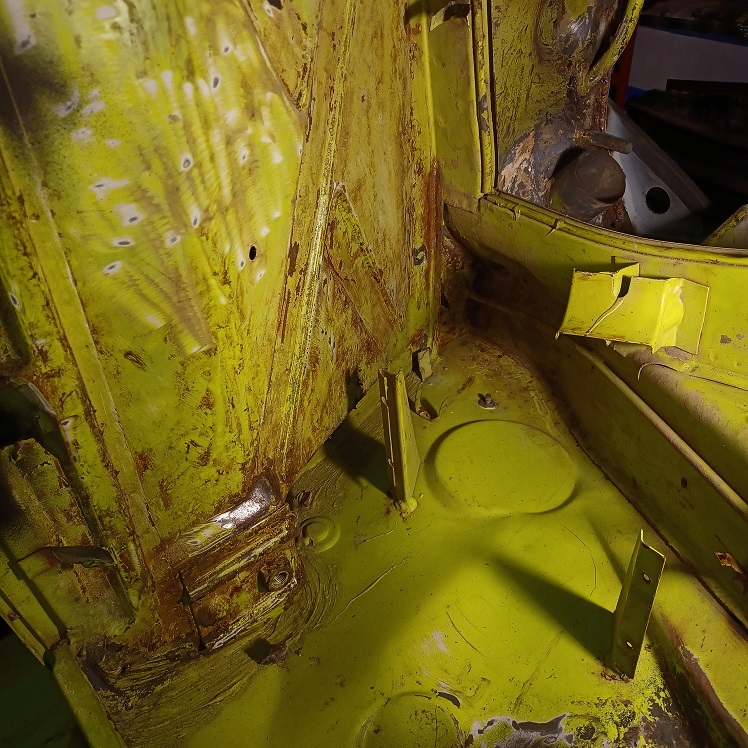
Today I figured I had put off the cleaning part of the body work long enough. I started with removing the tar undercoating up in the passenger side wheel well
  |
|
|
|
| Puebloswatcop |
Dec 31 2021, 05:39 PM
Post
#278
|
|
Senior Member Group: Members Posts: 1,690 Joined: 27-December 14 From: Mineola, Texas Member No.: 18,258 Region Association: Southwest Region |
What I have discoverd is that the tar chips off faily easily, unless it is over seam sealer. The Tar really forms a strong bond with the seam sealer, which I am hoping when I have the body blasted will break the bond and blast the tar off. But after a couple hours of chipping and scraping I was able to get the largest majority of it off.
 |
|
|
|
| Puebloswatcop |
Dec 31 2021, 05:50 PM
Post
#279
|
|
Senior Member Group: Members Posts: 1,690 Joined: 27-December 14 From: Mineola, Texas Member No.: 18,258 Region Association: Southwest Region |
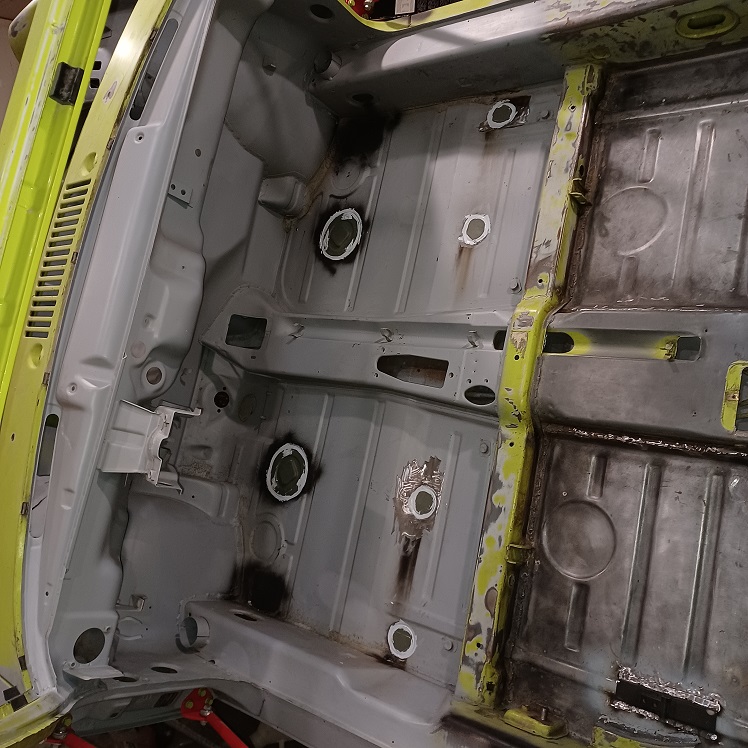
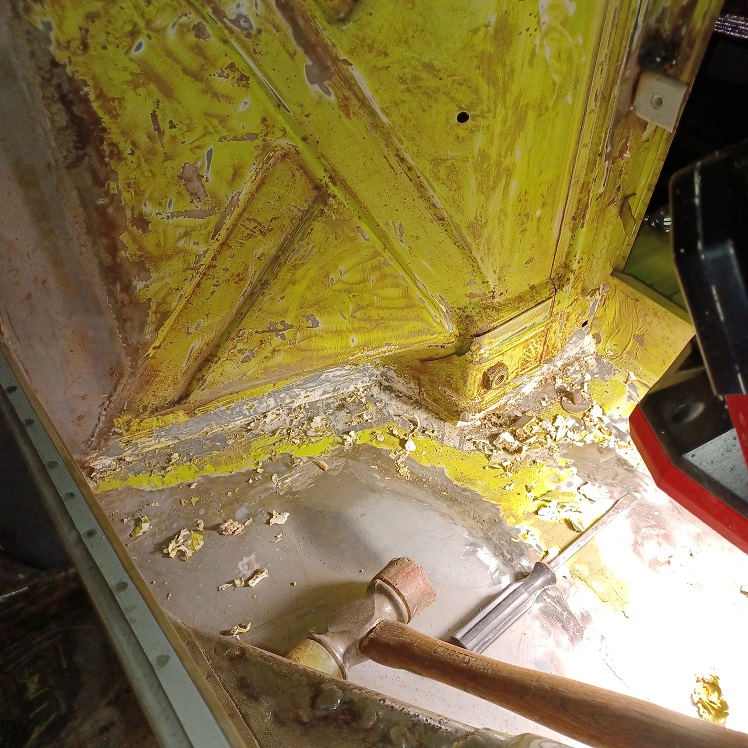
Then I moved into the engine bay. I began by chipingthe old seam sealer out of the seams of the rear firewall. As thick as that stuff was I believe it was half the original cost of the cars....certainly didnt go sparingly. But hapily there was no rust or metal damage under the seam sealer at all.
  |
|
|
|
| Puebloswatcop |
Dec 31 2021, 05:54 PM
Post
#280
|
|
Senior Member Group: Members Posts: 1,690 Joined: 27-December 14 From: Mineola, Texas Member No.: 18,258 Region Association: Southwest Region |
On a good note the drivers side is not nearly as heavy with seam sealer, the bad thing is all that brown stuff, that looks like rust is actuall some type of adhesive. It is extreemly hard to remove and gets very sticky when solvent is applied....Yuk, but better than rust.
 |
|
|
|
|
1 User(s) are reading this topic (1 Guests and 0 Anonymous Users)
0 Members:

|
Lo-Fi Version | Time is now: 15th December 2025 - 11:44 PM |
Invision Power Board
v9.1.4 © 2025 IPS, Inc.