|
|
|
Porsche, and the Porsche crest are registered trademarks of Dr. Ing. h.c. F. Porsche AG.
This site is not affiliated with Porsche in any way. Its only purpose is to provide an online forum for car enthusiasts. All other trademarks are property of their respective owners. |
|
|

  |

| Puebloswatcop |
 Jan 8 2022, 04:18 PM Jan 8 2022, 04:18 PM
Post
#301
|
|
Senior Member  Group: Members Posts: 1,690 Joined: 27-December 14 From: Mineola, Texas Member No.: 18,258 Region Association: Southwest Region |
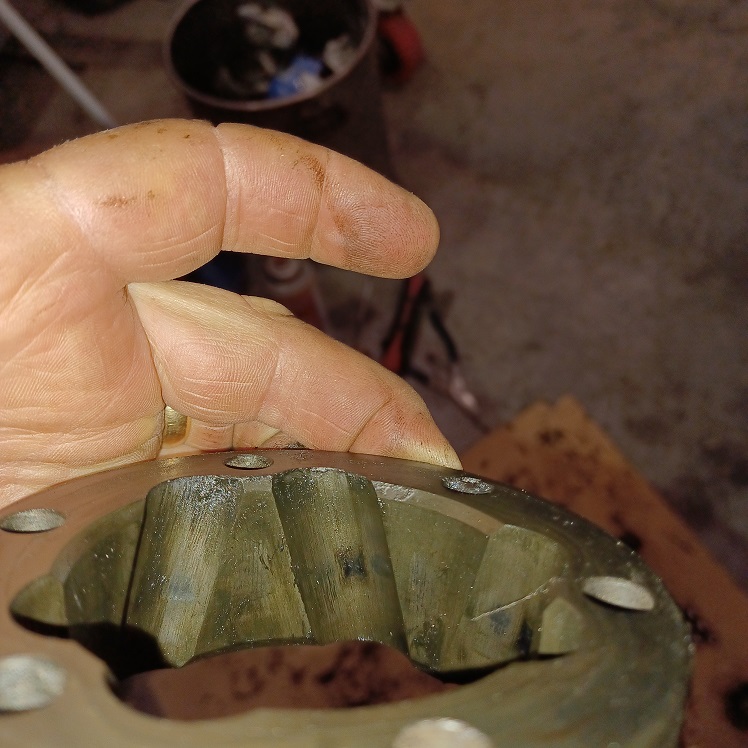
But after wiping them with several rags, most of the goo is gone so you can inspect the individual parts...
 |
   |

 
|
| Puebloswatcop |
Jan 8 2022, 04:20 PM
Post
#302
|
|
Senior Member Group: Members Posts: 1,690 Joined: 27-December 14 From: Mineola, Texas Member No.: 18,258 Region Association: Southwest Region |
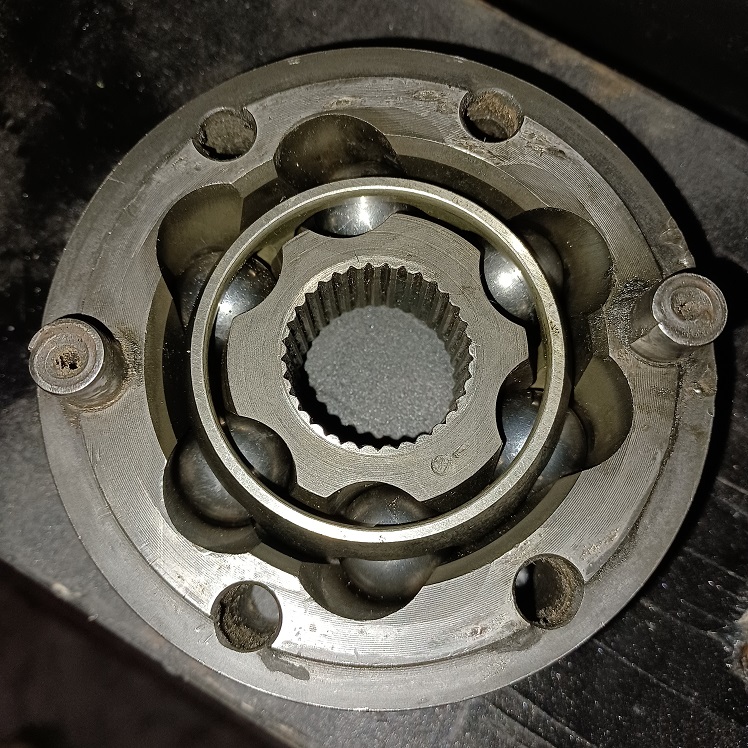
Just a quick look at the outer race (housing) and you can see it showes very little wear.
 |
|
|
|
| Puebloswatcop |
Jan 8 2022, 04:27 PM
Post
#303
|
|
Senior Member Group: Members Posts: 1,690 Joined: 27-December 14 From: Mineola, Texas Member No.: 18,258 Region Association: Southwest Region |
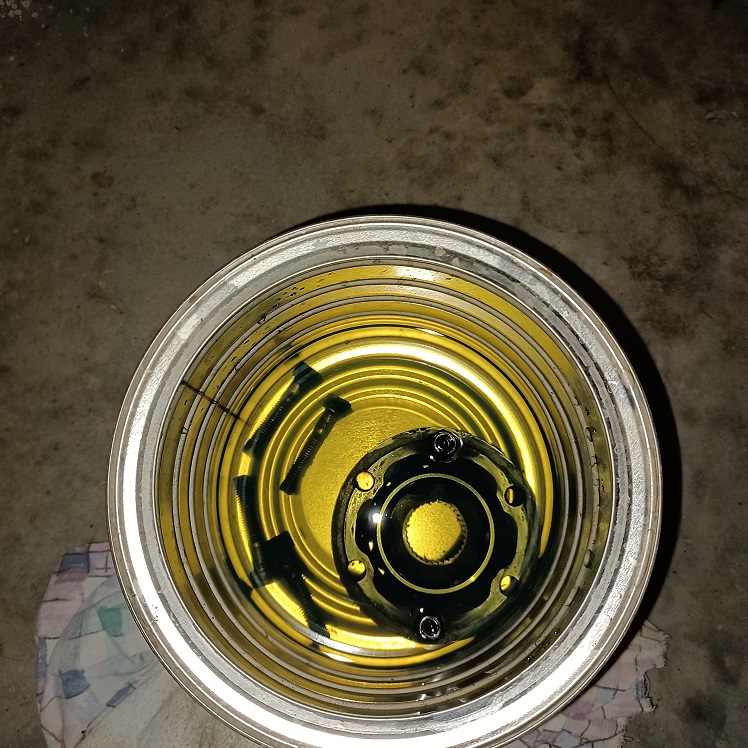
For the ease of cleaning and not losing parts I reassembled the CV joint and dropped it into a can of diesel for the night.
  |
|
|
|
| Puebloswatcop |
Jan 8 2022, 04:30 PM
Post
#304
|
|
Senior Member Group: Members Posts: 1,690 Joined: 27-December 14 From: Mineola, Texas Member No.: 18,258 Region Association: Southwest Region |
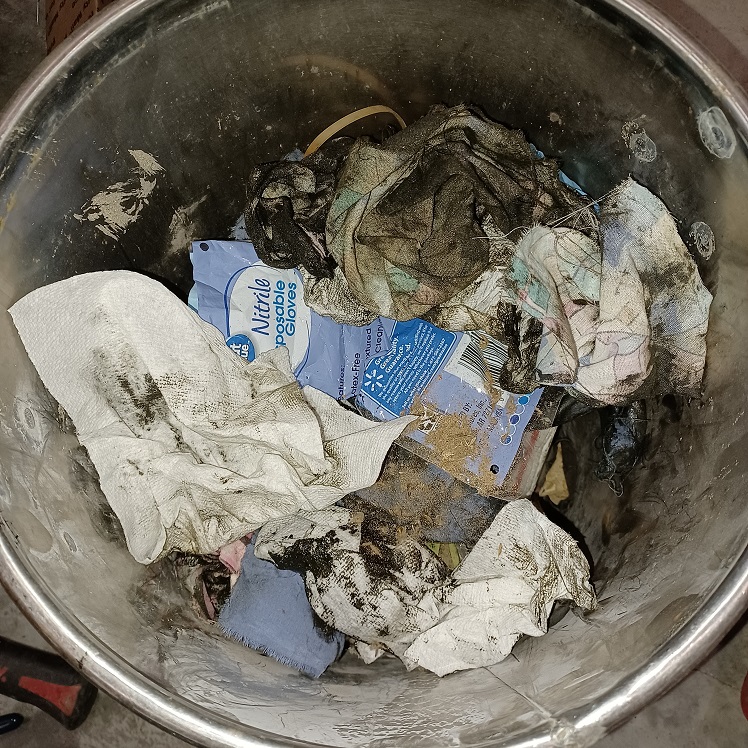
As you can see, after cleaning just 1 CV joint, it creates allot of greasy rags and a couple of pairs of gloves....If you are inclined to do this nasty chore for yourself I will post the step by step outline tomorrow since it is going to be another rainy day in Texas....
 |
|
|
|
| Puebloswatcop |
Jan 9 2022, 11:58 AM
Post
#305
|
|
Senior Member Group: Members Posts: 1,690 Joined: 27-December 14 From: Mineola, Texas Member No.: 18,258 Region Association: Southwest Region |
So I know I said I would post the step by step on how to rebuild your CV joints on your rear axles. However I don't believe in re-inventing the wheel, and I see that Ian Karr has already done a great video on the subject. I guarantee Ian is allot more fun to watch than people listening to me ramble. Here is the link:
https://youtu.be/F-5Xpug52Qw The only thing I would recommend is when you remove the stub axle, is to partially thread the bolts back into the holes and use a soft hammer (I prefer a plastic end) to tap the stub axle loose rather than use a screwdriver. I can't tell you the number of joints that I have seen that are all gouged up because of screwdriver use. The other thing is to pay close attention to getting the narrow part of the cage alligned with the wide part of the housing. Believe it or not it can be assembled with the narrow and wide parts alligned, but if you run it that way on your car it will destroy the the joint and probably allot of other things in the process. 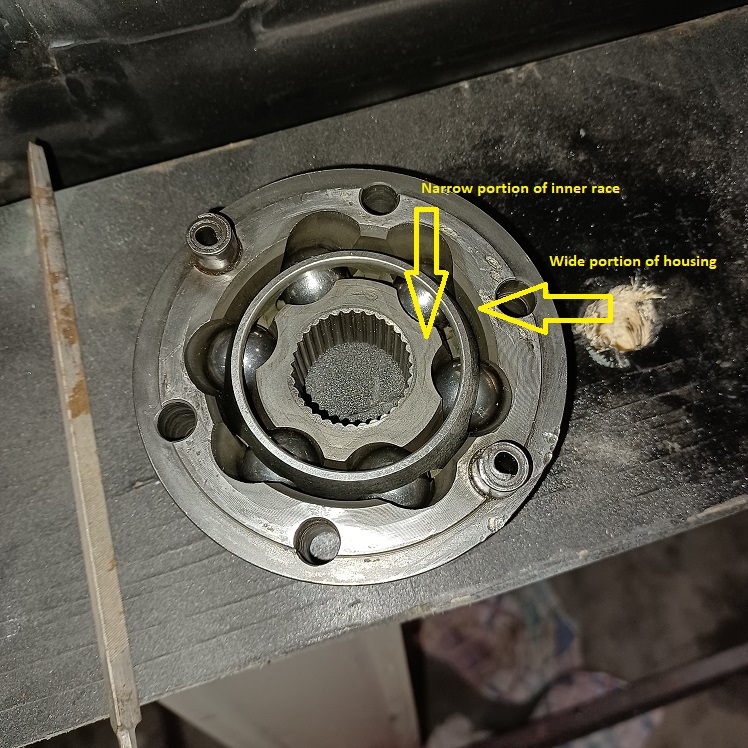 The best way to insure you have it correct is to see if you can deflect the cage in and out of the housing (both ways) without it falling out. If you can't deflect the cage, look closely and you probably have the wide portions alligned with the large and the small with the small..... 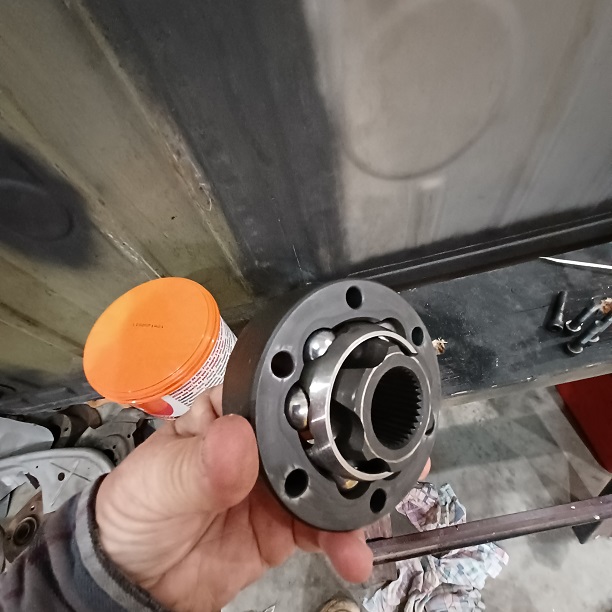 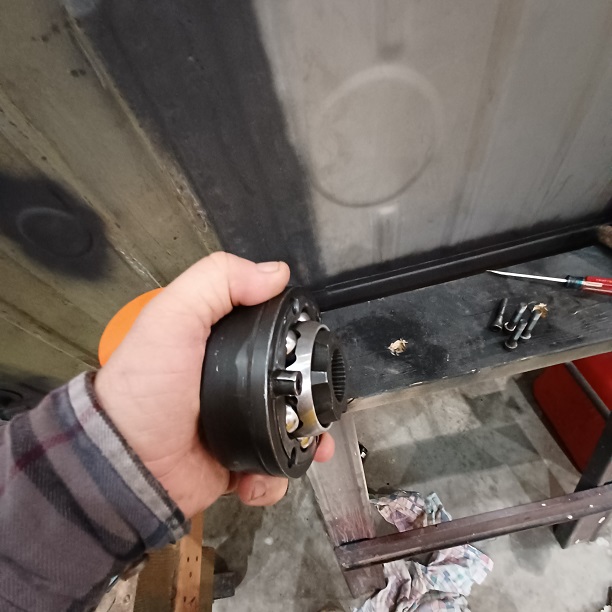 |
|
|
|
| Literati914 |
Jan 9 2022, 12:07 PM
Post
#306
|
|
Advanced Member Group: Members Posts: 2,174 Joined: 16-November 06 From: Dallas, TX Member No.: 7,222 Region Association: Southwest Region |
Good tips, another job I'll be benefitting from you doing first ! (IMG:style_emoticons/default/biggrin.gif)
. |
|
|
|
| Puebloswatcop |
Jan 14 2022, 09:09 AM
Post
#307
|
|
Senior Member Group: Members Posts: 1,690 Joined: 27-December 14 From: Mineola, Texas Member No.: 18,258 Region Association: Southwest Region |
Well after a totally wasted day yesterday searching for a lost animal, I am back at it today. Spent the past few days cleaning parts and finshed blasting a bunch for powder coating.
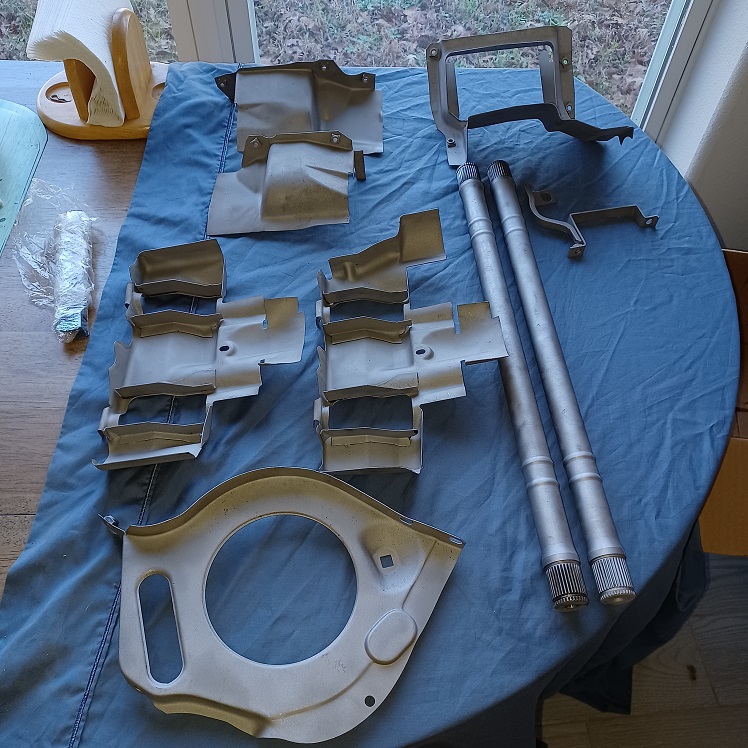 Hopefully the parts I am waiting on will be delivered today and I can get back to work....and if you were wondering the animal in question decided to return on his own when he got hungry... |
|
|
|
| Puebloswatcop |
Jan 15 2022, 07:48 AM
Post
#308
|
|
Senior Member Group: Members Posts: 1,690 Joined: 27-December 14 From: Mineola, Texas Member No.: 18,258 Region Association: Southwest Region |
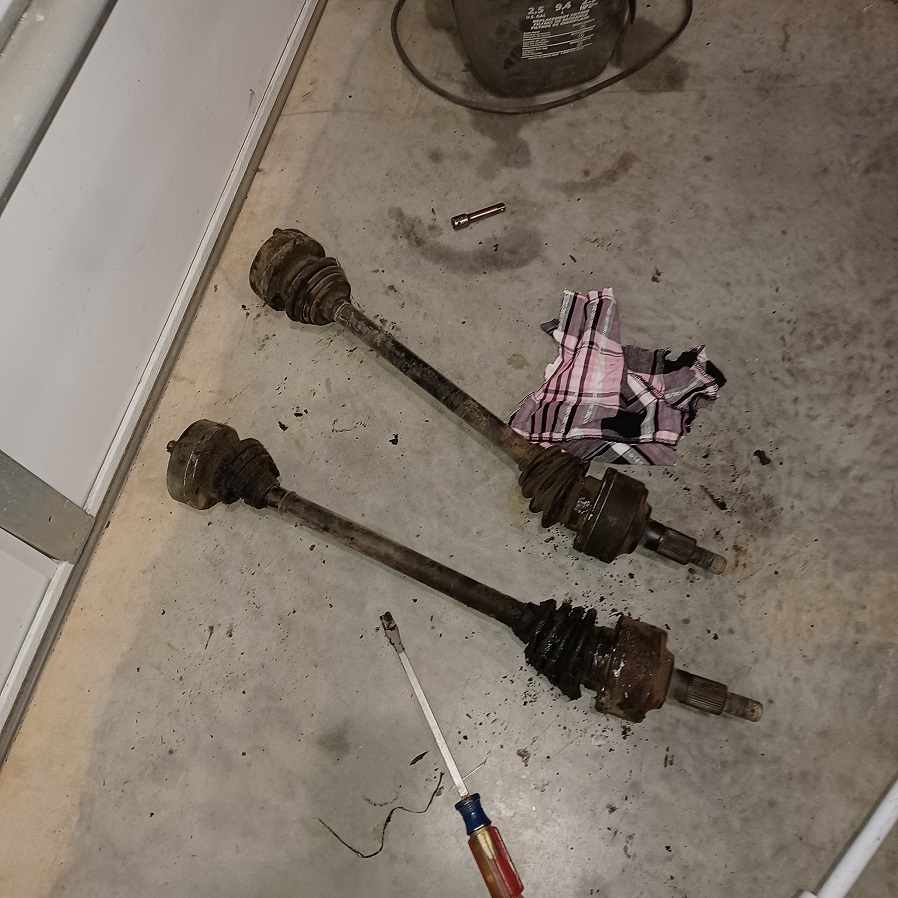
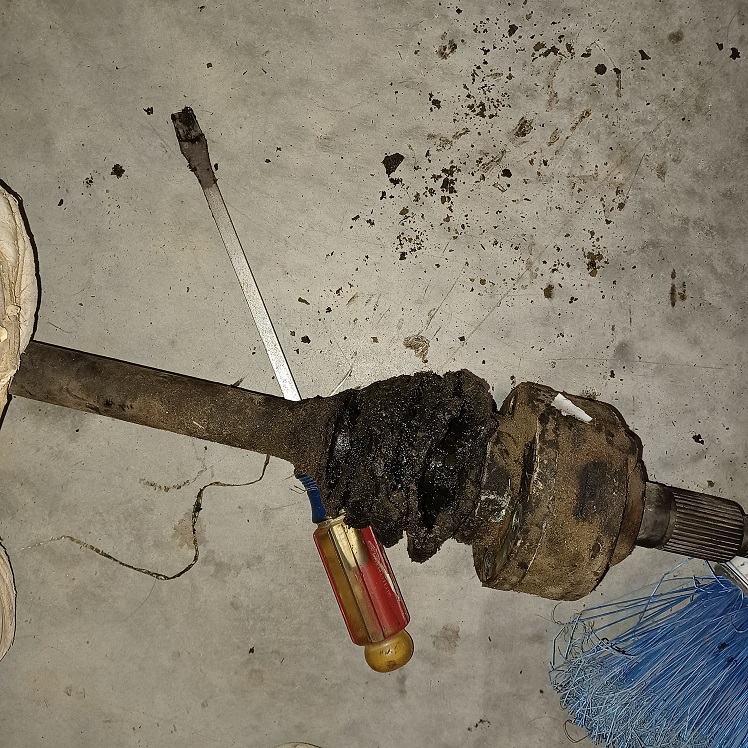
While I was waiting I decided to tear down the last 2 axle sets that I have. These were from my 1973 fireball parts car. As you can see, there is some fire damage to the boots, but it doesnt appear to have caused extensive damage to the actual axle assemblies.
   |
|
|
|
| Puebloswatcop |
Jan 15 2022, 08:09 AM
Post
#309
|
|
Senior Member Group: Members Posts: 1,690 Joined: 27-December 14 From: Mineola, Texas Member No.: 18,258 Region Association: Southwest Region |
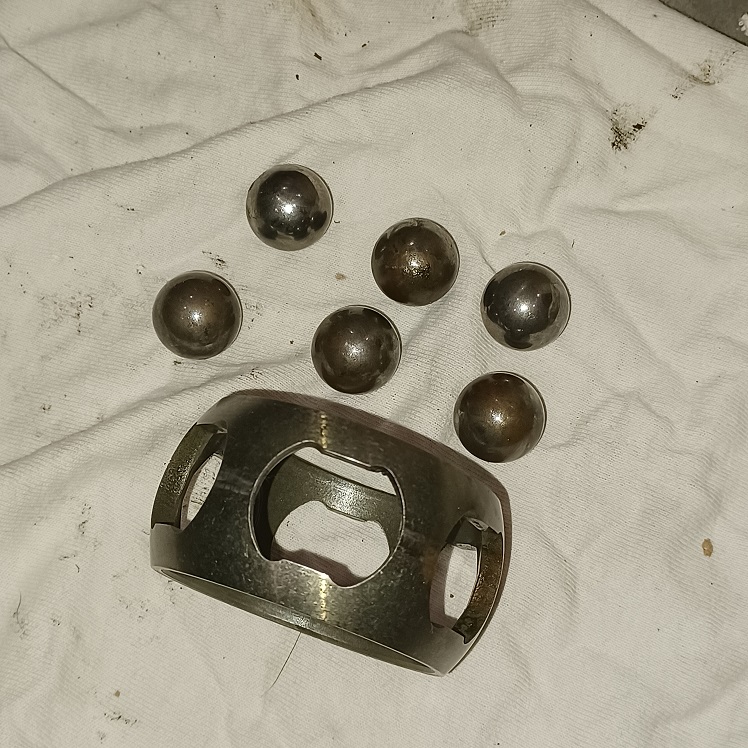
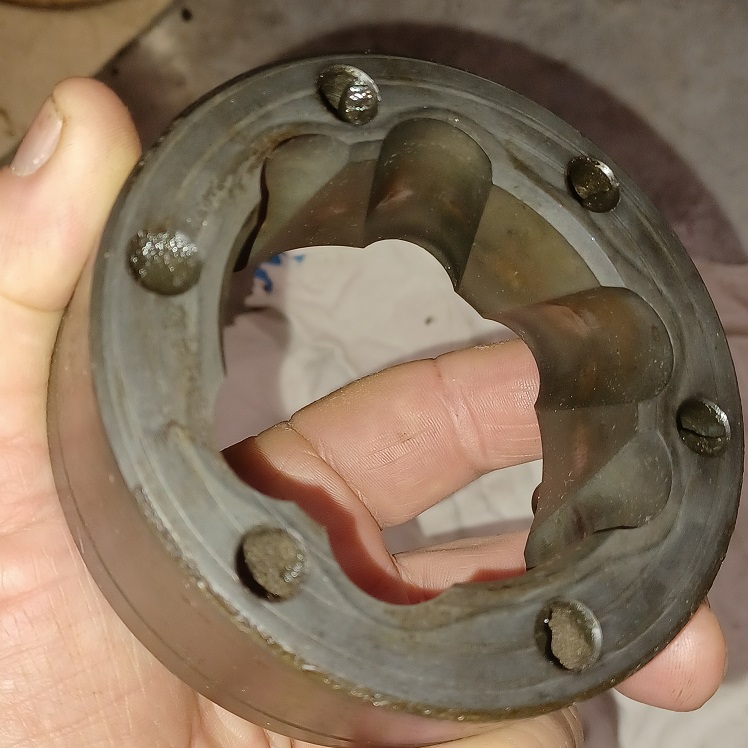
After tearing down the first joint, the one with the most heat exposure, I was fairly pleased with what I saw. The cage and bearings were in pretty good shape. They dont appear to have any heat damage. Some of the ball bearings have some discoloration from being exposed to moisture, but I have several extras.
 |
|
|
|
| Puebloswatcop |
Jan 15 2022, 08:14 AM
Post
#310
|
|
Senior Member Group: Members Posts: 1,690 Joined: 27-December 14 From: Mineola, Texas Member No.: 18,258 Region Association: Southwest Region |
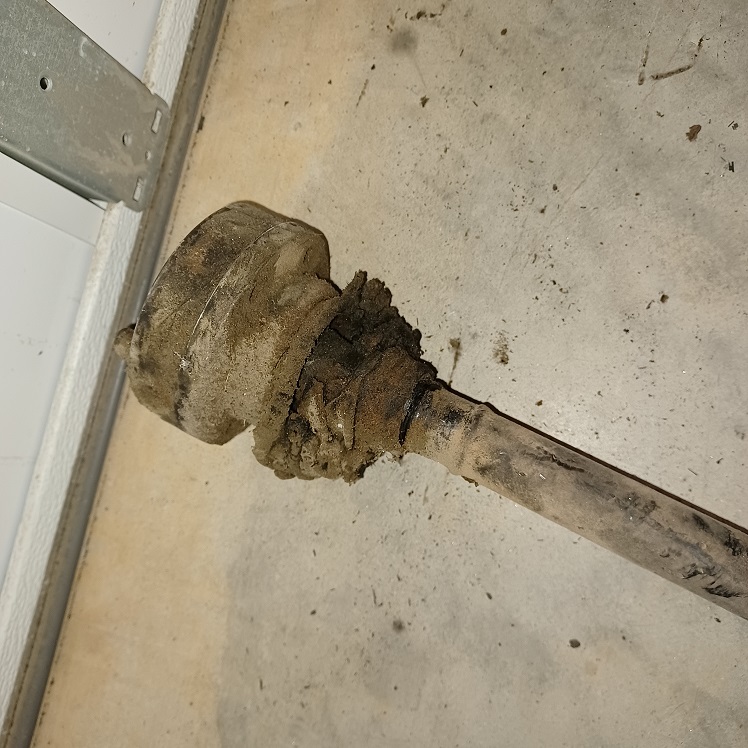
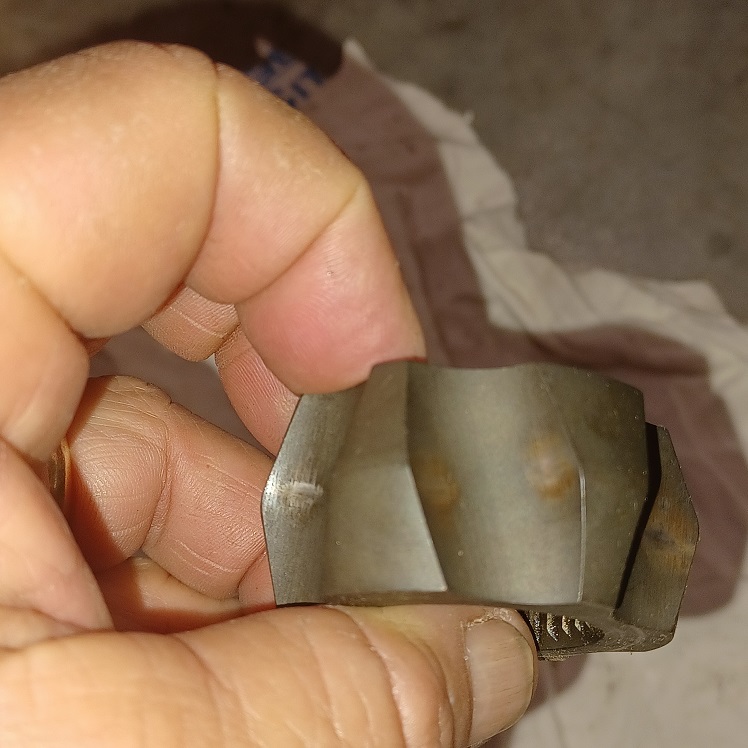
The housing and inner race show no signs of heat damage and are in remarkably good shape, probably because the car had not been used all the years after the engine fire....But I don't know exactly when that happened. Change found in the car was from the early 80's, so I am guessing somewhere around that time.
  |
|
|
|
| Puebloswatcop |
Jan 15 2022, 08:17 AM
Post
#311
|
|
Senior Member Group: Members Posts: 1,690 Joined: 27-December 14 From: Mineola, Texas Member No.: 18,258 Region Association: Southwest Region |
I also chased the mounting threads on all of the stub axles I have. A couple of them have some minor thread damage on the end threads of the stubs, so I will order a die and clean those up as well.
And with the preliminary inspection done, all these can go into the soaker for the day. 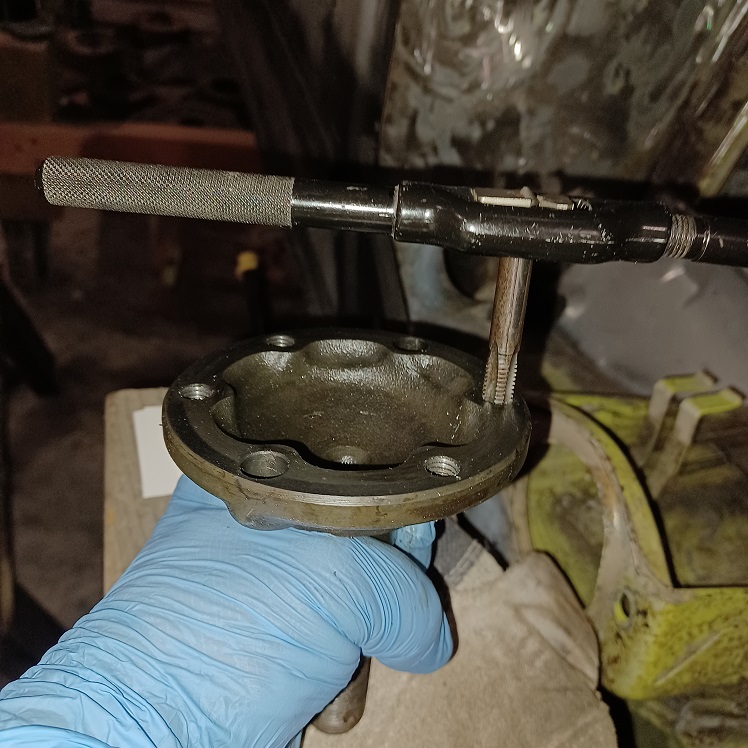 |
|
|
|
| Puebloswatcop |
Jan 15 2022, 08:24 AM
Post
#312
|
|
Senior Member Group: Members Posts: 1,690 Joined: 27-December 14 From: Mineola, Texas Member No.: 18,258 Region Association: Southwest Region |
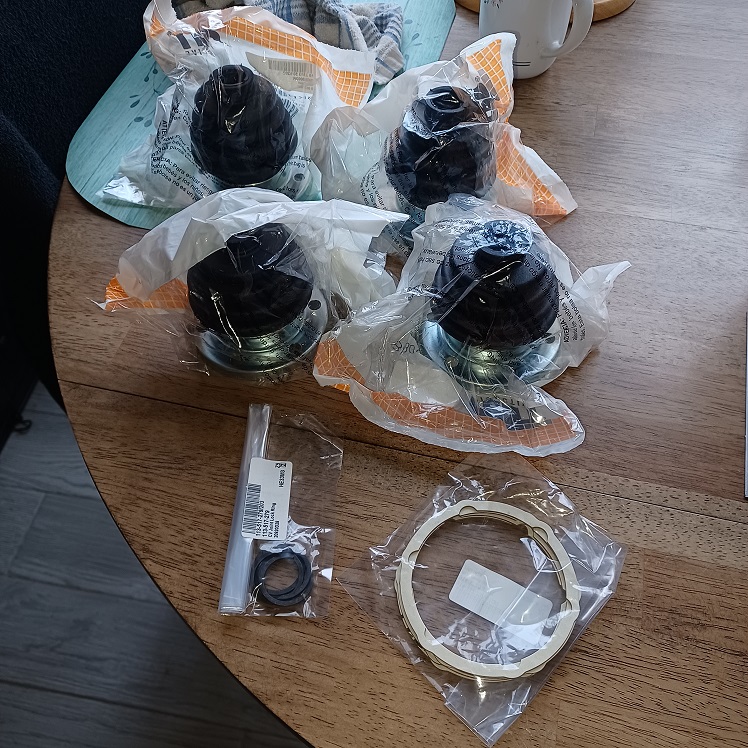
Finally, all of the axle parts arrived from Autohaus Arizona, so I can start rebuilding the axles that will actually go back into this car. All new boots, gaskets, and the retaining clips. I always replace the clips with new ones, cheap insurance that the joints will stay on the axle shafts.
 |
|
|
|
| Puebloswatcop |
Jan 15 2022, 08:31 AM
Post
#313
|
|
Senior Member Group: Members Posts: 1,690 Joined: 27-December 14 From: Mineola, Texas Member No.: 18,258 Region Association: Southwest Region |
And then a short time later my seat hinge brackets arrived from R.D. They are very nice reproductions of the originals..
I have already marked these where the hinge will be located. 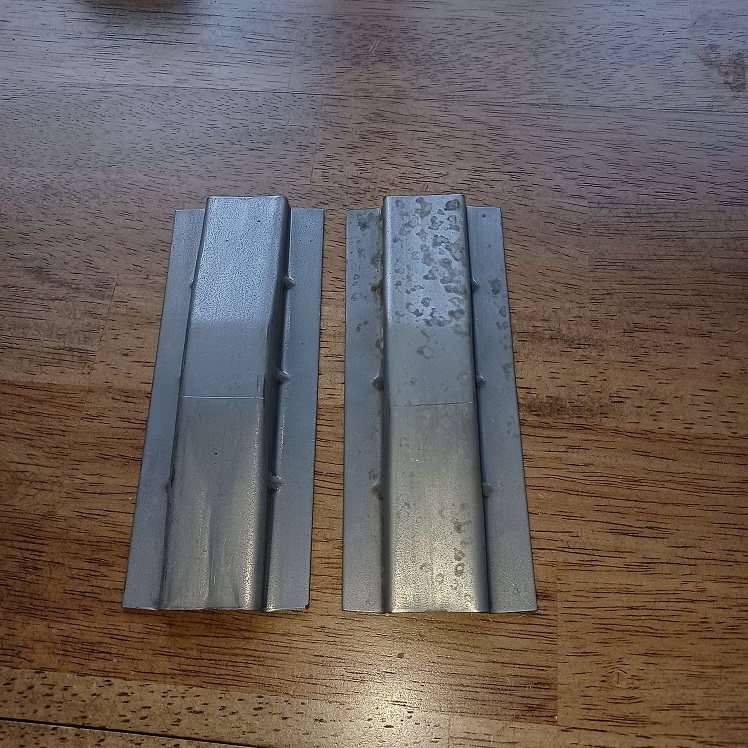 |
|
|
|
| Puebloswatcop |
Jan 15 2022, 08:36 AM
Post
#314
|
|
Senior Member Group: Members Posts: 1,690 Joined: 27-December 14 From: Mineola, Texas Member No.: 18,258 Region Association: Southwest Region |
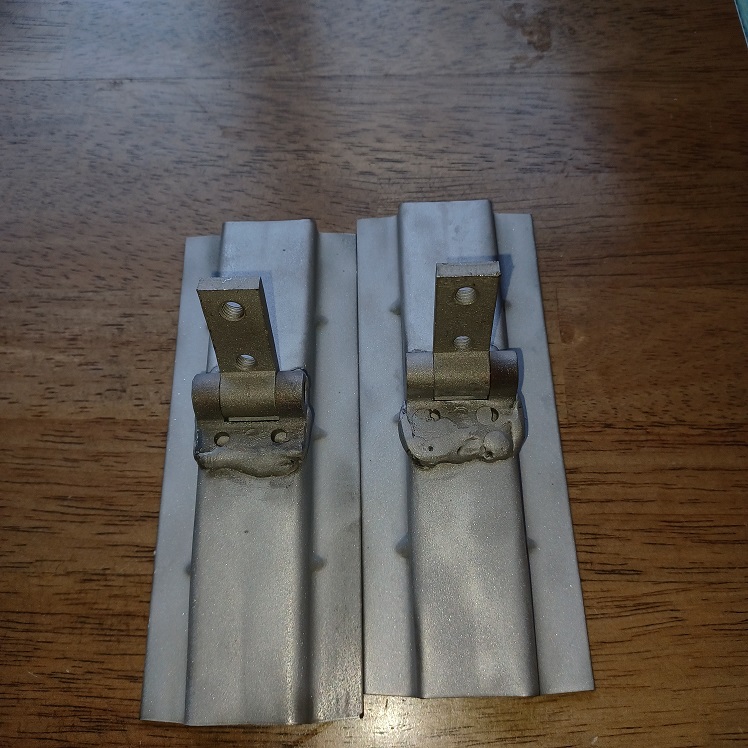
And of course I couldn't wait to weld the hinges on. I forgot that I had welded some thicker steel the other day, so I bet you can tell which one got welded before I re-adjusted the wire feed....not the most beautiful welds....but surely functional.
 |
|
|
|
| Puebloswatcop |
Jan 21 2022, 06:36 PM
Post
#315
|
|
Senior Member Group: Members Posts: 1,690 Joined: 27-December 14 From: Mineola, Texas Member No.: 18,258 Region Association: Southwest Region |
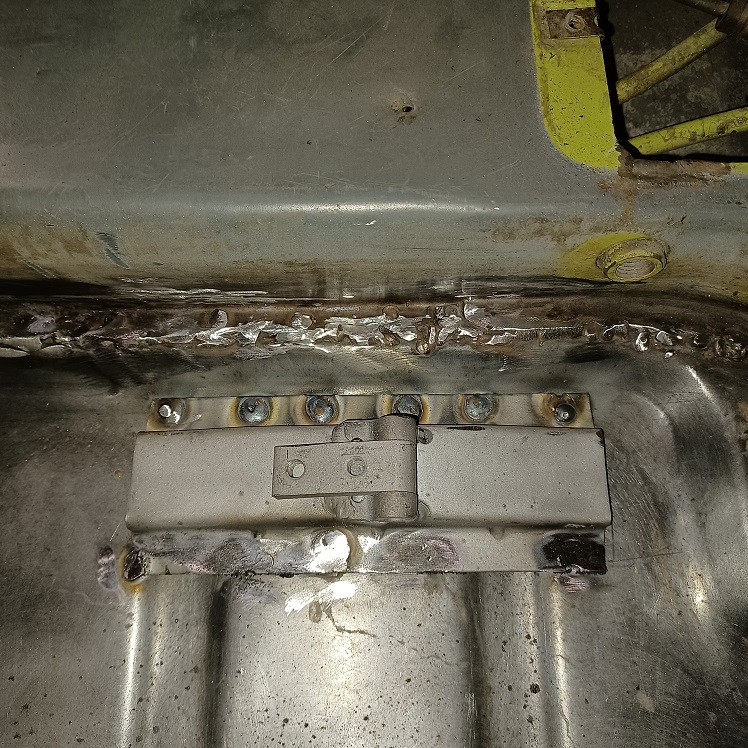
Has been a bit of a crazy week. Son came down with COVID so kinda had to put things on the Porsche on hold. He got better and came up negative today...yeah. So I did get a small thing done today. Finished installing the driver's side seat brackets. I really do like this new welder. That and more practice are getting me back into the hang of things.
I spaced the welds 1 inch apart and skipped where the lower ribs in the floor were. It definitly is solid. 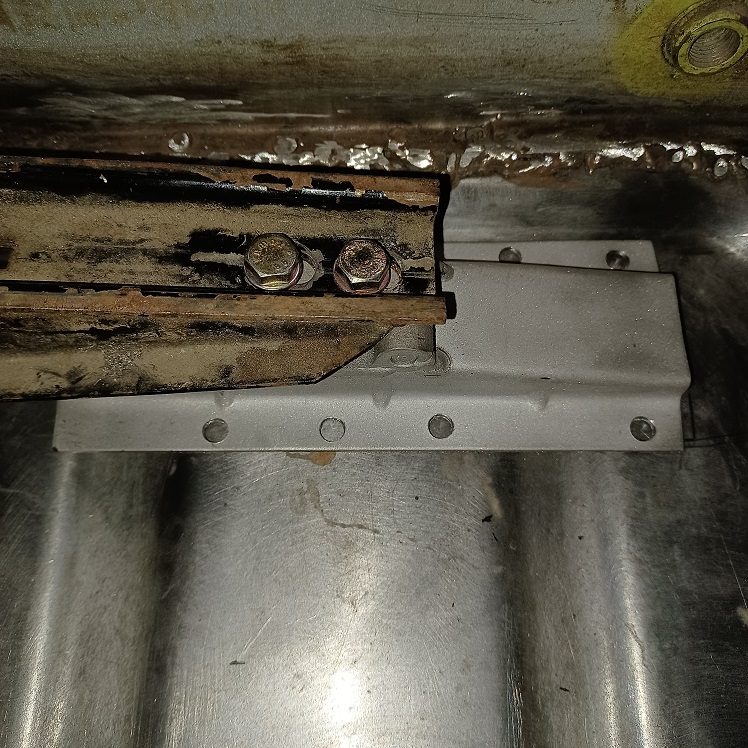 |
|
|
|
| Puebloswatcop |
Jan 21 2022, 06:40 PM
Post
#316
|
|
Senior Member Group: Members Posts: 1,690 Joined: 27-December 14 From: Mineola, Texas Member No.: 18,258 Region Association: Southwest Region |
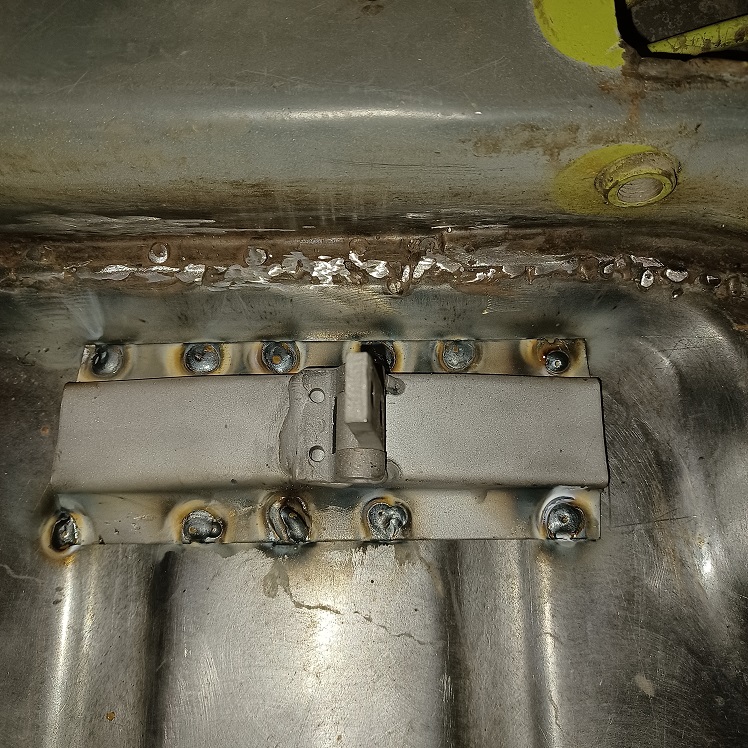
The welds are so much smoother and cleaner.
 |
|
|
|
| Puebloswatcop |
Jan 21 2022, 06:42 PM
Post
#317
|
|
Senior Member Group: Members Posts: 1,690 Joined: 27-December 14 From: Mineola, Texas Member No.: 18,258 Region Association: Southwest Region |
Smothed out the inner welds, but think I'll skip doing that to the outer weld since reaching them is harder and I don't want to chance grinding away too much material.
 |
|
|
|
| Puebloswatcop |
Jan 21 2022, 06:44 PM
Post
#318
|
|
Senior Member Group: Members Posts: 1,690 Joined: 27-December 14 From: Mineola, Texas Member No.: 18,258 Region Association: Southwest Region |
I am hoping to start setting up for blasting the underside of the body next week. So trying to figure out how to tent the car so my garage isn't full of media after blasting it.
Any Ideas? |
|
|
|
| Puebloswatcop |
Feb 5 2022, 09:10 AM
Post
#319
|
|
Senior Member Group: Members Posts: 1,690 Joined: 27-December 14 From: Mineola, Texas Member No.: 18,258 Region Association: Southwest Region |
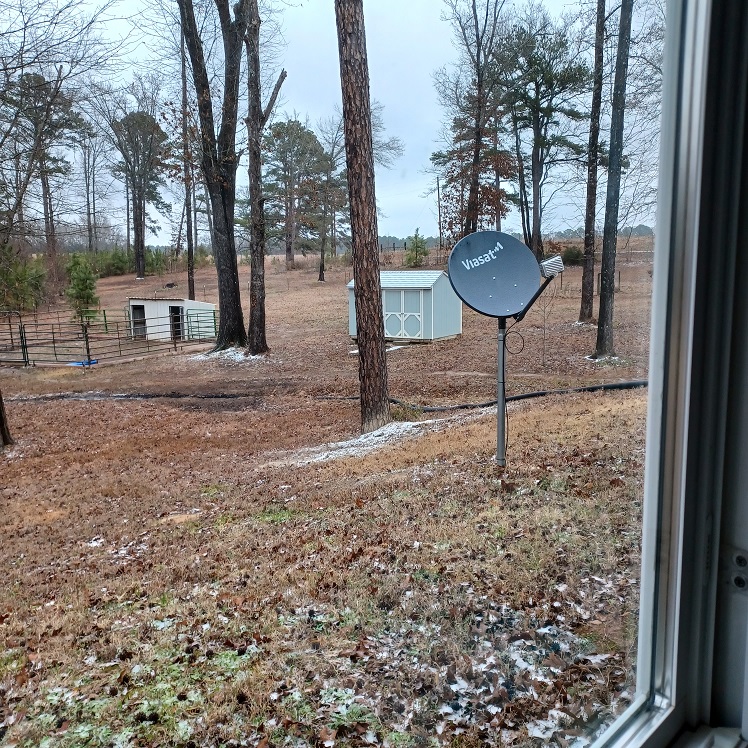
So I just returned from a short trip to Colorado, Sorry Texas, I seemed to have brought the cold weather and snow back with me....
 |
|
|
|
| Puebloswatcop |
Feb 5 2022, 09:19 AM
Post
#320
|
|
Senior Member Group: Members Posts: 1,690 Joined: 27-December 14 From: Mineola, Texas Member No.: 18,258 Region Association: Southwest Region |
While in Colorado I decided to box up a small box of parts to send back to Texas, I specifically needed the passenger side seat slider so i could finsh installing the seat brackets. Figured I might as well send some other things along with it.
Won't do that again...$53 dollars to send them back. That would have gotten me a partial drive to load a whole truck of parts, but oh well. 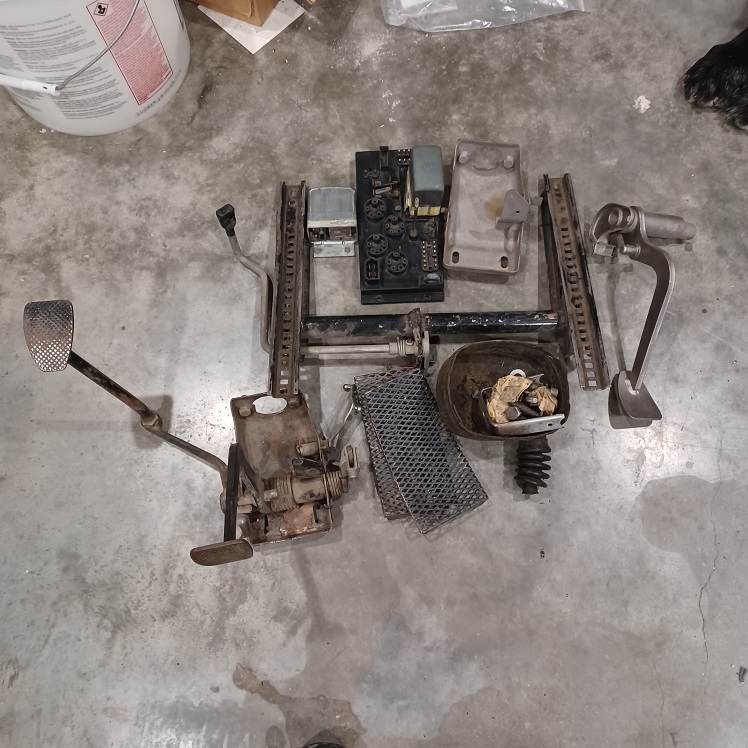 |
|
|
|
|
1 User(s) are reading this topic (1 Guests and 0 Anonymous Users)
0 Members:

|
Lo-Fi Version | Time is now: 16th December 2025 - 06:56 AM |
Invision Power Board
v9.1.4 © 2025 IPS, Inc.