|
|
|
Porsche, and the Porsche crest are registered trademarks of Dr. Ing. h.c. F. Porsche AG.
This site is not affiliated with Porsche in any way. Its only purpose is to provide an online forum for car enthusiasts. All other trademarks are property of their respective owners. |
|
|

  |

| Chaznaster |
 Nov 22 2021, 07:41 PM Nov 22 2021, 07:41 PM
Post
#1
|
|
Member  Group: Members Posts: 288 Joined: 22-November 15 From: Concord, MA Member No.: 19,389 Region Association: North East States |
Hi All,
I am working on reinstalling the glass on an early 914 door - the door style where the plastic button rides on the curved track. It has not been in since I bought the car as it has been all top down driving and parking in safe places. I have the window (pic below) and, as expected, there are three parts that should be bonded/glued to it - the rear, bottom, corner glide that fits into the rear channel, the bit at the bottom in the middle where it bolts to the button/slide, and the front, stainless strip with the 4 little wheels. The problem is that only the bit at the bottom in the middle is glued on. The rear corner piece I can figure out as it only fits on one way. I’d appreciate any guidance on a few questions: 1) where on the front edge does the stainless strip attach? Does it line up at the top of the glass or the bottom? Or is there a measurement from either top or bottom to position it? It looks like will need to be in the right place to ensure the whole window rides up an down without an binding. 2) I was planning on using black silicone sealant to attache the parts. Is that a good choice? As always - thank you very much! 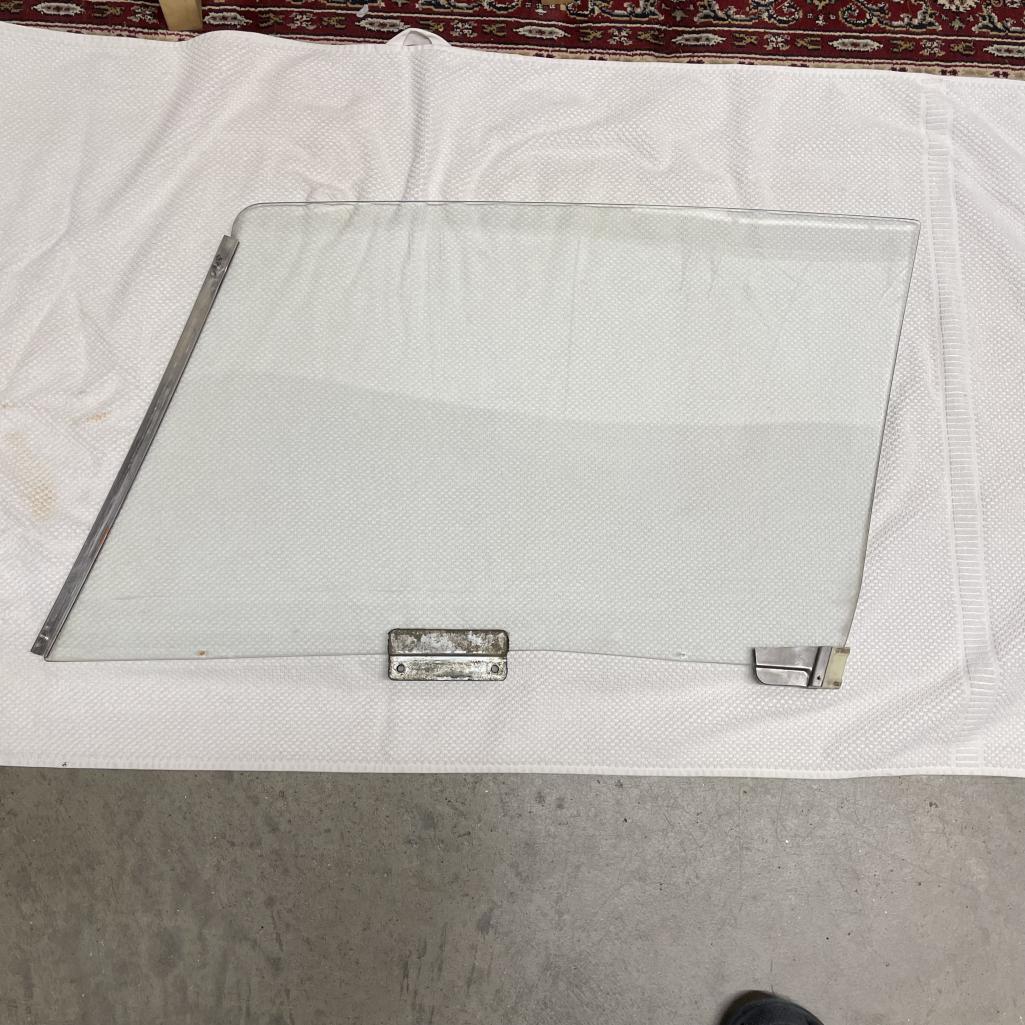 |
   |

 
|
| Mikey914 |
Nov 23 2021, 12:59 AM
Post
#2
|
|
The rubber man Group: Members Posts: 12,638 Joined: 27-December 04 From: Hillsboro, OR Member No.: 3,348 Region Association: None |
The placement of the front edge shouldn't be critical as it only acts as a fixture for the glass to roll up and down.
As I recall it's about where you have it. Perhaps someone will have a pic they can post up. Just make sure the button that is on the worm drive isn't too worn or it will pop off and can break. You will want to use epoxy (JB weld works) to hold the metal to the glass. Just clean the glass and track out. |
|
|
|
| Chaznaster |
Nov 23 2021, 08:55 AM
Post
#3
|
|
Member Group: Members Posts: 288 Joined: 22-November 15 From: Concord, MA Member No.: 19,389 Region Association: North East States |
QUOTE(Mikey914 @ Nov 23 2021, 01:59 AM)  The placement of the front edge shouldn't be critical as it only acts as a fixture for the glass to roll up and down. As I recall it's about where you have it. Perhaps someone will have a pic they can post up. Just make sure the button that is on the worm drive isn't too worn or it will pop off and can break. You will want to use epoxy (JB weld works) to hold the metal to the glass. Just clean the glass and track out. Thanks Mike - this is really helpful. The button looks good but I may pick up a new one from your site next time I place an order just to be safe. A follow-on question - I have your rollers/washers for the front strip. One spins freely on the little posts and the others are tight. Would you recommend reaming out the tight ones so they all move freely? |
|
|
|
| Mikey914 |
Nov 23 2021, 10:55 AM
Post
#4
|
|
The rubber man Group: Members Posts: 12,638 Joined: 27-December 04 From: Hillsboro, OR Member No.: 3,348 Region Association: None |
Should all roll smoothly. Try a little scotch brite on the pin. I suspect it's just crud.
|
|
|
|
| Chaznaster |
Nov 24 2021, 05:52 AM
Post
#5
|
|
Member Group: Members Posts: 288 Joined: 22-November 15 From: Concord, MA Member No.: 19,389 Region Association: North East States |
Thanks Mike. Glued the bits on last night and got all the rollers spinning. Install tonight!
|
|
|
|
| Chaznaster |
Nov 27 2021, 08:21 PM
Post
#6
|
|
Member Group: Members Posts: 288 Joined: 22-November 15 From: Concord, MA Member No.: 19,389 Region Association: North East States |
UPDATE:The install went well until i went to put the outside scraper on. It is a super tight fit and the door tried to eat it when rolled down all the way.
Is there a secret to installing/ treating the scraper so it does not stick? |
|
|
|
| Mikey914 |
Nov 29 2021, 01:08 PM
Post
#7
|
|
The rubber man Group: Members Posts: 12,638 Joined: 27-December 04 From: Hillsboro, OR Member No.: 3,348 Region Association: None |
The scraper was originally a thin design. It was replaced with the 911 style later. Problem is that it creates more friction so it wants to pull out until it's worn and aged some.
We did make an "improved" version with a fuzzily on it. It just costs a little more. Good news is right now they are on sale til the end of the day. https://914rubber.com/late-outer-window-scr...eal-w-fuzzy-set This is the early profile - https://914rubber.com/early-outer-window-scraper-seal-set-1 Attached thumbnail(s)  Attached image(s) 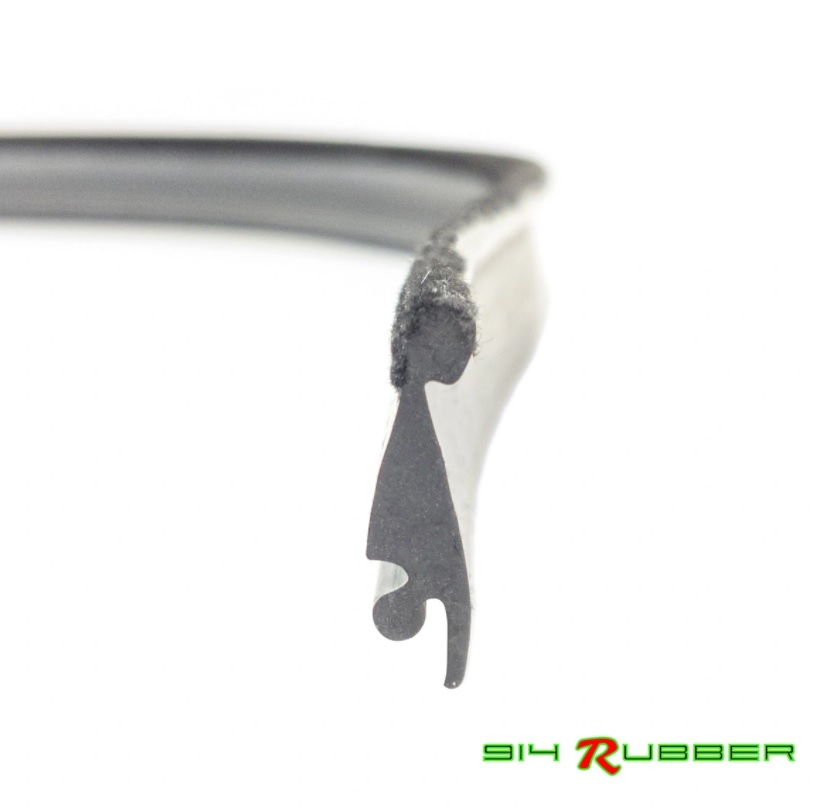 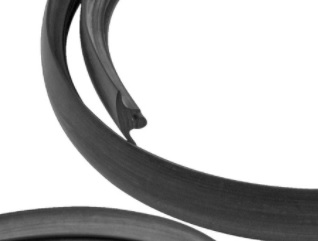
|
|
|
|
| Chaznaster |
Nov 29 2021, 06:28 PM
Post
#8
|
|
Member Group: Members Posts: 288 Joined: 22-November 15 From: Concord, MA Member No.: 19,389 Region Association: North East States |
QUOTE(Mikey914 @ Nov 29 2021, 02:08 PM) The scraper was originally a thin design. It was replaced with the 911 style later. Problem is that it creates more friction so it wants to pull out until it's worn and aged some. We did make an "improved" version with a fuzzily on it. It just costs a little more. Good news is right now they are on sale til the end of the day. https://914rubber.com/late-outer-window-scr...eal-w-fuzzy-set This is the early profile - https://914rubber.com/early-outer-window-scraper-seal-set-1 Thanks Mike. This is an early door - can I use the flocked late door strip? It does not look like the early door has the flocking looking at your site. Also, I have a '74 with one early and one late door (not the original setup, obviously). Are you willing to sell just one? |
|
|
|
| Mikey914 |
Nov 29 2021, 08:13 PM
Post
#9
|
|
The rubber man Group: Members Posts: 12,638 Joined: 27-December 04 From: Hillsboro, OR Member No.: 3,348 Region Association: None |
Sorry we have them set up in sets. makes it less expensive to inventory and allows us to discount as a set.
Early door scraper doesn't need the fuzzy, it's a super thin profile. The late ones do if you buy that version. They are interchangeable. I did put early in my late car, and you can put late in the early. We provide our seals long enough to go either way, you cut to fit. |
|
|
|
|
1 User(s) are reading this topic (1 Guests and 0 Anonymous Users)
0 Members:

|
Lo-Fi Version | Time is now: 19th April 2024 - 12:54 AM |
Invision Power Board
v9.1.4 © 2024 IPS, Inc.