|
|
|
Porsche, and the Porsche crest are registered trademarks of Dr. Ing. h.c. F. Porsche AG.
This site is not affiliated with Porsche in any way. Its only purpose is to provide an online forum for car enthusiasts. All other trademarks are property of their respective owners. |
|
|

  |

| ejm |
 Jan 9 2022, 05:53 PM Jan 9 2022, 05:53 PM
Post
#21
|
|
I can see the light at the end of the tunnel  Group: Members Posts: 2,690 Joined: 3-February 03 From: Massachusetts Member No.: 224 Region Association: None |
That pump is not original. The pump used thru '74 had 3 inline ports.
QUOTE(DBF @ Jan 9 2022, 05:20 PM)  I looked closer at the fuel lines in the engine compartment and they don't have any flex anymore. I also wonder if this is the original fuel pump? It has a single inlet and outlet - I thought I read that 914's had two outlets?? The brakes will need some work. The master leaked all the brake fluid and is solid rust, so I bought an easy install 19mm from 914Rubber. The parking brake works fine, but we'll see how the hydraulic system works when I install the master cylinder. The front brakes certainly look like they'll need some refurbishment. 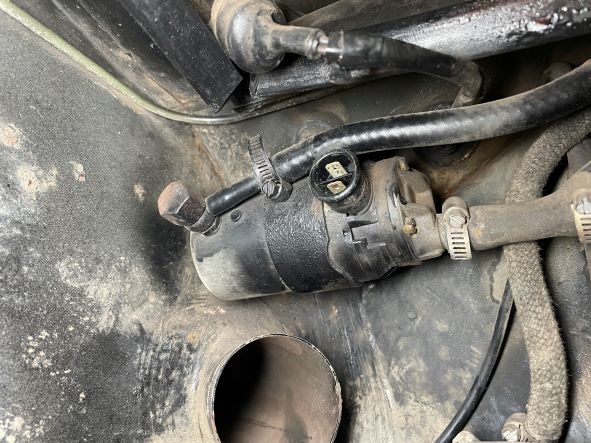 |
   |

 
|
| DBF |
Jan 12 2022, 06:32 PM
Post
#22
|
|
Member Group: Members Posts: 91 Joined: 29-August 21 From: Wisconsin Member No.: 25,865 Region Association: Upper MidWest |
We had warm weather today so decided to start work on the brakes and could use some advice. All my other barn finds have had drum brakes, so not sure what to expect with a barn find with calipers. The front caliper pistons were stuck. It took quite a bit of work to free them up, but once they broke free, they depressed easily, and there was brake fluid in the calipers. They aren't leaking, the outer seal is soft, but does the fact that they were stuck mean it's time to have PMB rebuild them? There's a photo below.
I ordered new rubber lines from PMB's 914World deal, and I need new rotors. As the photo shows, they are at 11mm, but they are so rough they would be below the 10mm minimum if I had them turned. Porsche didn't really intend for these to be turned, did they? Made a final decision to replace the nylon fuel lines with stainless steel lines. I pulled the lines from the firewall and tried bending them with my hands spaced about a foot apart. The lines bent and creased almost immediately - no flex left in these lines. As good as all the rubber is on this car, surprising how stiff the fuel lines are. I read that the indent on the LE edition front spoiler was intended to allow use of the front tow hook. Doesn't look like mine was ever used. I was reading the comments about the Creamsicle on BAT and one comment said the DOT sticker was replaced. Is mine original? Thanks. 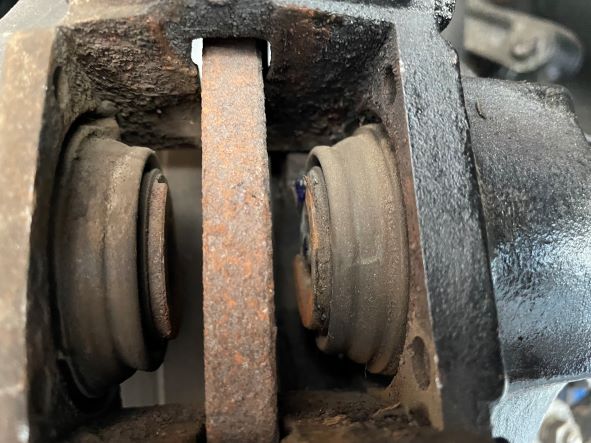 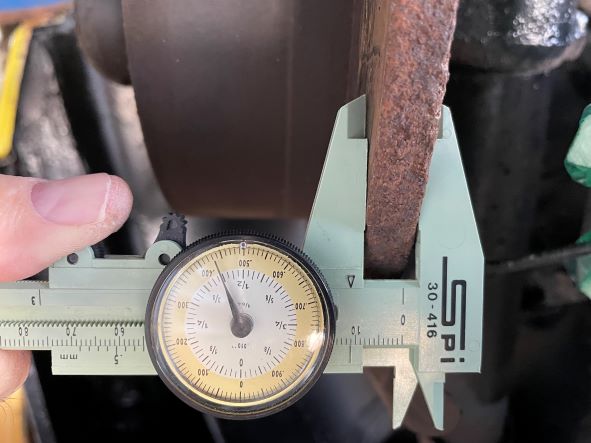 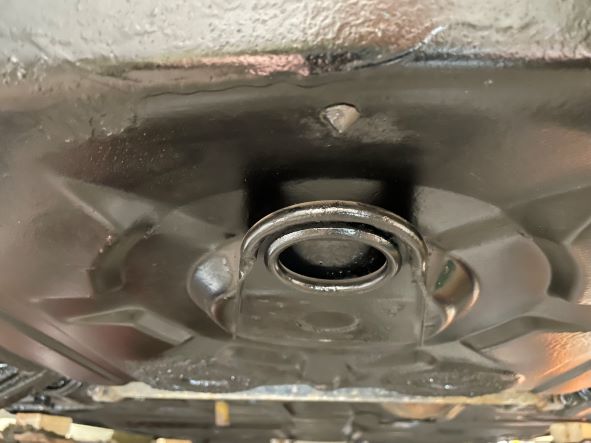 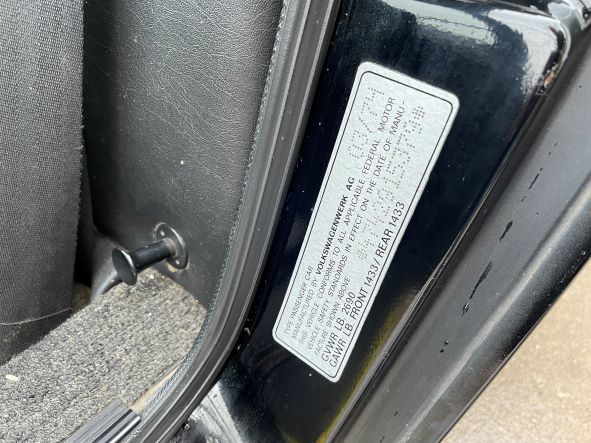 |
 |
|
| dstudeba |
Jan 12 2022, 07:04 PM
Post
#23
|
|
Member Group: Members Posts: 117 Joined: 3-December 21 From: San Diego Member No.: 26,128 Region Association: Southern California |
Your sticker looks good. If you look at the one on BAT the dots are slightly larger. For instance on the side of the zero there are on 3 dots as opposed to the 4 on yours. Also the 4s on the VIN are the incorrect font, they shouldn't match the date font.
I can't tell but it looks like yours have the little crescent cuts which are on the original. Edited to add: Below is the VIN of the LE on BAT which is a reproduction. It is added for ease of comparison to compare to the LE above 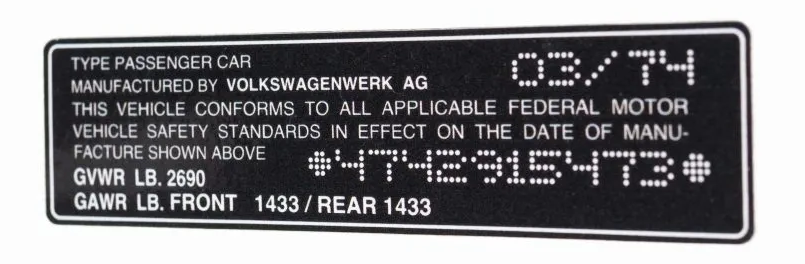 |
|
|
|
| JeffBowlsby |
Jan 12 2022, 07:43 PM
Post
#24
|
|
914 Wiring Harnesses Group: Members Posts: 8,485 Joined: 7-January 03 From: San Ramon CA Member No.: 104 Region Association: None |
The label on 15473 is a repo.
|
|
|
|
| JeffBowlsby |
Jan 12 2022, 07:44 PM
Post
#25
|
|
914 Wiring Harnesses Group: Members Posts: 8,485 Joined: 7-January 03 From: San Ramon CA Member No.: 104 Region Association: None |
Sorry, DP
|
|
|
|
| dstudeba |
Jan 12 2022, 09:54 PM
Post
#26
|
|
Member Group: Members Posts: 117 Joined: 3-December 21 From: San Diego Member No.: 26,128 Region Association: Southern California |
QUOTE(JeffBowlsby @ Jan 12 2022, 05:43 PM) The label on 15473 is a repo. Sorry I wasn't clear. I have edited my post to indicate that I was showing the BAT 914 LE VIN label that is a reproduction to compare to his VIN label which he had questioned the authenticity of. |
|
|
|
| DBF |
Jan 22 2022, 06:00 PM
Post
#27
|
|
Member Group: Members Posts: 91 Joined: 29-August 21 From: Wisconsin Member No.: 25,865 Region Association: Upper MidWest |
I pulled the brake calipers and they are on their way to PMB. When I propped them up to drain the brake fluid, the photo shows what came out. I will feel a lot more confident going into Turn 5 at Road America next summer knowing I have a new master cylinder, rubber lines, rotors, bearings, pads and rebuilt calipers!
I also have photo evidence why you should replace old rubber fuel lines. I was removing the fuel pump to test it and couldn't get a good grip on one of the fuel lines. I used a pliers to get a better grip, and with very little pressure the line just tore in two. I also have a question about the glass in the car. There is a logo on all the glass but seems to be backwards on the driver's side glass. Is this original or has something been replaced? I have a photo showing a passenger glass and drivers glass for comparison. Lastly, included a couple truck photos. The number matches the number in the door jam plate, and the car also has the pad under the carpet, and it is in good shape. Thanks. 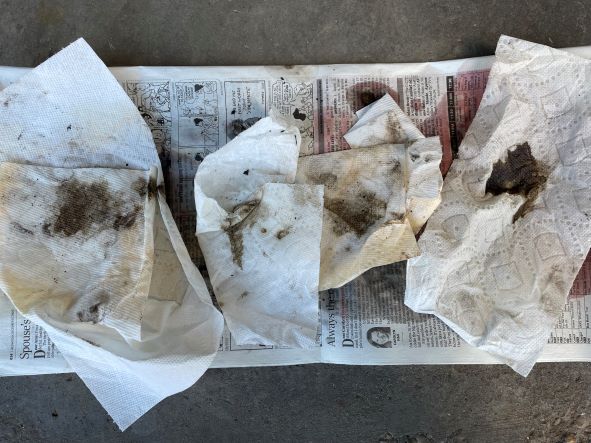 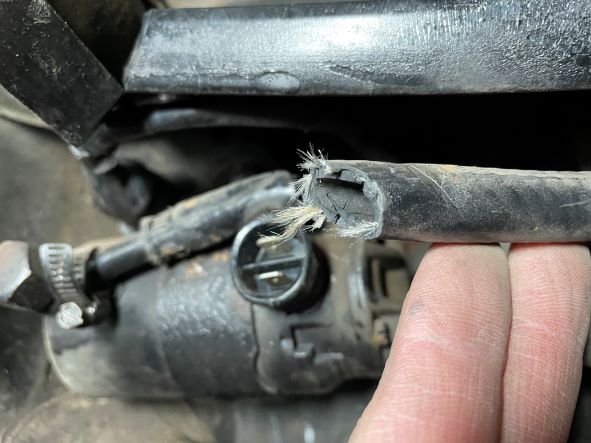 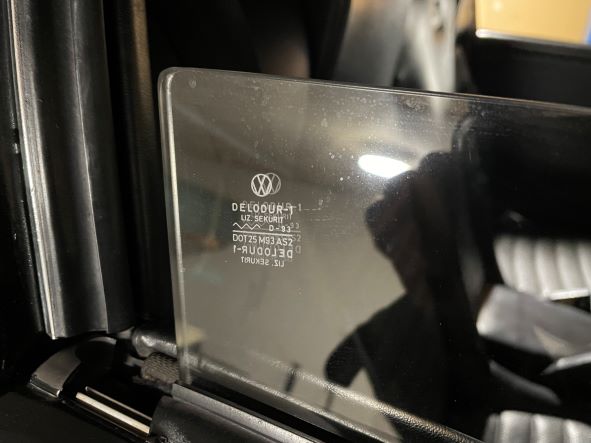 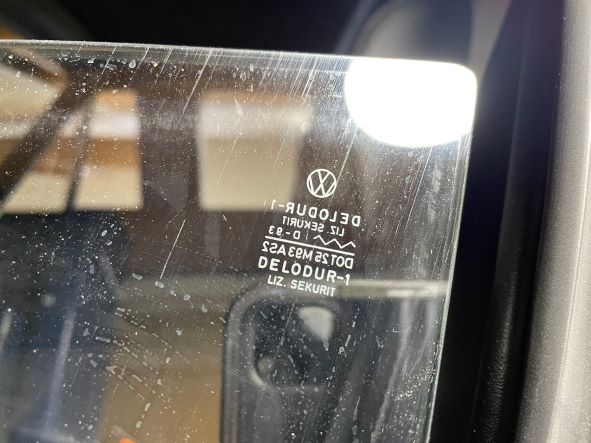 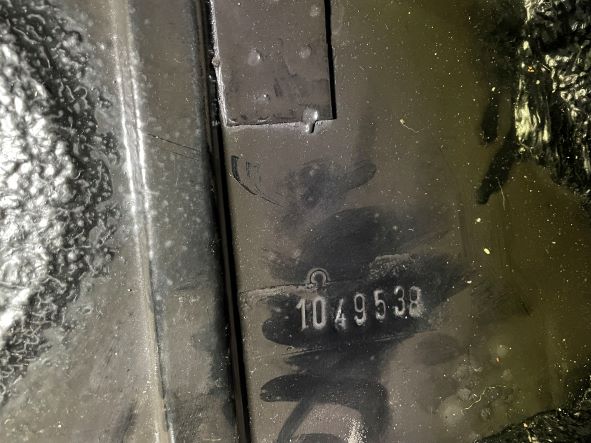 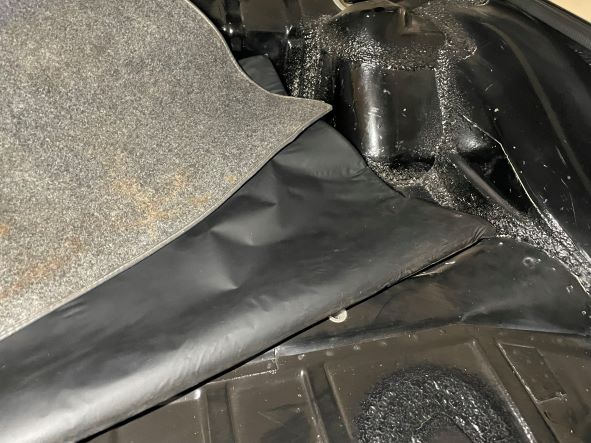 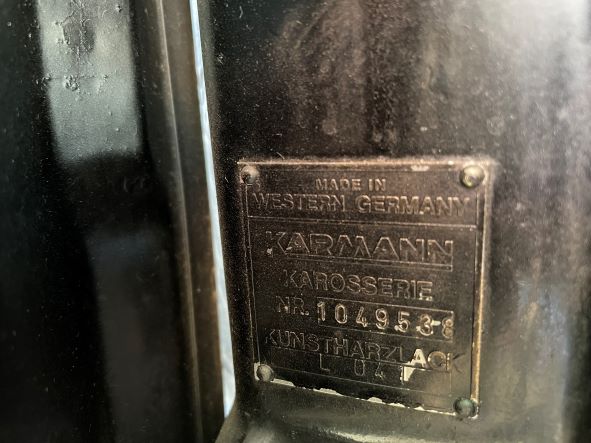 |
|
|
|
| DBF |
Jan 23 2022, 05:15 PM
Post
#28
|
|
Member Group: Members Posts: 91 Joined: 29-August 21 From: Wisconsin Member No.: 25,865 Region Association: Upper MidWest |
Have a few more questions hopefully some of you can help me with. I was told a hiding spot for rust is at the bottom of the bulkhead/rear floor, and when I was looking closer at that location, I noticed a disconnected wire behind each seat. Can anyone tell me what was disconnected?
I was also told rust can hide behind the mat in the engine compartment since moisture can get trapped there. Mine seemed a bit loose and was easy to remove. It was just attached on a couple of spots - you can see in the photo. As I carefully lifted it out, I started to see red spots and thought rust. Turns out it was just dried glue. I put it back for now just held with the clips. Is it better to glue it back in, or just use the clips/plastic plugs so it can be periodically removed for cleaning and ensuring no moisture is trapped between the mat and firewall? I also included a couple photos showing the crack in the dash and driver's seat. Is there something I can do to keep the cracks from getting any worse? Being vinyl, not sure if there is any treatment anyone has tried that keeps the vinyl from shrinking further? Thanks. 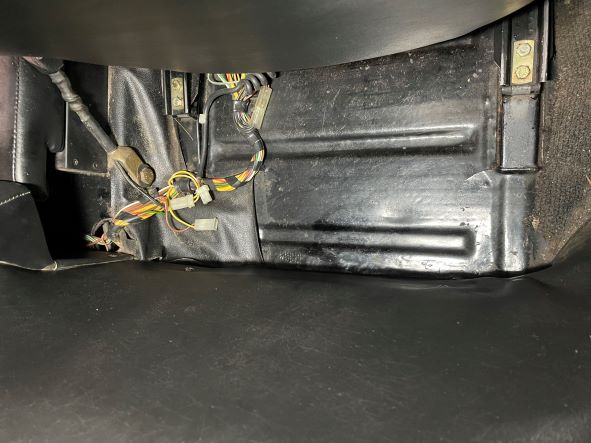 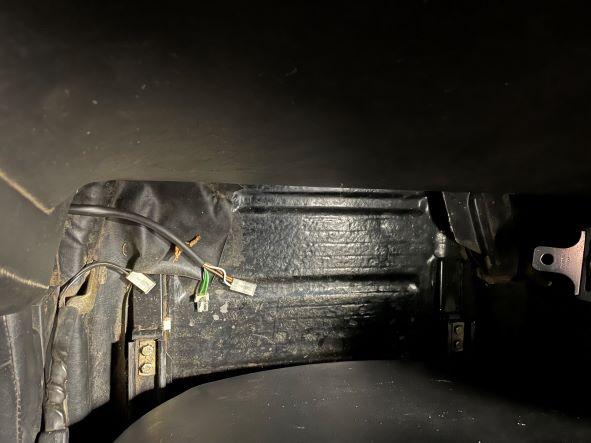 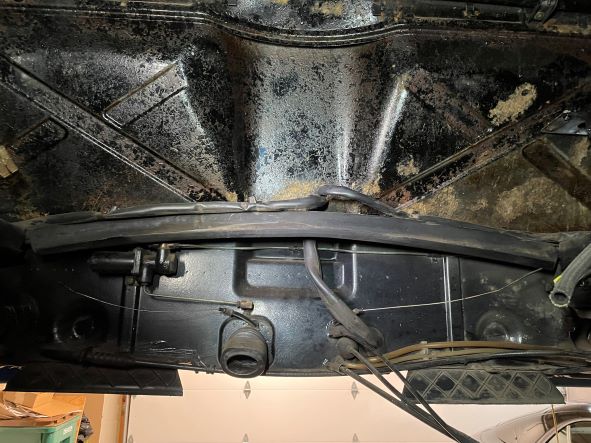 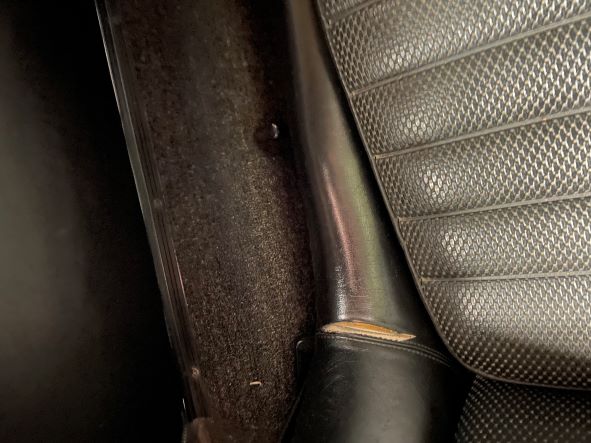 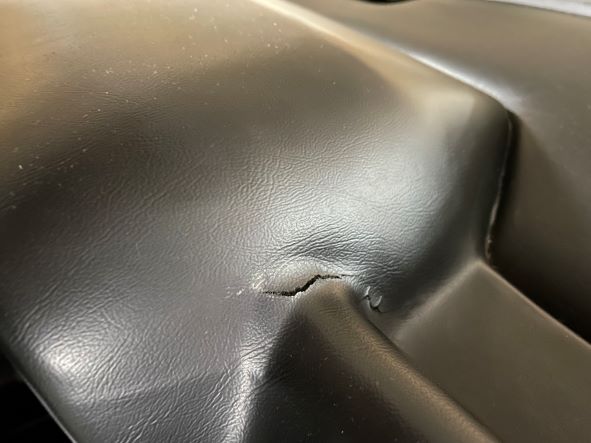 |
|
|
|
| iankarr |
Jan 24 2022, 01:34 AM
Post
#29
|
|
The wrencher formerly known as Cuddy_K Group: Members Posts: 2,472 Joined: 22-May 15 From: Heber City, UT Member No.: 18,749 Region Association: Intermountain Region |
The news keeps getting better. Great that you still have the trunk stamp...and that everything appears solid. The disconnected wires are for the seat belt interlock which used to prevent the car from starting when someone was sitting in a seat without the belt clicked in. That coiled line leads to the seat base sensor. Very cool that you still have it. Most owners bypassed the interlock and/or removed everything. You def don't want to hook it back up, but it's nice to know the parts are there. Regarding the dash, I'm not aware of a product which stops cracks from progressing. 914 Rubber makes new tops that are super close to OEM. It also looks like a previous owner removed the floor tar, which can also trap water. That's a score cause it's a messy job!
|
|
|
|
| mlindner |
Jan 24 2022, 06:23 AM
Post
#30
|
|
Senior Member Group: Members Posts: 1,514 Joined: 11-November 11 From: Merrimac, WI Member No.: 13,770 Region Association: Upper MidWest |
Love all the pictures of your car. Looks like the shot with the two bugs was taken in Sun Prairie. Hope to see it this spring. Best, Mark
|
|
|
|
| DBF |
Jan 24 2022, 11:45 AM
Post
#31
|
|
Member Group: Members Posts: 91 Joined: 29-August 21 From: Wisconsin Member No.: 25,865 Region Association: Upper MidWest |
Thanks for the info on the wires. That confirms what I was thinking when I looked at the wiring diagram this morning. It appears the interlock works by grounding the circuit, so disconnecting the sensors won't bypass the interlock. There are times I will want to start the car without putting on the seat belt first, so would like to bypass the interlock. Does anyone have a schematic for a bypass? I'm concerned that simply grounding the interlock sensor could also ground other circuits and create a parasitic drain on the electrical system. Thanks.
|
|
|
|
| JeffBowlsby |
Jan 24 2022, 11:51 AM
Post
#32
|
|
914 Wiring Harnesses Group: Members Posts: 8,485 Joined: 7-January 03 From: San Ramon CA Member No.: 104 Region Association: None |
Here you go, no cutting required.
Attached image(s) 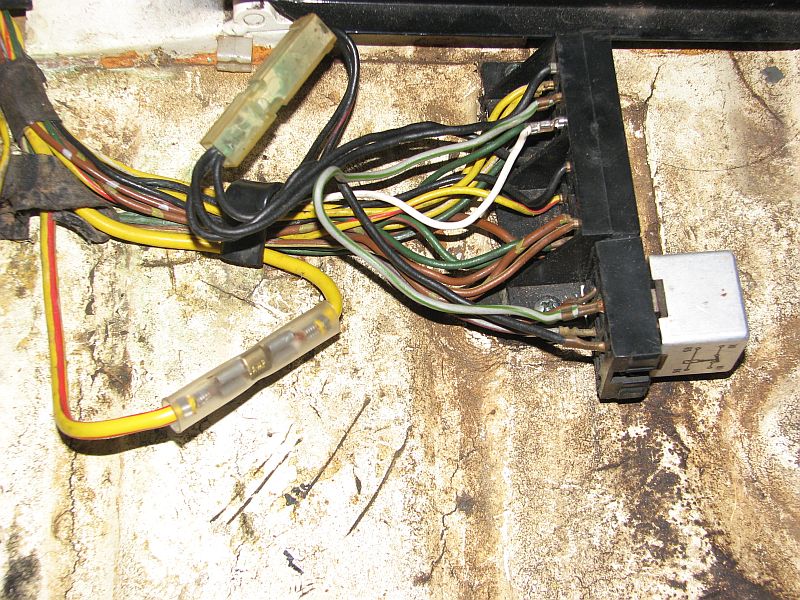
|
|
|
|
| DBF |
Jan 24 2022, 12:07 PM
Post
#33
|
|
Member Group: Members Posts: 91 Joined: 29-August 21 From: Wisconsin Member No.: 25,865 Region Association: Upper MidWest |
The floor tar is still there - it is just hard to see in the photos since it has a black interior. Fortunately, it is still firmly attached so I don't think any moisture is trapped. It will be something to keep an eye on. I'm familiar with how the tar pads trapped moisture, especially with salt/melted snow in winter driven cars. VW used that system, and when I was buying/fixing up/selling VW's and 356 Porsches in the 70's, cars just a few years old could have rust through in the floors.
The trunk/frunk are both very solid. I have a paint thickness gauge and almost all the paint is original in the trunks. There are a couple spots that were touched up on the trunk floors, likely when the car was repainted, but amounts to less that 1 square foot of touch-up in total. The underside looks pretty good too. 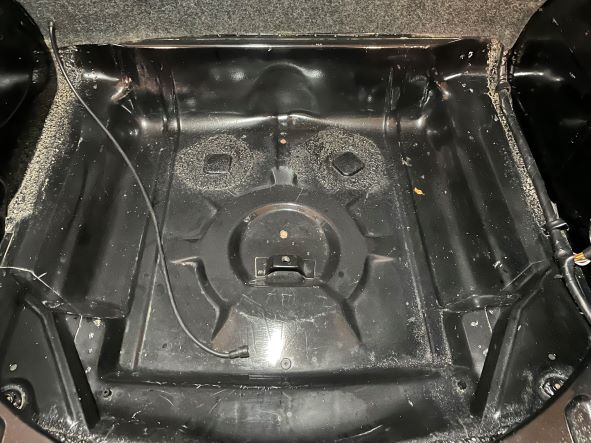   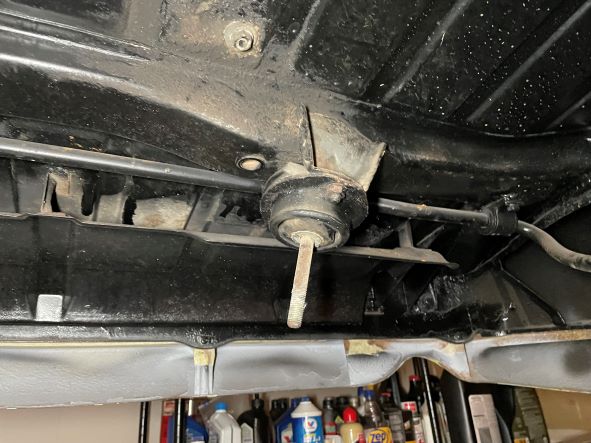 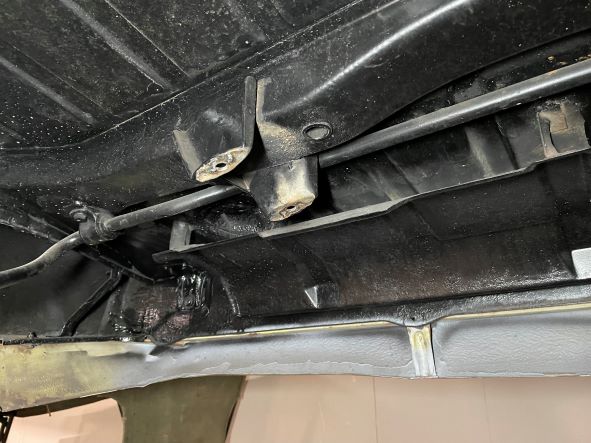 |
|
|
|
| DBF |
Jan 24 2022, 12:09 PM
Post
#34
|
|
Member Group: Members Posts: 91 Joined: 29-August 21 From: Wisconsin Member No.: 25,865 Region Association: Upper MidWest |
QUOTE(JeffBowlsby @ Jan 24 2022, 11:51 AM) Here you go, no cutting required. Thanks Jeff - simpler than I thought it would be! |
|
|
|
| fixer34 |
Jan 24 2022, 02:18 PM
Post
#35
|
|
Senior Member Group: Members Posts: 1,076 Joined: 16-September 14 From: Chicago area Member No.: 17,908 Region Association: Upper MidWest |
When you go to install the EZ master cylinder, follow this video.
https://www.youtube.com/watch?v=N6ZHK5f_9bE There are some tricks to make it much easier that aren't obvious. |
|
|
|
| sixnotfour |
Jan 24 2022, 08:46 PM
Post
#36
|
|
914 Wizard Group: Members Posts: 10,412 Joined: 12-September 04 From: Life Elevated..planet UT. Member No.: 2,744 Region Association: Rocky Mountains |
early 911 cis pump,, 73.5-76
|
|
|
|
| DBF |
Jan 30 2022, 06:54 PM
Post
#37
|
|
Member Group: Members Posts: 91 Joined: 29-August 21 From: Wisconsin Member No.: 25,865 Region Association: Upper MidWest |
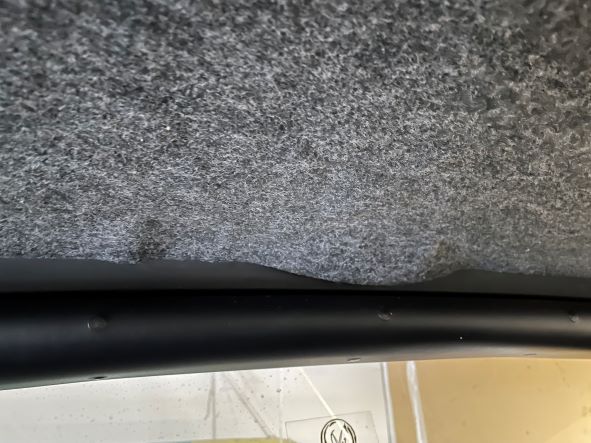
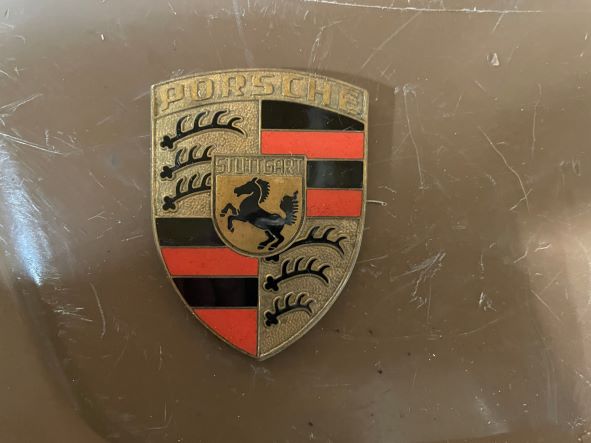
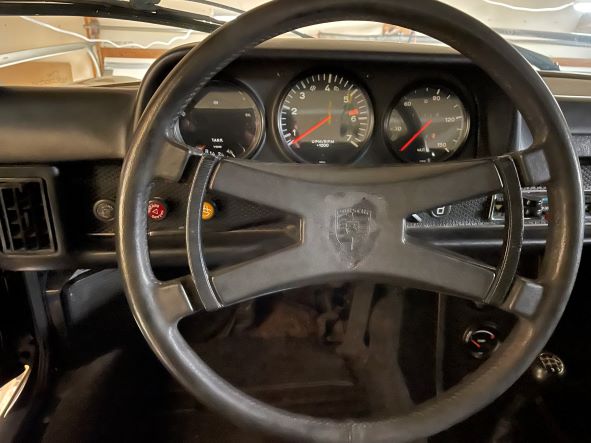
I haven't done much on the car this week since I was doing some honey-do projects around the house and converting part of our finished basement to a workshop area. Yes my wife okayed it! I showed some warts on the car on an earlier post (touch up in the trunks, crack in the dash and drivers seat) and here are a couple other warts. Part of the headliner has detached, but fortunately on the edge so should be an easy repair. The bad one is the steering wheel. The original owner glued on a Porsche emblem. I used a heat gun and was carefully pulling it off. It was coming off fairly easily and I was almost done when it popped off and took a bit of the steering wheel with it. I'll try gluing the small piece back, but I suppose worse case is glue the emblem back. It has the same patina as the rest of the car and judging from many photos of other 914's, it was not uncommon for people to add to their cars.
   |
|
|
|
| DBF |
Feb 1 2022, 08:34 PM
Post
#38
|
|
Member Group: Members Posts: 91 Joined: 29-August 21 From: Wisconsin Member No.: 25,865 Region Association: Upper MidWest |
It was 40 degrees outside today, so a nice 50-55 degrees in my garage - perfect for working on cars. I have the engine stripped down to a long block, and this is by far the dirtiest engine I've ever worked on. I spent hours using plastic scrapers to remove baked on oil/dirt, followed by degreasers and still not done. Any advice on how to get the last bit that is still in the corners and pockets? I don't want to pull the heads and cylinders until the case is clean.
I also noticed some sealer on the case. Is that factory? I rebuilt many type 1 motors years ago and don't ever recall seeing this type of sealant. I am going to order tires and looked at the spare. It is a Dunlap SP57. Anyone know what was the original tires on these cars? If that is the original spare, I'll keep it and get another wheel to use for the spare. 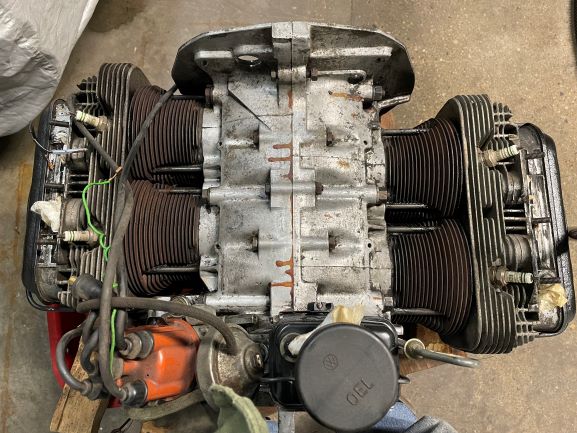 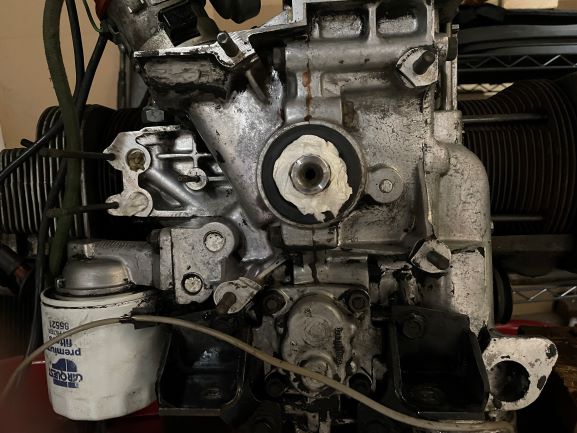 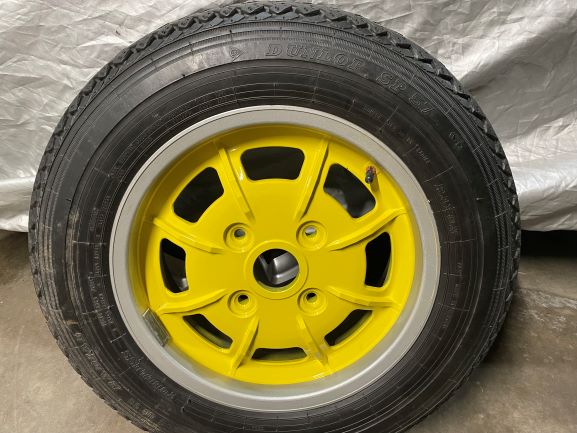 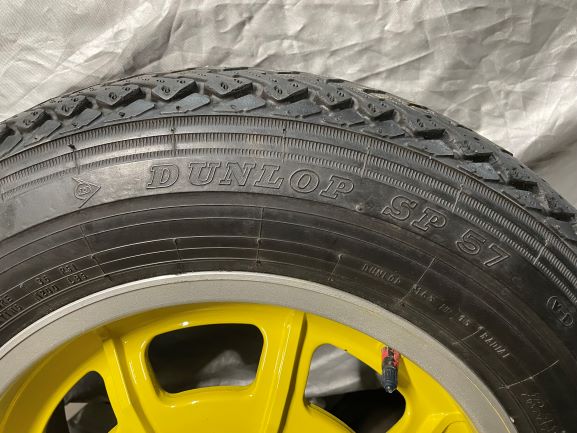 |
|
|
|
| seanpaulmc |
Feb 2 2022, 05:56 AM
Post
#39
|
|
Member Group: Members Posts: 297 Joined: 6-December 16 From: Orlando, FL Member No.: 20,649 Region Association: South East States |
My recommendation for cleaning into the cracks and crevices on the engine after spending days doing the same is to spray with brake cleaner, agitate using an acid brush, and wipe away with rags or shop towels. You will go through a lot of brushes and rags. Do in a very well ventilated area.
I started with all types of degreasers but they just didn’t cut it. Lovely find! That is one solid car. Best, Sean |
|
|
|
| DBF |
Feb 4 2022, 08:48 PM
Post
#40
|
|
Member Group: Members Posts: 91 Joined: 29-August 21 From: Wisconsin Member No.: 25,865 Region Association: Upper MidWest |
I pulled the fuel tank, and the well is in good shape, although you can see it has been driven on dusty roads. The pads are fine, they are all the same light color, but for some reason look three different shades in the photo. Must be the shop lights and shadows. There is a spot where the fuel tank was rubbing on the body and there is some surface rust. That is the only rust - the spot that looks like rust by the brake reservoir is dirt. All the wiring looks good too. There has been no sign that mice were living in the car during its 20 plus year slumber. I was thinking of cleaning up the rust on the fuel tank and body, treat it with some POR 15 and put a fuel tank pad on that spot. Any different suggestions?
The inside of the tank has several small dime-size and smaller spots where the finish is coming off on the underside of the top of the tank. The rest is amazingly clean. My guess is condensation. I was thinking about treating it with POR 15, but decided just to rinse out the tank, replace all the seals, always store the car with a full tank, and just keep an eye on it. As always though, feel free to comment if you have other suggestions. I went through the box of heater parts I got from the owner. I am missing one elbow. I checked the parts diagram, and it appears that they are the same for both the driver/passenger side. However, I thought I recalled reading somewhere they are different. When I put it on the driver's side, it looked like it could rub on the j-pipe, but this was just sitting on the floor so could fit a lot different when on the engine. Are they the same part? Thanks. 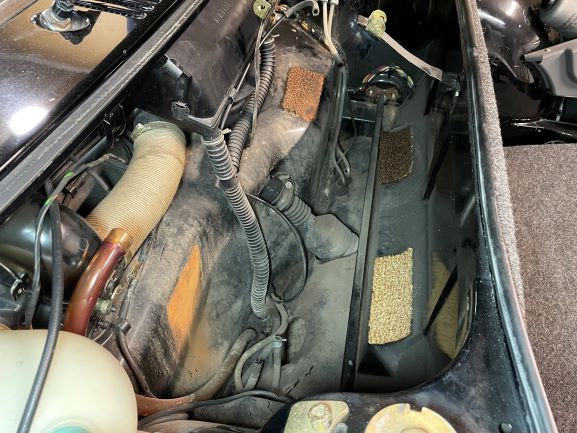 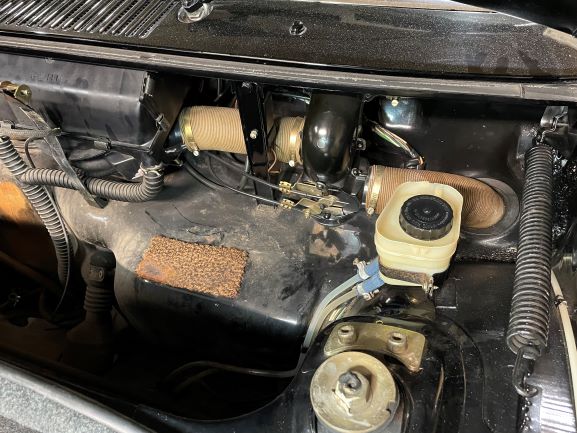 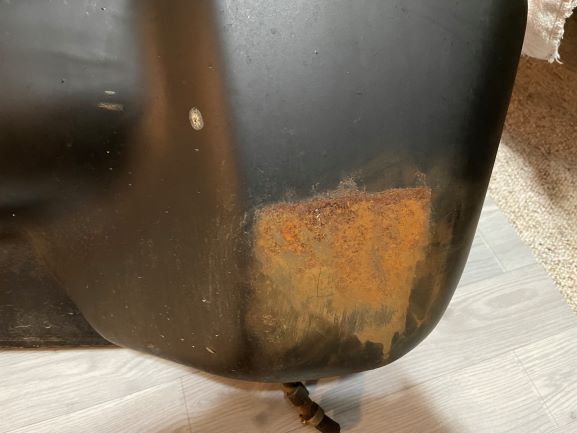 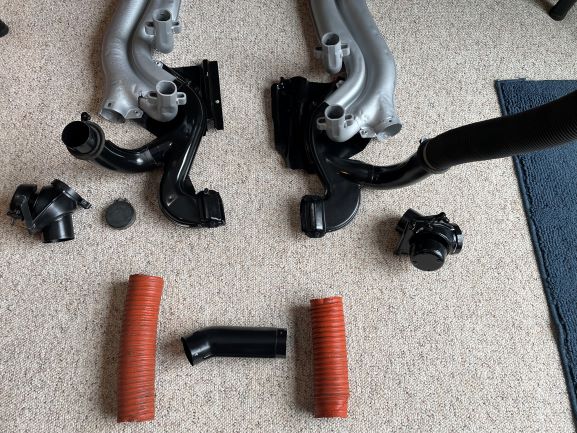 |
|
|
|
|
1 User(s) are reading this topic (1 Guests and 0 Anonymous Users)
0 Members:

|
Lo-Fi Version | Time is now: 29th April 2024 - 05:10 AM |
Invision Power Board
v9.1.4 © 2024 IPS, Inc.