|
|
|
Porsche, and the Porsche crest are registered trademarks of Dr. Ing. h.c. F. Porsche AG.
This site is not affiliated with Porsche in any way. Its only purpose is to provide an online forum for car enthusiasts. All other trademarks are property of their respective owners. |
|
|

  |

| tygaboy |
 Sep 9 2025, 10:13 AM Sep 9 2025, 10:13 AM
Post
#1481
|
|
914 Guru  Group: Members Posts: 5,835 Joined: 6-October 15 From: Petaluma, CA Member No.: 19,241 Region Association: Northern California |
Why couldn't I have figured this out in the beginning? (IMG:style_emoticons/default/dry.gif)
After the fail by the powder coaters and my multiple fails with the VHT rattle can product (IMG:style_emoticons/default/headbang.gif), I spent some time searching for what other options exist to replicate a wrinkle finish. And looky what I found. And Son Of A Biscuit, it couldn't have been a more obvious URL: wrinklepaint.com How embarrassing. But the awesome news is highlighted in yellow. I've communicated with the company and they do ship to CA (but only the liquid, no spray cans). It ain't cheap but the good stuff usually isn't. Now to find a painter to apply it. Attached thumbnail(s) 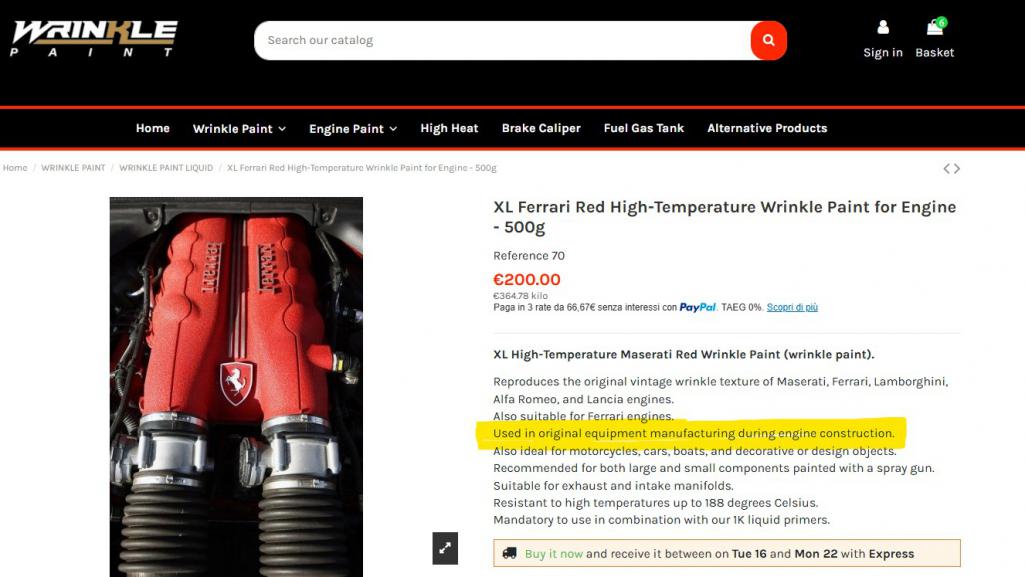
|
   |

 
|
| tygaboy |
Sep 9 2025, 10:19 AM
Post
#1482
|
|
914 Guru Group: Members Posts: 5,835 Joined: 6-October 15 From: Petaluma, CA Member No.: 19,241 Region Association: Northern California |
All the cool colors, too! Plus they offer some other interesting products I may try, such as chrome and metallic satin steel paint. That might open up some interesting options for things like fiberglass bumpers or ??? (IMG:style_emoticons/default/idea.gif)
Attached thumbnail(s) 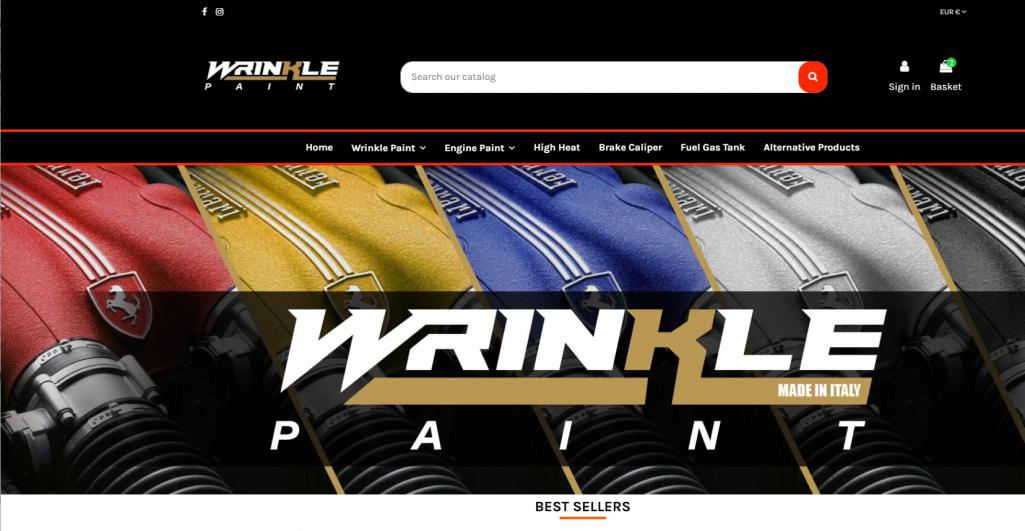
|
|
|
|
| tygaboy |
Oct 11 2025, 07:32 AM
Post
#1483
|
|
914 Guru Group: Members Posts: 5,835 Joined: 6-October 15 From: Petaluma, CA Member No.: 19,241 Region Association: Northern California |
After a few weeks focusing on the wide-body project, I'm back on the 914 Ferrari.
Getting closer... https://www.youtube.com/watch?v=XWjEWkaYQYc |
|
|
|
| 930cabman |
Oct 11 2025, 05:53 PM
Post
#1484
|
|
Advanced Member Group: Members Posts: 4,733 Joined: 12-November 20 From: Buffalo Member No.: 24,877 Region Association: North East States |
cool project, got me thinking about the extra 355 engine I have stored under the stairs at my shop. Not sure if I will live long enough to see completion of said project
|
|
|
|
| Cairo94507 |
Oct 12 2025, 07:50 AM
Post
#1485
|
|
Michael Group: Members Posts: 10,686 Joined: 1-November 08 From: Auburn, CA Member No.: 9,712 Region Association: Northern California |
Really nice wiring - I doubt it was that beautiful and resistant to vibration, etc., when Ferrari built the cars. Just amazing skills being demonstrated by Chris. (IMG:style_emoticons/default/beerchug.gif)
|
 |
|
| tygaboy |
Oct 18 2025, 07:00 AM
Post
#1486
|
|
914 Guru Group: Members Posts: 5,835 Joined: 6-October 15 From: Petaluma, CA Member No.: 19,241 Region Association: Northern California |
|
|
|
|
| tygaboy |
Nov 1 2025, 07:04 AM
Post
#1487
|
|
914 Guru Group: Members Posts: 5,835 Joined: 6-October 15 From: Petaluma, CA Member No.: 19,241 Region Association: Northern California |
Enough with the wiring. Let's get back to some fabrication, eh?
https://www.youtube.com/watch?v=isFD7r8jk9Q |
|
|
|
| napasteve |
Nov 1 2025, 07:15 AM
Post
#1488
|
|
914 driving winemaker Group: Members Posts: 528 Joined: 2-January 13 From: Napa, CA Member No.: 15,327 Region Association: Northern California |
Amazing work as always.
|
|
|
|
| Cairo94507 |
Nov 1 2025, 07:36 AM
Post
#1489
|
|
Michael Group: Members Posts: 10,686 Joined: 1-November 08 From: Auburn, CA Member No.: 9,712 Region Association: Northern California |
Wow!!!! That is so much nicer and completely fits this build with the tunnel "Red Barned".
Absolutely cool. (IMG:style_emoticons/default/beerchug.gif) |
|
|
|
| Montreal914 |
Nov 1 2025, 10:16 AM
Post
#1490
|
|
Advanced Member Group: Members Posts: 2,161 Joined: 8-August 10 From: Claremont, CA Member No.: 12,023 Region Association: Southern California |
Nice fabrication as always.
Watching with great interest! ...now I need to buy another tool. (IMG:style_emoticons/default/biggrin.gif) |
|
|
|
| NARP74 |
Nov 1 2025, 05:02 PM
Post
#1491
|
|
Senior Member Group: Members Posts: 1,448 Joined: 29-July 20 From: Colorado, USA, Earth Member No.: 24,549 Region Association: Rocky Mountains |
In #88, what did you use for the the SS fuel line separator that was in the tunnel?
|
|
|
|
| tygaboy |
Nov 1 2025, 10:21 PM
Post
#1492
|
|
914 Guru Group: Members Posts: 5,835 Joined: 6-October 15 From: Petaluma, CA Member No.: 19,241 Region Association: Northern California |
QUOTE(NARP74 @ Nov 1 2025, 04:02 PM)  In #88, what did you use for the the SS fuel line separator that was in the tunnel? @NARP74 - Those are NotcHead line clamps. Available in different sizes. Use separately or like I did - screwed together back-to-back, as in pic. Attached image(s) 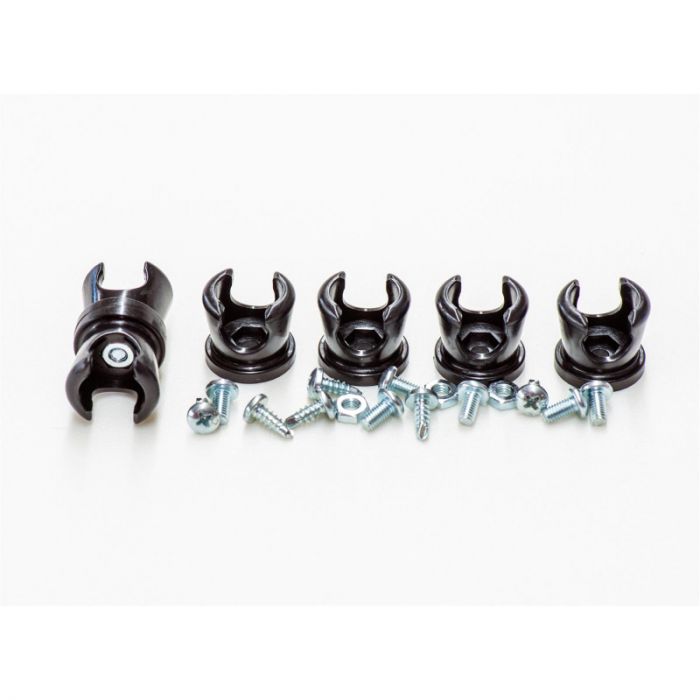
|
|
|
|
| NARP74 |
Nov 2 2025, 09:26 AM
Post
#1493
|
|
Senior Member Group: Members Posts: 1,448 Joined: 29-July 20 From: Colorado, USA, Earth Member No.: 24,549 Region Association: Rocky Mountains |
QUOTE(tygaboy @ Nov 1 2025, 10:21 PM) QUOTE(NARP74 @ Nov 1 2025, 04:02 PM) In #88, what did you use for the the SS fuel line separator that was in the tunnel? @NARP74 - Those are NotcHead line clamps. Available in different sizes. Use separately or like I did - screwed together back-to-back, as in pic. Awesome, thank you! |
|
|
|
| tygaboy |
Nov 6 2025, 07:17 PM
Post
#1494
|
|
914 Guru Group: Members Posts: 5,835 Joined: 6-October 15 From: Petaluma, CA Member No.: 19,241 Region Association: Northern California |
The 911 steering column/ignition switch conversion is nearing completion. I treated the car to a Momo hub and now need to select a steering wheel. This is just an old RaceMark wheel I had. Note it uses a different bolt pattern so only a couple fasteners in use but I wanted to check the ergonomics of this new set up.
Attached thumbnail(s) 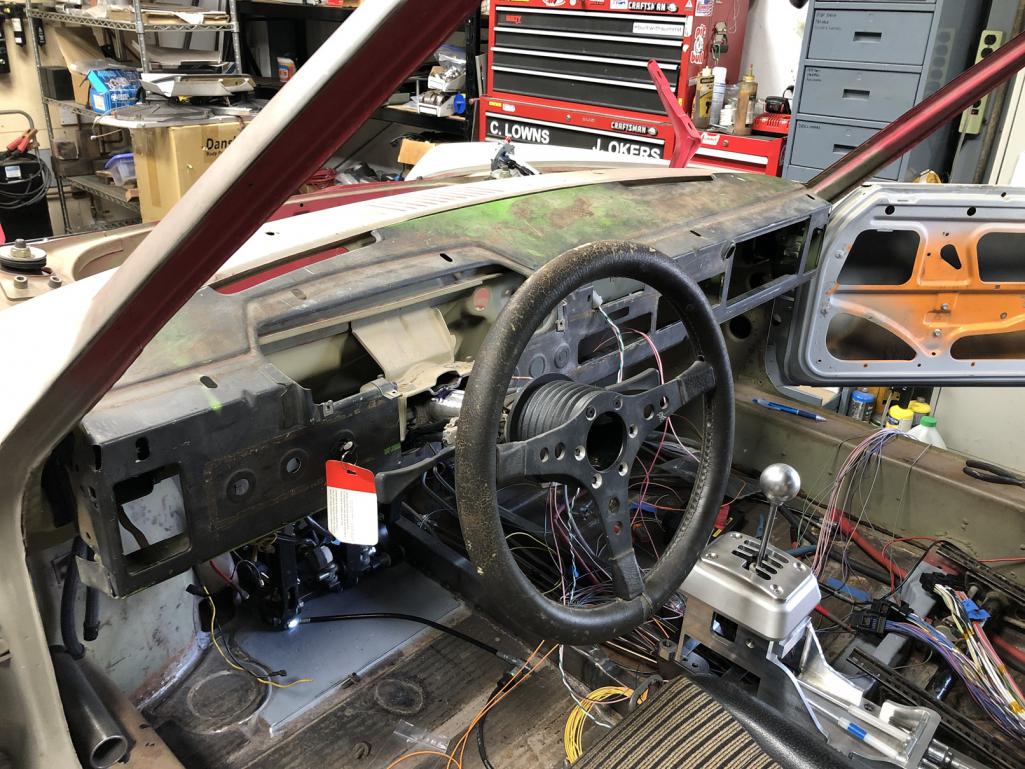
|
|
|
|
| tygaboy |
Nov 8 2025, 07:57 AM
Post
#1495
|
|
914 Guru Group: Members Posts: 5,835 Joined: 6-October 15 From: Petaluma, CA Member No.: 19,241 Region Association: Northern California |
The latest progress as I close in on finalizing the wiring.
https://www.youtube.com/watch?v=5SJItjPfq88 |
|
|
|
| tygaboy |
Nov 11 2025, 06:03 PM
Post
#1496
|
|
914 Guru Group: Members Posts: 5,835 Joined: 6-October 15 From: Petaluma, CA Member No.: 19,241 Region Association: Northern California |
The chassis stiffening begins. Note that the internal long stiffener kit has already been installed. I'm going to do a set up similar to what I did in the LS car, as pictured, but the door bars will be lower in the front, to ease entry/exit as much as possible.
Attached thumbnail(s) 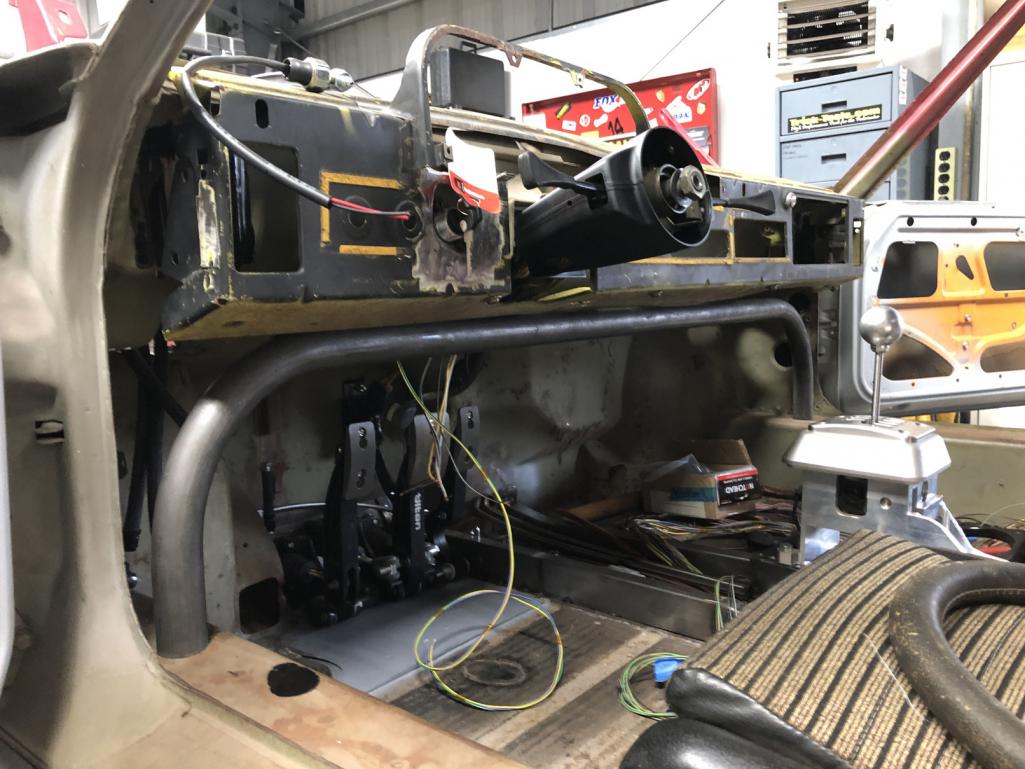 Attached image(s) 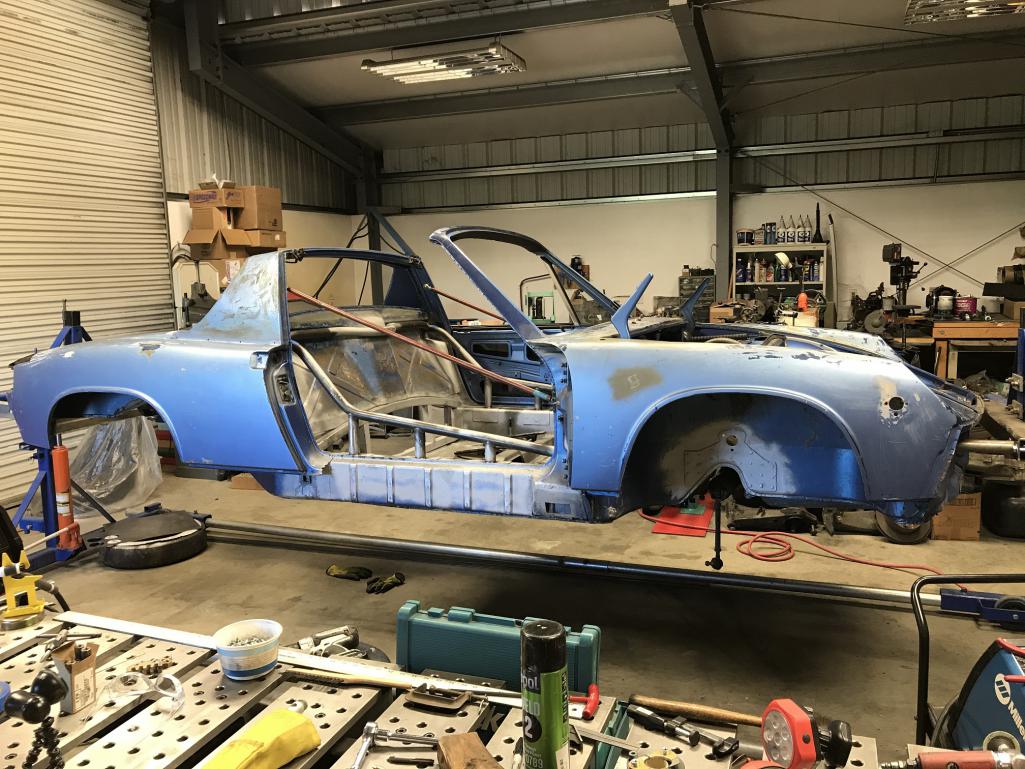
|
|
|
|
| SirAndy |
Nov 12 2025, 09:29 AM
Post
#1497
|
|
Resident German Group: Admin Posts: 42,486 Joined: 21-January 03 From: Oakland, Kalifornia Member No.: 179 Region Association: Northern California |
QUOTE(tygaboy @ Nov 11 2025, 04:03 PM) The chassis stiffening begins. Note that the internal long stiffener kit has already been installed. I'm going to do a set up similar to what I did in the LS car, as pictured, but the door bars will be lower in the front, to ease entry/exit as much as possible. On my car we moved the cross bar up higher and behind the lower part of the dashboard. There's actually plenty of space there for a bar. That way, i kept the full leg room and there's no way i get my knee caps ripped off in case of a violent impact. (IMG:style_emoticons/default/idea.gif) |
|
|
|
| SirAndy |
Nov 12 2025, 09:35 AM
Post
#1498
|
|
Resident German Group: Admin Posts: 42,486 Joined: 21-January 03 From: Oakland, Kalifornia Member No.: 179 Region Association: Northern California |
QUOTE(SirAndy @ Nov 12 2025, 07:29 AM) QUOTE(tygaboy @ Nov 11 2025, 04:03 PM) The chassis stiffening begins. Note that the internal long stiffener kit has already been installed. I'm going to do a set up similar to what I did in the LS car, as pictured, but the door bars will be lower in the front, to ease entry/exit as much as possible. On my car we moved the cross bar up higher and behind the lower part of the dashboard. There's actually plenty of space there for a bar. That way, i kept the full leg room and there's no way i get my knee caps ripped off in case of a violent impact. (IMG:style_emoticons/default/idea.gif) @tygaboy Some crappy pics from the cage install. You can see the cross bar is running right under the steering column and ends up completely behind the lower dash. That way it's completely hidden and i can even use the stock lower dash padding.  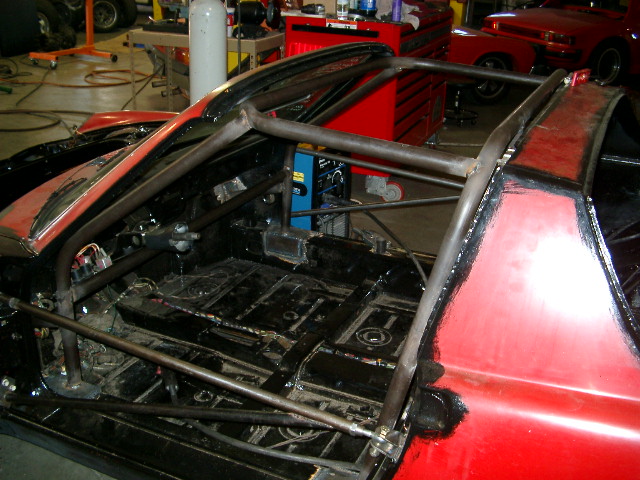 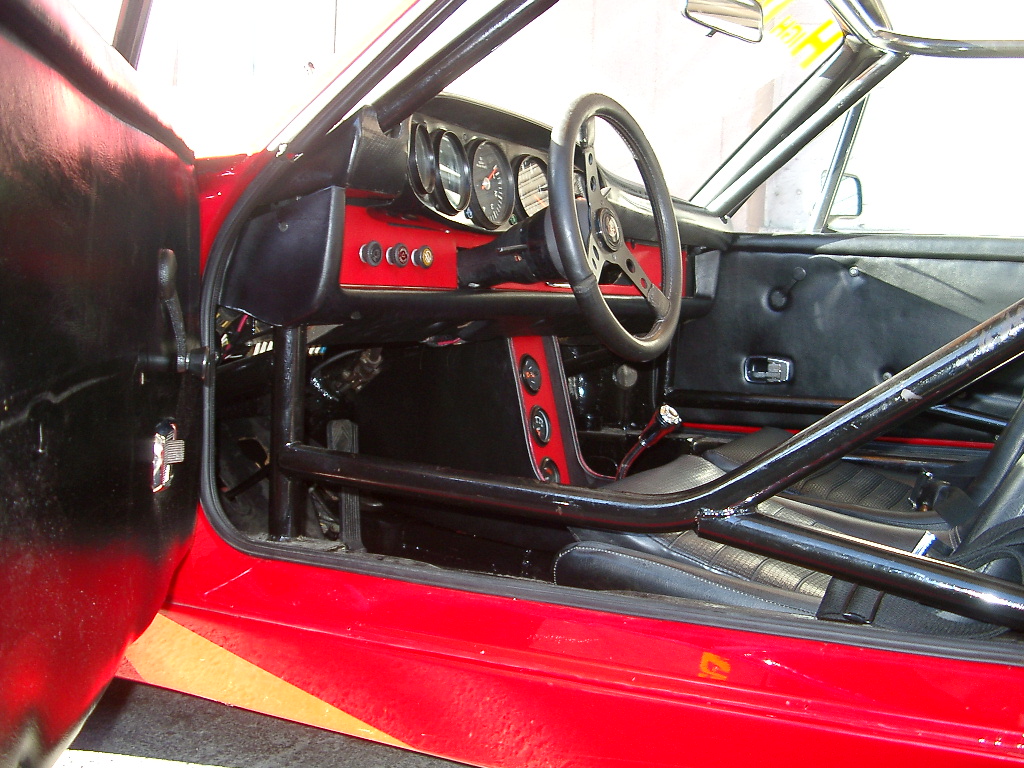 |
|
|
|
| tygaboy |
Nov 12 2025, 10:44 AM
Post
#1499
|
|
914 Guru Group: Members Posts: 5,835 Joined: 6-October 15 From: Petaluma, CA Member No.: 19,241 Region Association: Northern California |
@SirAndy - Yours is certainly higher but I think I'm OK. It's a bit deceiving when the dash pad isn't installed. Here's the LS car with and without the pad.
Attached thumbnail(s) 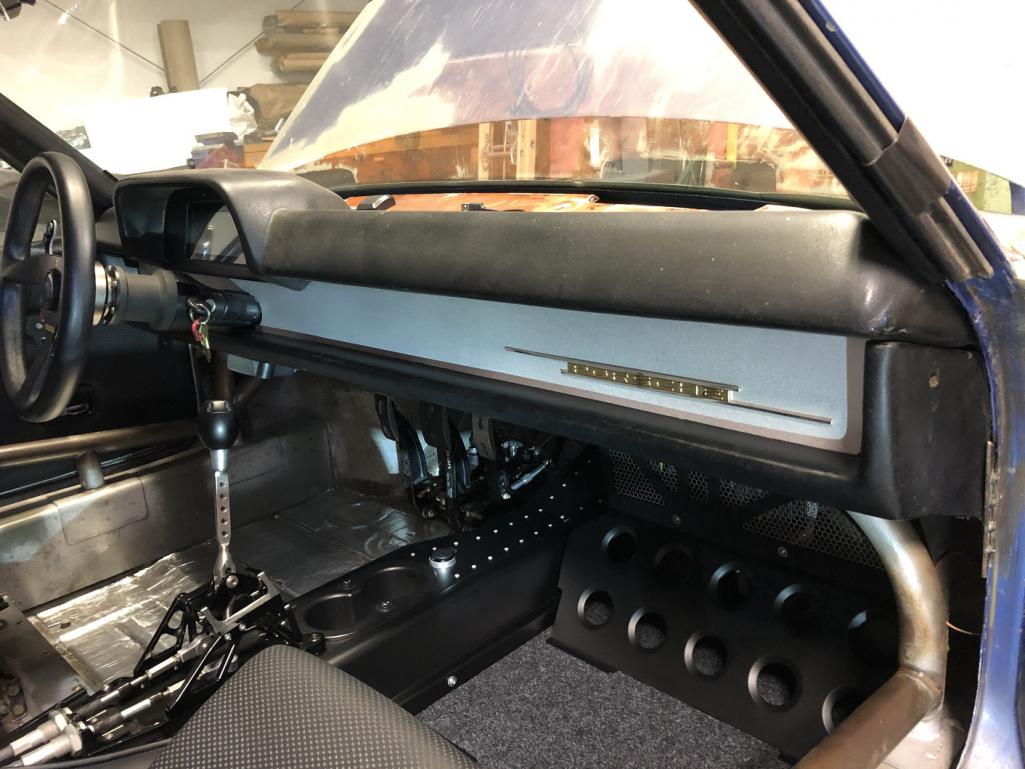 Attached image(s) 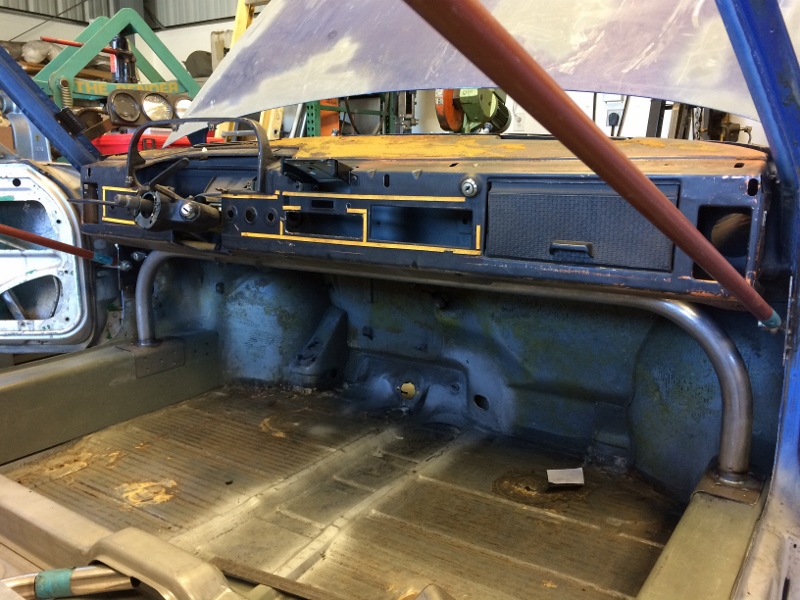
|
|
|
|
| tygaboy |
Nov 12 2025, 10:49 AM
Post
#1500
|
|
914 Guru Group: Members Posts: 5,835 Joined: 6-October 15 From: Petaluma, CA Member No.: 19,241 Region Association: Northern California |
I forgot to mention: I have determined I need to keep the vertical of the hoop behind the door opening to allow for ease of entry. The LS car isn't too bad but I want to lower where the door bar meets the front hoop by about 1.5".
It should make sense once I start fitting the door bar. |
|
|
|
|
13 User(s) are reading this topic (4 Guests and 0 Anonymous Users)
9 Members: Retroracer, mepstein, yellowporky, Jack Standz, Chris H., tygaboy, lalee914, markhoward, TC 914-8

|
Lo-Fi Version | Time is now: 3rd July 2026 - 09:28 AM |
Invision Power Board
v9.1.4 © 2026 IPS, Inc.