|
|
|
Porsche, and the Porsche crest are registered trademarks of Dr. Ing. h.c. F. Porsche AG.
This site is not affiliated with Porsche in any way. Its only purpose is to provide an online forum for car enthusiasts. All other trademarks are property of their respective owners. |
|
|

  |

| seanpaulmc |
 Aug 22 2022, 03:42 PM Aug 22 2022, 03:42 PM
Post
#1
|
|
Member  Group: Members Posts: 458 Joined: 6-December 16 From: Orlando, FL Member No.: 20,649 Region Association: South East States |
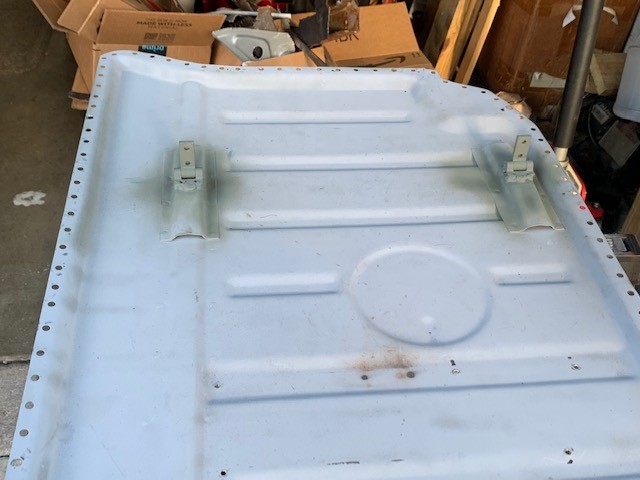
My seat rails are pretty fugly. They are solid and operate flawlessly. Bushings in good shape with no cracking observable. The paint, however, is the opposite of good. I'd like to get these cleaned up repainted or powder coated.
My concern and caution is that if I take the spring's retaining pin out then I won't be able to get it reassembled. Can anyone share a method to R&R that retaining pin and spring, hopefully not needed a shop press?  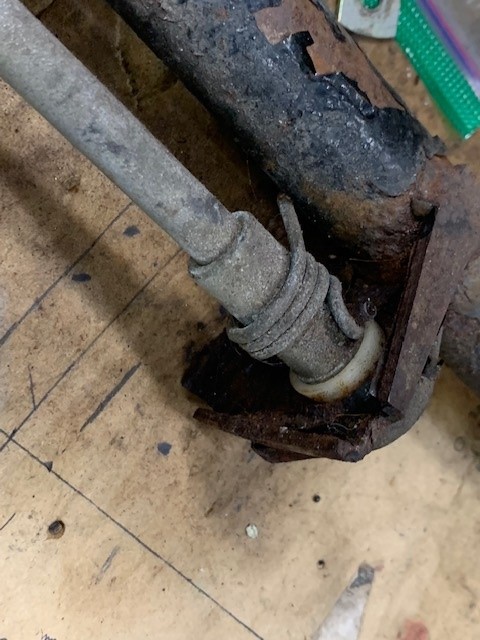 Thank you, Sean |
   |

 
|
| nathanxnathan |
Aug 22 2022, 08:06 PM
Post
#2
|
|
Member Group: Members Posts: 294 Joined: 16-February 18 From: Laguna Beach, CA Member No.: 21,899 Region Association: Southern California |
I took mine off thinking I will find a way to put this back on. I tried and tried, but after t popped off like 10x I gave up and I have the end of a punch that I managed to pry the spring into position and get it through the hole then cut off.
 I think I saw someone did it with a pair of needle nosed pliers? I'd also like to know if there's some trick to this. |
|
|
|
| Mikey914 |
Aug 22 2022, 08:22 PM
Post
#3
|
|
The rubber man Group: Members Posts: 12,782 Joined: 27-December 04 From: Hillsboro, OR Member No.: 3,348 Region Association: None |
We make a rebuild kit with tool to install
https://914rubber.com/seat-adjuster-rebuild-kit-1 You can drive out with a punch. I’ll check to see where we are on these. Attached thumbnail(s) 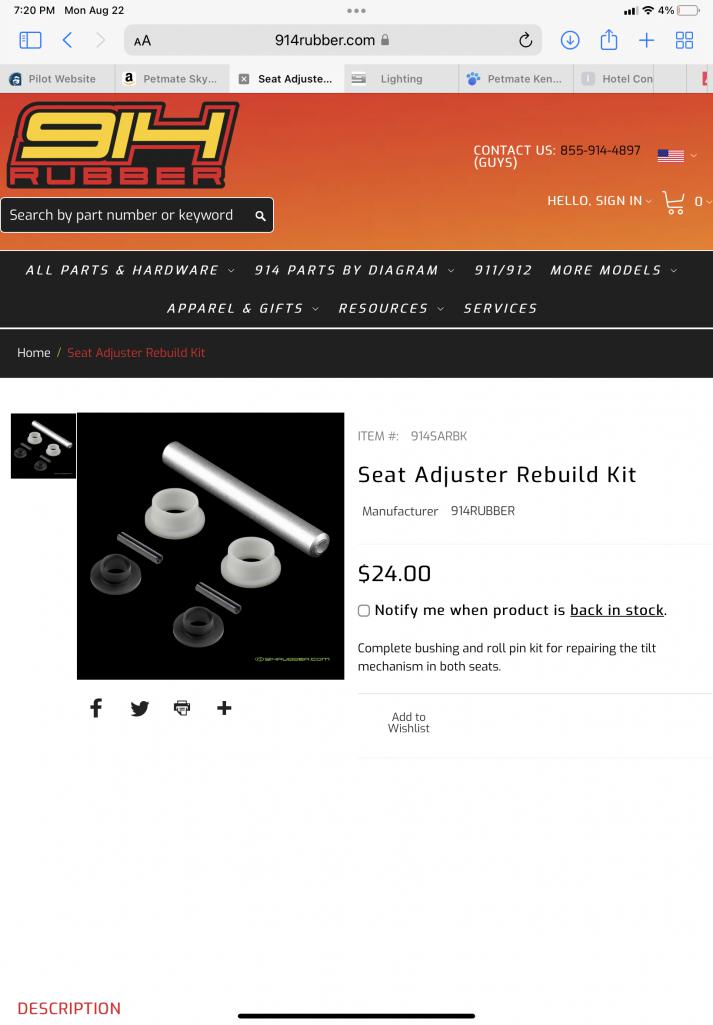
|
|
|
|
| bdstone914 |
Aug 22 2022, 08:39 PM
Post
#4
|
|
bdstone914 Group: Members Posts: 5,342 Joined: 8-November 03 From: Riverside CA Member No.: 1,319 |
@seanpaulmc
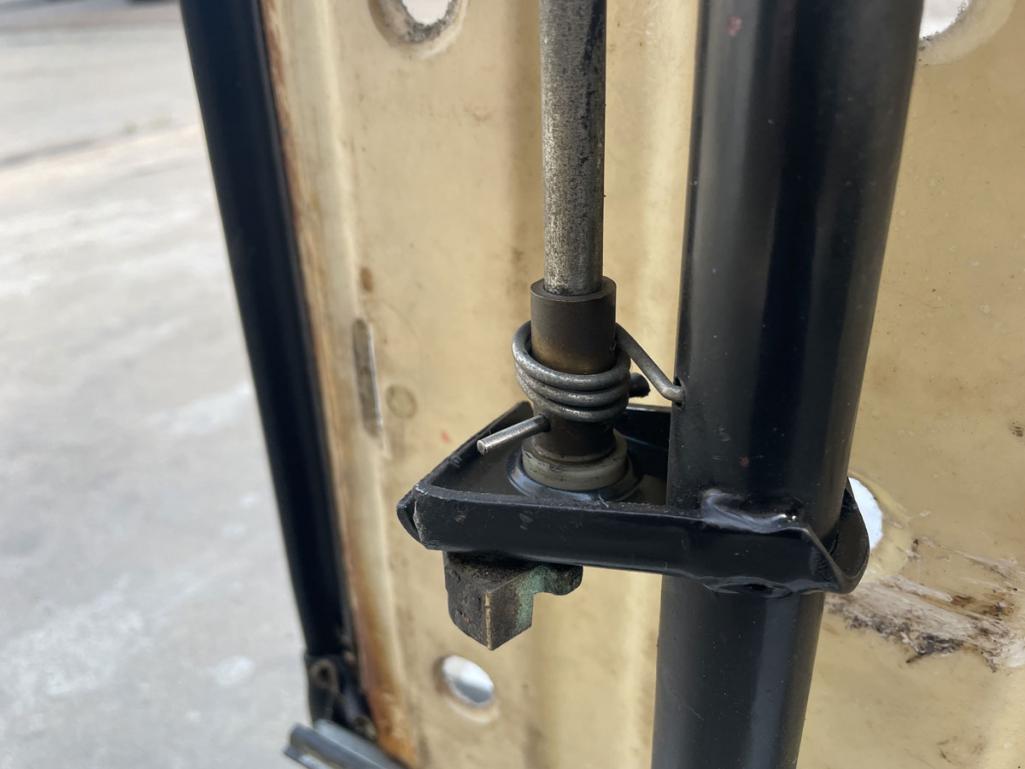
Get a metric roll pin punch to remove and install the roll pin I use a small punch 2mm or 1/16" to pry the spring over the installed roll pin. Sometimes need a flat blade screwdriver to snap the loop down on the pin. The pin can not protrude too far through or it does not work. I have to do another one soon and will snap a few pictures |
|
|
|
| bbrock |
Aug 22 2022, 08:51 PM
Post
#5
|
|
914 Guru Group: Members Posts: 5,269 Joined: 17-February 17 From: Montana Member No.: 20,845 Region Association: Rocky Mountains |
And be careful. There are two things on these cars that are possessed by the devil and feed their blood lust with your digits. One is the well-known rear trunk torsion bars. The other is these roll pins. Don't let them bite you.
|
|
|
|
| iankarr |
Aug 22 2022, 10:01 PM
Post
#6
|
|
The wrencher formerly known as Cuddy_K Group: Members Posts: 2,603 Joined: 22-May 15 From: Heber City, UT Member No.: 18,749 Region Association: Intermountain Region |
+! for 914rubber's rebuild kit. I used it on my bumblebee and shot a video...just need to edit it. One note...I ended up using the original roll pin since it was still snug and required less force. So don't let it fly off and damage anything.
|
|
|
|
| seanpaulmc |
Aug 23 2022, 06:41 AM
Post
#7
|
|
Member Group: Members Posts: 458 Joined: 6-December 16 From: Orlando, FL Member No.: 20,649 Region Association: South East States |
QUOTE(bbrock @ Aug 22 2022, 10:51 PM)  And be careful. There are two things on these cars that are possessed by the devil and feed their blood lust with your digits. One is the well-known rear trunk torsion bars. The other is these roll pins. Don't let them bite you. So far I've been hesitant (afraid) to tackle those trunk torsion bars. Every time I use that broom handle I feel like they are mocking me. I've read the threads and the ER reports. With so much else to do still I'm in no hurry. |
|
|
|
| Olympic 914 |
Aug 23 2022, 06:59 AM
Post
#8
|
|
Group: Members Posts: 1,789 Joined: 7-July 11 From: Pittsburgh PA Member No.: 13,287 Region Association: North East States |
If you look at my build thread, post #29.
I used a turnbuckle to pull the spring and hold it while driving the pin in. 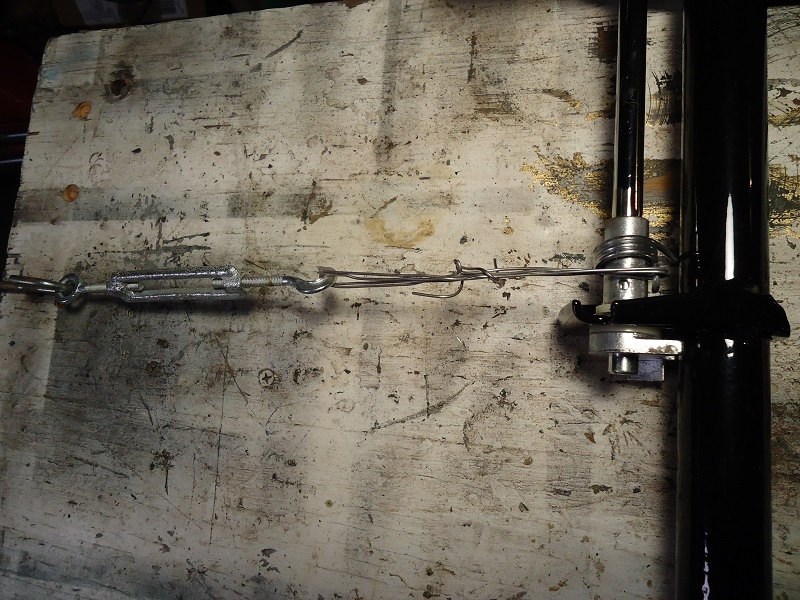 |
|
|
|
| bbrock |
Aug 23 2022, 08:47 AM
Post
#9
|
|
914 Guru Group: Members Posts: 5,269 Joined: 17-February 17 From: Montana Member No.: 20,845 Region Association: Rocky Mountains |
QUOTE(seanpaulmc @ Aug 23 2022, 06:41 AM) QUOTE(bbrock @ Aug 22 2022, 10:51 PM) And be careful. There are two things on these cars that are possessed by the devil and feed their blood lust with your digits. One is the well-known rear trunk torsion bars. The other is these roll pins. Don't let them bite you. So far I've been hesitant (afraid) to tackle those trunk torsion bars. Every time I use that broom handle I feel like they are mocking me. I've read the threads and the ER reports. With so much else to do still I'm in no hurry. McMark's torsion bar removal tool makes the dreaded trunk spring job safe and easy. You can buy them at 914R now https://914rubber.com/rear-trunk-spring-pre...-relieving-tool To be honest, I didn't have much luck with 914R seat roll pin install tool but could have been operator error. Like Ian, I reused the original roll pins as I could not drive in the replacements that came with the kit. |
|
|
|
| nathanxnathan |
Aug 23 2022, 08:58 AM
Post
#10
|
|
Member Group: Members Posts: 294 Joined: 16-February 18 From: Laguna Beach, CA Member No.: 21,899 Region Association: Southern California |
I’m going to have to give the seat roll pin another go.. gotta find it now (IMG:style_emoticons/default/huh.gif)
|
|
|
|
| seanpaulmc |
Aug 23 2022, 04:45 PM
Post
#11
|
|
Member Group: Members Posts: 458 Joined: 6-December 16 From: Orlando, FL Member No.: 20,649 Region Association: South East States |
QUOTE(Olympic 914 @ Aug 23 2022, 08:59 AM) If you look at my build thread, post #29. I used a turnbuckle to pull the spring and hold it while driving the pin in. Clever with that turnbuckle. Like that touch of chrome. (IMG:style_emoticons/default/smilie_pokal.gif) It’s good to have friends like that. Nice work. And, nice build! Thanks for sharing this tip. |
|
|
|
| Mikey914 |
Aug 23 2022, 06:39 PM
Post
#12
|
|
The rubber man Group: Members Posts: 12,782 Joined: 27-December 04 From: Hillsboro, OR Member No.: 3,348 Region Association: None |
I have 6 on the shelf. These should be shown back in stock Wednesday. If not in call the office and place the order.
|
|
|
|
| seanpaulmc |
Aug 24 2022, 05:52 PM
Post
#13
|
|
Member Group: Members Posts: 458 Joined: 6-December 16 From: Orlando, FL Member No.: 20,649 Region Association: South East States |
Love the turnbuckle idea so I bought this today and wanted to share the outcome...
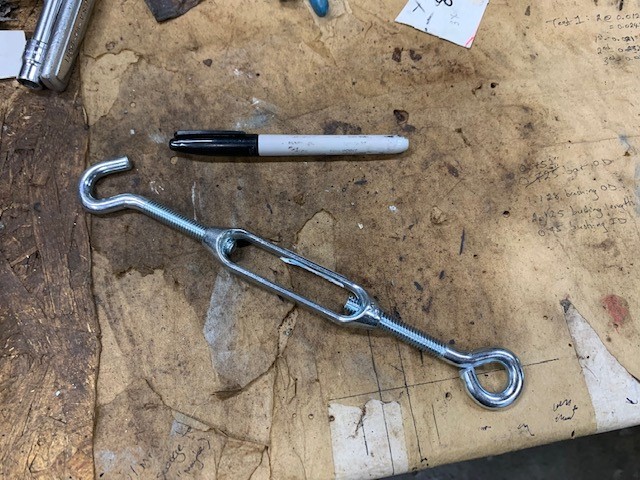 So there I was trying to work out how to get a wire around the end of the spring to pull it clear of the roll pin. (IMG:style_emoticons/default/headbang.gif) It is in rather tight quarters. 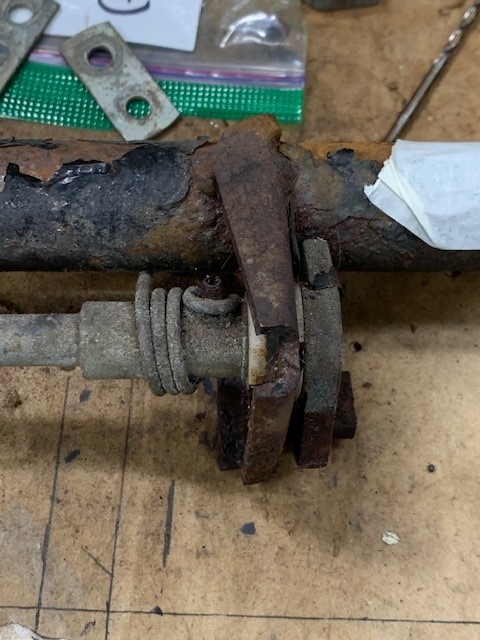 Then I had this idea. Now keep in mind these seat frames have been sitting on my table (purposefully in my way) since January of this year without inspiration.  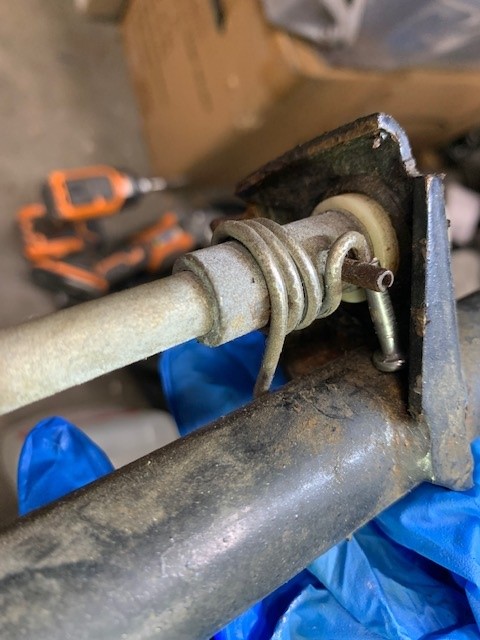 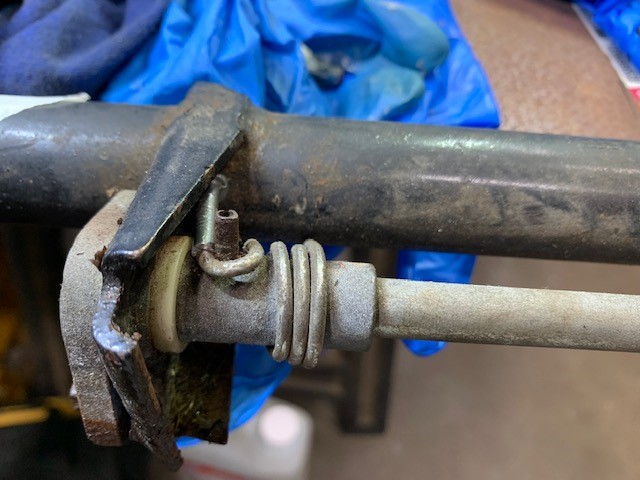 ...and voila! 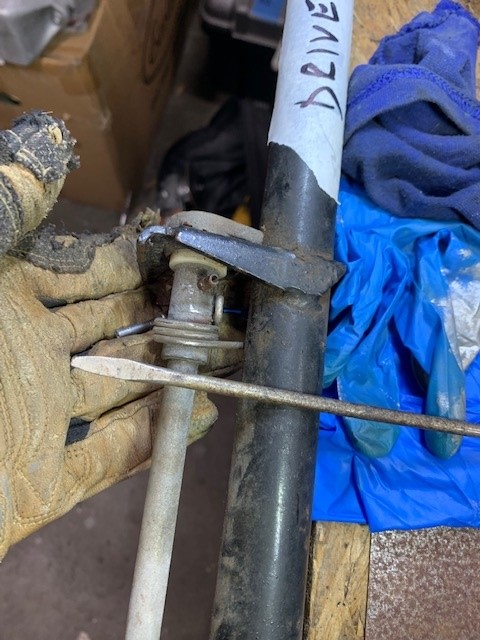 I am rather shocked at how well this worked with very, very little effort other than finding a suitable item to make a pin out of. As you can see, I took a nail of a larger diameter than the diameter of the wire in the spring, cut it down to ~20 mm (second try on length), and cut a small groove in the end of the nail so it wasn't a flat face. This way the end of the spring would catch in the notch I made in the pin. Once the spring was released the remaining disassembly was simple. I used a long thin screwdriver to fit between the spring hook and the roll pin and levered the end of the spring off of the roll pin. Here again I had to make a suitable size punch to fit the roll pin. In this case I just used a broken drill bit from the scrap pile. The roll pin drove out with little effort. Nothing like the difficulty I had with the pedal assembly. And you can see from the picture it is raining again. 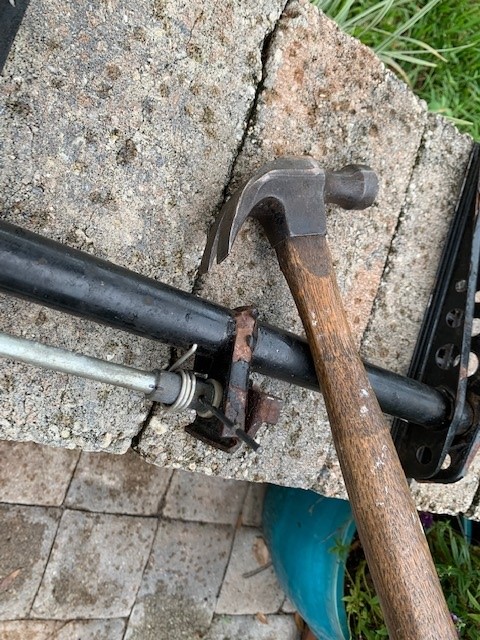 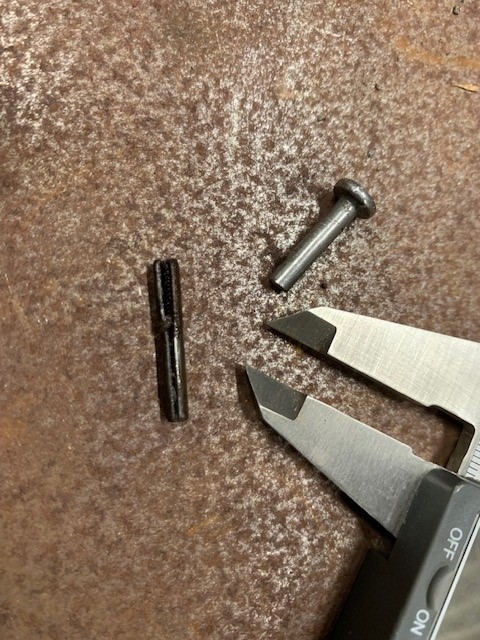 Here's everything disassembled. It was rather easy, simple, and safe. Most of my time was spent looking for and making tools. CAUTION: Always wear your eye protection and gloves are not a bad idea when handling springs or items that can go flying.  I have one more side to do but that will wait until I get the seat hinges fitted and welded to the new floor panel. Hopefully it will be easier and quicker to do this the second time since I don't have to make the tools again. And, I'm certain I'll use the turnbuckle to put it back together again. (IMG:style_emoticons/default/unsure.gif) Thanks to everyone that's been responding and providing the inspiration. Hopefully this addition helps someone else down the road. Cheers, Sean |
|
|
|
| bbrock |
Aug 24 2022, 06:25 PM
Post
#14
|
|
914 Guru Group: Members Posts: 5,269 Joined: 17-February 17 From: Montana Member No.: 20,845 Region Association: Rocky Mountains |
Nice work! (IMG:style_emoticons/default/first.gif)
|
|
|
|
| seanpaulmc |
Aug 26 2022, 07:27 AM
Post
#15
|
|
Member Group: Members Posts: 458 Joined: 6-December 16 From: Orlando, FL Member No.: 20,649 Region Association: South East States |
Seat hinges lined up on the new floor pan and installed. Now I can try the spring removal from the seat frame rail on other side and see if this process really is this simple or if I just got stupidly lucky the first time around.
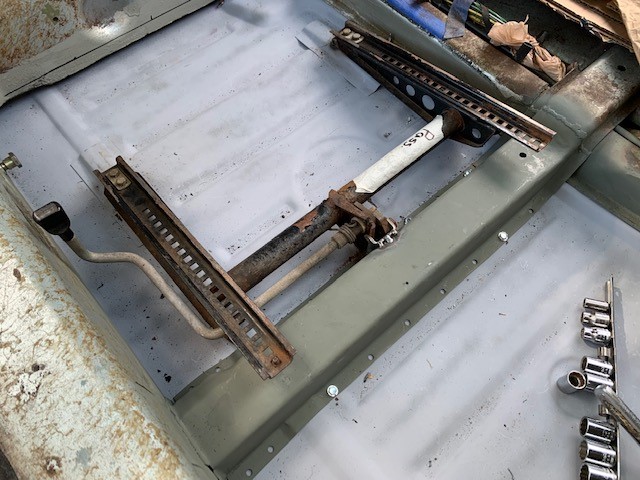  Here you can see the seat frame rail clamped to the corner of the table so that the lever arm can still articulate. 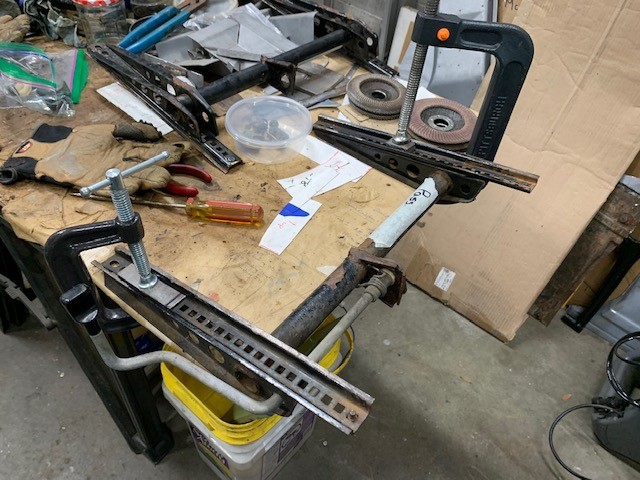 Push the lever Slide the pin in against the end of the spring (It gets wedged in there with nowhere to go) Release the lever Use screw driver to unhook spring from around the roll pin Use a punch to drive out the roll pin. Yes! It really is this simple, safe, and takes minutes to disassemble. 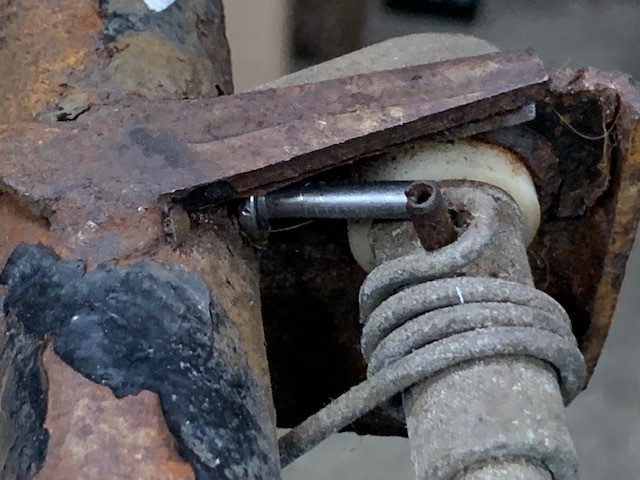 Good luck folks and thanks again for the feedback. Sean |
|
|
|
|
1 User(s) are reading this topic (1 Guests and 0 Anonymous Users)
0 Members:

|
Lo-Fi Version | Time is now: 31st July 2026 - 08:49 PM |
Invision Power Board
v9.1.4 © 2026 IPS, Inc.