|
|
|
Porsche, and the Porsche crest are registered trademarks of Dr. Ing. h.c. F. Porsche AG.
This site is not affiliated with Porsche in any way. Its only purpose is to provide an online forum for car enthusiasts. All other trademarks are property of their respective owners. |
|
|

  |

| East coaster |
 Nov 4 2022, 08:04 PM Nov 4 2022, 08:04 PM
Post
#1
|
|
Senior Member  Group: Members Posts: 1,650 Joined: 28-March 03 From: Brigantine, NJ Member No.: 487 Region Association: None |
I’ve been out of the 914 game for quite some time. The last 914 I built was back in 2006 and was quite a build. I’ve had about a dozen 914s over the years and my 2006 build was to be my ultimate 914 (for me at least). It was a GT flared 3.6 six conversion and was a great car. I sold it in 2015 and moved to other things. I’ve been getting the itch to build another teener for a while, but to go in a different direction. I’ve seen a couple Safari builds and that seemed interesting.
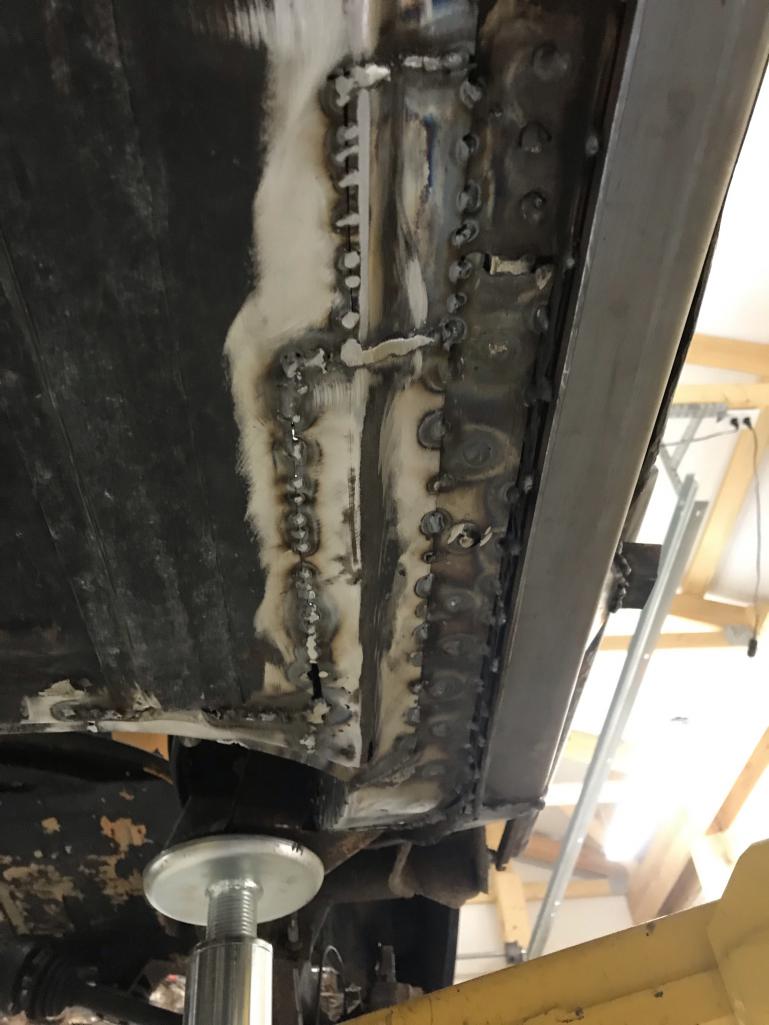
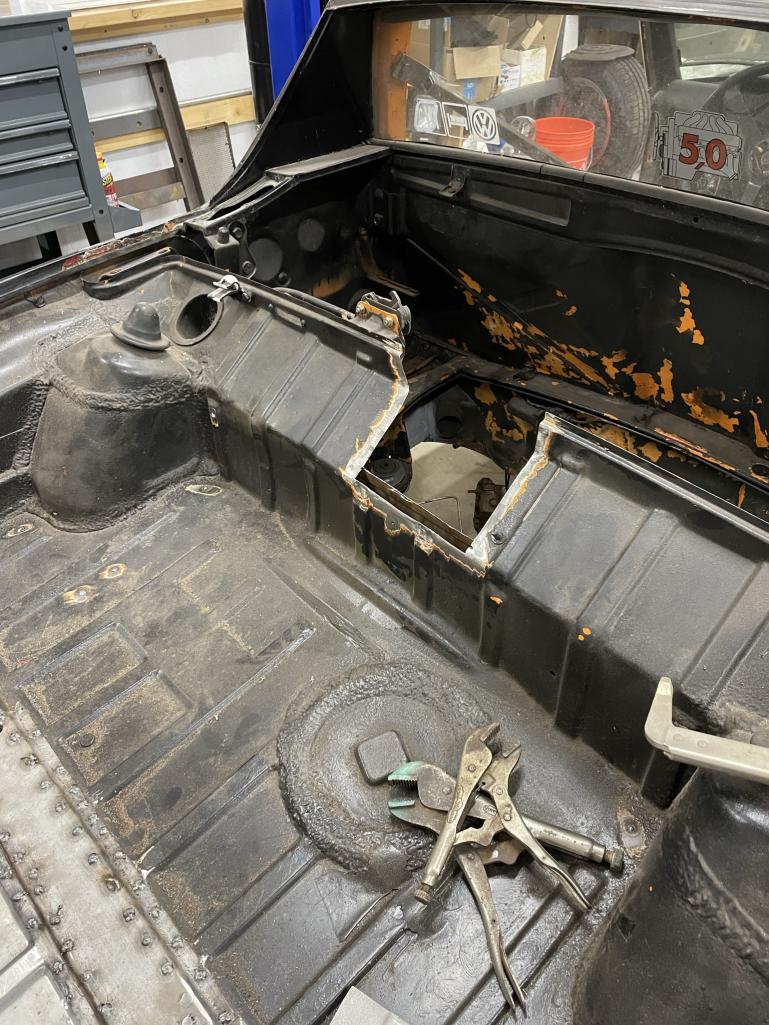
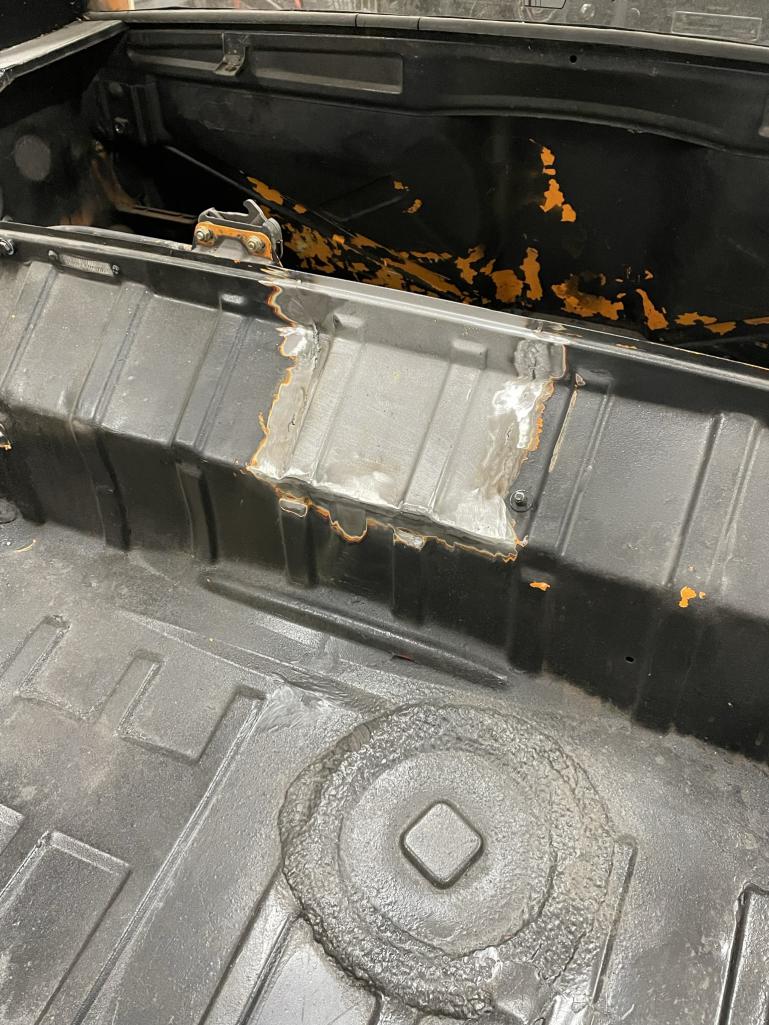
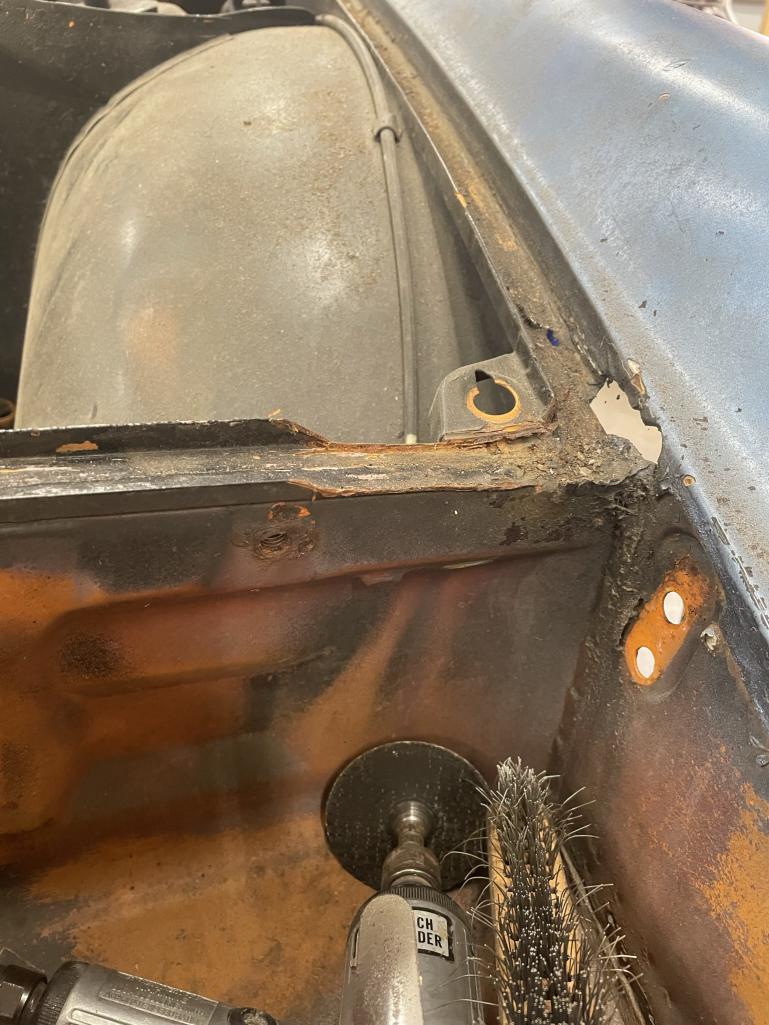
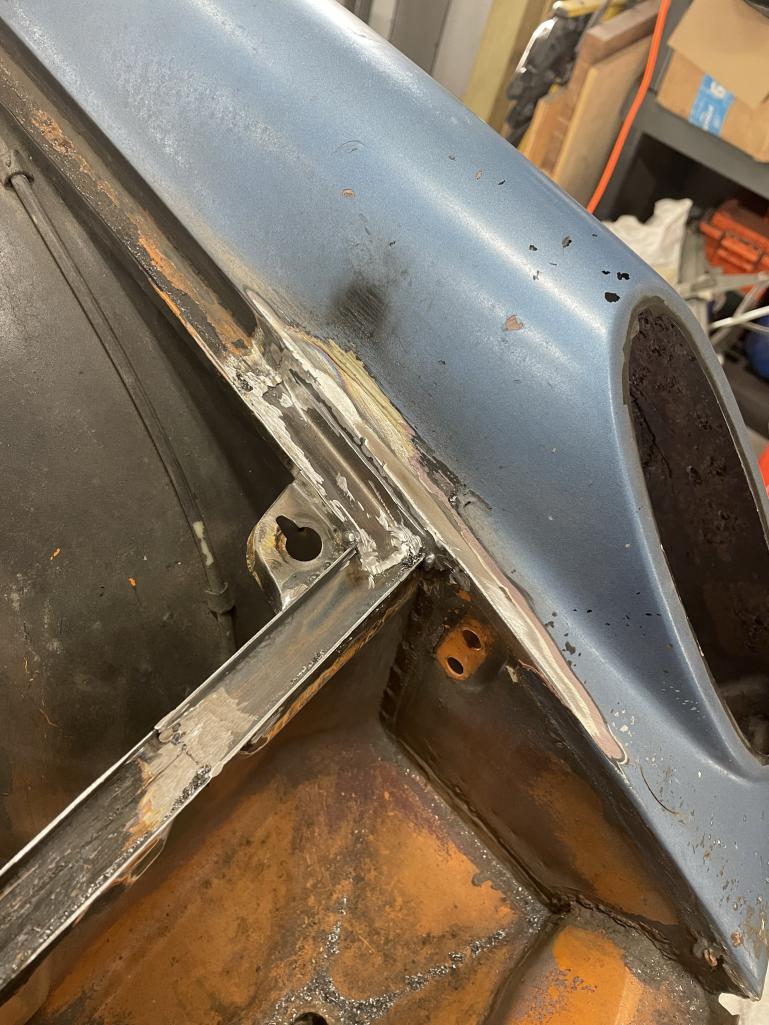
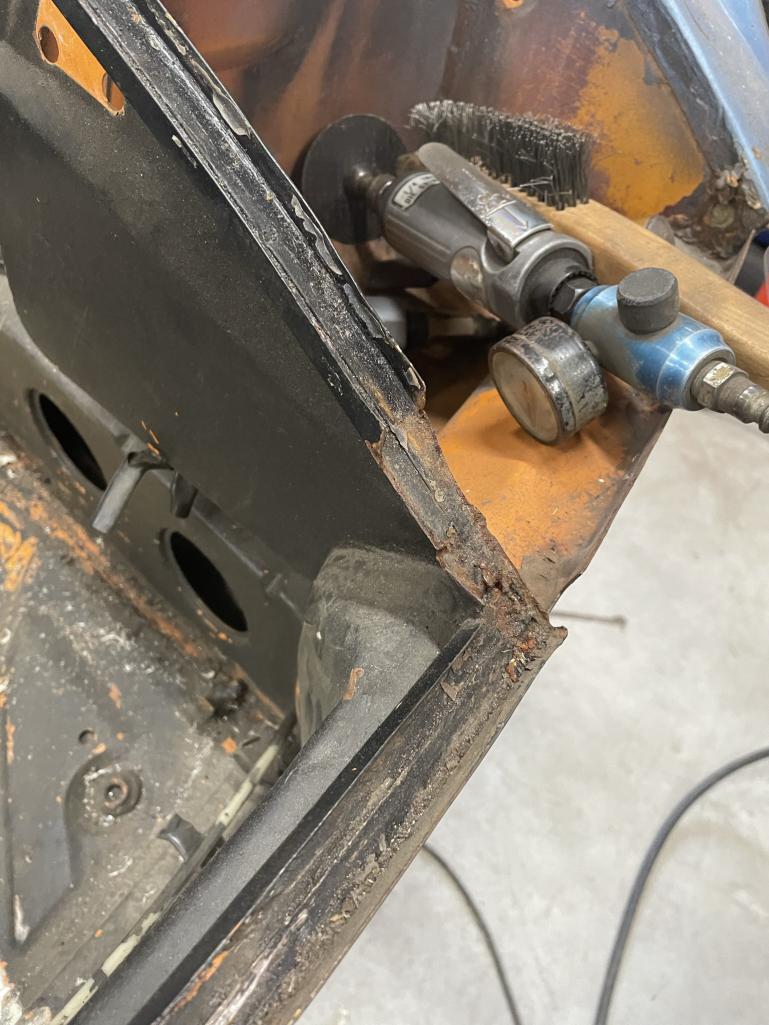
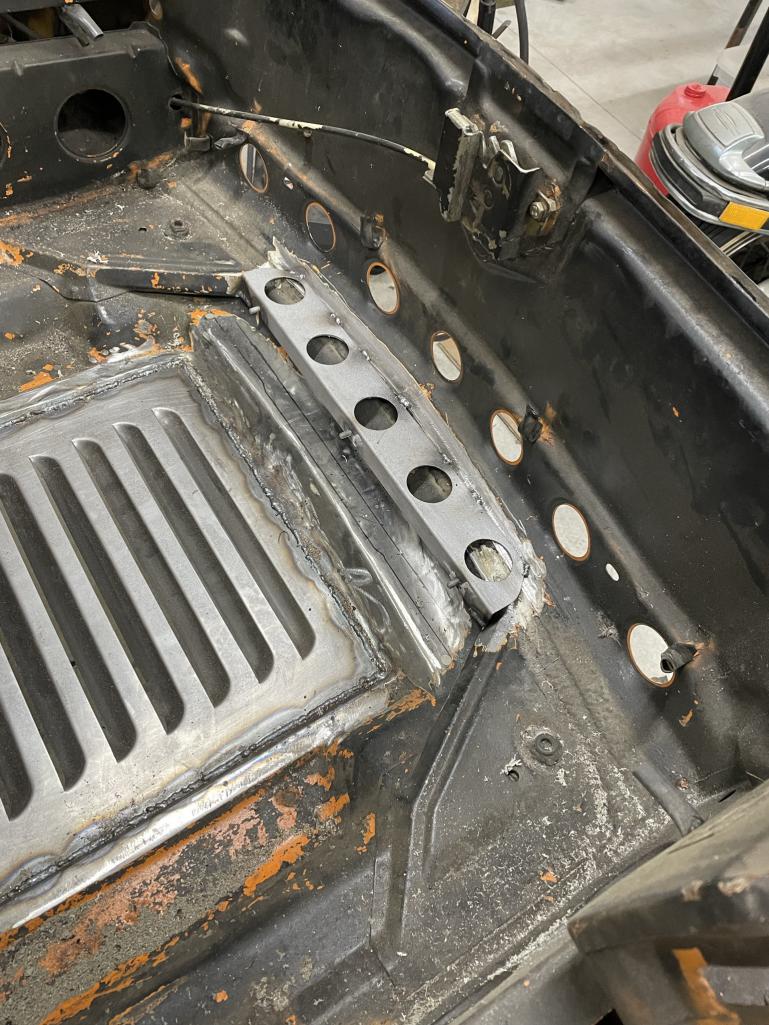
I picked up pretty well worn ‘72 914 for the base of my project. My plan is to build a budget conscious (it’s all relative) Subaru powered Safari mod. I plan to go with a normally aspirated 2.5 Subaru from a 1998 Forrester along with the Subaru tranny. I’ve been working on removing rust and getting the tub suitable for my plans. This will by no means be a concours resto type build, but should prove interesting. Here’s the base car being picked up for the project start 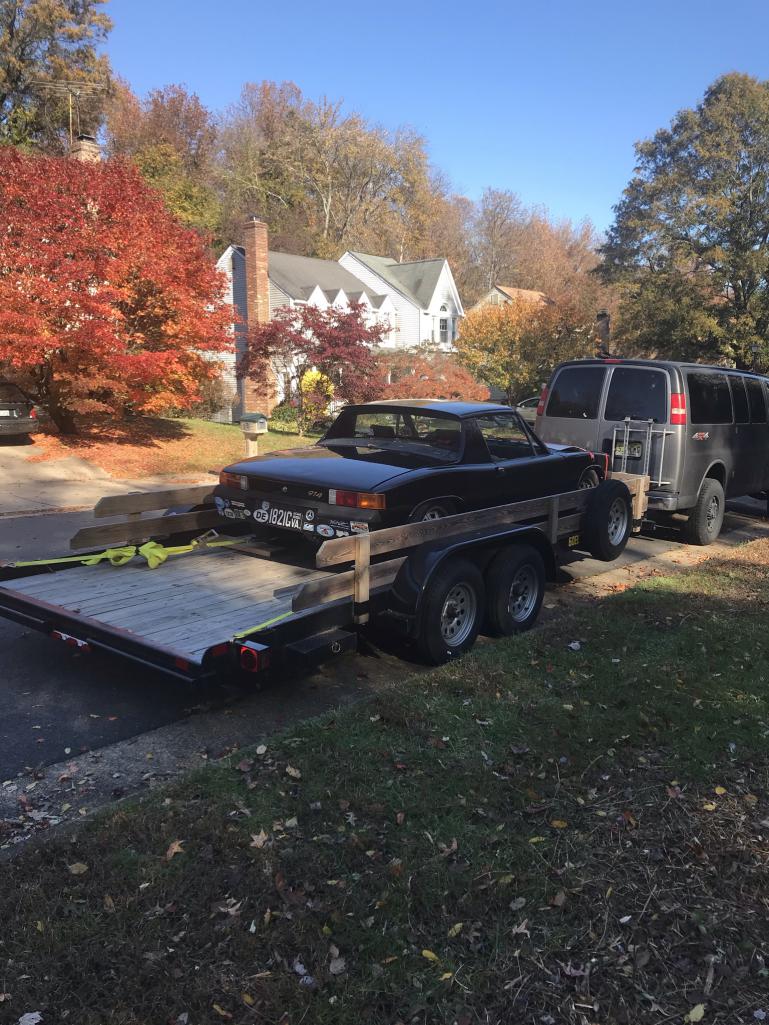 I stripped it down and sold the engine and tranny (it was a partially completed V8 conversion). Then started cutting out rusted areas a welding in new metal. Some Radom rust repair pics in no special order…. 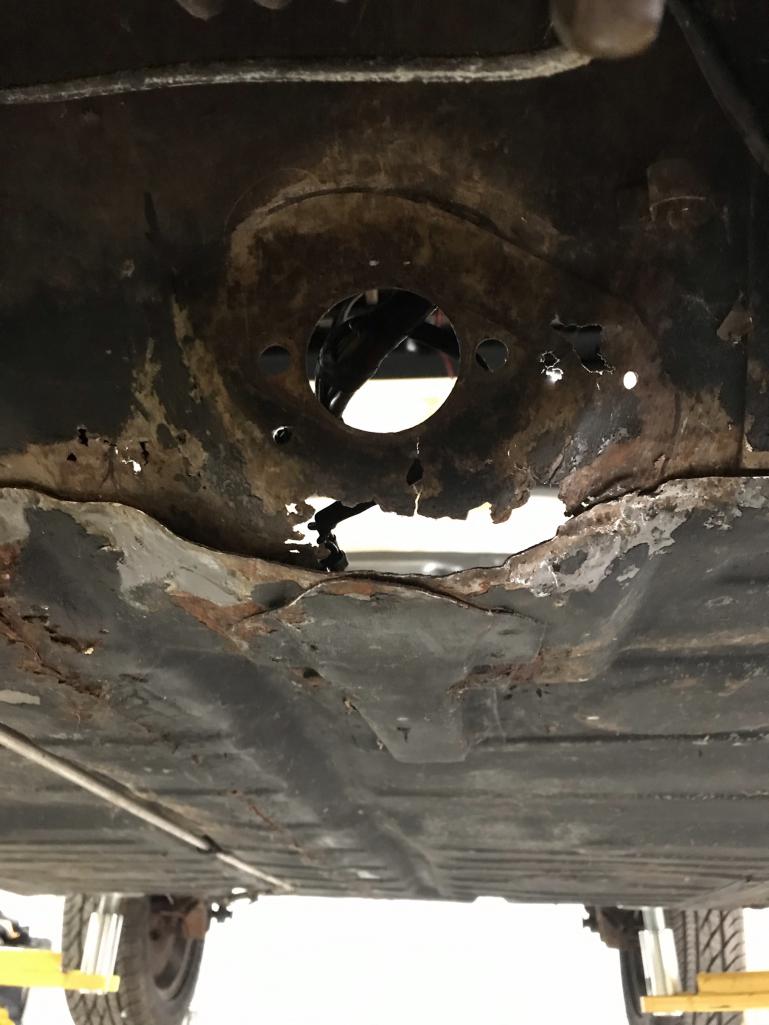 Attached thumbnail(s) 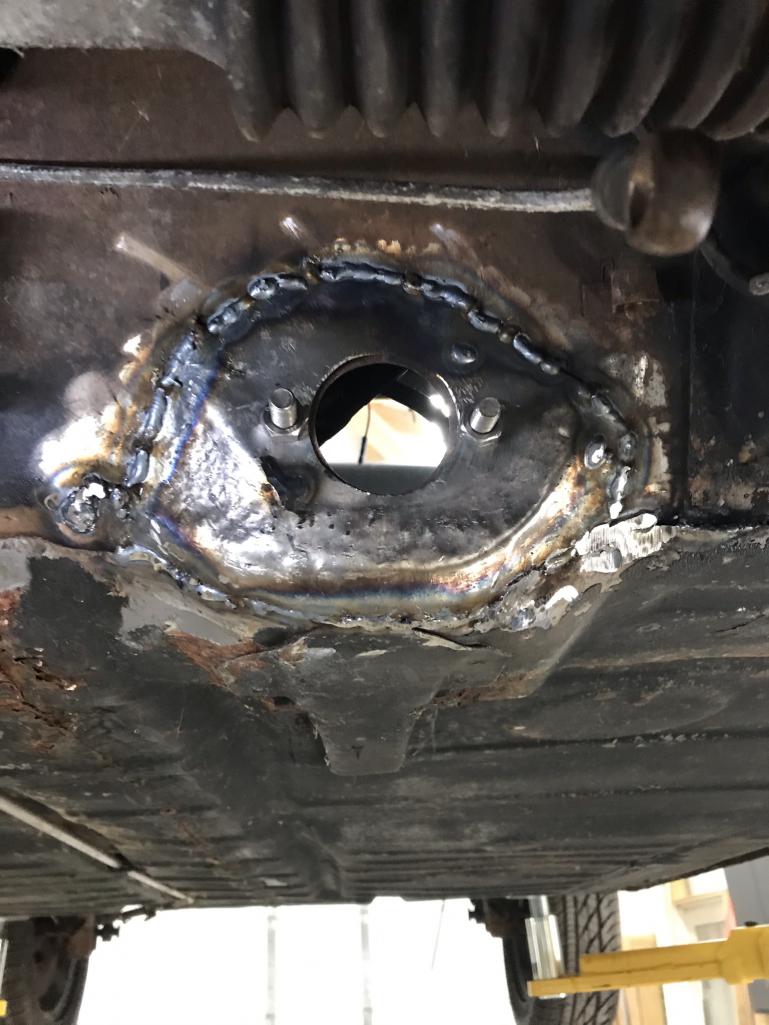
|
   |

 
|
| East coaster |
Nov 4 2022, 08:08 PM
Post
#2
|
|
Senior Member Group: Members Posts: 1,650 Joined: 28-March 03 From: Brigantine, NJ Member No.: 487 Region Association: None |
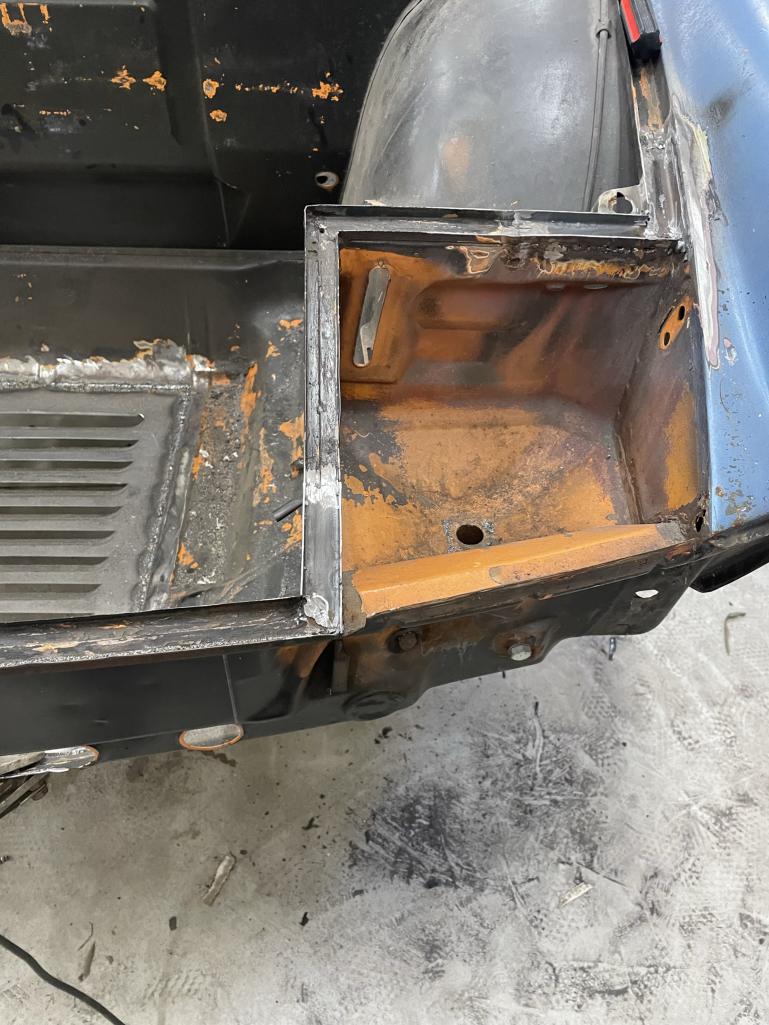
  [ [Hell hole attachmentid=856763] Attached thumbnail(s) 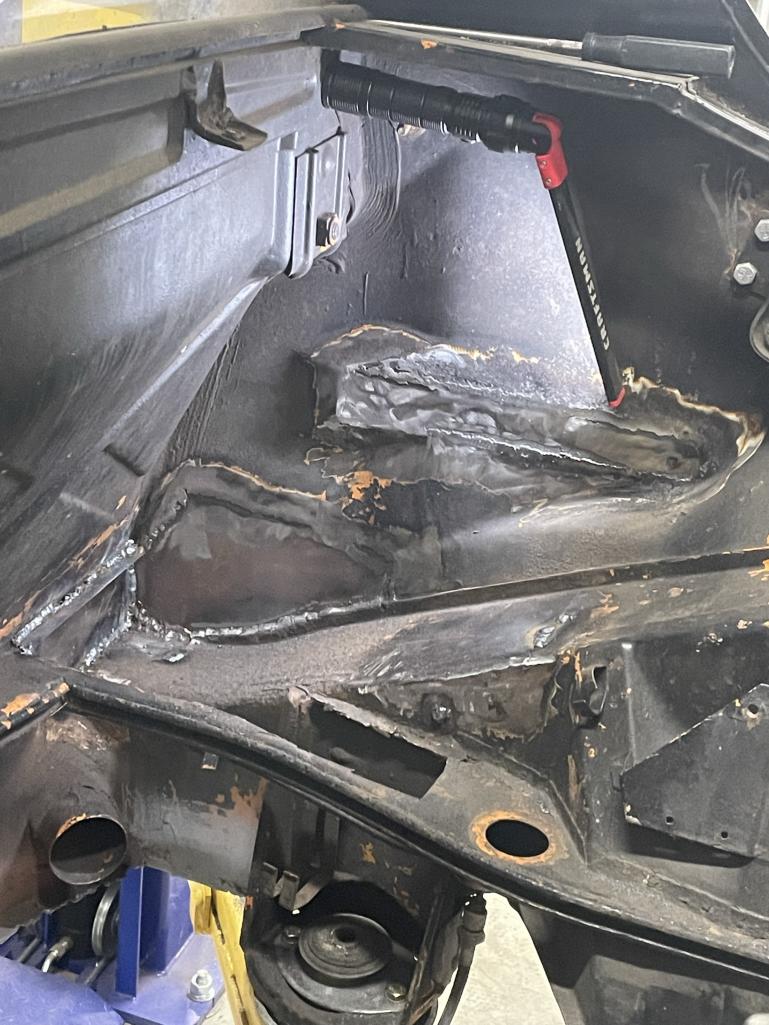
|
|
|
|
| East coaster |
Nov 4 2022, 08:11 PM
Post
#3
|
|
Senior Member Group: Members Posts: 1,650 Joined: 28-March 03 From: Brigantine, NJ Member No.: 487 Region Association: None |
Closed up the tell tale V8 mod
  |
|
|
|
| East coaster |
Nov 4 2022, 08:15 PM
Post
#4
|
|
Senior Member Group: Members Posts: 1,650 Joined: 28-March 03 From: Brigantine, NJ Member No.: 487 Region Association: None |
And moved on to some suspension fun……aka Safari lift
Raised the attach point on the rear trailing arms by 2” 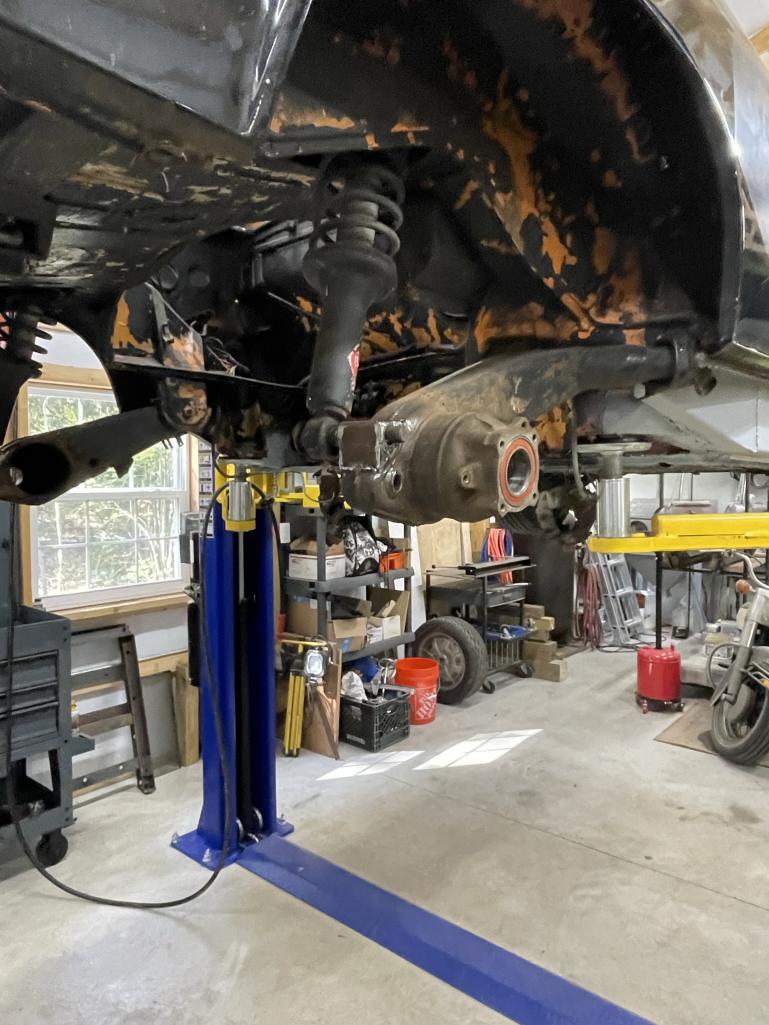 Then moved to fron struts and lowered the spindles to the max  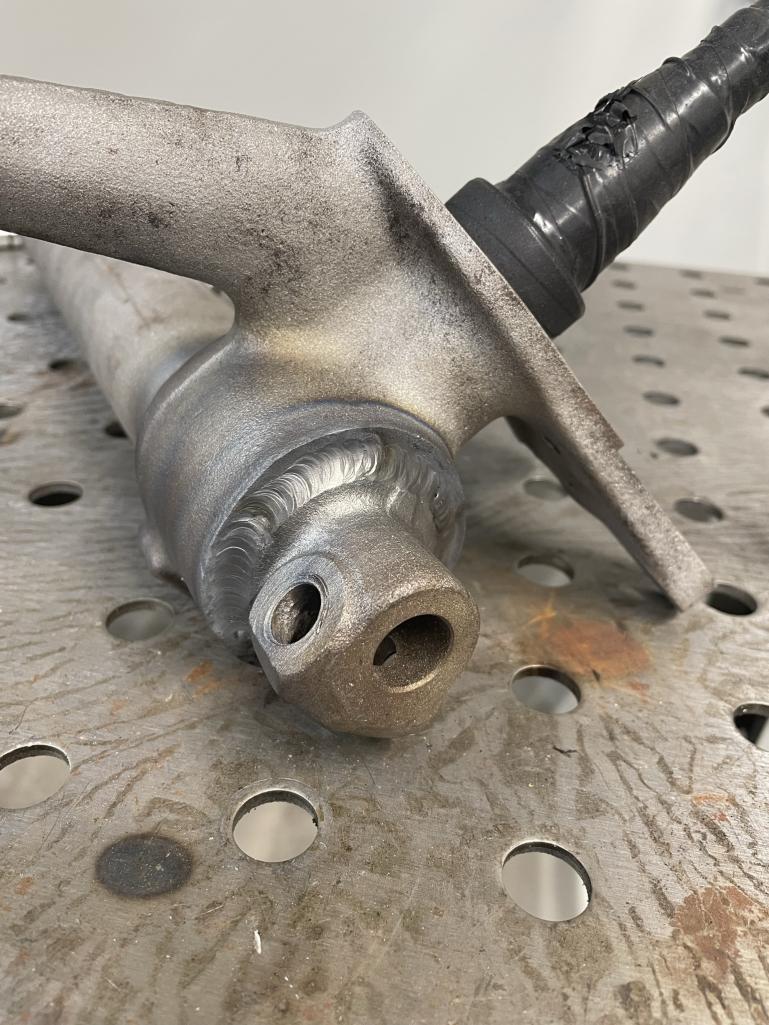 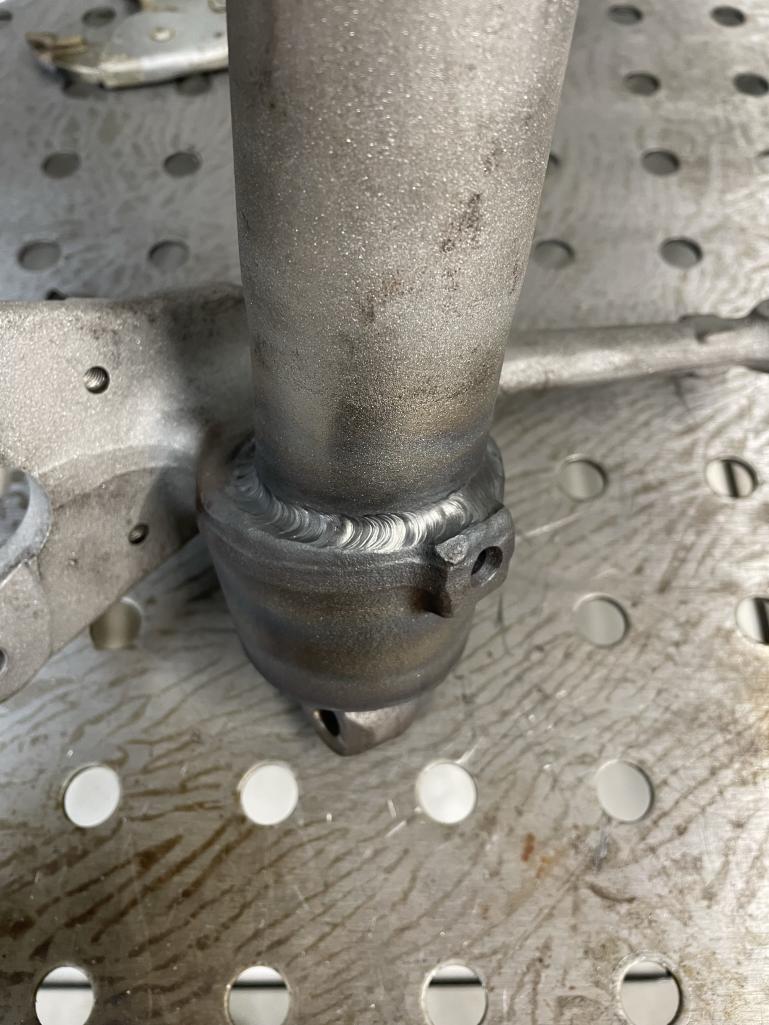 |
|
|
|
| East coaster |
Nov 4 2022, 08:18 PM
Post
#5
|
|
Senior Member Group: Members Posts: 1,650 Joined: 28-March 03 From: Brigantine, NJ Member No.: 487 Region Association: None |
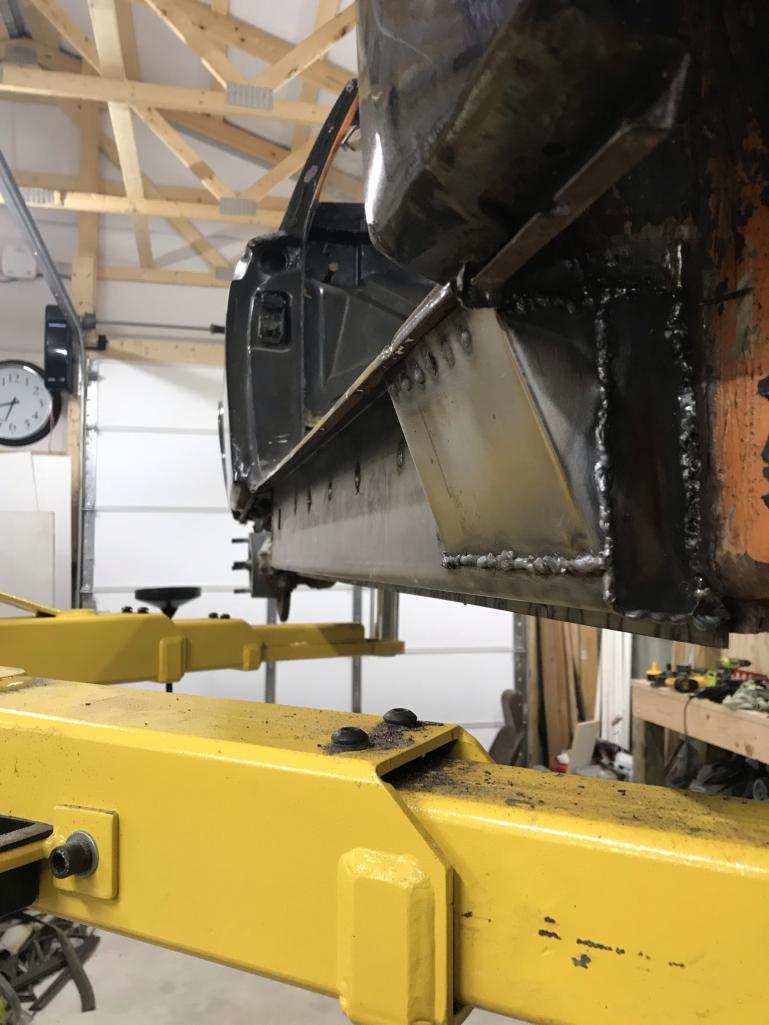
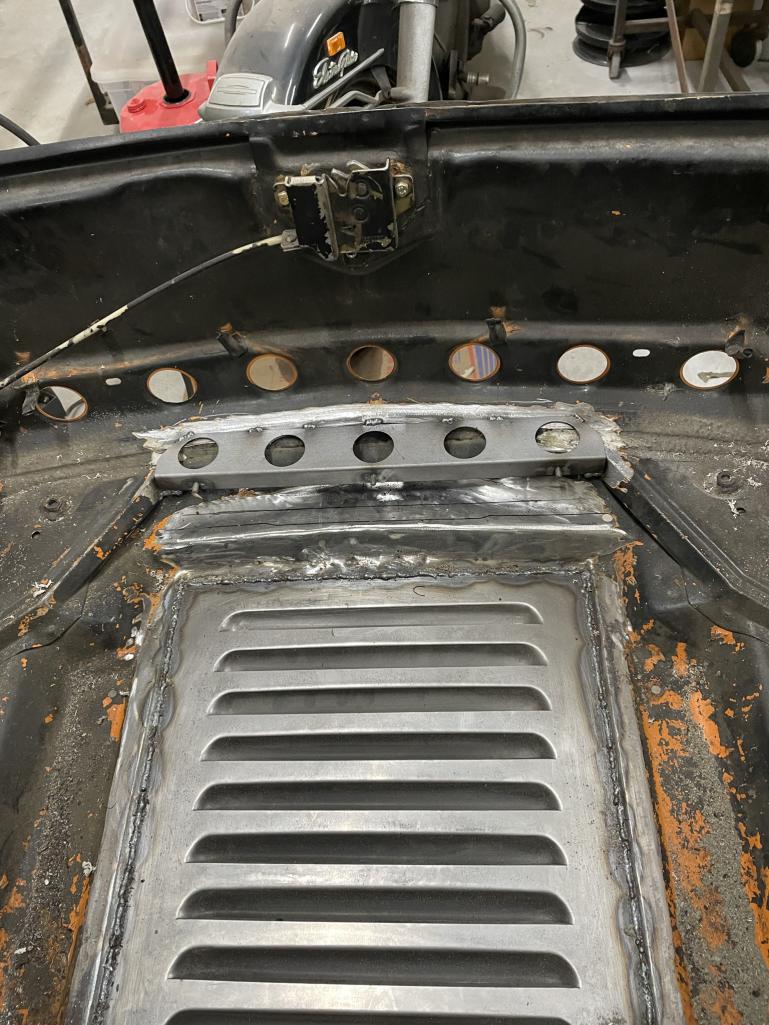
Working on the radiator install. I plan to vent out the bottom, but with the air ducted rearward. So I started by cutting a big hole….
 Then filled the big hole hole with a louvered panel from a VW Bus 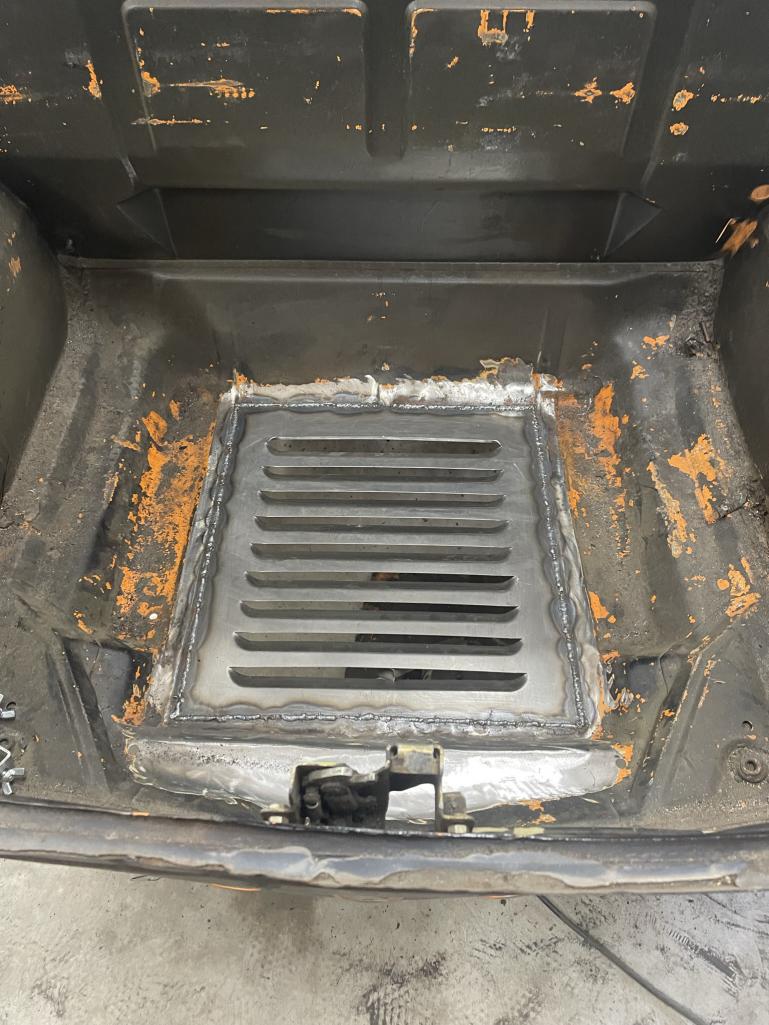 More pics to come…… |
|
|
|
| East coaster |
Nov 4 2022, 08:51 PM
Post
#6
|
|
Senior Member Group: Members Posts: 1,650 Joined: 28-March 03 From: Brigantine, NJ Member No.: 487 Region Association: None |
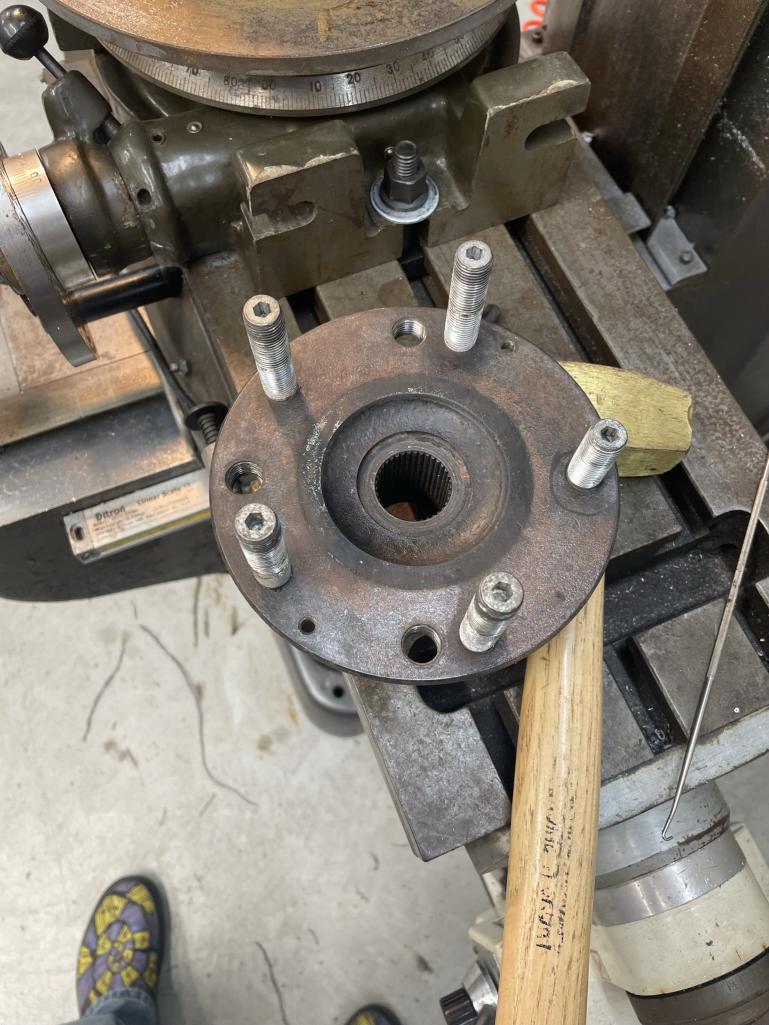
Machined rear hubs and rotors for 5 lug….
 Rebuilt the pedal cluster…. 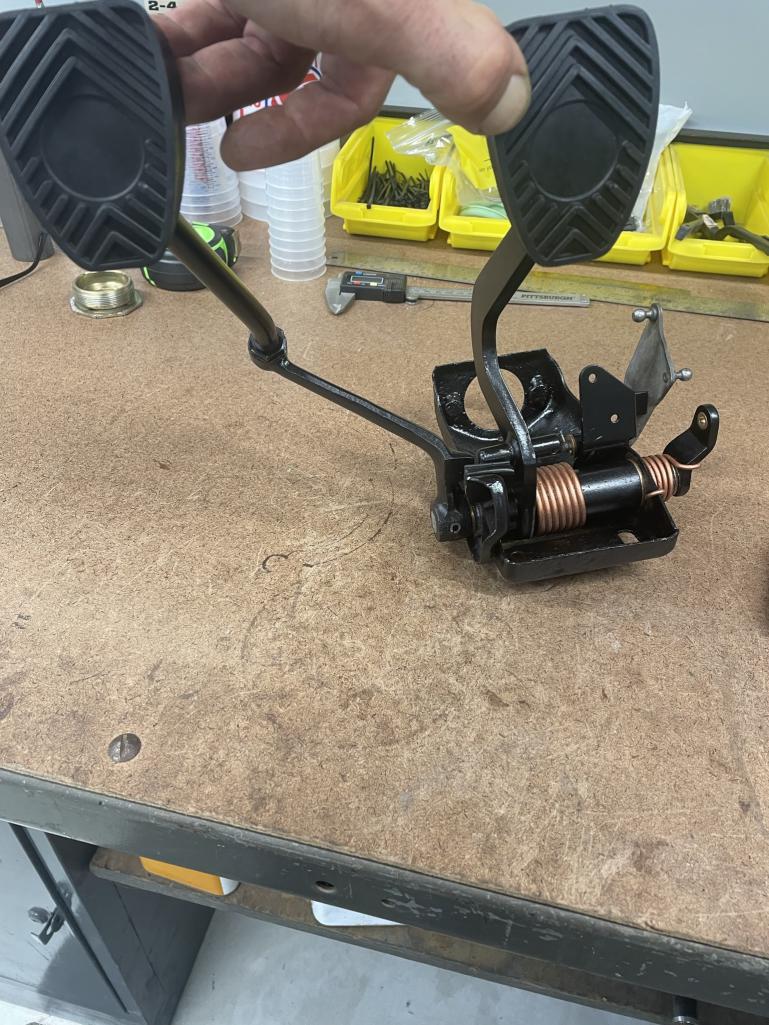 |
|
|
|
| Tjmrfe |
Nov 4 2022, 08:58 PM
Post
#7
|
|
NON IMPEDING RATIONE COGITATIONIS Group: Members Posts: 132 Joined: 10-April 15 From: Cornwall on Hudson, New York Member No.: 18,612 Region Association: North East States |
Looks great. Looking forward to following your journey…good luck.
|
|
|
|
| mb911 |
Nov 5 2022, 08:32 AM
Post
#8
|
|
914 Guru Group: Members Posts: 6,808 Joined: 2-January 09 From: Burlington wi Member No.: 9,892 Region Association: Upper MidWest |
Will you finishing the welds on the floor pan? Looks like a good start but also some finding and blending in your future.
|
|
|
|
| jhynesrockmtn |
Nov 5 2022, 09:11 AM
Post
#9
|
|
Member Group: Members Posts: 417 Joined: 13-June 16 From: spokane wa Member No.: 20,100 Region Association: Pacific Northwest |
I don't get the safari trend thing but your skills are impressive. Will be interested to see the project as it progresses.
|
|
|
|
| 914sgofast2 |
Nov 5 2022, 02:42 PM
Post
#10
|
|
Senior Member Group: Members Posts: 613 Joined: 10-May 13 From: El Dorado Hills, CA Member No.: 15,855 Region Association: None |
QUOTE(jhynesrockmtn @ Nov 5 2022, 08:11 AM)  I don't get the safari trend thing but your skills are impressive. Will be interested to see the project as it progresses. I think the Safari trend has arisen because paved roads are getting too clogged up, so the only place you can let it rip are on dirt roads and forest fire trails, at least here in California. |
 |
|
| 914e |
Nov 5 2022, 03:08 PM
Post
#11
|
|
Member Group: Members Posts: 496 Joined: 21-February 20 From: Arizona Member No.: 23,951 Region Association: Southwest Region |
QUOTE(jhynesrockmtn @ Nov 5 2022, 08:11 AM) I don't get the safari trend thing but your skills are impressive. Will be interested to see the project as it progresses. Trend? I have been watching Porsches race off road since the 70's. |
|
|
|
| East coaster |
Nov 6 2022, 06:21 AM
Post
#12
|
|
Senior Member Group: Members Posts: 1,650 Joined: 28-March 03 From: Brigantine, NJ Member No.: 487 Region Association: None |
QUOTE(mb911 @ Nov 5 2022, 07:32 AM) Will you finishing the welds on the floor pan? Looks like a good start but also some finding and blending in your future. Yes, these were just some random shots. The welds have been completed. |
|
|
|
| infraredcalvin |
Nov 6 2022, 07:33 AM
Post
#13
|
|
Distracted Member Group: Members Posts: 1,506 Joined: 25-August 08 From: Ladera Ranch, CA Member No.: 9,463 Region Association: Southern California |
Do you really want a hole on the bottom of the car when off roading? I’d think you would want to seal up the bottom tight to keep out dust, dirt, water, mud, snow…… just a thought…
BTW, love what you’re doing, I look forward to seeing your updates! |
|
|
|
| waltonsm |
Nov 6 2022, 05:10 PM
Post
#14
|
|
Member Group: Members Posts: 91 Joined: 27-June 14 From: United States Member No.: 17,561 Region Association: Pacific Northwest |
QUOTE(East coaster @ Nov 4 2022, 07:15 PM) And moved on to some suspension fun……aka Safari lift Raised the attach point on the rear trailing arms by 2” Then moved to fron struts and lowered the spindles to the max Are you planning to cut and weld the trailing arm to add camber back? You could lower the inner suspension console/mounting point too. I considered making a reversible insert in the inner ear for my build. I still might do it if I find I don’t have the adjust range I need. |
|
|
|
| East coaster |
Nov 7 2022, 06:42 AM
Post
#15
|
|
Senior Member Group: Members Posts: 1,650 Joined: 28-March 03 From: Brigantine, NJ Member No.: 487 Region Association: None |
I guess I’ll see where I end up with camber. I saw the mod you did on your arms but didn’t know if it was to achieve extra camber or to be able to get to stock specs.
|
|
|
|
| East coaster |
Nov 8 2022, 07:57 PM
Post
#16
|
|
Senior Member Group: Members Posts: 1,650 Joined: 28-March 03 From: Brigantine, NJ Member No.: 487 Region Association: None |
It was hood seal channel repair day. Bent some 18 gauge channel and went to work. Some before and afters……both sides were pretty much the same.
    |
|
|
|
| bkrantz |
Nov 8 2022, 08:26 PM
Post
#17
|
|
914 Guru Group: Members Posts: 7,729 Joined: 3-August 19 From: SW Colorado Member No.: 23,343 Region Association: Rocky Mountains |
Nice work! How high will the floor pan sit above the ground?
|
|
|
|
| r_towle |
Nov 9 2022, 08:06 AM
Post
#18
|
|
Custom Member Group: Members Posts: 24,560 Joined: 9-January 03 From: Taxachusetts Member No.: 124 Region Association: North East States |
Good to see this one saved…it needed your skills!
|
|
|
|
| East coaster |
Nov 12 2022, 08:35 PM
Post
#19
|
|
Senior Member Group: Members Posts: 1,650 Joined: 28-March 03 From: Brigantine, NJ Member No.: 487 Region Association: None |
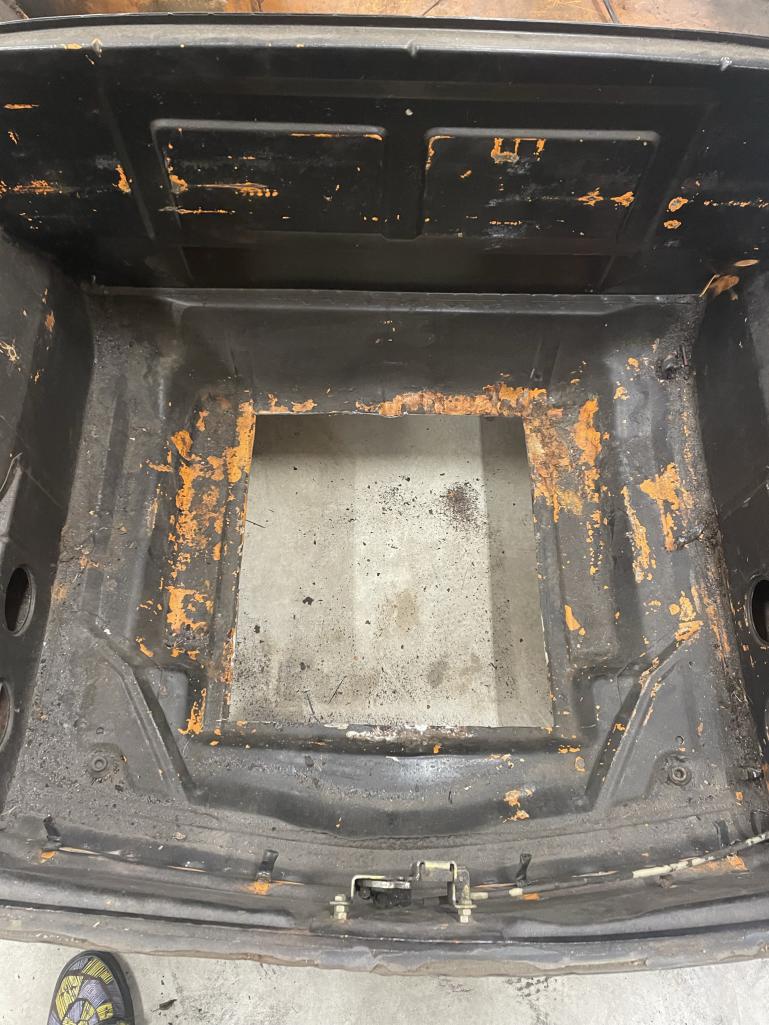
Radiator time…..made a mount for the bottom of the radiator and welded it into the front of the trunk. It has 3 rubber mounts at the bottom of the radiator that will support the majority of the weight and stresses.
  |
|
|
|
| East coaster |
Nov 12 2022, 08:36 PM
Post
#20
|
|
Senior Member Group: Members Posts: 1,650 Joined: 28-March 03 From: Brigantine, NJ Member No.: 487 Region Association: None |
Then moved on to a means of mounting the top of the radiator. These mounts won’t have much stress but I wanted them to be strong, but minimal. I decide on two reinforced posts extending from the front wall of the trunk. These are 3/8” chrome-moly tubing passed through the chassis and plug welded on the outside, then braced with some simple flanges on the inside. Rosette welded some 6mm studs into the radiator end of the tubes that mount the rubber isolating moun.
Very light and simple, but very strong…... 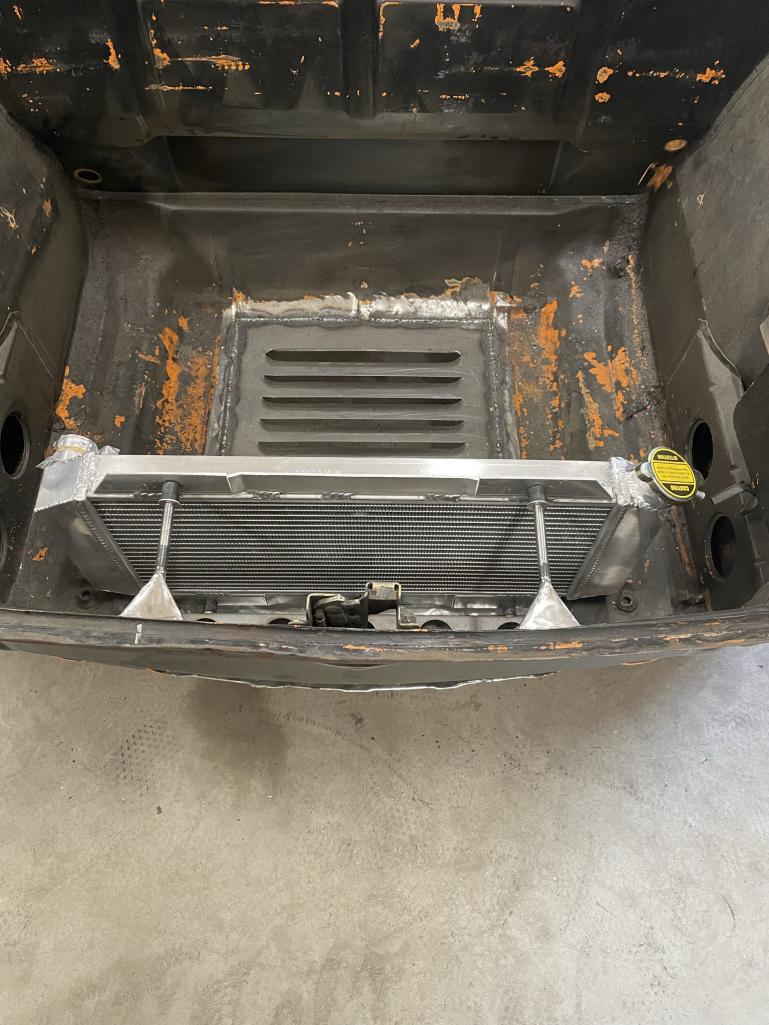 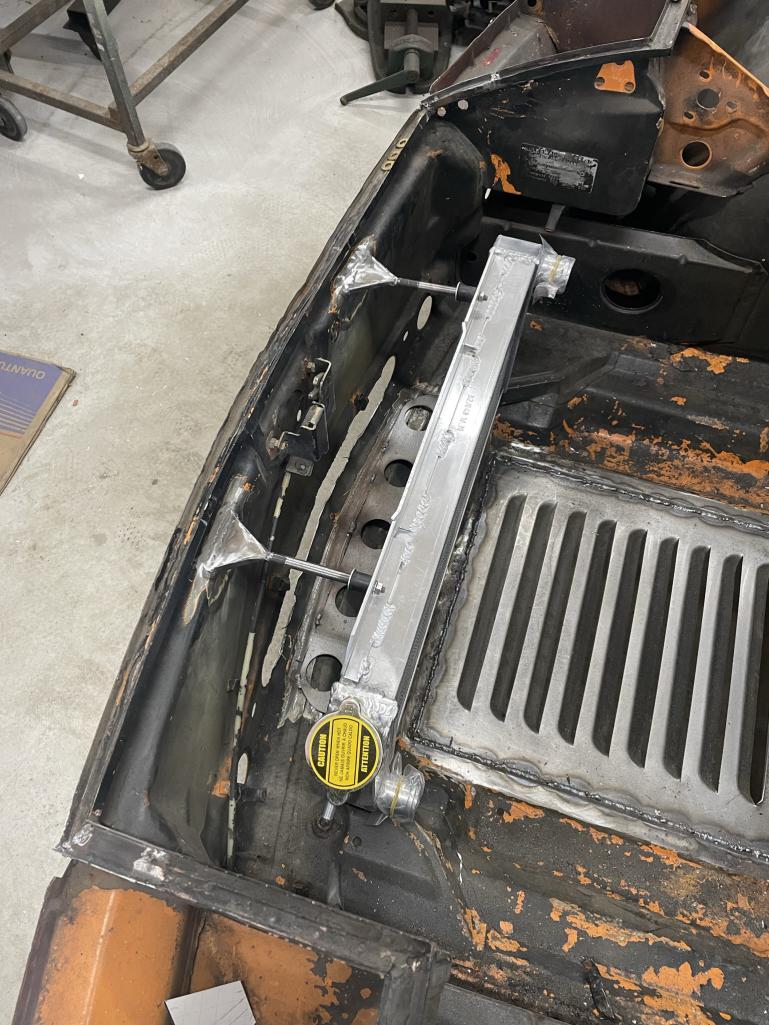 |
|
|
|
|
5 User(s) are reading this topic (5 Guests and 0 Anonymous Users)
0 Members:

|
Lo-Fi Version | Time is now: 24th April 2024 - 02:02 PM |
Invision Power Board
v9.1.4 © 2024 IPS, Inc.