|
|

|
Porsche, and the Porsche crest are registered trademarks of Dr. Ing. h.c. F. Porsche AG.
This site is not affiliated with Porsche in any way. Its only purpose is to provide an online forum for car enthusiasts. All other trademarks are property of their respective owners. |
|
|
  |
| 930cabman |
 Dec 2 2022, 02:13 PM Dec 2 2022, 02:13 PM
Post
#21
|
|
Advanced Member     Group: Members Posts: 4,389 Joined: 12-November 20 From: Buffalo Member No.: 24,877 Region Association: North East States 
|
There seems to be a lot of YouTube videos that may show you what's out there and how it's done. Looks like the key thing is to go slow and keep it cool. Sure, there are several different polishes and/or methods, but there is nothing like a new windscreen. I am very open to a process for polishing but in my 50+ years in the biz, I still have yet to find an acceptable means. What is your time worth? |
| fixer34 |
 Dec 2 2022, 07:21 PM Dec 2 2022, 07:21 PM
Post
#22
|
|
Senior Member    Group: Members Posts: 1,363 Joined: 16-September 14 From: Chicago area Member No.: 17,908 Region Association: Upper MidWest 
|
Following this, been asking myself the same question for years. Original windshield on my -6 seems to be smooth, but when the sunlight hits it just right, it almost goes translucent. So begs the discussion about replace with aftermarket new (and clean/clear) or try to revive original equipment on a numbers matching car.
|
| Ishley |
 Dec 2 2022, 10:58 PM Dec 2 2022, 10:58 PM
Post
#23
|
|
Member   Group: Members Posts: 309 Joined: 4-October 21 From: Clarendon Hills Il Member No.: 25,957 Region Association: Upper MidWest 
|
Ian Karr uses something on one of his YouTube videos and it looked great. You should be able to make it better.
|
| Mikey914 |
 Dec 3 2022, 02:08 AM Dec 3 2022, 02:08 AM
Post
#24
|
|
The rubber man           Group: Members Posts: 12,772 Joined: 27-December 04 From: Hillsboro, OR Member No.: 3,348 Region Association: None 
|
Following this, been asking myself the same question for years. Original windshield on my -6 seems to be smooth, but when the sunlight hits it just right, it almost goes translucent. So begs the discussion about replace with aftermarket new (and clean/clear) or try to revive original equipment on a numbers matching car. The question here is, why? The windshields are laminated together, if the center layer is why, then no amount of polishing will help. If it's a fine pitting from the glass being abraded over time you have a shot. |
| dhuckabay |
 Dec 3 2022, 04:31 AM Dec 3 2022, 04:31 AM
Post
#25
|
|
Member   Group: Members Posts: 234 Joined: 14-June 20 From: Idaho Member No.: 24,379 Region Association: Pacific Northwest 
|
|
| Mikey914 |
 Dec 3 2022, 02:41 PM Dec 3 2022, 02:41 PM
Post
#26
|
|
The rubber man           Group: Members Posts: 12,772 Joined: 27-December 04 From: Hillsboro, OR Member No.: 3,348 Region Association: None 
|
Lexan is just a trade name for acrylic. You can polish acrylic using wet sand paper and the 3M perfect-it system.
Start with the least grit needed (600 hopefully, or higher), then wipe clean, go to 1200, then 2000. After you can use the perfect it system. I've done this on the WAS tops and on aircraft I've owned. |
| 930cabman |
 Dec 3 2022, 04:15 PM Dec 3 2022, 04:15 PM
Post
#27
|
|
Advanced Member     Group: Members Posts: 4,389 Joined: 12-November 20 From: Buffalo Member No.: 24,877 Region Association: North East States 
|
Lexan is just a trade name for acrylic. You can polish acrylic using wet sand paper and the 3M perfect-it system. Start with the least grit needed (600 hopefully, or higher), then wipe clean, go to 1200, then 2000. After you can use the perfect it system. I've done this on the WAS tops and on aircraft I've owned. Lexan is a product of GE and is a polycarbonate NOT an acrylic. Many of us with ageing vision have a difficult time with night vision, rain, depth. Why would anyone cheap out with their windscreen. One answer: new windscreen |
| Mikey914 |
 Dec 3 2022, 05:22 PM Dec 3 2022, 05:22 PM
Post
#28
|
|
The rubber man           Group: Members Posts: 12,772 Joined: 27-December 04 From: Hillsboro, OR Member No.: 3,348 Region Association: None 
|
Then the windows were not Lexan. Polycarb is definitely a different animal.
|
| burton73 |
 Dec 3 2022, 05:34 PM Dec 3 2022, 05:34 PM
Post
#29
|
|
Senior member, and old dude     Group: Members Posts: 3,937 Joined: 2-January 07 From: Los Angeles Member No.: 7,414 Region Association: Southern California 
|
Lexan is just a trade name for acrylic. You can polish acrylic using wet sand paper and the 3M perfect-it system. Start with the least grit needed (600 hopefully, or higher), then wipe clean, go to 1200, then 2000. After you can use the perfect it system. I've done this on the WAS tops and on aircraft I've owned. Sheet grade polycarbonate (aka Lexan or Makrolon) and acrylic sheet (aka Lucite) are two of the most frequently used see-through plastics. Each of the two have benefits and drawbacks. Acrylic is shinier and polycarb is stronger. Acrylic is less expensive but easier to crack.Oct 12, 2022 Lexan is more flexible is used on motorcycle windshields. I use it around the deck of my jacuzzi as Acrylic is much easier to crack. As far as polishing goes pretty similar you got to go through the sanding grits and then you got to buff it with a wheel or a non-directional sander. Different grits of compound so you get the desired effect. New compounds from people like the Chemical Guys really help with this job. Bob B |
| relentless |
 Dec 3 2022, 05:48 PM Dec 3 2022, 05:48 PM
Post
#30
|
|
Member   Group: Members Posts: 350 Joined: 1-April 07 From: Oregon Member No.: 7,636 |
There is nothing like a clean, fresh windshield. Especially after 50 years of sand blasting! Back in the day we used Cerium Oxide, but polish too long and you ended up with distortions in vision. Not good. Don't cheap out, these cars are becoming too valuable to cut corners. Evaluate whether your windshield can have water spots removed (doable) or whether the damage is permanent.
|
| 930cabman |
 Dec 3 2022, 05:55 PM Dec 3 2022, 05:55 PM
Post
#31
|
|
Advanced Member     Group: Members Posts: 4,389 Joined: 12-November 20 From: Buffalo Member No.: 24,877 Region Association: North East States 
|
|
| Olympic 914 |
 Dec 16 2022, 09:25 AM Dec 16 2022, 09:25 AM
Post
#32
|
   Group: Members Posts: 1,765 Joined: 7-July 11 From: Pittsburgh PA Member No.: 13,287 Region Association: North East States 
|
Decided to work on this yesterday,
Promised report. Here’s what’s in the Eastwood package 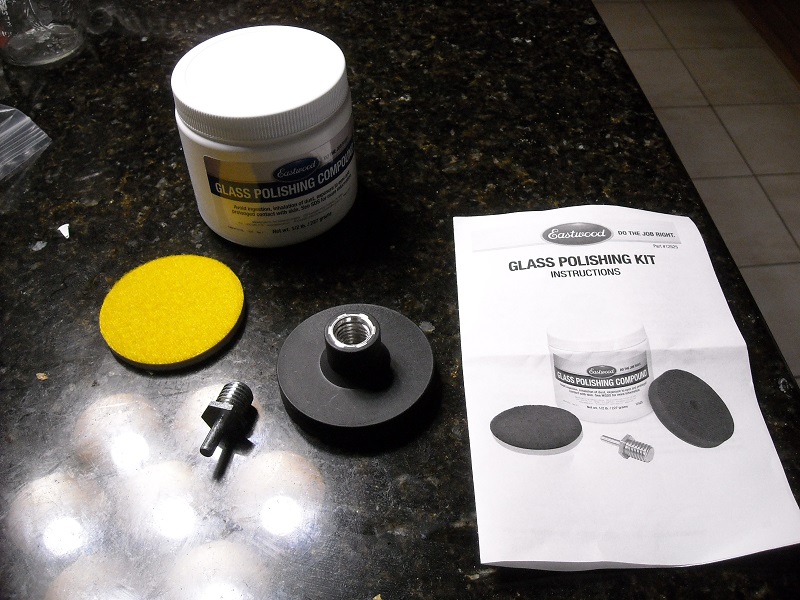 First I laid some plastic drop cloths over the car to protect from compound getting everywhere 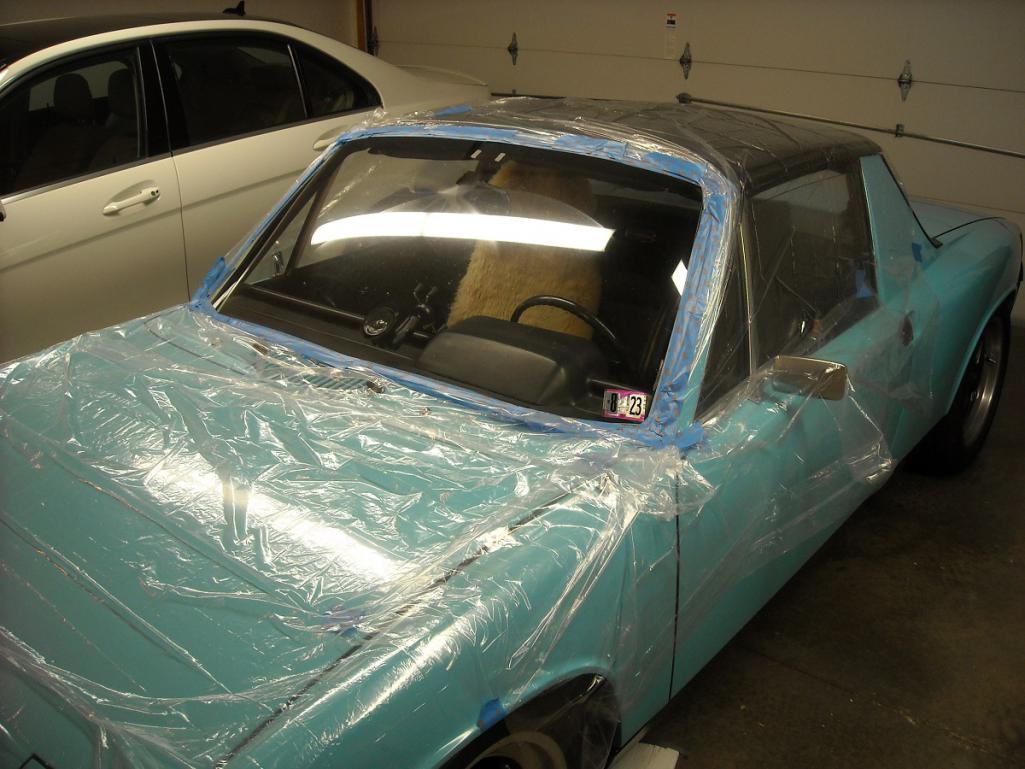 You can see the wiper marks here reflected in the light. 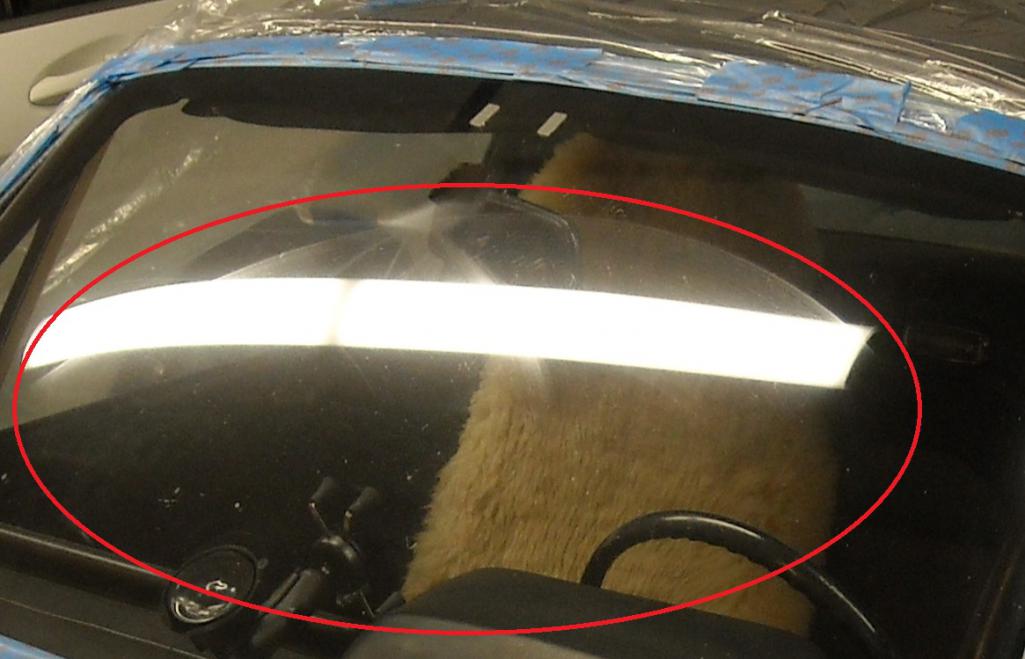 I only used two teaspoons of compound mixed with a sprits of water to mix it up (they recommend a toothpaste like thickness, mine was thinner) Started out with their pad mounted in a cordless drill, they recommend a speed of 600-1500 rpm max Well my dual range drill goes 0-450 or 0-1800. So I put it on the lower range to start. 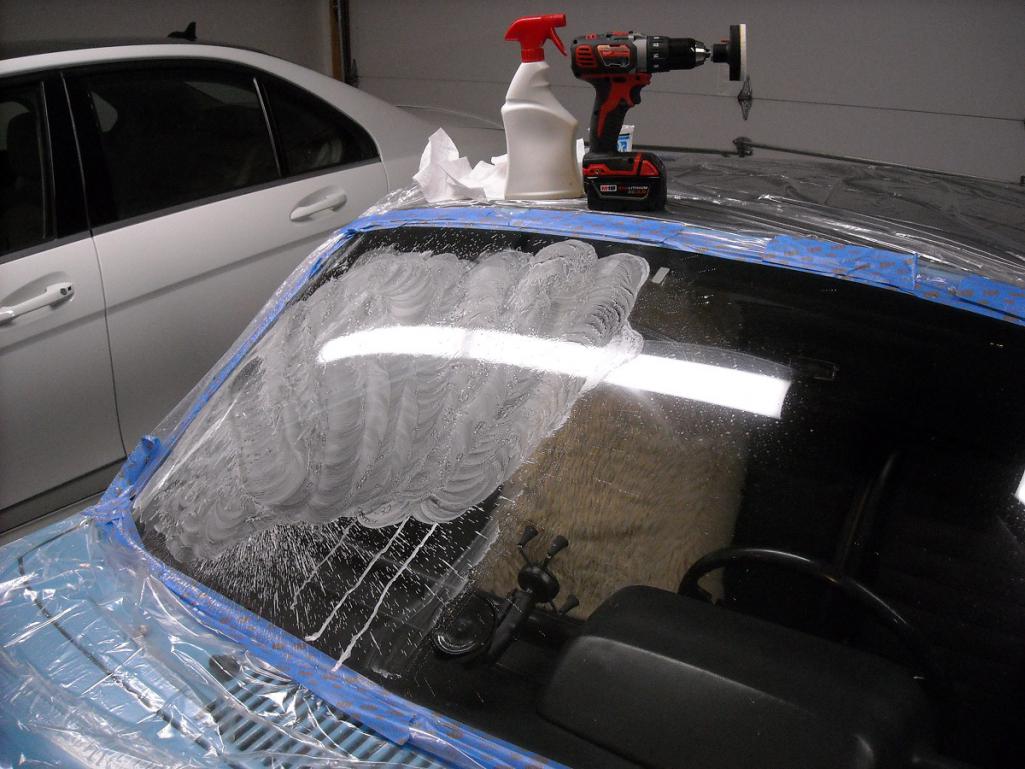 Very hard keeping the 3” pad they supplied flat on the surface, It would start to oscillate violently at 450 and you had to stop and start again. In the top range anywhere near the 1500 it was slinging compound all over everything, So I stayed with the lower range. When the instructions say “Labor intensive” They are not kidding. I worked the windshield for 3 hours doing ¼ at a time, spritzing with water to keep the surface wet (but not running) wiping off every 15-20 min to check progress. And change batteries, (Had two on charge all the time) After around 3 hours I stopped for lunch and thought about this for a while. Then I decided to get out my Porter Cable Orbital buffer and try that out. 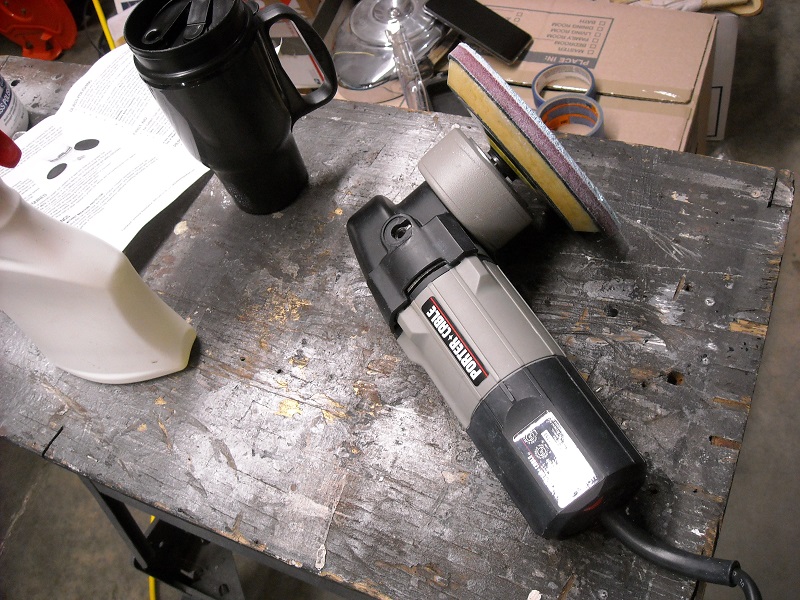 I had originally not used it because the min speed was 2400 OPM and I thought it would be too fast. Found that a Meguires 6” cutting pad seemed to be similar to the 3” wool or felt pad supplied by Eastwood. 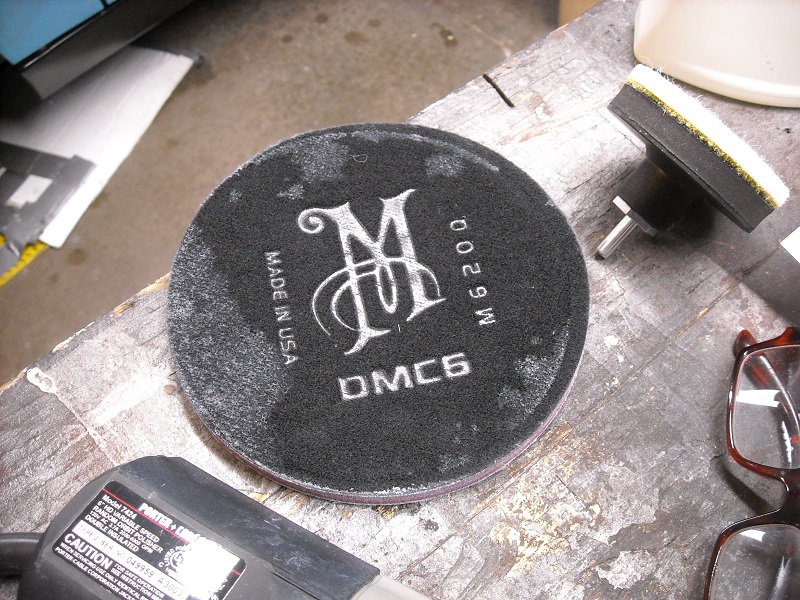 So I hooked up the 6” pad and started again. MUCH much easier to control, and I could do ½ the windshield at a time. The larger pad didn’t want to lift an edge like the smaller pad, Kept it moving to avoid heating up one spot. 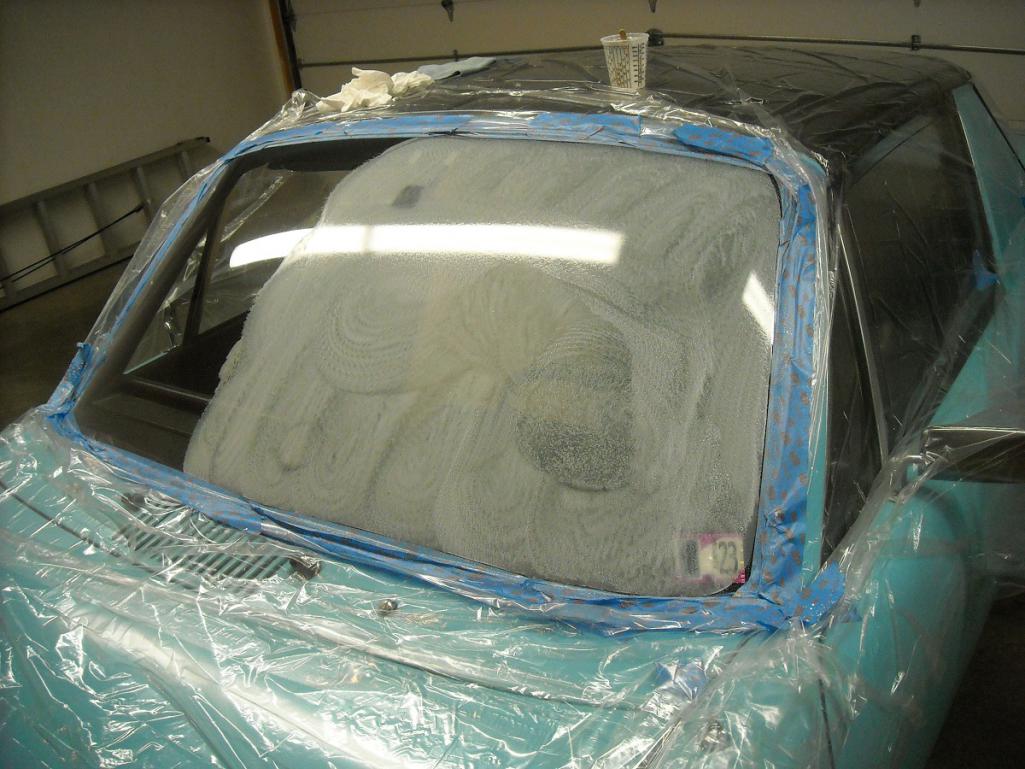 So I worked this for about another 3 ½ hours and I am quite happy with the results. If I get the light Just right I can still see where the wiper marks were, BUT they are almost invisible. 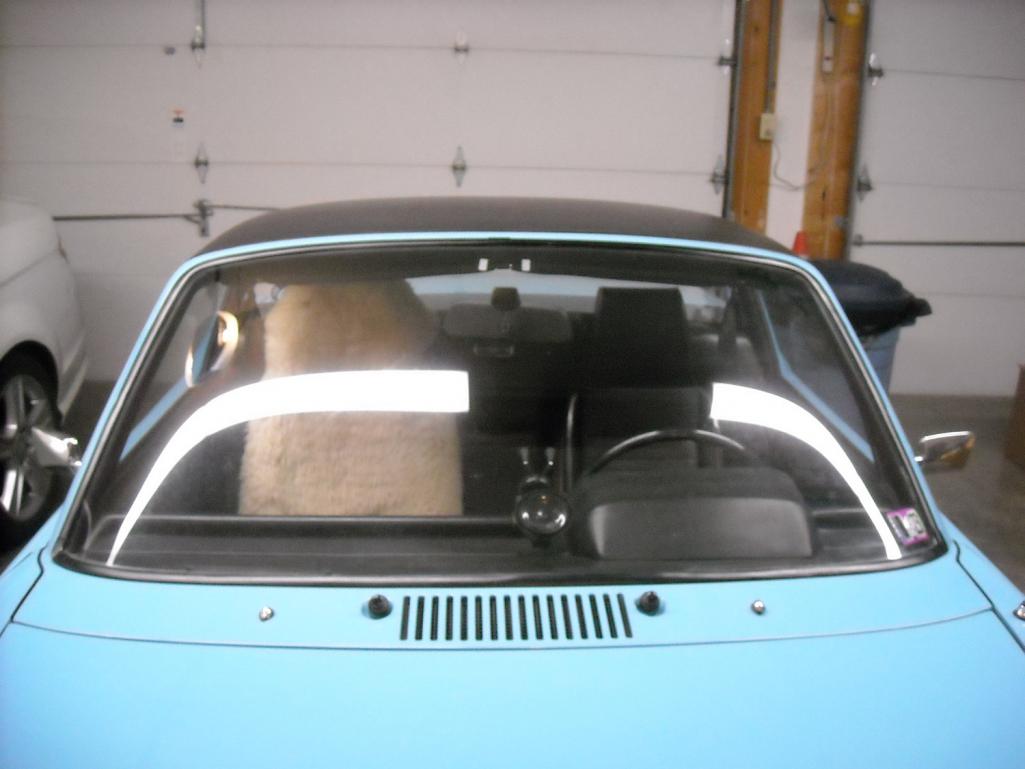 A drive at night with lights coming towards me will be the real test. Hoping for the best. I only used two teaspoons of compound mixed with water out of the ½ lb supplied in the kit. You could do this many times with this much compound. With this compound you don't have to worry about cutting too much, It takes a long time so it must be pretty fine. I struggled with the 3" pad on a drill, Maybe on orbital buffer it would have been OK but the 6" pad was much easier to control Hope this helps someone who wants to tackle this project. |
| StarBear |
 Dec 16 2022, 09:57 AM Dec 16 2022, 09:57 AM
Post
#33
|
|
Advanced Member     Group: Members Posts: 2,222 Joined: 2-September 09 From: NJ Member No.: 10,753 Region Association: North East States 
|
Soooo helpful. Encourages me to initiate effort after New Years. Great idea with the plastic; wouldn’t have thought of that. Maybe more like 90 minute sessions for me, though.
Thanks! (IMG:style_emoticons/default/biggrin.gif) |
| bbrock |
 Dec 16 2022, 01:53 PM Dec 16 2022, 01:53 PM
Post
#34
|
|
914 Guru      Group: Members Posts: 5,269 Joined: 17-February 17 From: Montana Member No.: 20,845 Region Association: Rocky Mountains 
|
Just seeing this thread. I've polished (actually ground) out some pretty serious scratches and on side glass to boot. Everybody says it can't be done until somebody does it. Then they still say it can't be done. (IMG:style_emoticons/default/av-943.gif)
It was not easy, but I was able to salvage a set of tinted side glass. Here's how I did it: http://www.914world.com/bbs2/index.php?s=&...t&p=2790699 |
| Dion |
 Dec 17 2022, 09:42 PM Dec 17 2022, 09:42 PM
Post
#35
|
|
RN     Group: Members Posts: 2,920 Joined: 16-September 04 From: Audubon,PA Member No.: 2,766 Region Association: MidAtlantic Region 

|
Looks great Tom! Yes, I remember now how messy a process it was and quite the time consumer. Well done.
|
| rgalla9146 |
 Dec 18 2022, 04:28 AM Dec 18 2022, 04:28 AM
Post
#36
|
|
Advanced Member     Group: Members Posts: 4,900 Joined: 23-November 05 From: Paramus NJ Member No.: 5,176 Region Association: None 
|
My experience was with a basic kit that provider no results after a few hours effort.
I have scratched tinted side glass too...... Brents results give me hope. Excellent job. Rory |
| StarBear |
 Mar 3 2023, 03:34 PM Mar 3 2023, 03:34 PM
Post
#37
|
|
Advanced Member     Group: Members Posts: 2,222 Joined: 2-September 09 From: NJ Member No.: 10,753 Region Association: North East States 
|
Whew! Taking winter weather episode to do this in the garage. Both in-progress and done pics below.
Thanks to @olympic 914 for encouragement, advice, and just the right amount of little white powder! No dramatic wow results as was in fairly good shape before, but got rid of little divots, light scratches, and wiper wear area on a 48-year old face. I should be so lucky! About 6-7 hours of polishing. Do use the 6” pad and sufficient orbital polisher; can’t imagine doing it with a 3” one. @rgalla9146 Do it! (IMG:style_emoticons/default/biggrin.gif) 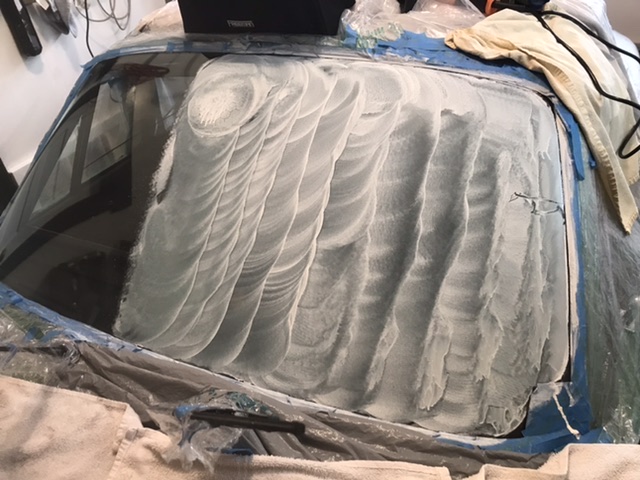 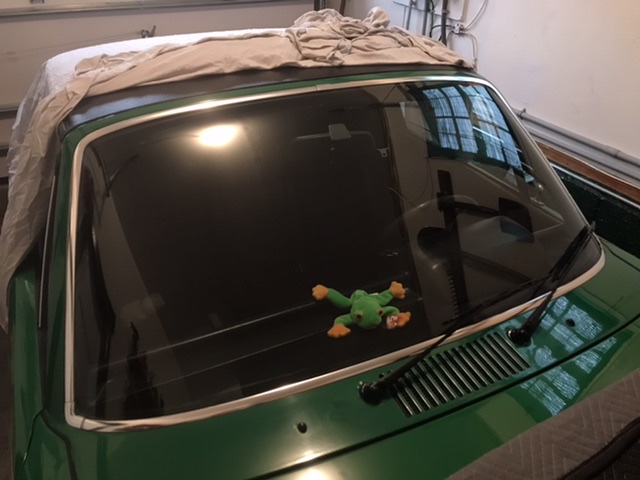 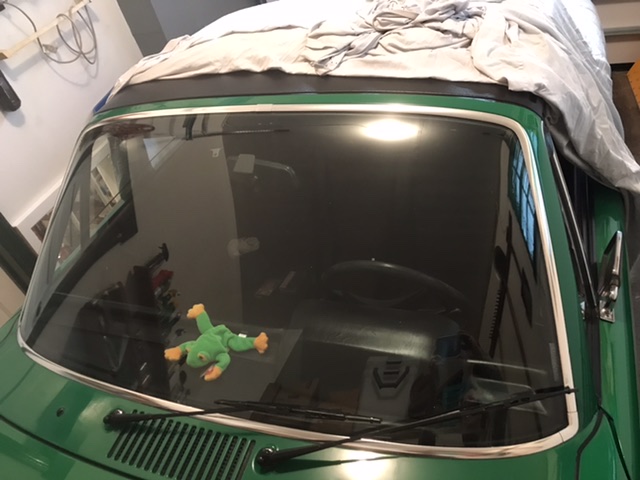 |
  |
1 User(s) are reading this topic (1 Guests and 0 Anonymous Users)
0 Members:

|
Lo-Fi Version | Time is now: 25th December 2025 - 06:51 AM |
Invision Power Board
v9.1.4 © 2025 IPS, Inc.


