|
|
|
Porsche, and the Porsche crest are registered trademarks of Dr. Ing. h.c. F. Porsche AG.
This site is not affiliated with Porsche in any way. Its only purpose is to provide an online forum for car enthusiasts. All other trademarks are property of their respective owners. |
|
|


| doug_b_928 |
 May 18 2023, 10:48 AM May 18 2023, 10:48 AM
Post
#21
|
|
Senior Member  Group: Members Posts: 730 Joined: 17-January 13 From: Winnipeg Member No.: 15,382 Region Association: Canada |
After no progress in 2022 due to other time commitments I'm ready to get back to my restoration. Most of the rust repair on the middle and rear of the tub is done, but I still have the front end to do. I'm at a crossroads with respect to the cowl-quarter channels.
It's very difficult to see and even more difficult to get good pics but the right side channel has some spots where it has rusted through. Here are some pics: 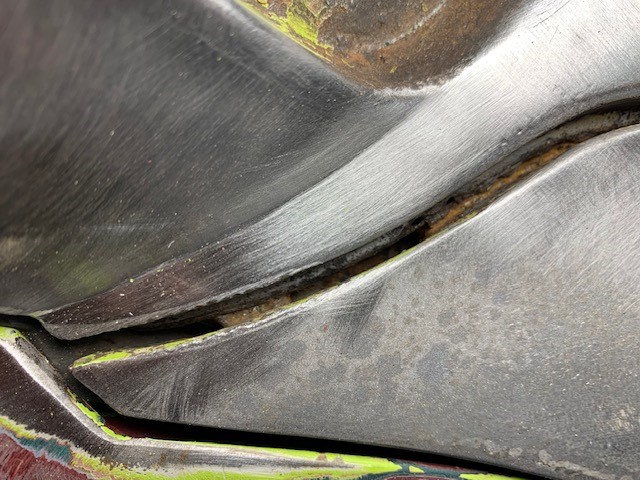 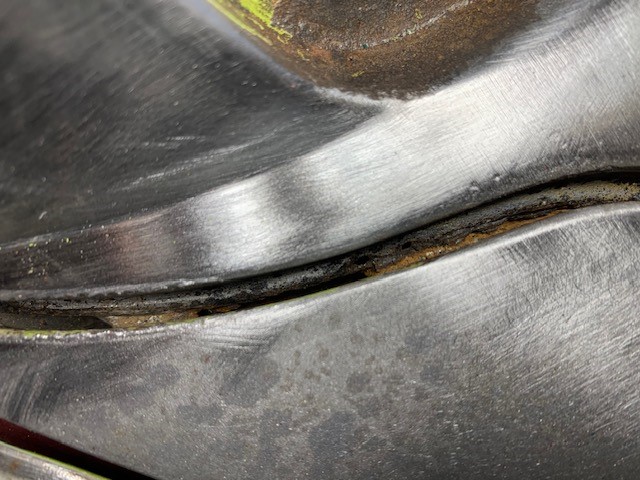 But the underside looks great to me. Here's pic of the underside which I cleaned up, rust treated, and epoxy primed several years ago. 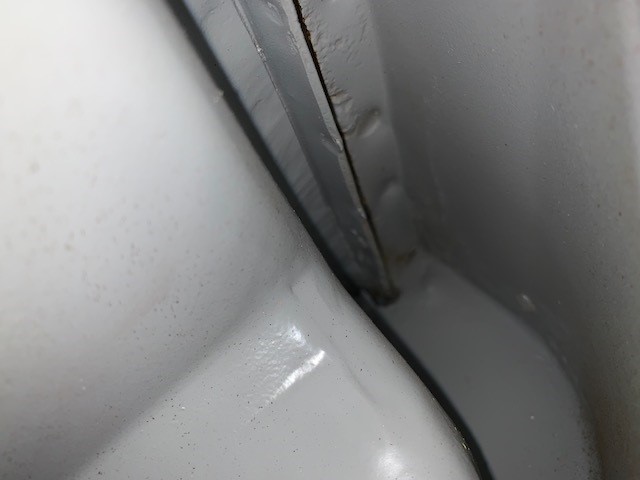 The left side fender-cowl channel is in better shape when looking down into it. Here is a pic: 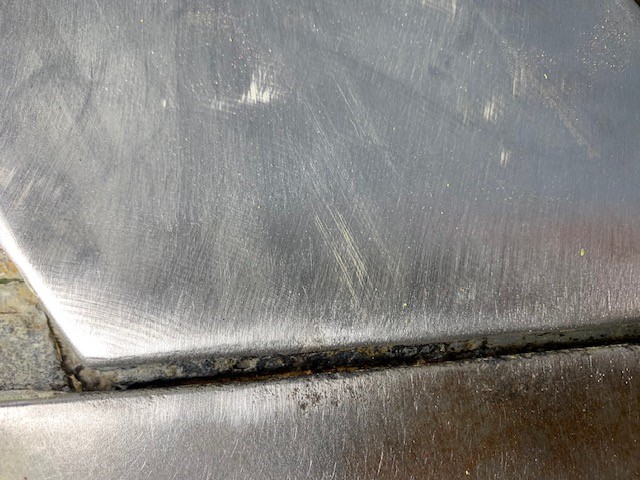 I removed most of the seam sealer from the underside but still need to clean it up. As shown in the pic below, there is a spot of rust but it does not look like it has rusted through, so I expect this side to clean up as nicely as the right side. 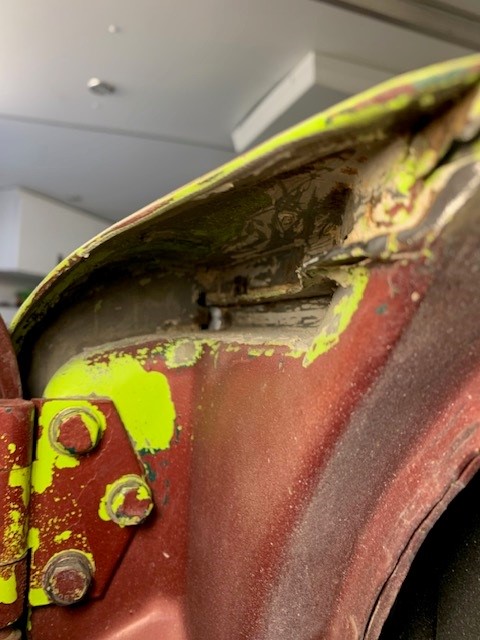 So, question #1 is how to deal with these areas. There aren't many threads that deal with their repair but having studied the ones I could find I think I have a good sense of how the two pieces are welded together. It looks like it might be difficult to remove the spot welds in the door area. I believe I can do it but I'm wondering if wire wheeling, treating with metal prep, epoxy priming and then seam sealing might be what's best in this area. Obviously best is always to cut it out and get rid of any sign weakened metal but then getting the panel to look as good after the repair might be a challenge and since this location is kind of buried maybe it's better to leave the nice lines on top and treat it. On the other hand, if it's going to be an issue in the future then I'd rather cut it out and repair now. So this is the conundrum. What say the brain trust? The top side of the cowl is in nice shape and the channel for the windshield has some pitting but not perforation. I still need to take a wire wheel to the windshield channel. Here are some pics: 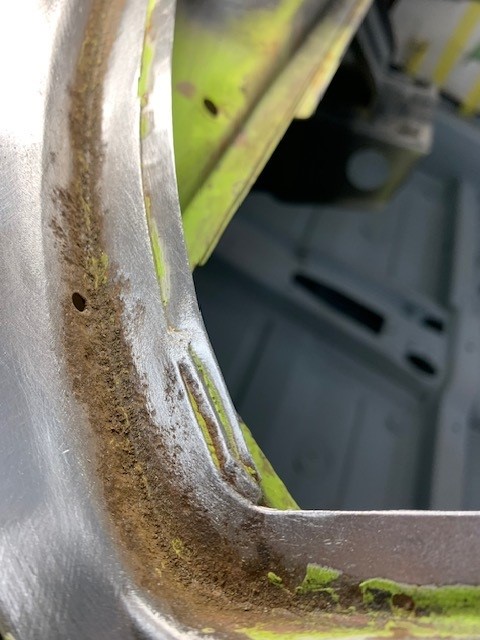 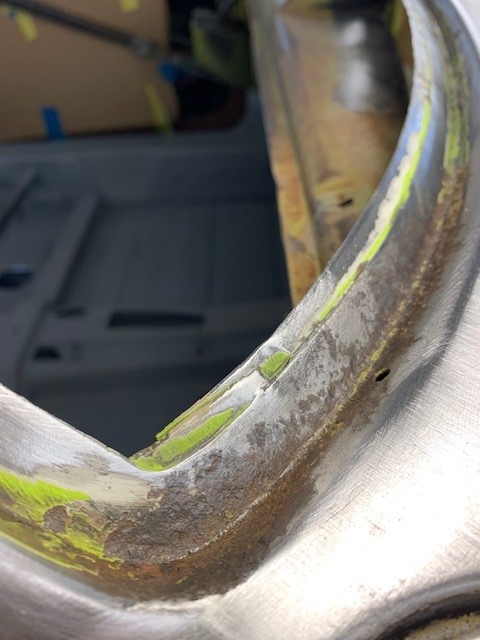 Unrelatedly, one benefit of taking forever to do the rust repair is one gets a chance to see where rust wants to rear its ugly head again. There are 4 spots where I can see some rust on the epoxy primer. Two of them are on the left suspension console where I did the 'weld little rust areas with the mig' techniqe. Here are pics of those: 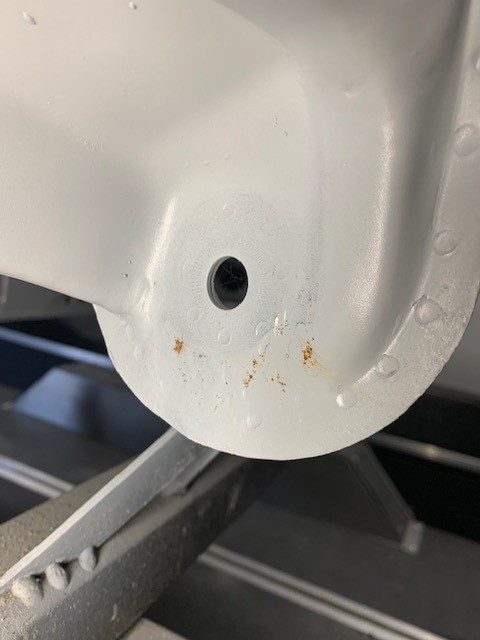 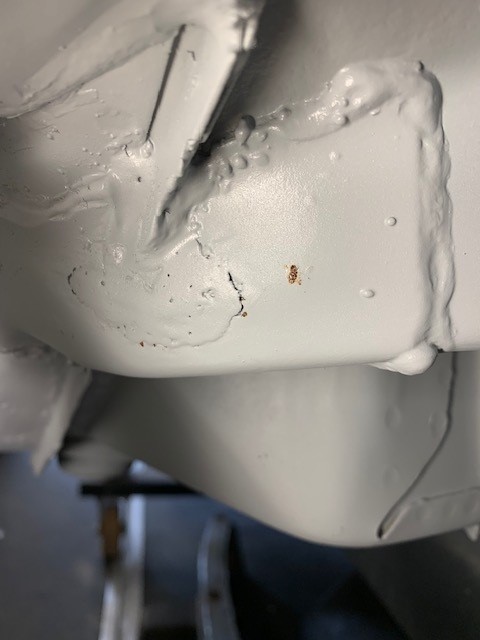 And the other two are seams where new metal was welded to old. One is on the rear trunk floor crossmember and the other is below the right rear tail light. 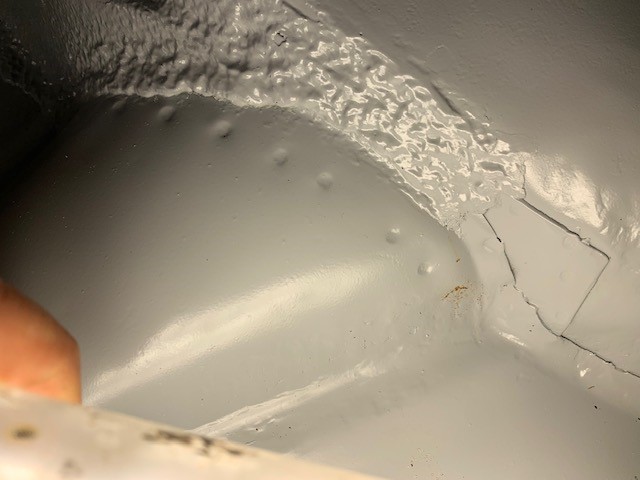  So, Is this a matter of some rust mixed in with the weld or is that there was still rust behind the area that needs to be dealt with? Attached image(s)  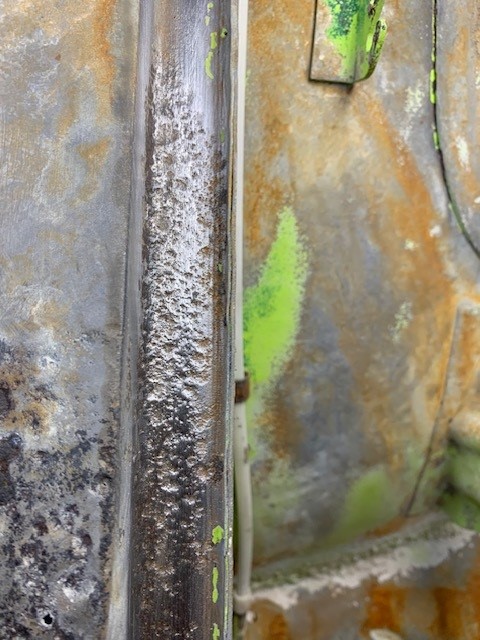
|
   |

 
|
Posts in this topic
 doug_b_928 Advice needed on cowl-fender repair areas and rust in welds May 18 2023, 10:48 AM
 doug_b_928 P.S. Sorry about the double of one of the pics. ... May 18 2023, 11:00 AM mgphoto Looking at a few of the photos there is a lack of ... May 18 2023, 02:09 PM r_towle it may help to get one of the small hand held sand... May 18 2023, 02:14 PM mgphoto I use this for rust removal and surface prep, crea... May 18 2023, 04:59 PM Montreal914 This is my repair so far of the cowl area.
http:/... May 19 2023, 10:13 AM doug_b_928 Thanks for the replies. For metal prep I'm de... May 20 2023, 07:51 AM mepstein Anyplace that has multiple layers of metal probabl... May 20 2023, 08:02 AM Montreal914 Agreed, every time I separate two healthy metal pi... May 20 2023, 09:22 AM doug_b_928 Well, I'm about as far down the rabbit hole as... May 20 2023, 10:19 AM rhodyguy Mar-Hyde one step rust converter. May 20 2023, 10:25 AM Geezer914 Eastwood Rust Converter. May 20 2023, 11:06 AM doug_b_928 Two votes for rust converter duly noted. May 20 2023, 07:47 PM
doug_b_928 P.S. Sorry about the double of one of the pics. ... May 18 2023, 11:00 AM mgphoto Looking at a few of the photos there is a lack of ... May 18 2023, 02:09 PM r_towle it may help to get one of the small hand held sand... May 18 2023, 02:14 PM mgphoto I use this for rust removal and surface prep, crea... May 18 2023, 04:59 PM Montreal914 This is my repair so far of the cowl area.
http:/... May 19 2023, 10:13 AM doug_b_928 Thanks for the replies. For metal prep I'm de... May 20 2023, 07:51 AM mepstein Anyplace that has multiple layers of metal probabl... May 20 2023, 08:02 AM Montreal914 Agreed, every time I separate two healthy metal pi... May 20 2023, 09:22 AM doug_b_928 Well, I'm about as far down the rabbit hole as... May 20 2023, 10:19 AM rhodyguy Mar-Hyde one step rust converter. May 20 2023, 10:25 AM Geezer914 Eastwood Rust Converter. May 20 2023, 11:06 AM doug_b_928 Two votes for rust converter duly noted. May 20 2023, 07:47 PM
 zoomCat
Two votes for rust converter duly noted.
It appe... May 21 2023, 08:53 AM doug_b_928 Watched that one and some others earlier this morn... May 21 2023, 09:28 AM Literati914 I’ve replaced the “pointy” sections of the f... May 21 2023, 09:28 AM r_towle Thoughts on using a rust converter then welding th... May 21 2023, 12:58 PM mgphoto
Thoughts on using a rust converter then welding t... May 21 2023, 05:16 PM 930cabman
Thoughts on using a rust converter then welding ... May 23 2023, 05:05 AM mepstein Rust repair becomes a challenge when paint is part... May 23 2023, 05:17 AM doug_b_928 Points well taken from both sides.
If it was re... May 23 2023, 08:06 AM mgphoto This is what Navel Jelly looks like after 30 years... May 23 2023, 09:45 AM mgphoto I was forced to make this repair, they tell you in... May 23 2023, 09:59 AM mgphoto I looked for some of the photos I took, this is th... May 23 2023, 10:18 AM mgphoto I found more photos of the repair.
I cut the f... May 23 2023, 11:14 AM doug_b_928 Nice work. In my case I'd be trying to save, ... May 23 2023, 02:09 PM mgphoto
Nice work. In my case I'd be trying to save,... May 23 2023, 09:56 PM Montreal914 This is a pretty complex area. From one of your pi... May 23 2023, 09:52 PM
zoomCat
Two votes for rust converter duly noted.
It appe... May 21 2023, 08:53 AM doug_b_928 Watched that one and some others earlier this morn... May 21 2023, 09:28 AM Literati914 I’ve replaced the “pointy” sections of the f... May 21 2023, 09:28 AM r_towle Thoughts on using a rust converter then welding th... May 21 2023, 12:58 PM mgphoto
Thoughts on using a rust converter then welding t... May 21 2023, 05:16 PM 930cabman
Thoughts on using a rust converter then welding ... May 23 2023, 05:05 AM mepstein Rust repair becomes a challenge when paint is part... May 23 2023, 05:17 AM doug_b_928 Points well taken from both sides.
If it was re... May 23 2023, 08:06 AM mgphoto This is what Navel Jelly looks like after 30 years... May 23 2023, 09:45 AM mgphoto I was forced to make this repair, they tell you in... May 23 2023, 09:59 AM mgphoto I looked for some of the photos I took, this is th... May 23 2023, 10:18 AM mgphoto I found more photos of the repair.
I cut the f... May 23 2023, 11:14 AM doug_b_928 Nice work. In my case I'd be trying to save, ... May 23 2023, 02:09 PM mgphoto
Nice work. In my case I'd be trying to save,... May 23 2023, 09:56 PM Montreal914 This is a pretty complex area. From one of your pi... May 23 2023, 09:52 PM  |
1 User(s) are reading this topic (1 Guests and 0 Anonymous Users)
0 Members:

|
Lo-Fi Version | Time is now: 2nd April 2026 - 10:28 AM |
Invision Power Board
v9.1.4 © 2026 IPS, Inc.