|
|
|
Porsche, and the Porsche crest are registered trademarks of Dr. Ing. h.c. F. Porsche AG.
This site is not affiliated with Porsche in any way. Its only purpose is to provide an online forum for car enthusiasts. All other trademarks are property of their respective owners. |
|
|

  |

| NARP74 |
 Jul 18 2023, 11:41 AM Jul 18 2023, 11:41 AM
Post
#21
|
|
Senior Member  Group: Members Posts: 1,448 Joined: 29-July 20 From: Colorado, USA, Earth Member No.: 24,549 Region Association: Rocky Mountains |
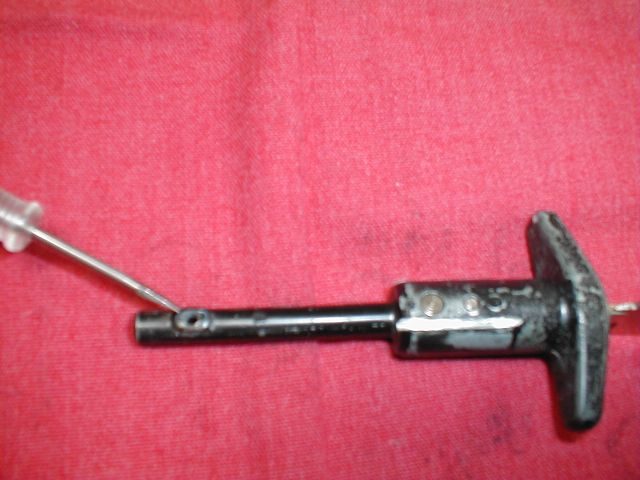
Looking for info on this screw. Where the screwdriver is pointing.
 |
   |

 
|
| NARP74 |
Jul 18 2023, 12:40 PM
Post
#22
|
|
Senior Member Group: Members Posts: 1,448 Joined: 29-July 20 From: Colorado, USA, Earth Member No.: 24,549 Region Association: Rocky Mountains |
I have been told by @TheCabinetmaker that the specs are M4x0.7mm size and thread pitch and 4.5 mm long, it has a slotted head
|
|
|
|
| NARP74 |
Jul 29 2023, 01:24 PM
Post
#23
|
|
Senior Member Group: Members Posts: 1,448 Joined: 29-July 20 From: Colorado, USA, Earth Member No.: 24,549 Region Association: Rocky Mountains |
Well, I have a good update and an epic fail update.
I was able to find a suitable stop screw, the one I was missing and got it installed. I was even able to get the handle tightened back to the body all by myself using a piece of wood as a third hand to pry it up against the body to start the screws. I thought that would be the hard part. Because I was now able to push the handle back into the holder more, I had to loosen the cable clamp on the latch. I pulled the slack cable through and tightened the cable clamp. I had some extra cable cover slack that I was able to move as well. I tried the latch and handle operation a few times with the frunk open and it all worked great. I had a sense of foreboding as I decided to fully close the front trunk but I did it anyway. Back into the car and tried the handle, nothing! The handle pulls out to the stop screw and does not open the frunk. I feel some cable resistance but cant tell if it is slipping or what. I am Fuched! I have a fiberglass front bumper installed, came that way, hate on, so I don't see any way to get in. I am low on gas, I was going to get some right after this project. I'll do a search, but this is now a how do I get in the frunk thread. I am pretty disappointed and taking a break from it for a few, had to walk away... Help! |
|
|
|
| mepstein |
Jul 29 2023, 01:35 PM
Post
#24
|
|
914-6 GT in waiting Group: Members Posts: 20,541 Joined: 19-September 09 From: Landenberg, PA/Wilmington, DE Member No.: 10,825 Region Association: MidAtlantic Region |
You remove the front bumper and stick a flat blade screwdriver through a hole in the middle of the front panel. Wiggle it around and you will be able to trip the latch. The first time I did it took me a minute or two to trip the latch and pop the trunk but it’s pretty easy. Sometimes the hole has a rubber plug in it.
In my case, the cable slipped because the amount of tension required to pull the latch was too much. I lubed every moving, sliding and pivoting component from the latch to the pull handle and most importantly, the cable inside the plastic sleeve. After that, it only took a light pull to trip the front latch. |
|
|
|
| NARP74 |
Jul 29 2023, 01:38 PM
Post
#25
|
|
Senior Member Group: Members Posts: 1,448 Joined: 29-July 20 From: Colorado, USA, Earth Member No.: 24,549 Region Association: Rocky Mountains |
I think my fiberglass bumper is mounted from the frunk. I'll look more carefully but I was looking at it before I closed the lid. I saw some bolts in there, not sure what they are for yet.
|
|
|
|
| mepstein |
Jul 29 2023, 01:40 PM
Post
#26
|
|
914-6 GT in waiting Group: Members Posts: 20,541 Joined: 19-September 09 From: Landenberg, PA/Wilmington, DE Member No.: 10,825 Region Association: MidAtlantic Region |
QUOTE(NARP74 @ Jul 29 2023, 03:38 PM)  I think my fiberglass bumper is mounted from the frunk. I'll look more carefully but I was looking at it before I closed the lid. I guess it could be but most are mounted at the front of the wheel well. You turn the wheel to one side to have the room to access the two bolts. |
|
|
|
| NARP74 |
Jul 29 2023, 01:44 PM
Post
#27
|
|
Senior Member Group: Members Posts: 1,448 Joined: 29-July 20 From: Colorado, USA, Earth Member No.: 24,549 Region Association: Rocky Mountains |
And I have an oil cooler in that area...
|
|
|
|
| TheCabinetmaker |
Jul 29 2023, 02:16 PM
Post
#28
|
|
I drive my car everyday Group: Members Posts: 8,367 Joined: 8-May 03 From: Tulsa, Ok. Member No.: 666 |
The cable must be screwed in till it stops. The adjustment is done in at the trunk latch. The Screw that limits the travel of the handle also clamps on the cable to keep it from unscrewing itself. The fasteners you saw inside the trunk are the attachment points for the front valance. Pull the 4 bolts from inside the wheel wells and the bumper will fall off. Literally fall off, if you don't catch it.
|
|
|
|
| NARP74 |
Jul 29 2023, 07:50 PM
Post
#29
|
|
Senior Member Group: Members Posts: 1,448 Joined: 29-July 20 From: Colorado, USA, Earth Member No.: 24,549 Region Association: Rocky Mountains |
Sounds like I have some work ahead of me. I think the oil cooler mount hardware has nylocks on them, inside the frunk. Might be time for a nutsert tool.
|
|
|
|
| NARP74 |
Jul 30 2023, 09:32 AM
Post
#30
|
|
Senior Member Group: Members Posts: 1,448 Joined: 29-July 20 From: Colorado, USA, Earth Member No.: 24,549 Region Association: Rocky Mountains |
I think I figured out what might have happened. Because my assembly was not put together correctly during the previous reassembly, I do not have a stop on the cable guide sheath. They must have taken it off to get it to work the latch. When I put it together correctly, the guide sheath just pulled through the tube at the firewall and did not open the latch. I still need to start disassembly to get into the frunk to verify this.
|
|
|
|
| NARP74 |
Jul 30 2023, 10:08 AM
Post
#31
|
|
Senior Member Group: Members Posts: 1,448 Joined: 29-July 20 From: Colorado, USA, Earth Member No.: 24,549 Region Association: Rocky Mountains |
I'm in! Necessity is the mother of all shortcuts! I figured the cable housing was slipping in the metal tube on the firewall. When I got underneath to look at the handle assembly and saw the stop screw pointing down, I decided to take it out. That allowed me to pull more cable and sheath until the frunk latch opened, et voila! Frunk opened without major disassembly, which I should still look at some time later to be ready for this again.
Now tell me what this is all about? 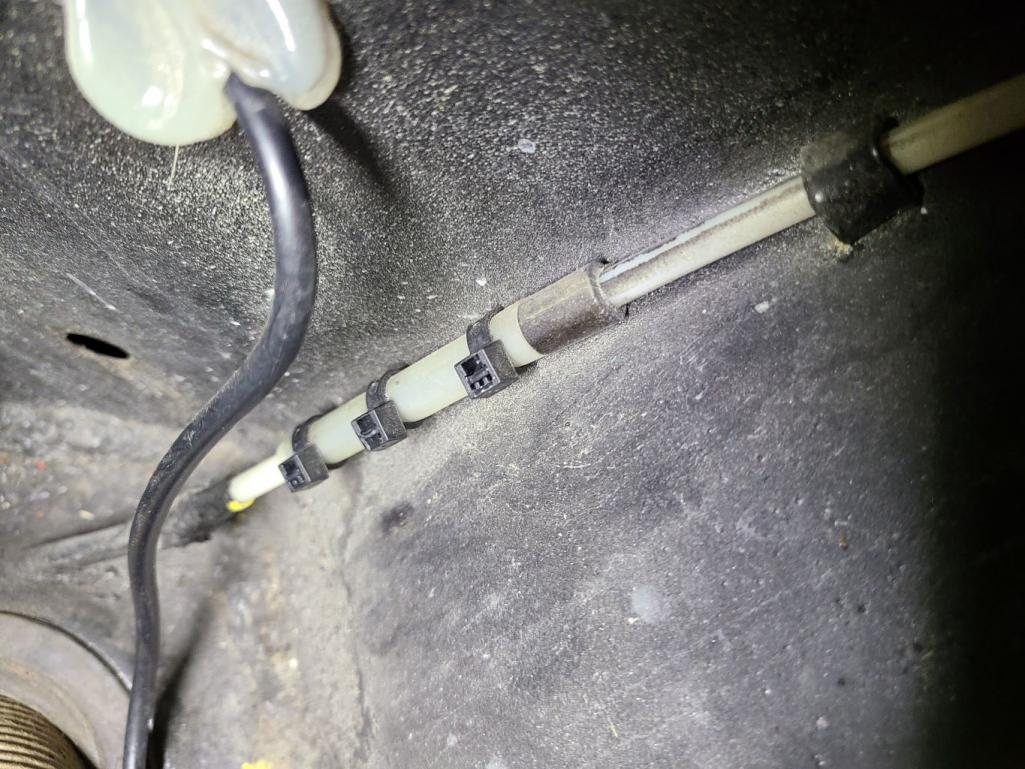 |
|
|
|
| TheCabinetmaker |
Jul 30 2023, 10:23 AM
Post
#32
|
|
I drive my car everyday Group: Members Posts: 8,367 Joined: 8-May 03 From: Tulsa, Ok. Member No.: 666 |
Broken sheath repair. 914 rubber has them, I think.
|
|
|
|
| NARP74 |
Jul 30 2023, 10:33 AM
Post
#33
|
|
Senior Member Group: Members Posts: 1,448 Joined: 29-July 20 From: Colorado, USA, Earth Member No.: 24,549 Region Association: Rocky Mountains |
That is where I got the idea that the sheath was just pulling through. It looks like it has a stop, the black ring, but it is too far up the sheath to be effective so they made an extender of some sort. Must be the wrong cable sheath to begin with. They are out of stock at 914 rubber ATM.
|
|
|
|
| NARP74 |
Aug 12 2023, 08:12 PM
Post
#34
|
|
Senior Member Group: Members Posts: 1,448 Joined: 29-July 20 From: Colorado, USA, Earth Member No.: 24,549 Region Association: Rocky Mountains |
https://www.youtube.com/watch?v=MvbQ4wJak_c Channeling Kevin Kline here... So while 914 rubber was out of stock I spent a lot of time coming up with a nifty solution to the outer cable housing problem. I almost had it but my vertical lathe, AKA drill press could not handle the work and the part I started with was running out of metal. Then the part was back in stock so I just ordered one and it got here quick. I started fitting it and it was very tight. The tube is roughly 6mm plus a bit. The old cable housing I had that was bad was 6.05mm, it slipped in pretty well, tight but it went in. The new cable housing was 6.35mm and was too tight to get in the tube, even with lube and some firm hands. I started looking at the tube and decided it had some slag in it or something that was making entry difficult. I carefully drilled out the first part of the tube from the trunk area, cleaned it out and lubed it again. I got the new cable installed up to the stop on the housing. I fed the wire in from the front seat and did a test fit, everything seemed good. I started to take it all apart to route the cable and lube it and the stop on the cable housing broke free and now I am back to the very beginning again! @Mikey914 I know you are very busy and shorthanded, do you have any suggestions how I can repair the front trunk cable guide tubing I just bought? |
|
|
|
| partwerks |
Aug 12 2023, 10:00 PM
Post
#35
|
|
Senior Member Group: Members Posts: 1,619 Joined: 7-September 06 From: Grand Island, NE Member No.: 6,787 |
QUOTE(NARP74 @ Jul 18 2023, 09:41 AM) Looking for info on this screw. Where the screwdriver is pointing. Small set screw from under dash side. |
|
|
|
| NARP74 |
Aug 13 2023, 07:03 AM
Post
#36
|
|
Senior Member Group: Members Posts: 1,448 Joined: 29-July 20 From: Colorado, USA, Earth Member No.: 24,549 Region Association: Rocky Mountains |
Have it, thanks. Specific details are in a post above for those searching.
|
|
|
|
| Mikey914 |
Aug 13 2023, 08:59 AM
Post
#37
|
|
The rubber man Group: Members Posts: 12,772 Joined: 27-December 04 From: Hillsboro, OR Member No.: 3,348 Region Association: None |
QUOTE(NARP74 @ Aug 12 2023, 07:12 PM) https://www.youtube.com/watch?v=MvbQ4wJak_c Channeling Kevin Kline here... So while 914 rubber was out of stock I spent a lot of time coming up with a nifty solution to the outer cable housing problem. I almost had it but my vertical lathe, AKA drill press could not handle the work and the part I started with was running out of metal. Then the part was back in stock so I just ordered one and it got here quick. I started fitting it and it was very tight. The tube is roughly 6mm plus a bit. The old cable housing I had that was bad was 6.05mm, it slipped in pretty well, tight but it went in. The new cable housing was 6.35mm and was too tight to get in the tube, even with lube and some firm hands. I started looking at the tube and decided it had some slag in it or something that was making entry difficult. I carefully drilled out the first part of the tube from the trunk area, cleaned it out and lubed it again. I got the new cable installed up to the stop on the housing. I fed the wire in from the front seat and did a test fit, everything seemed good. I started to take it all apart to route the cable and lube it and the stop on the cable housing broke free and now I am back to the very beginning again! @Mikey914 I know you are very busy and shorthanded, do you have any suggestions how I can repair the front trunk cable guide tubing I just bought? Thanks, I'm showing these in stock and the version with the cable as a kit is too https://914rubber.com/guide-tube-for-front-...release-cable-1 The stop is welded to the body of the tube. If you got a defective one from us we will be happy yo replace it. Our failure rate on these is pretty low, and with the process we use (if done properly) it should be non-existent. You can PM me the specifics and I'd be happy to take care of this. Attached thumbnail(s) 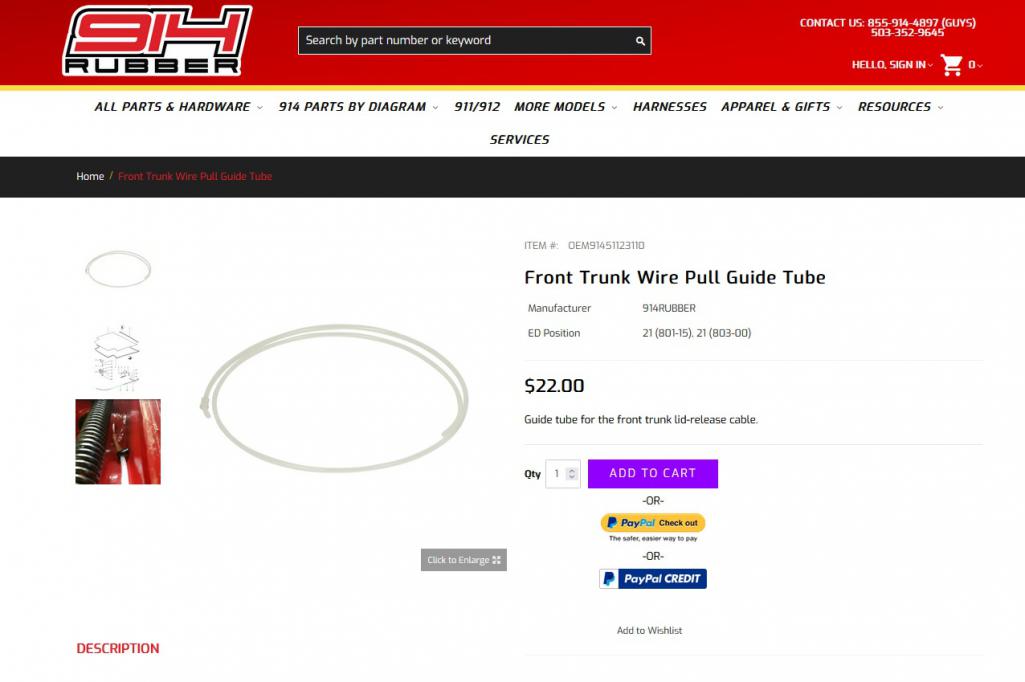
|
|
|
|
| NARP74 |
Aug 13 2023, 10:23 AM
Post
#38
|
|
Senior Member Group: Members Posts: 1,448 Joined: 29-July 20 From: Colorado, USA, Earth Member No.: 24,549 Region Association: Rocky Mountains |
Msg sent, thanks
|
|
|
|
|
1 User(s) are reading this topic (1 Guests and 0 Anonymous Users)
0 Members:

|
Lo-Fi Version | Time is now: 16th March 2026 - 09:08 PM |
Invision Power Board
v9.1.4 © 2026 IPS, Inc.