

 Fred's Backyard LE Restoration Fred's Backyard LE Restoration |
|
|

|
Porsche, and the Porsche crest are registered trademarks of Dr. Ing. h.c. F. Porsche AG.
This site is not affiliated with Porsche in any way. Its only purpose is to provide an online forum for car enthusiasts. All other trademarks are property of their respective owners. |
|
|
  |
| friethmiller |
 Aug 3 2026, 04:56 PM Aug 3 2026, 04:56 PM
Post
#1041
|
|
Senior Member  Group: Members Posts: 1,446 Joined: 10-February 19 From: Austin, TX Member No.: 22,863 Region Association: Southwest Region 
 |
Diverting to Other Tasks (8/2/2026):
At almost 100F, I had a fun day out on the car. I drank plenty of fluids and worked at a steady pace throughout the day trying to push on multiple fronts. Originally, I had planned to install the door glass but realized that I had missed ordering the outer fuzzy tracks from 914rubber. (IMG:style_emoticons/default/blink.gif) No reason to proceed without all the parts so I diverted to other tasks. I started with the A-pillar pads and sun visors and then moved on to the door outer seals. These were a little challenging since the bottom of the door tracks were fabricated (see #522 as an example) and a little on the tight side. Nothing too bad. 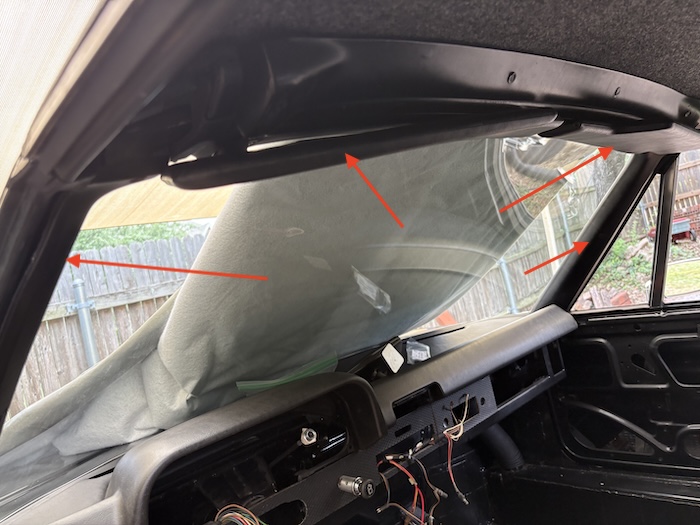 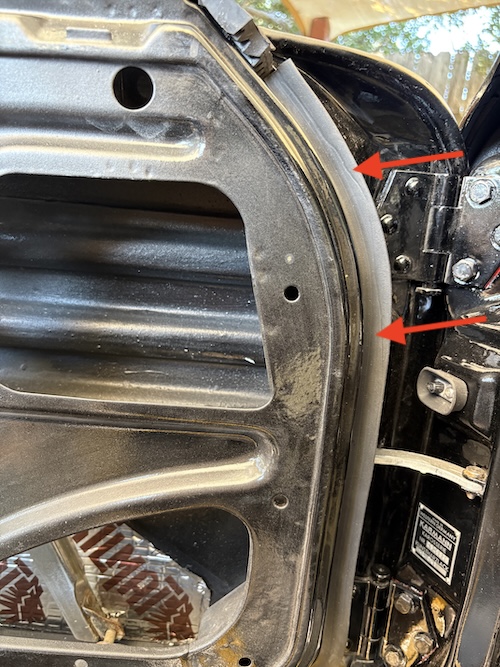 I also started digging through the shed looking for LE parts. I found the passenger side foam footrest and its original glove box, which was in excellent condition. (IMG:style_emoticons/default/smilie_pokal.gif) I found other items in the LE parts bin that need to be refurbished a bit, as well. Note: I still need to find the glue pad for the rear-view mirror (lost on Friday somewhere (IMG:style_emoticons/default/confused24.gif) ) and the glove box door that I saw in the shed a few weeks ago. Probably put it somewhere I wouldn't forget! Sigh! Getting old sucks! (IMG:style_emoticons/default/wacko.gif) 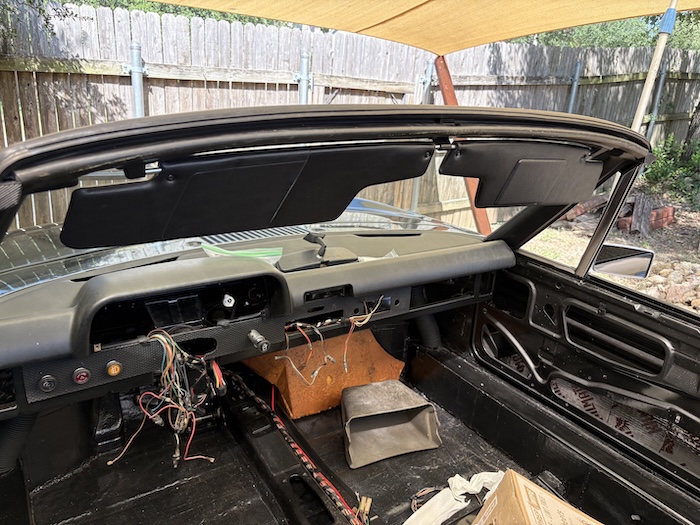 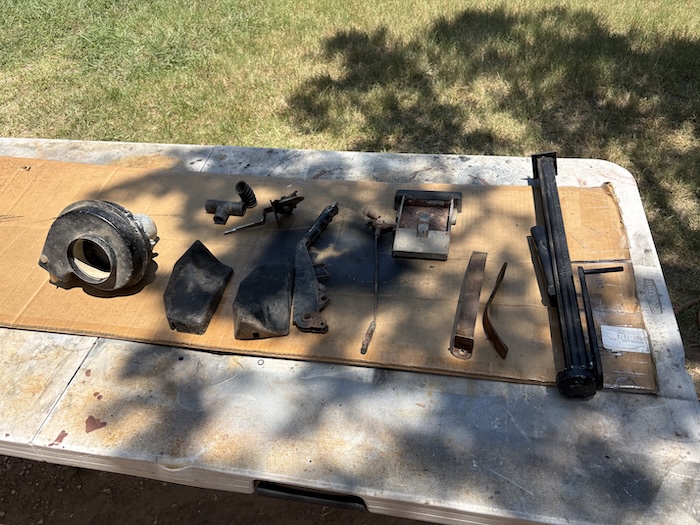 I assembled the new pedal board. It replaces the worn out old, crusty one! (IMG:style_emoticons/default/bootyshake.gif) I also found the new gas pedal, located new hardware, and used the tap to clear the threads where the pedal attaches to the floor. All these items must wait for the clutch and accelerator cables to be attached. 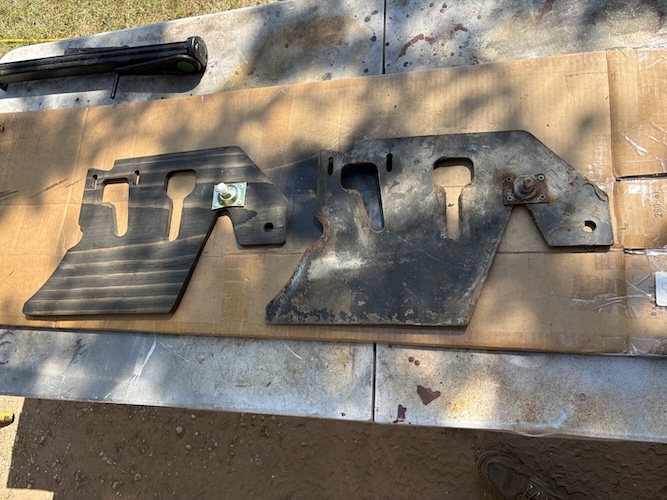 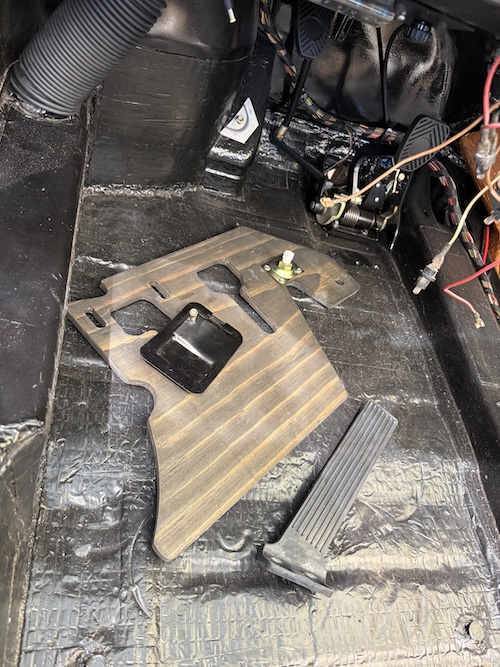 This is a good segue for the work I did next in the engine bay. I basically set out on installing the speedo, clutch, and accelerator cables, which are done from inside the engine bay. Additionally, the firewall shift support bearing kit from Tangerine Racing needed to be installed. 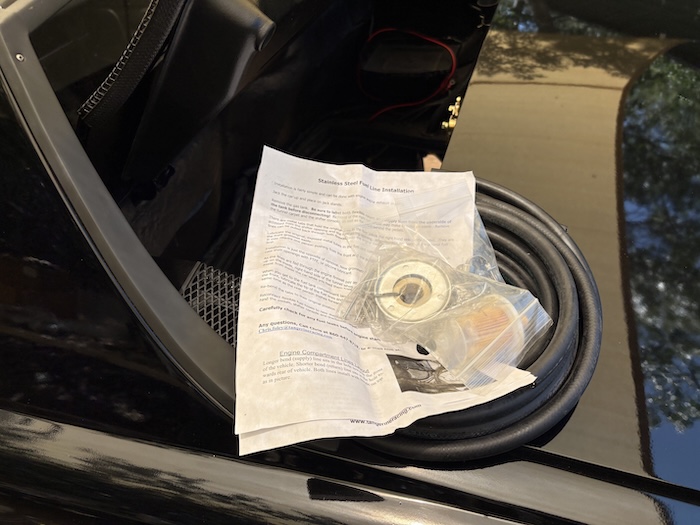 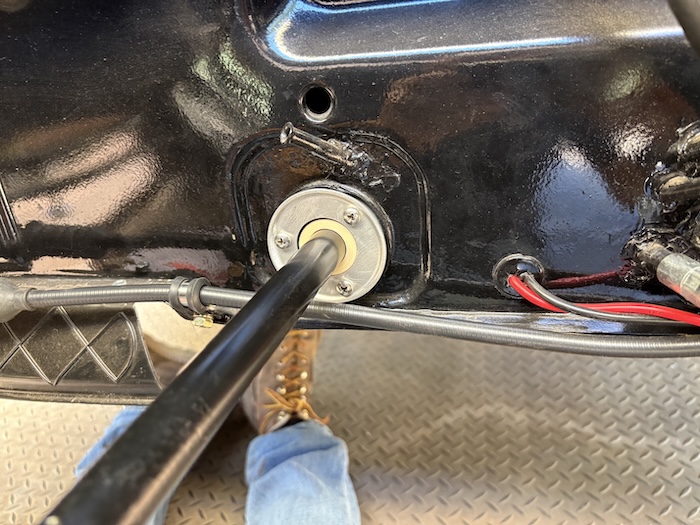 In the next photo, you can see that the speedo and clutch cables were successfully run through the firewall as well as some initial fuel line. Unfortunately, the accelerator cable would only go in about 5 inches before stopping. I was able to shoot air through it without issue, so it doesn't appear to be blocked. I think the pipe must be bent. This is a scavenged tunnel from another car. (IMG:style_emoticons/default/idea.gif) As far as the fuel hose, I don't have a fuel pump yet, so I just connected it through to the pass-thru pipes for now. 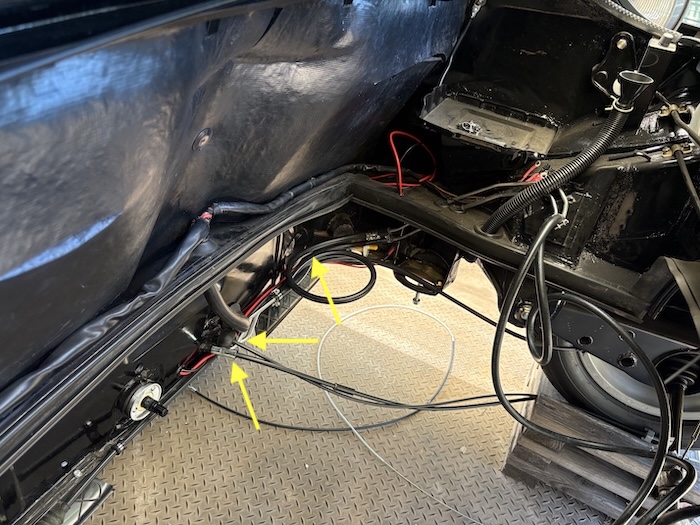 In additional to all of this, I managed to get around to using the 3M adhesive in a few places - mainly the targa top and the main targa seal. These pics show one of the spots I did. 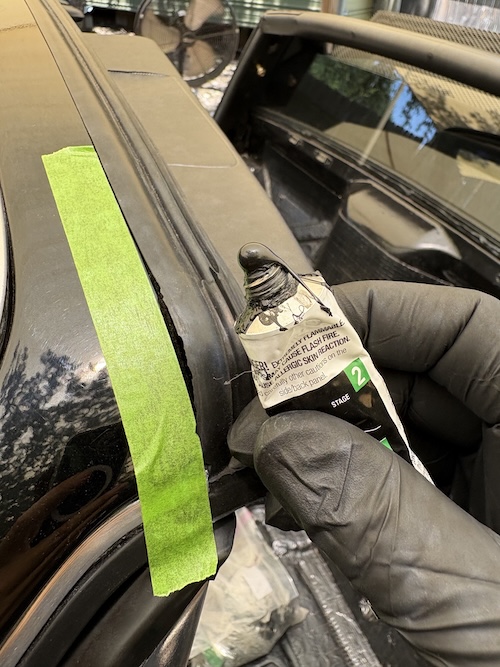 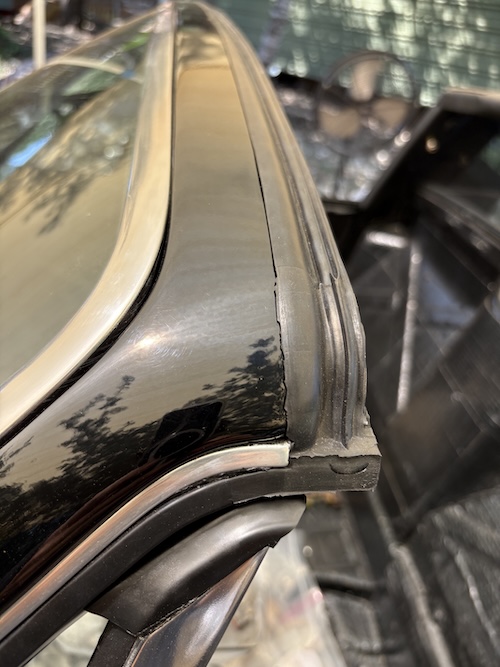 You may have noticed that I started to run the longitudinal to vent hoses. I don't have any new clamps yet but decided to try and restore, and possible reused, the originals. To preserve the electro-plating, I'm using gasoline here to help start the cleaning process. I'm not dead set on using them but they seem functional. They're just a little dirty from 50 years of service. More on this later, I guess. 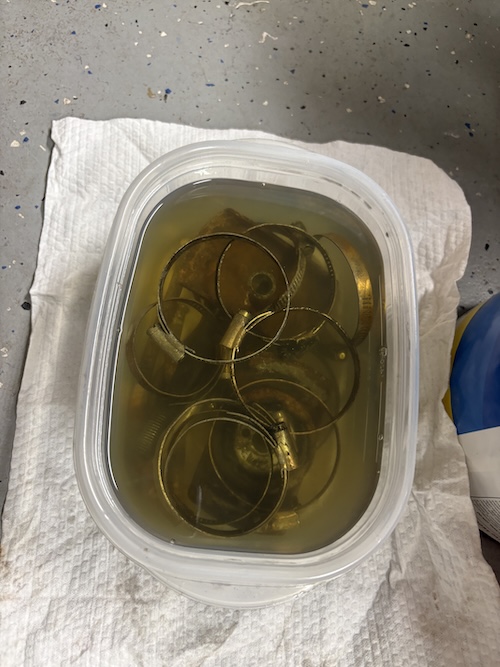 Finally, some shots of the car and my work environment. It's hot and dry here now and I feel like I'm working in a mound of dust. I think that's because I am. (IMG:style_emoticons/default/rolleyes.gif) Till next time, cheers! (IMG:style_emoticons/default/beerchug.gif) 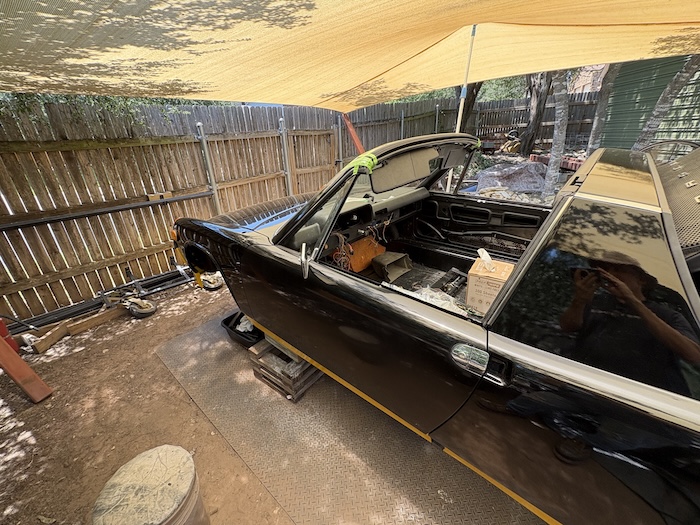 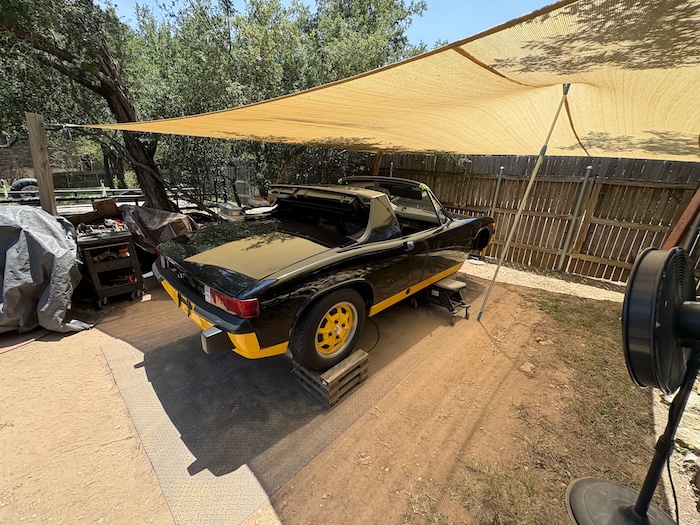 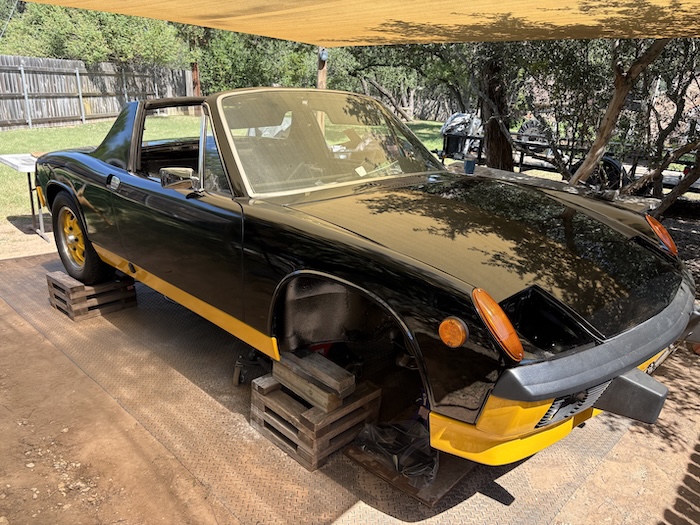 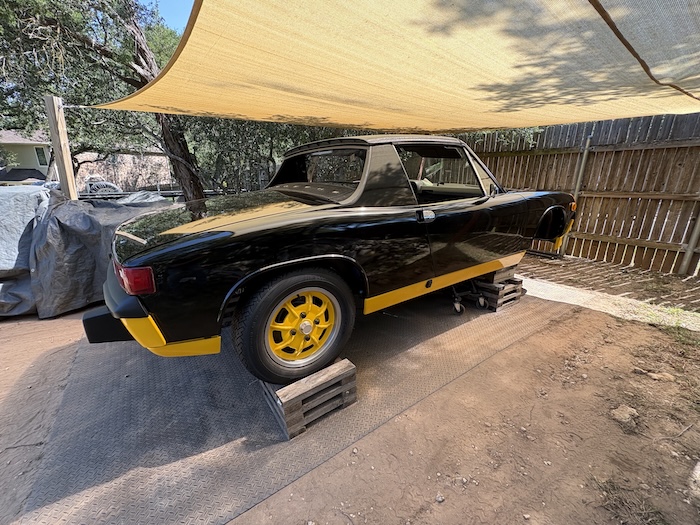 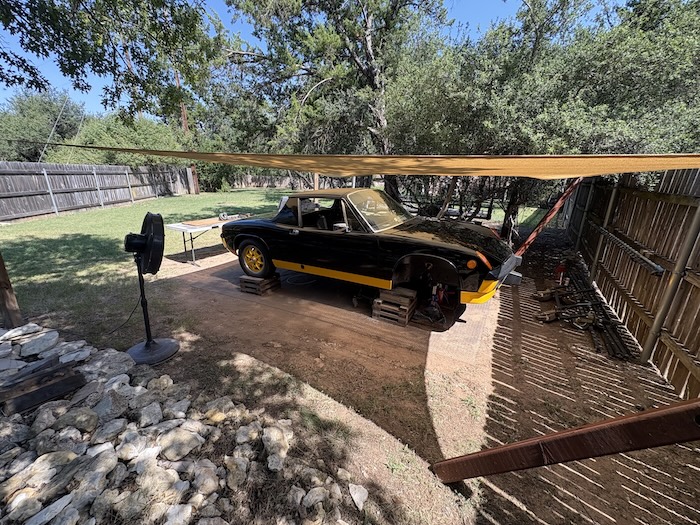 |
   |

 
|
| Cairo94507 |
Aug 4 2026, 05:44 AM
Post
#1042
|
|
Michael Group: Members Posts: 10,731 Joined: 1-November 08 From: Auburn, CA Member No.: 9,712 Region Association: Northern California
|
That's a nice set-up with the canopy and fan. Big open space makes things nice too. (IMG:style_emoticons/default/beerchug.gif)
|
|
|
|
| friethmiller |
Aug 4 2026, 07:42 AM
Post
#1043
|
|
Senior Member Group: Members Posts: 1,446 Joined: 10-February 19 From: Austin, TX Member No.: 22,863 Region Association: Southwest Region
|
QUOTE(Cairo94507 @ Aug 4 2026, 06:44 AM)  That's a nice set-up with the canopy and fan. Big open space makes things nice too. (IMG:style_emoticons/default/beerchug.gif) Yeah, it's alright. It keeps the majority of the mid-day sun off me, which is nice. I use a pole to raise the canopy a bit for head room. Normally it's below fence height level. I'm trying to minimize community impact/fly below the radar. (IMG:style_emoticons/default/happy11.gif) |
|
|
|
| Root_Werks |
Aug 4 2026, 08:27 AM
Post
#1044
|
|
Village Idiot Group: Members Posts: 9,043 Joined: 25-May 04 From: About 15NM from Canada Member No.: 2,105 Region Association: Pacific Northwest
|
Boy, you know it's warm outside when you have a fan going!
|
|
|
|
| wonkipop |
Aug 4 2026, 01:26 PM
Post
#1045
|
|
914 Guru Group: Members Posts: 5,654 Joined: 6-May 20 From: north antarctica Member No.: 24,231 Region Association: NineFourteenerVille
|
if you want to go full nerd (and i'd be the last person to advise that (IMG:style_emoticons/default/biggrin.gif) ) you could paint your visor pins black. VW went cheapo on the 74s and used black plastic pins instead of the "german tradition" of high quality steel (chrome?) pins before that.
its such a good looking bumble bee this one. (IMG:style_emoticons/default/beerchug.gif) (IMG:style_emoticons/default/beerchug.gif) that texan back yard looks like it could be anywhere in australia. (IMG:style_emoticons/default/beerchug.gif) |
|
|
|
| bkrantz |
Aug 4 2026, 07:58 PM
Post
#1046
|
|
914 Guru Group: Members Posts: 8,748 Joined: 3-August 19 From: SW Colorado Member No.: 23,343 Region Association: Rocky Mountains
|
QUOTE(friethmiller @ Aug 4 2026, 07:42 AM) QUOTE(Cairo94507 @ Aug 4 2026, 06:44 AM) That's a nice set-up with the canopy and fan. Big open space makes things nice too. (IMG:style_emoticons/default/beerchug.gif) Yeah, it's alright. It keeps the majority of the mid-day sun off me, which is nice. I use a pole to raise the canopy a bit for head room. Normally it's below fence height level. I'm trying to minimize community impact/fly below the radar. (IMG:style_emoticons/default/happy11.gif) You know, a cave would be more stealthy and cooler. (IMG:style_emoticons/default/biggrin.gif) |
|
|
|
| friethmiller |
Aug 4 2026, 08:21 PM
Post
#1047
|
|
Senior Member Group: Members Posts: 1,446 Joined: 10-February 19 From: Austin, TX Member No.: 22,863 Region Association: Southwest Region
|
QUOTE(bkrantz @ Aug 4 2026, 08:58 PM) An insulated garage with a split-unit would be cooler too. Though the cave would be a cheaper option. (IMG:style_emoticons/default/biggrin.gif) |
|
|
|
| Ninja |
Aug 5 2026, 07:43 AM
Post
#1048
|
|
Member Group: Members Posts: 261 Joined: 25-September 25 From: Granbury Texas Member No.: 29,004 Region Association: Southwest Region |
Just imagine what Fred could do with a dedicated shop!
He does just fine without one... Looking "jewel like" Fred. (IMG:style_emoticons/default/first.gif) I'll NEVER work in another shop without AC down here in Hell... Mepstine commented (in a PM) about 85 degree heat. That's our LOW for the day down here! Happens at sunrise! Then it's a 100+ |
|
|
|
| Shivers |
Aug 5 2026, 07:50 AM
Post
#1049
|
|
Senior Member Group: Members Posts: 3,504 Joined: 19-October 20 From: La Quinta, CA Member No.: 24,781 Region Association: Southern California |
Car is looking great. It's been 115 degrees around here and I know Texas can
get hot. Drink lots of water Sir. I jump inside for 15 minutes to bring down the core temp. I can work till 1:00pm, I start at 3:00am |
|
|
|
| friethmiller |
Aug 5 2026, 08:14 AM
Post
#1050
|
|
Senior Member Group: Members Posts: 1,446 Joined: 10-February 19 From: Austin, TX Member No.: 22,863 Region Association: Southwest Region
|
Hose Clamp Restoration (8/4/2026):
As we last left off... the old, original hose clamps were taking a gasoline bath. 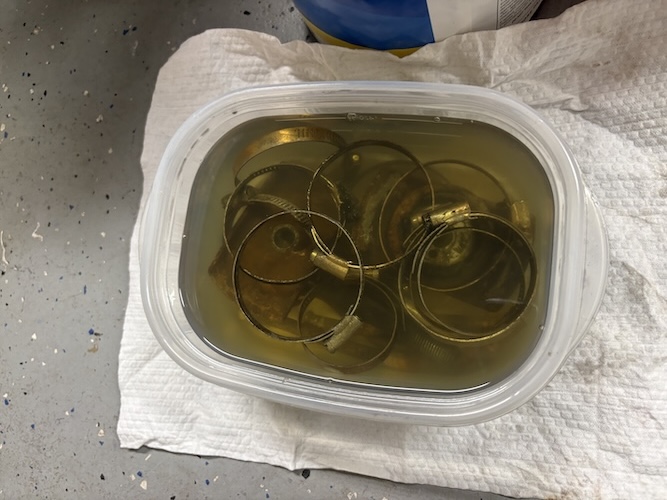 From here, I tried cleaning the clamps without removing the electroplating but they were still a bit rough no matter what I tried. So I decided to ditch that plan. (IMG:style_emoticons/default/bootyshake.gif) The next thing I tried was a phosphate + water solution which removed the coating and a fair amount of the rust. Not too bad but still not good enough. Next, I dipped each clamp into Muriatic acid and then a baking soda/water wash (sorry no pics (IMG:style_emoticons/default/sad.gif) ). After drying everything off, I went with a satin clear coat to keep the rust from returning. If you remember this was the paint I used on the backside of the LE's rims. Here's a few photos of the clear coat going on and a few of the final results - I like it! 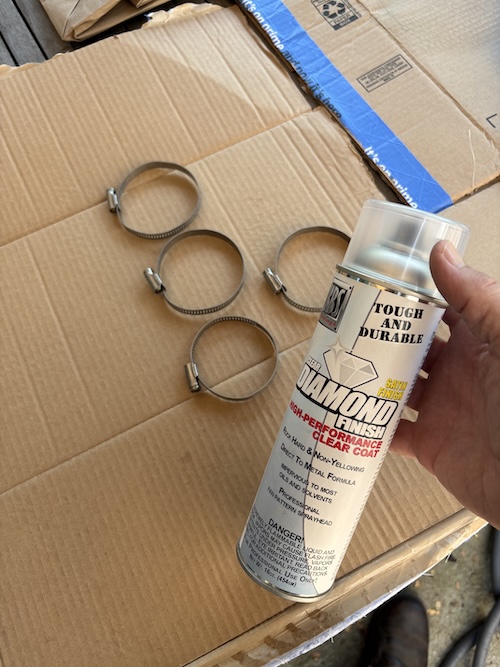 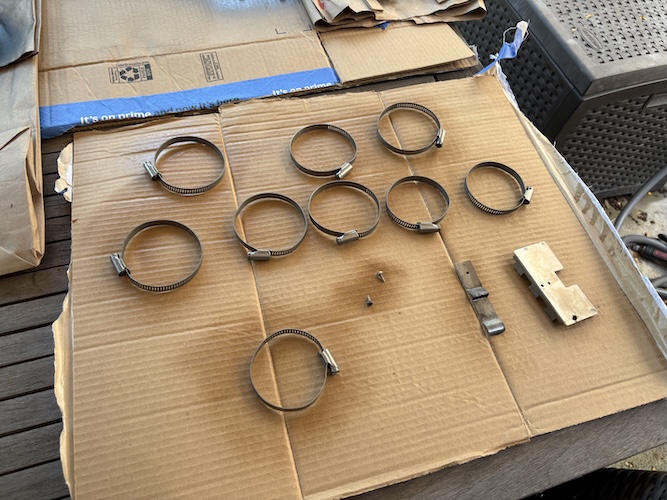 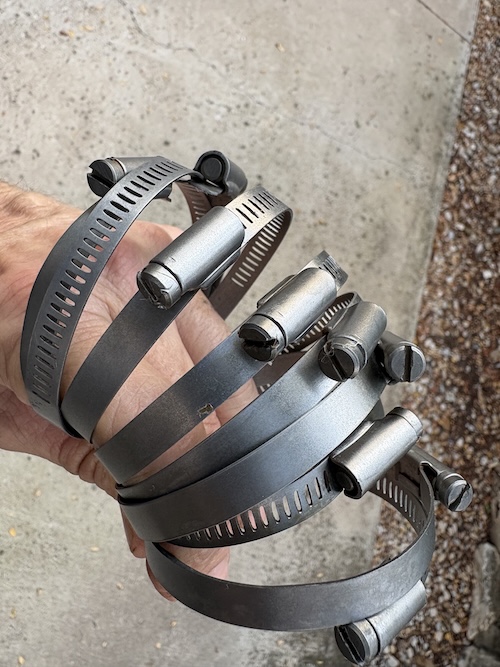 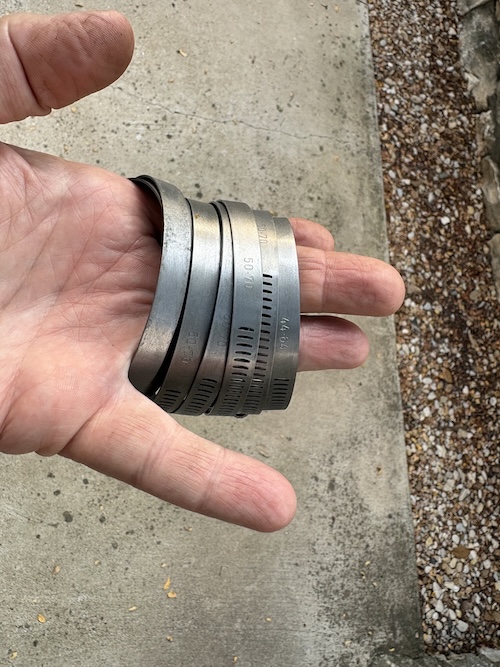 I had saved two clamps that I didn't restore. Here's a side-by-side. 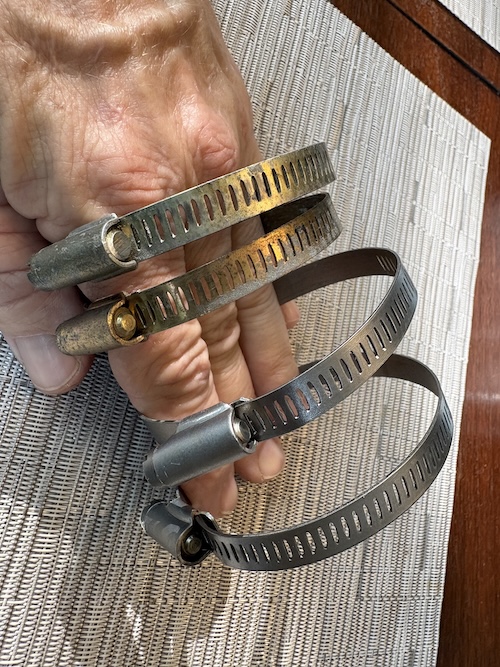 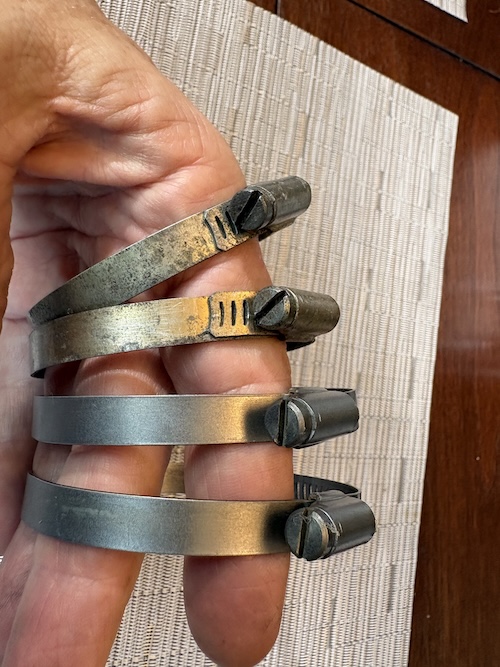 |
|
|
|
| Cairo94507 |
Aug 5 2026, 09:01 AM
Post
#1051
|
|
Michael Group: Members Posts: 10,731 Joined: 1-November 08 From: Auburn, CA Member No.: 9,712 Region Association: Northern California
|
Those look nice. (IMG:style_emoticons/default/beerchug.gif)
|
|
|
|
| friethmiller |
Aug 5 2026, 09:44 AM
Post
#1052
|
|
Senior Member Group: Members Posts: 1,446 Joined: 10-February 19 From: Austin, TX Member No.: 22,863 Region Association: Southwest Region
|
QUOTE(Cairo94507 @ Aug 5 2026, 10:01 AM) Thanks! Easy to do and these are better quality than new, IMHO. So, to recap... just drop them in muriatic acid till they stop bubbling, baking soda wash, and then clear coat. Found the pics of those last two I did: 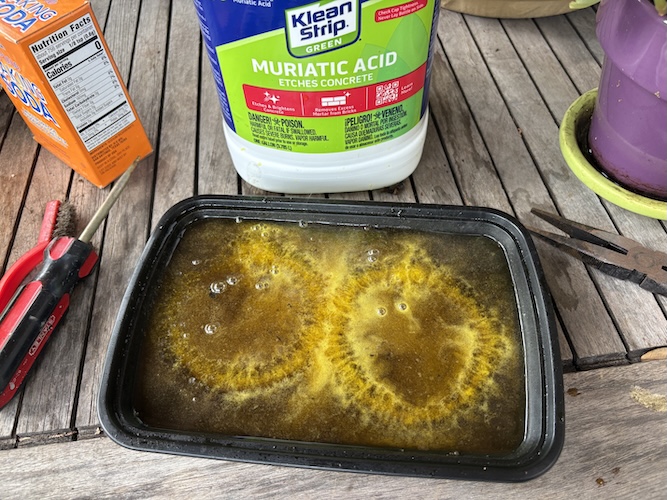 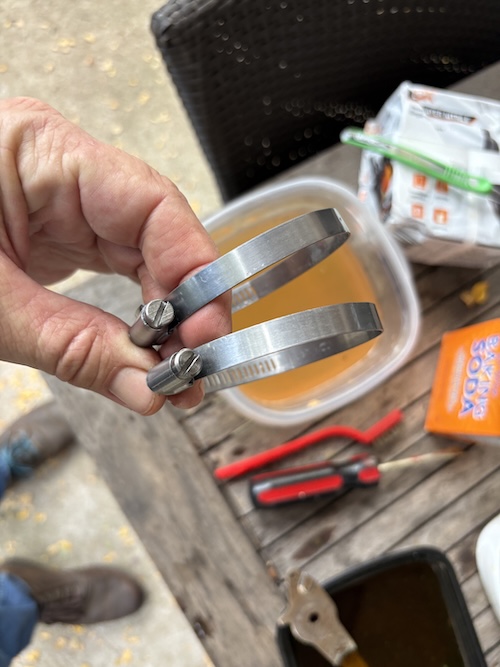 |
|
|
|
| Nogoodwithusernames |
Aug 5 2026, 02:07 PM
Post
#1053
|
|
Member Group: Members Posts: 313 Joined: 31-May 16 From: Sutter, CA Member No.: 20,051 Region Association: None |
QUOTE(friethmiller @ Aug 5 2026, 08:44 AM) QUOTE(Cairo94507 @ Aug 5 2026, 10:01 AM) Thanks! Easy to do and these are better quality than new, IMHO. So, to recap... just drop them in muriatic acid till they stop bubbling, baking soda wash, and then clear coat. Looks great. It will be interesting to see how the clear coat in the thread areas hold up after being tightened down and if that causes any rust prone areas. What was your reason for not trying out one of the at home plating kits? |
|
|
|
| friethmiller |
Aug 5 2026, 03:35 PM
Post
#1054
|
|
Senior Member Group: Members Posts: 1,446 Joined: 10-February 19 From: Austin, TX Member No.: 22,863 Region Association: Southwest Region
|
QUOTE(Nogoodwithusernames @ Aug 5 2026, 03:07 PM) Looks great. It will be interesting to see how the clear coat in the thread areas hold up after being tightened down and if that causes any rust prone areas. What was your reason for not trying out one of the at home plating kits? Ha! I was waiting for that question. These would certainly plate, no doubt... and they'd look nice - I'm sure. I guess pure laziness on my part. It's a bit of an operation pulling out all the buckets, prep'ing everything. I'm like... if I failed to identify this as a plate-able part when I did everything earlier this year, it's too late. (IMG:style_emoticons/default/biggrin.gif) I've got a few more things in this category you'll see very soon. |
|
|
|
| friethmiller |
Aug 5 2026, 04:24 PM
Post
#1055
|
|
Senior Member Group: Members Posts: 1,446 Joined: 10-February 19 From: Austin, TX Member No.: 22,863 Region Association: Southwest Region
|
QUOTE(Nogoodwithusernames @ Aug 5 2026, 03:07 PM) Looks great. It will be interesting to see how the clear coat in the thread areas hold up after being tightened down and if that causes any rust prone areas. What was your reason for not trying out one of the at home plating kits? See #846 for all the plating that was done. |
|
|
|
|
3 User(s) are reading this topic (3 Guests and 0 Anonymous Users)
0 Members:

|
Lo-Fi Version | Time is now: 6th August 2026 - 05:38 AM |
Invision Power Board
v9.1.4 © 2026 IPS, Inc.