|
|
|
Porsche, and the Porsche crest are registered trademarks of Dr. Ing. h.c. F. Porsche AG.
This site is not affiliated with Porsche in any way. Its only purpose is to provide an online forum for car enthusiasts. All other trademarks are property of their respective owners. |
|
|

  |

| friethmiller |
 Feb 12 2024, 09:32 AM Feb 12 2024, 09:32 AM
Post
#121
|
|
Senior Member  Group: Members Posts: 1,358 Joined: 10-February 19 From: Austin, TX Member No.: 22,863 Region Association: Southwest Region |
Lower Firewall - Part 1: (2/11/2024) - It rained all day Saturday and into Sunday morning, so I didn't get a lot of time in the backyard this weekend.
In order to fit the lower firewall replacement panel in one piece, one of the heater pipes must be removed. This is the reason for not closing up the driver side longitudinal at this time. The first step in the process was to cut out the original, rusted-out lower firewall just below the upper backrest panel (name?). With most of the metal gone, I was able to get to the spot welds up underneath the front engine shelf. For the most part, I had easy-access to the small 90 degree strip of metal that remained. The first picture shows the process of me drilling out each weld and them using vise-grips to slowly remove the top edge of the lower firewall. After that, the paint was removed to expose a light coat of surface rust that was removed using some Fast Etch. 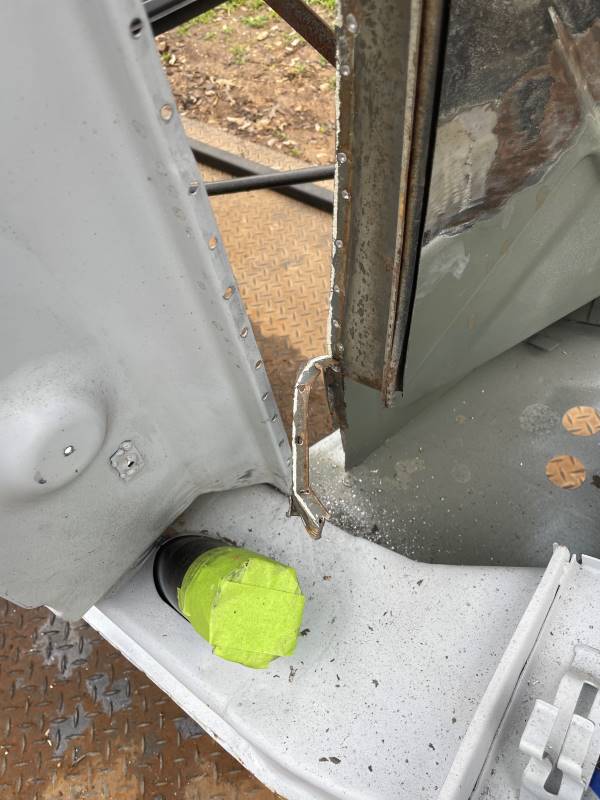 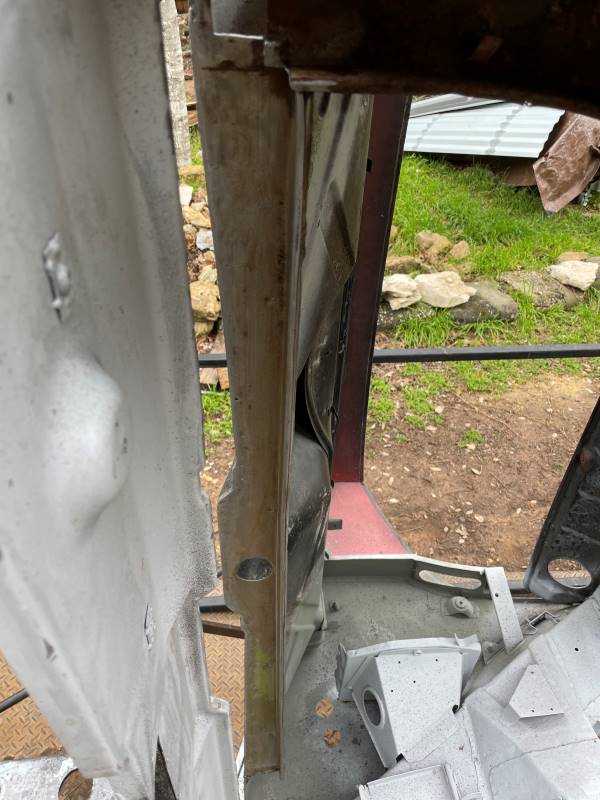 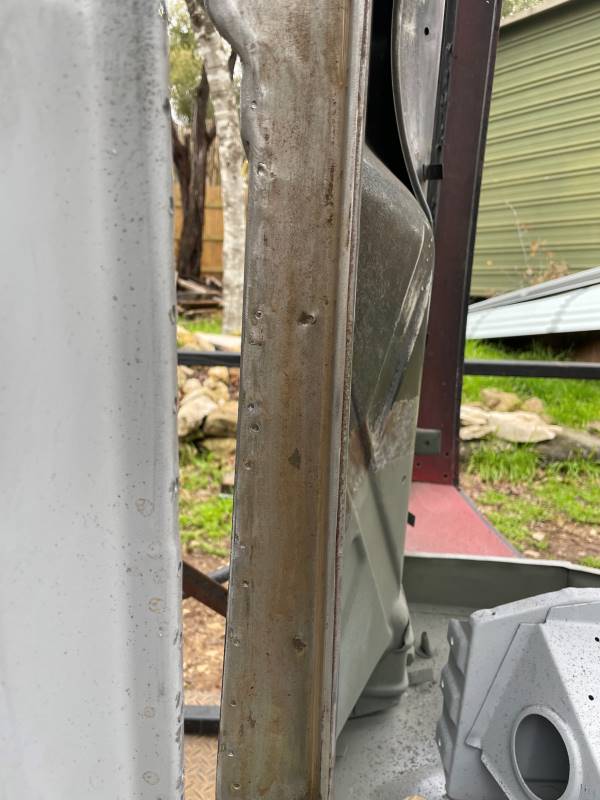 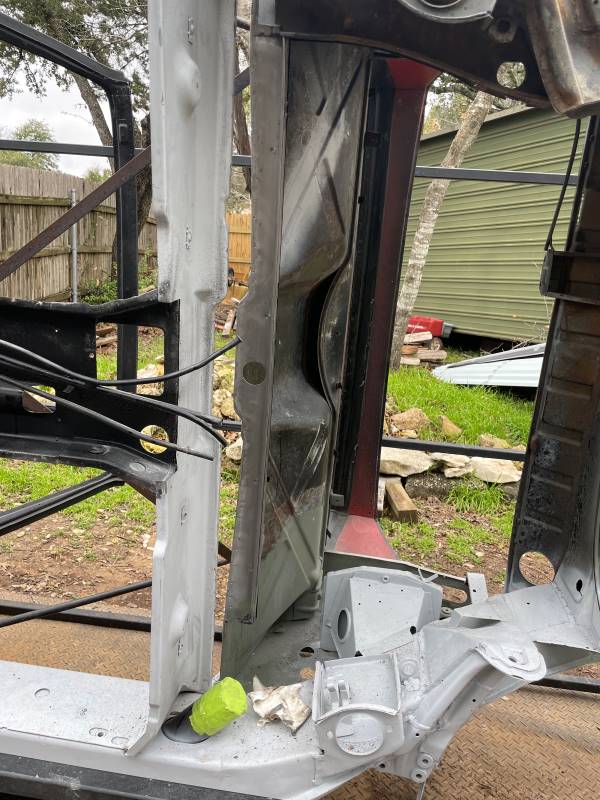 Next, I decided to go ahead and weld in the last of the three stiffeners that goes on the front of the front-lower bulkhead (opposite the lower firewall). As with the other two, there's just a ton of welding you have to do to proper install the panel. The following photos show this progression. Note how the weld-thru occurs on the backside. This is the main reason for doing this step before installing the lower firewall. I will prep and paint the backside before installing the firewall next weekend. 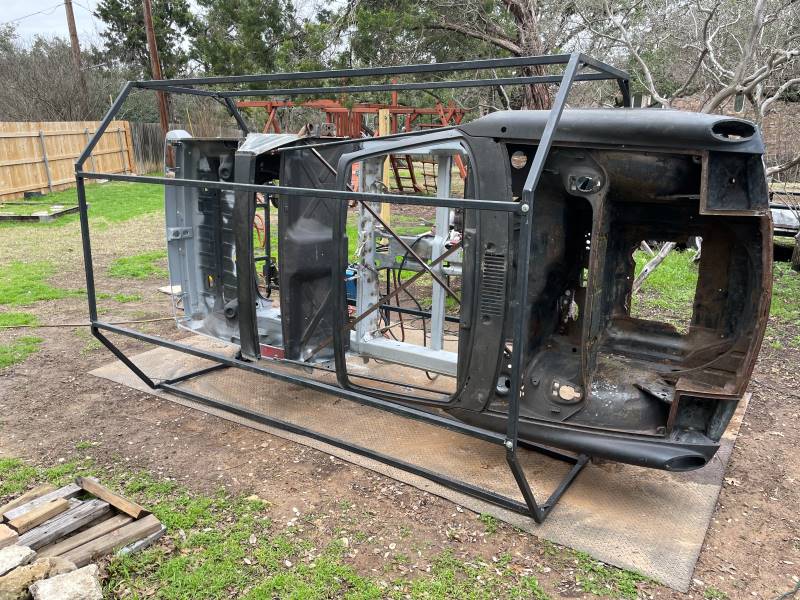 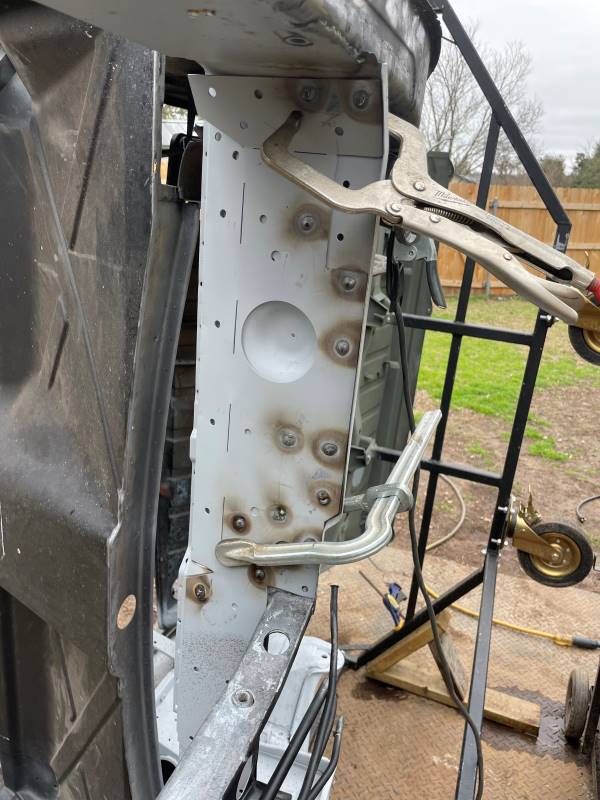  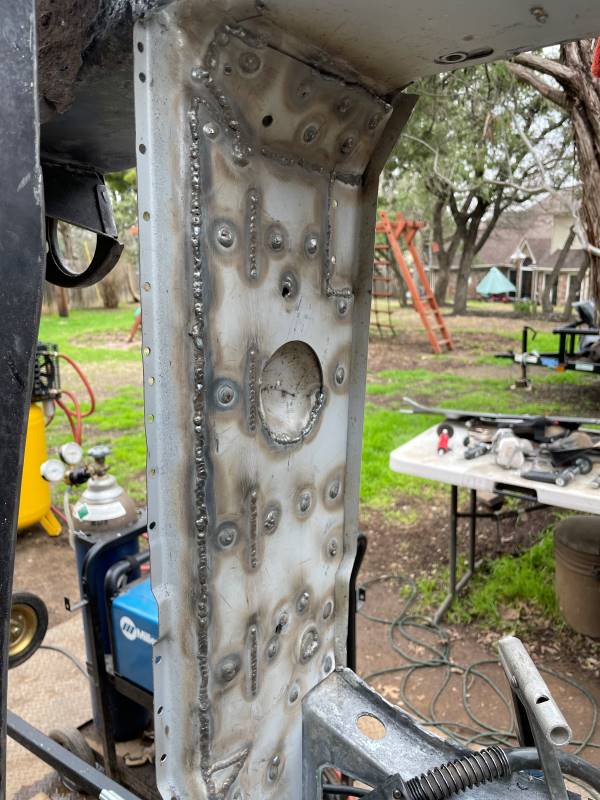 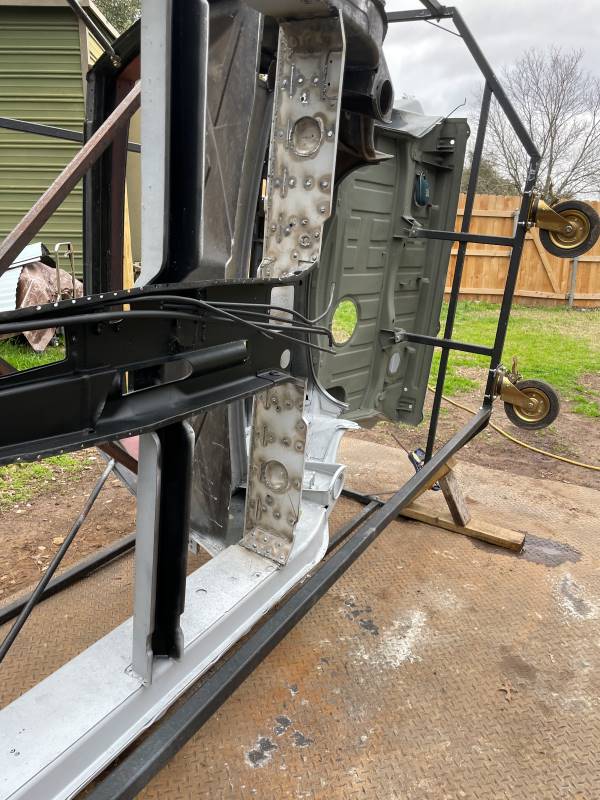 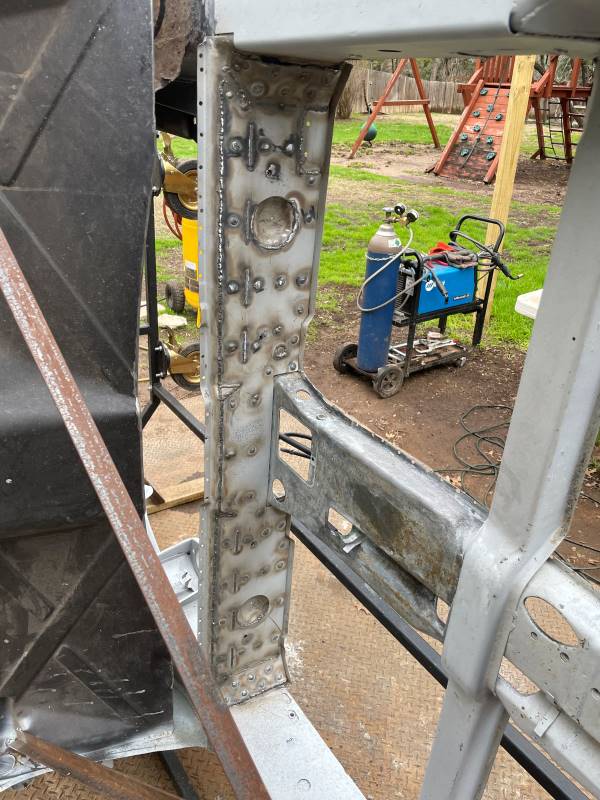  |
   |

 
|
| friethmiller |
Feb 19 2024, 09:15 AM
Post
#122
|
|
Senior Member Group: Members Posts: 1,358 Joined: 10-February 19 From: Austin, TX Member No.: 22,863 Region Association: Southwest Region |
Lower Firewall - Part 2: (2/17 & 2/18/2024)
Day 1 - Firewall Prep: I had a full day of it just getting the necessary items transferred over to the new part. You can see how I decided to cut and mount the original shifter recessed piece. Things were pretty rusty so I was continually treating and wire-wheeling the parts to get them ready to be welded. My brazing job was a bit of a failure here (not enough heat) but I plan to redo it once I get the correct welder. Note the arrows on the last image. These are new wire tabs I put in at the top and two heavy duty tabs that were welded in at the bottom for the passenger side e-brake. 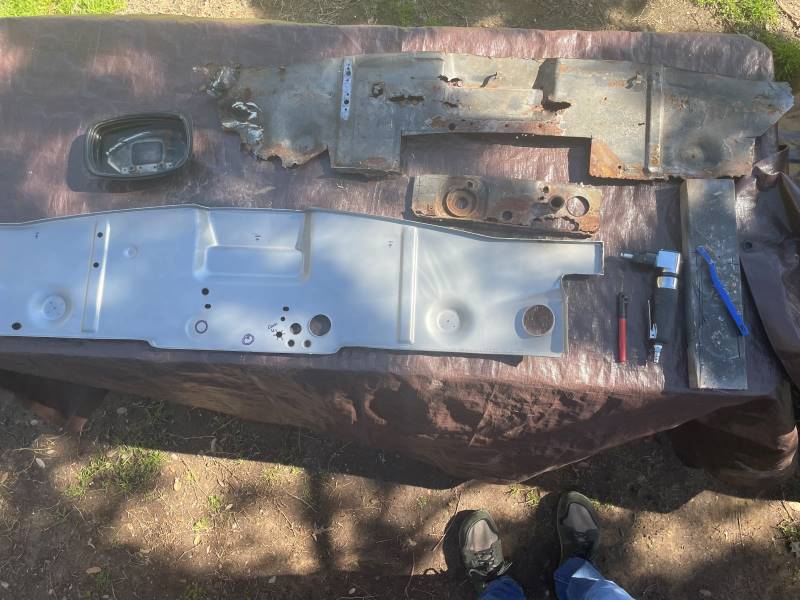 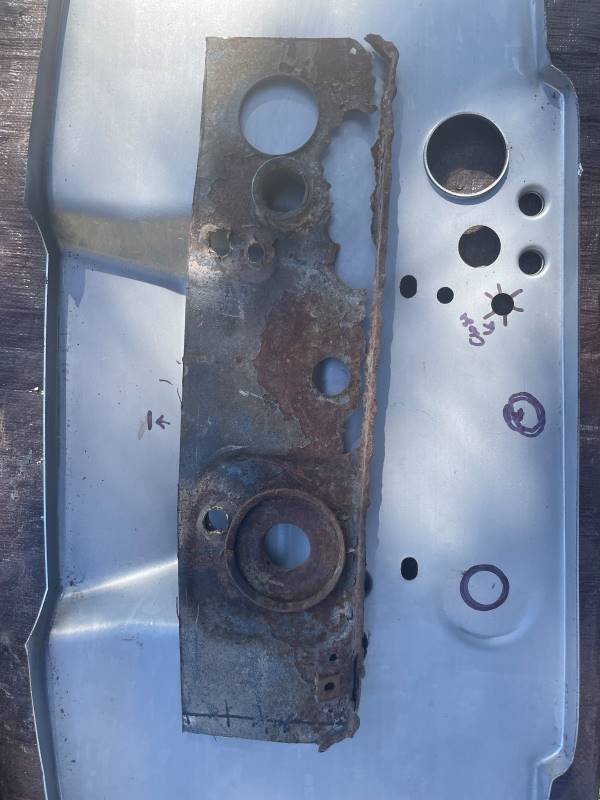 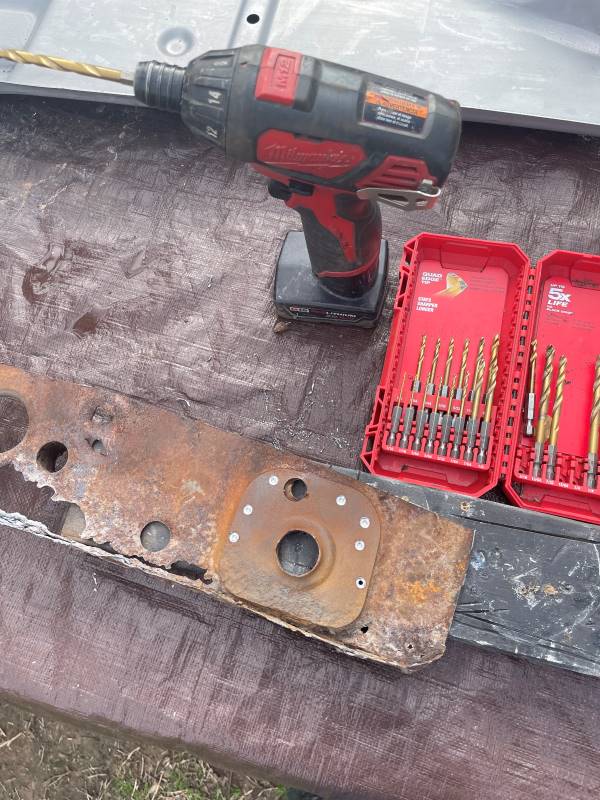 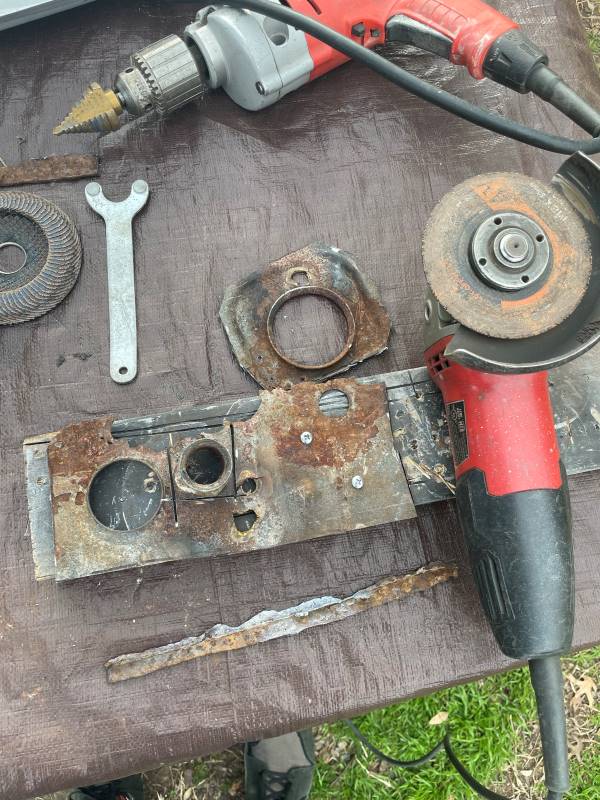 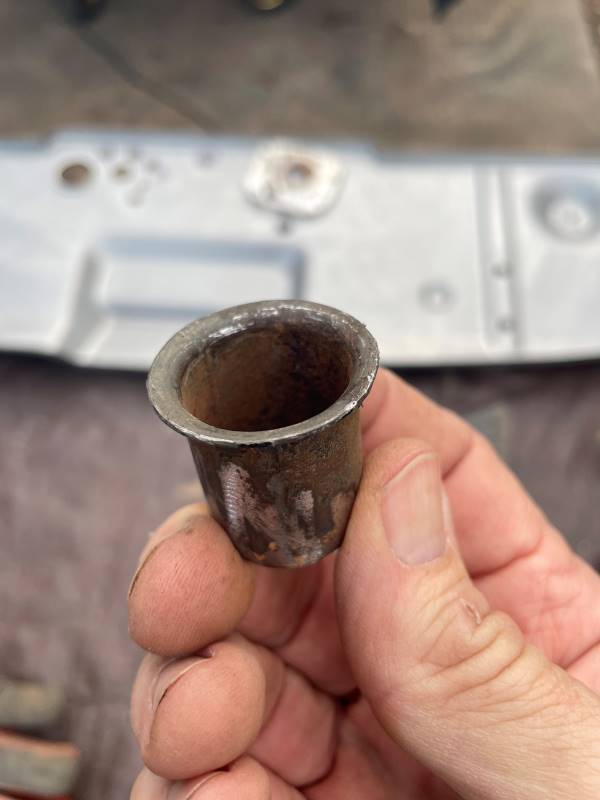 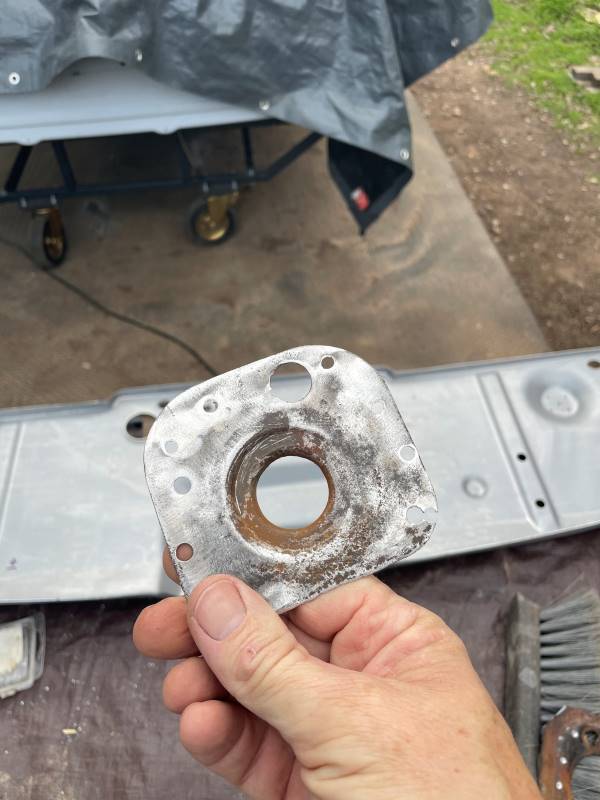 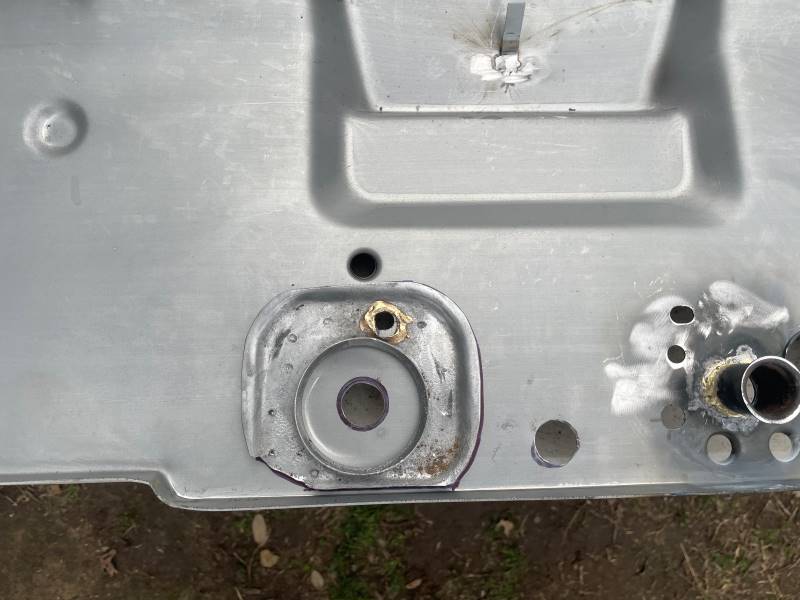 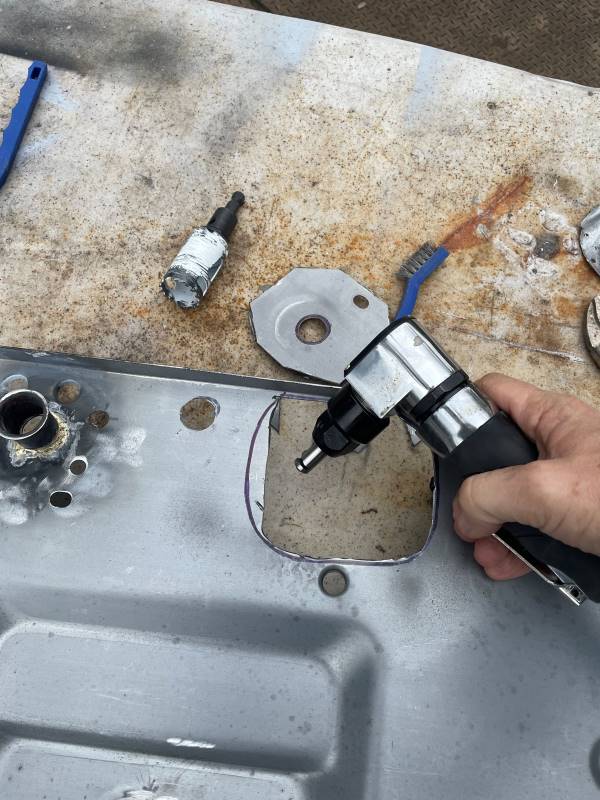 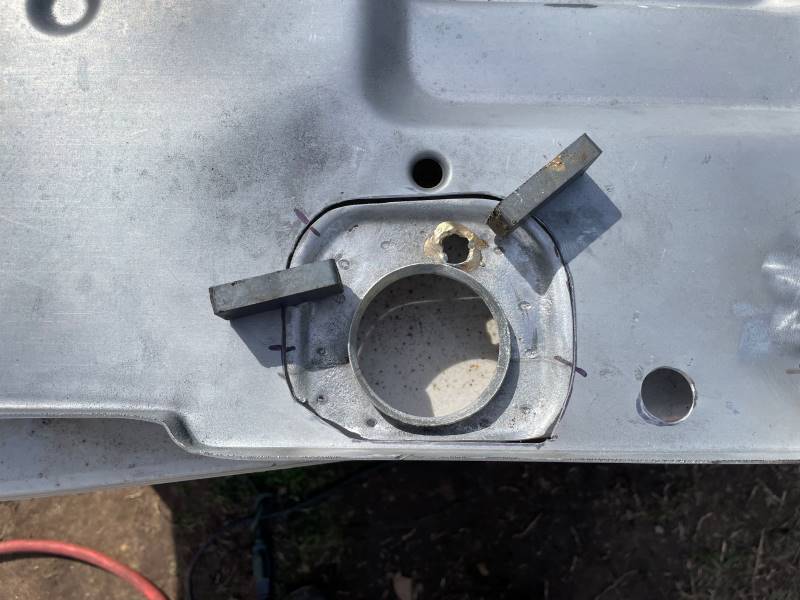 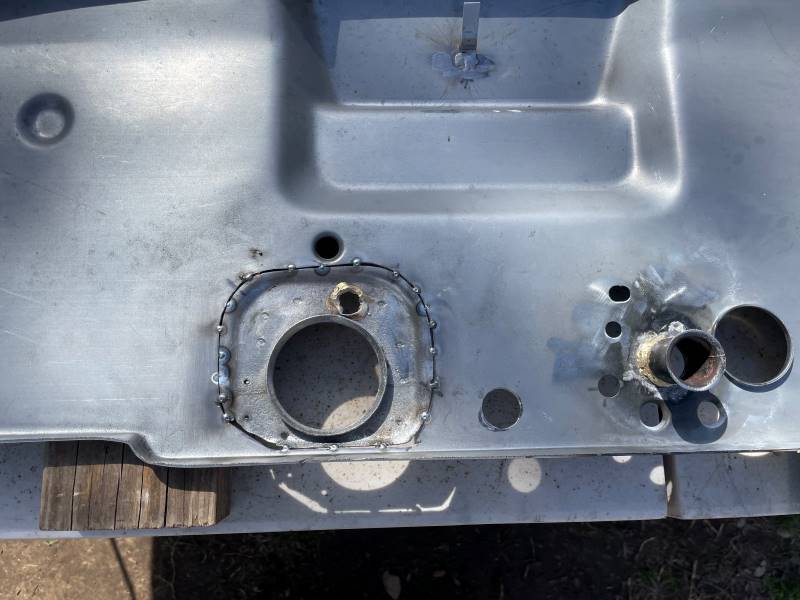 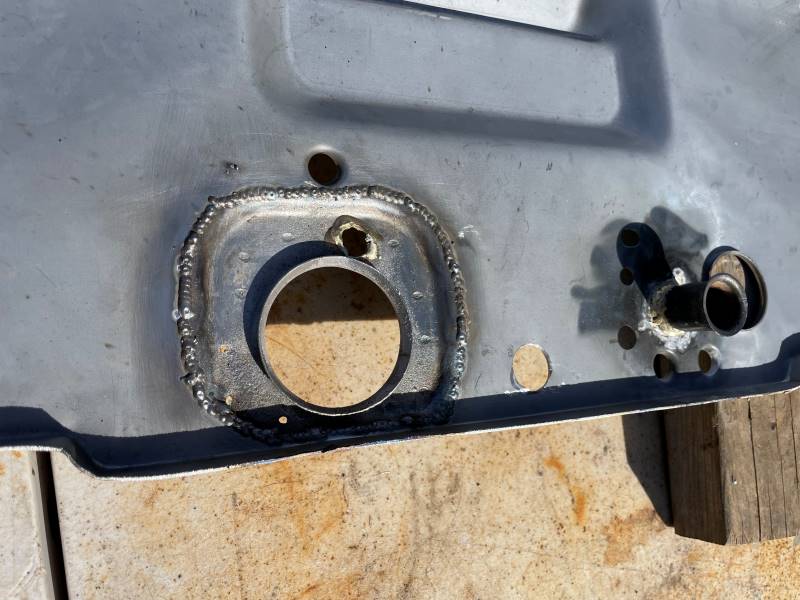  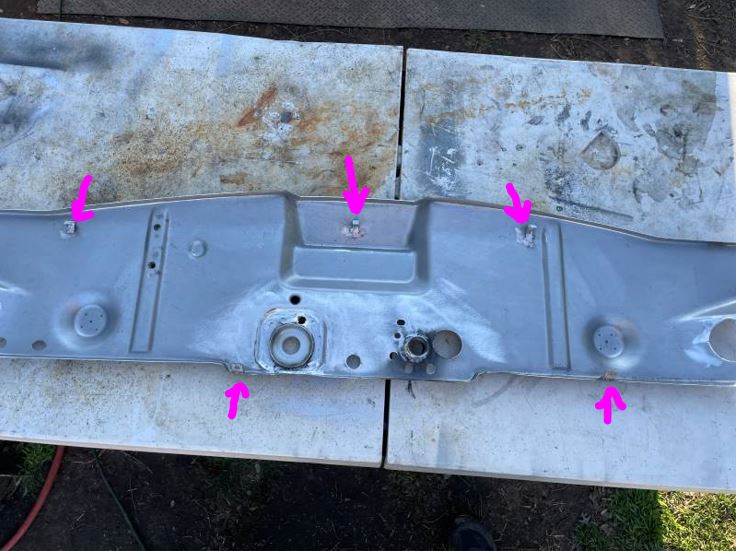 Day 2 - Firewall Install: Sunday was cold but it warmed to a beautiful day. My plan was to weld this entire panel in in one piece. Well.... No way. This is the 2nd Restoration Design firewall that I've installed and both have had the same two issues: 1) the heater pipe holes are undersized; and 2) the tabs that extend on either side toward the inner fenders are about a 1/2" too short. A little frustrating. Anyways... to deal with the issue, I cut both ends off at the flattest point along the panel. This allowed me to install the middle section and then deal with each end piece separately. The light went flat before I had a chance to grind anything - so more work remains. More photos to come... 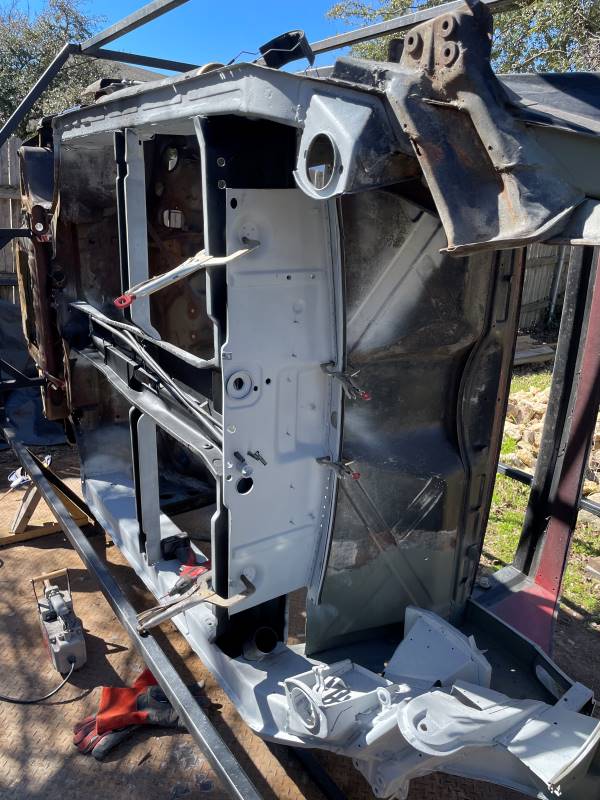 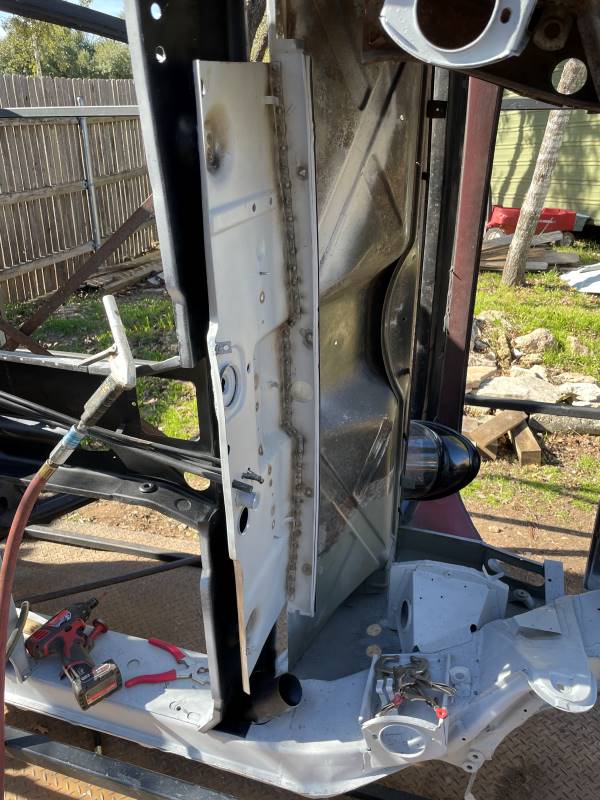 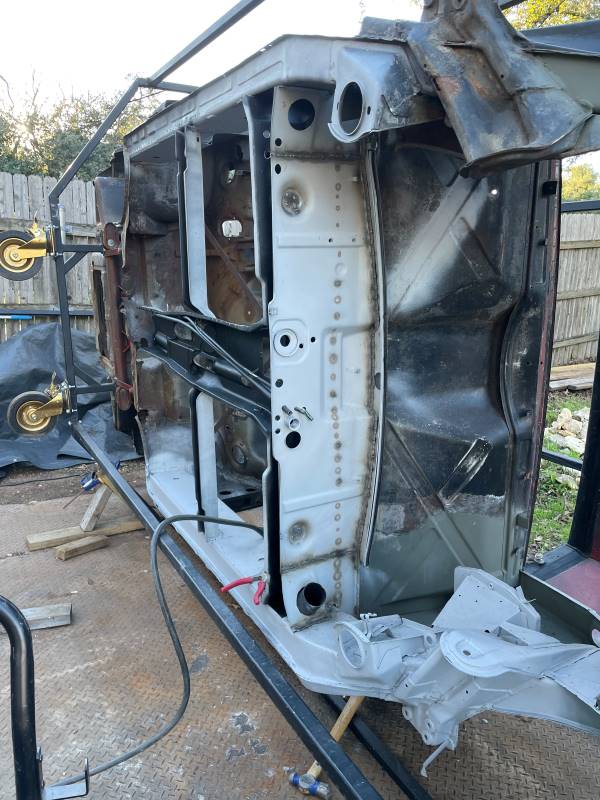  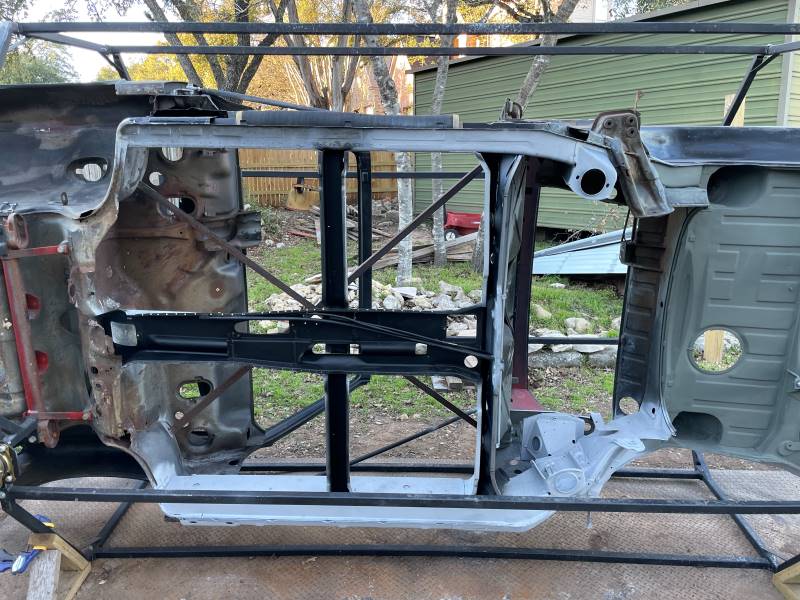 |
|
|
|
| friethmiller |
Feb 20 2024, 08:27 AM
Post
#123
|
|
Senior Member Group: Members Posts: 1,358 Joined: 10-February 19 From: Austin, TX Member No.: 22,863 Region Association: Southwest Region |
@technicalninja - did you see my air nibbler? Really liked the tool. Thanks for the suggestion! (IMG:style_emoticons/default/first.gif)
|
|
|
|
| technicalninja |
Feb 20 2024, 09:31 AM
Post
#124
|
|
Advanced Member Group: Members Posts: 2,531 Joined: 31-January 23 From: Granbury Texas Member No.: 27,135 Region Association: Southwest Region |
Yes. I did.
Not real fast and cannot handle thick stuff but you can write your name in cursive with them... |
|
|
|
| TRS63 |
Feb 20 2024, 01:23 PM
Post
#125
|
|
Member Group: Members Posts: 326 Joined: 14-September 20 From: Germany - Stuttgart Member No.: 24,690 Region Association: Europe |
Impressive work here!
Antoine |
|
|
|
| friethmiller |
Feb 20 2024, 02:05 PM
Post
#126
|
|
Senior Member Group: Members Posts: 1,358 Joined: 10-February 19 From: Austin, TX Member No.: 22,863 Region Association: Southwest Region |
QUOTE(TRS63 @ Feb 20 2024, 01:23 PM)  Impressive work here! Antoine Thanks Antoine! I certainly appreciate the comments/advice I've been getting from everybody on what I'm trying to do. I just spent my lunch hour grinding welds. (IMG:style_emoticons/default/blink.gif) Going to take a few more "lunches" just to get done what I welded in this past weekend. Once my gas welder gets here, I'll be brazing the firewall tubes. My used e-brake tubes arrive tomorrow from Rich at 914 Werkes - can't wait. Sincerely, Fred |
|
|
|
| friethmiller |
Feb 22 2024, 02:46 PM
Post
#127
|
|
Senior Member Group: Members Posts: 1,358 Joined: 10-February 19 From: Austin, TX Member No.: 22,863 Region Association: Southwest Region |
Lower Firewall - Part 2.5: (2/20 - 2/22/2024)
Finally after several "working lunches" this week, I was able to grind, prep, and primer all the welds along the new lower firewall panel. What a PIA! Most of the welds up under the front engine tray prevent easy access. I've got the tubing area all cleaned up / exposed for brazing this weekend. Note: not pictured here is the drivers side heat tube and both e-brake tubes.  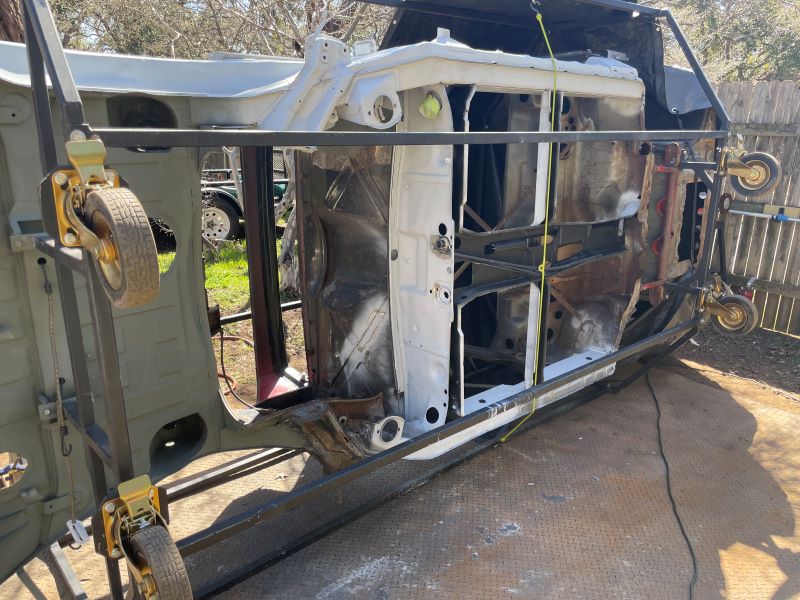 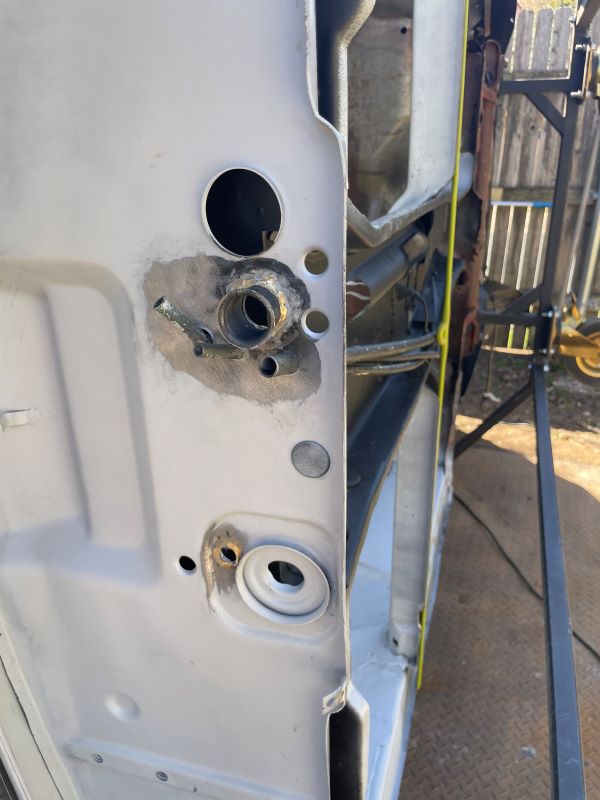 |
|
|
|
| Root_Werks |
Feb 23 2024, 12:36 PM
Post
#128
|
|
Village Idiot Group: Members Posts: 9,024 Joined: 25-May 04 From: About 15NM from Canada Member No.: 2,105 Region Association: Pacific Northwest |
If the tubes are metal, is there a benefit to brazing instead of welding them? Wondering if the factory brazed because of cost or something different?
(IMG:style_emoticons/default/idea.gif) |
|
|
|
| friethmiller |
Feb 24 2024, 07:25 AM
Post
#129
|
|
Senior Member Group: Members Posts: 1,358 Joined: 10-February 19 From: Austin, TX Member No.: 22,863 Region Association: Southwest Region |
QUOTE(Root_Werks @ Feb 23 2024, 12:36 PM) If the tubes are metal, is there a benefit to brazing instead of welding them? Wondering if the factory brazed because of cost or something different? (IMG:style_emoticons/default/idea.gif) Dan, Not 100% sure the reason. (IMG:style_emoticons/default/confused24.gif) Perhaps the thinner metal of the tube or the risk of the weld penetrating [slightly] into the ID of the tube. However, I think its actually stronger to braze the tubes in this instance. Case in Point: I mig-welded my e-brake tubes on my other 914 and I this is now on my "Redo List" for when the engine comes out for any reason. (IMG:style_emoticons/default/wacko.gif) 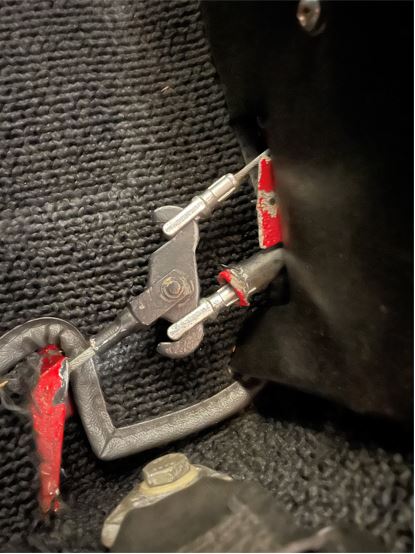 |
|
|
|
| friethmiller |
Feb 26 2024, 01:16 PM
Post
#130
|
|
Senior Member Group: Members Posts: 1,358 Joined: 10-February 19 From: Austin, TX Member No.: 22,863 Region Association: Southwest Region |
Drivers Side Longitudinal - Part 7 (2/23/2024): With the lower firewall in place, it was time to finally finish up the longitudinal. First up... the rear heat pipe. Just getting the heat pipe pass through the lower firewall required a good bit of work. Once the pipe lined up with my markings, I zapped the tube in place and repainted the area. Next, I reinstalled my restored heater muffler.
 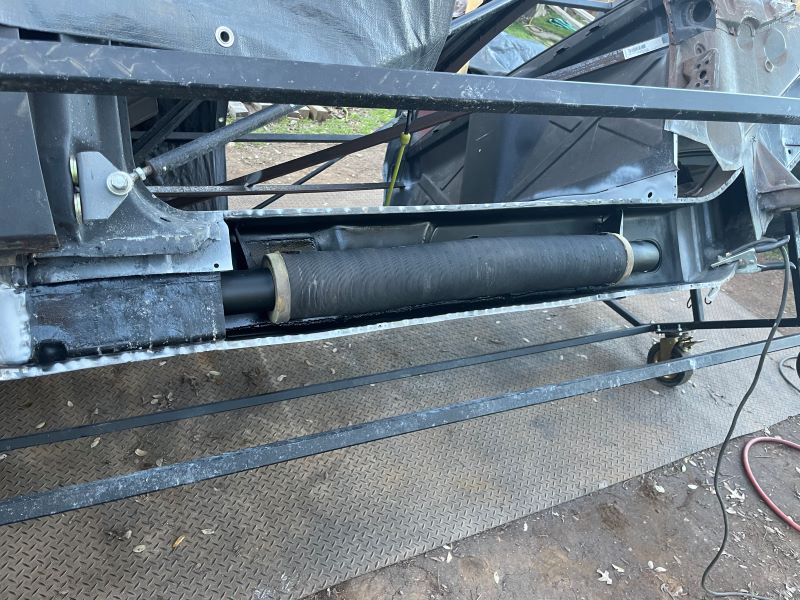 After one last shot of marine wax, the "refurbished" inner rocker was clamped down and welded to the longitudinal. Nothing too exciting to see here but a bunch of welds and whole lot of grinding. More work is required in the area so everything is coated in weld-thru primer. For example, I will return here later to install the lower front door hinge support. Next up, brazing the console/e-brake pipes. 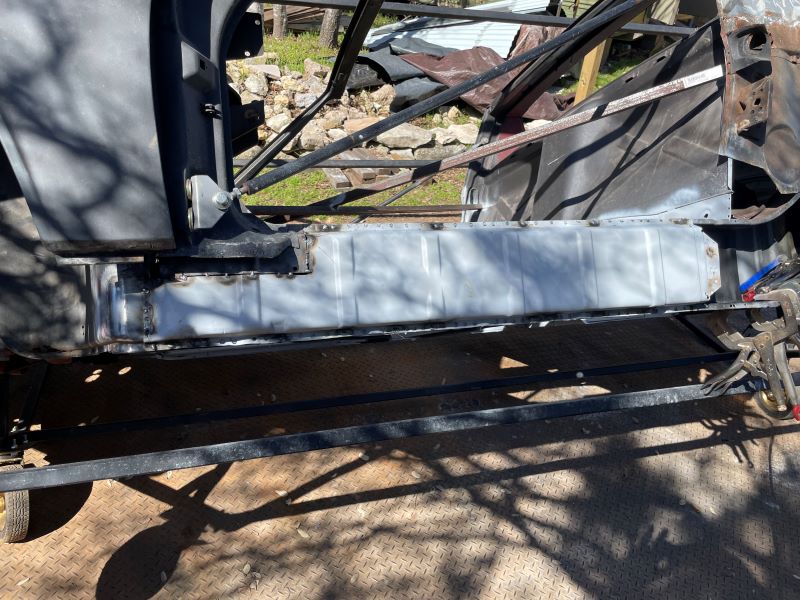  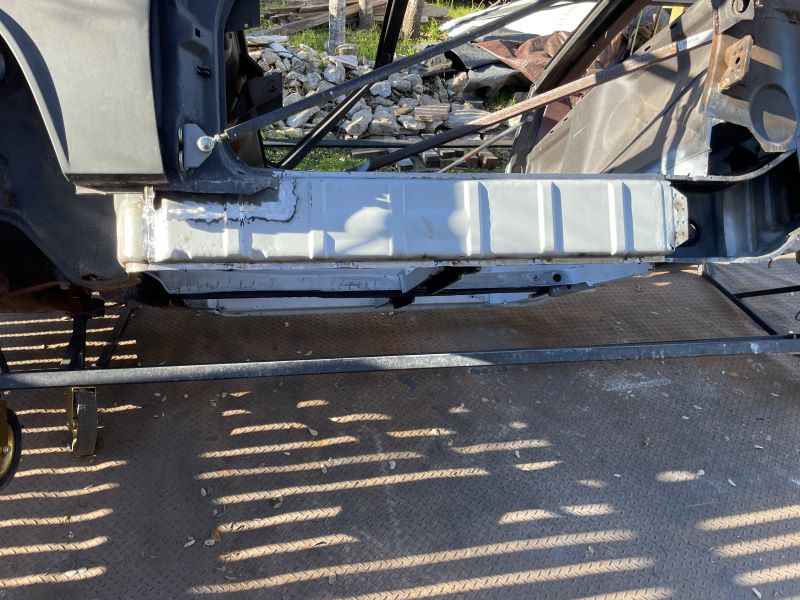 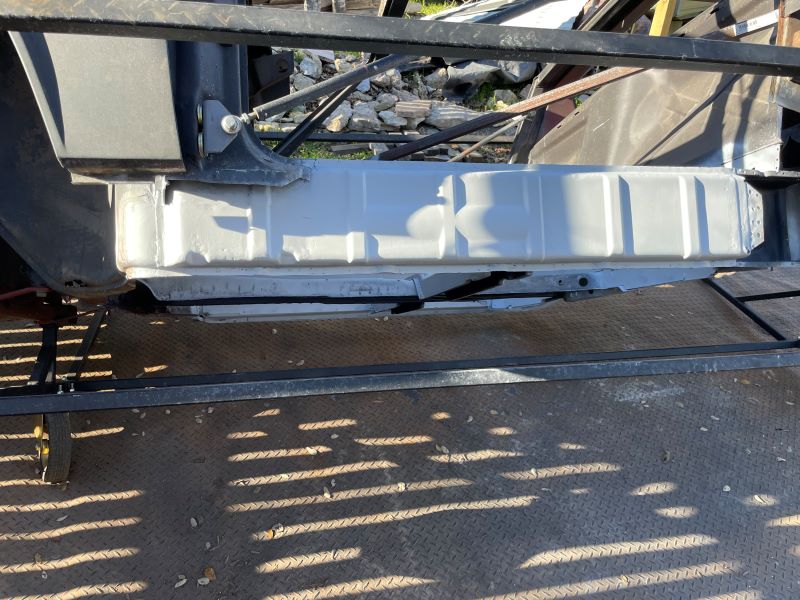 |
|
|
|
| friethmiller |
Feb 26 2024, 01:59 PM
Post
#131
|
|
Senior Member Group: Members Posts: 1,358 Joined: 10-February 19 From: Austin, TX Member No.: 22,863 Region Association: Southwest Region |
Lower Firewall - Part 3: (2/24/2024): With my new Bernzomatic Map/Oxy torch kit, I was dead set on brazing in the tubes that were poking through my new lower firewall panel. After a failed attempt at just using MAP gas, I was back again with the added heat available with adding O2 to the mix. After getting the torch flame to the correct spot (I remembered my Dad showing me this as a teenager working on his old cars), I started brazing the pipes in place. Can't say I was very good but I think I got the job done. I was warned that this setup went through a lot of Oxygen. Boy! They weren't kidding! This torch burns through O2 at a prodigious rate! I had to actually source a 2nd bottle from a TSC Saturday afternoon and come in for a 2nd round. I'm happy with the results but there are a few gaps I'd like to add a bit more braze to (i.e. the pass side e-brake tube). Debating if I should get more O2 and braze a little more or just get some JB Weld and jam it into the gaps (IMG:style_emoticons/default/biggrin.gif)
@914Werke -> These are the e-brake tubes you sent me. Thank you! 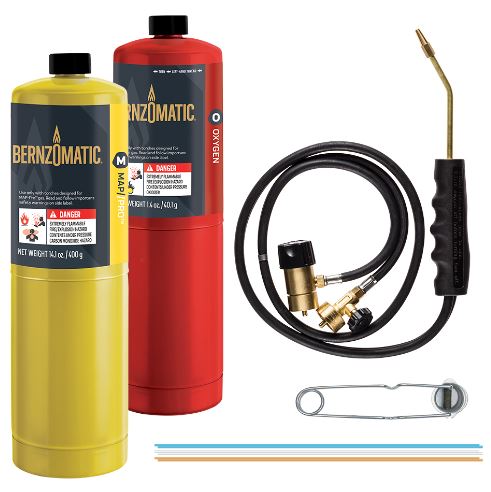 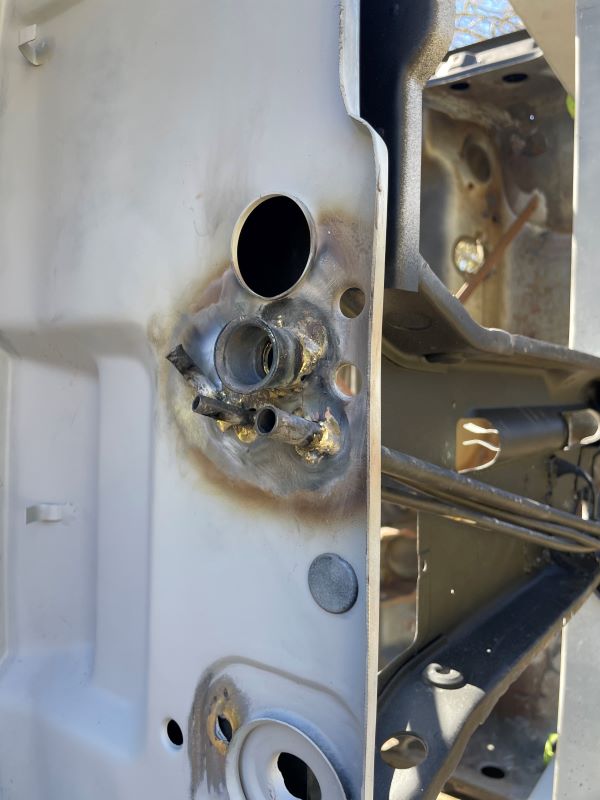 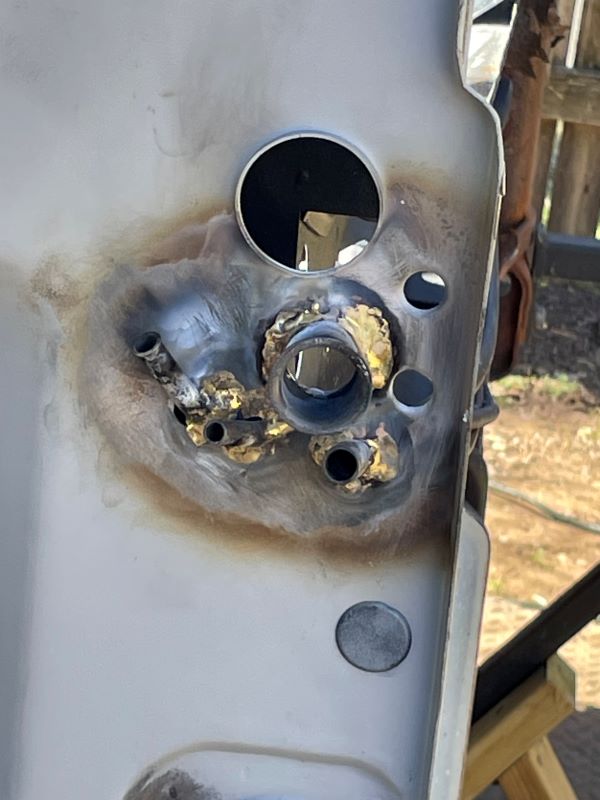 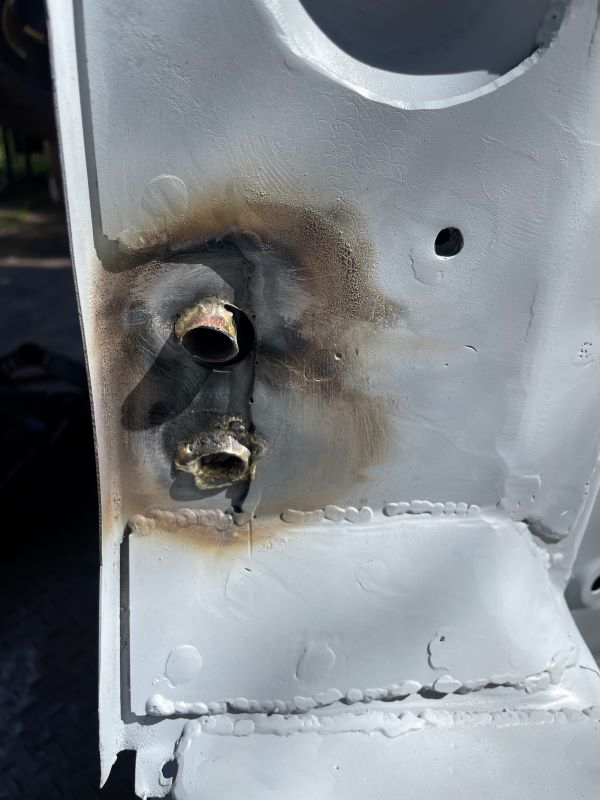 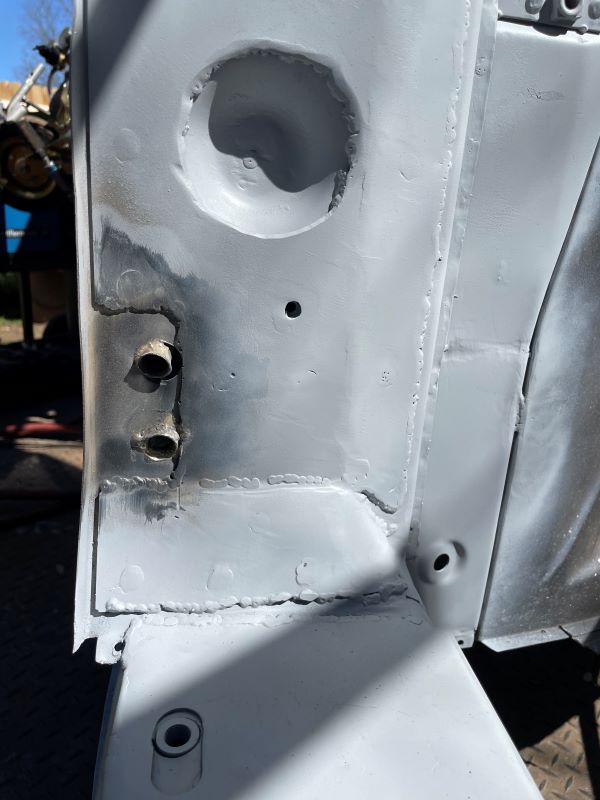 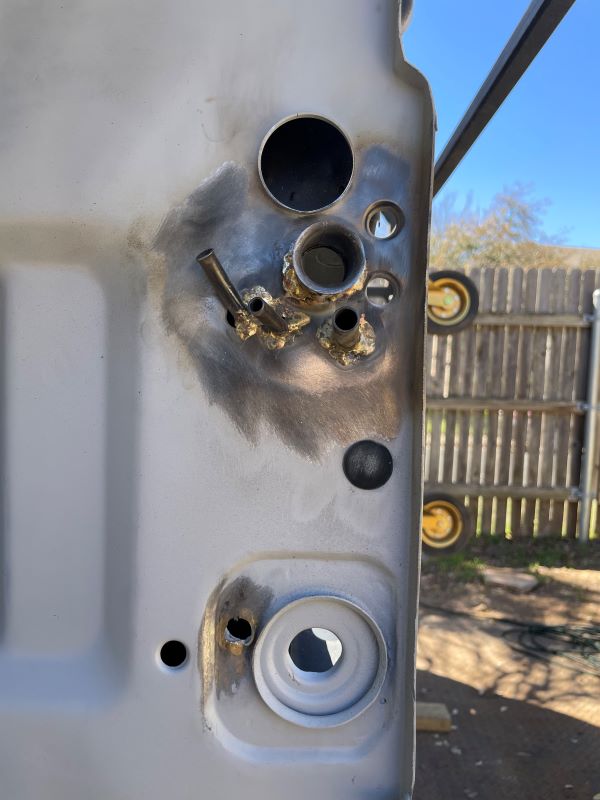 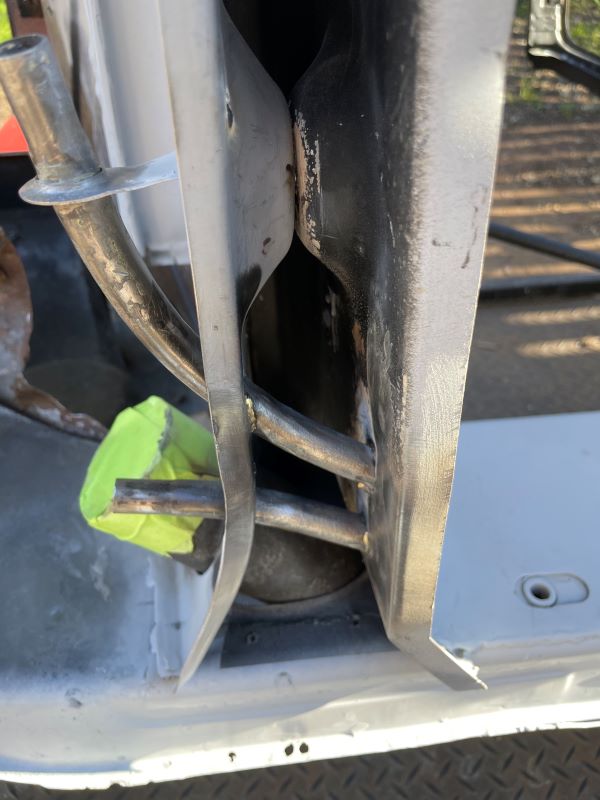  Final shots of the lower firewall in the evening light in my backyard (IMG:style_emoticons/default/smile.gif) 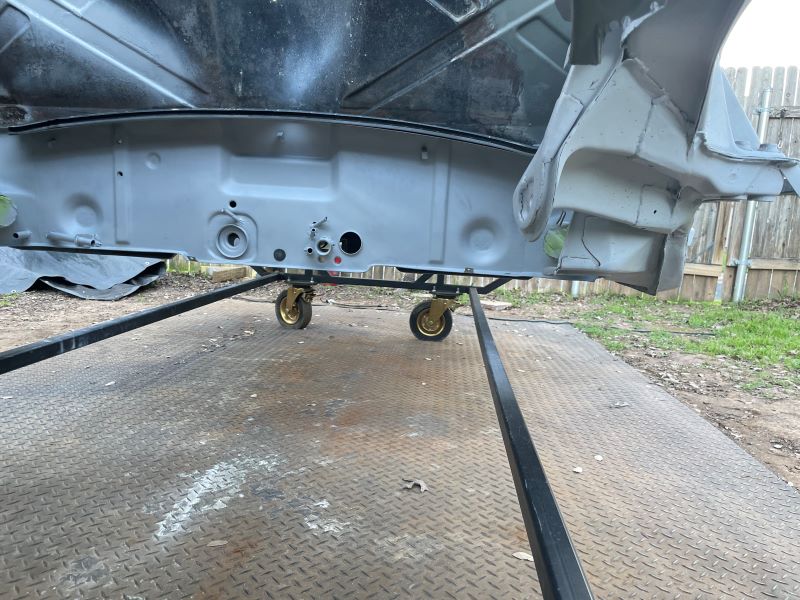 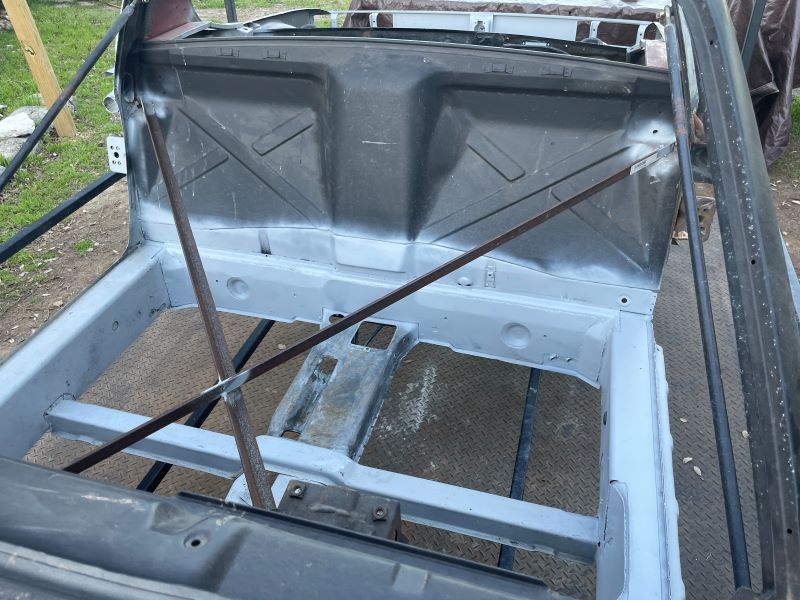 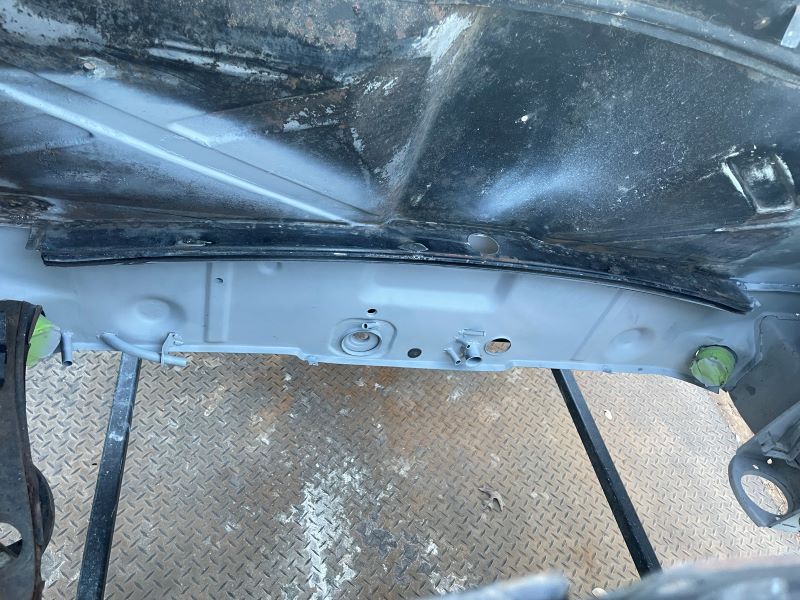 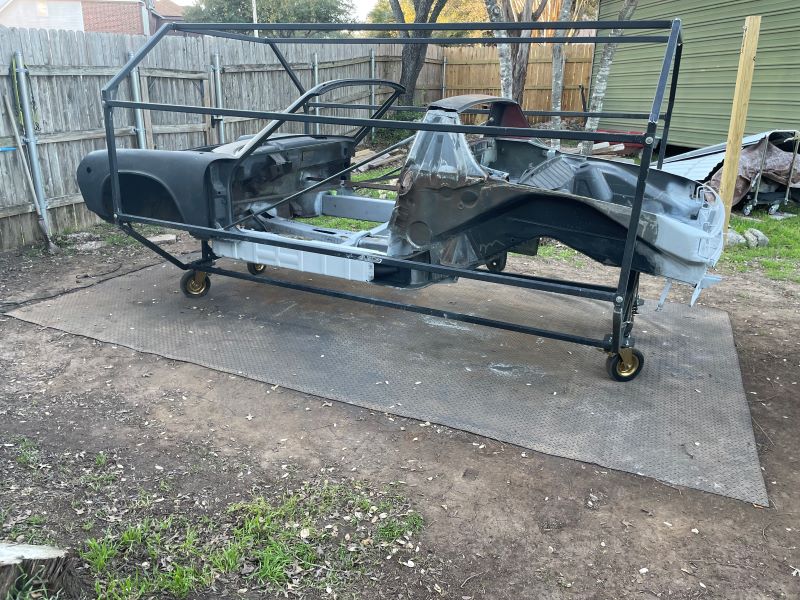 |
|
|
|
| East coaster |
Feb 26 2024, 07:39 PM
Post
#132
|
|
Senior Member Group: Members Posts: 1,949 Joined: 28-March 03 From: Millville, NJ Member No.: 487 Region Association: None |
Looking great!
|
|
|
|
| friethmiller |
Feb 27 2024, 08:19 AM
Post
#133
|
|
Senior Member Group: Members Posts: 1,358 Joined: 10-February 19 From: Austin, TX Member No.: 22,863 Region Association: Southwest Region |
QUOTE(East coaster @ Feb 26 2024, 07:39 PM) Looking great! Thanks @East coaster! It's all about the engine bay at the moment. I can't believe the amount of rust under this paint! 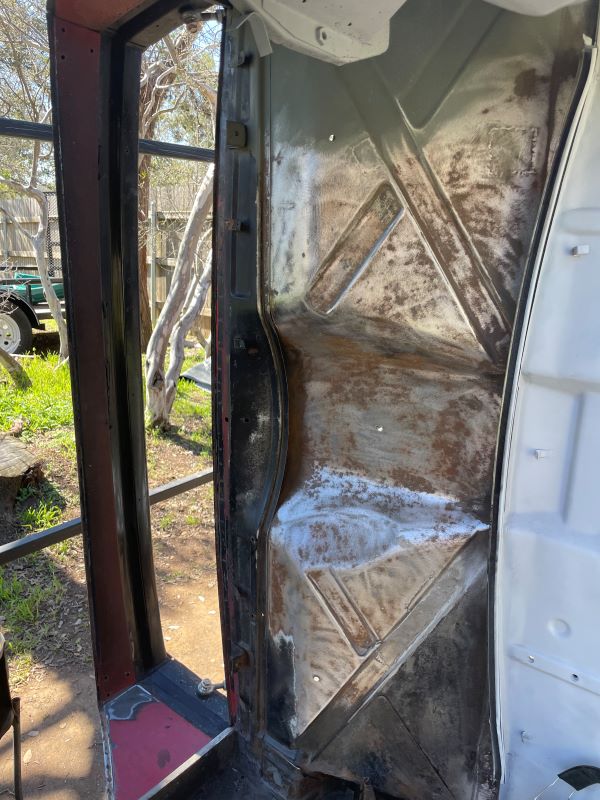 |
|
|
|
| 914werke |
Feb 27 2024, 01:27 PM
Post
#134
|
|
"I got blisters on me fingers" Group: Members Posts: 11,686 Joined: 22-March 03 From: USofA Member No.: 453 Region Association: Pacific Northwest |
|
|
|
|
| friethmiller |
Mar 4 2024, 10:07 AM
Post
#135
|
|
Senior Member Group: Members Posts: 1,358 Joined: 10-February 19 From: Austin, TX Member No.: 22,863 Region Association: Southwest Region |
Drivers Side Rear Inner Console - Part 1: (3/1/2024):
With this excellent pull-off from Rich at @914werke , I set to work removing the frame metal that the console comes wrapped in. This is the kind of wrapping that takes several hours to undo (IMG:style_emoticons/default/biggrin.gif) The first set of photos shows how I drilled out all the spot welds. I've found it easier to just use sharp bits with some oil. I typically step up in bit size 2 or 3 times. Having sharp bits makes this work soooo much easier. 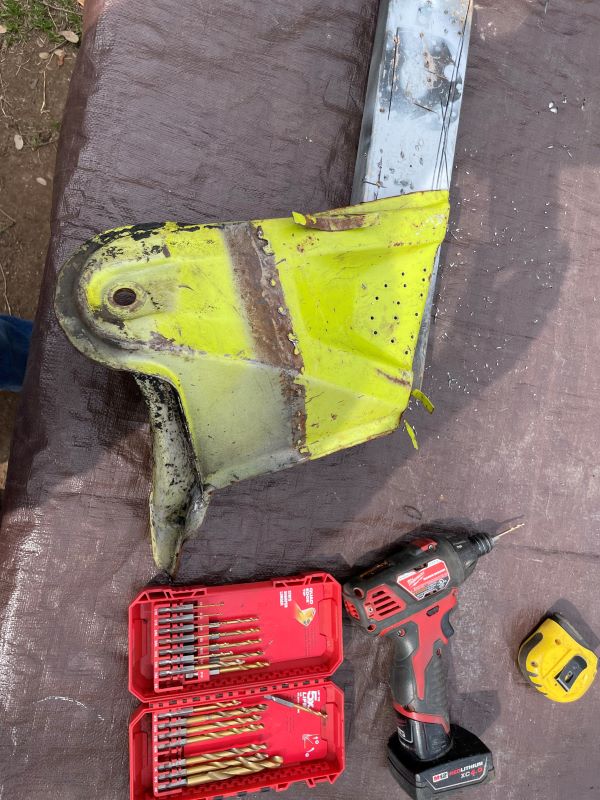 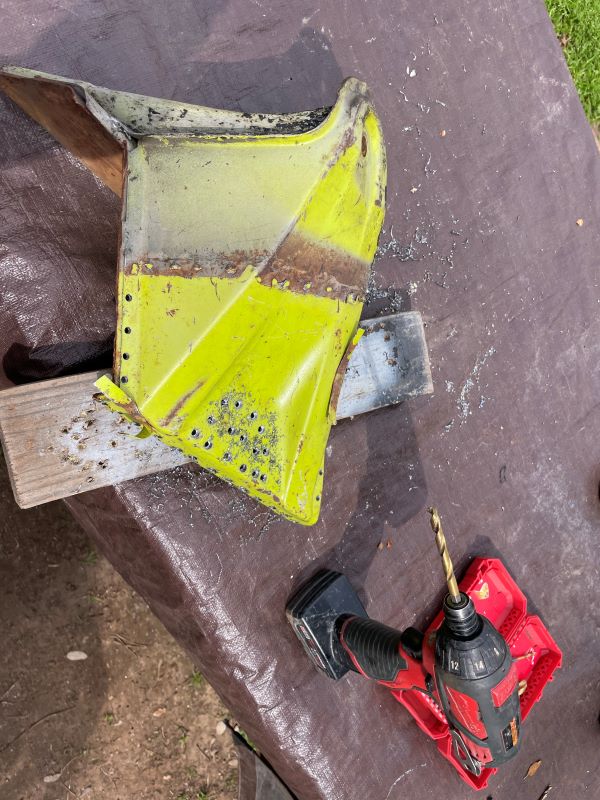 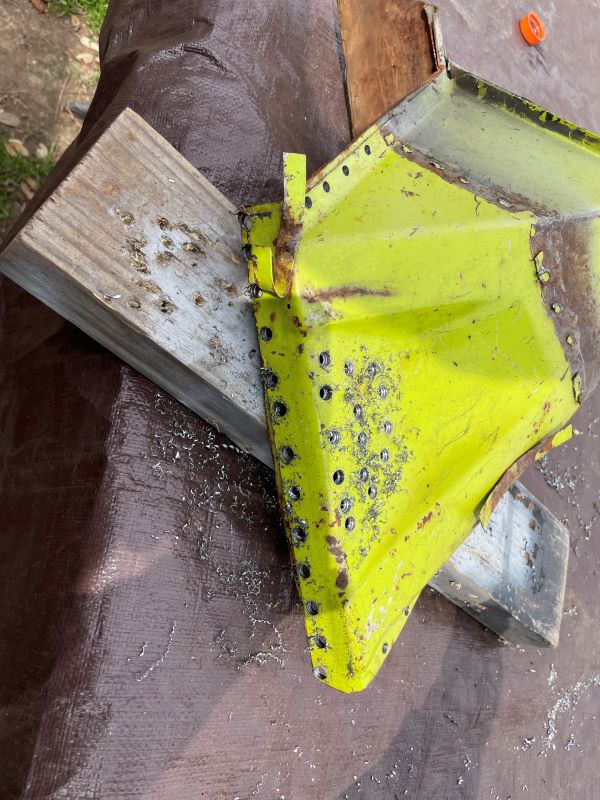 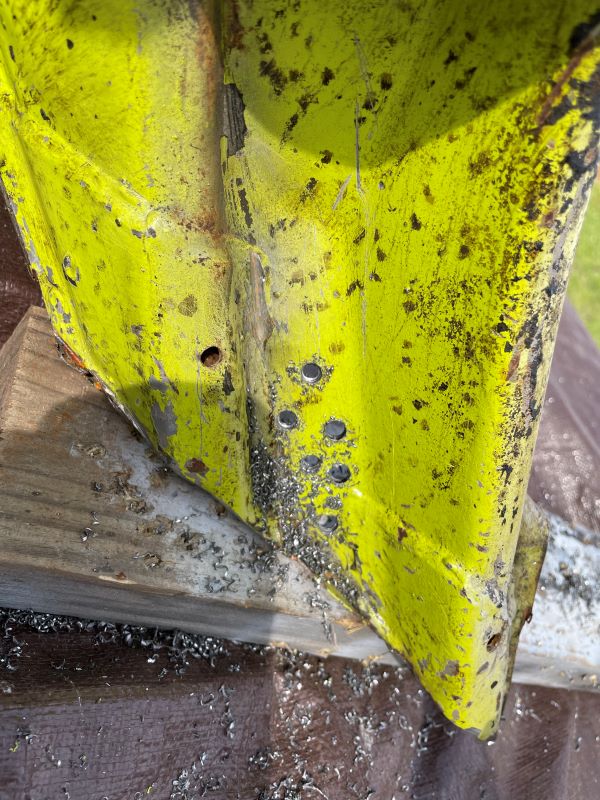 As I get down to the last of the metal that needs to be removed, I get to see the condition of the part. This one is in excellent condition. I guess it should be better on the non-hell hole side of things. 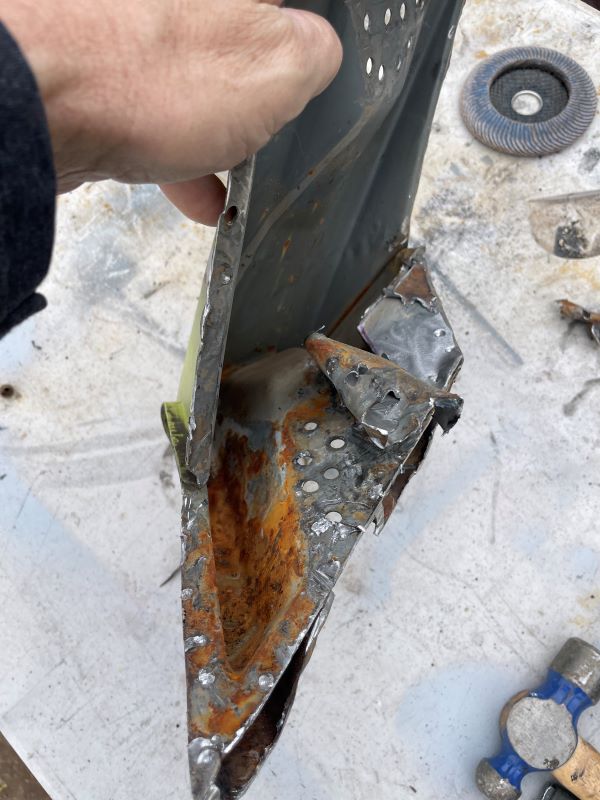 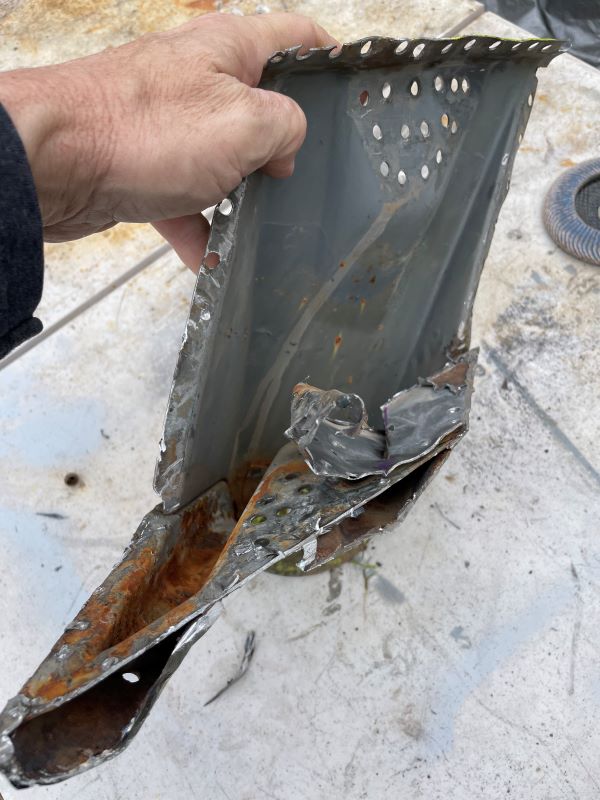 Since this part is in such good condition, I can just leave the gusset metal in-place, reinforce the console ear (as planned) prior to welding it on the car. I like this since I can properly prepare the internal metal after welding on the reinforcement. This is shown in the last picture. Note: the part is treated with a phosphorous-based etching solution prior to paint. In this instance, I'm using Eastwoods black frame rail paint and weld-through primer. This part isn't completely ready but it's close. My next post will be on the removal of the existing (and damaged) suspension console. 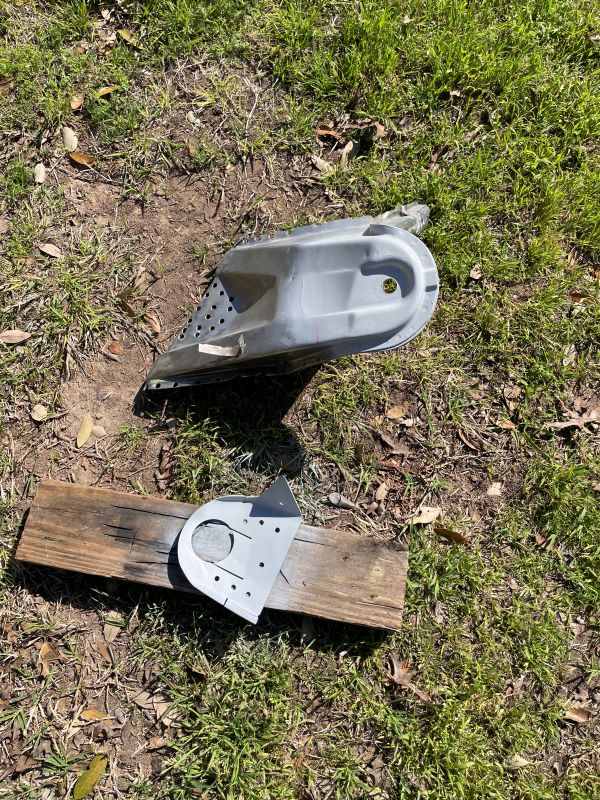 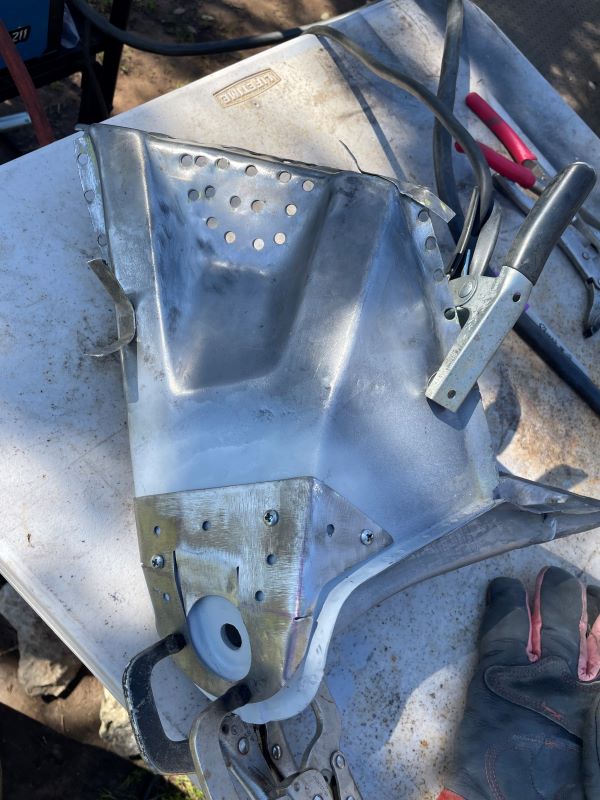 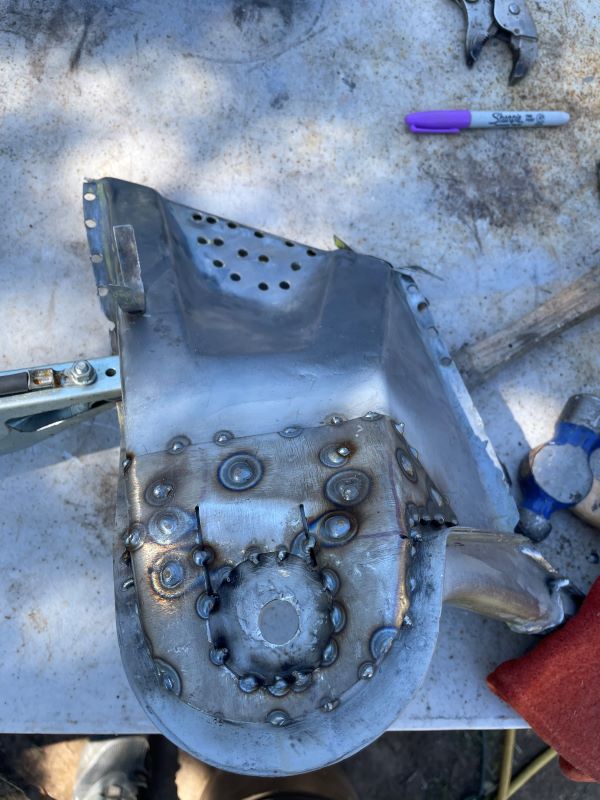 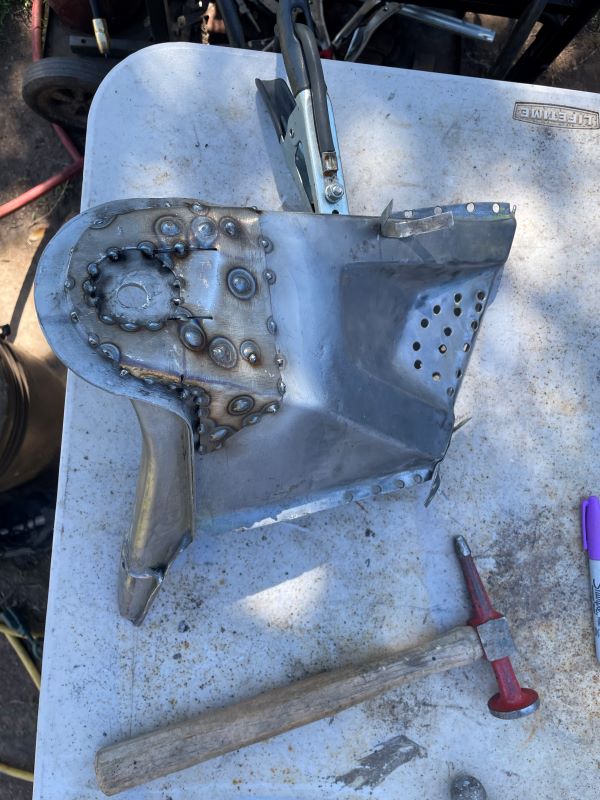 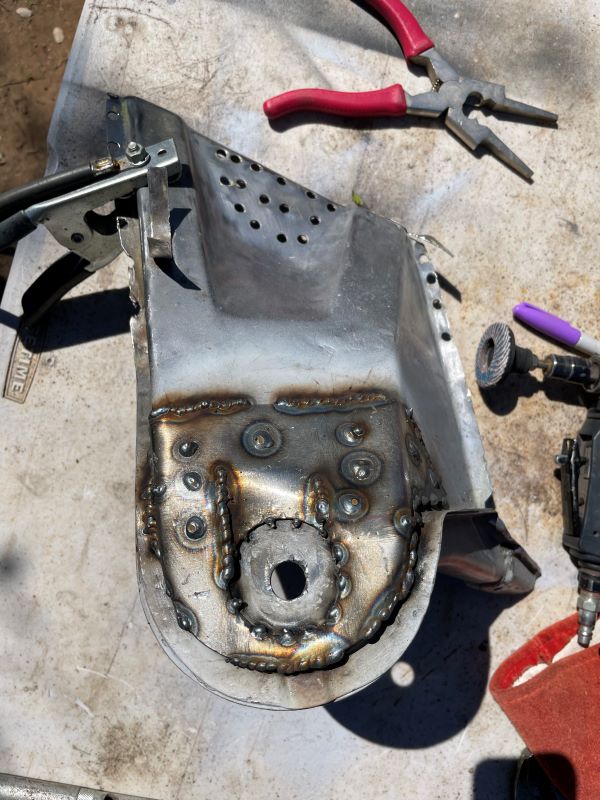  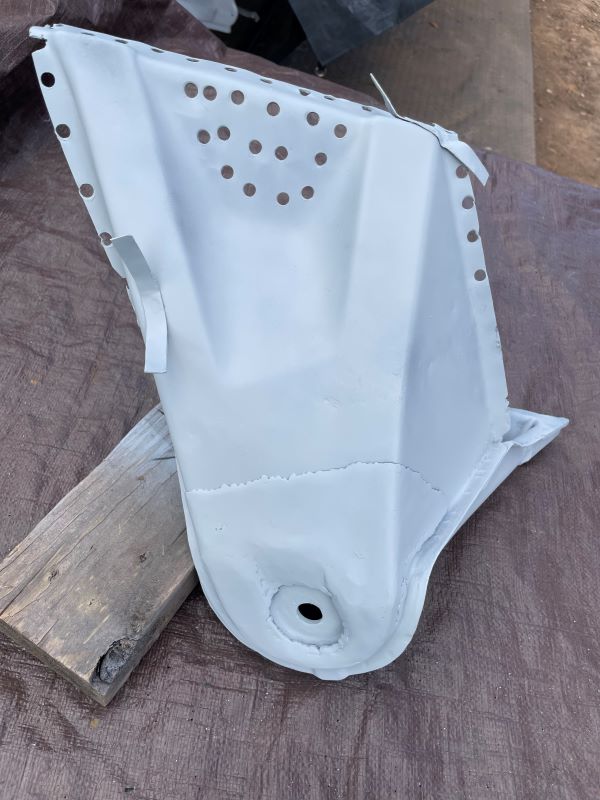 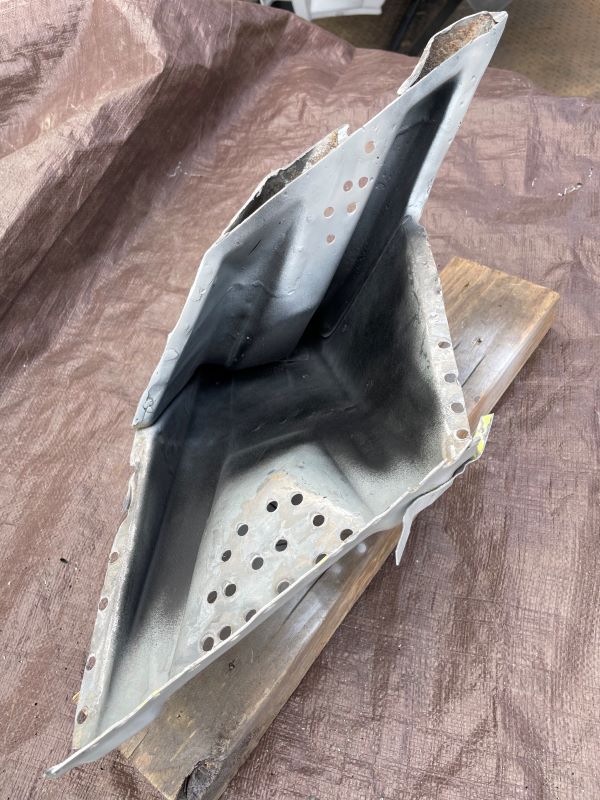 |
|
|
|
| Dion |
Mar 4 2024, 07:50 PM
Post
#136
|
|
RN Group: Members Posts: 2,931 Joined: 16-September 04 From: Shepherdstown, WV Member No.: 2,766 Region Association: MidAtlantic Region |
Knockin it out! Beautiful progress. (IMG:style_emoticons/default/beerchug.gif) I’m having flashbacks of my wrestling the console.
|
|
|
|
| friethmiller |
Mar 5 2024, 11:47 AM
Post
#137
|
|
Senior Member Group: Members Posts: 1,358 Joined: 10-February 19 From: Austin, TX Member No.: 22,863 Region Association: Southwest Region |
QUOTE(Dion @ Mar 4 2024, 07:50 PM) Knockin it out! Beautiful progress. (IMG:style_emoticons/default/beerchug.gif) I’m having flashbacks of my wrestling the console. @Dion - Thanks! I'm about to take some time off for Spring Break. It would be awesome to get this console in before I leave. We will see (IMG:style_emoticons/default/sunglasses.gif) |
|
|
|
| friethmiller |
Mar 20 2024, 08:59 AM
Post
#138
|
|
Senior Member Group: Members Posts: 1,358 Joined: 10-February 19 From: Austin, TX Member No.: 22,863 Region Association: Southwest Region |
Drivers Side Rear Inner Console - Part 2: (3/18/2024):
Warning: Lots of pictures here (IMG:style_emoticons/default/biggrin.gif) @914Werke - this is your part going in here! Onward! I began by removing what remained of the old console and worked to get the old paint/rust/dirt pushed back away from the work area. Removing the console without also removing the engine support is a bit tricky. You need multiple size cutting blades to get in and around things. Next, I roughly fitted the part based on my alignment marks. One thing I wanted to do was cut back the gussets far enough to properly weld in the "rail side" of the console. You can see the lines/cuts I made to allow just enough room to get the welder in there. 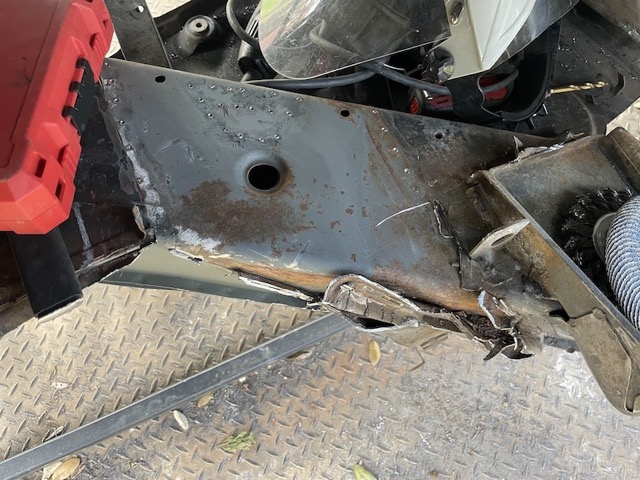 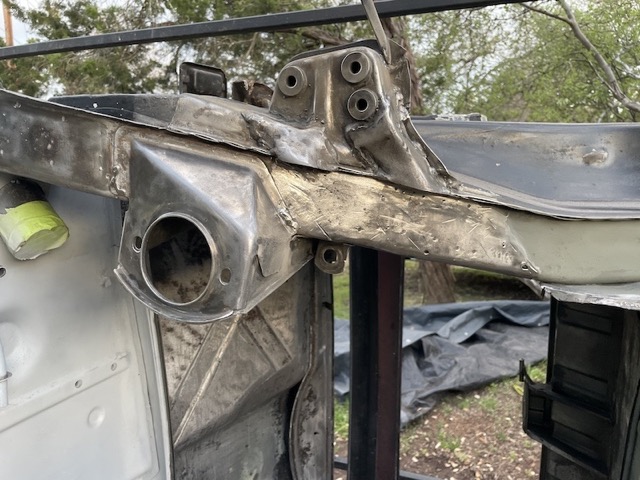 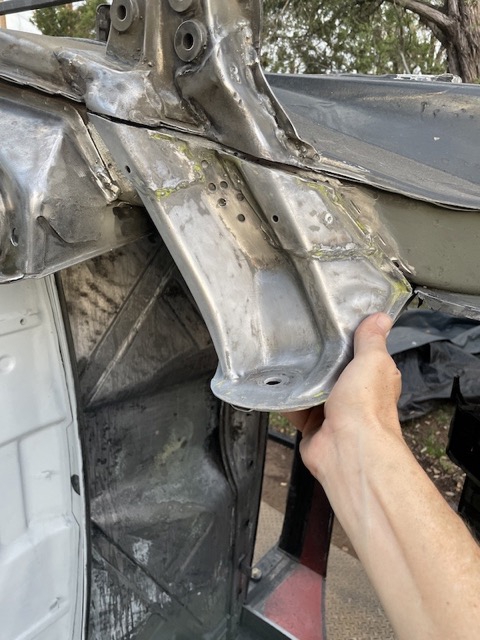 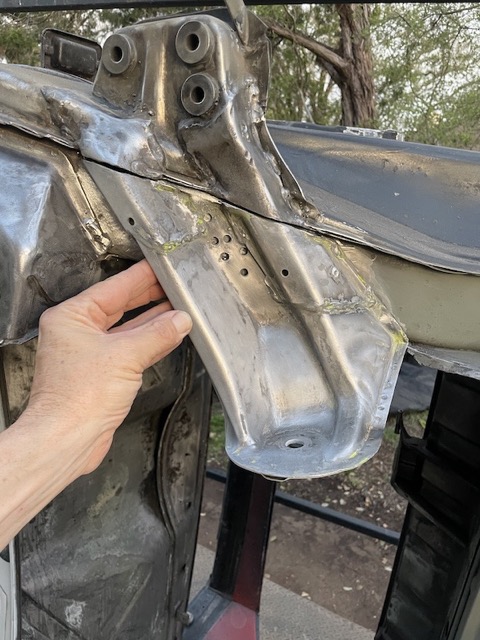 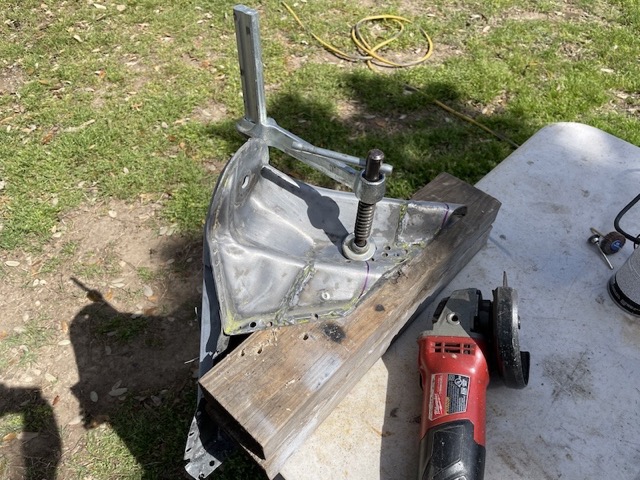 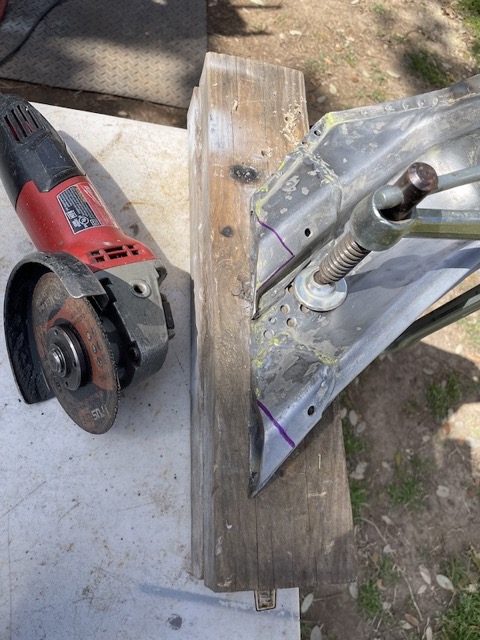 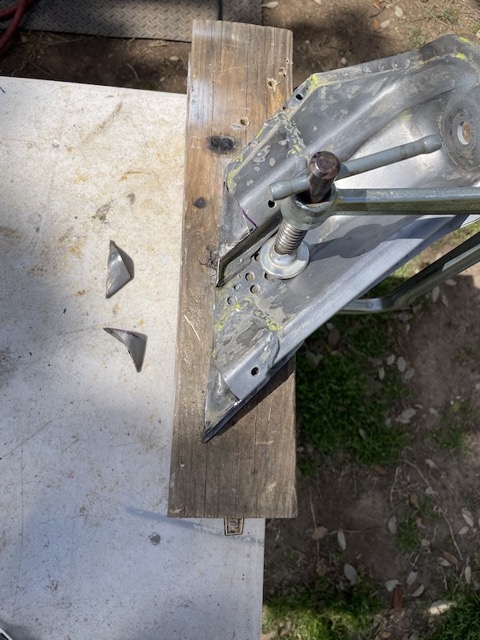 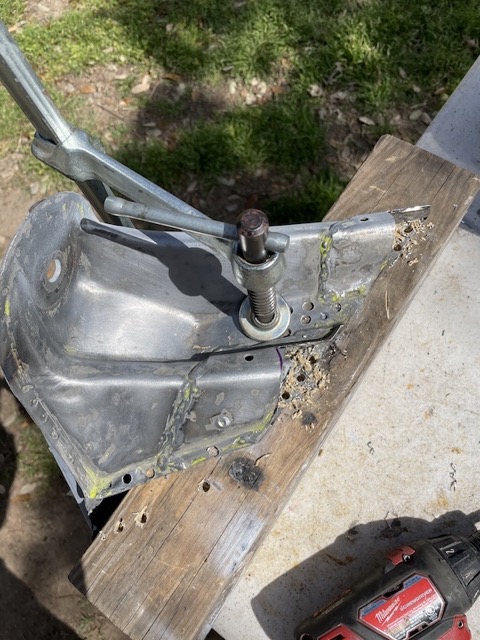 Next, cleaned and painted the rail with weld-thru primer. And then did a final alignment of the console using my witness marks as a secondary and my measurements from the center hole in the upper firewall to the hole in the console (28 1/4", I believe). I also checked the "ear to ear" measurement, as well. 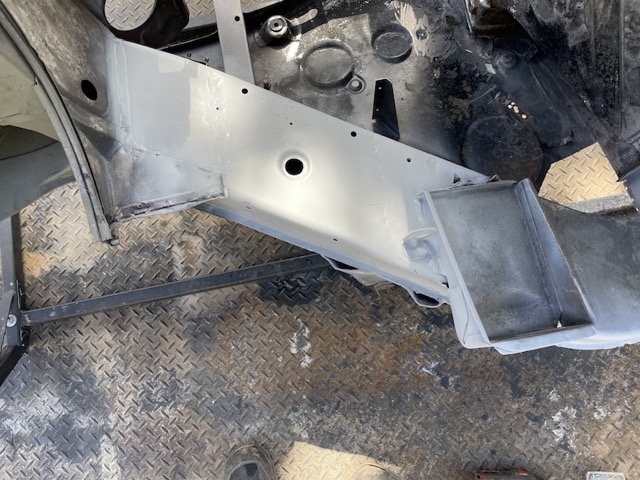  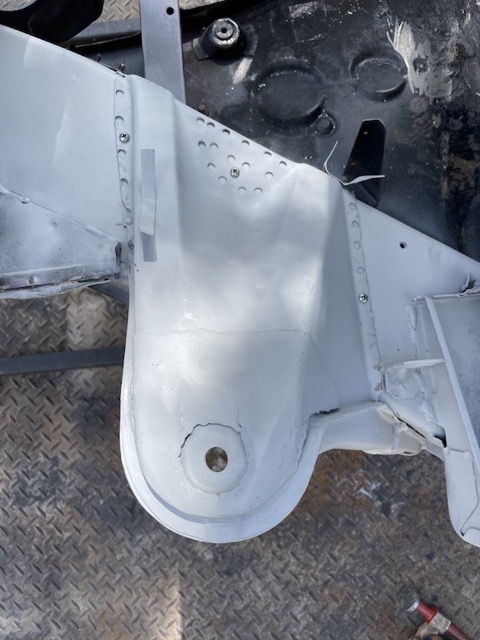 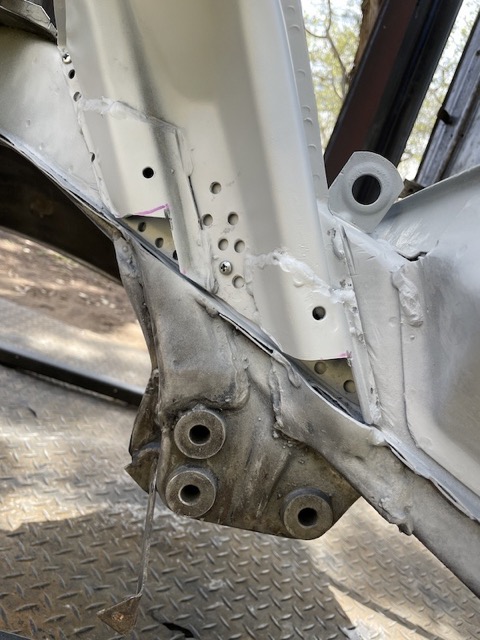 Once satisfied with the console's position, I started welding in some of the plug-welds to secure the part. Note: I barely had enough room to weld inside the gussets. I guess I could have cut back a bit more to make it a little easier. Regardless, everything came together nicely in the end. Pretty happy with results and glad this task is finally done. 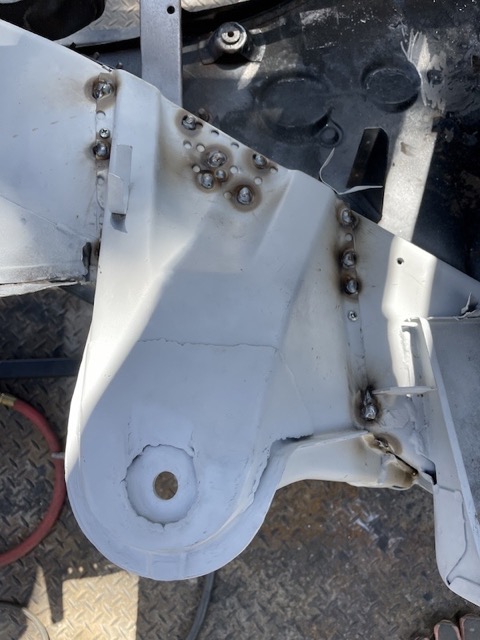 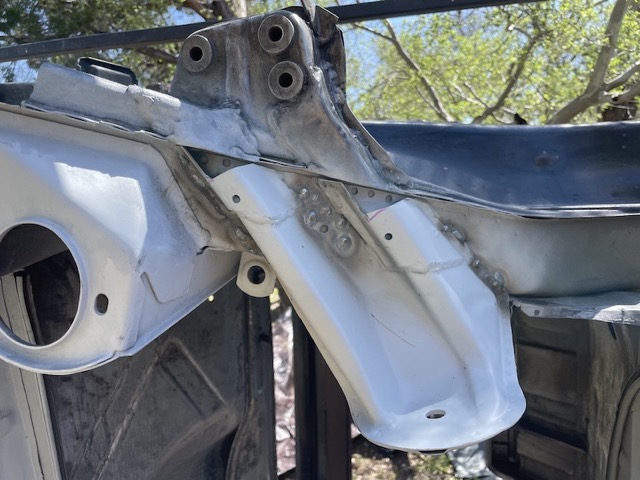 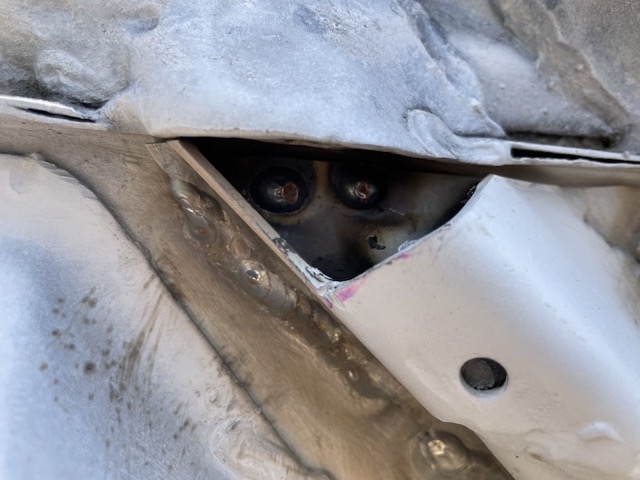  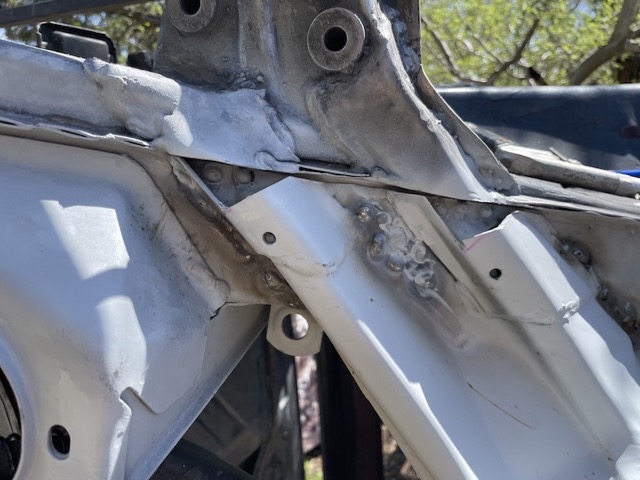 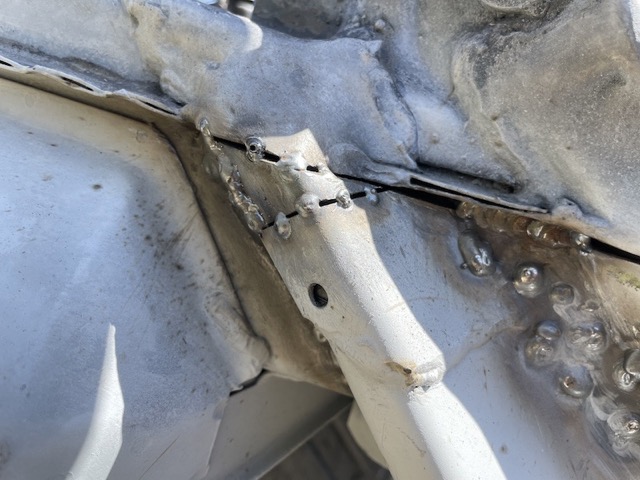 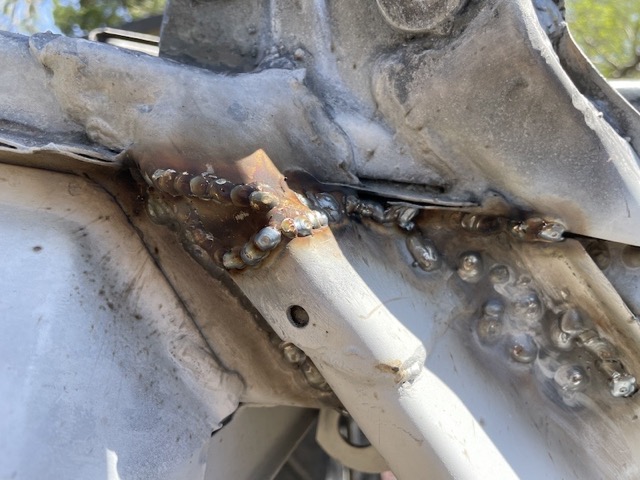 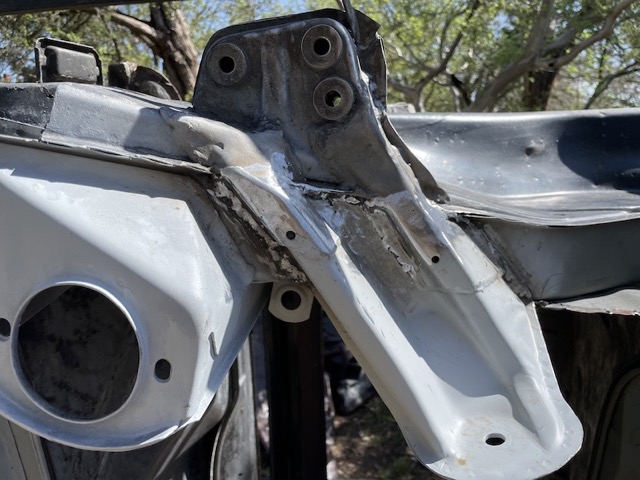 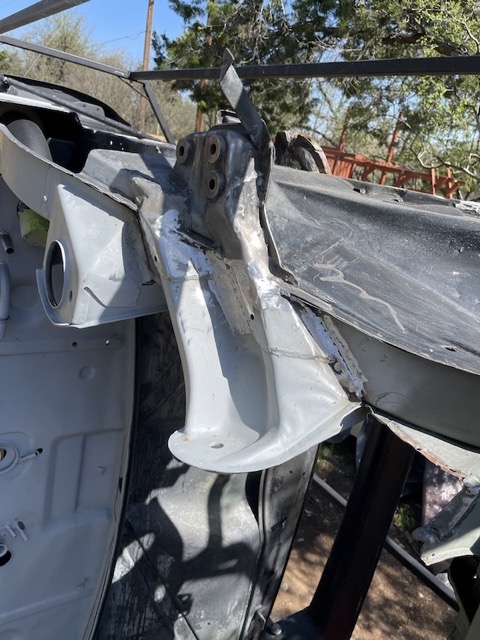 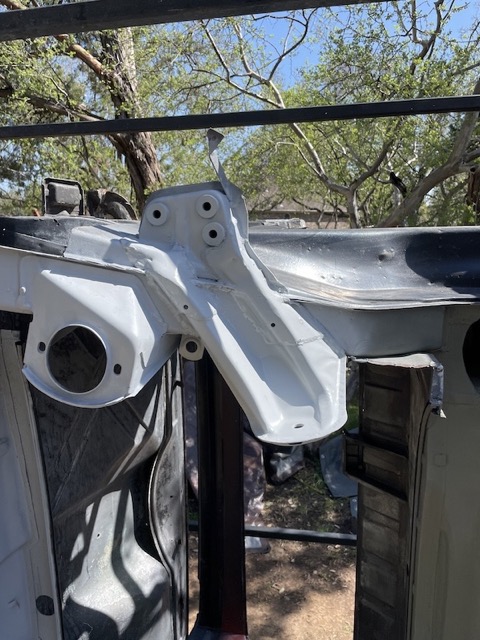 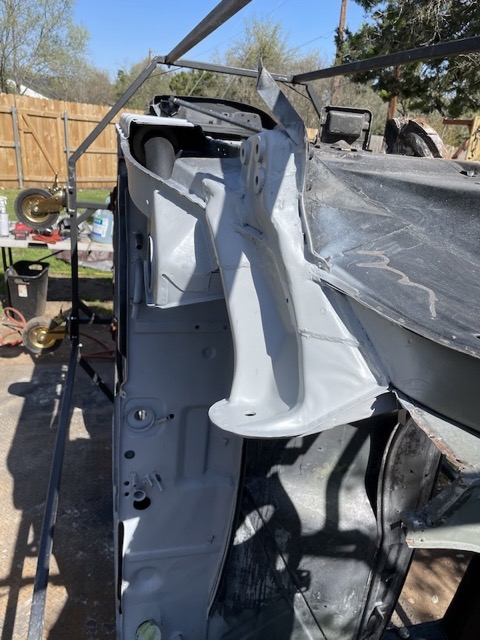 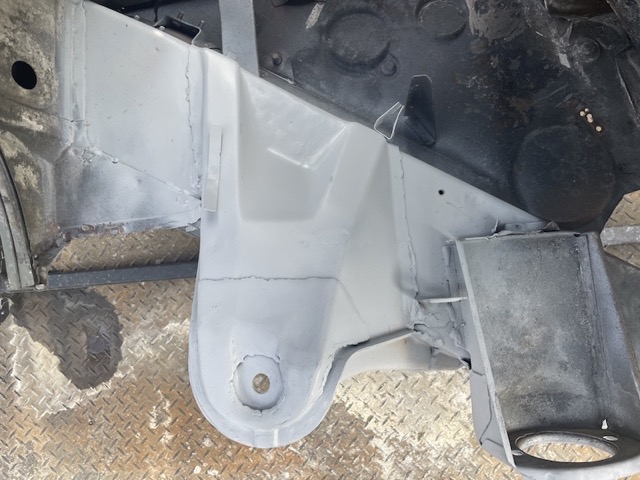 |
|
|
|
| 930cabman |
Mar 20 2024, 11:44 AM
Post
#139
|
|
Advanced Member Group: Members Posts: 4,733 Joined: 12-November 20 From: Buffalo Member No.: 24,877 Region Association: North East States |
Wow, you must be one of really crazy ones, all the while working outdoors.
Great looking workmanship and chassis rolling jig One Q? How did you index the innermost suspension ear prior to welding in place. Thank you for documenting your work, this is very helpful to many |
|
|
|
| friethmiller |
Mar 20 2024, 01:20 PM
Post
#140
|
|
Senior Member Group: Members Posts: 1,358 Joined: 10-February 19 From: Austin, TX Member No.: 22,863 Region Association: Southwest Region |
QUOTE(930cabman @ Mar 20 2024, 12:44 PM) How did you index the innermost suspension ear prior to welding in place. @930cabman , From here mainly. My drivers side console had a bent ear from a prior wreck. The diagonal distance to the center hole in the firewall was about 27 inches. I might have tried to save it if it weren't also for the rust holes. My measurements all check out for both [replaced] inner consoles. I'll take some additional measurements later for the outer consoles once I finish with this damn engine bay (IMG:style_emoticons/default/headbang.gif) 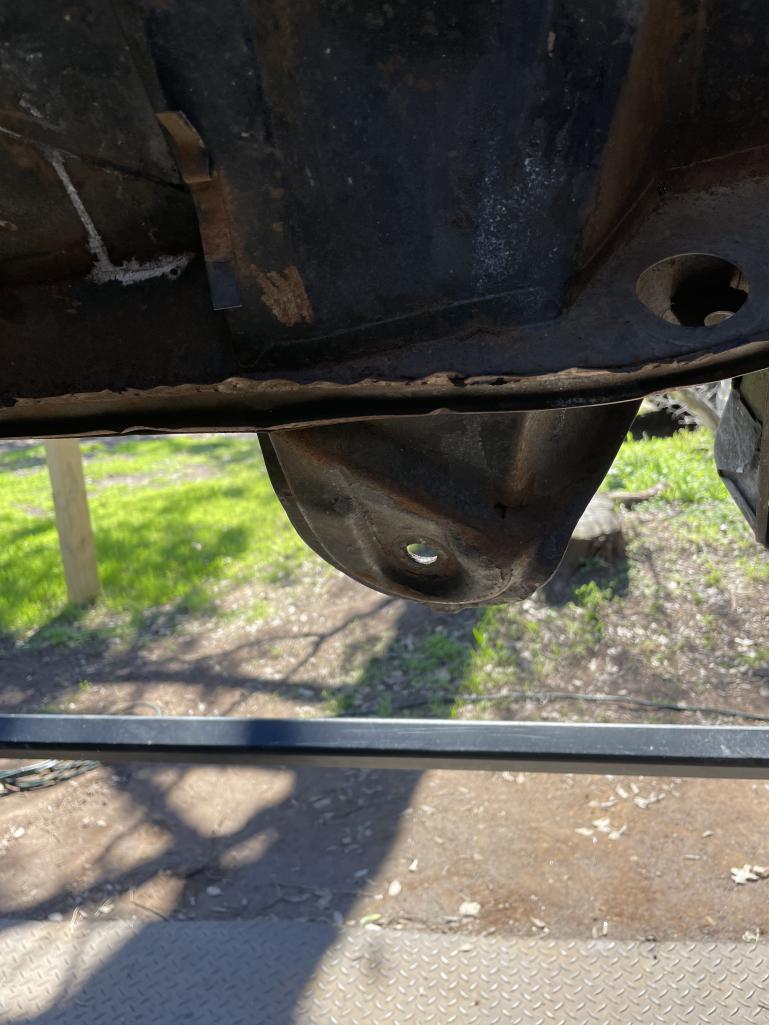 |
|
|
|
|
2 User(s) are reading this topic (2 Guests and 0 Anonymous Users)
0 Members:

|
Lo-Fi Version | Time is now: 4th July 2026 - 03:58 AM |
Invision Power Board
v9.1.4 © 2026 IPS, Inc.