|
|
|
Porsche, and the Porsche crest are registered trademarks of Dr. Ing. h.c. F. Porsche AG.
This site is not affiliated with Porsche in any way. Its only purpose is to provide an online forum for car enthusiasts. All other trademarks are property of their respective owners. |
|
|

  |

| friethmiller |
 May 20 2024, 12:29 PM May 20 2024, 12:29 PM
Post
#161
|
|
Senior Member  Group: Members Posts: 1,358 Joined: 10-February 19 From: Austin, TX Member No.: 22,863 Region Association: Southwest Region |
Driver Side Clean-up - Part 2 of 2: (5/18/2024 - 5/19/2024):
Fresh Air Intake: One of my least favorite thing to repair on the car - for some reason (IMG:style_emoticons/default/confused24.gif) . Used 20 gauge metal to bend, cut, and pray here. I kept telling myself not to "over think it". So I used a die grinder's body as a form to bend the metal around and used tin-snips to cut the piece down. Once it was tacked in place, I used a body hammer to tap things into the right shape welding as I went. In the end, it worked out pretty well. Again, the part just needs to allow air to flow through it when the door is closed. 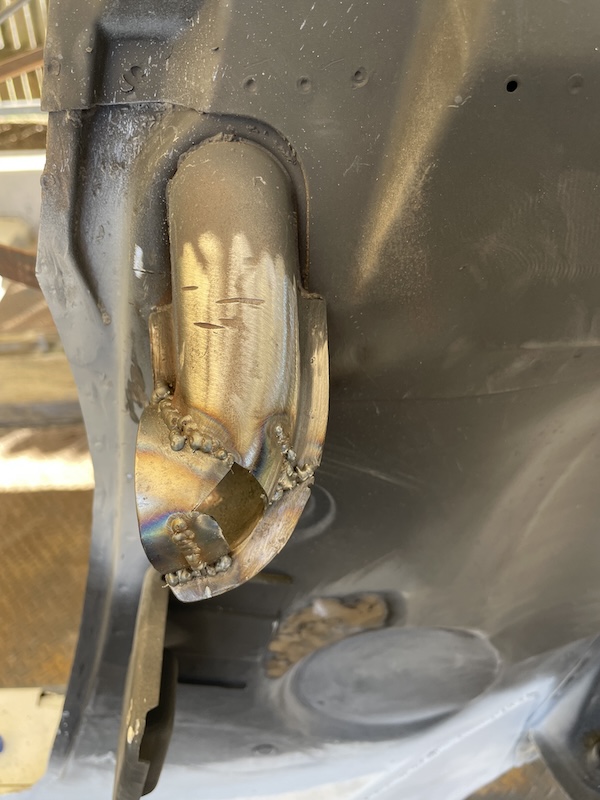 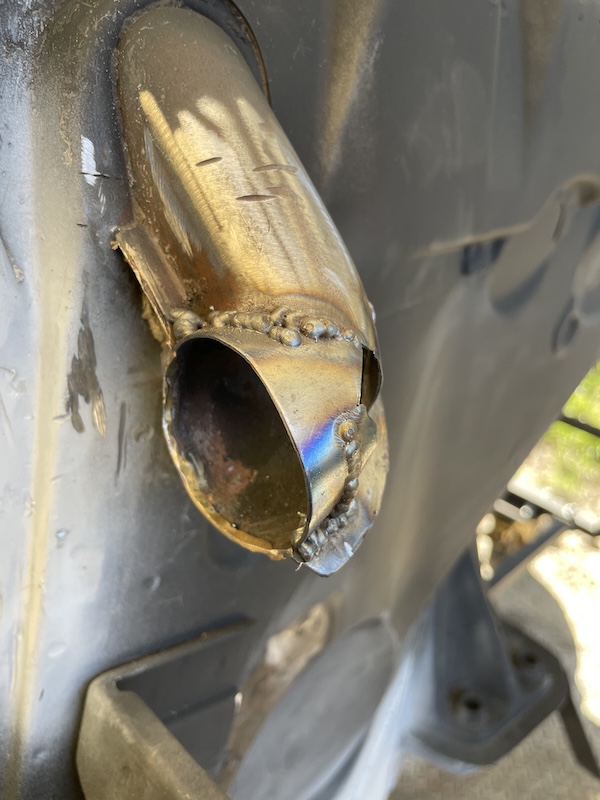 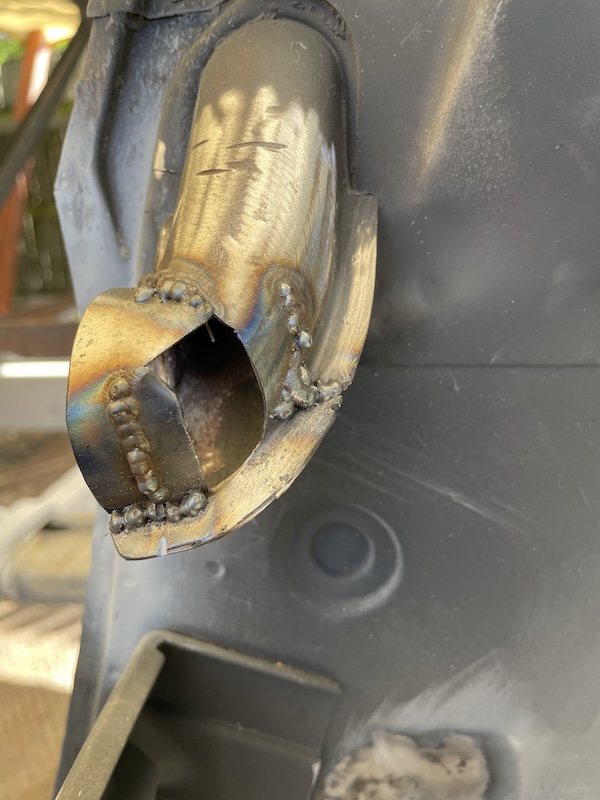 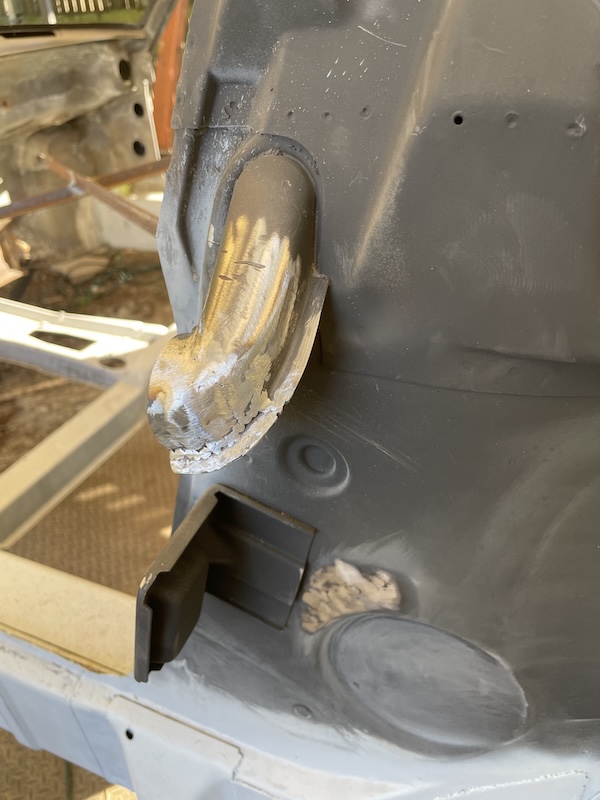 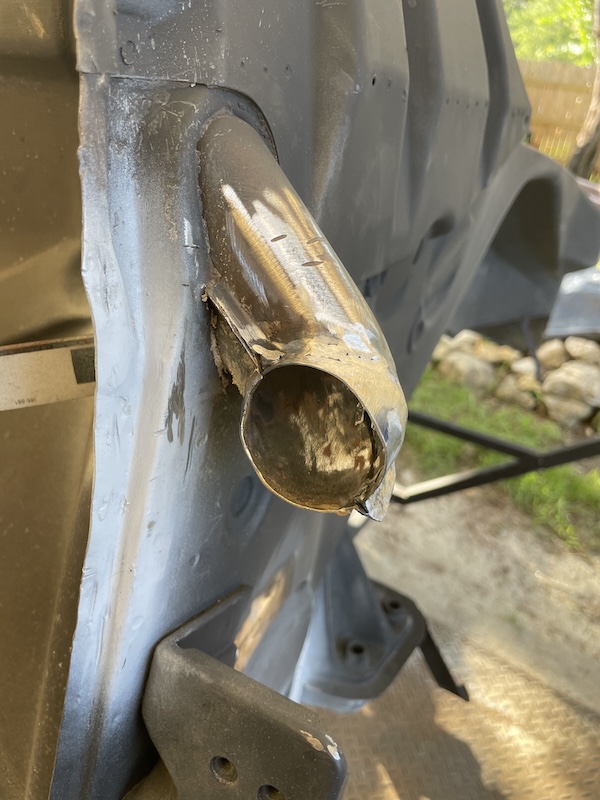  Fender Support: Not exactly sure what this part is called but it sure holds a lot of sealant against the car (IMG:style_emoticons/default/biggrin.gif) Anyways, this one had an issue at the back where the rear chrome piece's bolt goes through. It was basically gone! So, I decided to reattach what remained of the piece and then fabricate the small rear section, as best I could. You can see that this part ,that had been sand blasted a few weeks ago, had a bit of light surface rust on it (no big deal). I figured I hit that with the phosphorus spray before painting. You can see this in the 3rd photo. I used the same part from the passenger side to make a sketch on the metal, used tin snips, and bent the piece the opposite direction so it would match the drivers side. I employed vise grips to make a few bends and then drilled out a hole in, hopefully, the correct location. I figured I get it to work later during fitment. 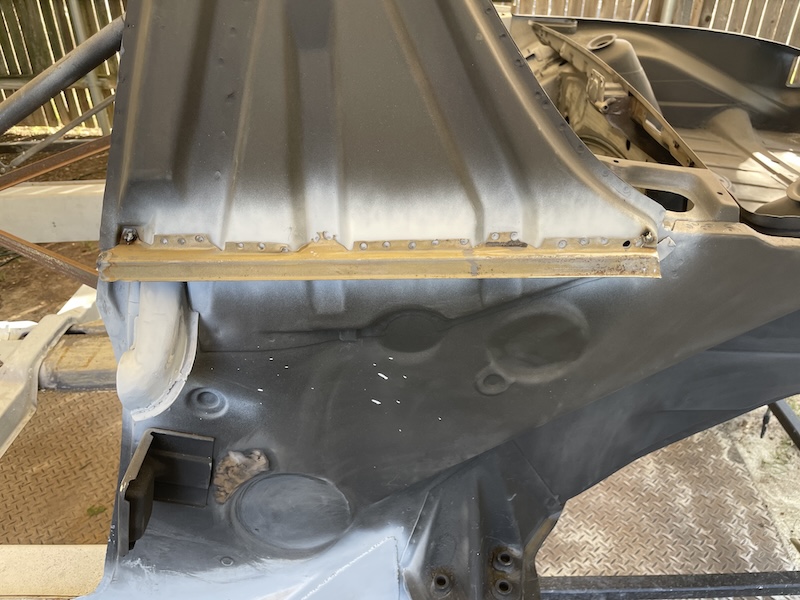 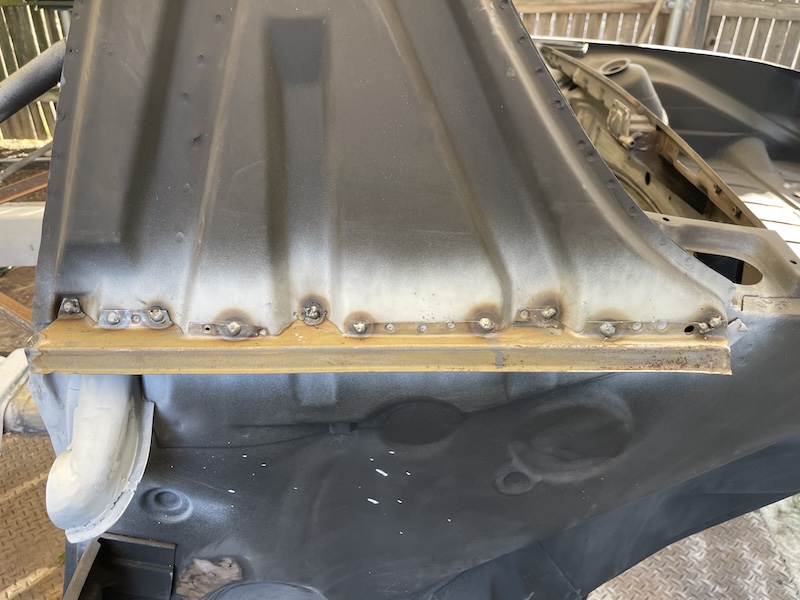 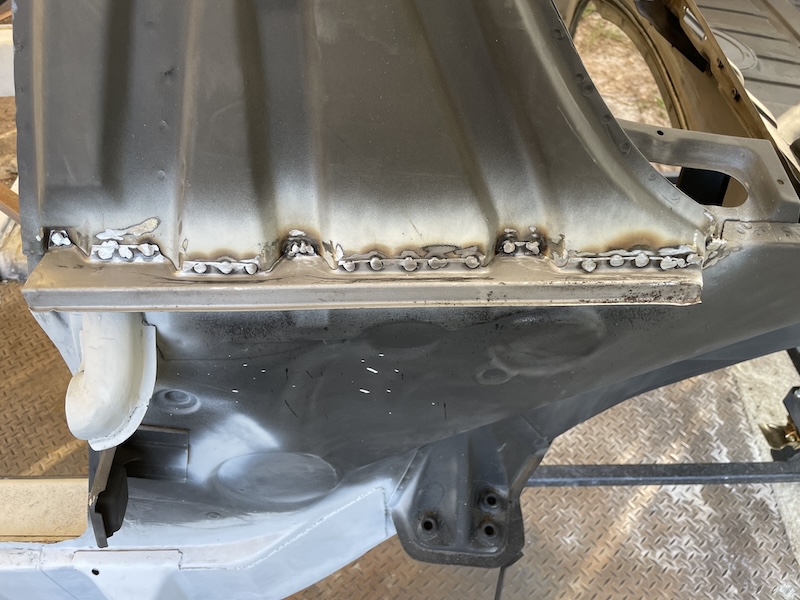 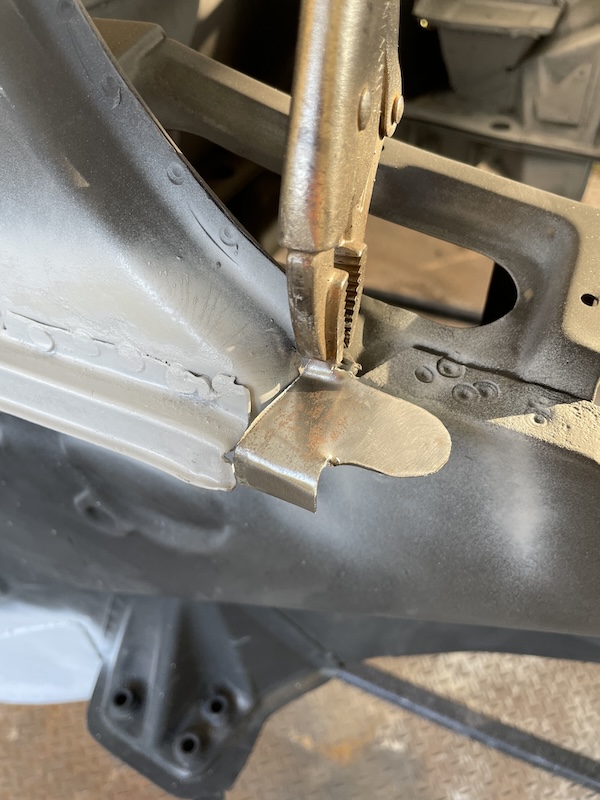 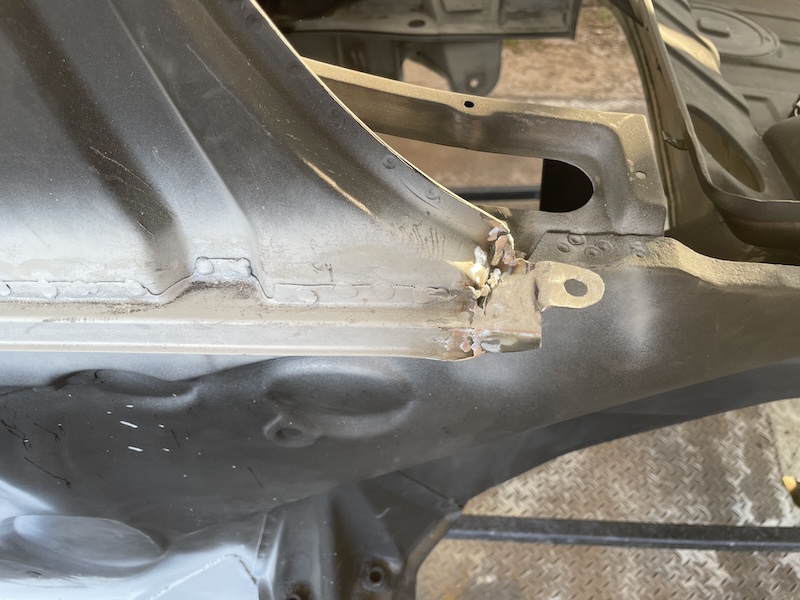 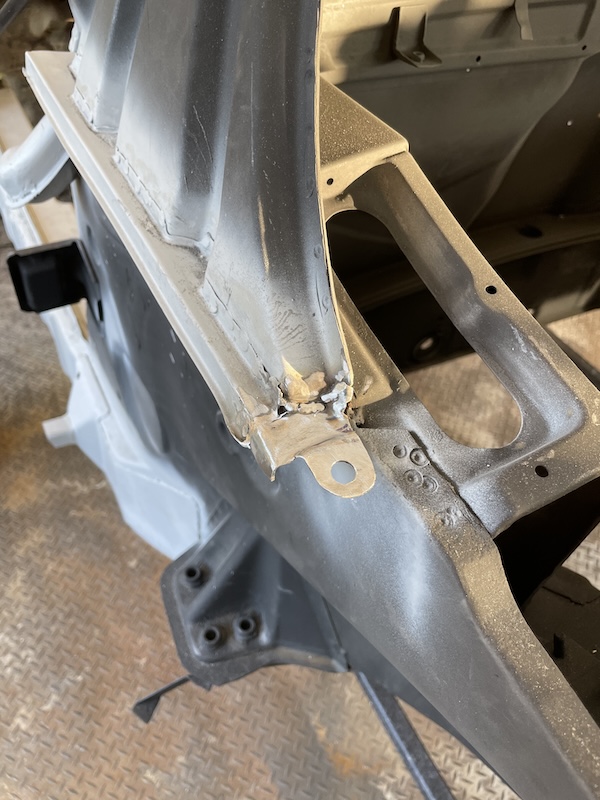 Final shots of the work completed in part 2:  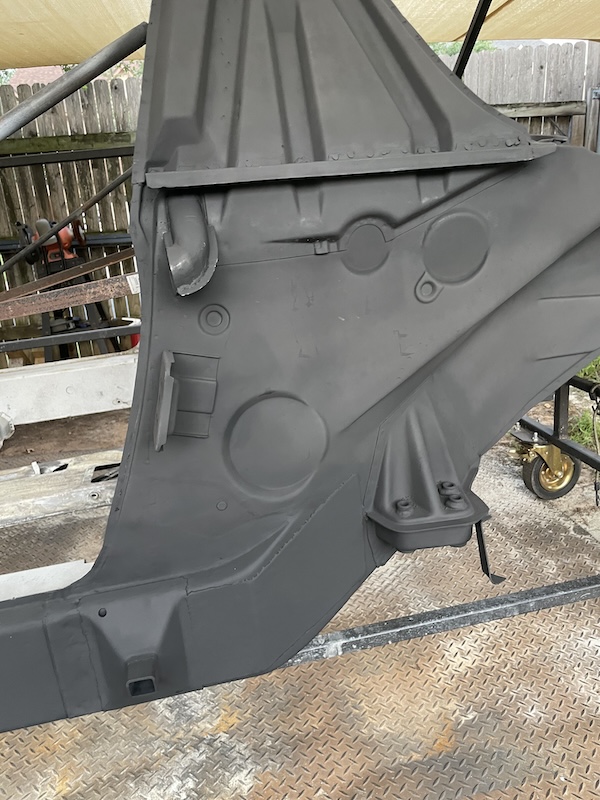 |
   |

 
|
| friethmiller |
May 20 2024, 01:13 PM
Post
#162
|
|
Senior Member Group: Members Posts: 1,358 Joined: 10-February 19 From: Austin, TX Member No.: 22,863 Region Association: Southwest Region |
QUOTE(930cabman @ May 20 2024, 01:16 PM)  All the while working in the outdoors!! Hats off to Fred I nominate this for build of the year, great workmanship, You're funny, @930cabman! (IMG:style_emoticons/default/beerchug.gif) |
|
|
|
| technicalninja |
May 20 2024, 01:36 PM
Post
#163
|
|
Advanced Member Group: Members Posts: 2,531 Joined: 31-January 23 From: Granbury Texas Member No.: 27,135 Region Association: Southwest Region |
This guy's "wing and a prayer rigs" that will NEVER be SEEN again look great!
I believe I'd undercoat/protect that is some way that will COMPLETELY hide any imperfections. I second that nomination! (IMG:style_emoticons/default/first.gif) (IMG:style_emoticons/default/first.gif) At some point this car SHOULD be displayed as "Car of the Month" @mepstein , @SirAndy what's up guys? Thought Mark was "hog tied". This one should place HIGH in the serious results with limited tools section. You know what it means when this level of work can be done in a backyard? Sheer skill! If this guy was "set up" just think what he could accomplish. (IMG:style_emoticons/default/ninja.gif) |
|
|
|
| SirAndy |
May 20 2024, 02:03 PM
Post
#164
|
|
Resident German Group: Admin Posts: 42,486 Joined: 21-January 03 From: Oakland, Kalifornia Member No.: 179 Region Association: Northern California |
QUOTE(technicalninja @ May 20 2024, 12:36 PM) This guy's "wing and a prayer rigs" that will NEVER be SEEN again look great! I believe I'd undercoat/protect that is some way that will COMPLETELY hide any imperfections. I second that nomination! (IMG:style_emoticons/default/first.gif) (IMG:style_emoticons/default/first.gif) At some point this car SHOULD be displayed as "Car of the Month" @mepstein , @SirAndy what's up guys? Thought Mark was "hog tied". This one should place HIGH in the serious results with limited tools section. You know what it means when this level of work can be done in a backyard? Sheer skill! If this guy was "set up" just think what he could accomplish. (IMG:style_emoticons/default/ninja.gif) Nobody ever sent me anything for COTM ... (IMG:style_emoticons/default/confused24.gif) |
|
|
|
| friethmiller |
May 20 2024, 02:56 PM
Post
#165
|
|
Senior Member Group: Members Posts: 1,358 Joined: 10-February 19 From: Austin, TX Member No.: 22,863 Region Association: Southwest Region |
My reward will be to some day drive this thing. (IMG:style_emoticons/default/driving.gif) Happy to share pics of the adventure along the way.
|
|
|
|
| iankarr |
May 20 2024, 08:24 PM
Post
#166
|
|
The wrencher formerly known as Cuddy_K Group: Members Posts: 2,602 Joined: 22-May 15 From: Heber City, UT Member No.: 18,749 Region Association: Intermountain Region |
Great thread and awesome work!
|
|
|
|
| TP914 |
May 20 2024, 08:41 PM
Post
#167
|
|
Member Group: Members Posts: 90 Joined: 6-August 23 From: OC , Calif. Member No.: 27,504 Region Association: Southern California |
Great work !
|
|
|
|
| friethmiller |
May 21 2024, 07:59 AM
Post
#168
|
|
Senior Member Group: Members Posts: 1,358 Joined: 10-February 19 From: Austin, TX Member No.: 22,863 Region Association: Southwest Region |
|
|
|
|
| Artfrombama |
May 21 2024, 11:23 AM
Post
#169
|
|
Artfrombama Group: Members Posts: 466 Joined: 21-January 24 From: One of the chosen few Member No.: 27,870 Region Association: South East States |
@friethmiller Admire your work and anxiously await the next installment. (IMG:style_emoticons/default/popcorn[1].gif) |
|
|
|
| friethmiller |
May 21 2024, 01:18 PM
Post
#170
|
|
Senior Member Group: Members Posts: 1,358 Joined: 10-February 19 From: Austin, TX Member No.: 22,863 Region Association: Southwest Region |
QUOTE(Artfrombama @ May 21 2024, 12:23 PM) @friethmiller Admire your work and anxiously await the next installment. (IMG:style_emoticons/default/popcorn[1].gif) Hey thanks! I'm very close to putting in the floorpans. Stay tuned... |
|
|
|
| friethmiller |
May 22 2024, 07:44 PM
Post
#171
|
|
Senior Member Group: Members Posts: 1,358 Joined: 10-February 19 From: Austin, TX Member No.: 22,863 Region Association: Southwest Region |
3 Remaining Tasks + Epoxy: (5/22/2024):
Had to complete three minor tasks in the engine bay today prior to prep'n and painting a 2nd coat of epoxy: 1) Install the Engine Hood Release Tube 2) Fix metal around hole in the rear panel 3) Weld cut in engine shelf 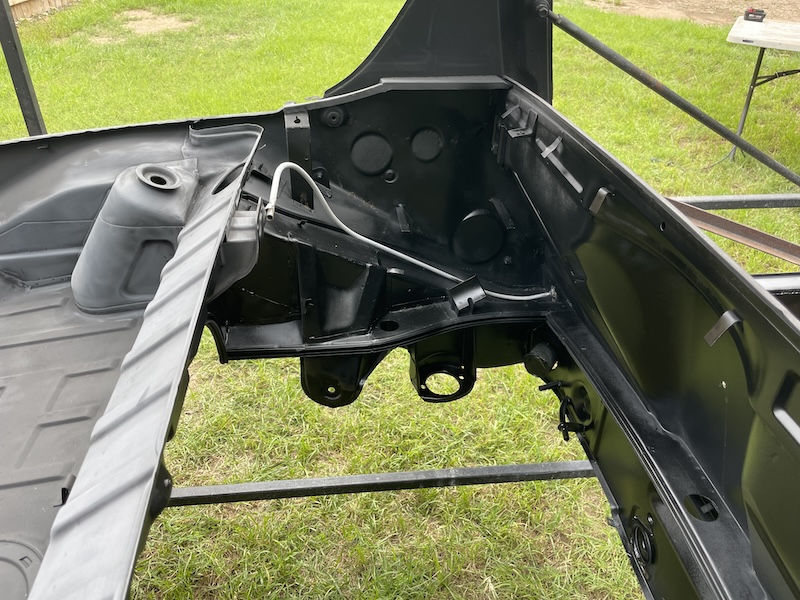 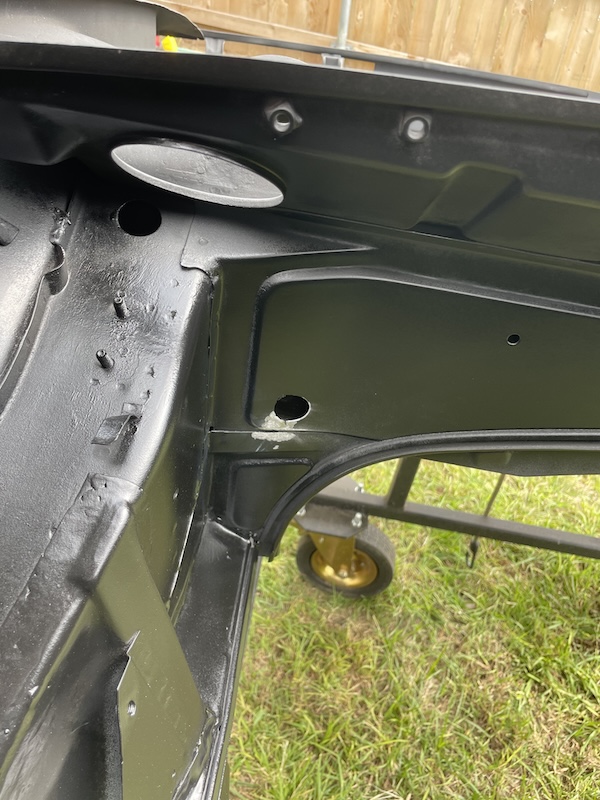 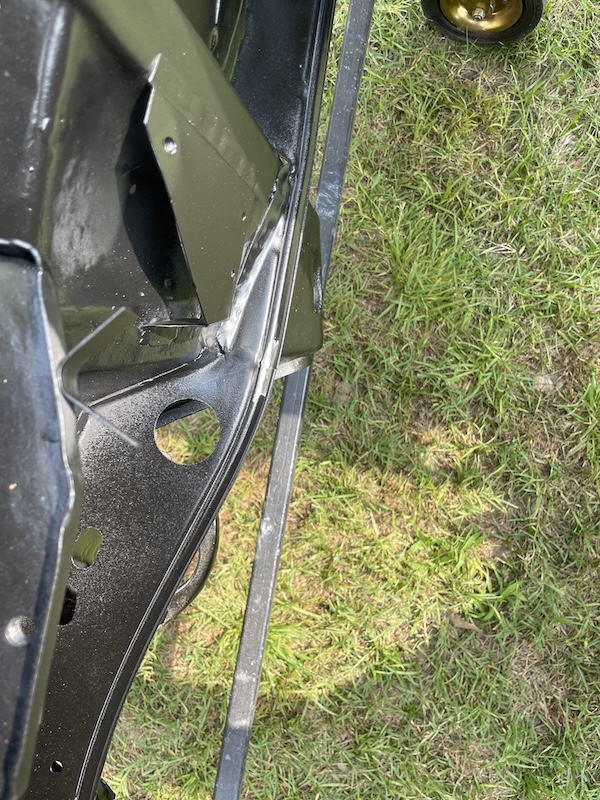 Here are the pics after sanding, cleaning, and spraying a 2nd coat of epoxy over the 2/3 of the car I've restored to-date. I didn't have a lot of paint to work with today so I hit most of the top-side and engine bay. 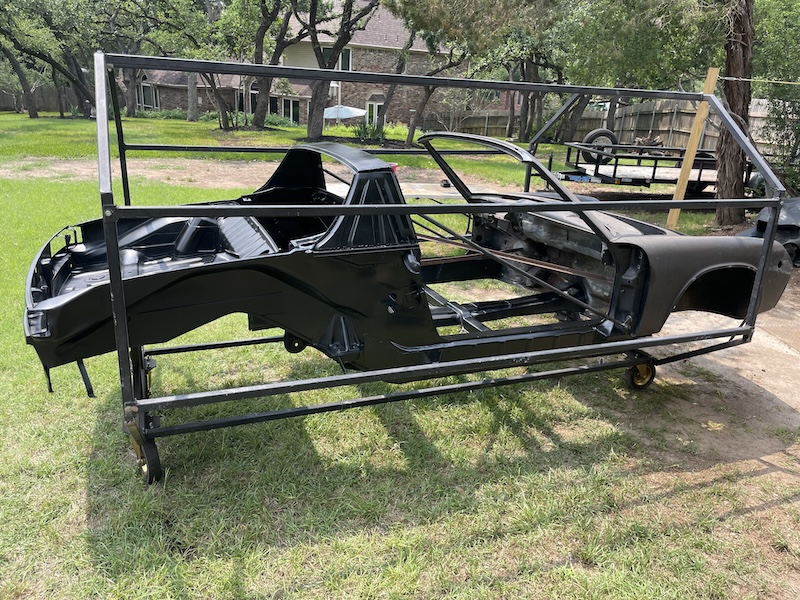  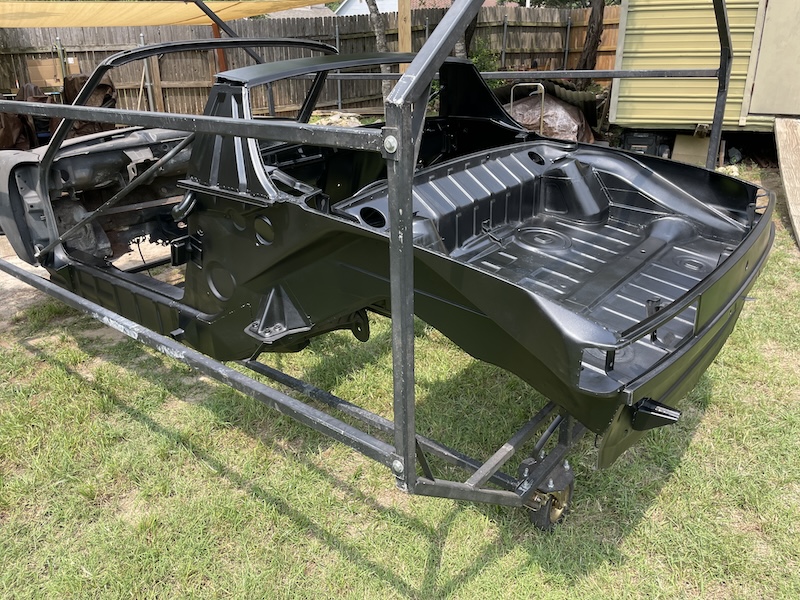 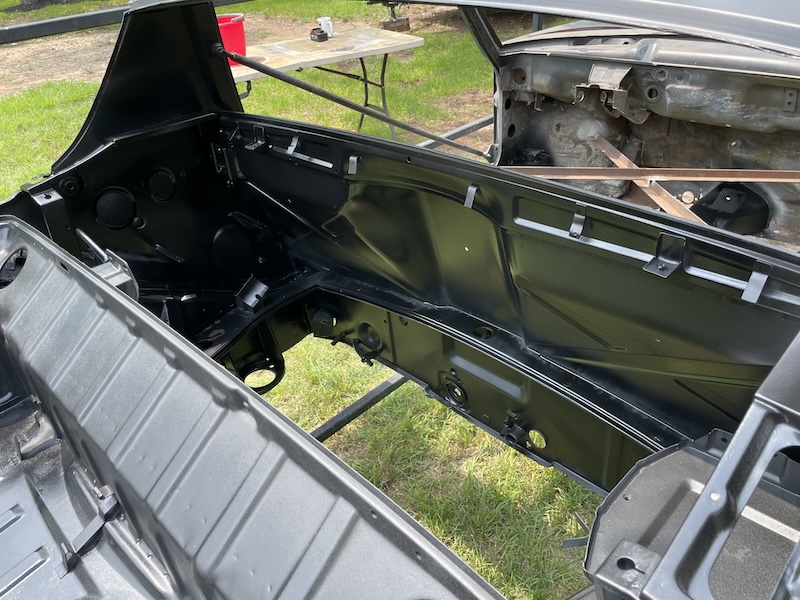 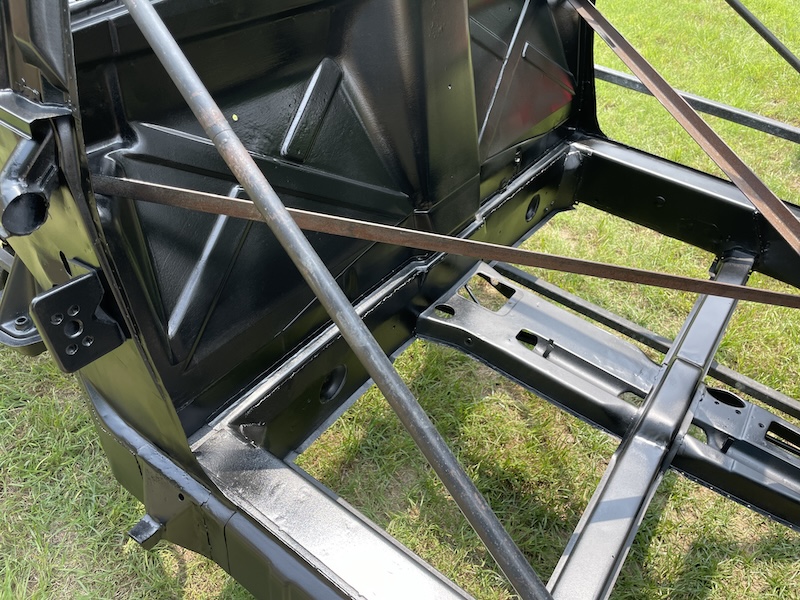 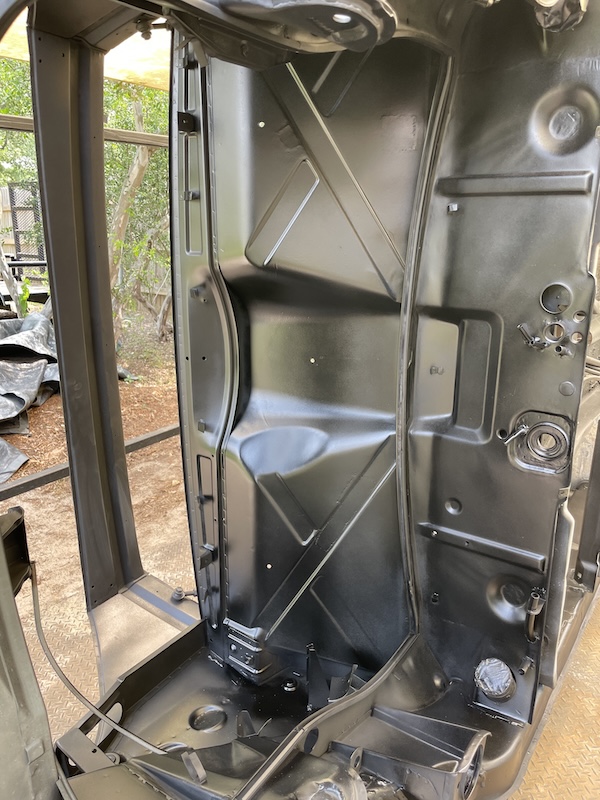 |
|
|
|
| TRS63 |
May 24 2024, 09:49 AM
Post
#172
|
|
Member Group: Members Posts: 326 Joined: 14-September 20 From: Germany - Stuttgart Member No.: 24,690 Region Association: Europe |
Incredible work here!
Bests Antoine |
|
|
|
| 930cabman |
May 26 2024, 10:51 AM
Post
#173
|
|
Advanced Member Group: Members Posts: 4,733 Joined: 12-November 20 From: Buffalo Member No.: 24,877 Region Association: North East States |
QUOTE(TRS63 @ May 24 2024, 09:49 AM) Incredible work here! Bests Antoine (IMG:style_emoticons/default/agree.gif) (IMG:style_emoticons/default/agree.gif) Wish I could get Fred do one of mine, all while working outdoors |
 |
|
| friethmiller |
May 27 2024, 08:15 PM
Post
#174
|
|
Senior Member Group: Members Posts: 1,358 Joined: 10-February 19 From: Austin, TX Member No.: 22,863 Region Association: Southwest Region |
Floorpan Prep (5/26/2024 - 5/27/2024):
More pics! With my son graduating from High School this weekend, I didn't have a ton of time to work on the LE. I did, however, start the prep on the rear floorpan. On Sunday, I was able to get the seat support pieces prep'd and installed. I also had the opportunity to see how the floorpan fit and got an idea on what needed to be modified.    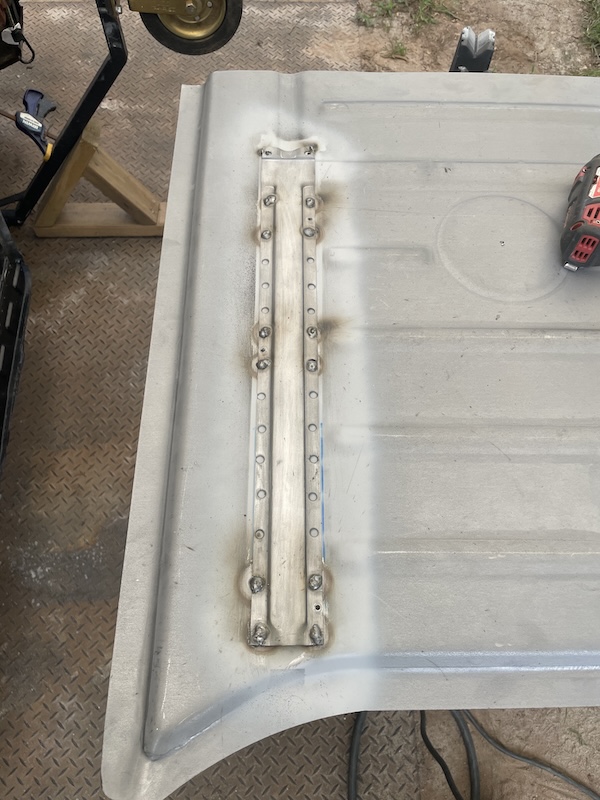  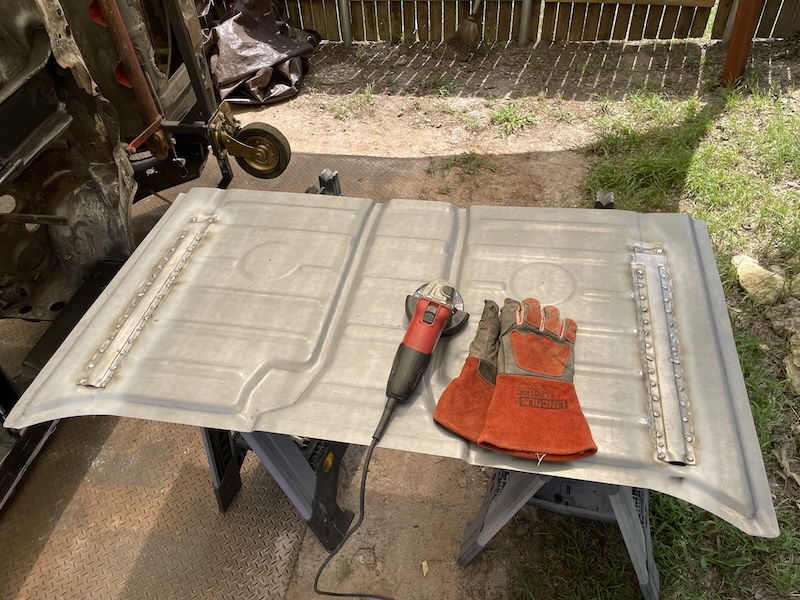 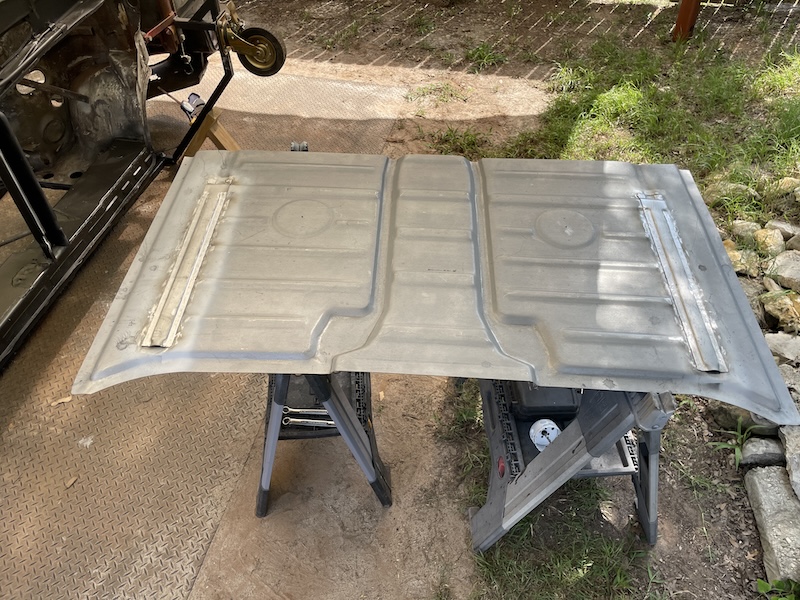 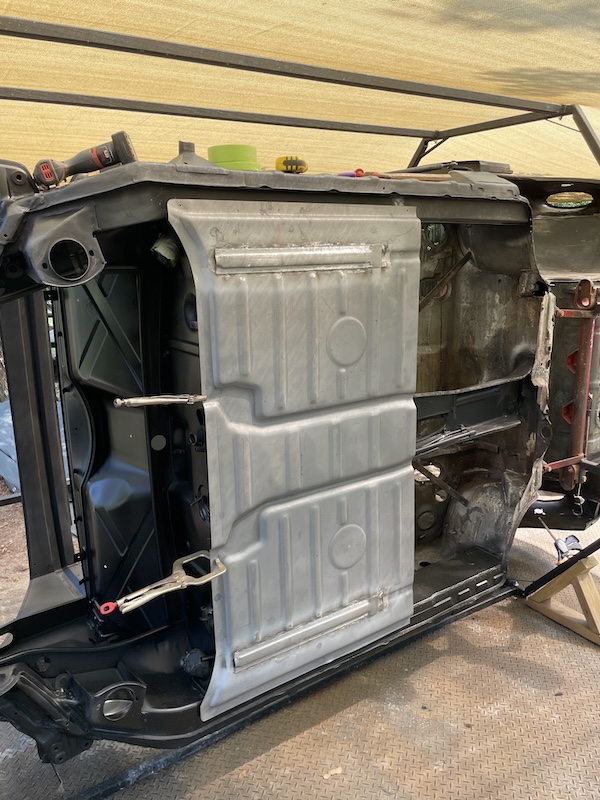 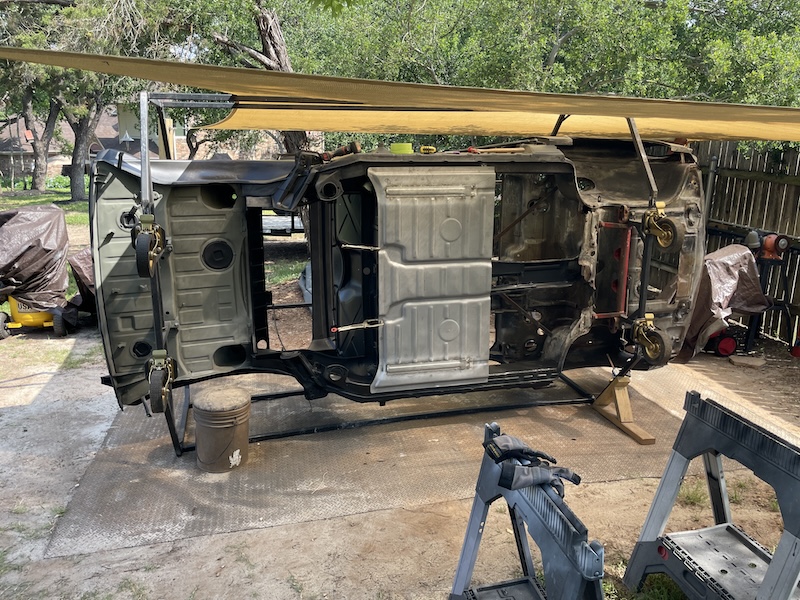 On Monday, I spent a few hours drilling holes and modifying the inner firewall to add a missing recess to match a raised part on the floorpan. There's a lot of spot welds that will need to be done here and my goal was to get the "car side" ready today. I will work on preparing the pan later this week. Hoping to install at least the rear floorpan next weekend. We'll see. 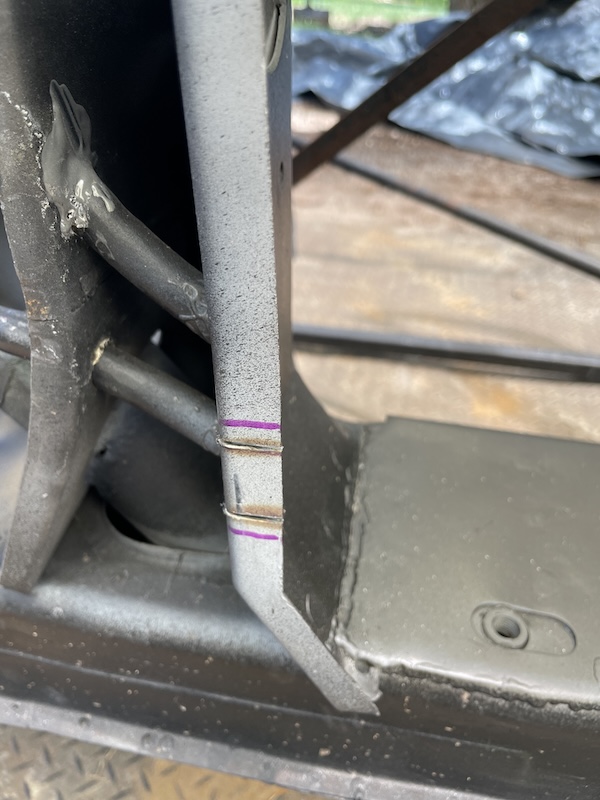 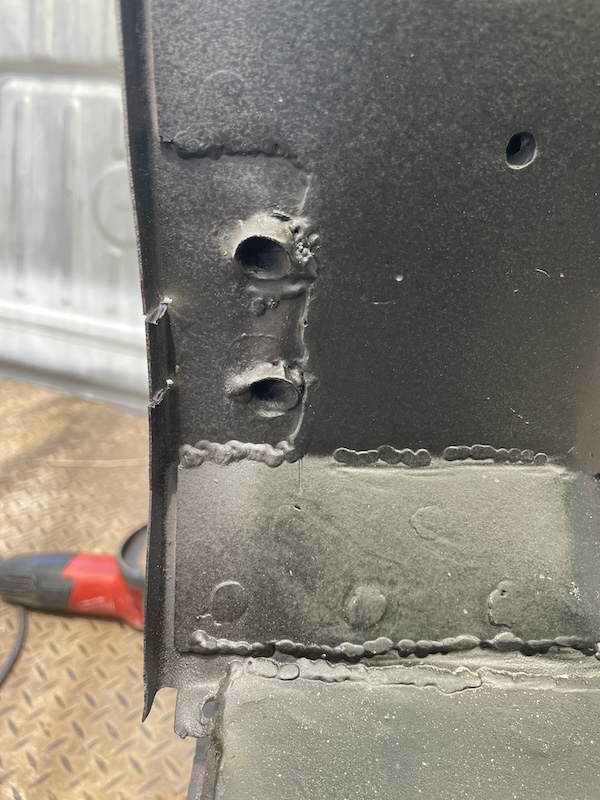 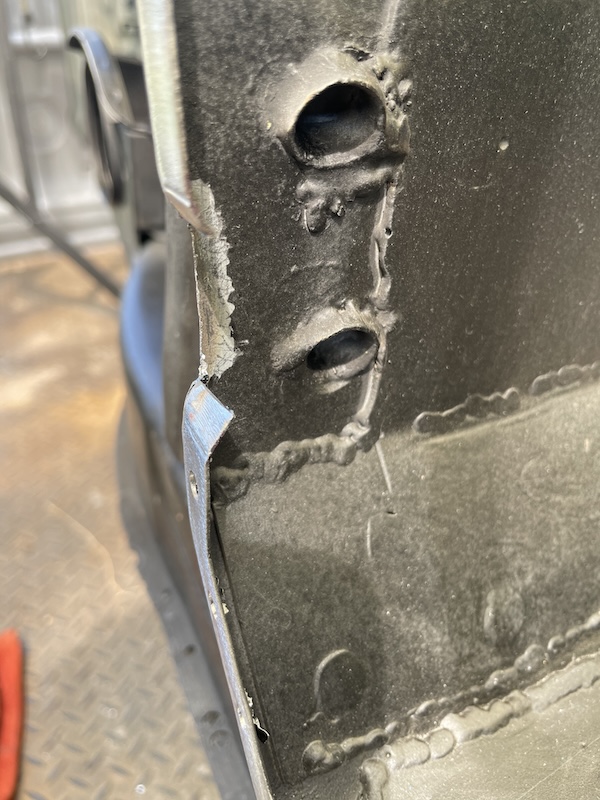 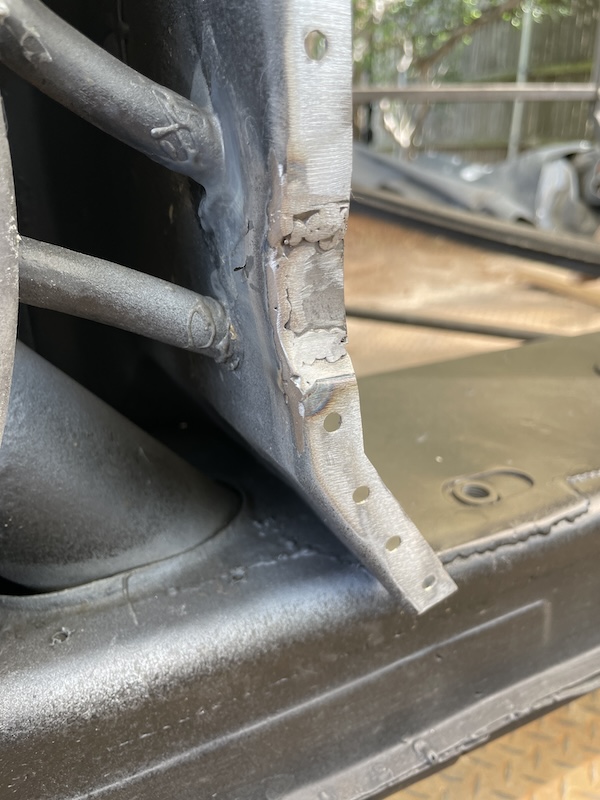 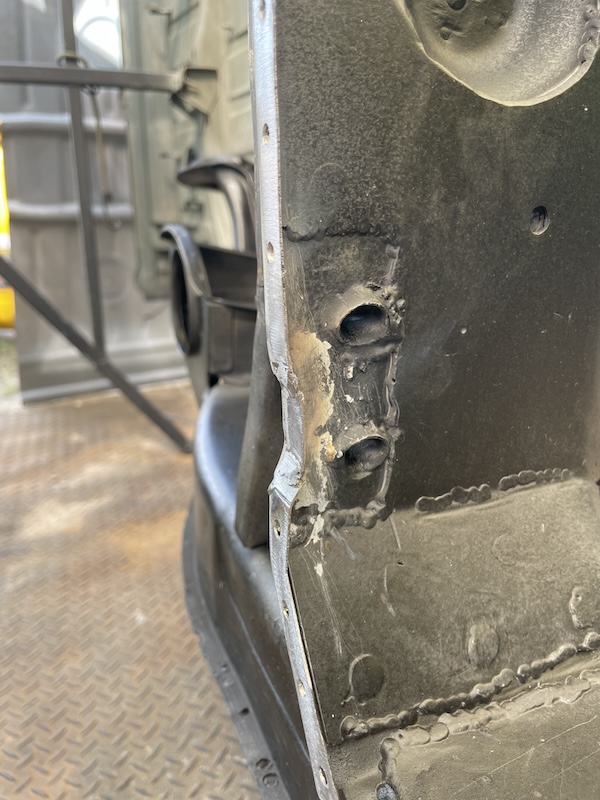 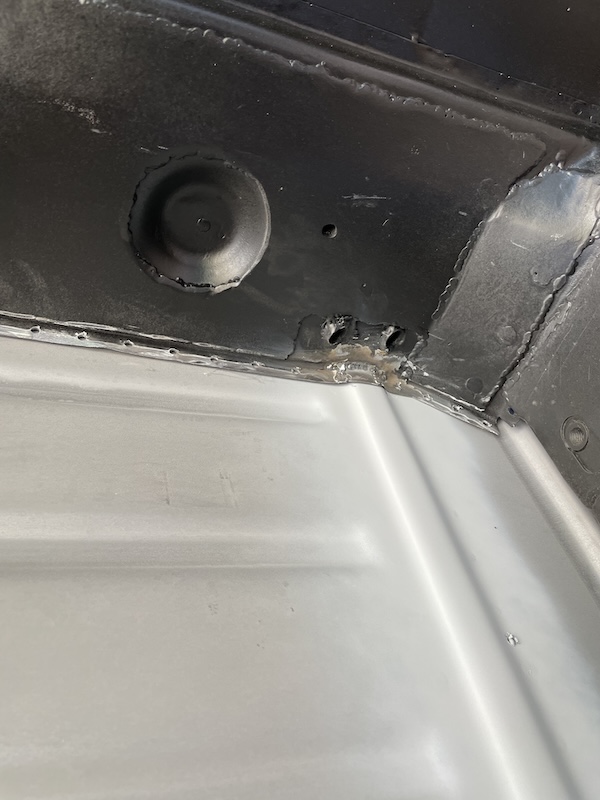 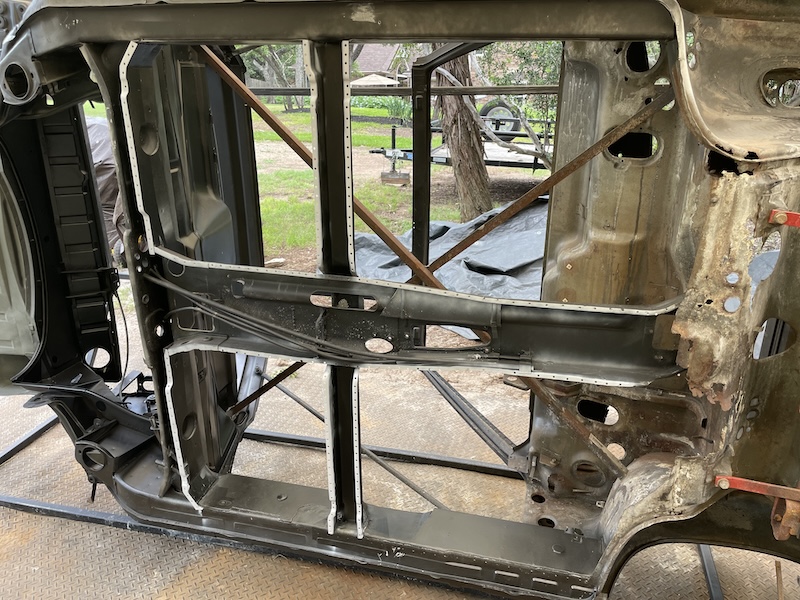 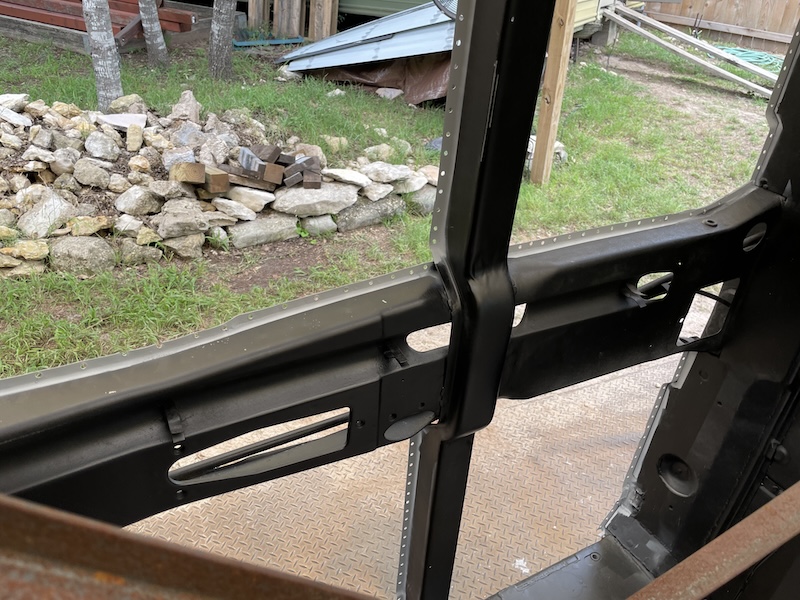 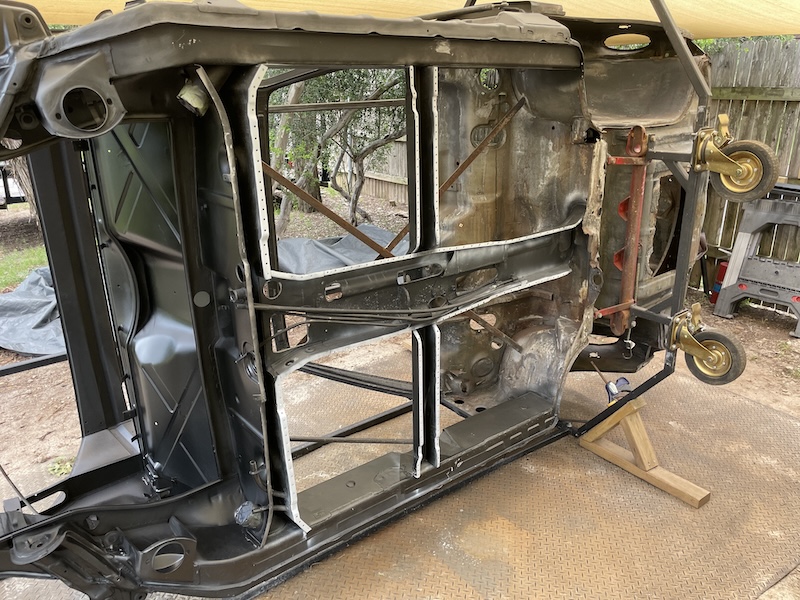 |
|
|
|
| friethmiller |
May 29 2024, 07:30 AM
Post
#175
|
|
Senior Member Group: Members Posts: 1,358 Joined: 10-February 19 From: Austin, TX Member No.: 22,863 Region Association: Southwest Region |
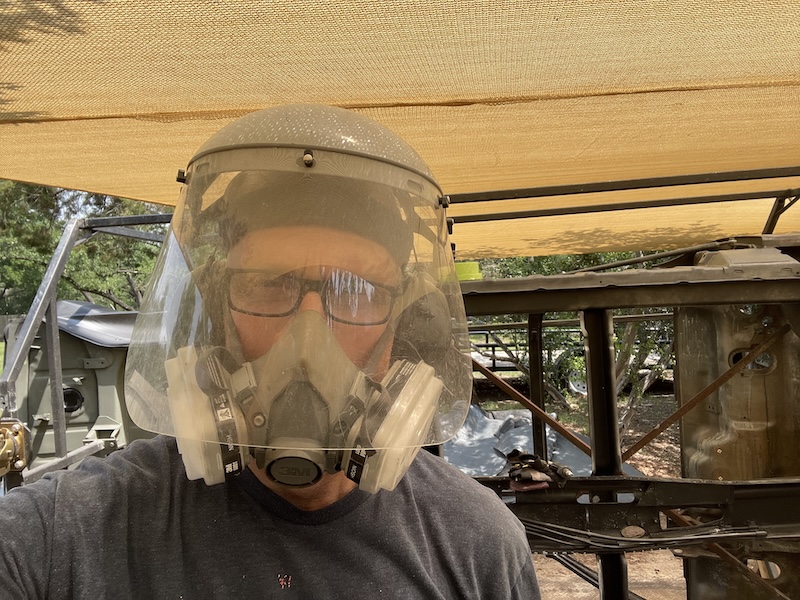
Just here promoting the use of PPE when restoring old cars! That and scaring kids in my neighborhood!
 |
|
|
|
| 914werke |
May 29 2024, 09:05 AM
Post
#176
|
|
"I got blisters on me fingers" Group: Members Posts: 11,686 Joined: 22-March 03 From: USofA Member No.: 453 Region Association: Pacific Northwest |
|
|
|
|
| Montreal914 |
Jun 1 2024, 09:27 PM
Post
#177
|
|
Advanced Member Group: Members Posts: 2,161 Joined: 8-August 10 From: Claremont, CA Member No.: 12,023 Region Association: Southern California |
Amazing work and inspiration. (IMG:style_emoticons/default/smilie_pokal.gif)
I was a little surprised to see you had to do some rework on the inner lower firewall for the floor embossing. It made me look at various pictures trying to find which replacement panel was at fault. I finally got my answer going all the way back to your post #36. We can see the lower firewall inner replacement panel with the indent for the floor on the passenger side, but that indent isn’t there on the driver’s side…!! (IMG:style_emoticons/default/blink.gif) Small annoyance compared to the benefits of having such replacement part. (IMG:style_emoticons/default/smile.gif) Following the great work! (IMG:style_emoticons/default/popcorn[1].gif) |
|
|
|
| friethmiller |
Jun 2 2024, 06:55 PM
Post
#178
|
|
Senior Member Group: Members Posts: 1,358 Joined: 10-February 19 From: Austin, TX Member No.: 22,863 Region Association: Southwest Region |
QUOTE(Montreal914 @ Jun 1 2024, 10:27 PM) Amazing work and inspiration. (IMG:style_emoticons/default/smilie_pokal.gif) I was a little surprised to see you had to do some rework on the inner lower firewall for the floor embossing. It made me look at various pictures trying to find which replacement panel was at fault. I finally got my answer going all the way back to your post #36. We can see the lower firewall inner replacement panel with the indent for the floor on the passenger side, but that indent isn’t there on the driver’s side…!! (IMG:style_emoticons/default/blink.gif) Small annoyance compared to the benefits of having such replacement part. (IMG:style_emoticons/default/smile.gif) Following the great work! (IMG:style_emoticons/default/popcorn[1].gif) Nice @Montreal914! Yeah, I figured that out since the indentation was for the seat post support that runs down the floorpan on both sides. I don't remember having to do this on my last floorpan so I guess it must have been a "defect" with the panel. Regardless, the fix was super easy to do, so no big deal. I'll take those kind of problems (IMG:style_emoticons/default/smile.gif) |
|
|
|
| friethmiller |
Jun 2 2024, 08:52 PM
Post
#179
|
|
Senior Member Group: Members Posts: 1,358 Joined: 10-February 19 From: Austin, TX Member No.: 22,863 Region Association: Southwest Region |
Rear Floorpan (6/1/2024 - 6/2/2024):
Here we go! Was super excited to get underway on the LE's floors on Saturday. I started by verifying the alignment of the pan to the car. I also checked the measurements of the targa/door gaps to make sure everything was still square. Once completed, I removed the pan and drilled out a hole every inch along the back and sides. Finally prep'ing the contact points with weld-through primer. With the floor remounted using screws and clamps, I inspected all the weld points to make sure everything was flush and ready to go. There were a few areas where I needed to use the hammer or add additional screws but after an hour or so I was finally ready to start welding. The following pics show a bit of the prep and yours truly with his new jacket and welding helmet. This helmet is way better than the cheap one I've been using for years. Thought this would be a good time for an upgrade. Funny, I can actually see what I'm welding now (IMG:style_emoticons/default/welder.gif) 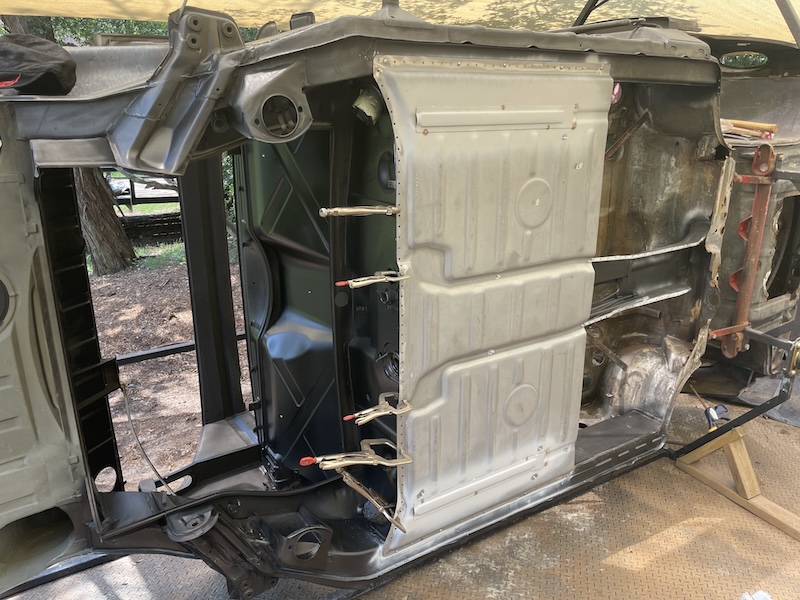  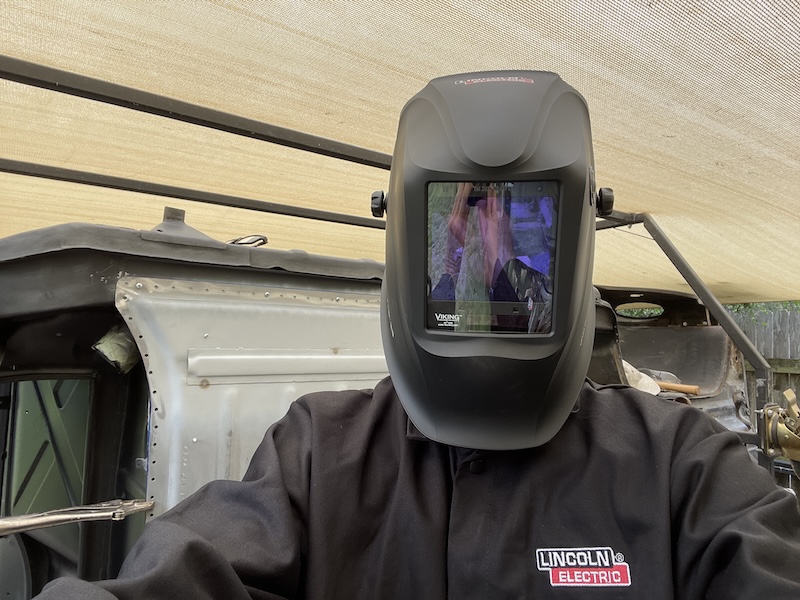 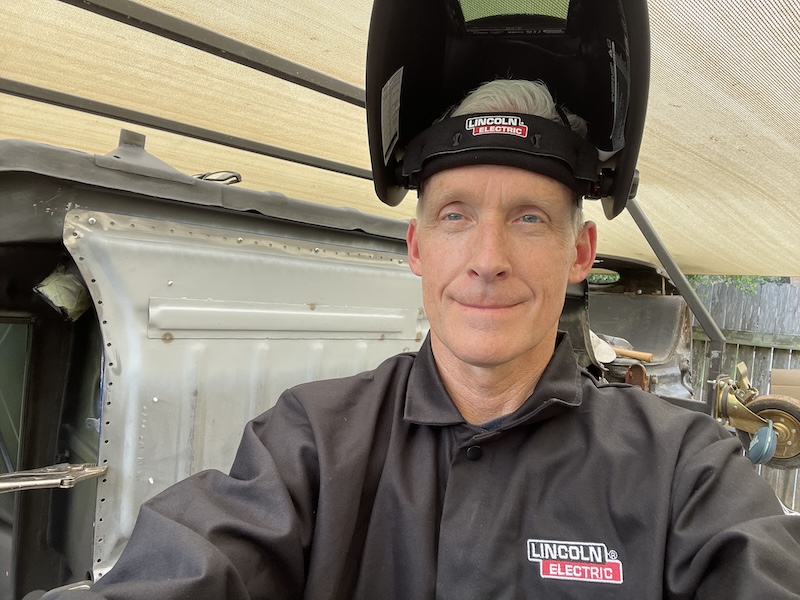 The following photos show the work to weld the rosettes around both side of the pan. This took a while to do. 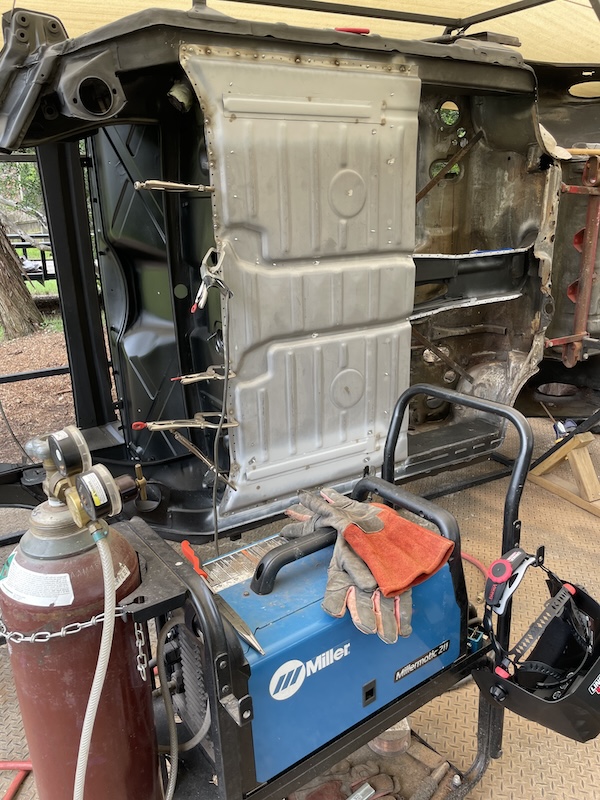 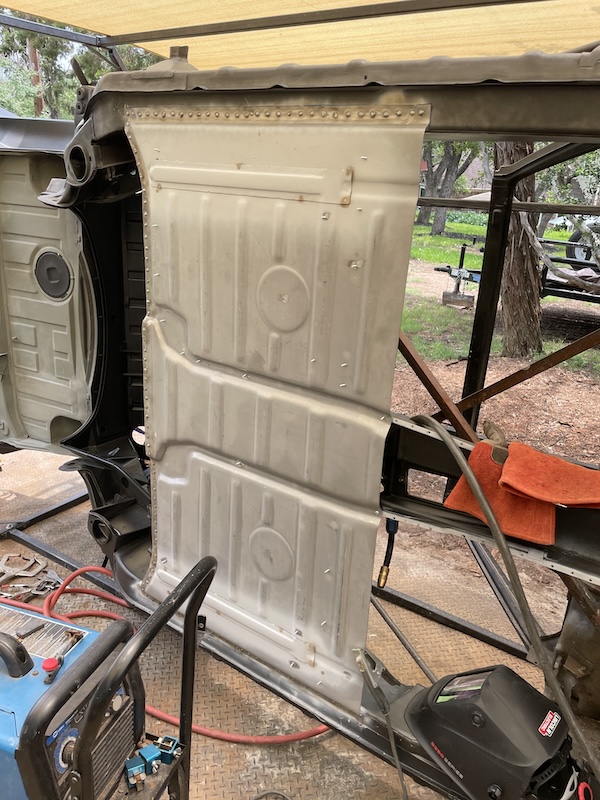 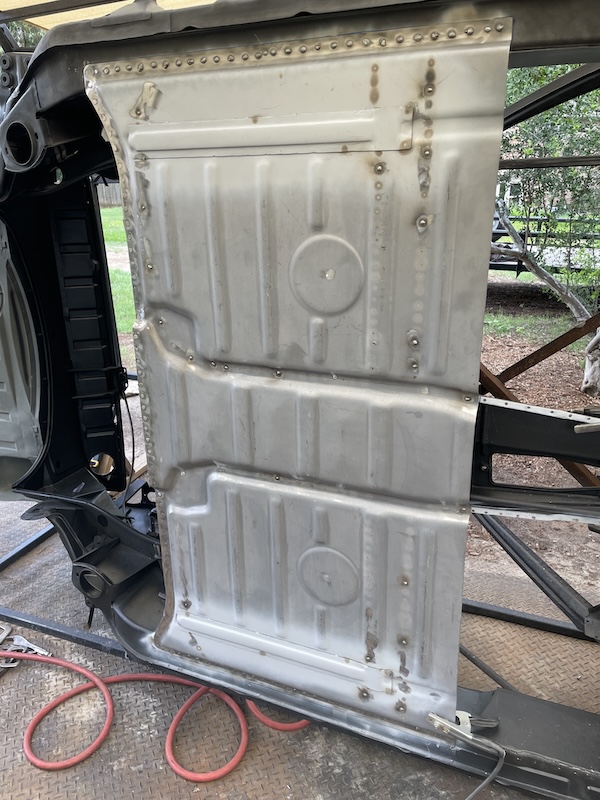 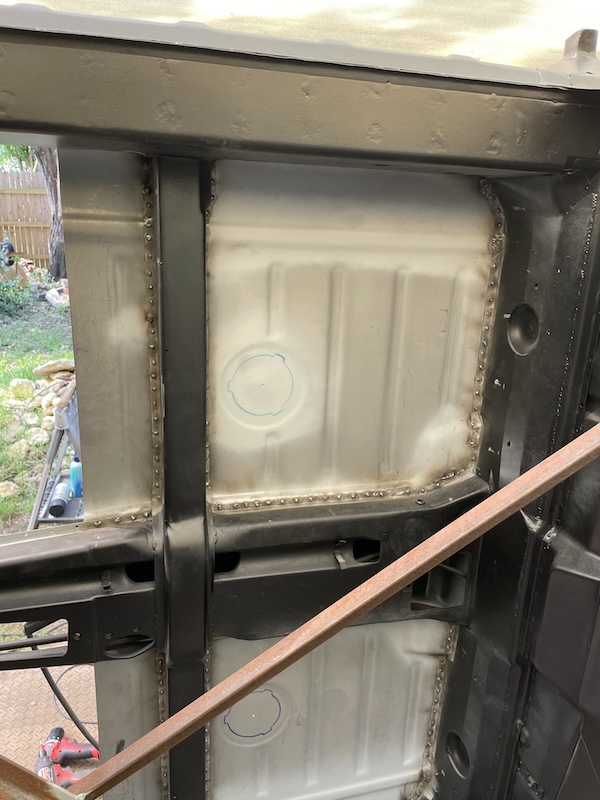 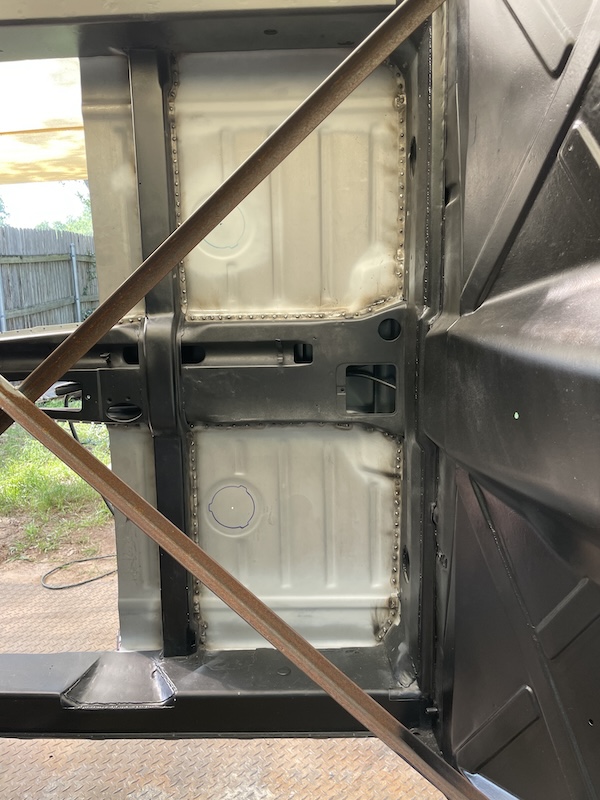 Once all the pan welds were completed, I ground down the back corner welds to flatten the surface enough to install the rear floor jack points on both sides. This is typically an easy part to install. This proved to be the case today. The following pics show the prep and install of the parts. 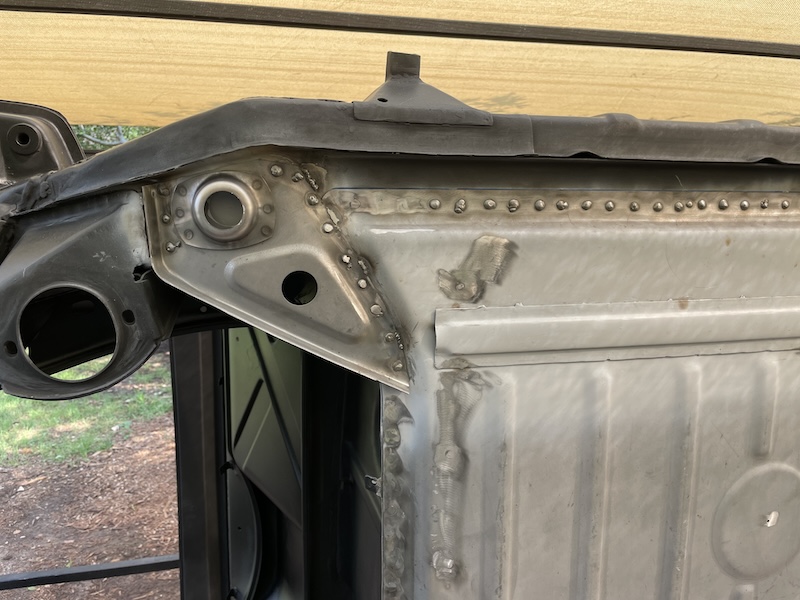 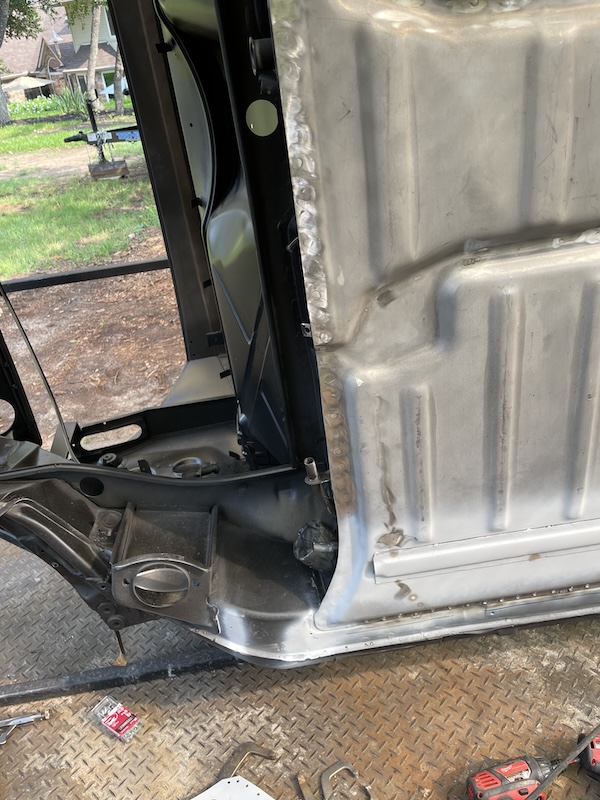   Here is the final picture of the floor completely installed. At this point, I called it a day! Note: I did leave the grinding of the inside welds for Sunday.  A little burned out after Saturday's "weld-fest" so a took some time off in the morning before returning to grind the inside welds on the pan and also install the e-brake components along the drivers side longitudinal. The following photos show the work done today to get everything done. Well, almost everything. I did have to delay cutting out the holes in the pan for the plates till I can get another air fitting for my nibbler. 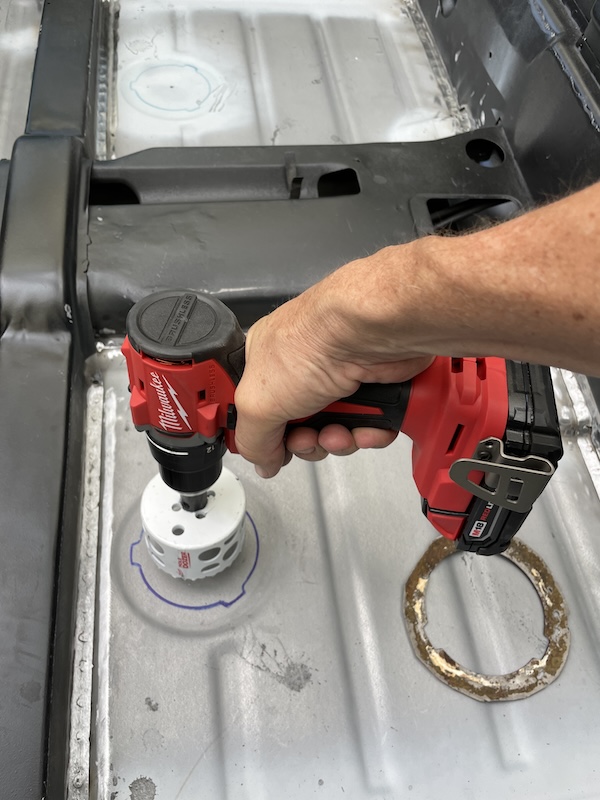 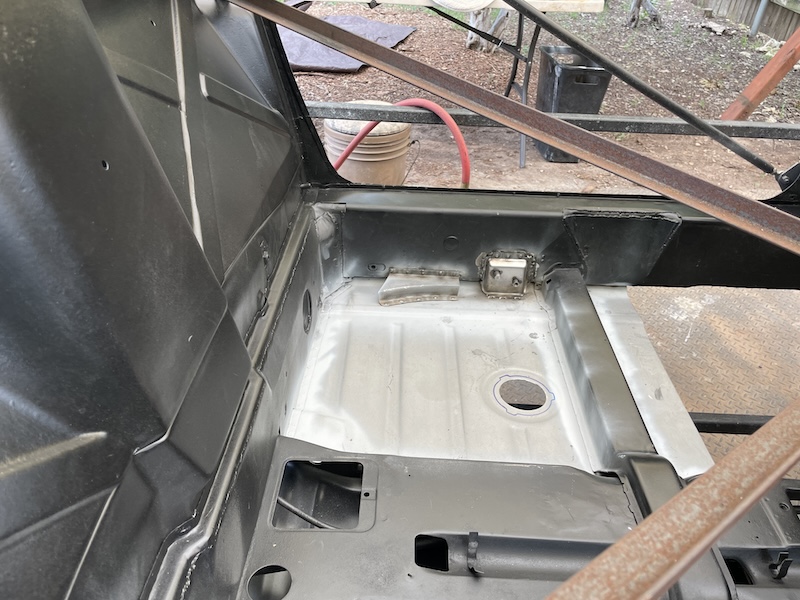 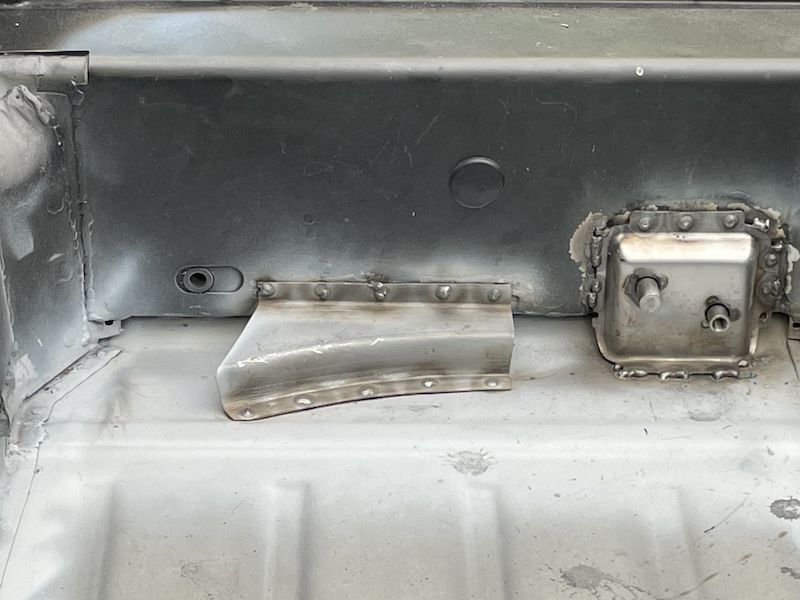   |
|
|
|
| East coaster |
Jun 3 2024, 05:20 AM
Post
#180
|
|
Senior Member Group: Members Posts: 1,949 Joined: 28-March 03 From: Millville, NJ Member No.: 487 Region Association: None |
Nice work and progress!
|
|
|
|
|
1 User(s) are reading this topic (1 Guests and 0 Anonymous Users)
0 Members:

|
Lo-Fi Version | Time is now: 4th July 2026 - 04:56 AM |
Invision Power Board
v9.1.4 © 2026 IPS, Inc.