|
|
|
Porsche, and the Porsche crest are registered trademarks of Dr. Ing. h.c. F. Porsche AG.
This site is not affiliated with Porsche in any way. Its only purpose is to provide an online forum for car enthusiasts. All other trademarks are property of their respective owners. |
|
|

  |

| friethmiller |
 Jan 7 2025, 10:15 AM Jan 7 2025, 10:15 AM
Post
#361
|
|
Senior Member  Group: Members Posts: 1,067 Joined: 10-February 19 From: Austin, TX Member No.: 22,863 Region Association: Southwest Region |
QUOTE(technicalninja @ Jan 7 2025, 10:11 AM)  You're going to find out being "certified" doesn't mean jack diddly shit! I've let all of my certifications lapse... Turned out they were more "money game" than real certifications! My wife would argue that I am fully certifiable! At the point you can write the questions for the "certification tests" they no longer count (for you) in my book! Someone just mistook MIG for TIG with you! That's a sign! And not a bad one... (IMG:style_emoticons/default/ninja.gif) (IMG:style_emoticons/default/lol-2.gif) You made me laugh! Good point! |
   |

 
|
| friethmiller |
Jan 19 2025, 08:25 PM
Post
#362
|
|
Senior Member Group: Members Posts: 1,067 Joined: 10-February 19 From: Austin, TX Member No.: 22,863 Region Association: Southwest Region |
Passenger Light Bucket Area Repair - Part 6 (1/18/2025):
Moving on to the last portion of the lower wheel well, you can see the rust damage to section that I removed earlier to gain access to area below the light bucket. Used Rust Bullet to coat the entire area before tacking in the trimmed-up original metal. This work was tricky as it needs to curve around the bottom of the car in this area.  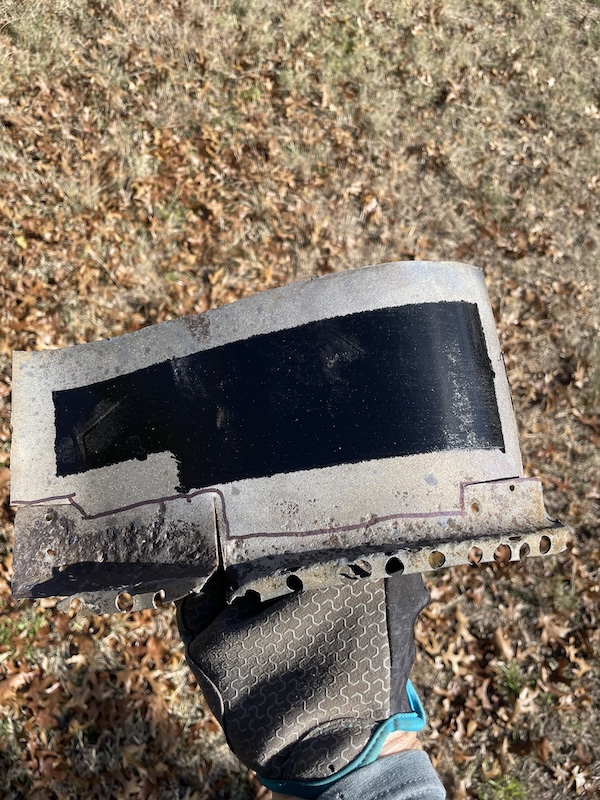 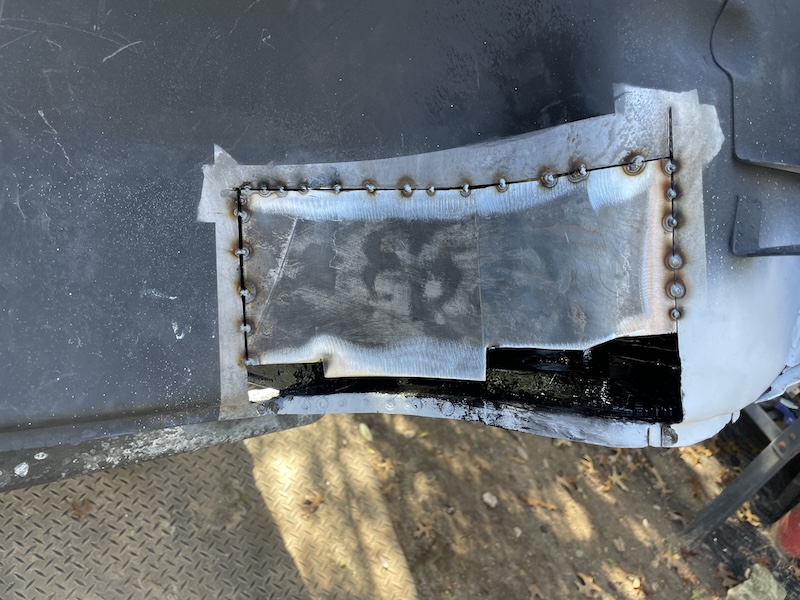 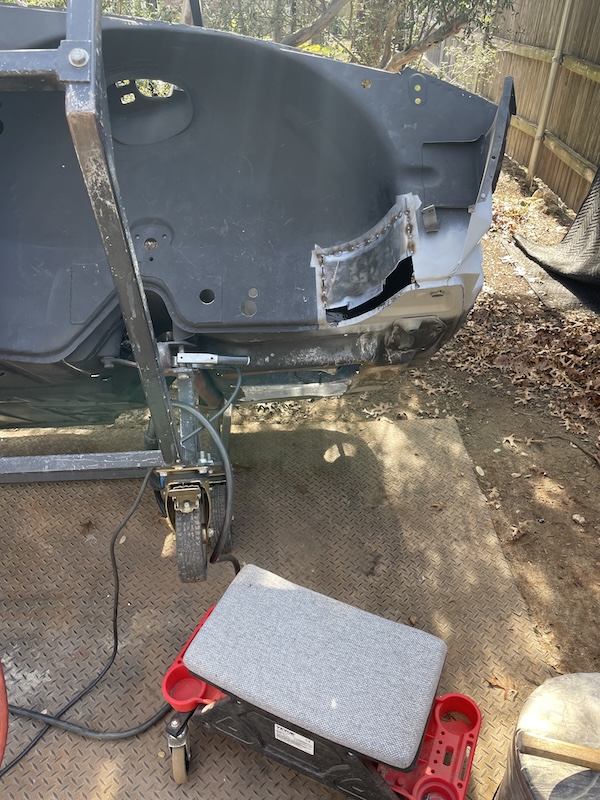 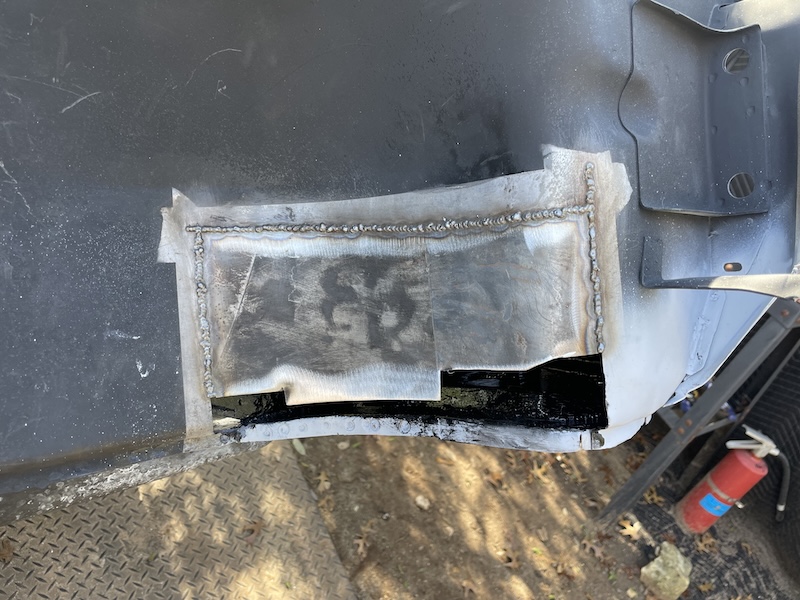 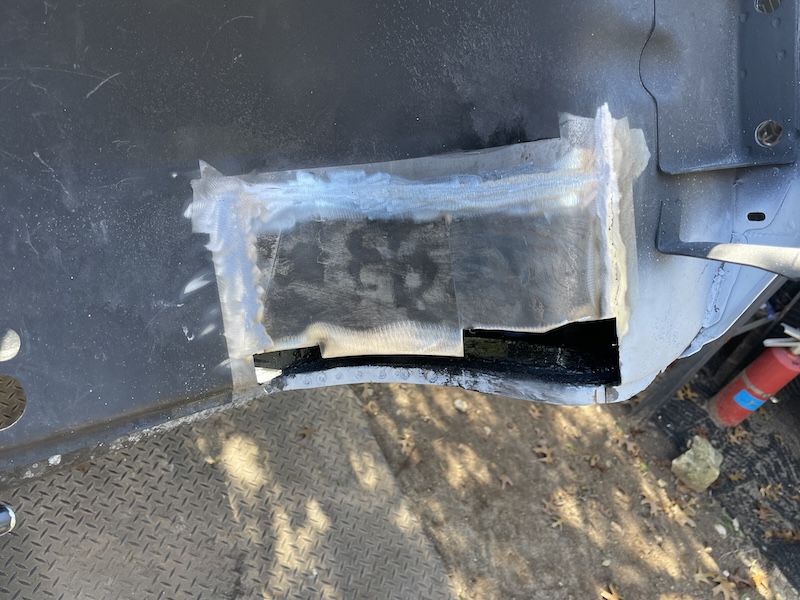  Working the bottom edge: You can see that I worked in small patches to try and match the curve the best I could. I have found it's most important to pay attention to the sides and top of these pieces - making sure everything is as flush as it can be. None of this is going to show too much but I trying to do a little bit better than my previous efforts. Might need an English Wheel or something to create these flowing curves with all the other vertical bends/curves that are necessary (IMG:style_emoticons/default/confused24.gif) The following photos show the process of buttoning up this area. 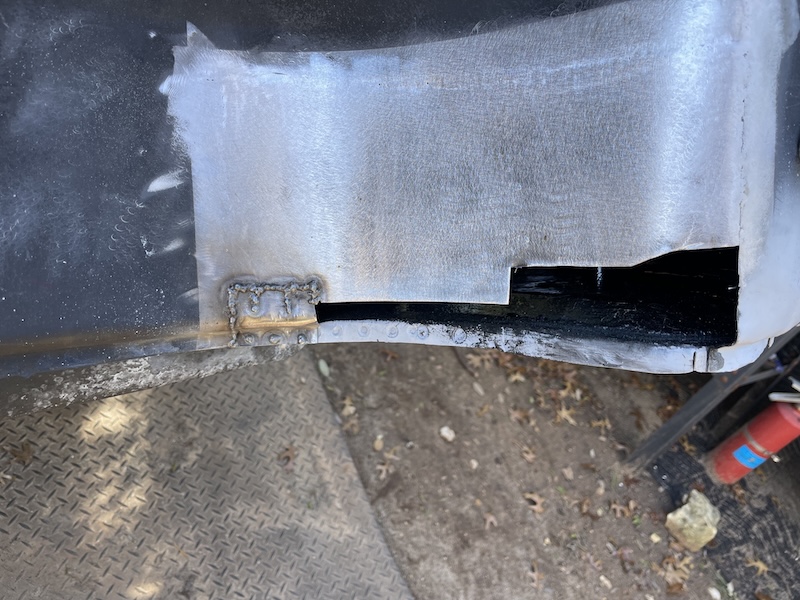 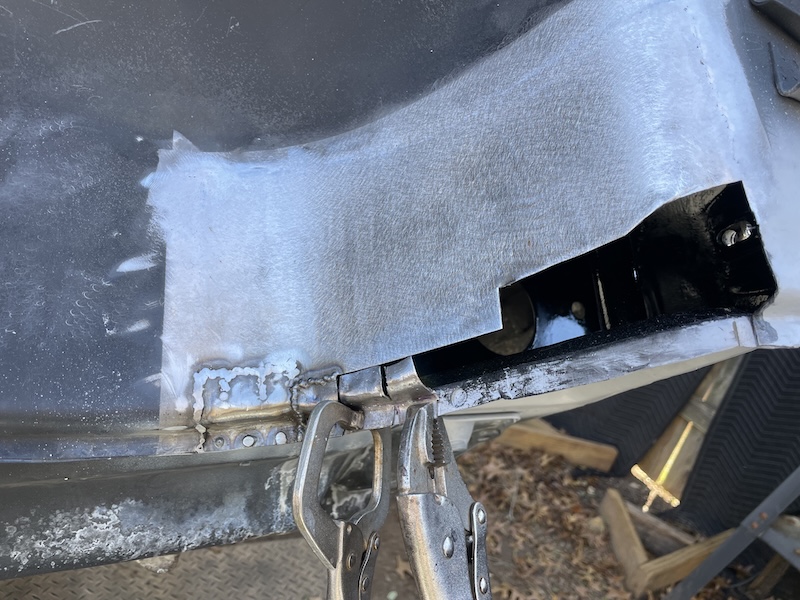 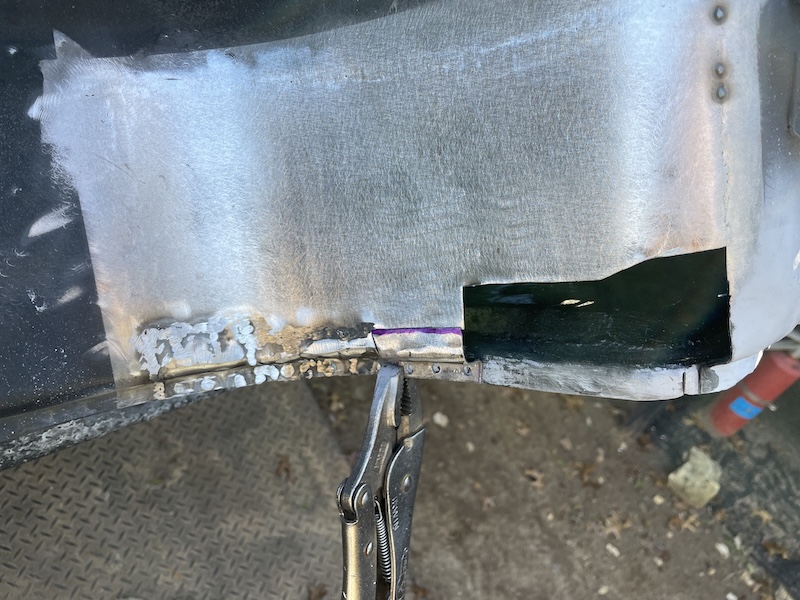 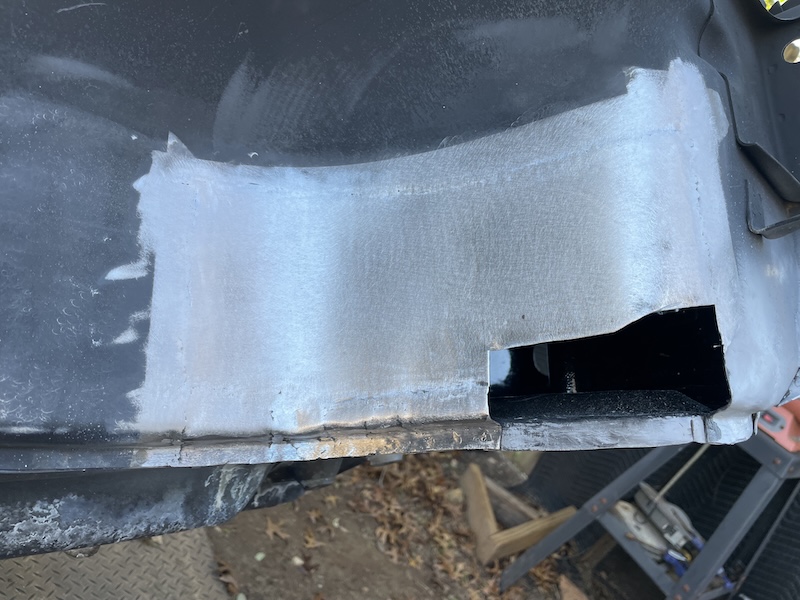 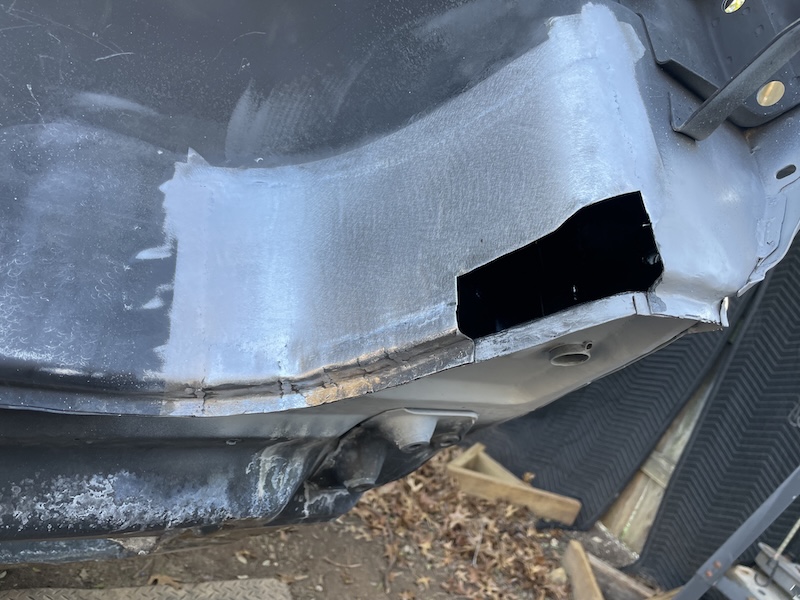 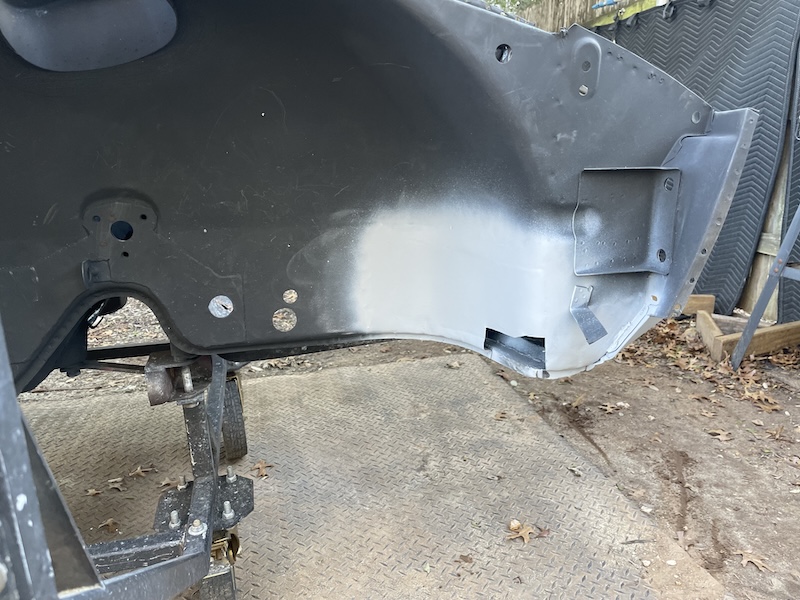  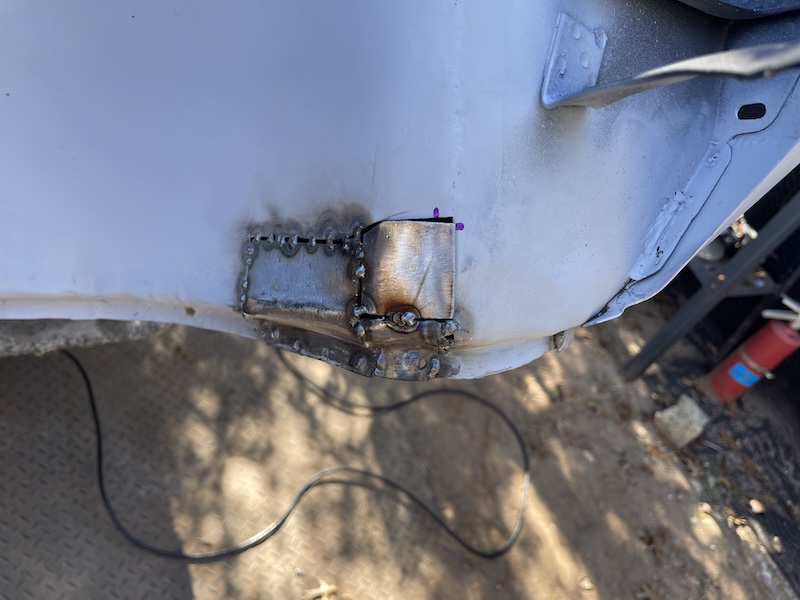 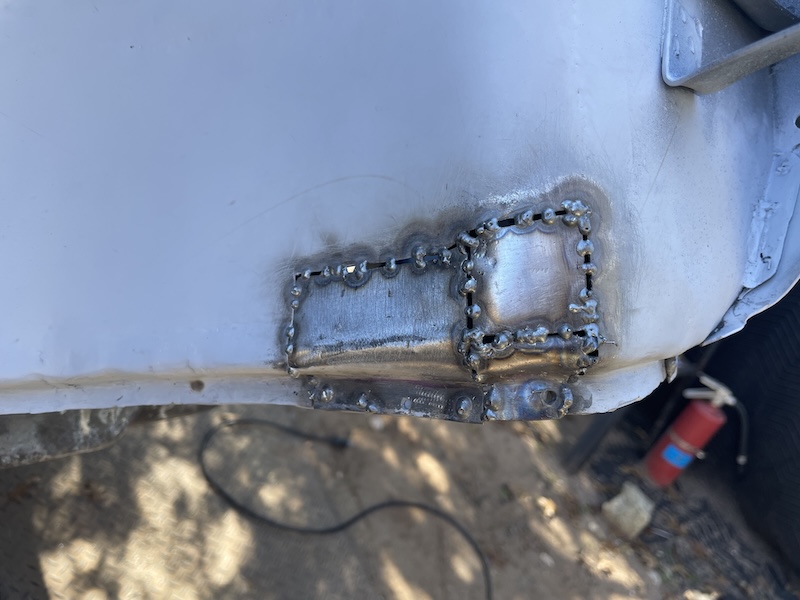 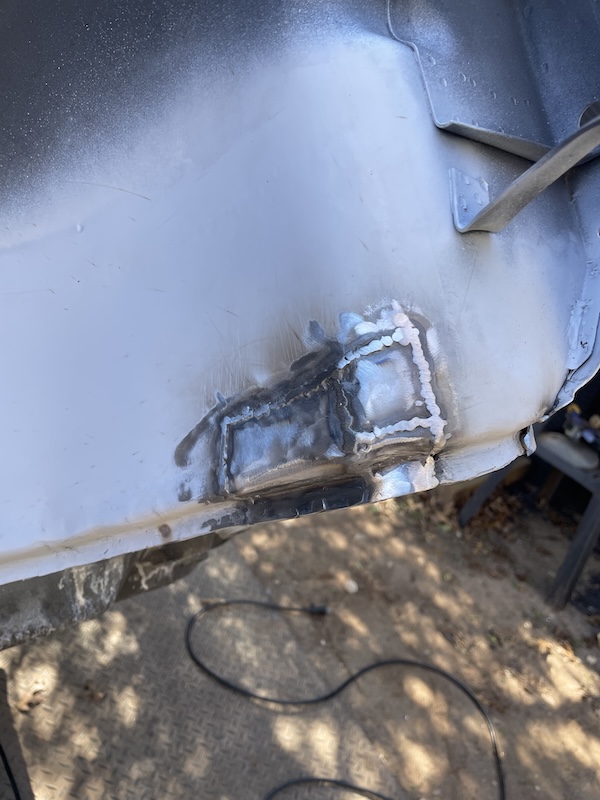 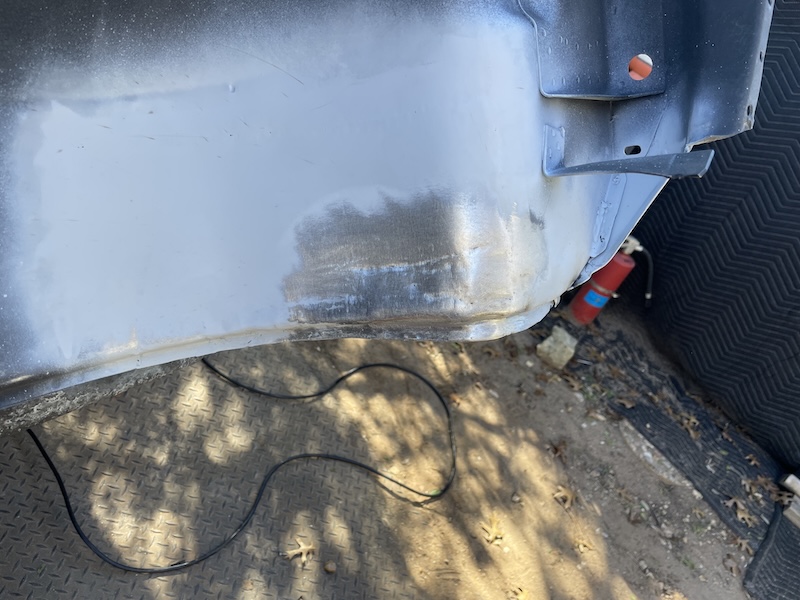 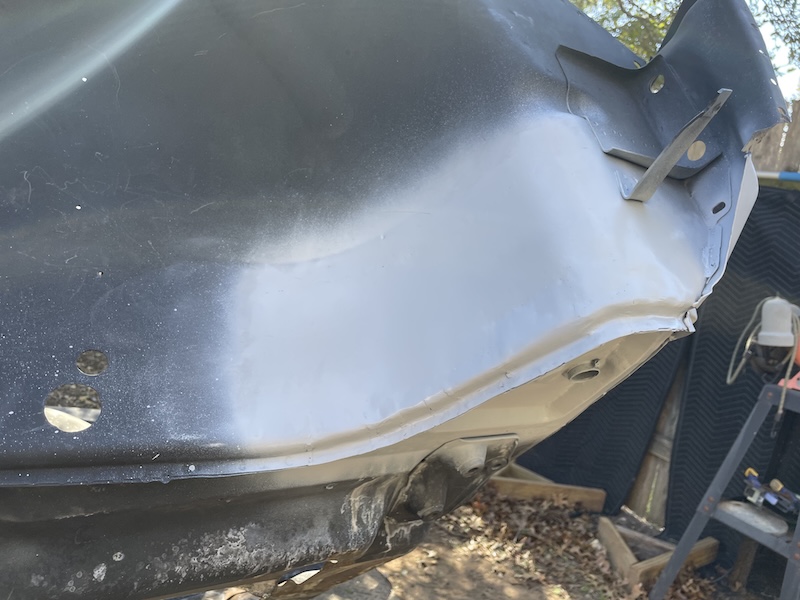 |
|
|
|
| friethmiller |
Jan 19 2025, 08:38 PM
Post
#363
|
|
Senior Member Group: Members Posts: 1,067 Joined: 10-February 19 From: Austin, TX Member No.: 22,863 Region Association: Southwest Region |
Passenger Light Bucket Area Repair - Part 6 (Bonus Pics) - 1/18/2025):
Working on the edges of the light bucket here. There was rust damage on the fender side as well as front vertical panel where the eyebrow holes are located. 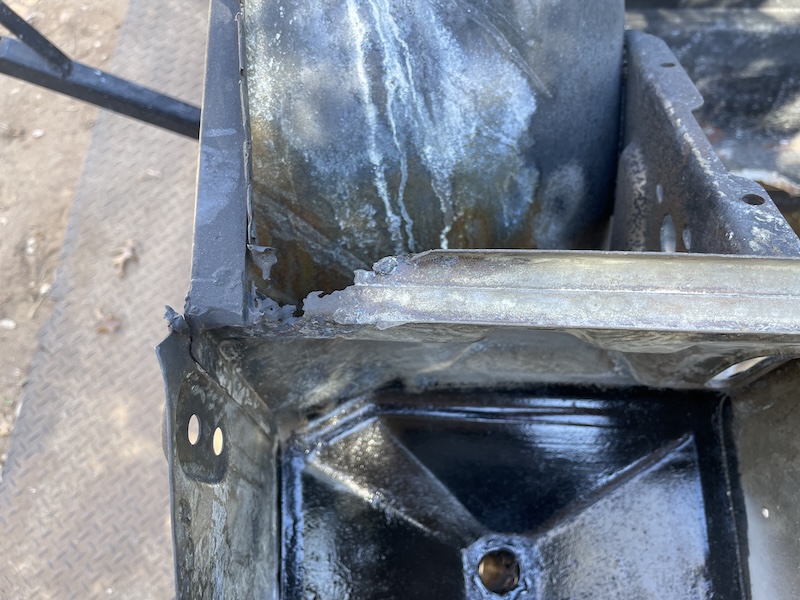 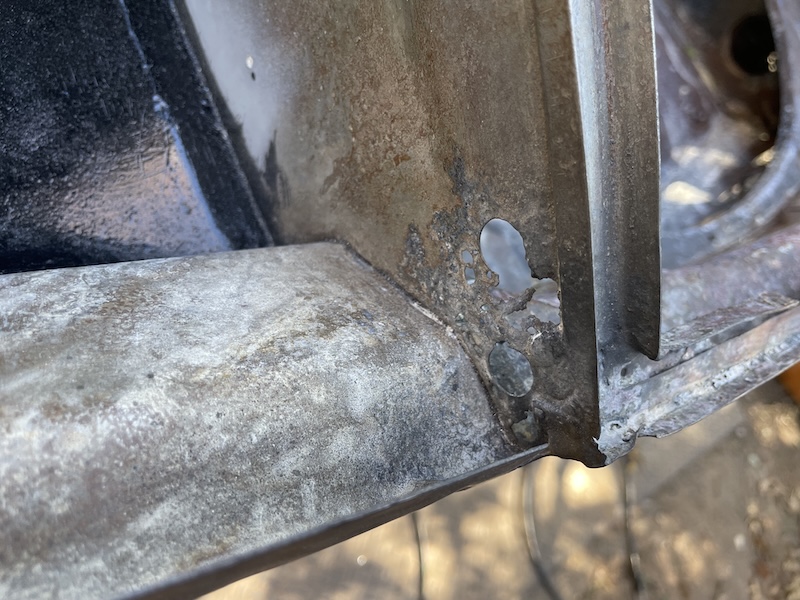 Running out of daylight here so I jumped in a cut out all the bad metal where the bucket meets the fender. My plan was to attempt to repair this with only one piece of metal. Starting with construction paper, I cut out the patch, made bends, and then began the slow process of trimming the metal to fit. After about an hour or so I was finally happy with the fit and started welding the patch in place. You'll notice the area that was a little raised (red arrow). I waited till the patch was completely in place before using my hammer/dolly to flatten everything out. Going to finish this area up and move on next weekend. Cheers (IMG:style_emoticons/default/beerchug.gif) 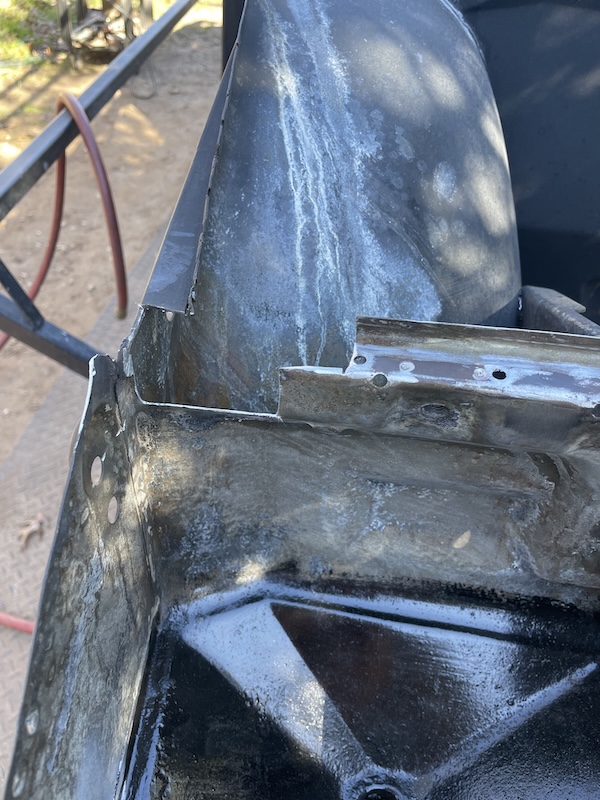 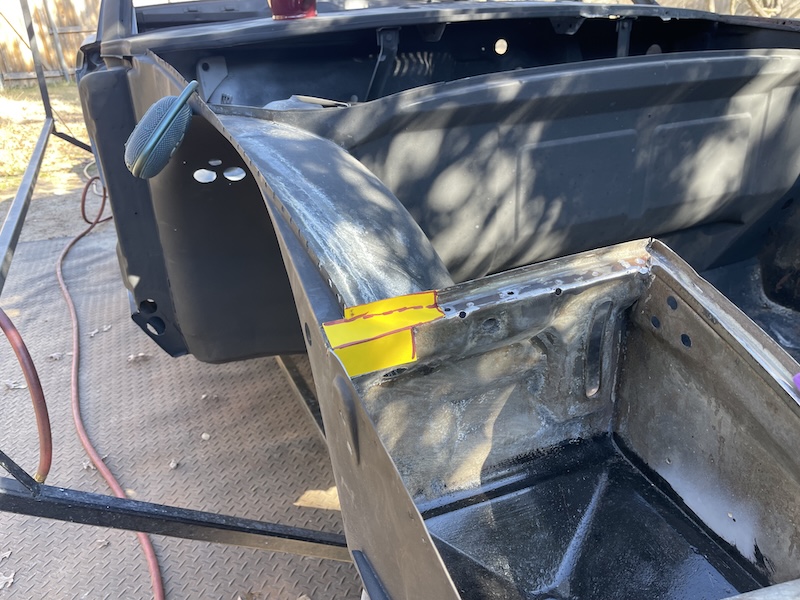 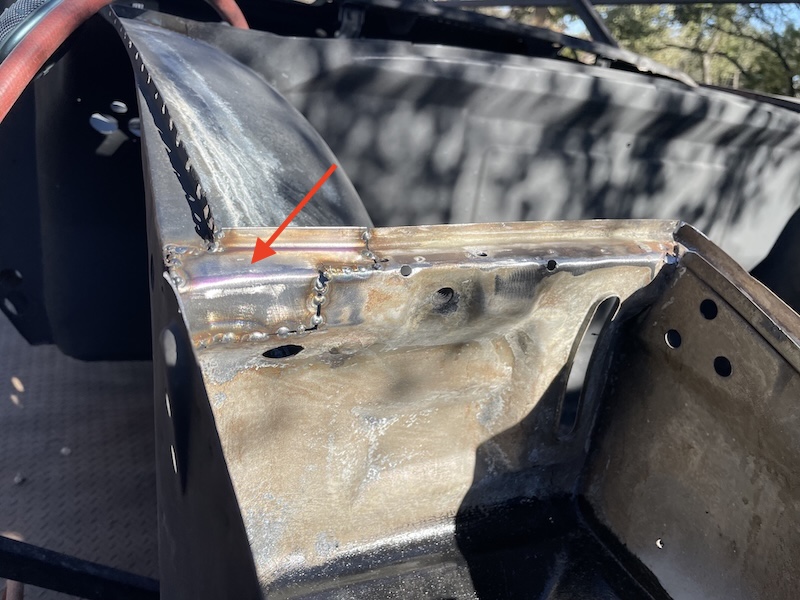 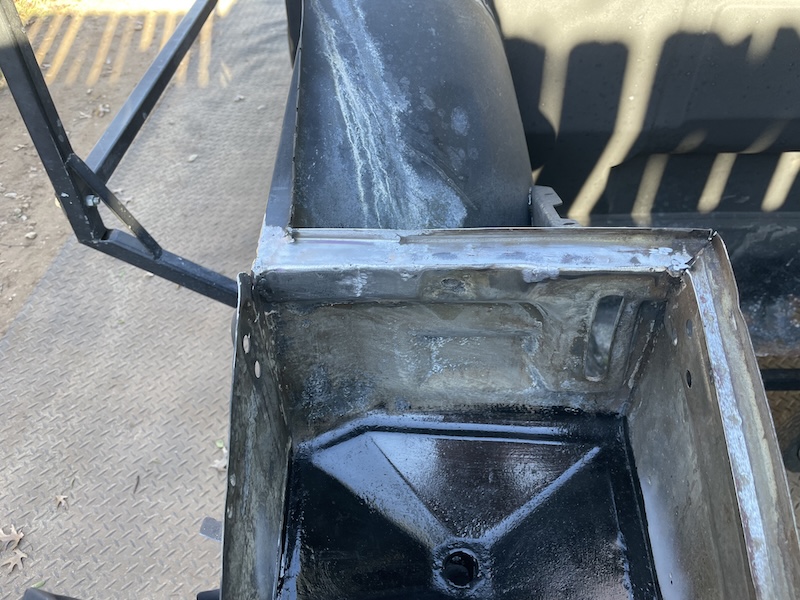 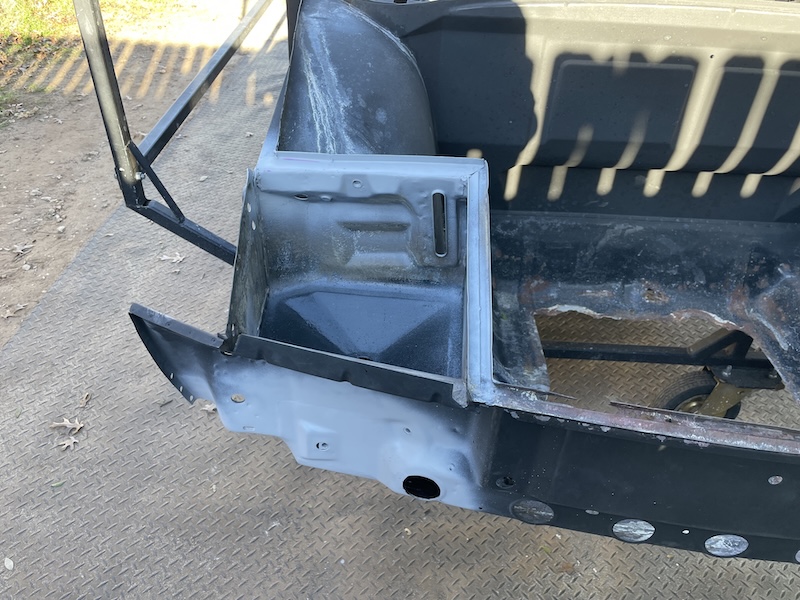 |
|
|
|
| bkrantz |
Jan 19 2025, 09:02 PM
Post
#364
|
|
914 Guru Group: Members Posts: 8,530 Joined: 3-August 19 From: SW Colorado Member No.: 23,343 Region Association: Rocky Mountains |
QUOTE(friethmiller @ Jan 19 2025, 07:25 PM) Passenger Light Bucket Area Repair - Part 6 (1/18/2025): Moving on to the last portion of the lower wheel well, you can see the rust damage to section that I removed earlier to gain access to area below the light bucket. Used Rust Bullet to coat the entire area before tacking in the trimmed-up original metal. This work was tricky as it needs to curve around the bottom of the car in this area. Working the bottom edge: You can see that I worked in small patches to try and match the curve the best I could. I have found it's most important to pay attention to the sides and top of these pieces - making sure everything is as flush as it can be. None of this is going to show too much but I trying to do a little bit better than my previous efforts. Might need an English Wheel or something to create these flowing curves with all the other vertical bends/curves that are necessary (IMG:style_emoticons/default/confused24.gif) The following photos show the process of buttoning up this area. Yay! (IMG:style_emoticons/default/cheer.gif) |
 |
|
| bkrantz |
Jan 19 2025, 09:20 PM
Post
#365
|
|
914 Guru Group: Members Posts: 8,530 Joined: 3-August 19 From: SW Colorado Member No.: 23,343 Region Association: Rocky Mountains |
This is one of those sections that I bet Karmann bitched about--and added cost to the body production.
BTW, that same right side lower corner where the inner fender, front bulkhead, lower headlight bucket, front pumper mount, and floor all come together was where I spend many, many hours tp repair collision damage and rust. |
|
|
|
| friethmiller |
Jan 20 2025, 08:52 AM
Post
#366
|
|
Senior Member Group: Members Posts: 1,067 Joined: 10-February 19 From: Austin, TX Member No.: 22,863 Region Association: Southwest Region |
QUOTE(bkrantz @ Jan 19 2025, 09:20 PM) This is one of those sections that I bet Karmann bitched about--and added cost to the body production. BTW, that same right side lower corner where the inner fender, front bulkhead, lower headlight bucket, front pumper mount, and floor all come together was where I spend many, many hours tp repair collision damage and rust. (IMG:style_emoticons/default/agree.gif) That was a complete "time-suck" for me. I can't imagine having to also reconstruct after everything was pushed-in about 3 inches. Have some interesting repairs at the front by the hood latch coming up. Can't wait to get back at it. (IMG:style_emoticons/default/welder.gif) |
|
|
|
| friethmiller |
Jan 26 2025, 03:55 PM
Post
#367
|
|
Senior Member Group: Members Posts: 1,067 Joined: 10-February 19 From: Austin, TX Member No.: 22,863 Region Association: Southwest Region |
Early Spring Clean-up (1/25 - 1/26/2025):
Too rainy to uncover the car this weekend so I decided to spend time organizing the shed. Believe it or not, these are the "After" photos. I have two tail shifters and 1 side shifter transmission in here. Plenty of suspension parts, engine tin and 1.7 FI parts, too. Going to put up for sale an extra RD firewall panel, I have and that peddle cluster could be a good core for one of the guys here that restore them. Here's to better weather next weekend (IMG:style_emoticons/default/beerchug.gif) 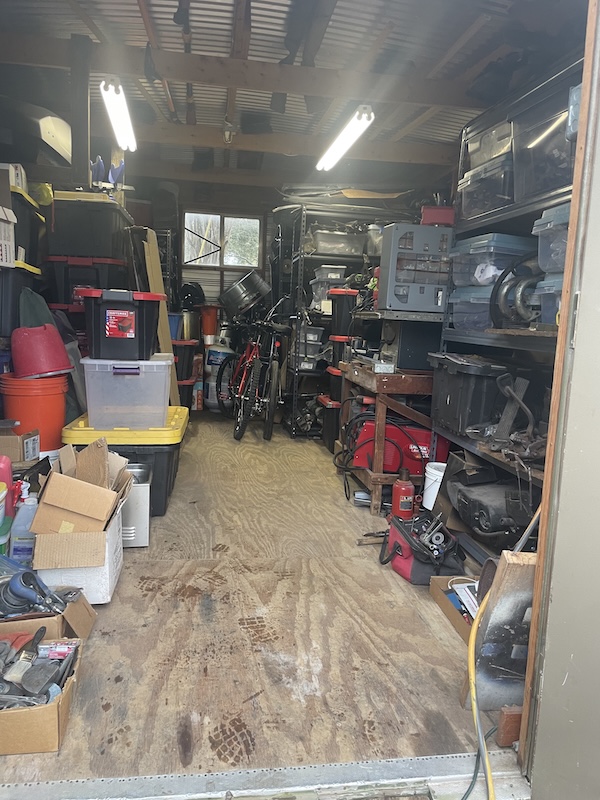 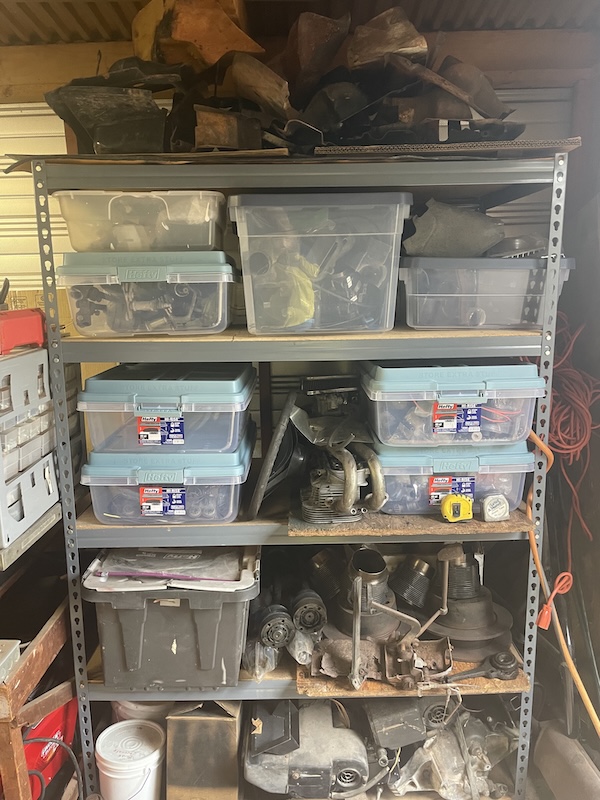  |
|
|
|
| technicalninja |
Jan 26 2025, 04:26 PM
Post
#368
|
|
Advanced Member Group: Members Posts: 2,531 Joined: 31-January 23 From: Granbury Texas Member No.: 27,135 Region Association: Southwest Region |
Just imagine what Fred could do with a shop full of real metal working tools!
(IMG:style_emoticons/default/ninja.gif) Fred, because you did the work and know where the "not perfect" stuff is you think less of your work than you should. That bitchy area in the inner front fender... All you have to do is "Body Schultz" that area and NO-ONE will be able to tell. Most of the cars got something like that done at the selling dealers anyway. My 75 which did not get undercoated appears to have had a mild amount of Body Shultz sprayed by the factory on the bottom BEFORE the silver paint was applied. I believe its "as produced". A factory overspray of Shultz covering that area before paint might be very believable! |
|
|
|
| friethmiller |
Feb 9 2025, 06:27 PM
Post
#369
|
|
Senior Member Group: Members Posts: 1,067 Joined: 10-February 19 From: Austin, TX Member No.: 22,863 Region Association: Southwest Region |
Front Trunk Seal Track Repair - Part 1 - (2/1 & 2/2/2025):
I decided to blast and paint the passenger side of the front trunk to finish up/protect the previous work on the bottom corner of the car. I end up going with Rust Bullet's black epoxy, which I brushed on. Pretty happy with the results. IMO, this stuff is way better than POR-15. 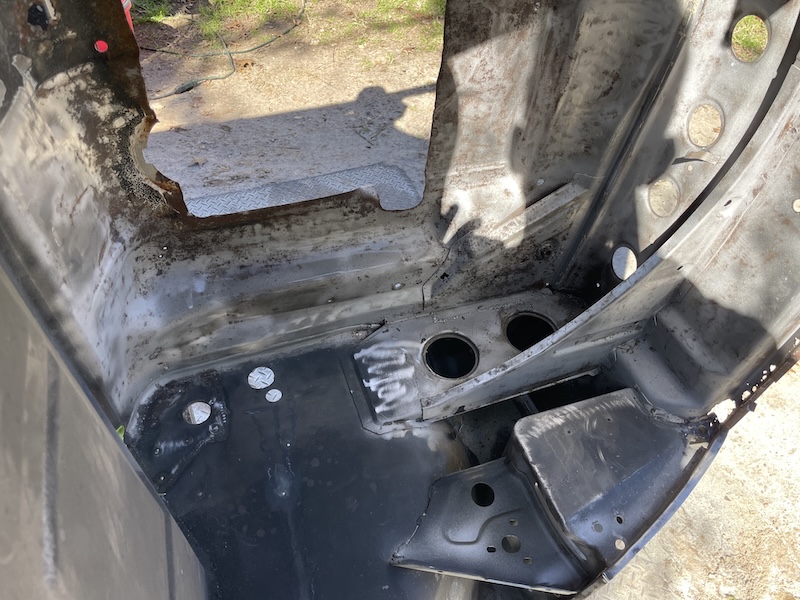 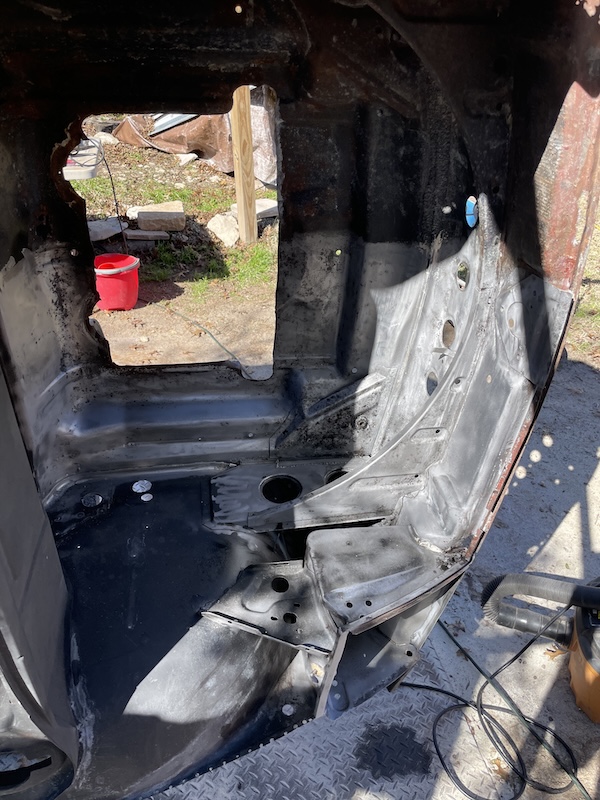 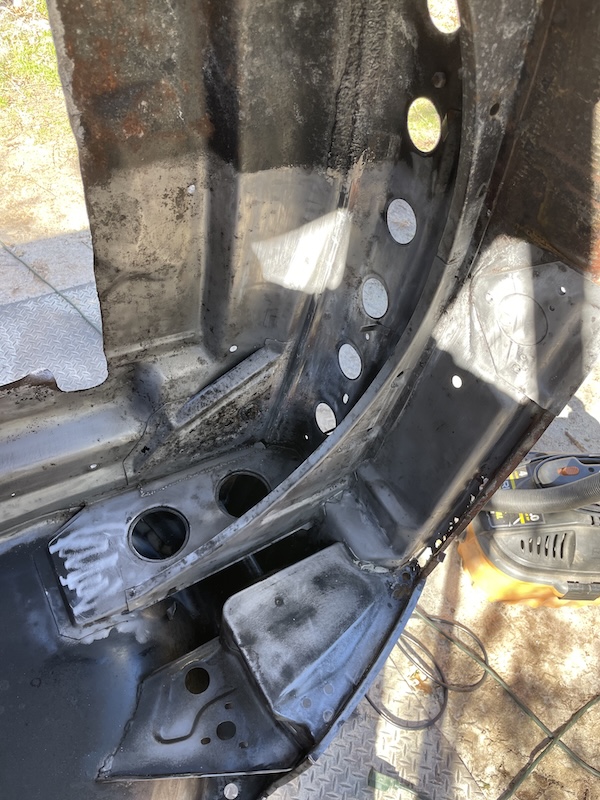 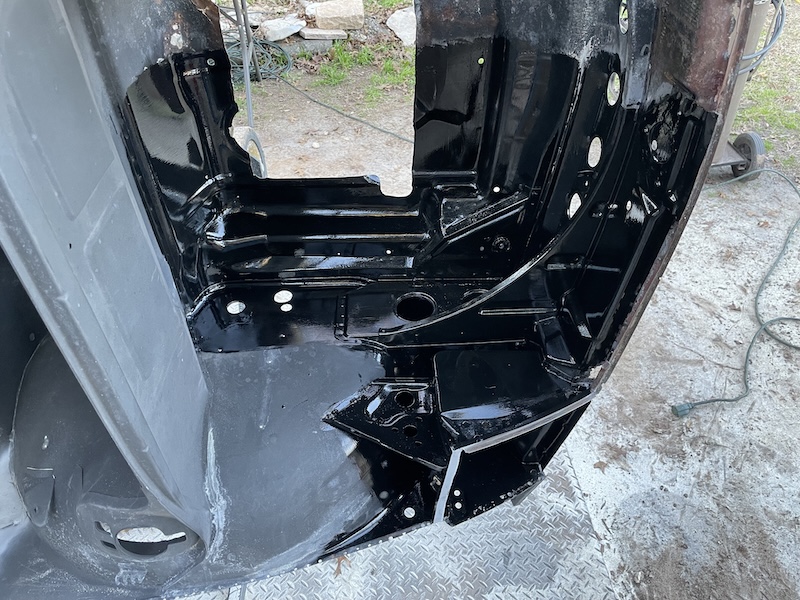 Next, I started where I left off on the bottom corner of the passenger side light bucket. The eye brow holes are pretty messed up here. In fact, as you'll see, the entire front of the hood seal track is in really bad shape. I had to replace almost all of it. The following photos show the work to remove and repair this area. 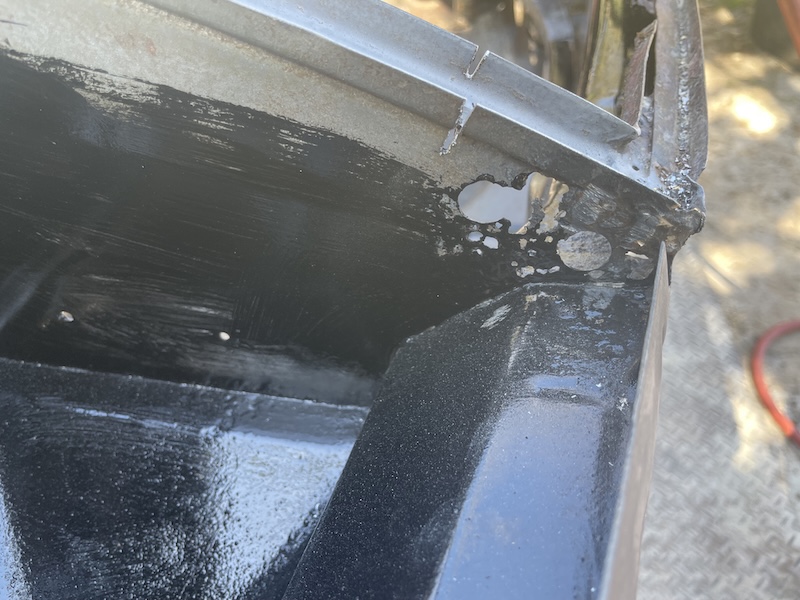 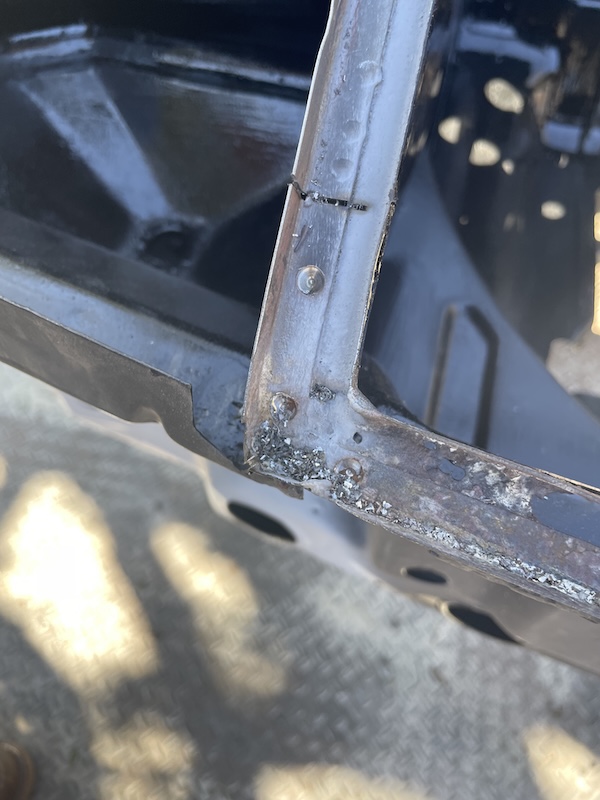 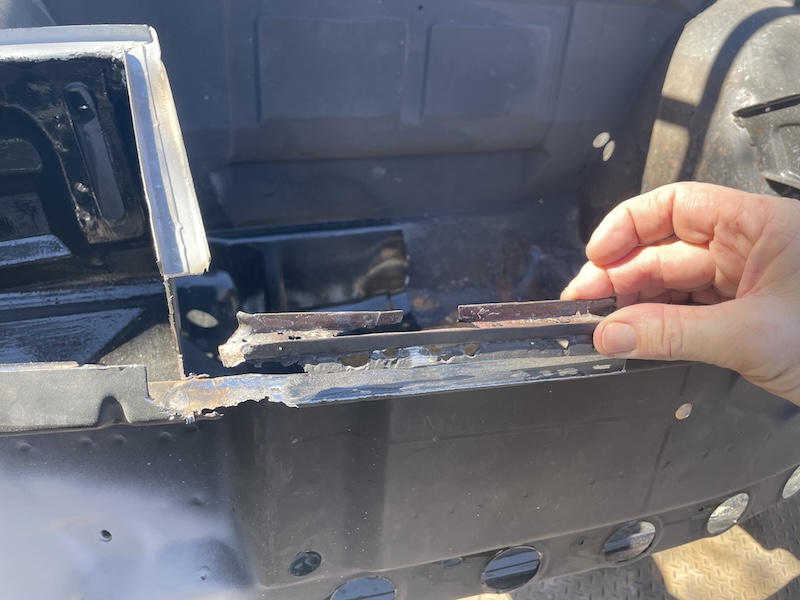 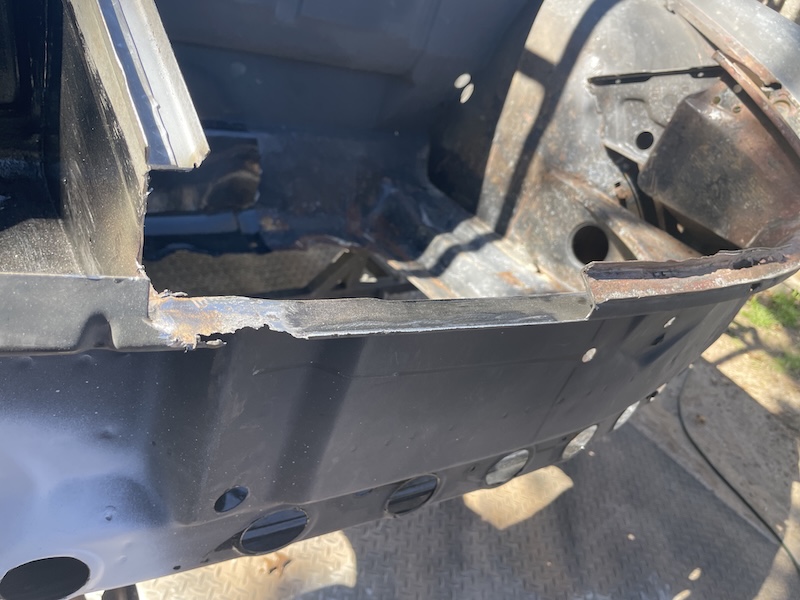 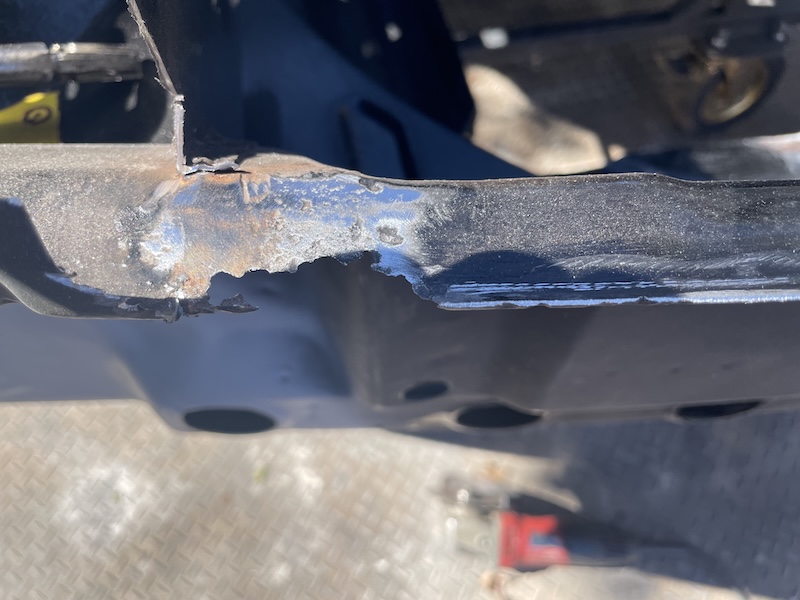 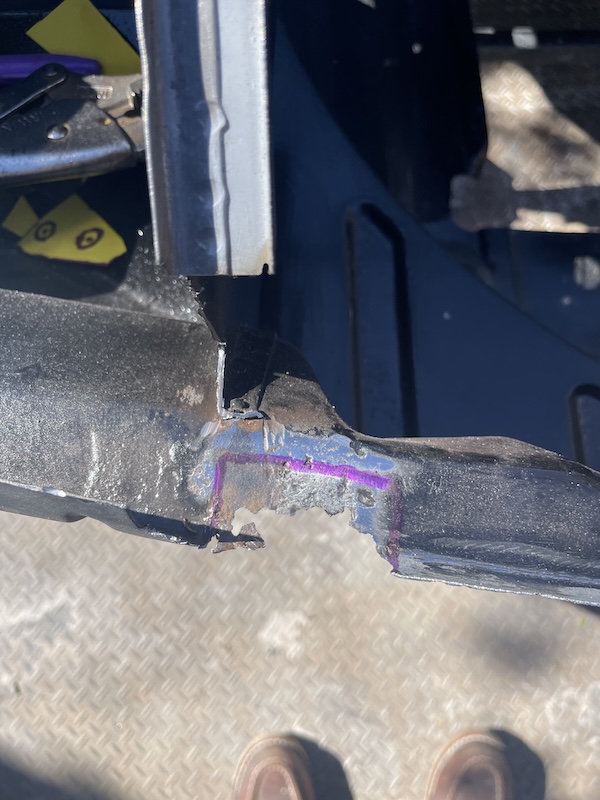 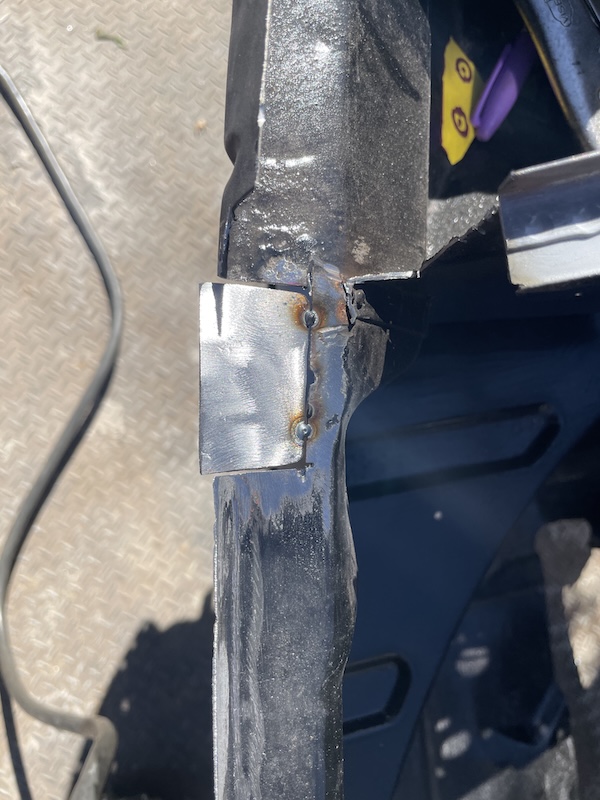 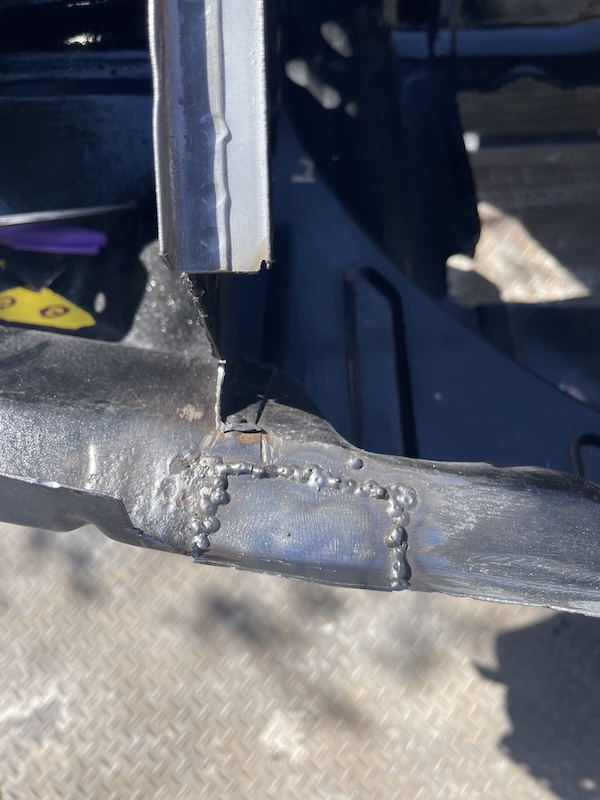 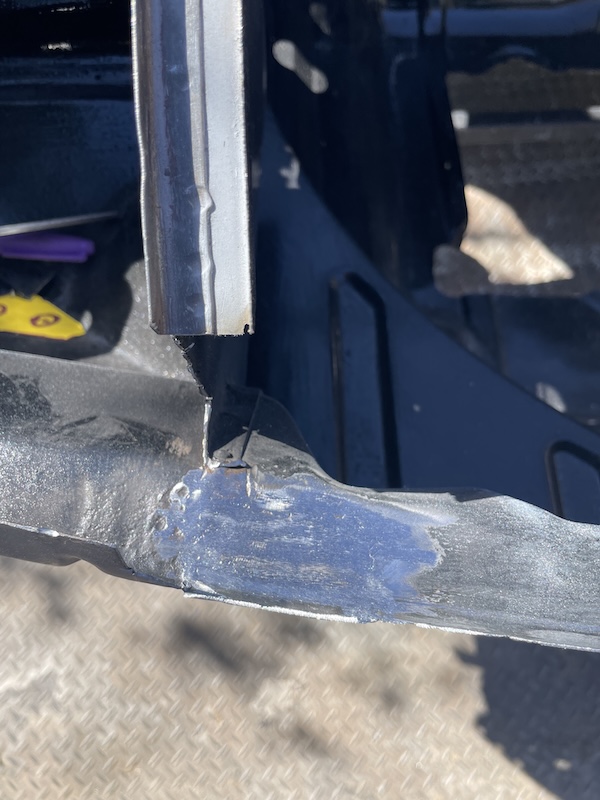 After getting the metal under the bucket side panel ready, I then replaced the front part of the bucket. My plan is to address the eyebrow holes later. I hope I don't regret the decision. (IMG:style_emoticons/default/rolleyes.gif)   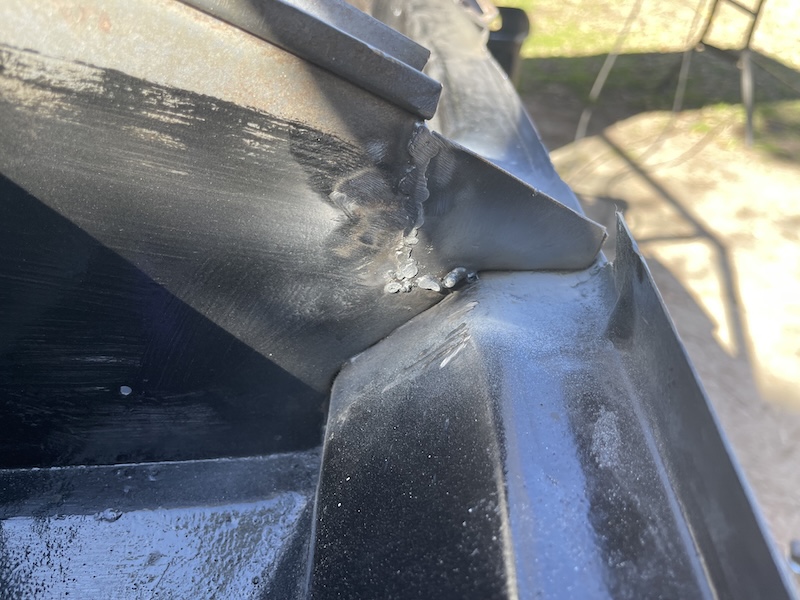 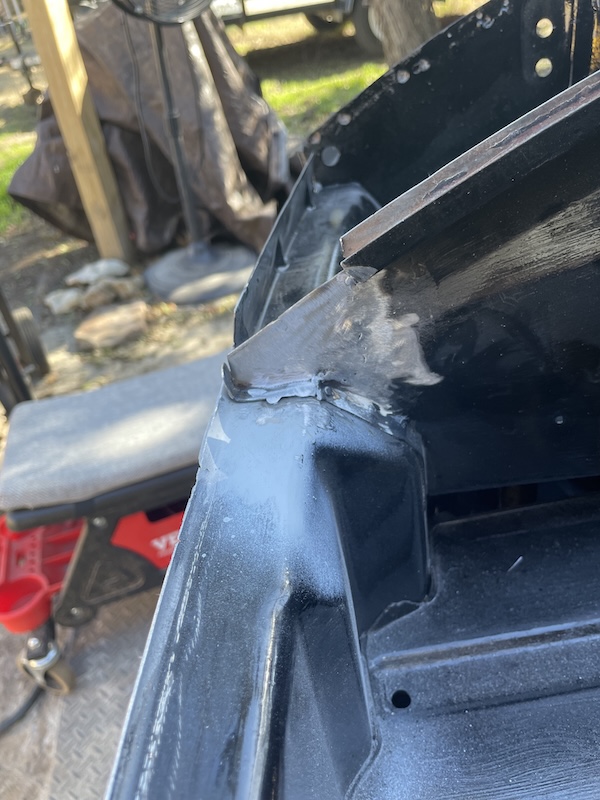 With that complete, I moved on to the front track that was completely toast. I formed the metal patch and then welded it in place. You may notice that I made the part a little too "fat" in the bottom corner. I ended up fixing this issue the next day (see next post). 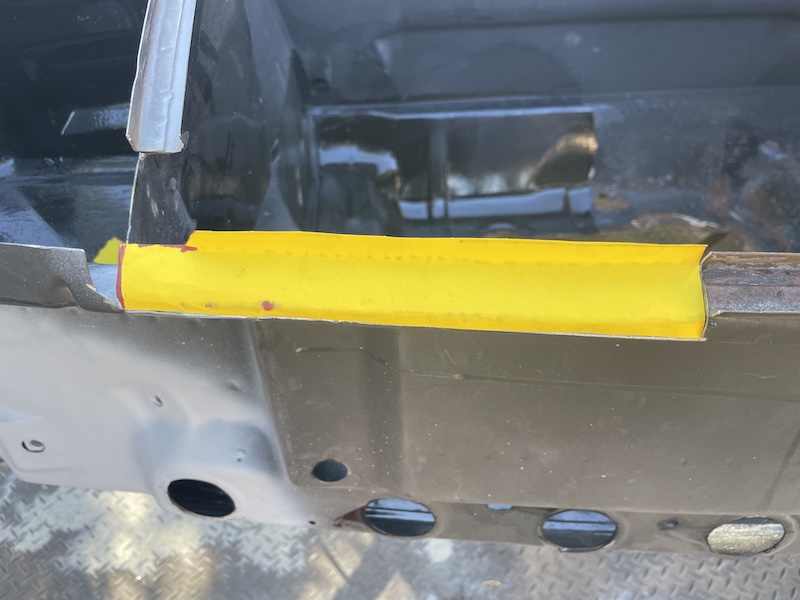 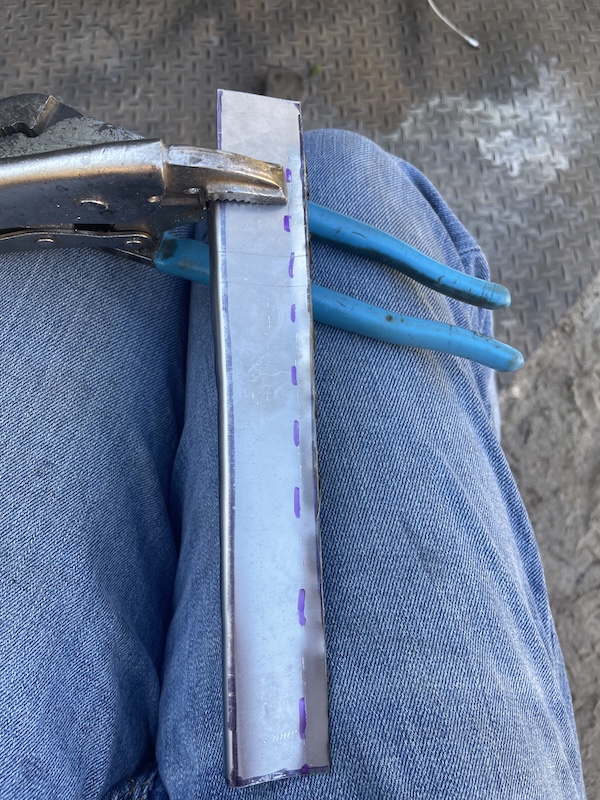 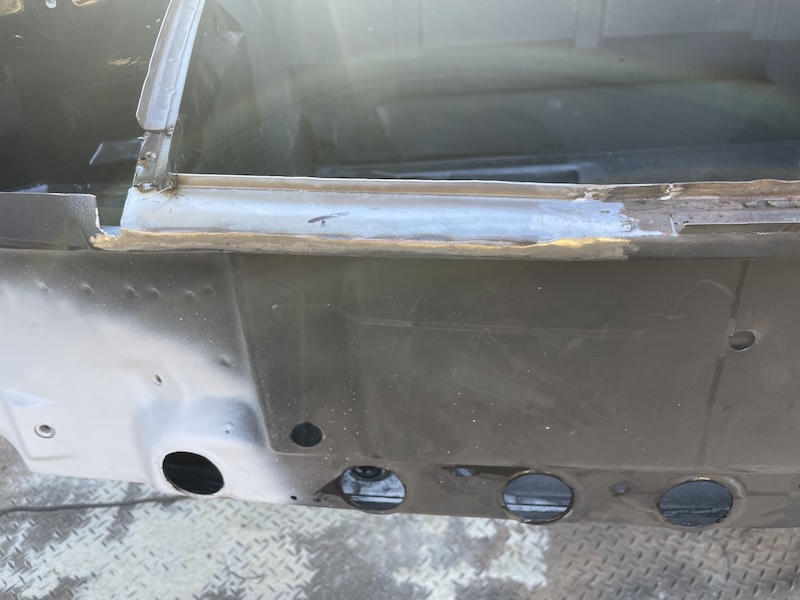 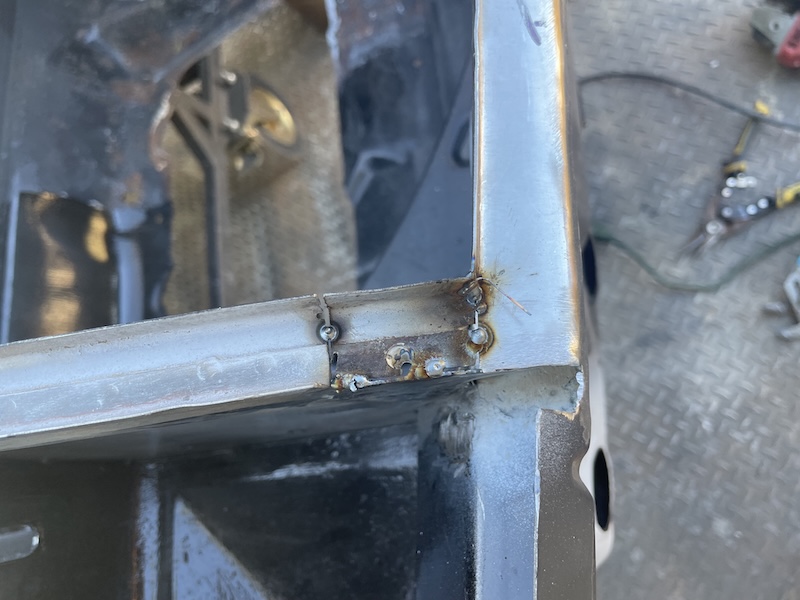 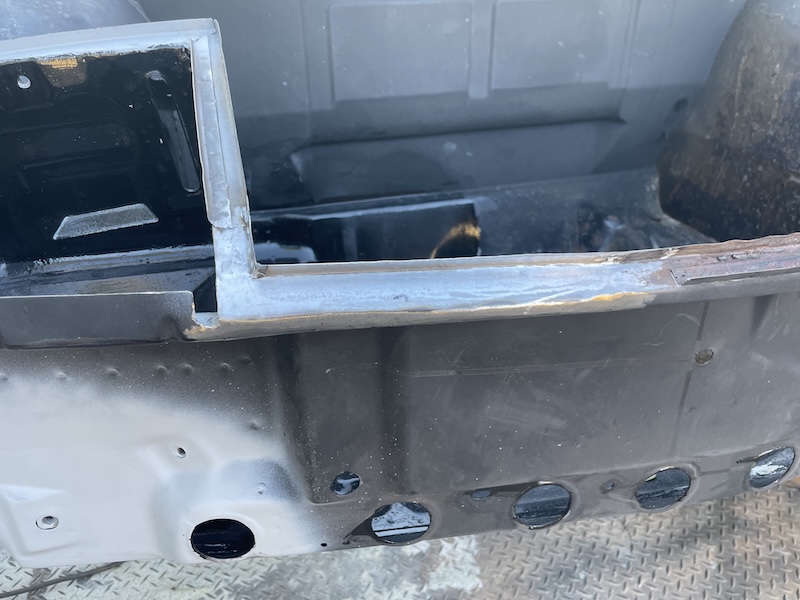 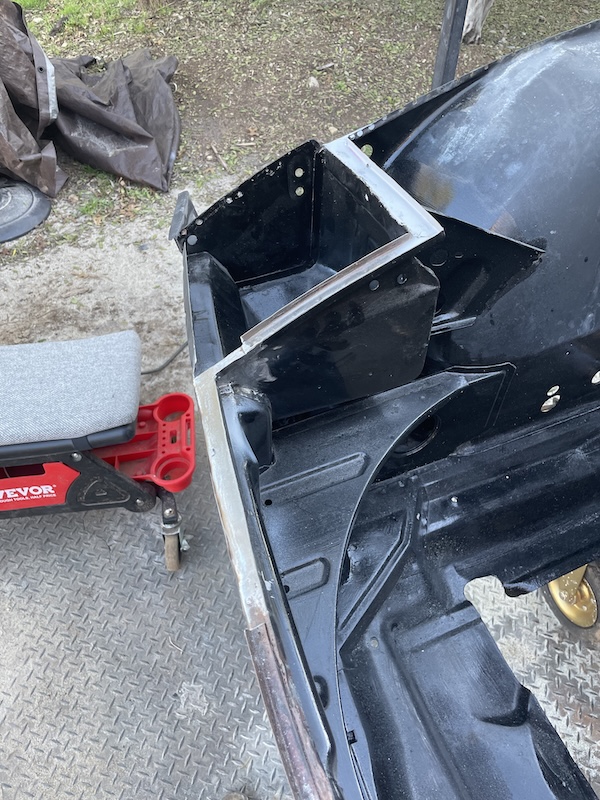 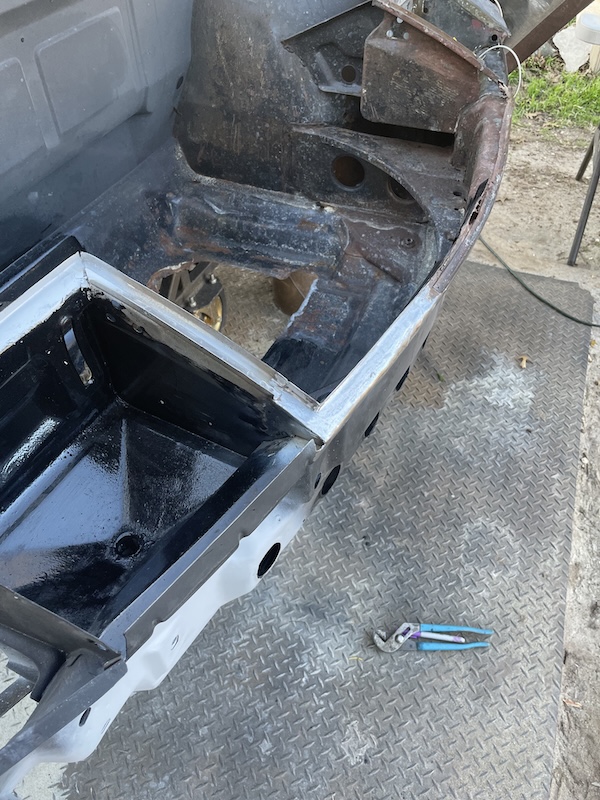 |
|
|
|
| friethmiller |
Feb 9 2025, 06:43 PM
Post
#370
|
|
Senior Member Group: Members Posts: 1,067 Joined: 10-February 19 From: Austin, TX Member No.: 22,863 Region Association: Southwest Region |
Front Trunk Seal Track Repair: The Quick Fix - (2/3/2025):
After work on Monday, I decided to fix an issue that I noticed late on Sunday. The patch metal I had welded in to fix the bottom-left corner of the trunk seal was a little large. After looking at it for a bit, I marked a 3/4" cut line that represented where the 90 degree edge should have been. Easy! I just cut the metal on the line and then trimmed a small strip of metal to match the 3/4" depth. Zap, zap, and grind! (IMG:style_emoticons/default/welder.gif) Fixed! I just wish my other screw-ups were that easy to fix.  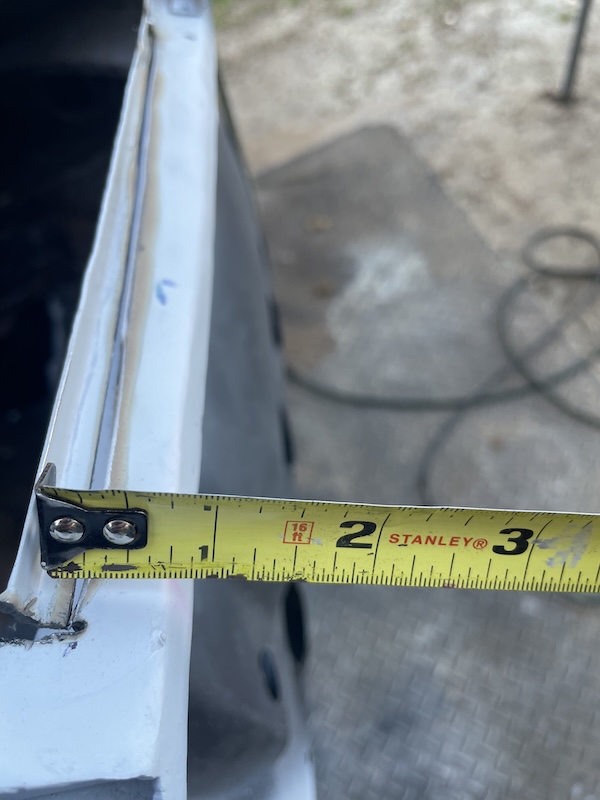 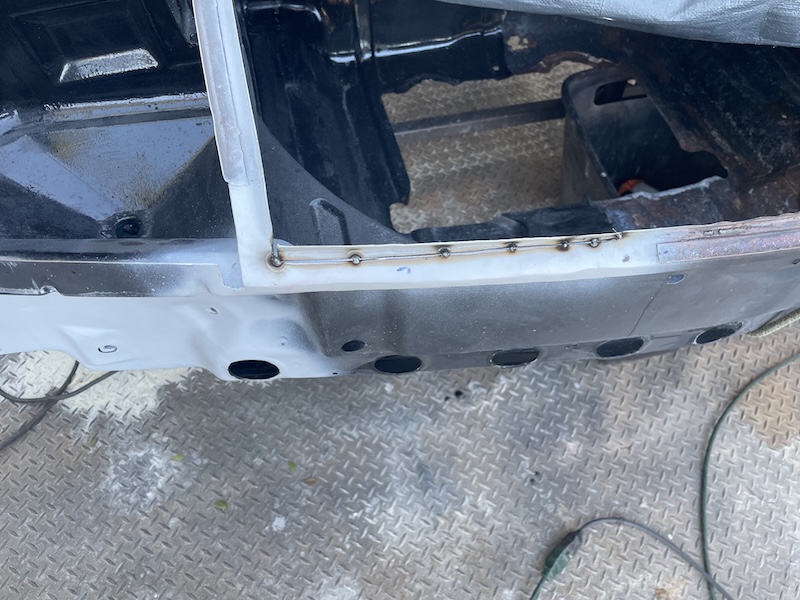 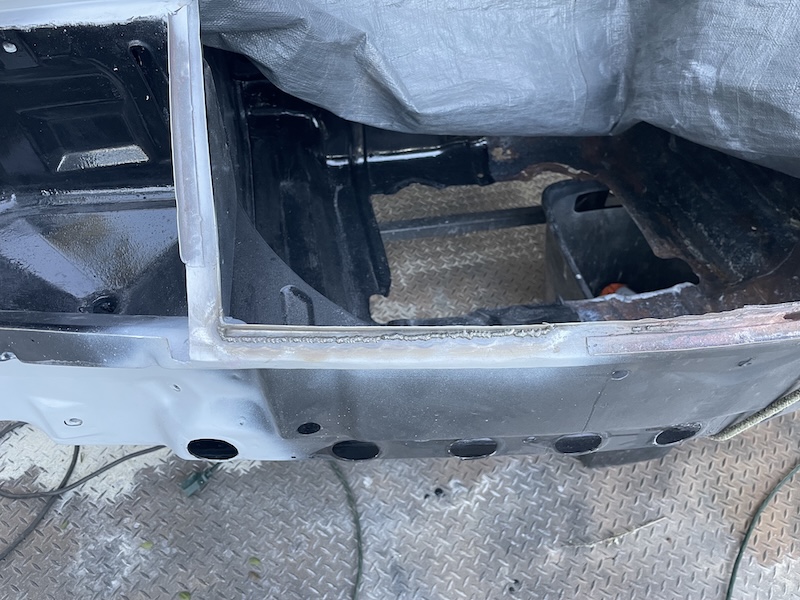 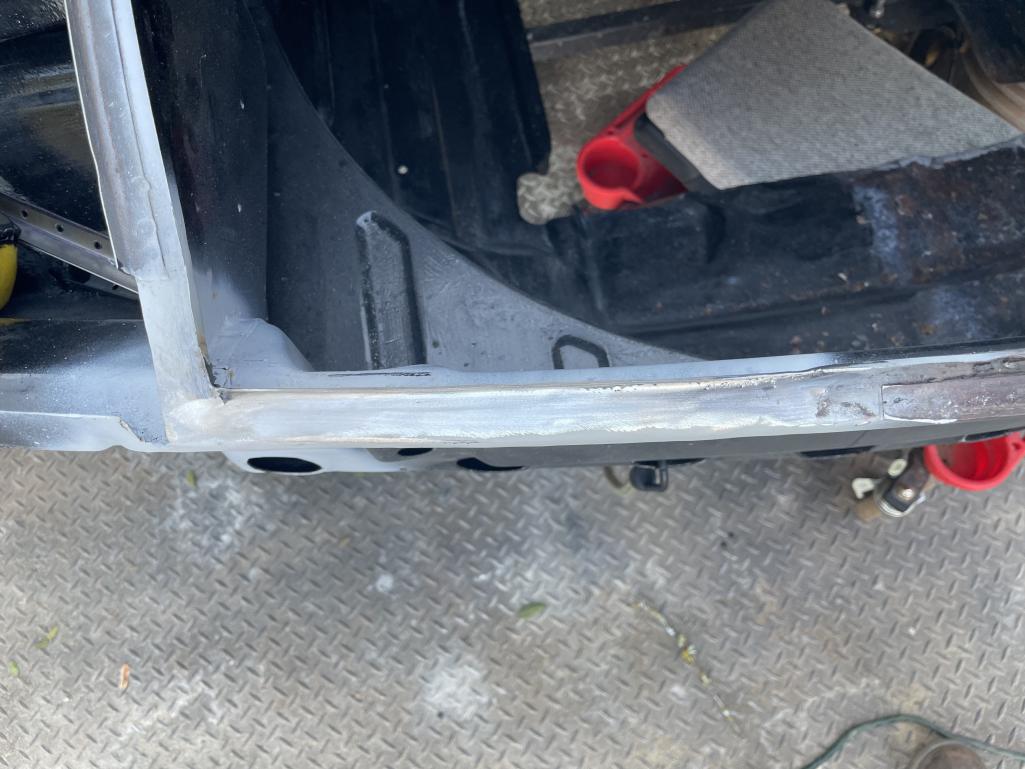 |
|
|
|
| friethmiller |
Feb 10 2025, 08:26 AM
Post
#371
|
|
Senior Member Group: Members Posts: 1,067 Joined: 10-February 19 From: Austin, TX Member No.: 22,863 Region Association: Southwest Region |
Front Trunk Seal Track Repair: Part 2 - (2/8/2025):
Diving right into the replacement of the 20 gauge outside channel track, I welded in the top part of the light bucket and then proceeded to patch a small piece at the bottom. I then moved the corner to weld in the front part of the channel track where my plan was to introduce drain holes at the corners and approximately every 8 inches in between. These ugly slits were created by a three inch cutting wheel and a flat bladed screwdriver. My plan is to come back in with a file to clean up the edges at the end. 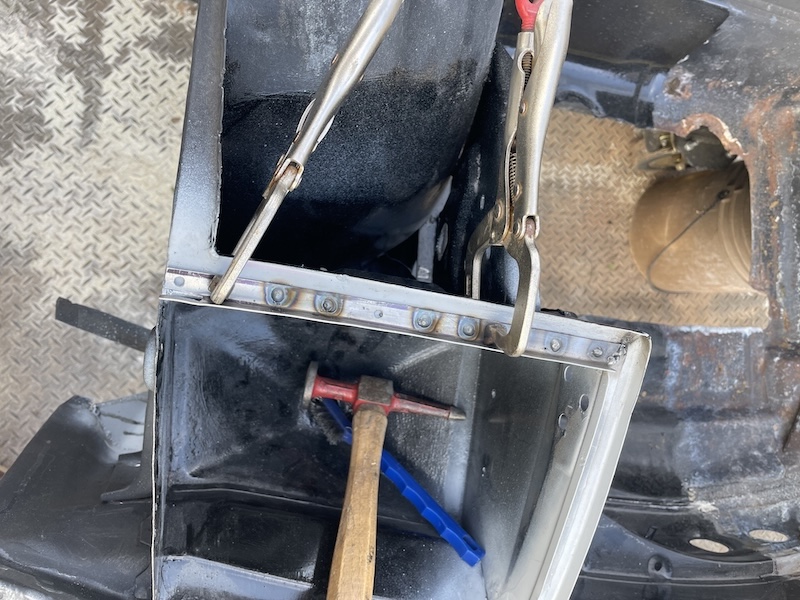 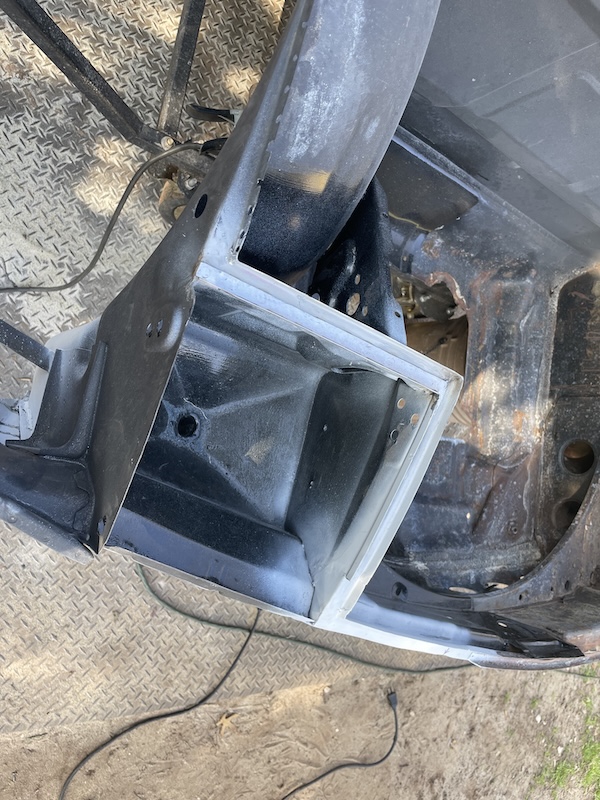 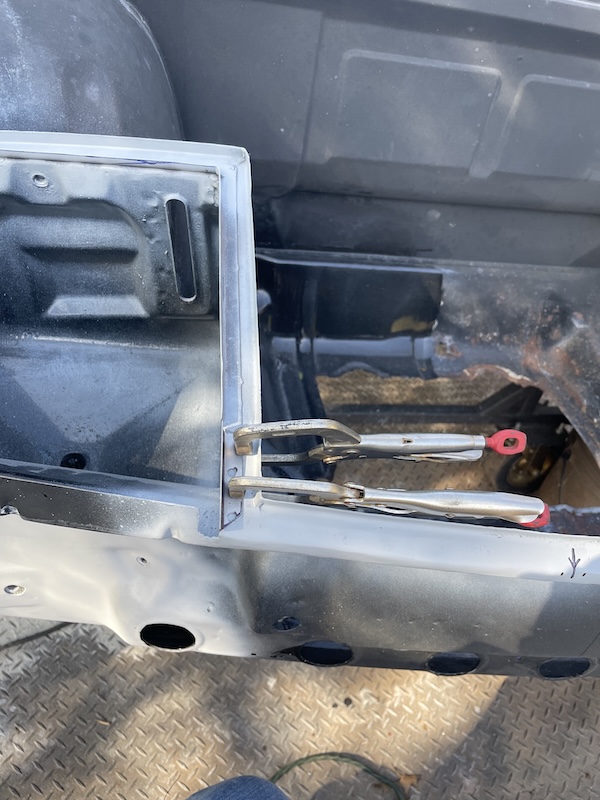 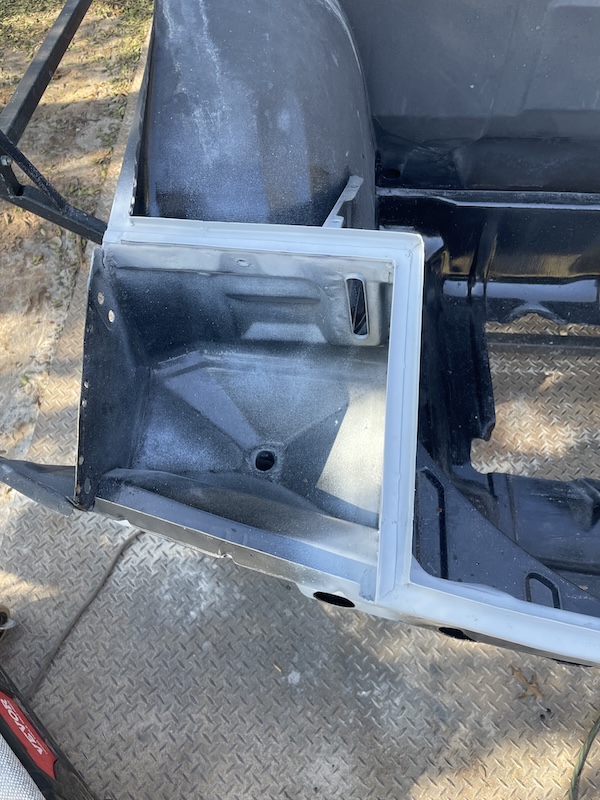 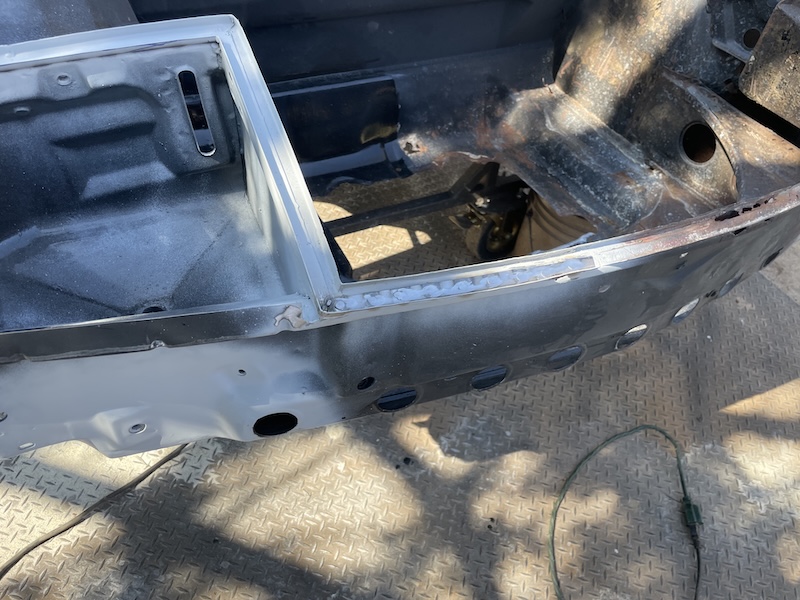 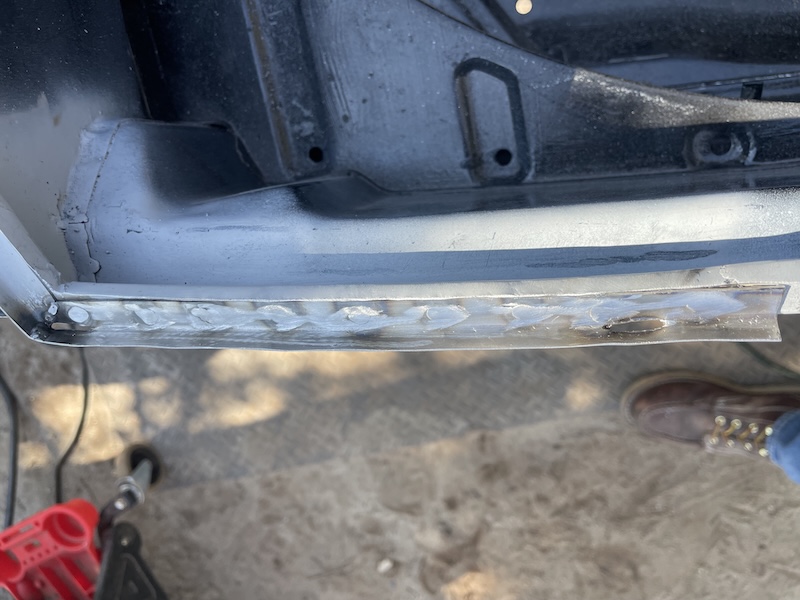 Moving on from here required a good bit of cutting to remove the rotten, poorly fiberglassed repair from long ago. While I had removed the fiberglass patches about a year ago, you can still see the red primer that was underneath. You'll notice, again, the two hole area for the eyebrow was toast and had to be removed. I can't believe my luck here! (IMG:style_emoticons/default/rolleyes.gif) 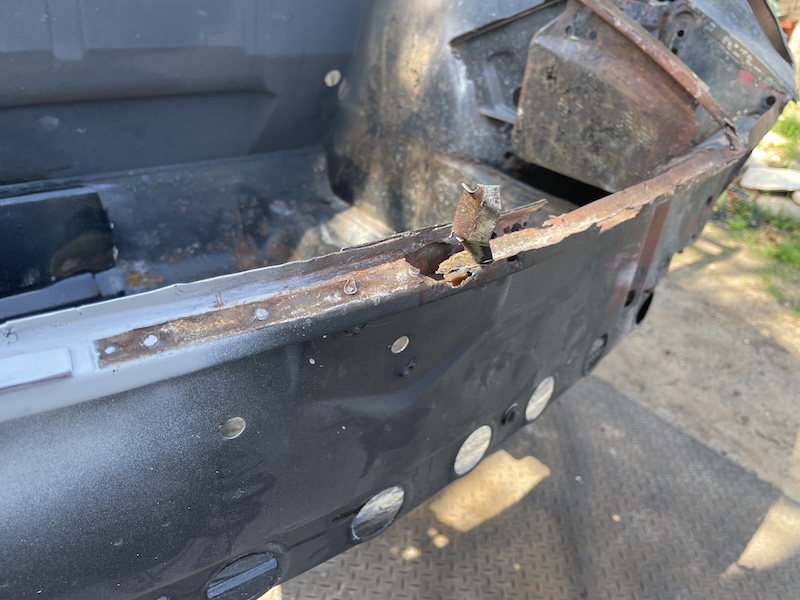 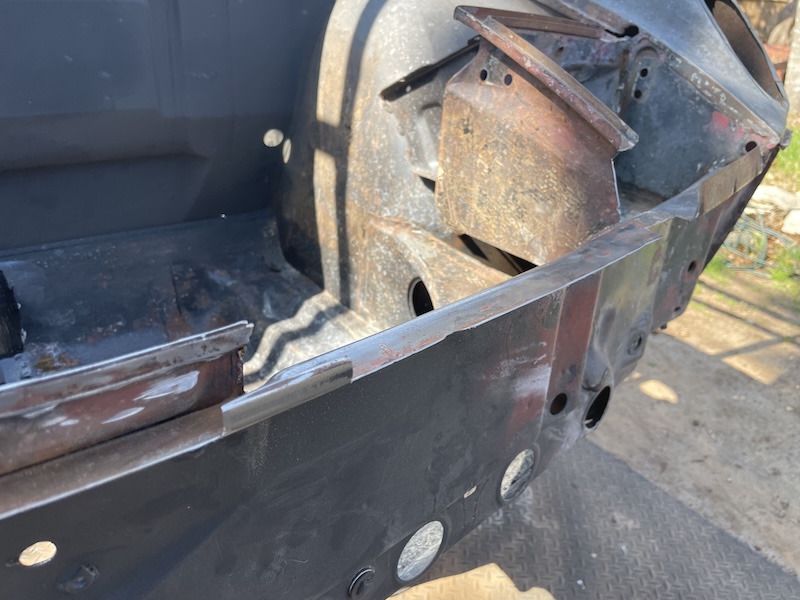  After that, I started fabricating replacement metal patches from construction paper templates. I used my bending brake and my metal shrinker a bit here to get the metal to line up with the sweep from the nose back to the headlight. 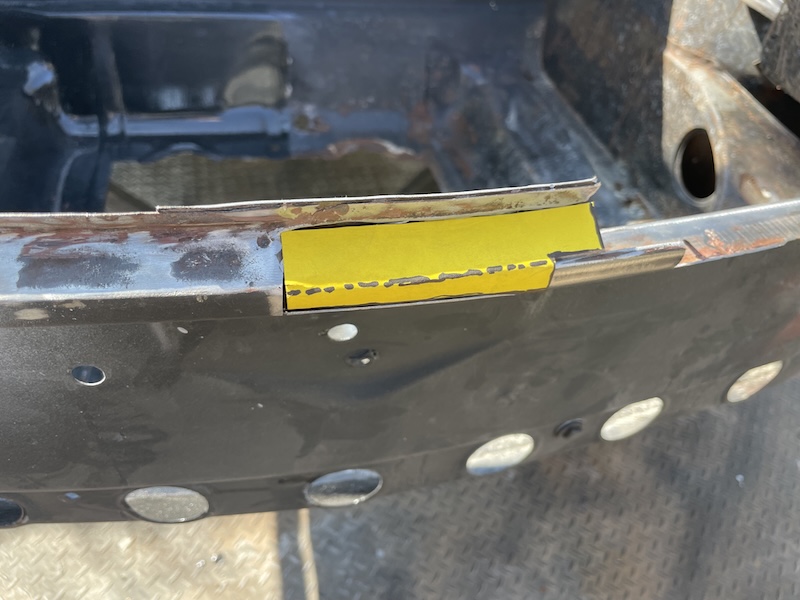 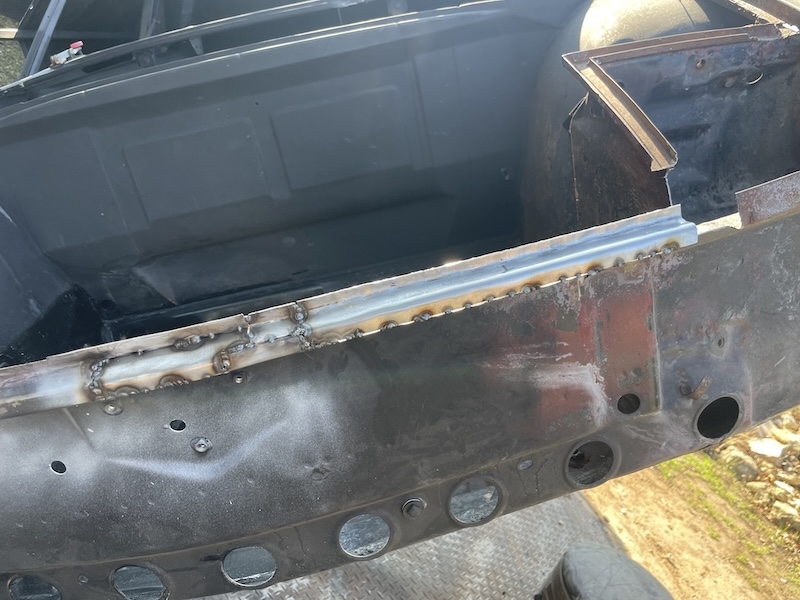 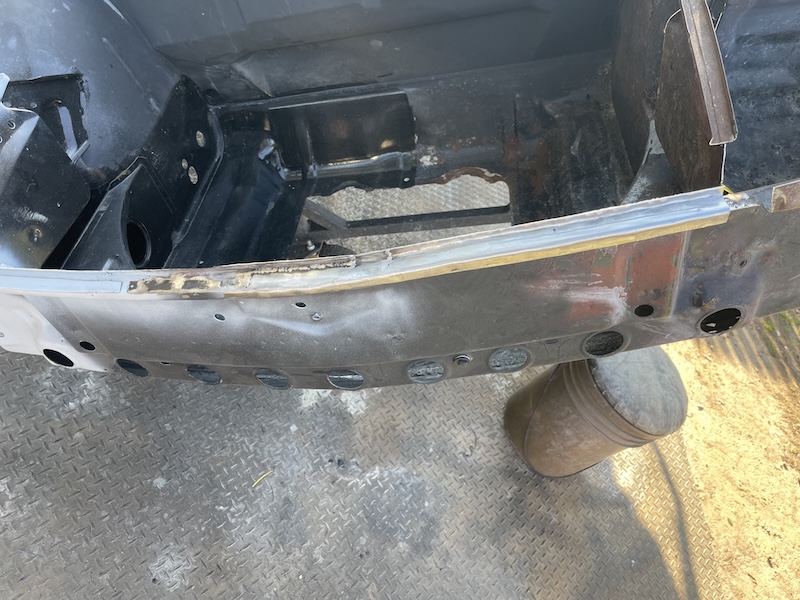 The final photos show my prep work for the morning. I feel like I'm getting a little better at making these multangular patches. Final shot show the results of the day. Progress!! (IMG:style_emoticons/default/beerchug.gif) 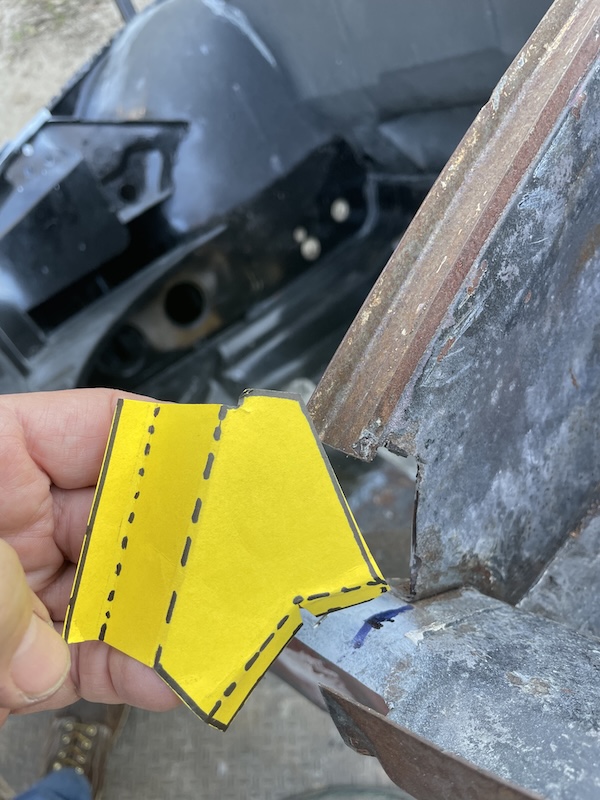  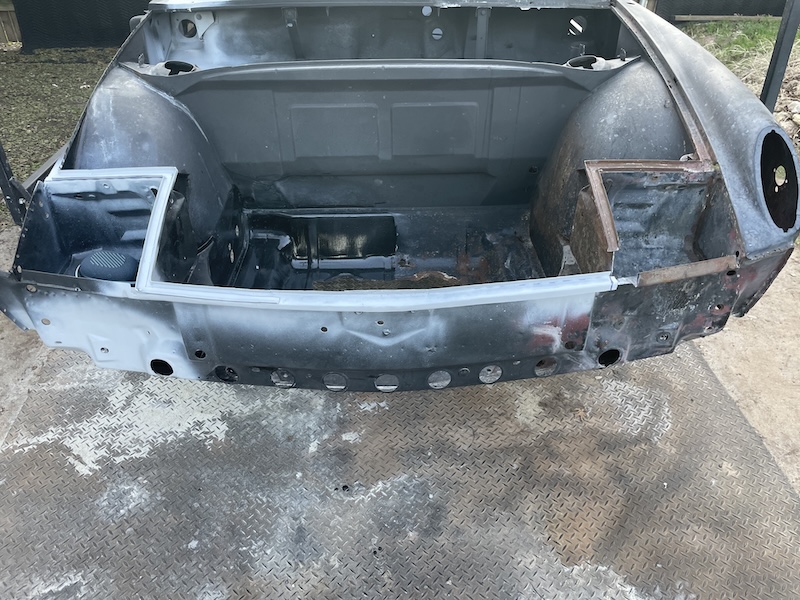 |
|
|
|
| East coaster |
Feb 10 2025, 09:45 AM
Post
#372
|
|
Senior Member Group: Members Posts: 1,893 Joined: 28-March 03 From: Millville, NJ Member No.: 487 Region Association: None |
Nice work! I cheated and made my channels one piece, but then again, mines not a Bumble Bee.
|
|
|
|
| friethmiller |
Feb 10 2025, 10:25 AM
Post
#373
|
|
Senior Member Group: Members Posts: 1,067 Joined: 10-February 19 From: Austin, TX Member No.: 22,863 Region Association: Southwest Region |
Front Trunk Seal Track Repair: Part 3 - (2/9/2025):
Finishing up the front corner of the trunk seal / driver side light bucket area, I started with a tricky little repair. I used new metal to patch an area at the bottom of the seal track corner that connects to the metal that is used by the eyebrow. Not sure what this is called but the left edge was missing/rusted away. After getting the patch in place, I went ahead and welded one of my "pre-cuts" back up - not trusting my measurements. This turned out to be spot on and I ended up cutting back down this same line <sigh>. Anyway, the second more complicated patch that I had made the previous day was a bit oversized but trimmed down without too much difficulty. I still ended up with a few gaps here and there. Luckily this is easily fixed with new metal with welds. Here are the photos showing the process. I decided to stop here and go watch the Super Bowl. (IMG:style_emoticons/default/blink.gif) Should have kept working. Oh well, I'll pick up here next weekend. Cheers! (IMG:style_emoticons/default/beerchug.gif) 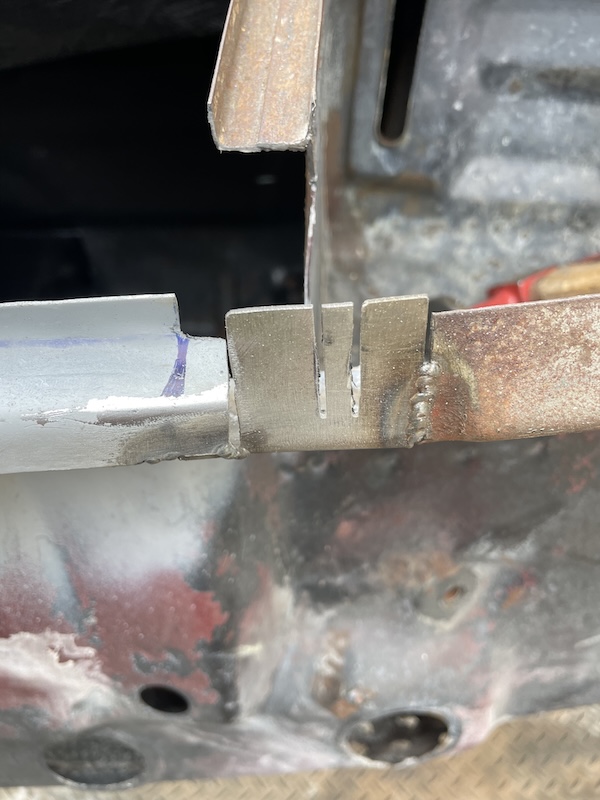  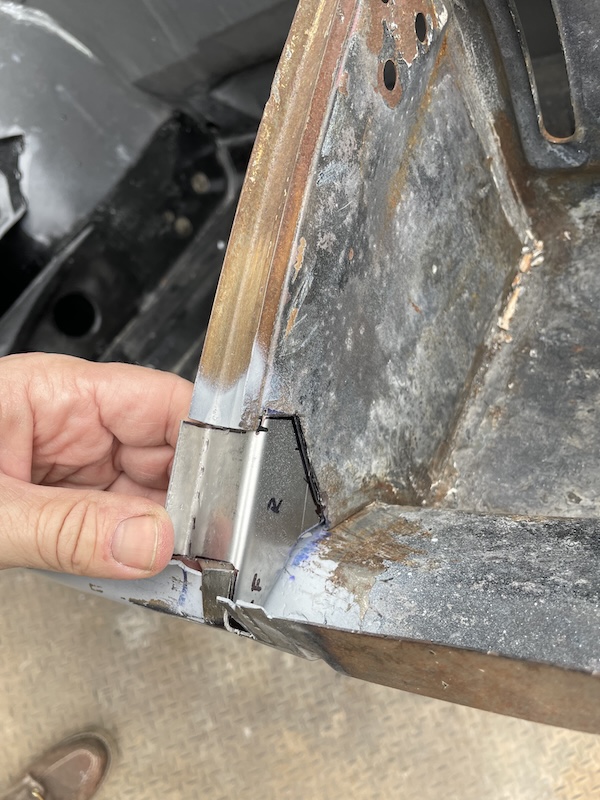 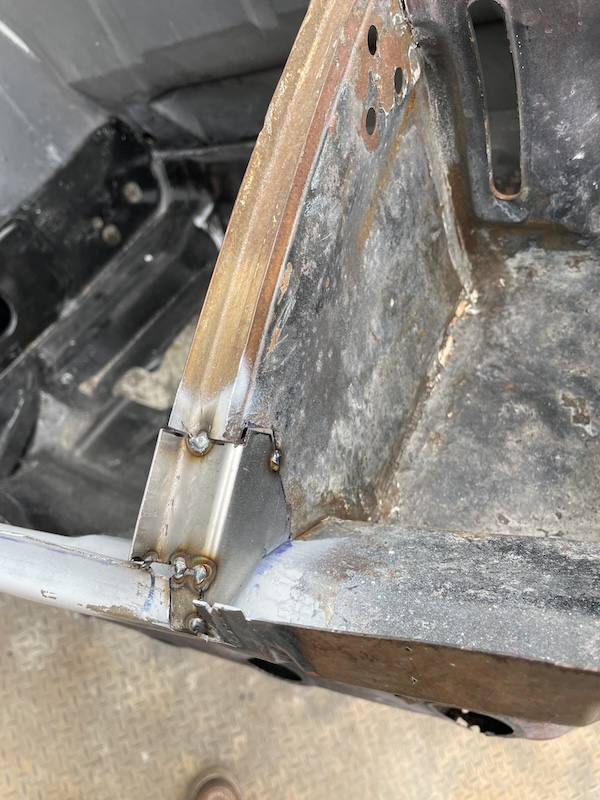 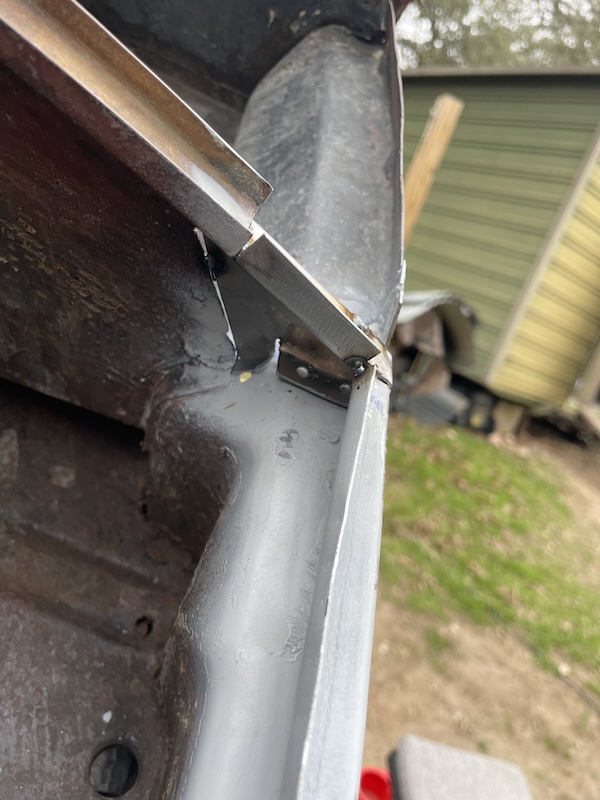 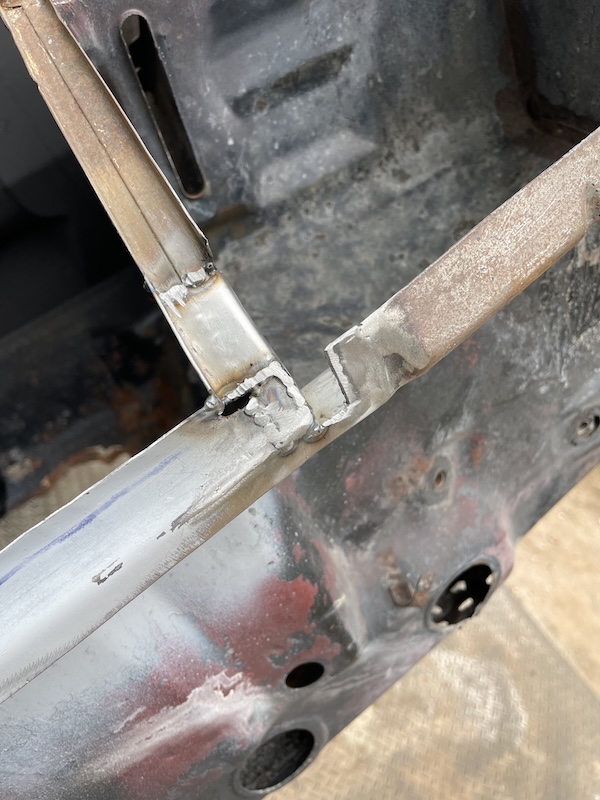  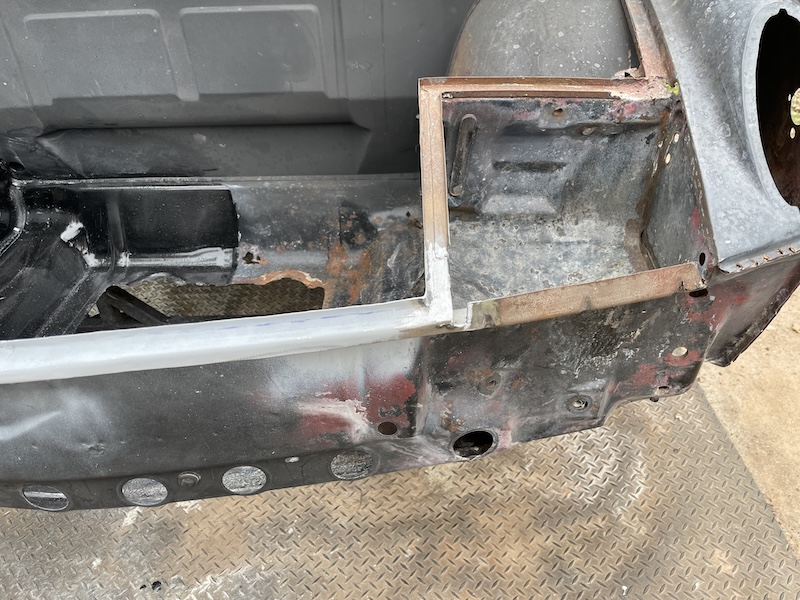 Attached image(s) 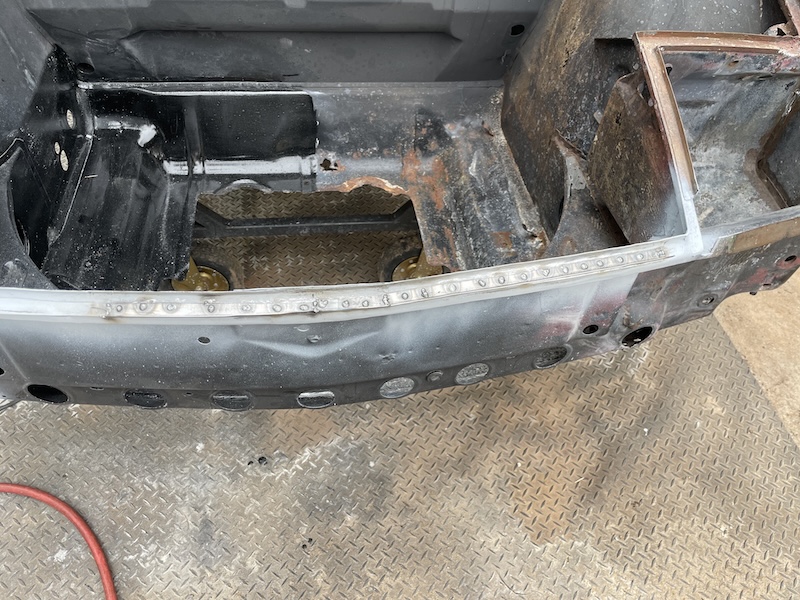
|
|
|
|
| friethmiller |
Feb 10 2025, 10:27 AM
Post
#374
|
|
Senior Member Group: Members Posts: 1,067 Joined: 10-February 19 From: Austin, TX Member No.: 22,863 Region Association: Southwest Region |
QUOTE(East coaster @ Feb 10 2025, 09:45 AM) Nice work! I cheated and made my channels one piece, but then again, mines not a Bumble Bee. Yeah, good idea (IMG:style_emoticons/default/aktion035.gif) |
|
|
|
| 930cabman |
Feb 10 2025, 10:46 AM
Post
#375
|
|
Advanced Member Group: Members Posts: 4,323 Joined: 12-November 20 From: Buffalo Member No.: 24,877 Region Association: North East States |
Fred is doing a great job, he is one of these guys with more than 24 hours in his day
|
|
|
|
| ClayPerrine |
Feb 10 2025, 12:18 PM
Post
#376
|
|
Life's been good to me so far..... Group: Admin Posts: 16,526 Joined: 11-September 03 From: Hurst, TX. Member No.: 1,143 Region Association: NineFourteenerVille |
I think this is amazing.
I can build anything in the way of a drive train. I can fix wiring with no issues. I can even do upholstery, but I don't like it. But this type of work I can't do. I pay others that are good at it. And you are truly an artist at this. (IMG:style_emoticons/default/pray.gif) |
|
|
|
| friethmiller |
Feb 10 2025, 01:11 PM
Post
#377
|
|
Senior Member Group: Members Posts: 1,067 Joined: 10-February 19 From: Austin, TX Member No.: 22,863 Region Association: Southwest Region |
QUOTE(ClayPerrine @ Feb 10 2025, 12:18 PM) I think this is amazing. I can build anything in the way of a drive train. I can fix wiring with no issues. I can even do upholstery, but I don't like it. But this type of work I can't do. I pay others that are good at it. And you are truly an artist at this. (IMG:style_emoticons/default/pray.gif) Thanks Clay, I admit I keep making mistakes with this channel. There’s a lot going on in this area and my “3rd grade education” isn’t helping. Seriously though, I find the work engaging. Gotta get it done. I’ll be switching gears soon to rebuild my other 914’s motor, which should be exciting. |
|
|
|
| friethmiller |
Feb 19 2025, 01:18 PM
Post
#378
|
|
Senior Member Group: Members Posts: 1,067 Joined: 10-February 19 From: Austin, TX Member No.: 22,863 Region Association: Southwest Region |
Front Trunk Seal Track Repair: Part 4 (final work) - (2/15/2025):
Here's work from last Saturday that was done to finish up the front trunk seal. I do have just a little bit left but that will be done once the driver side front fender has been removed. To get at things in the track, I used a 3" grinder to knock back a lot of the welds. I then followed up with a finger sander to smooth things out. I still need to finish grinding the inner corners with a Dremel or straight bit on the air grinder. These spots are impossible to get at with most tools. Next post will cover work done to remove the old paint and cut rust damage from the front trunk bottom and front cross panel. Stay tuned... 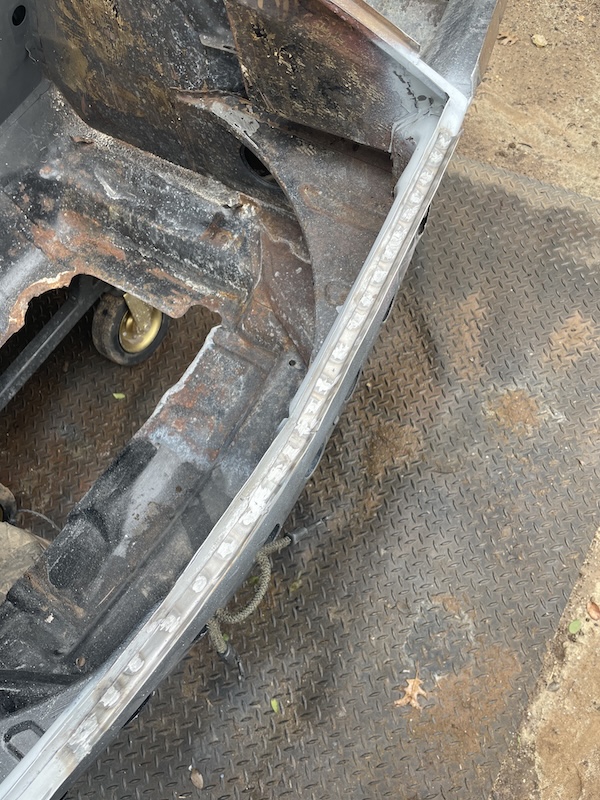 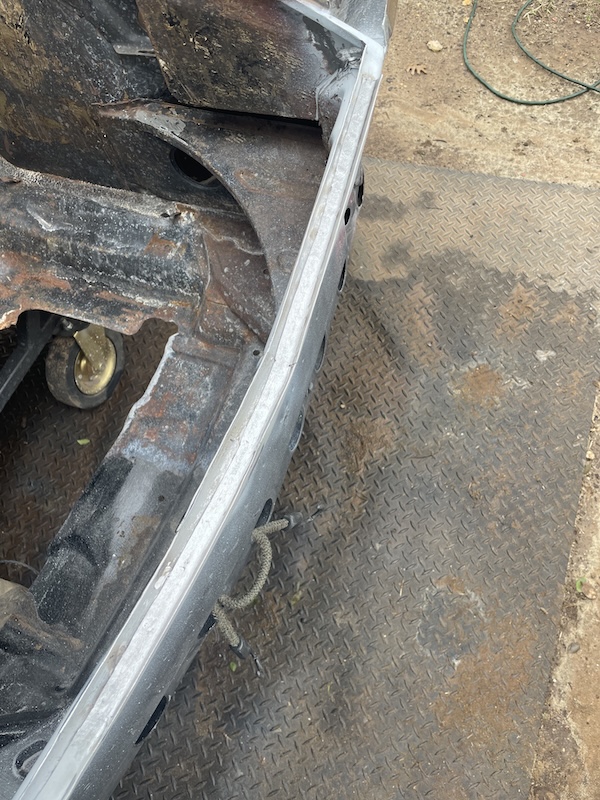 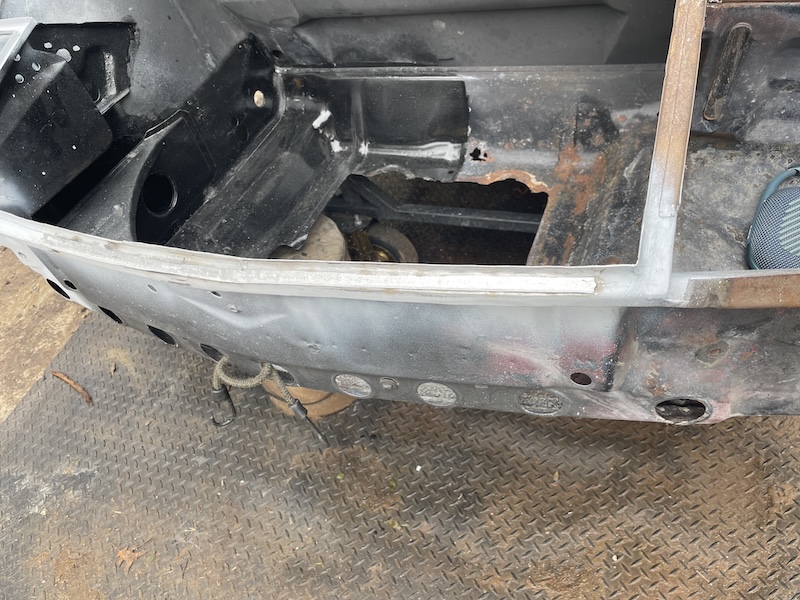 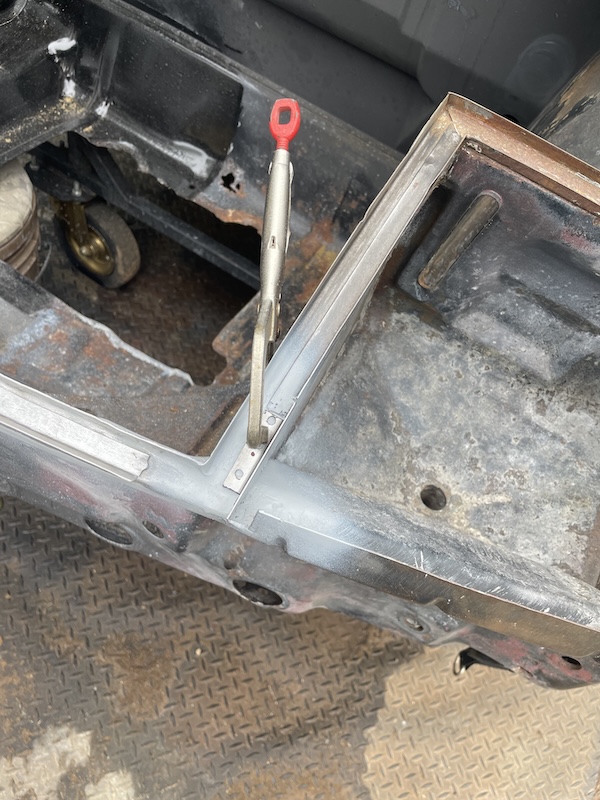 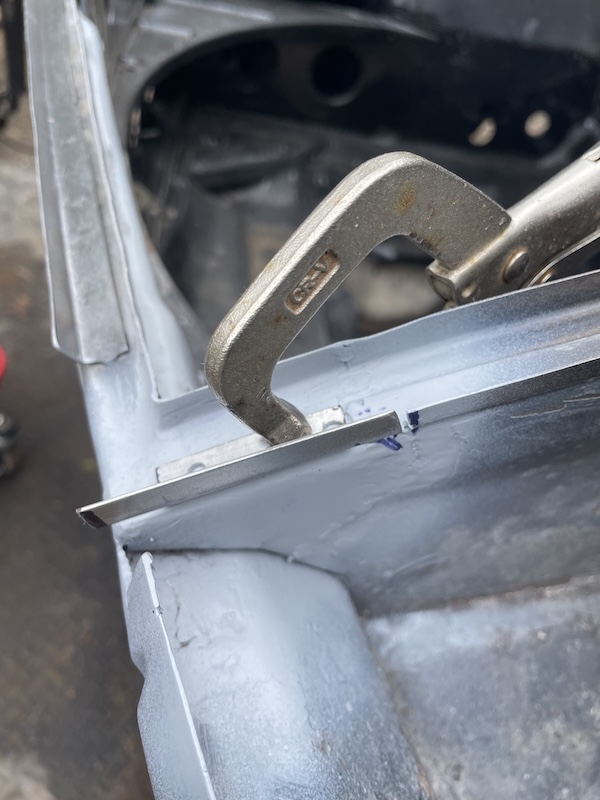 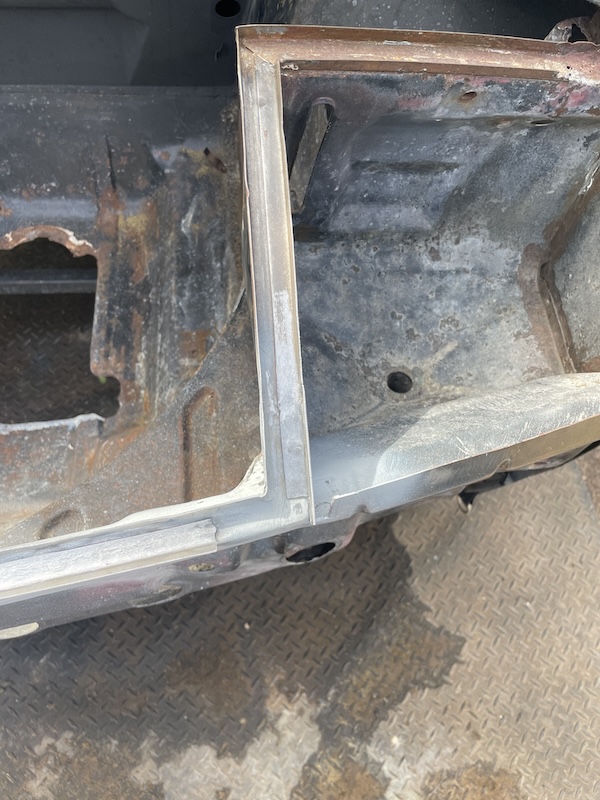 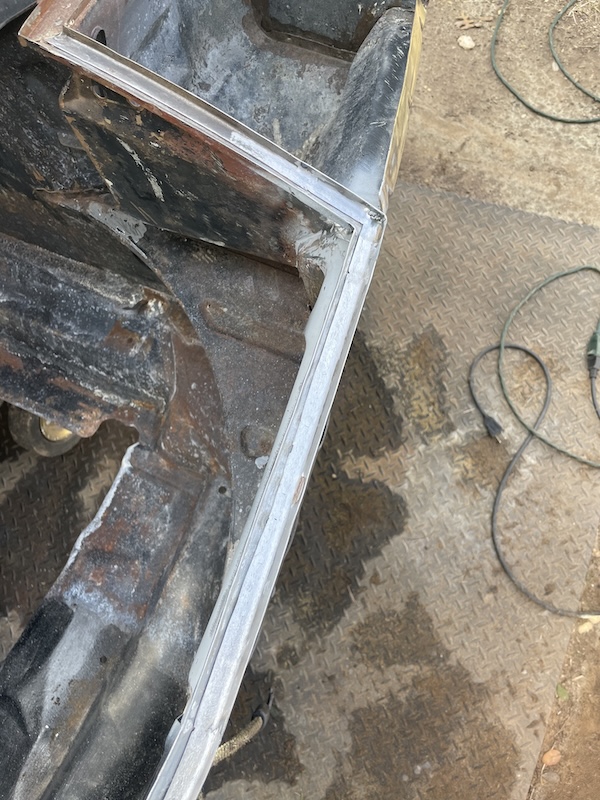 |
|
|
|
| Artfrombama |
Feb 19 2025, 01:59 PM
Post
#379
|
|
Artfrombama Group: Members Posts: 391 Joined: 21-January 24 From: North Alabama Member No.: 27,870 Region Association: South East States |
@friethmiller
Excellent work and thanks for posting! |
|
|
|
| 930cabman |
Feb 19 2025, 02:12 PM
Post
#380
|
|
Advanced Member Group: Members Posts: 4,323 Joined: 12-November 20 From: Buffalo Member No.: 24,877 Region Association: North East States |
|
|
|
|
|
1 User(s) are reading this topic (1 Guests and 0 Anonymous Users)
0 Members:

|
Lo-Fi Version | Time is now: 10th November 2025 - 01:15 PM |
Invision Power Board
v9.1.4 © 2025 IPS, Inc.