|
|
|
Porsche, and the Porsche crest are registered trademarks of Dr. Ing. h.c. F. Porsche AG.
This site is not affiliated with Porsche in any way. Its only purpose is to provide an online forum for car enthusiasts. All other trademarks are property of their respective owners. |
|
|

  |

| bkrantz |
 Apr 28 2025, 07:50 PM Apr 28 2025, 07:50 PM
Post
#461
|
|
914 Guru  Group: Members Posts: 8,530 Joined: 3-August 19 From: SW Colorado Member No.: 23,343 Region Association: Rocky Mountains |
More great work, Fred. And glad to see someone else trying the front jack point floor reinforcements. But even with those, I think we need to be careful.
|
   |

 
|
| friethmiller |
Apr 29 2025, 07:26 AM
Post
#462
|
|
Senior Member Group: Members Posts: 1,069 Joined: 10-February 19 From: Austin, TX Member No.: 22,863 Region Association: Southwest Region |
QUOTE(Puebloswatcop @ Apr 28 2025, 07:40 AM)  Looking good Fred. Wish I could have been there to help you replace the fenders, unfortunatly I was a week early. QUOTE(bkrantz @ Apr 28 2025, 08:50 PM) More great work, Fred. And glad to see someone else trying the front jack point floor reinforcements. But even with those, I think we need to be careful. Thanks guys! Installing fenders is not the most exciting work by any means but having them back on is awesome. I had to take the opportunity to weld in those reinforcement plates, too. (IMG:style_emoticons/default/welder.gif) To do it right, I think you'd have to tie in the body edge with the donut, making a triangle. Well, what's been done is better than nothing, that's for sure. Onward! Next weekend might offer an opportunity to undercoat/paint the bottom. We've got rain forecasted on Wednesday & Friday. We'll see. |
 |
|
| trojanhorsepower |
Apr 30 2025, 05:54 AM
Post
#463
|
|
Senior Member Group: Members Posts: 992 Joined: 21-September 03 From: Marion, NC Member No.: 1,179 Region Association: None |
Looks great! Keep up the good work.
|
|
|
|
| friethmiller |
Apr 30 2025, 11:28 AM
Post
#464
|
|
Senior Member Group: Members Posts: 1,069 Joined: 10-February 19 From: Austin, TX Member No.: 22,863 Region Association: Southwest Region |
QUOTE(trojanhorsepower @ Apr 30 2025, 06:54 AM) Looks great! Keep up the good work. Thanks man! Started with the bottom side sealant yesterday evening. Just got the inner front fender area and little around the rear suspension consoles so far. I didn't want to flip the car up on it's side yet since rain is on its way. I've got a ton of prep to do! Shout out to Chris ( @Aerostatwv )! Thanks for the offer but I found my pneumatic seam sealer gun yesterday. It was completely clogged full of sealant (IMG:style_emoticons/default/rolleyes.gif). Got it all cleaned out and ready to go! 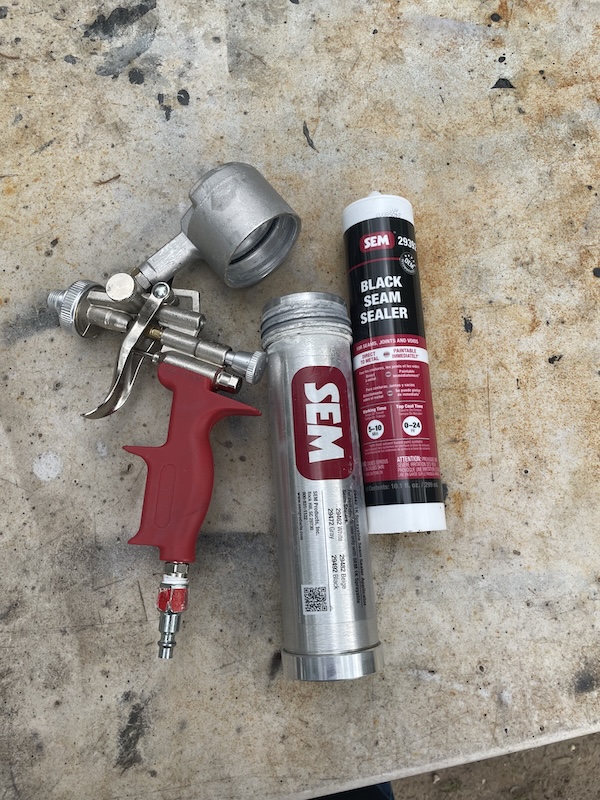 |
|
|
|
| Root_Werks |
Apr 30 2025, 02:03 PM
Post
#465
|
|
Village Idiot Group: Members Posts: 8,841 Joined: 25-May 04 From: About 5NM from Canada Member No.: 2,105 Region Association: Pacific Northwest |
Really fun keeping up on this thread. A lot of determination!
(IMG:style_emoticons/default/welder.gif) |
|
|
|
| rick 918-S |
May 2 2025, 03:56 AM
Post
#466
|
|
Hey nice rack! -Celette Group: Members Posts: 21,111 Joined: 30-December 02 From: Now in Superior WI Member No.: 43 Region Association: Northstar Region |
|
|
|
|
| 930cabman |
May 2 2025, 04:50 AM
Post
#467
|
|
Advanced Member Group: Members Posts: 4,323 Joined: 12-November 20 From: Buffalo Member No.: 24,877 Region Association: North East States |
QUOTE(Root_Werks @ Apr 30 2025, 02:03 PM) Really fun keeping up on this thread. A lot of determination! (IMG:style_emoticons/default/welder.gif) ain't that the truth, Fred is doing a killer job, just wish I had the time, skills, ..... keep it goin Fred (IMG:style_emoticons/default/beerchug.gif) (IMG:style_emoticons/default/beerchug.gif) |
|
|
|
| friethmiller |
May 2 2025, 08:25 AM
Post
#468
|
|
Senior Member Group: Members Posts: 1,069 Joined: 10-February 19 From: Austin, TX Member No.: 22,863 Region Association: Southwest Region |
Thanks guys! Sometimes I think I should be moving faster. This July will be 3 years since starting on this body and I haven't even touched the hoods or doors (IMG:style_emoticons/default/blink.gif)
Anyways... prep shot as we head into the weekend. Still fighting the rain chances here. Cleaned the entire bottom and started hand sanding the epoxy. Still have to install the floor drain plugs and add a good bit of sealant. 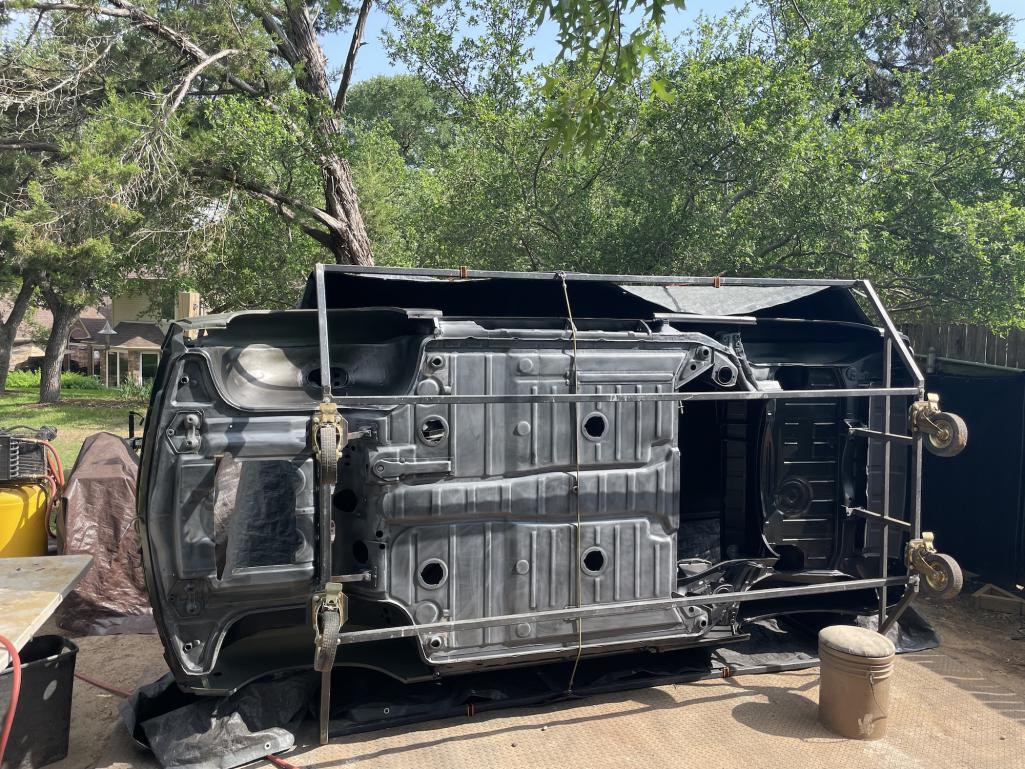 |
|
|
|
| jesse7flying |
May 2 2025, 08:50 AM
Post
#469
|
|
Member Group: Members Posts: 138 Joined: 9-August 16 From: Burleson,TX Member No.: 20,281 Region Association: None |
A true labor of love. Keep it up.
|
|
|
|
| simonjb |
May 2 2025, 05:49 PM
Post
#470
|
|
KiwiMan Group: Members Posts: 574 Joined: 18-October 16 From: Stamford, Connecticut Member No.: 20,505 Region Association: North East States |
Just an unbelievable transformation. Well done !
|
|
|
|
| friethmiller |
May 3 2025, 08:46 PM
Post
#471
|
|
Senior Member Group: Members Posts: 1,069 Joined: 10-February 19 From: Austin, TX Member No.: 22,863 Region Association: Southwest Region |
Bottom Prep: (5/3/2025):
This weekend's goal was to undercoat and paint the bottom of the car. To do this, I had to get a few items done, finish preparing the surface, and completely caulk the entire bottom & inner fender wells. Thankfully the weather was amazing! Went to work immediately on welding in the floormat stays. I had completely forgot about having to do these until a good friend reminded me on Friday night. He sent photos and dimensions from his car to help get me stared. I also remembered I had an extra set of floormats. With all this, I was able to mark and weld-in each stud. I figured out pretty quick that access with all the reinforcing bars and rotisserie was very difficult. Goal here was to just get the welding done so I could address the bottom. The arrow in the one photo points to my hand-sanding done to just one edge. Once I dropped a few tacks in, the metal heated the rest of the paint for easy removal with a small wire brush. 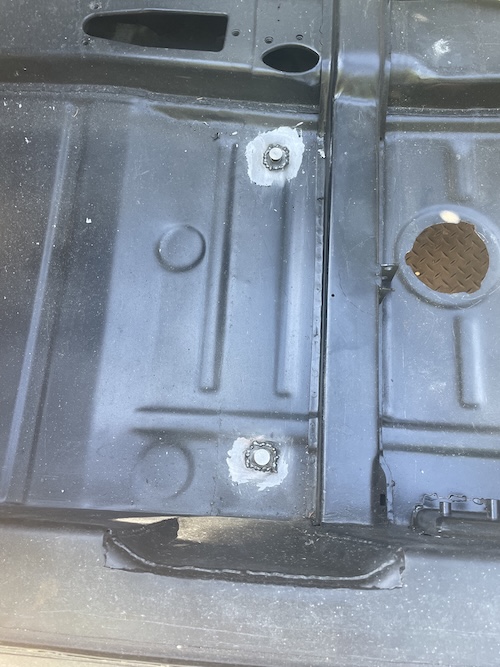 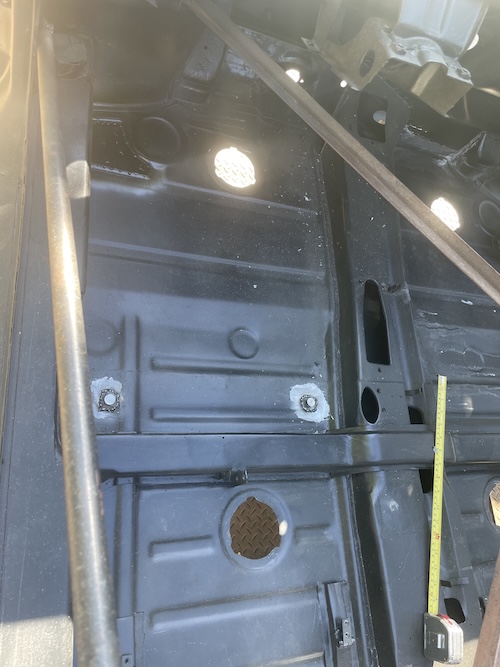 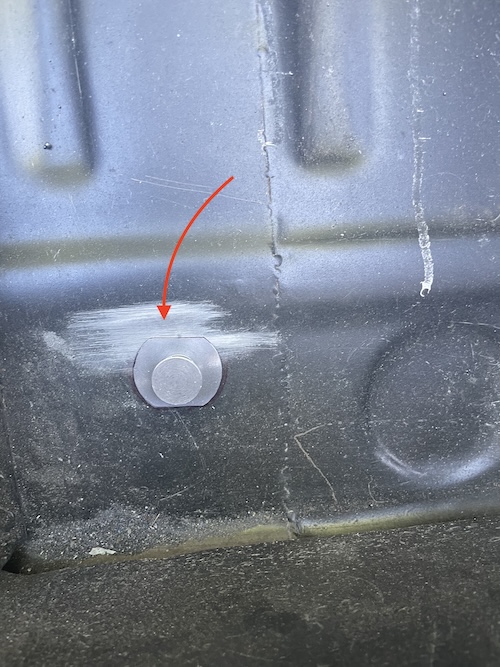 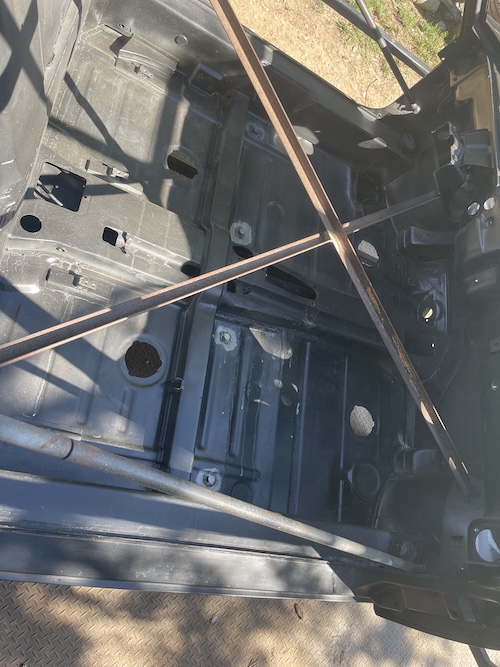 Next, was the task of adding in the drain to the floor underneath the gas tank. This was another item I had previously forgotten about. Pretty straight forward here. Marked it, cut it, and then opened it up with a screw driver. 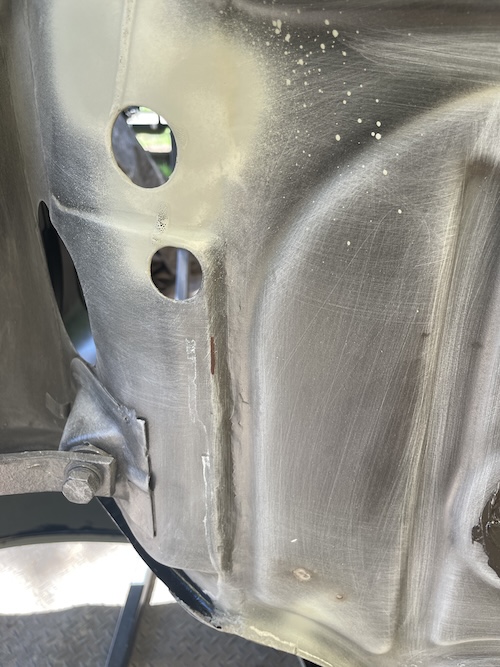 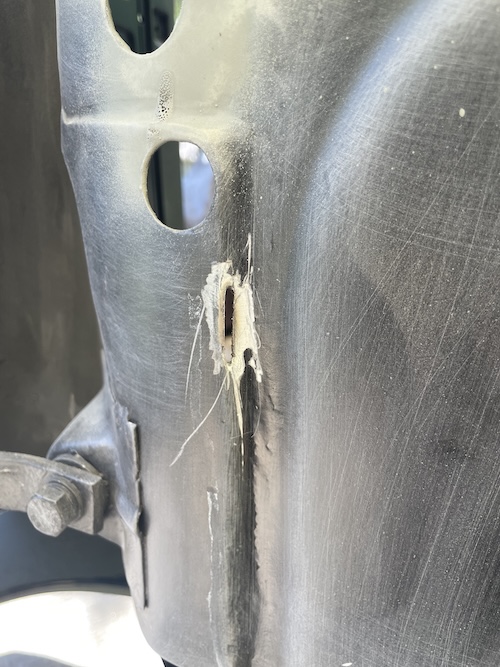 With that done, it was finally time to insert the floor lids with sealant. This was pretty easy to do. Applied sealant on the interior side of the hole, put a little on the lid, and then install it in the car. Even though I planned to hit this with the pneumatic sealant, I still wanted to do most of the work with my finger. (IMG:style_emoticons/default/happy11.gif) 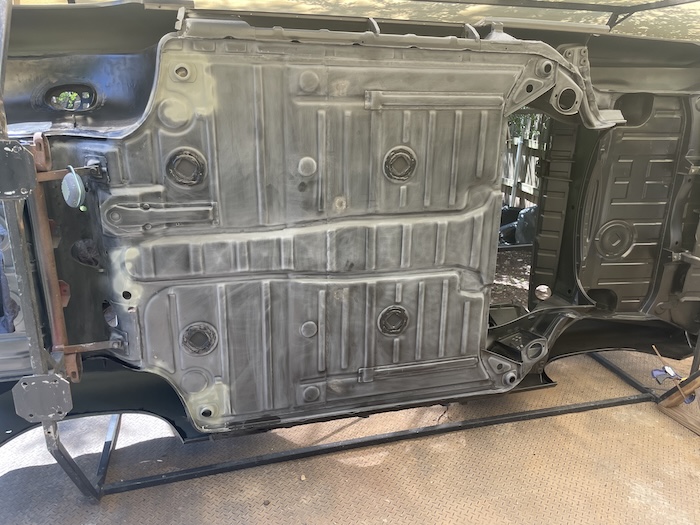 Another thing I did to help prepare for painting was to remove the rotisserie's wheels. Not only are the wheels dirty and full of sandblasting glass, they are in the way. Deleting them for this task was a no-brainer! 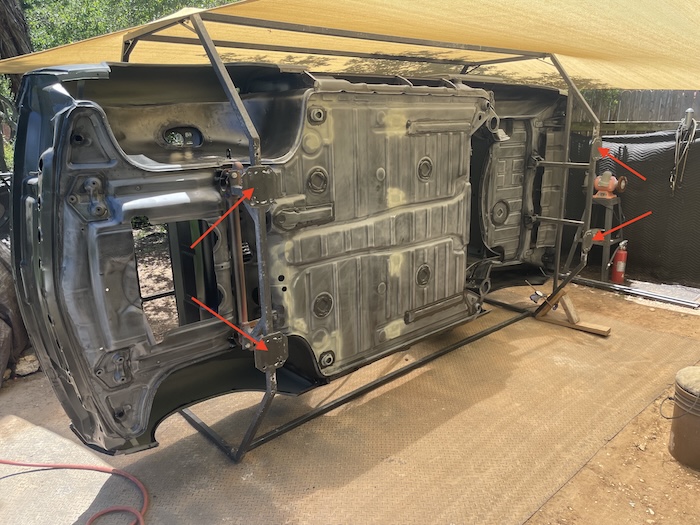 After that I started to seal the rest of the bottom of the car. Thankfully most of the work in the fenders was completed a few days ago. The following photos show some of the work performed. 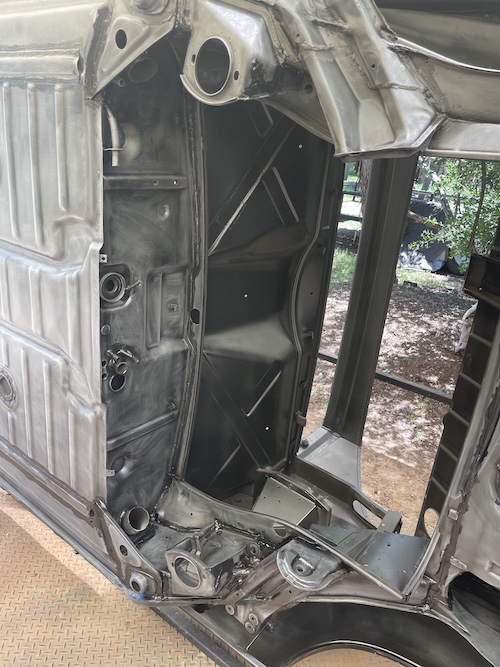 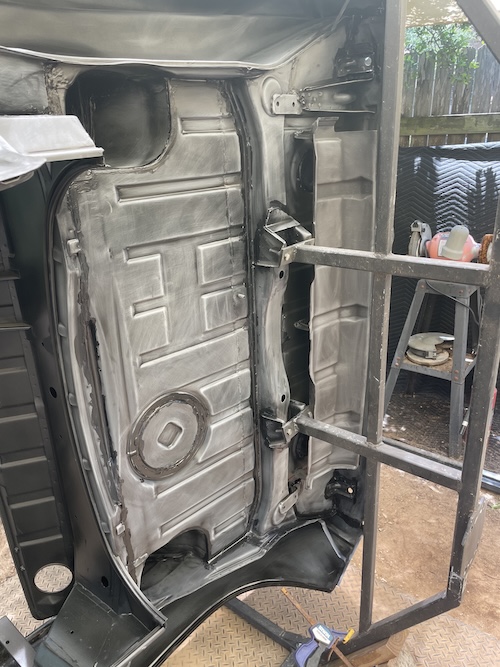 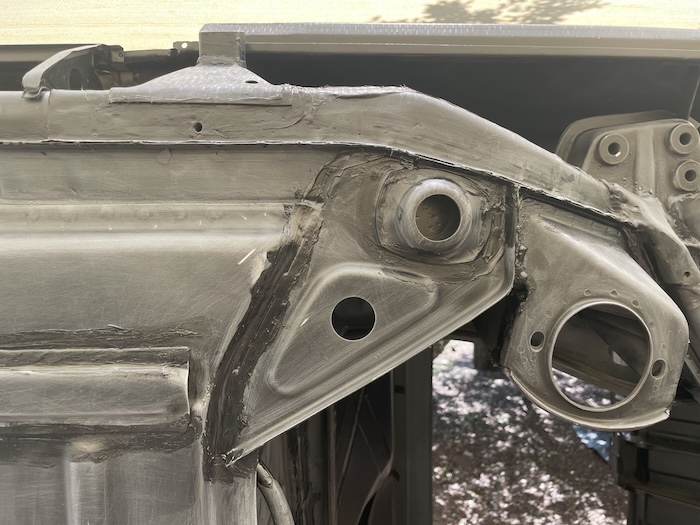 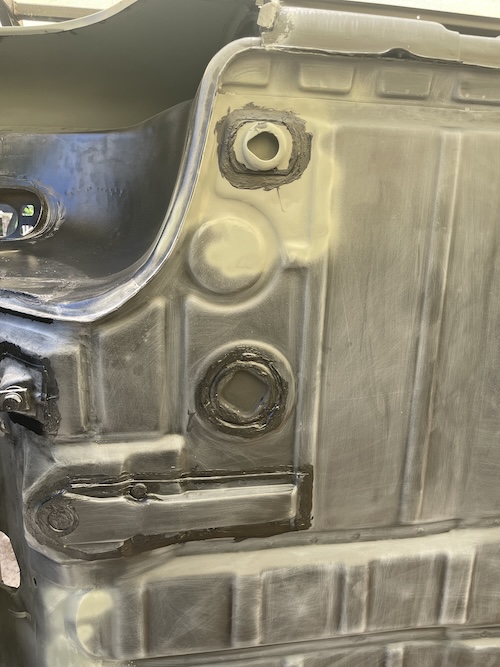 Having sealed most of the bottom by hand (with a normal caulking gun), I then prep'd the pneumatic sealant gun to get the floor lids and the floorpan edge - that runs down the length of the car between the jacking points. Unfortunately the gun wasn't working right. All the air was being diverted out a relief hole and I could barely get the sealant to come out. [I later figured out that I was missing a part to the gun.] To get the job done, however, I decided to just shoot the sealant out of the gun, use my finger to spread it out and then hit it with the compressed air gun to mimic the "factory look". The first photo here show the sealant before applying the air. The end result looks pretty good I think. 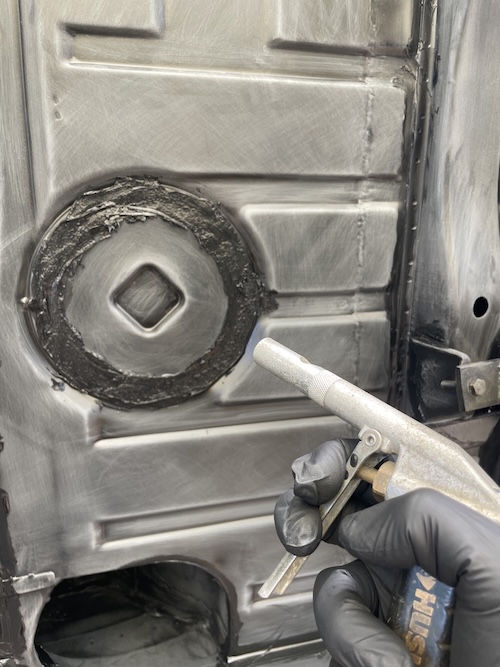 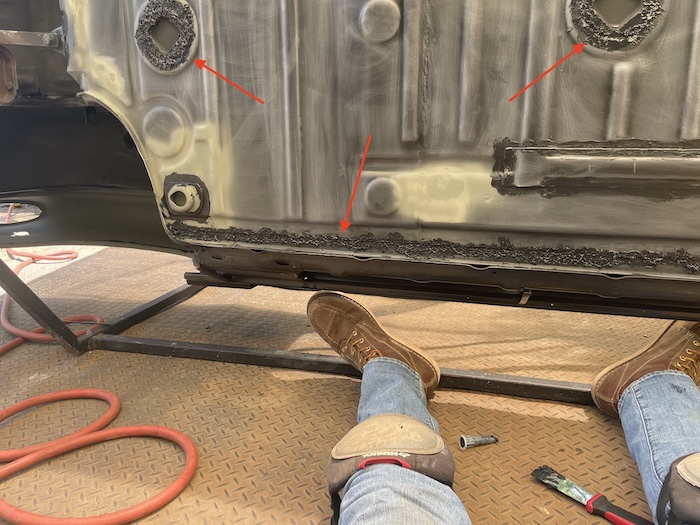 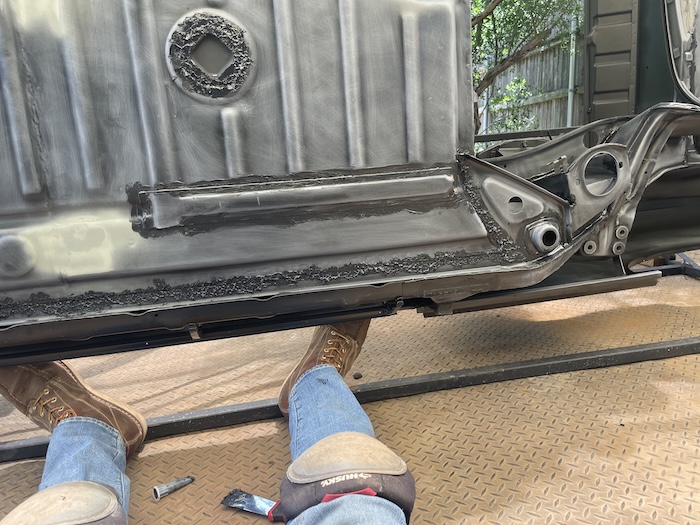 |
|
|
|
| friethmiller |
May 3 2025, 09:04 PM
Post
#472
|
|
Senior Member Group: Members Posts: 1,069 Joined: 10-February 19 From: Austin, TX Member No.: 22,863 Region Association: Southwest Region |
Bottom Masking and Undercoating: (5/3/2025):
Continuing with the prep, I began the process of masking off all the edges and holes necessary to start painting. Note that this process is very time consuming but must be done to keep the undercoat/paint from going everywhere. 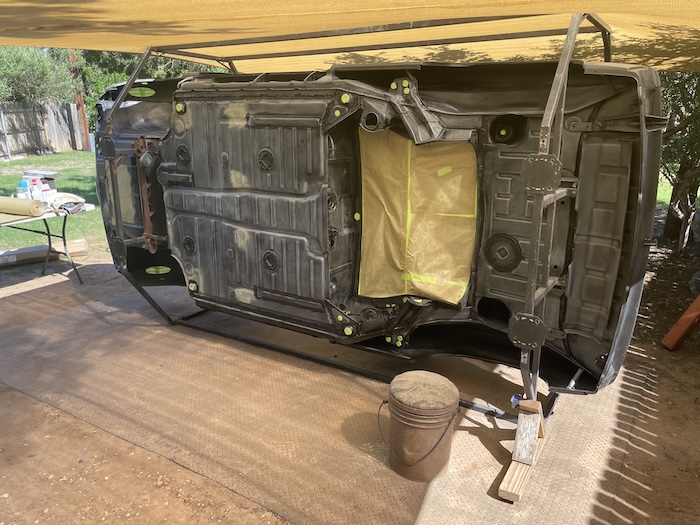 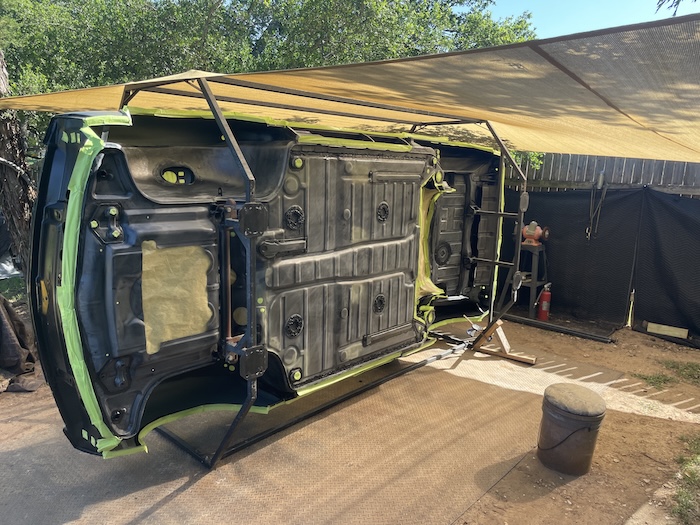 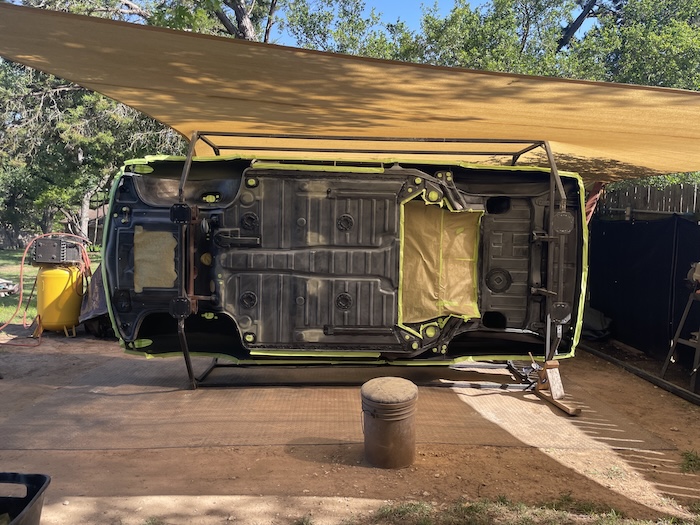 With all the masking complete, I had enough time in the day to get the undercoating done. So, after pulling out the special gun and the undercoat, I got to work. I put down about 3-4 medium coats which used the entire gallon. The cost of this stuff is about $150, it's super easy to work with, and it's specially made to be painted. The initial photos here show the results of the 1st coat. Getting up into the fenders is the real challenge here, especially the passenger side where I had to lay on the ground to shoot the paint in the right direction. 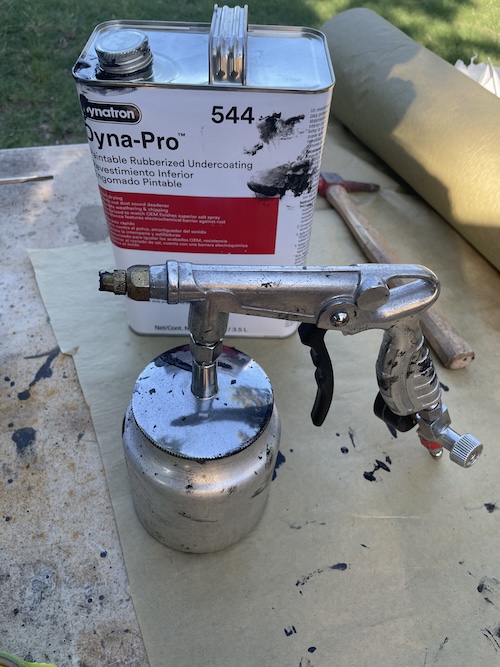 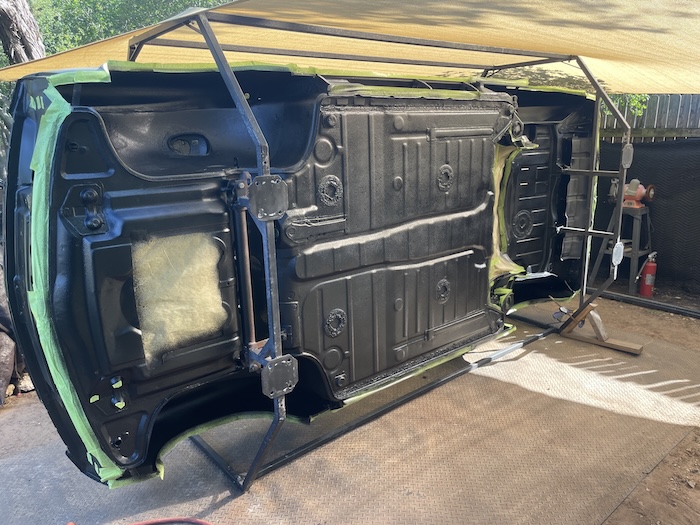 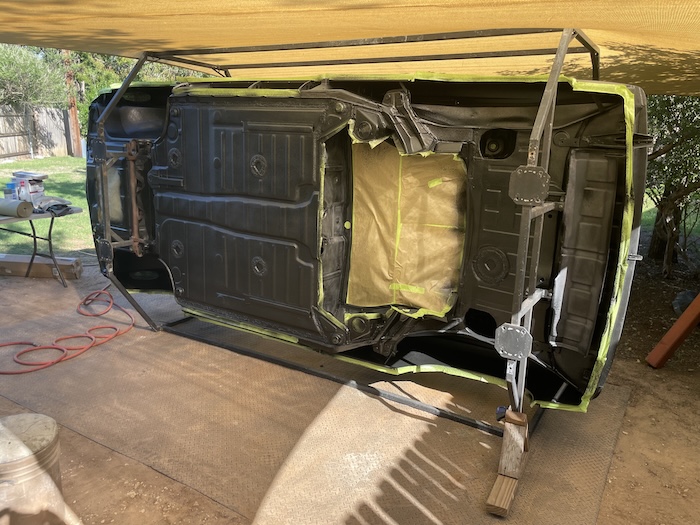 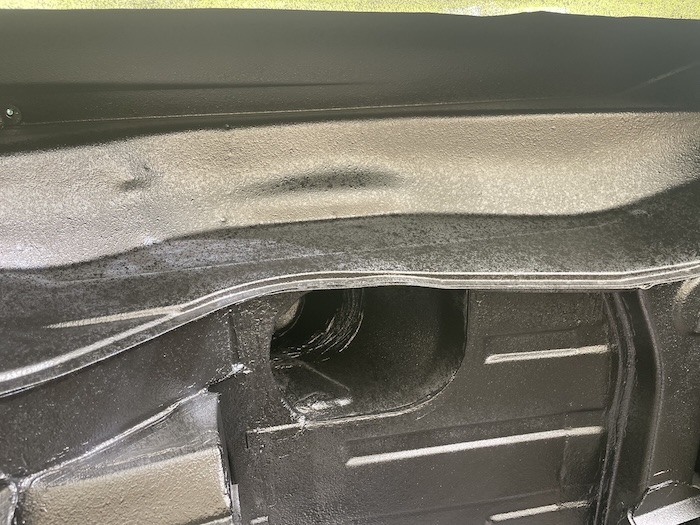 Here are the rest of the photos from the undercoating. Stay tuned. Tomorrow I will be painting the final L041 black!  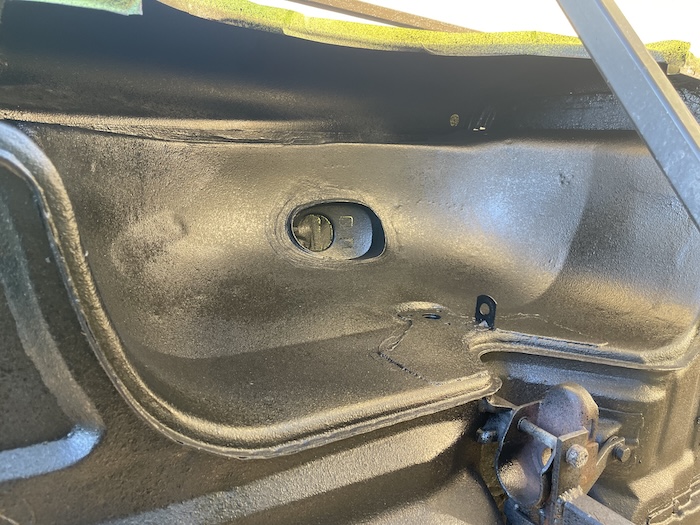 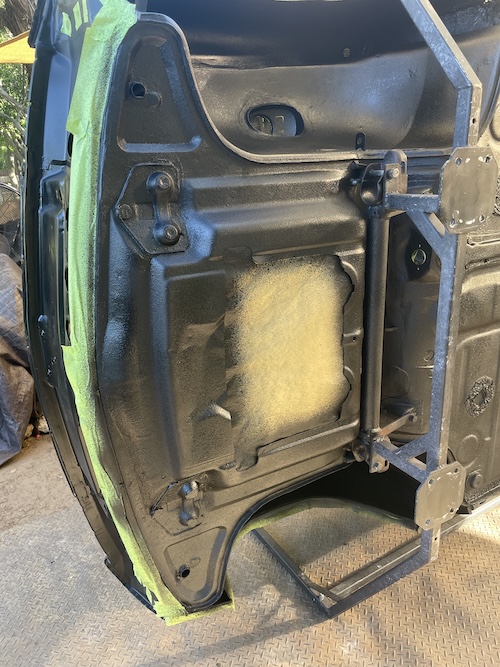 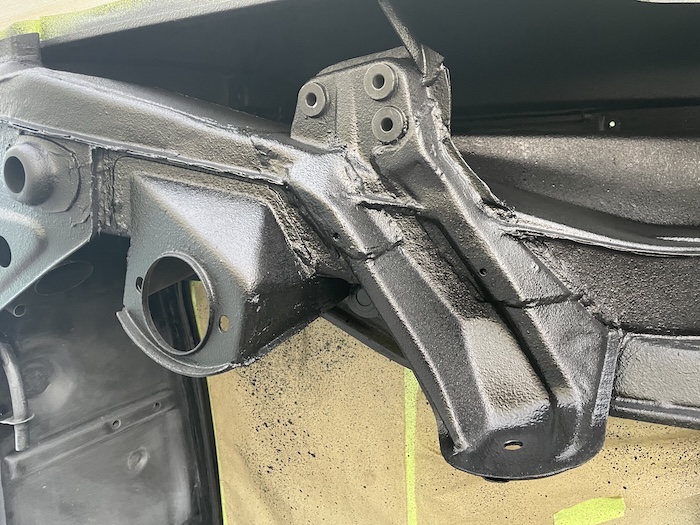 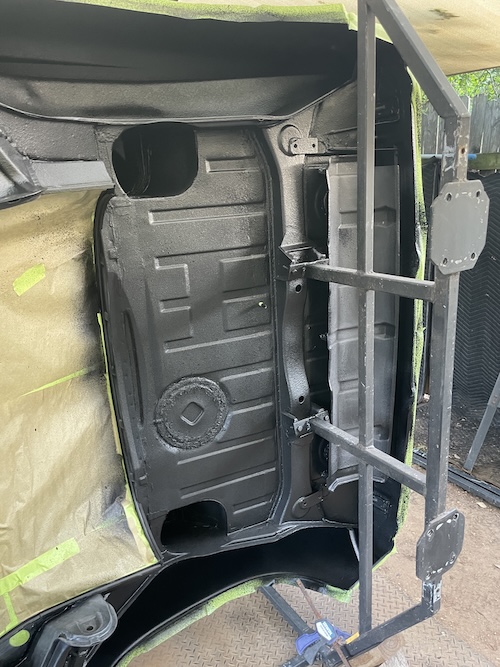 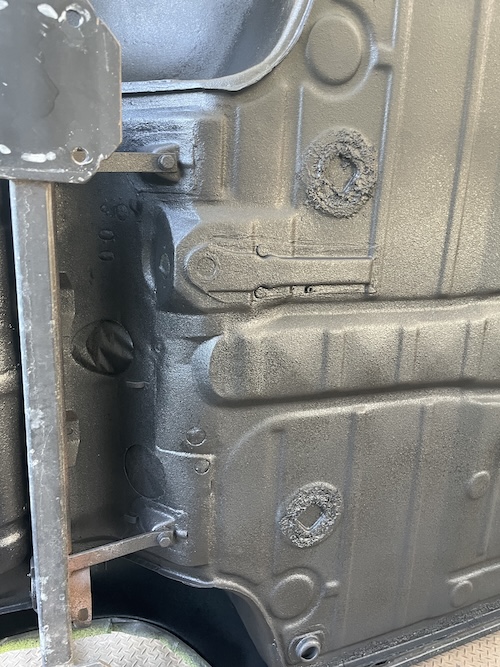 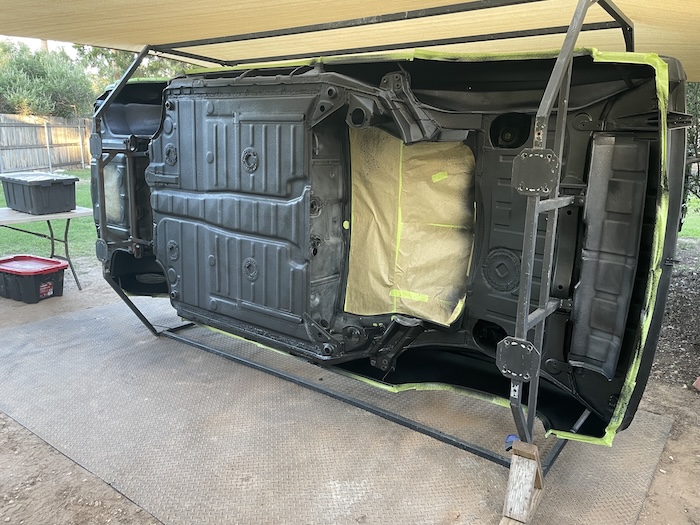 |
|
|
|
| friethmiller |
May 4 2025, 05:44 PM
Post
#473
|
|
Senior Member Group: Members Posts: 1,069 Joined: 10-February 19 From: Austin, TX Member No.: 22,863 Region Association: Southwest Region |
Painting the Bottom: (5/4/2025):
With the undercoating done yesterday, I was ready for the final paint. This work represented that last task for the bottom of this car. Super excited to hit this milestone. The paint I used for this was PPG's ShopLine single stage, black (L04I) paint. First photo shows my paint table setup with the paint (just stirred) ready to go. I'm using one of the cheapest guns I own simply because it's been working great. After adjusting the gun, I went straight to work getting inside each of the fenders. My goal on the first coat was to get a light coat in the hard to reach areas without missing any major spots. That seemed to work out well for me. I ended up doing 3 coats to make sure I got everything. These photos shows my work in-process. 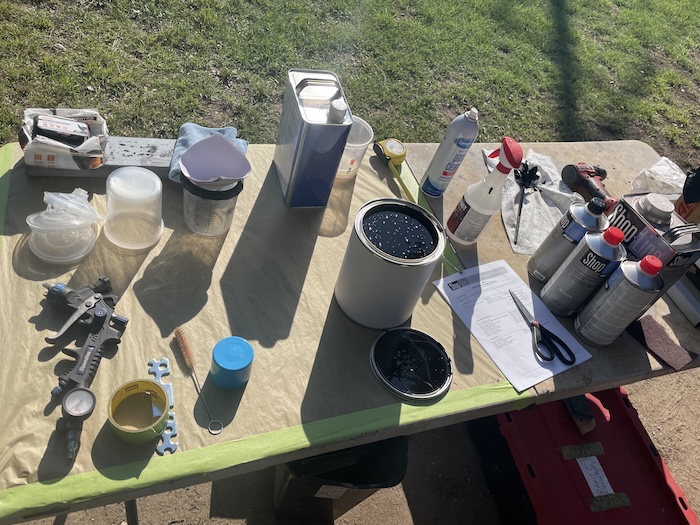 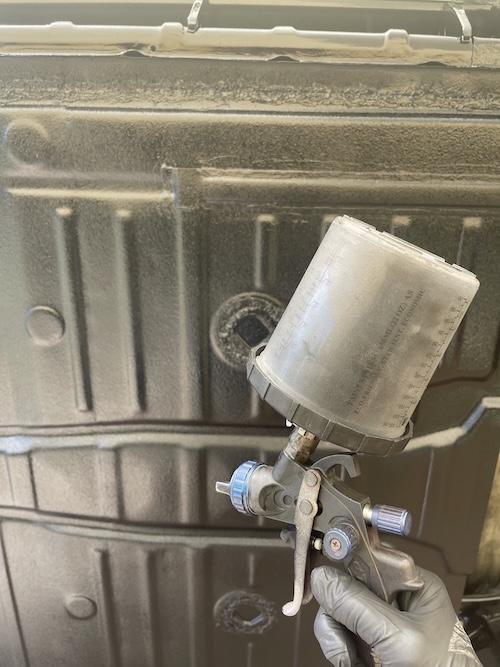 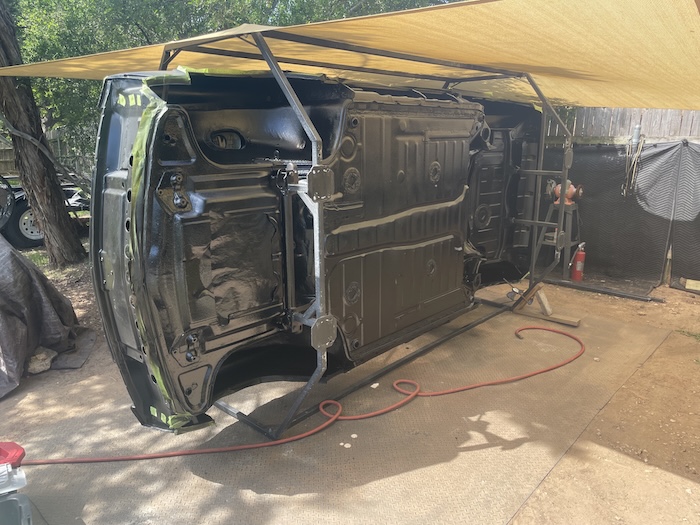 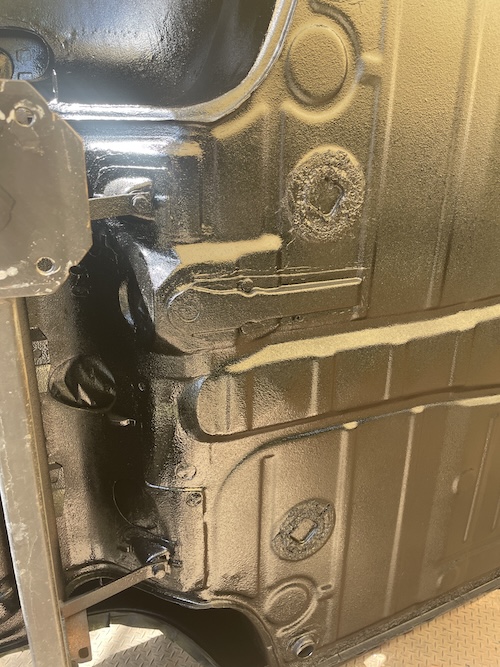  These photos show the paint after several hours of dry-time. Note: By design, I did not undercoat the lower firewall yesterday. In the engine bay, you can see the difference between the final paint and the epoxy primer above. Final photo shows the rotisserie back together with its wheels and the car getting ready to be flipped.  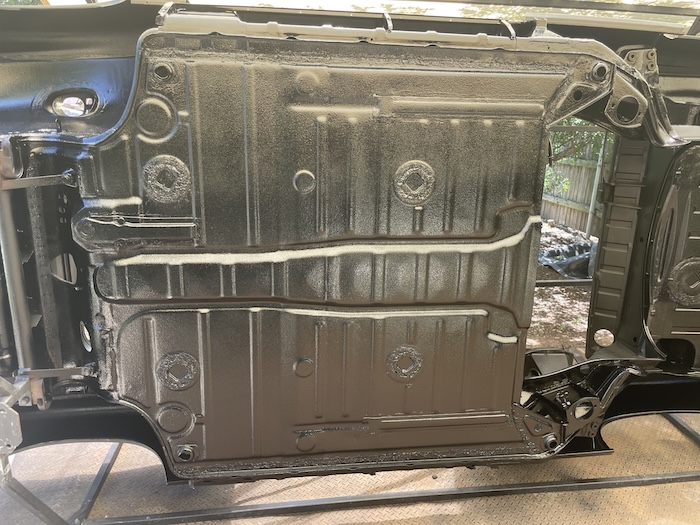 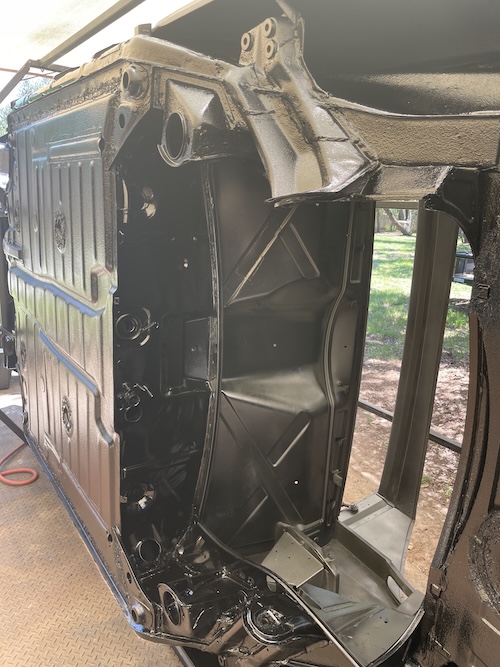 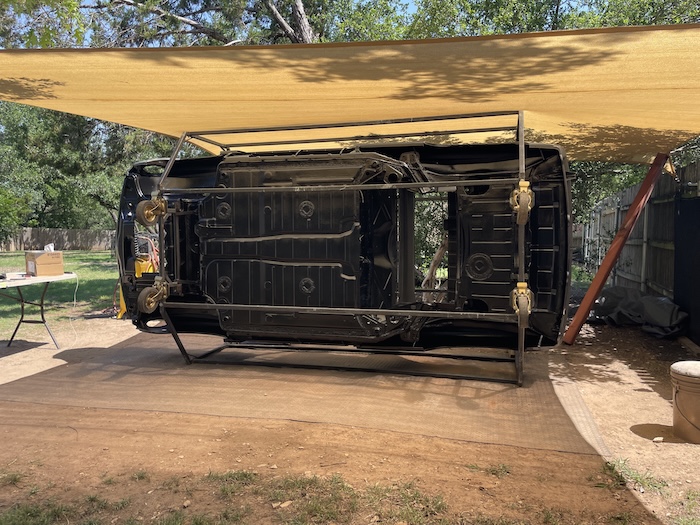 |
|
|
|
| friethmiller |
May 4 2025, 06:32 PM
Post
#474
|
|
Senior Member Group: Members Posts: 1,069 Joined: 10-February 19 From: Austin, TX Member No.: 22,863 Region Association: Southwest Region |
Transforming the Rotisserie: (5/4/2025):
I had been thinking about how to change this rotisserie into a body cart for a while now and I finally figured out how I wanted to do it today. I determined that by moving a set of rails from the top of the hoop to the bottom, I could create a structure sturdy enough to do the job. These pics show how I moved a set of rails and mounted them on the vertical posts just below the front and rear attachment points. Leaving the bottom rails in place, I now had four rails creating a box (kind of).  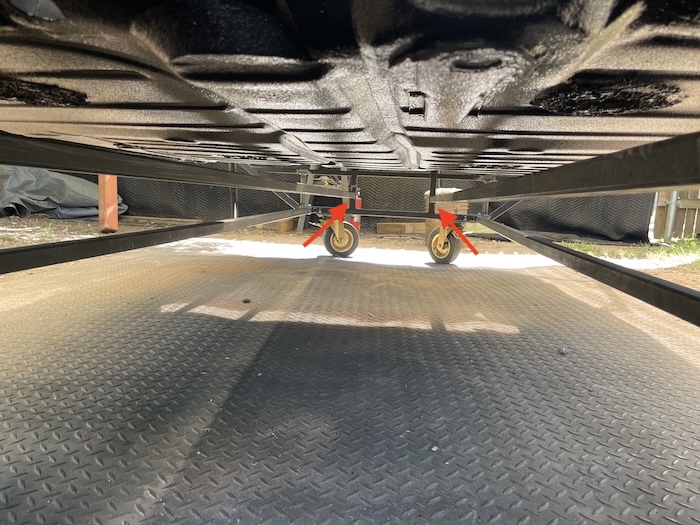 The following photo show where the cut was made (on both sides) to remove the front hoop. 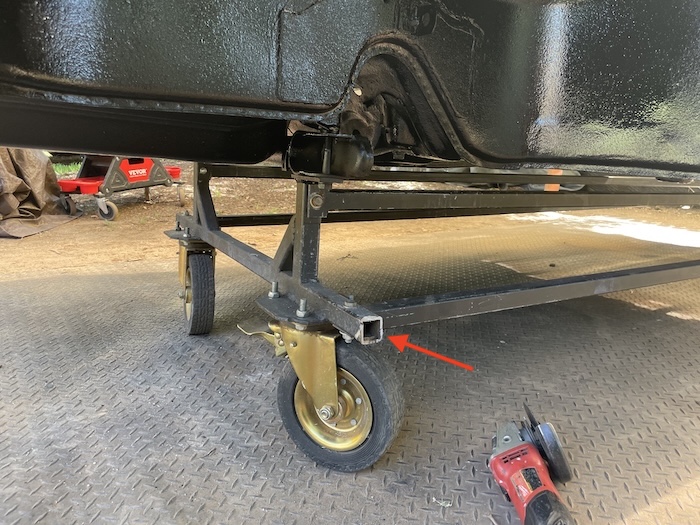 The lower arrow in the next photo shows where I added a 1" square tube to provide support to remove the rear hoop. The upper arrow shows the first of two cuts [on each side] to remove the hoop.  The first photo here shows the rear assembly after the hoop was removed. The second photos show the hoops new home [till needed again]. 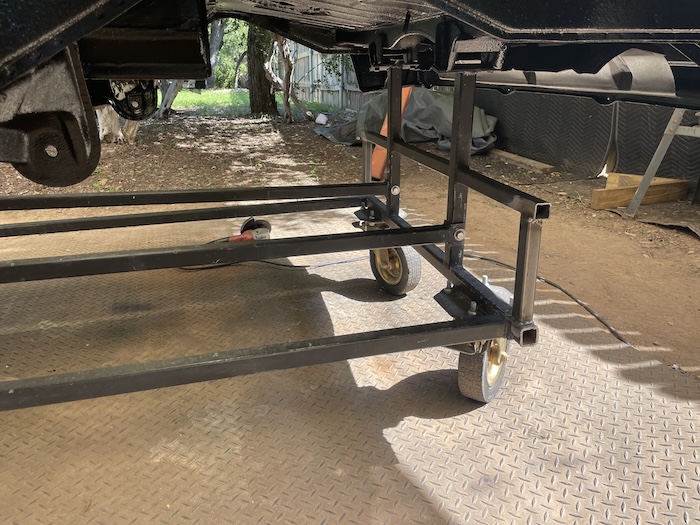 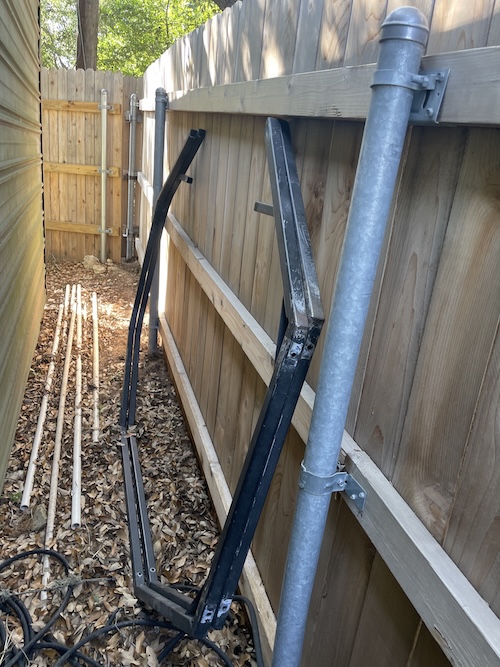 After cleaning, painting the exposed metal on my "new cart", I then turned my attention to removing all the bracing from the inside of the car. Thank goodness!! Took off the door bars and cut out the cross-bracing. I'll leave the final clean-up of the cut ends for next time. 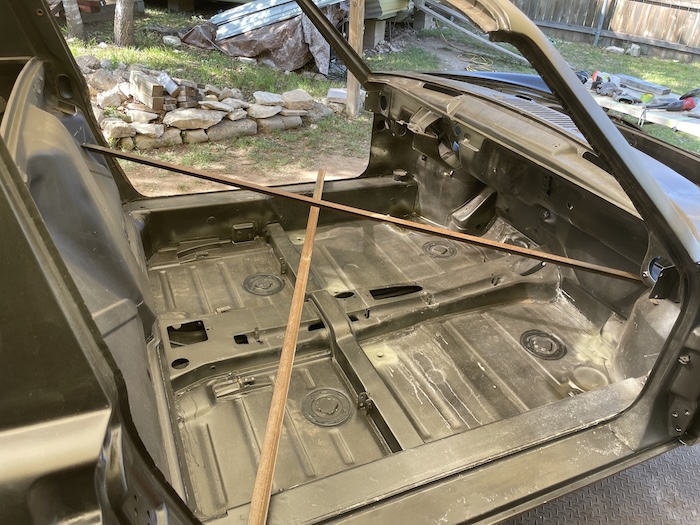 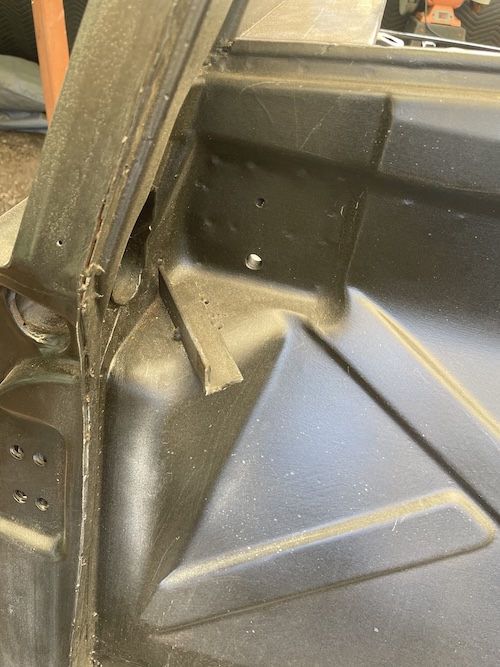 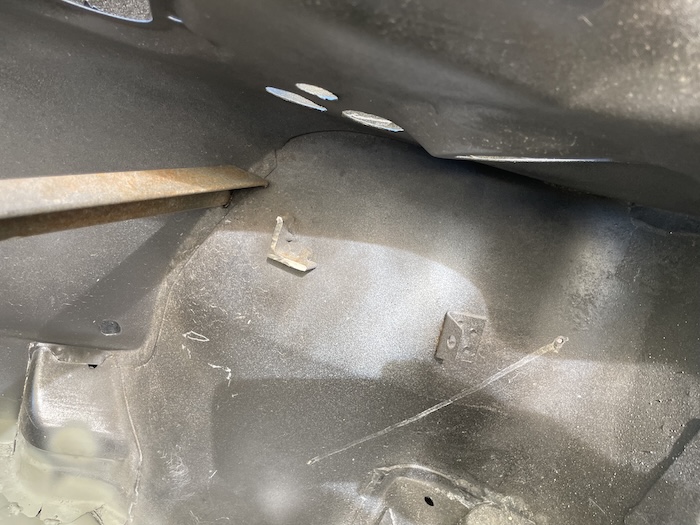 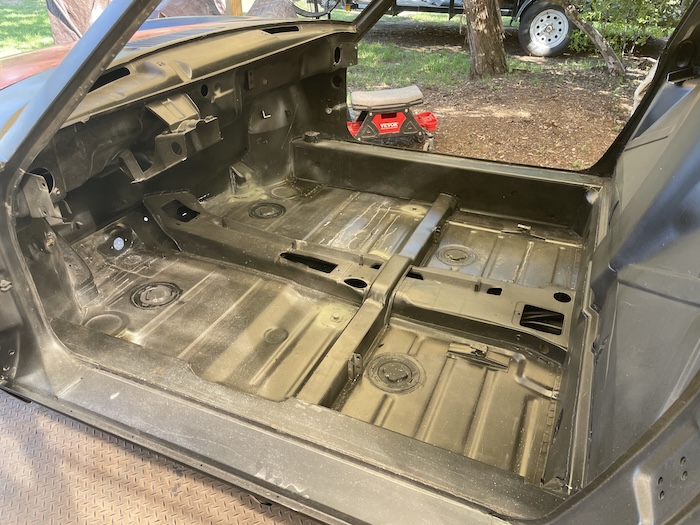 The following photos show the LE on its new cart! Till next time, cheers! (IMG:style_emoticons/default/beerchug.gif) 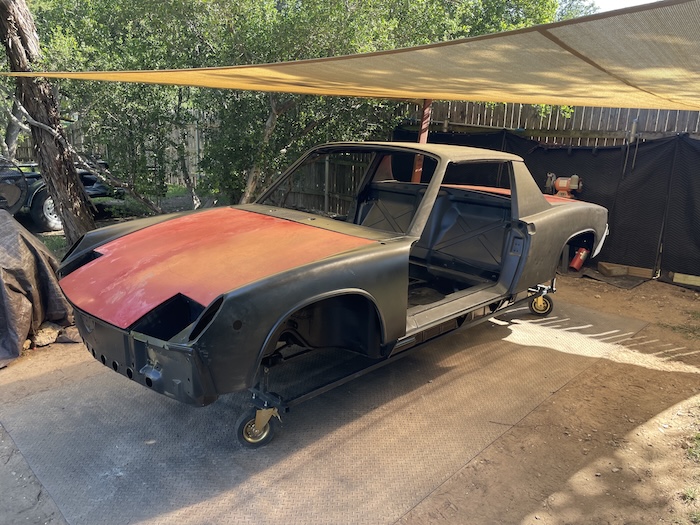 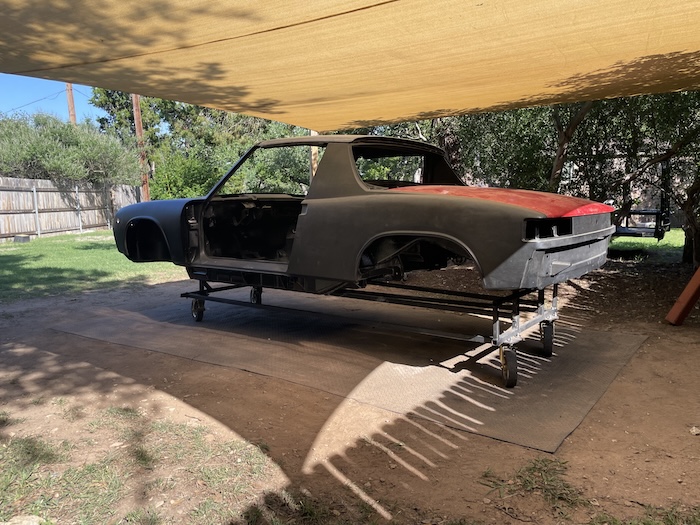 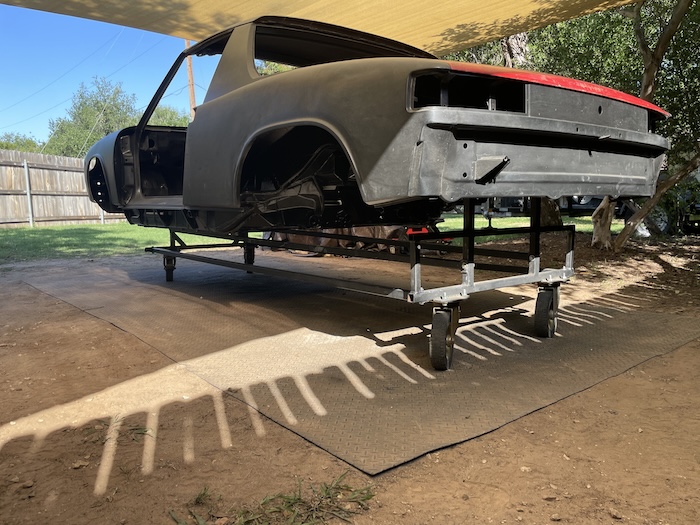 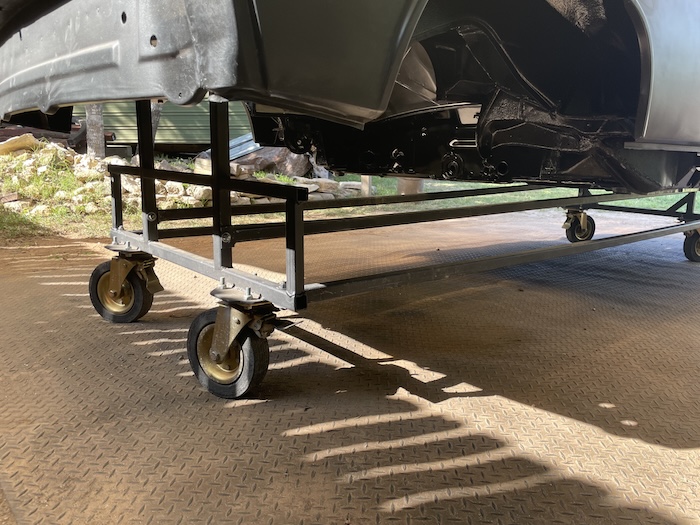 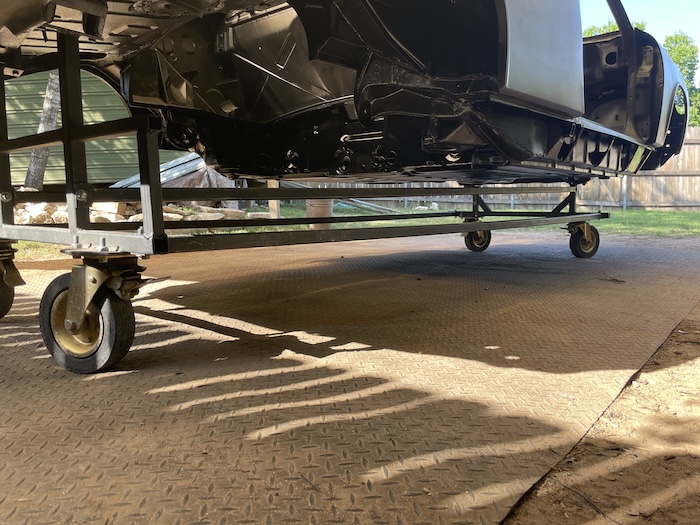 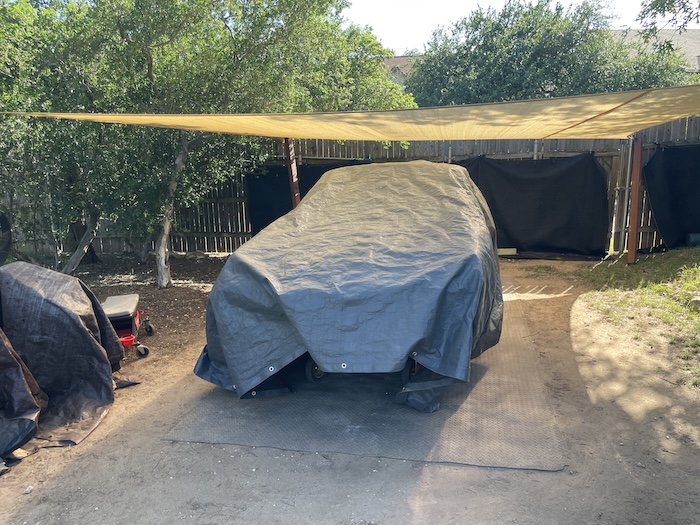 |
|
|
|
| friethmiller |
May 5 2025, 07:14 AM
Post
#475
|
|
Senior Member Group: Members Posts: 1,069 Joined: 10-February 19 From: Austin, TX Member No.: 22,863 Region Association: Southwest Region |
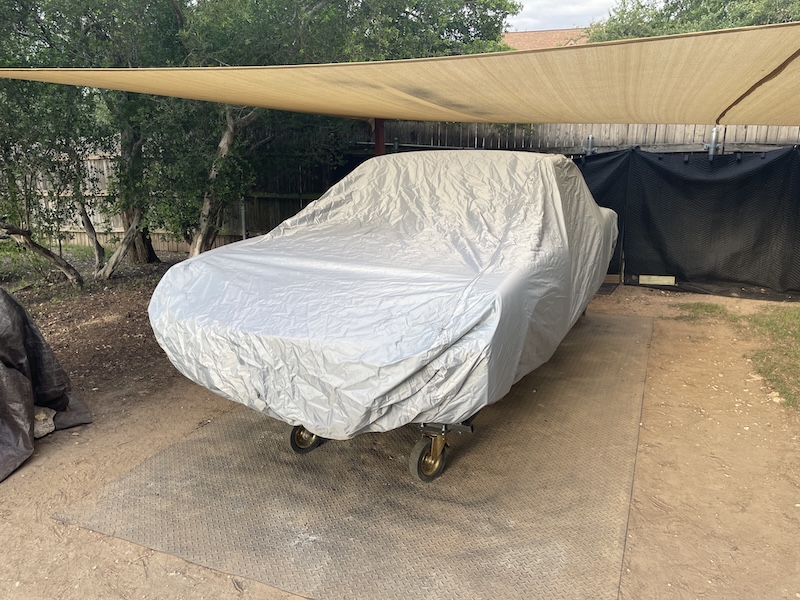
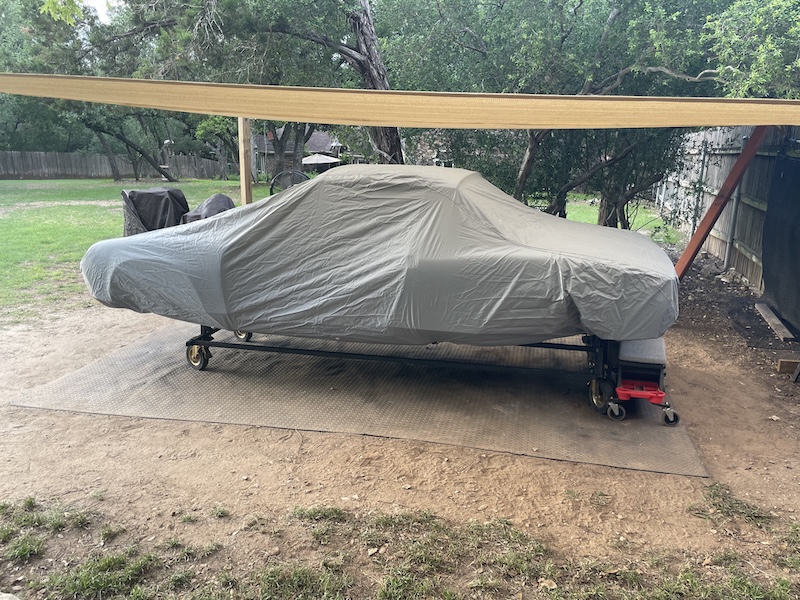
This morning I went out and found a car cover in the shed. This should do the job for now. The real test is coming this afternoon with thunderstorms likely. We'll see. (IMG:style_emoticons/default/dry.gif)
  |
|
|
|
| Lilchopshop |
May 5 2025, 09:48 AM
Post
#476
|
|
Member Group: Members Posts: 90 Joined: 17-February 20 From: New York Member No.: 23,932 Region Association: North East States |
(IMG:style_emoticons/default/beerchug.gif)
Great job Fred! It must feel great to reach this milestone! Very inspiring! |
|
|
|
| friethmiller |
May 5 2025, 10:17 AM
Post
#477
|
|
Senior Member Group: Members Posts: 1,069 Joined: 10-February 19 From: Austin, TX Member No.: 22,863 Region Association: Southwest Region |
QUOTE(Lilchopshop @ May 5 2025, 10:48 AM) (IMG:style_emoticons/default/beerchug.gif) Great job Fred! It must feel great to reach this milestone! Very inspiring! Thanks! No more bang'n my head on the rotisserie! (IMG:style_emoticons/default/aktion035.gif) Based on some other expenses, I have decided to wait on the suspension and continue on the body. Doors and hoods are next! |
|
|
|
| Cairo94507 |
May 7 2025, 05:48 AM
Post
#478
|
|
Michael Group: Members Posts: 10,490 Joined: 1-November 08 From: Auburn, CA Member No.: 9,712 Region Association: Northern California |
Amazing work Fred; I love the detailed photos showing the progress work and outcome. (IMG:style_emoticons/default/beerchug.gif)
|
|
|
|
| friethmiller |
May 7 2025, 07:20 AM
Post
#479
|
|
Senior Member Group: Members Posts: 1,069 Joined: 10-February 19 From: Austin, TX Member No.: 22,863 Region Association: Southwest Region |
QUOTE(Cairo94507 @ May 7 2025, 06:48 AM) Amazing work Fred; I love the detailed photos showing the progress work and outcome. (IMG:style_emoticons/default/beerchug.gif) Thanks Michael! Glad you like "watching" the progress. Just started on the passenger side door last night. Tons of bondo and some skin rust. The door structure looks good, though. This one should go pretty quick. 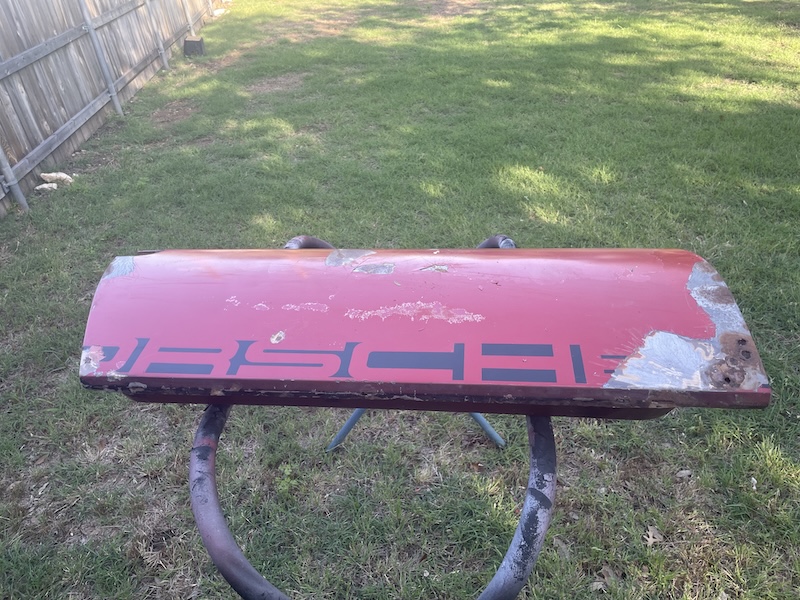 |
|
|
|
| 930cabman |
May 7 2025, 01:13 PM
Post
#480
|
|
Advanced Member Group: Members Posts: 4,323 Joined: 12-November 20 From: Buffalo Member No.: 24,877 Region Association: North East States |
door looks like toast and Fred takes it in stride.
(IMG:style_emoticons/default/beerchug.gif) (IMG:style_emoticons/default/beerchug.gif) (IMG:style_emoticons/default/beerchug.gif) (IMG:style_emoticons/default/beerchug.gif) real dyed in the wool guy |
|
|
|
|
2 User(s) are reading this topic (1 Guests and 0 Anonymous Users)
1 Members: friethmiller

|
Lo-Fi Version | Time is now: 10th November 2025 - 06:19 PM |
Invision Power Board
v9.1.4 © 2025 IPS, Inc.