|
|
|
Porsche, and the Porsche crest are registered trademarks of Dr. Ing. h.c. F. Porsche AG.
This site is not affiliated with Porsche in any way. Its only purpose is to provide an online forum for car enthusiasts. All other trademarks are property of their respective owners. |
|
|

  |

| friethmiller |
 May 7 2025, 01:50 PM May 7 2025, 01:50 PM
Post
#481
|
|
Senior Member  Group: Members Posts: 1,069 Joined: 10-February 19 From: Austin, TX Member No.: 22,863 Region Association: Southwest Region |
QUOTE(930cabman @ May 7 2025, 02:13 PM)  door looks like toast and Fred takes it in stride. (IMG:style_emoticons/default/beerchug.gif) (IMG:style_emoticons/default/beerchug.gif) (IMG:style_emoticons/default/beerchug.gif) (IMG:style_emoticons/default/beerchug.gif) real dyed in the wool guy Ha! There'd be no exciting repair if they were "good to go" (IMG:style_emoticons/default/biggrin.gif). By the way, the driver side is far worse. I'll have pics of the process for y'all this weekend. |
   |

 
|
| BillC |
May 7 2025, 07:05 PM
Post
#482
|
|
Senior Member Group: Members Posts: 694 Joined: 24-April 15 From: Silver Spring, MD Member No.: 18,667 Region Association: MidAtlantic Region |
QUOTE(930cabman @ May 7 2025, 03:13 PM) door looks like toast and Fred takes it in stride. (IMG:style_emoticons/default/beerchug.gif) (IMG:style_emoticons/default/beerchug.gif) (IMG:style_emoticons/default/beerchug.gif) (IMG:style_emoticons/default/beerchug.gif) real dyed in the wool guy After all the other intricate sheet metal repairs Fred has already done on that car, he can probably fix the door in his sleep. (IMG:style_emoticons/default/first.gif) (IMG:style_emoticons/default/beer.gif) |
 |
|
| friethmiller |
May 8 2025, 09:11 AM
Post
#483
|
|
Senior Member Group: Members Posts: 1,069 Joined: 10-February 19 From: Austin, TX Member No.: 22,863 Region Association: Southwest Region |
QUOTE(BillC @ May 7 2025, 08:05 PM) After all the other intricate sheet metal repairs Fred has already done on that car, he can probably fix the door in his sleep. (IMG:style_emoticons/default/first.gif) (IMG:style_emoticons/default/beer.gif) You give me too much credit, Bill (IMG:style_emoticons/default/shades.gif) I will continue to tease with more photos. Here's the driver side stripped down. 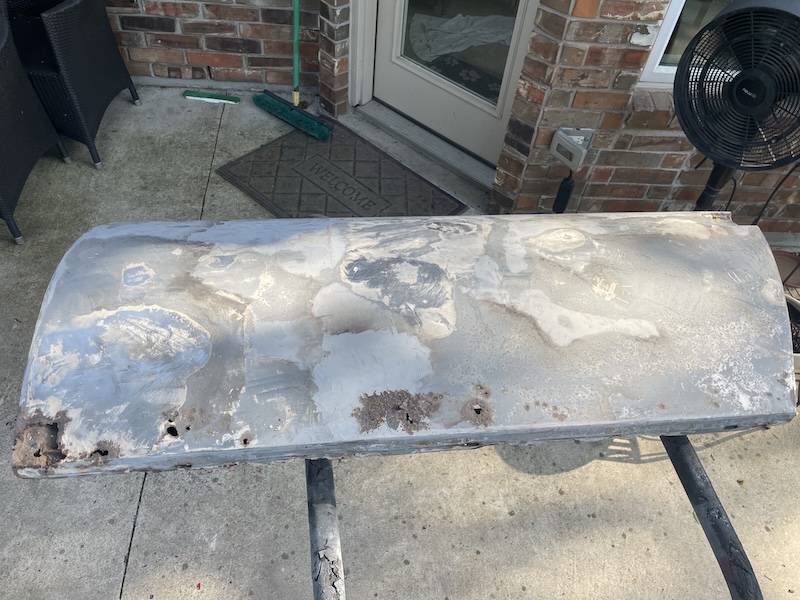 |
|
|
|
| Root_Werks |
May 8 2025, 10:34 AM
Post
#484
|
|
Village Idiot Group: Members Posts: 8,841 Joined: 25-May 04 From: About 5NM from Canada Member No.: 2,105 Region Association: Pacific Northwest |
|
|
|
|
| Ishley |
May 8 2025, 11:02 AM
Post
#485
|
|
Member Group: Members Posts: 305 Joined: 4-October 21 From: Clarendon Hills Il Member No.: 25,957 Region Association: Upper MidWest |
I had my doors acid dipped. Not sure if that's an option for you... but it really gets you a clean rust free door canvas to work with. I found the door skin repairs to be challenging... as it's easy to warp during welding. One of the few places I wished I had a tig welder and skills.
Your car looks great! |
|
|
|
| friethmiller |
May 9 2025, 09:57 AM
Post
#486
|
|
Senior Member Group: Members Posts: 1,069 Joined: 10-February 19 From: Austin, TX Member No.: 22,863 Region Association: Southwest Region |
QUOTE(Ishley @ May 8 2025, 12:02 PM) I had my doors acid dipped. Not sure if that's an option for you... but it really gets you a clean rust free door canvas to work with. I found the door skin repairs to be challenging... as it's easy to warp during welding. One of the few places I wished I had a tig welder and skills. Your car looks great! Good idea, @Ishley! BTW, I just pulled out another set of doors from my shed. These are much better on the outside. (IMG:style_emoticons/default/idea.gif) It might take 4 doors to make 2 good ones. We'll see. |
|
|
|
| friethmiller |
May 12 2025, 09:30 AM
Post
#487
|
|
Senior Member Group: Members Posts: 1,069 Joined: 10-February 19 From: Austin, TX Member No.: 22,863 Region Association: Southwest Region |
Passenger Side Door - Part 1 (5/10/2025):
After comparing the LE's doors and an extra set I had in the shed - the choice was easy. Despite the interior rust and frame damage, I decided to go with the spares. Here's the work done to prep and begin repairing the passenger side door. The Good! No body filler. There original paint was completely protected by a heavy primer. What luck! The blue, black, and red coatings came up quick. It was the original silver paint that was stubborn. Thankfully, aside from the rust spots coming in from the back, this metal was in very good condition. 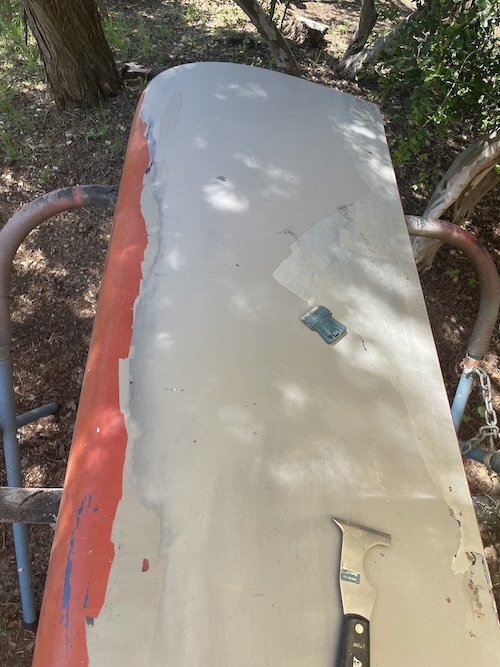 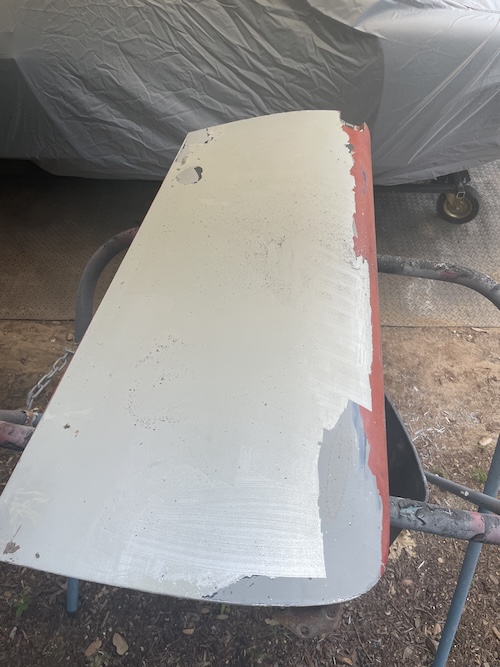 The Bad! A lot of internal rust here - both top and bottom. I just went ahead an cut out the support structure since clear access will be required. 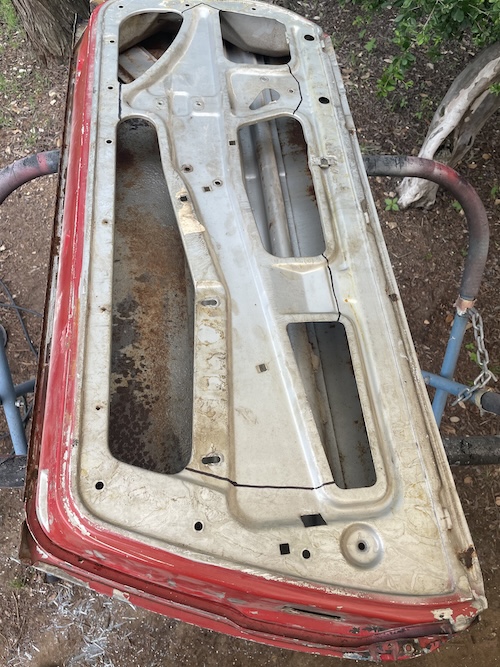 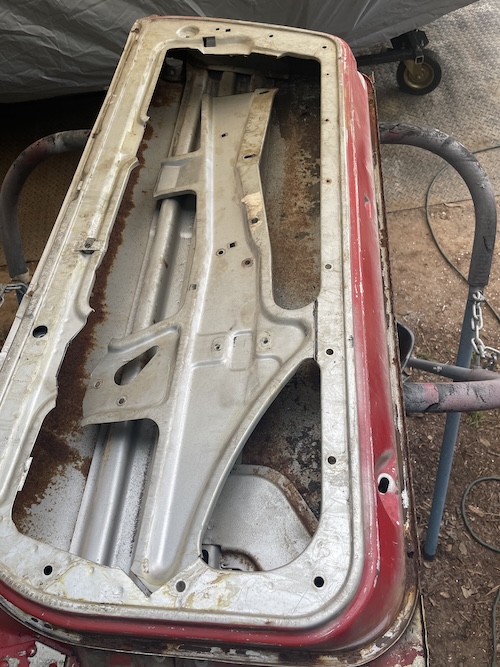 Tried paint remover. It barely works. I hate this eco-friendly crap! Waste of my time. (IMG:style_emoticons/default/headbang.gif) 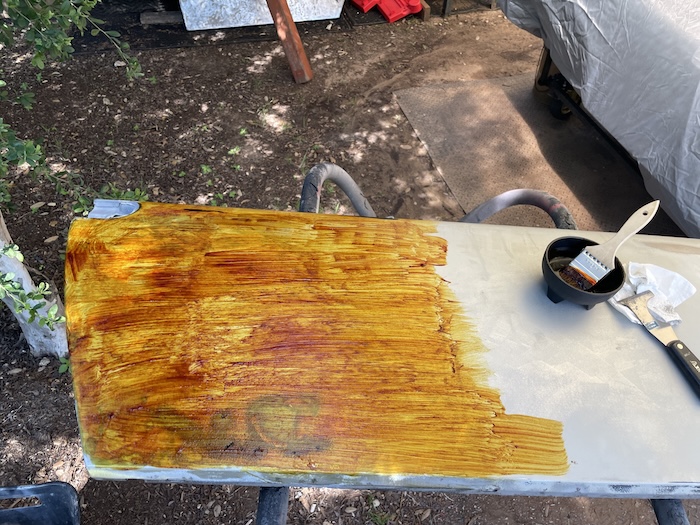 Gave up and just started with repairing the rust holes. I did this by sizing up my drill bits to make sure the damaged pit was removed. I used a copper backer to help things along here. Not perfect but it'll do the job. 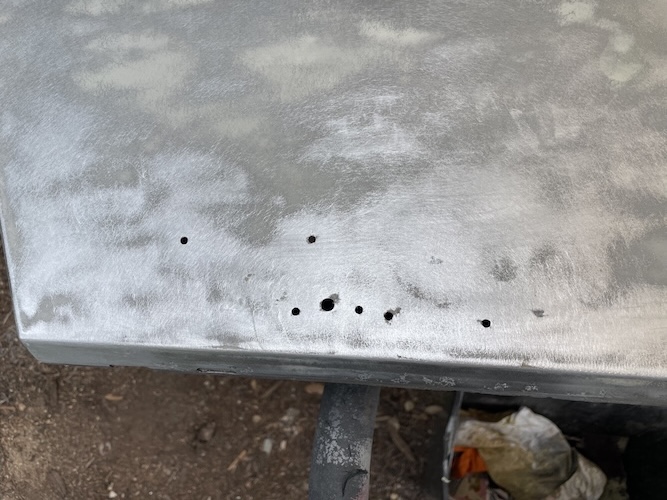 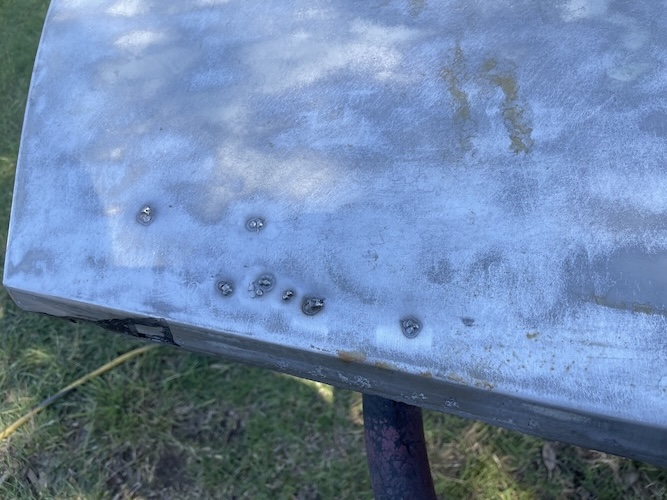 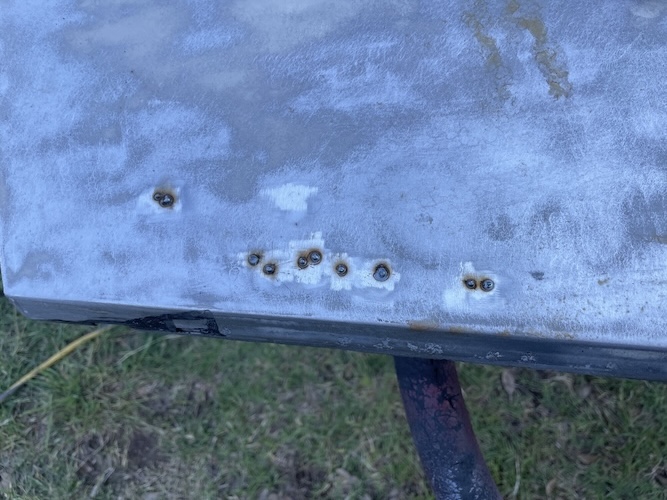  Next up was the forward section of the door. Had two holes to fill here and a suspicious looking rust in the bottom corner. After drilling out one spot. I decided to just cut out a section. Yikes! Going to replace this piece and make sure to get rust encapsulator into the cracks from the inside. Cleaned and treated what was exposed prior to the repair. 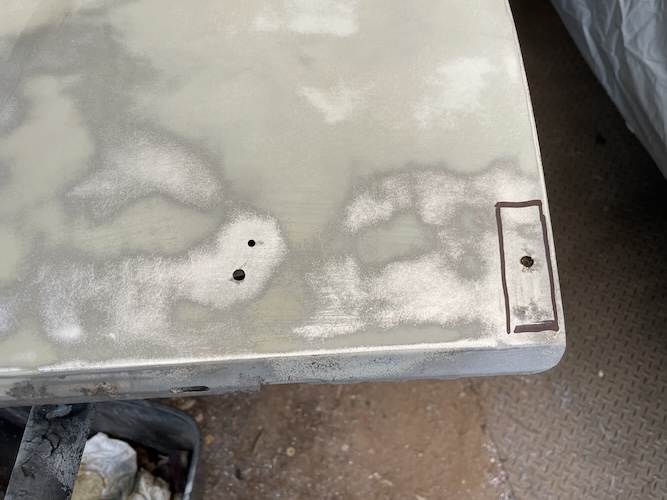 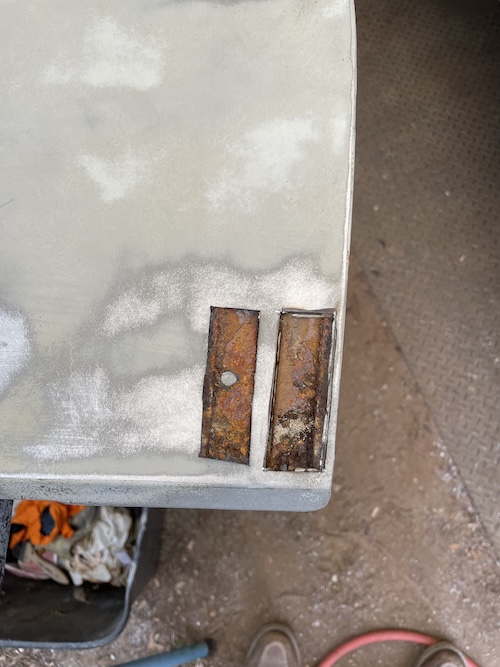 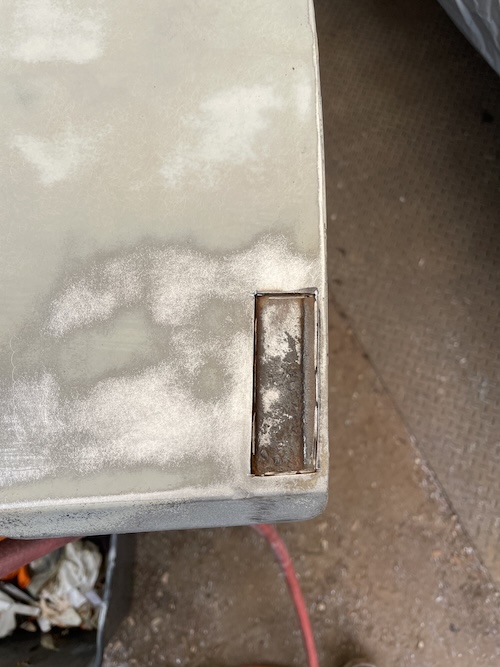 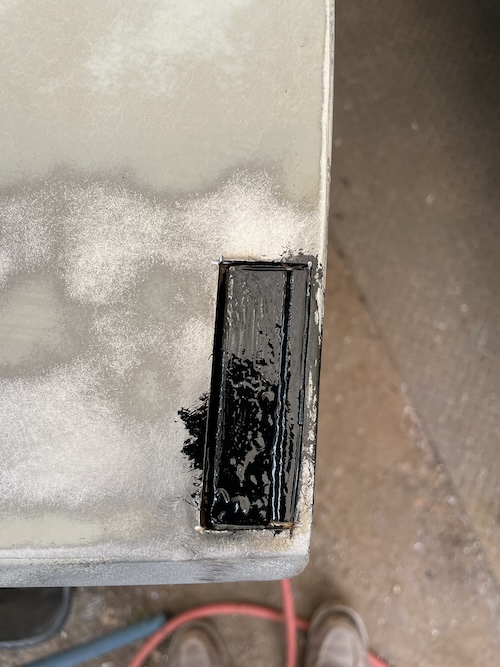 Went a little light here on the welds. I was super concerned with warpage. It did the job but could have been better. 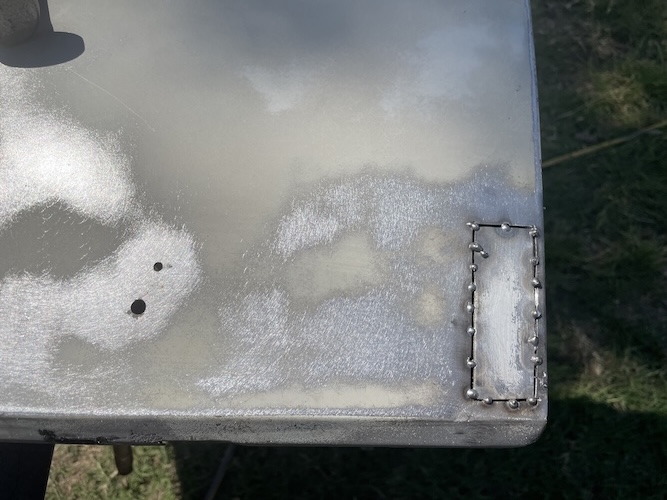 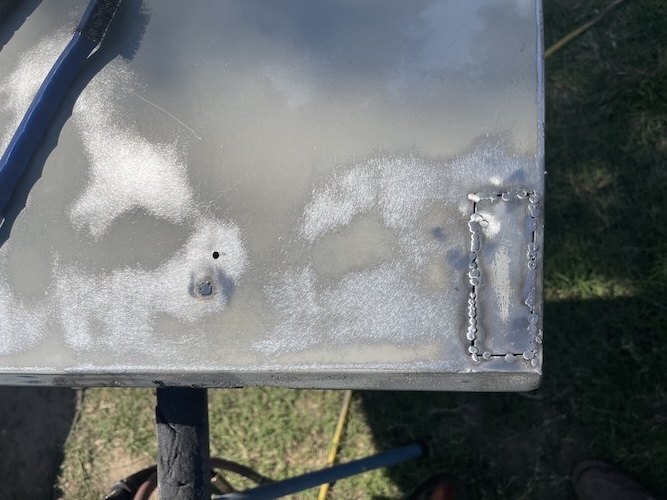 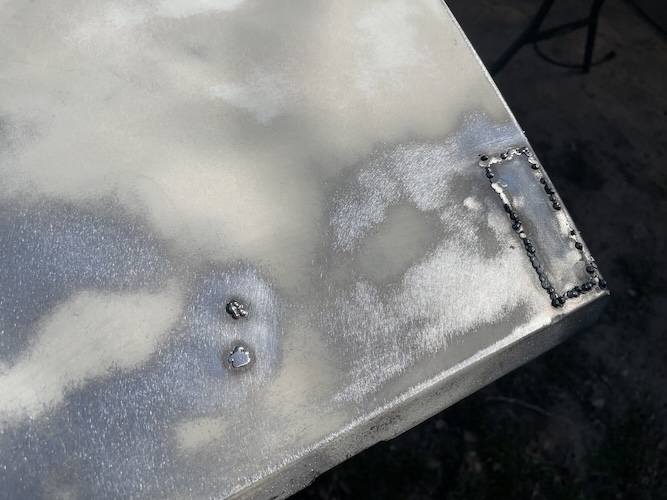 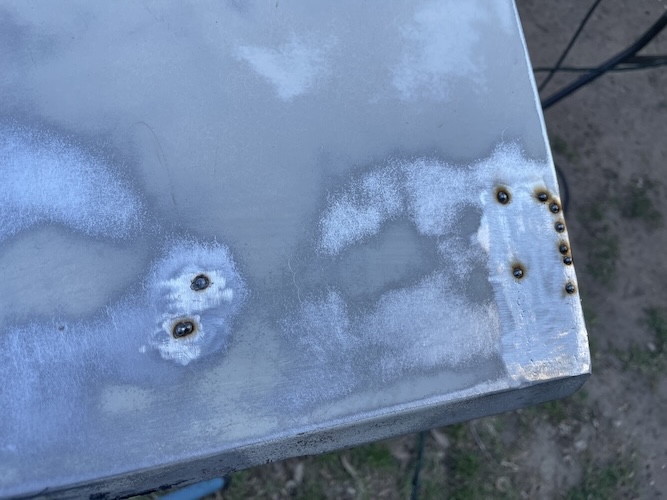 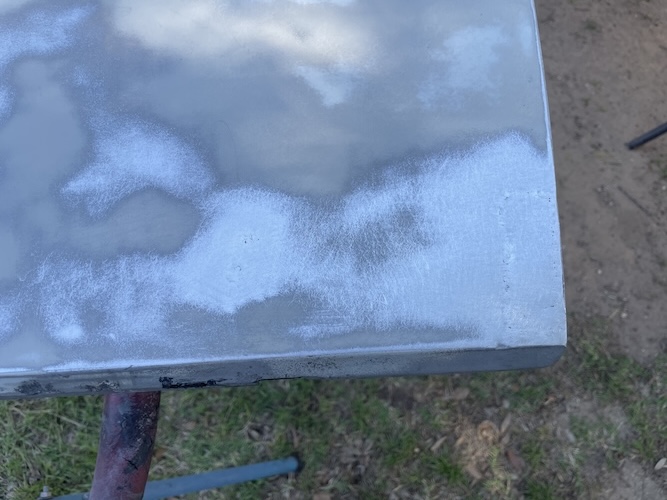 Glassblasted the insides, top and bottom. Didn't need to get everything. Rust encapsulator was next. 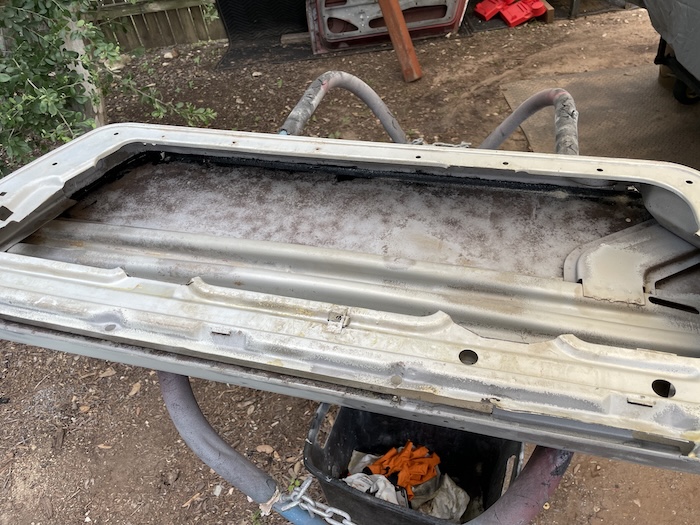 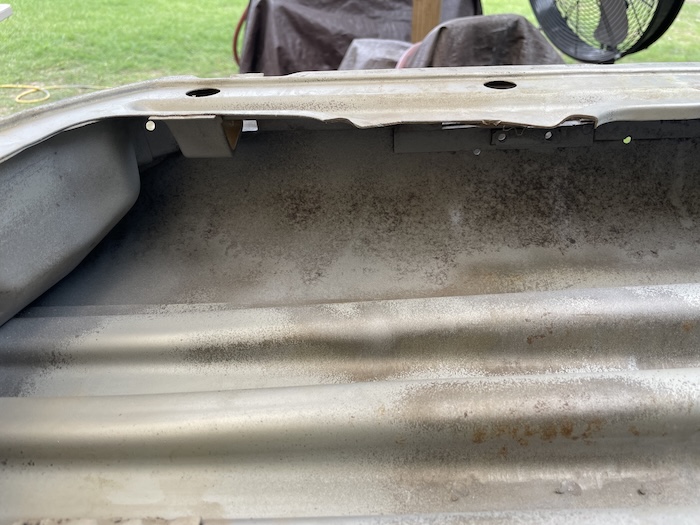 Insides after 2 coats of Rust Bullet was applied. 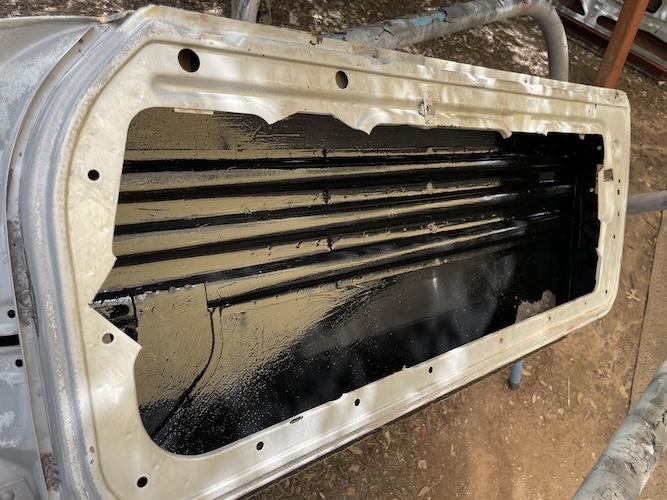 Next will be the door structure. Stay tuned. |
|
|
|
| friethmiller |
May 12 2025, 11:24 AM
Post
#488
|
|
Senior Member Group: Members Posts: 1,069 Joined: 10-February 19 From: Austin, TX Member No.: 22,863 Region Association: Southwest Region |
Passenger Side Door - Part 2 (5/11/2025):
Thought I'd press my luck and continue my work on Mother's Day. (IMG:style_emoticons/default/051103-stupid4.gif) Only worked a few hours and didn't get all of what I wanted to get done, done, but I'll take it. The Damage: Arrows mark the areas that had to be repaired. A few rust holes here with the addition of the bottom edge/rail, which was pretty much "chewed-up". 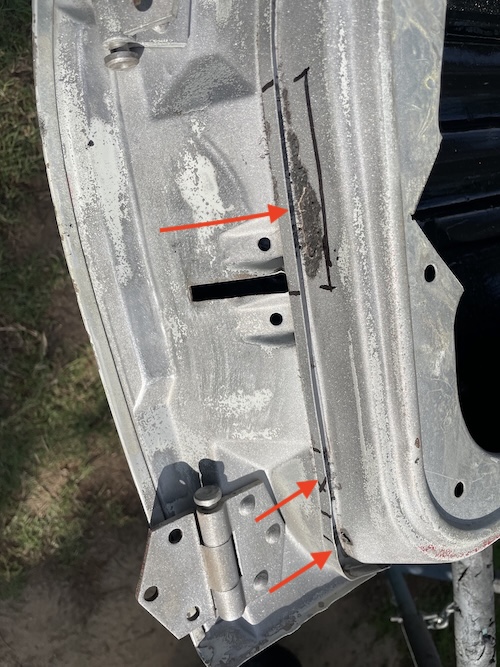 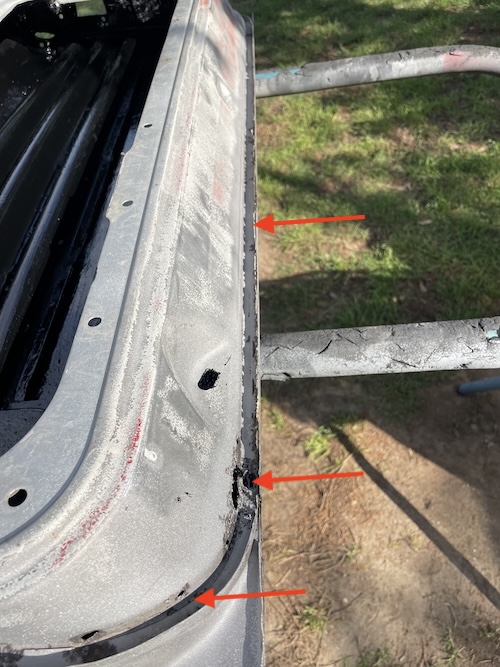 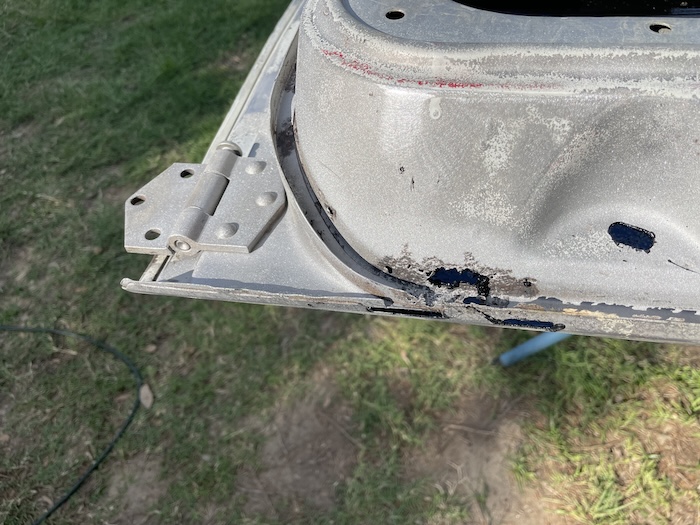  The Patches Attacking the spot between the hinges first. This is a typical rust-out spot on these doors. There's a support member directly behind here that allows water to collect. Best hope here was to cut, treat, and replace. However, the seal track had to be removed first. This is actually pretty easy to remove once you find the spot welds. They are very faint but once drilled the track comes right out. Some of this metal will be reused. 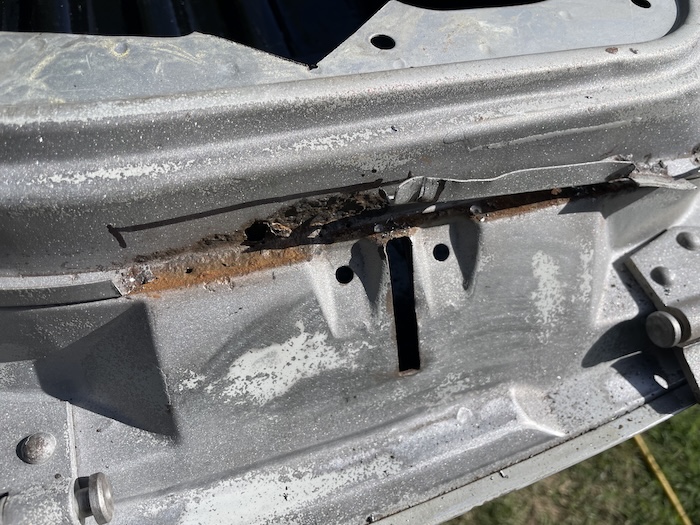  After marking a few cut lines, I decided to make the horizontal cuts first. Knowing I'd be cutting a lot of good panel with the vertical cuts, I used the opening for the door stay to my advantage (see arrows). 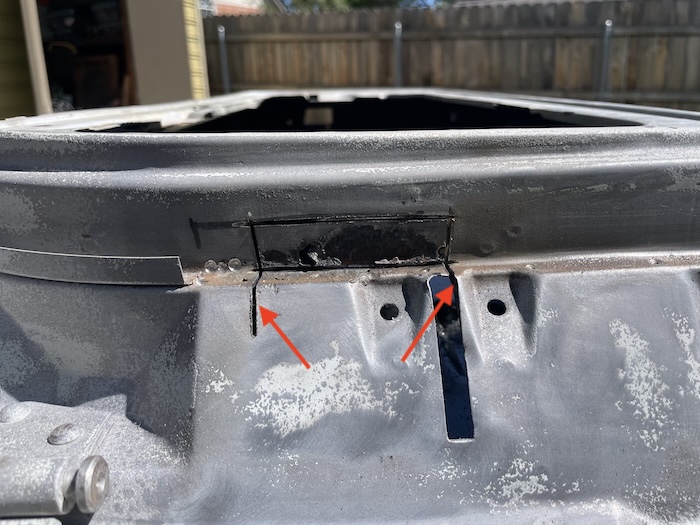  Unfortunately, I didn't get any of the in-process shots here. Just got one of me getting the shape for the patch [since the metal came out in pieces] and another of the repair completed. Again, the underlaying metal was cleaned and treated prior to applying the patch. 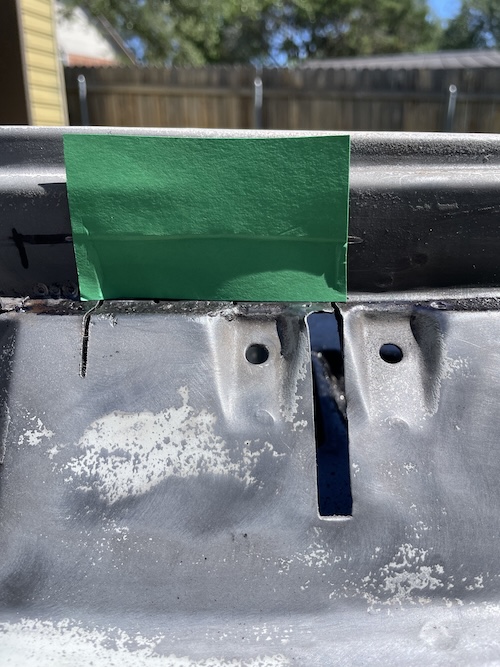 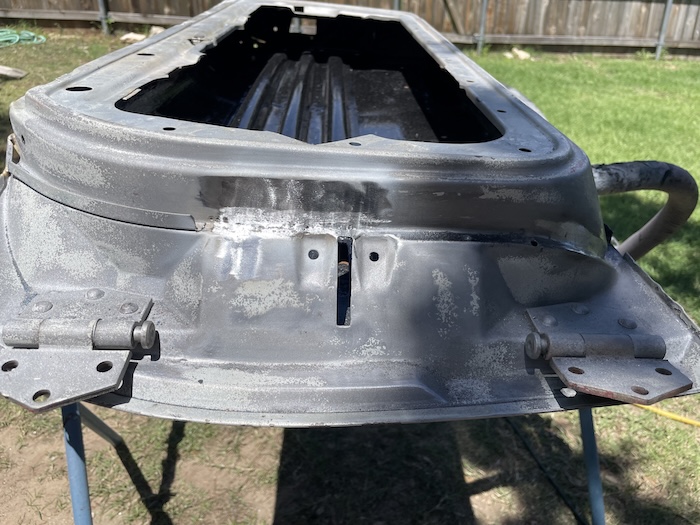 Here's a shot of the other holes repaired and ground-down.  Continuing down to the bottom of the door. Next up was the large, ugly rusty hole. Another common problem area (IMG:style_emoticons/default/bootyshake.gif) . To get access in here, I decided to cut down the bottom edge of the door, remove it and the rusty edge of the inner door structure, as well. This will all be replaced later. 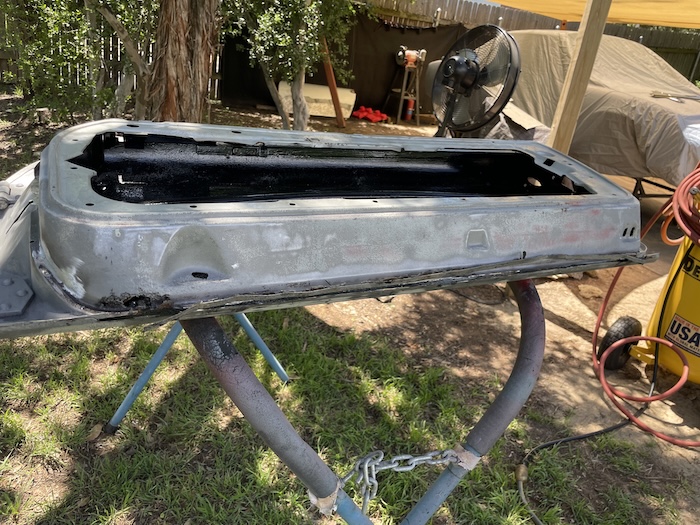 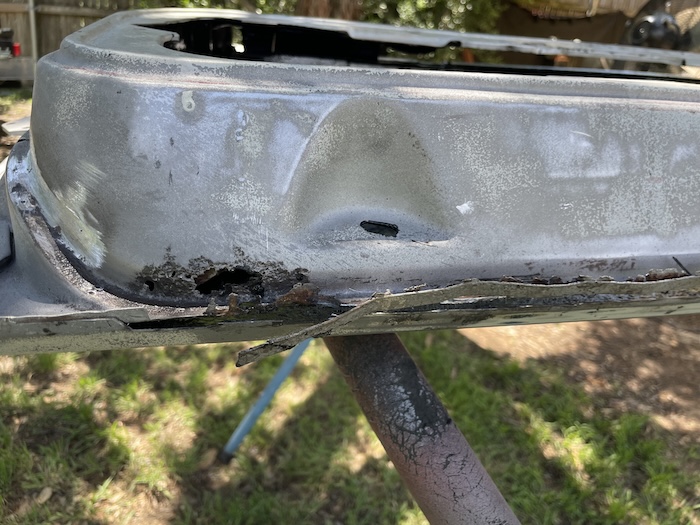 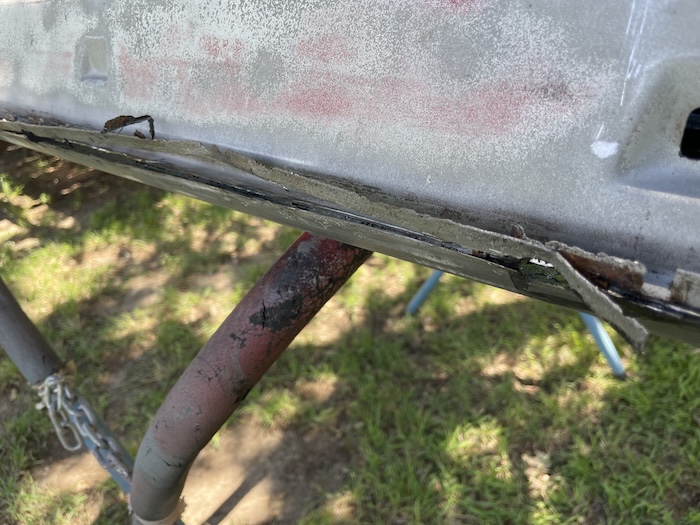 Outlining the repair with a marker, I cut out the bad metal and I traced the form to the sheet metal to create an oversized patch. This was then sized-down to fit the hole. Follow-on pics show the patch being welded-in and ground down. Final shot shows the repairs completed for the day. Next up will be the repair of the bottom edge plus re-welding the door structure that was cut out. Till then... Cheers! (IMG:style_emoticons/default/beerchug.gif) 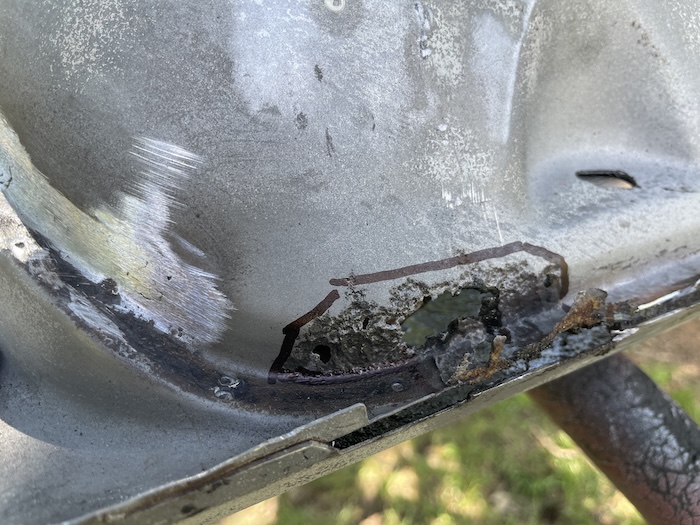 Attached image(s) 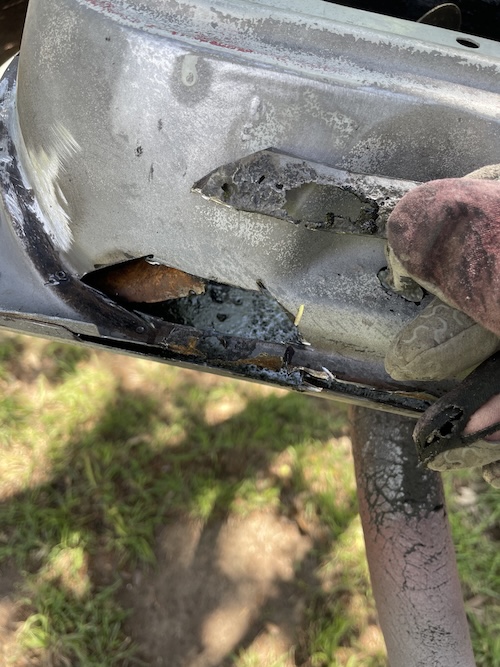 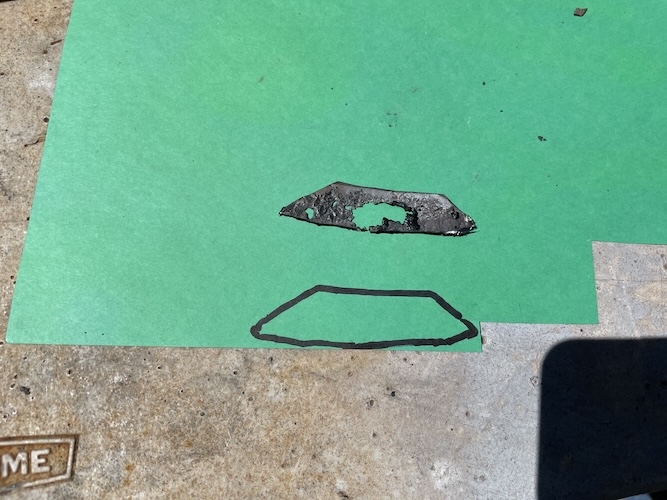 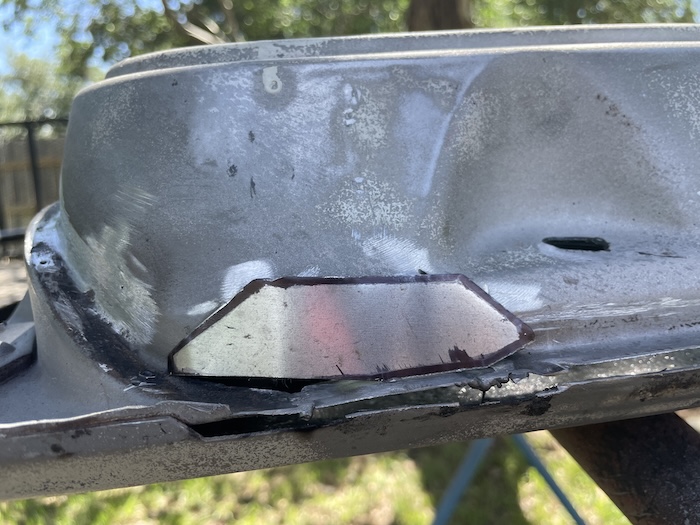 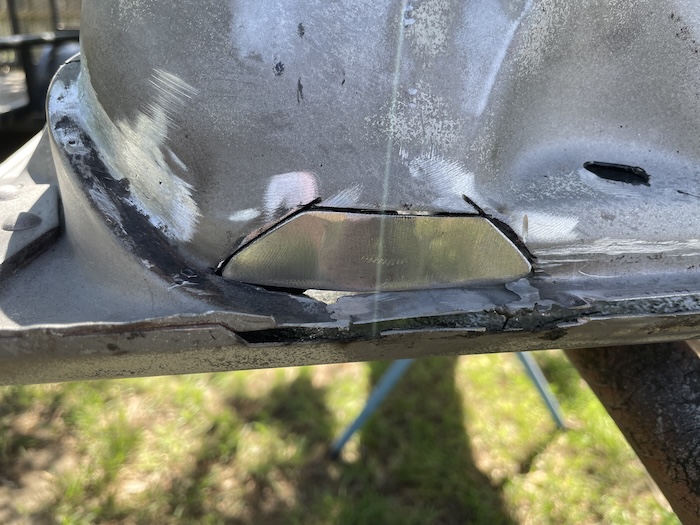 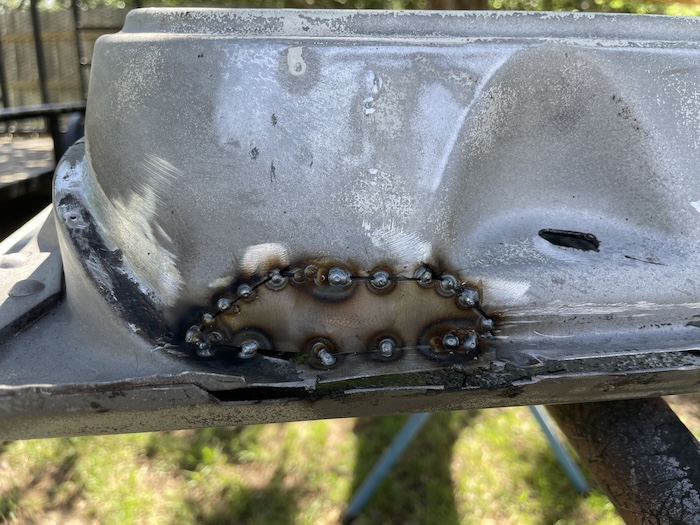 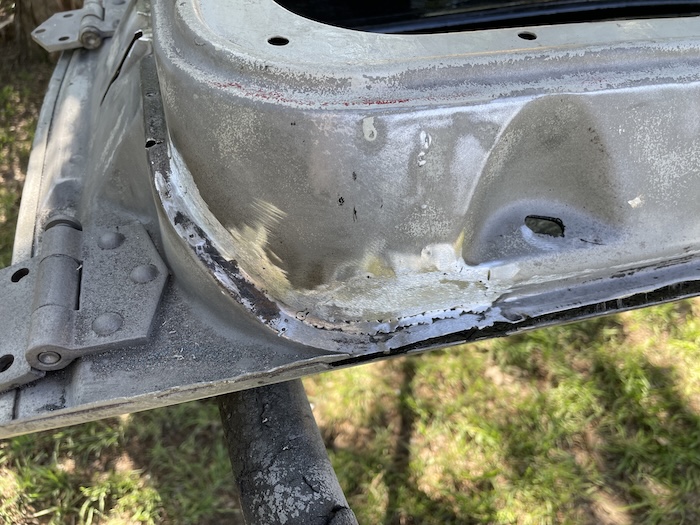 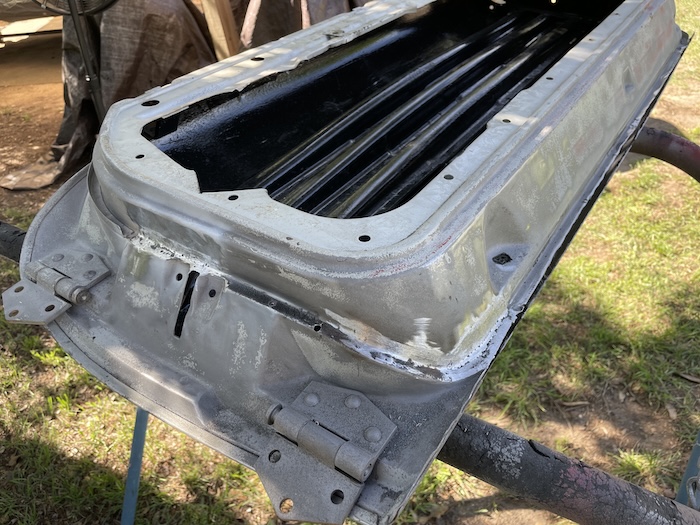
|
|
|
|
| bkrantz |
May 12 2025, 07:25 PM
Post
#489
|
|
914 Guru Group: Members Posts: 8,530 Joined: 3-August 19 From: SW Colorado Member No.: 23,343 Region Association: Rocky Mountains |
QUOTE(friethmiller @ May 7 2025, 01:50 PM) QUOTE(930cabman @ May 7 2025, 02:13 PM) door looks like toast and Fred takes it in stride. (IMG:style_emoticons/default/beerchug.gif) (IMG:style_emoticons/default/beerchug.gif) (IMG:style_emoticons/default/beerchug.gif) (IMG:style_emoticons/default/beerchug.gif) real dyed in the wool guy Ha! There'd be no exciting repair if they were "good to go" (IMG:style_emoticons/default/biggrin.gif). By the way, the driver side is far worse. I'll have pics of the process for y'all this weekend. But imagine a different fun if we could buy a pile of all the original factory sheet metal pressings, in pristine condition, and weld it all together. |
|
|
|
| friethmiller |
May 13 2025, 08:15 AM
Post
#490
|
|
Senior Member Group: Members Posts: 1,069 Joined: 10-February 19 From: Austin, TX Member No.: 22,863 Region Association: Southwest Region |
QUOTE(bkrantz @ May 12 2025, 08:25 PM) But imagine a different fun if we could buy a pile of all the original factory sheet metal pressings, in pristine condition, and weld it all together. Unfortunately, Dynacorn doesn't offer any sheetmetal parts for cars that begin with the letter "P". (IMG:style_emoticons/default/sad.gif) |
|
|
|
| friethmiller |
May 17 2025, 08:56 PM
Post
#491
|
|
Senior Member Group: Members Posts: 1,069 Joined: 10-February 19 From: Austin, TX Member No.: 22,863 Region Association: Southwest Region |
Passenger Side Door - Part 3 (5/17/2025):
Working on the bottom of the door today. Before I could start this repair, I had to first cut out two long strips of sheet metal to replace what was removed last weekend. If you remember this area was pretty rotten with rust. After a little bit of trimming and alignment the inner strip was tacked in place. Using a screw driver to help lift the skin out of the way, I worked my way down the panel - stitching as I went. I then ground down a majority of the welds to allow for the next strip of metal. This next piece was first prep'd with holes, primer'd, and then tacked down the edge of the lower door skin. Once this piece was welded down to the door, I then clamped the two edges of this new metal together to weld the door skin to the inner door structure. After the rosettes were ground down, I then used the grinder to even-out the welded edge. I had purposely made the inner metal a little taller (see arrows). The following photos show the process: 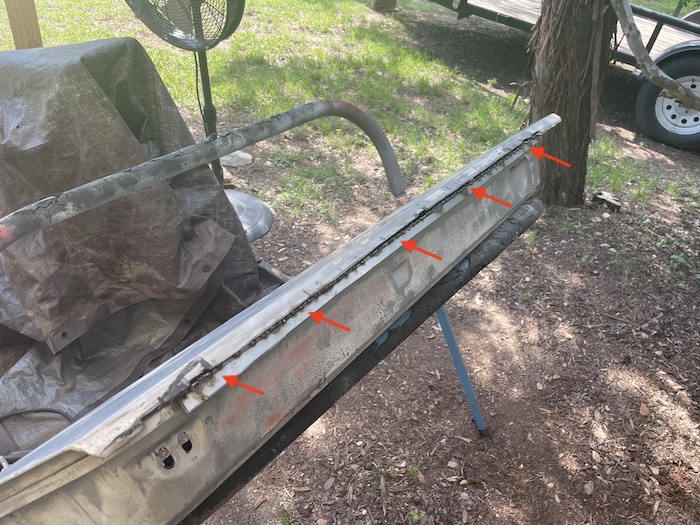 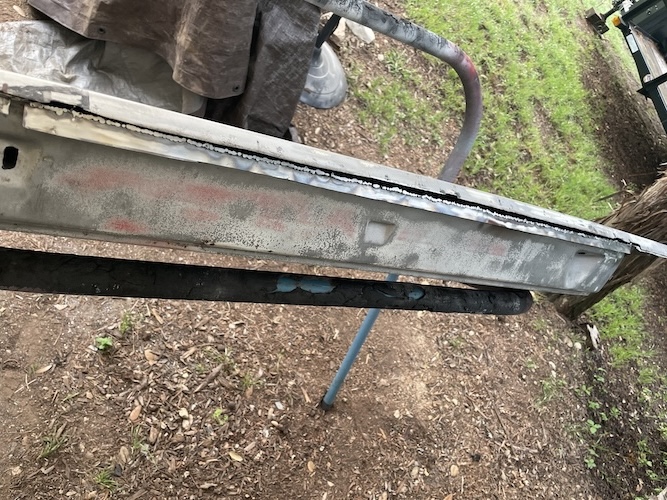 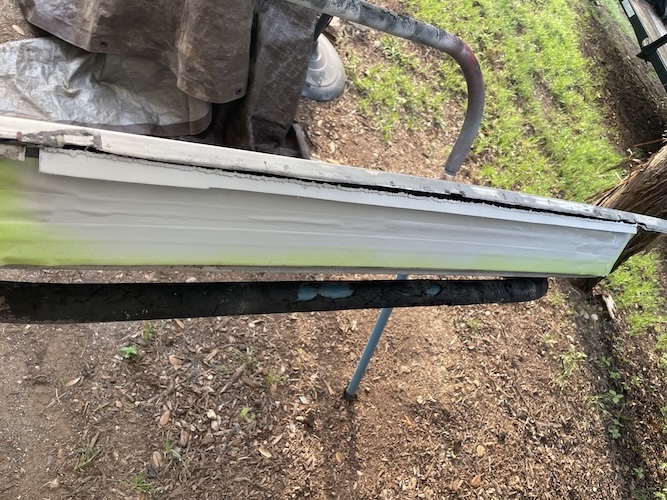 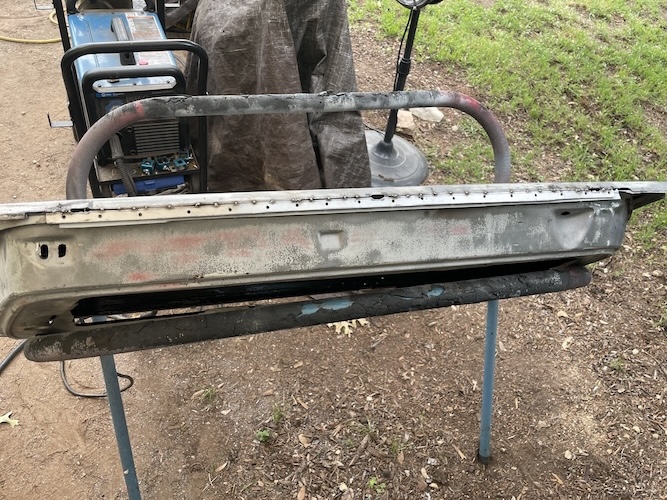 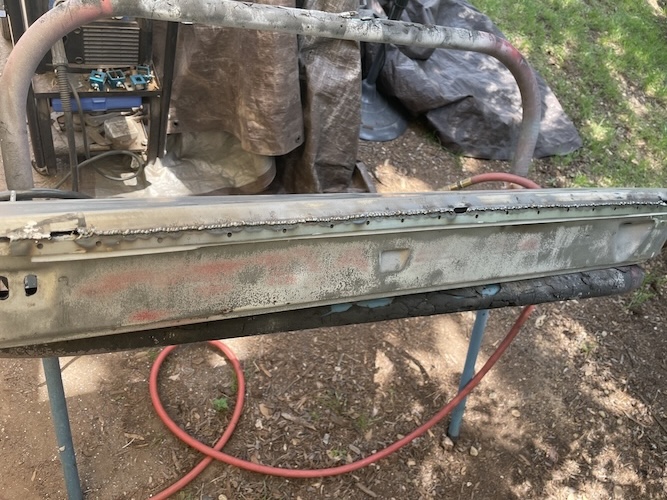 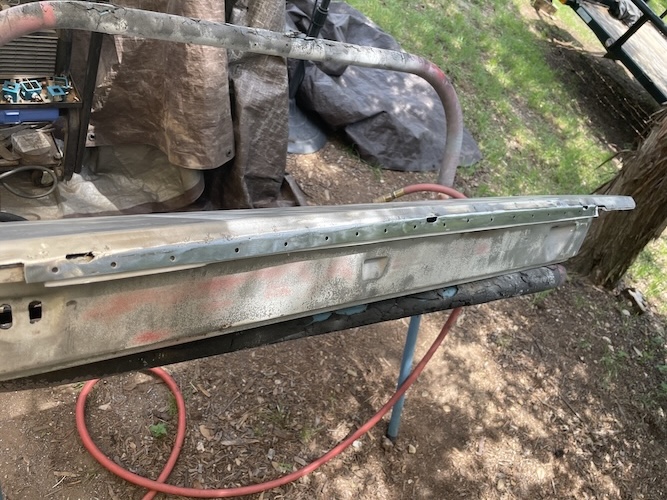 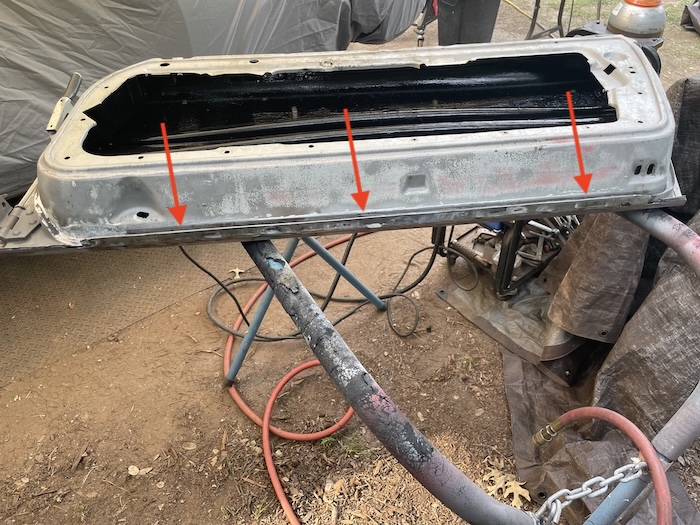 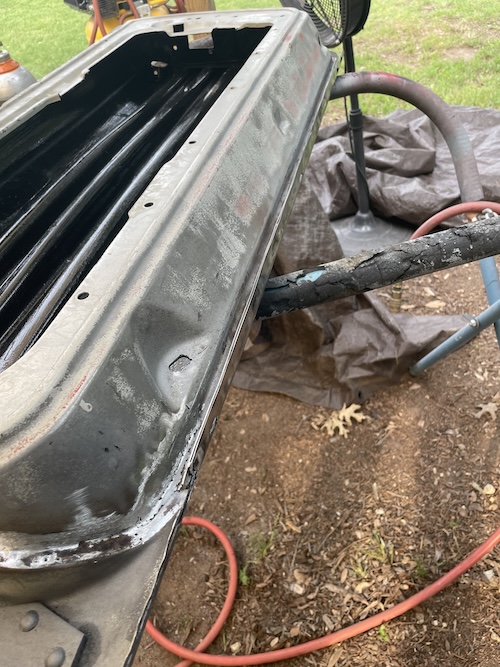 With this done, I moved to the last tasks of adding the seal channel back on the front of the inner door structure and [re]welding the part of the inner door that I had cut out at the beginning of my work. My plan here was to do both repairs simultaneously to allow more cooling time for my welds. I used 4 panel clamps to hold the cut-out metal in place (first pic). For the seal track, I had to create a long section in 22 gauge sheet metal, which mimiced the original and was super easy to cut from stock. After bending the piece in my brake, I returned out to the car and began lining up the track. I had to use sheet metal screws to hold everything down. After a bit of welding, I then used a 3 inch cutting wheel to grind down all the welds inside the track. No other tool could reaching into this tight space, BTW. I also slowly welded my way around the cut-out section. After grinding for a good bit, I called "good enough". Here's some photos of my work. Next up, is door fitment. Cheers! (IMG:style_emoticons/default/beerchug.gif) 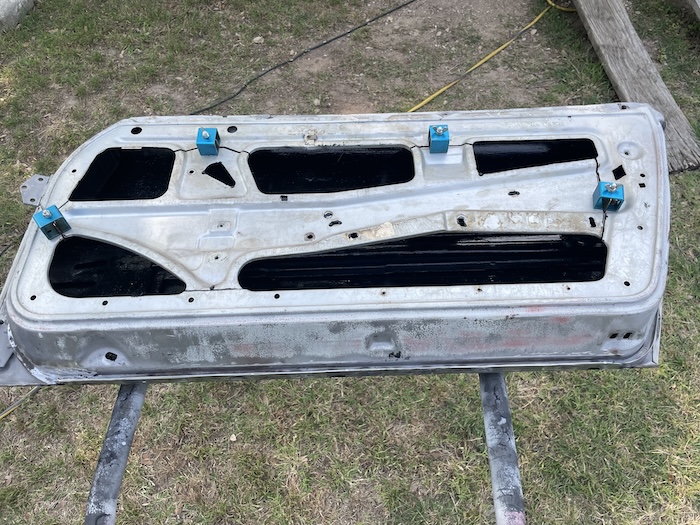 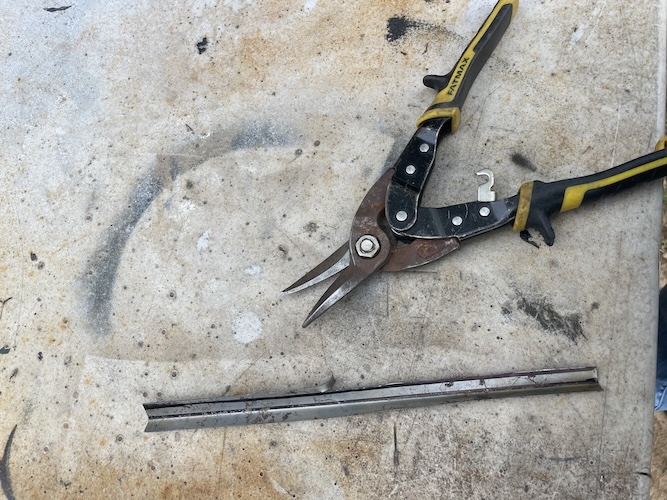 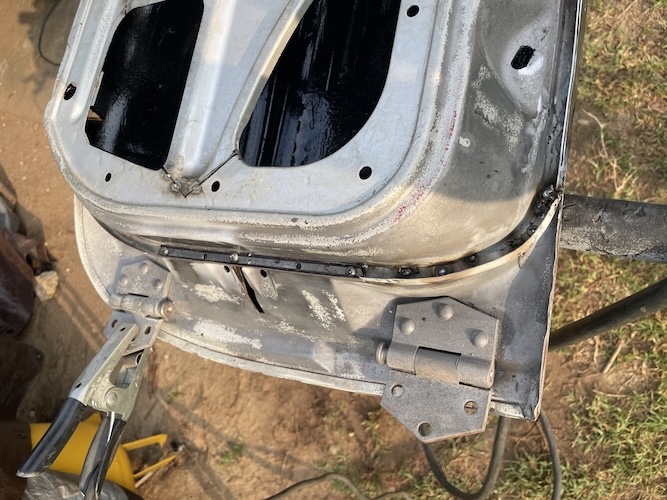 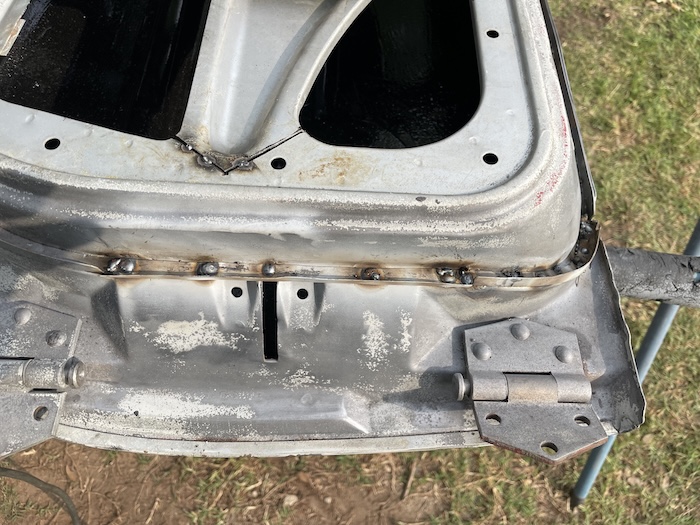 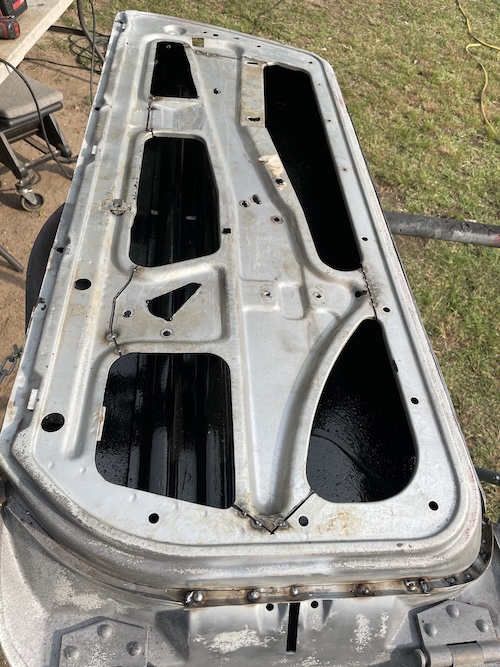 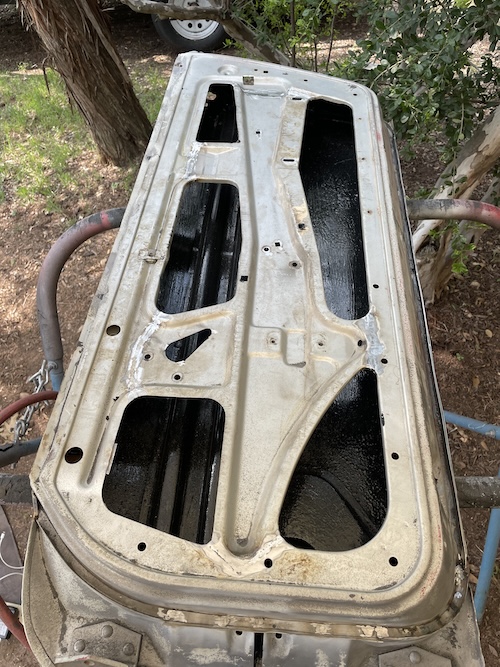 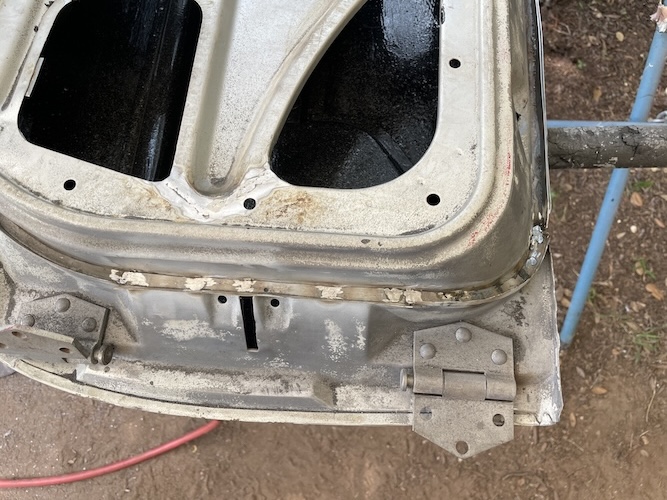 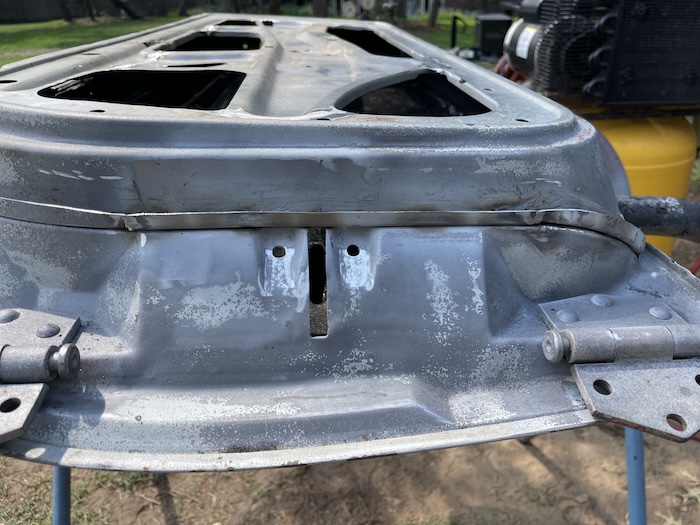 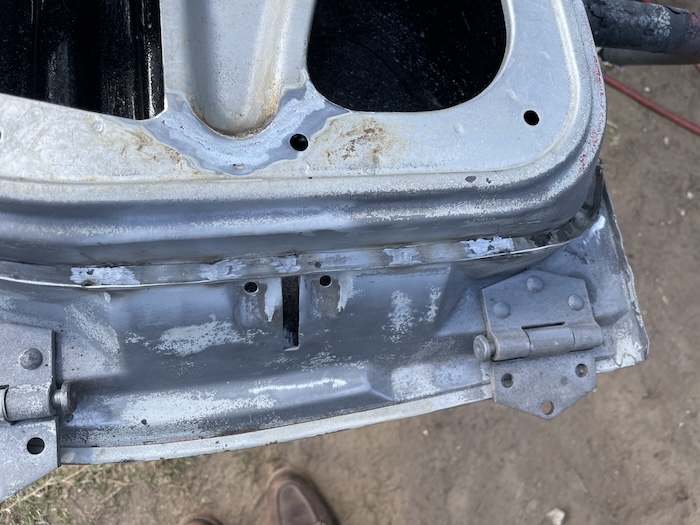 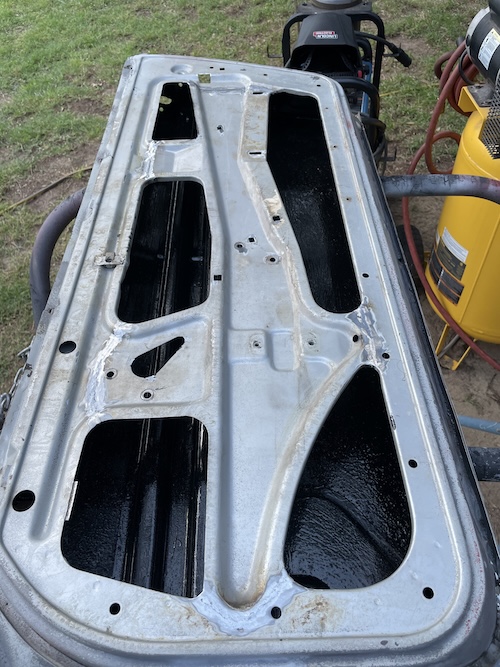 |
|
|
|
| friethmiller |
May 18 2025, 06:15 PM
Post
#492
|
|
Senior Member Group: Members Posts: 1,069 Joined: 10-February 19 From: Austin, TX Member No.: 22,863 Region Association: Southwest Region |
Passenger Side Door - Part 4 (5/18/2025):
Having removed and replaced both fenders, I figured on a bit of finesse to get proper door gaps. Add to that both doors came off another car. The main areas where the gaps were too tight were the lower front edge between the door and the front fender, and a larger portion of the door to the rear quarter panel. 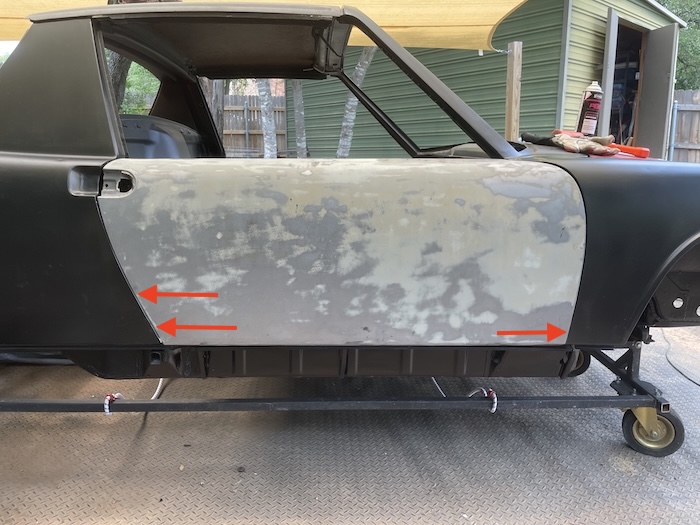 Lower Front Gap After carefully measuring down the fender, I determined my cut line and used the 3" cutting wheel to cut the outer skin of the door. Once free, it's just a matter of prying or tapping the edge closed to give the desired gap. After that, the grinder is used again to open up the cut line a bit, and then everything is welded closed. The following photos show this action. 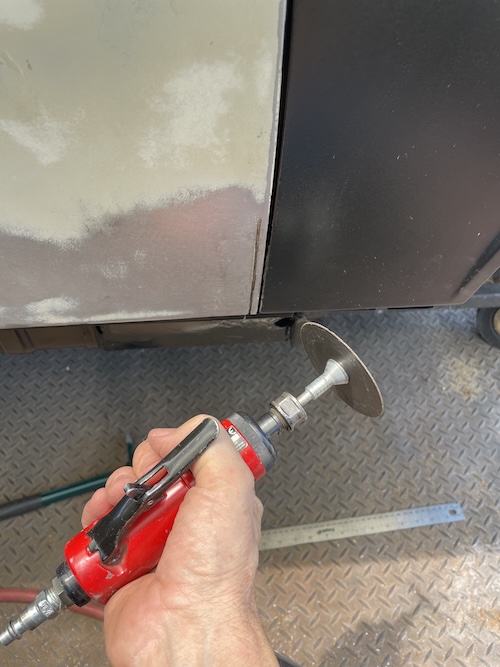 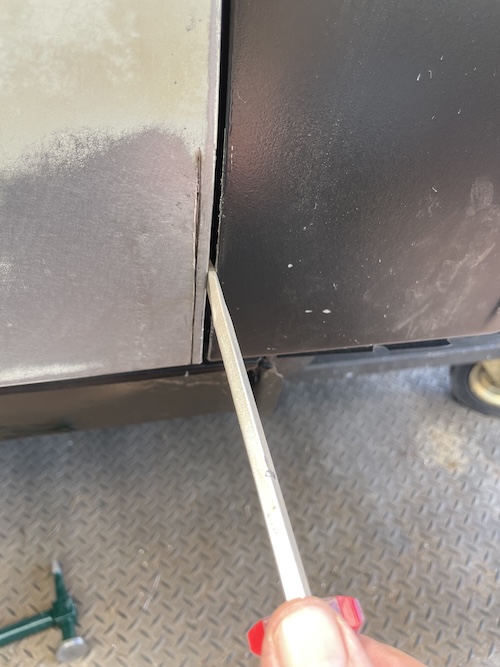 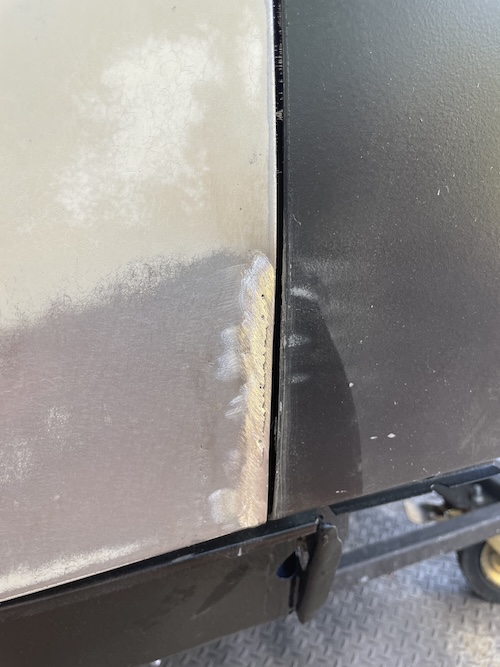 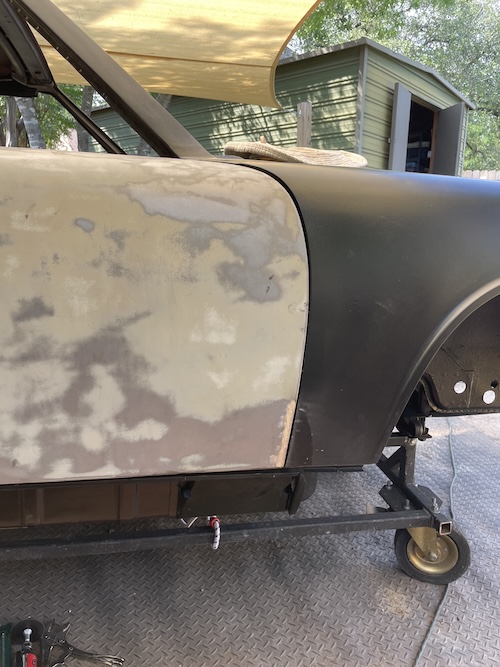 Back Gap The door gap on the backside was a bit worse. My cut ran up the majority of the door. Here's a few shots of the work to get a minimum of 3mm all the way down the door. 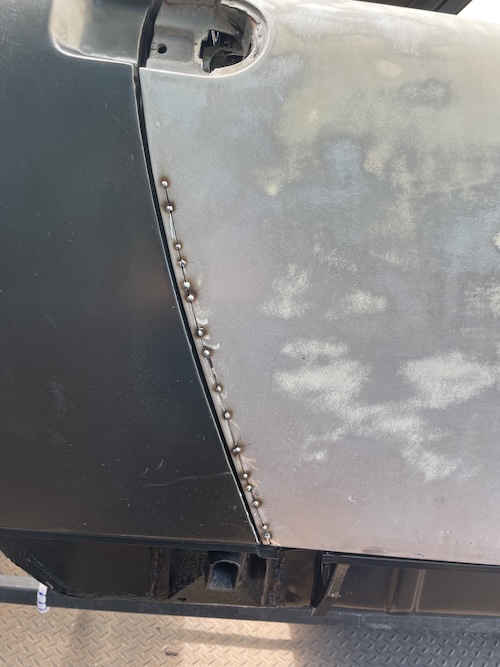 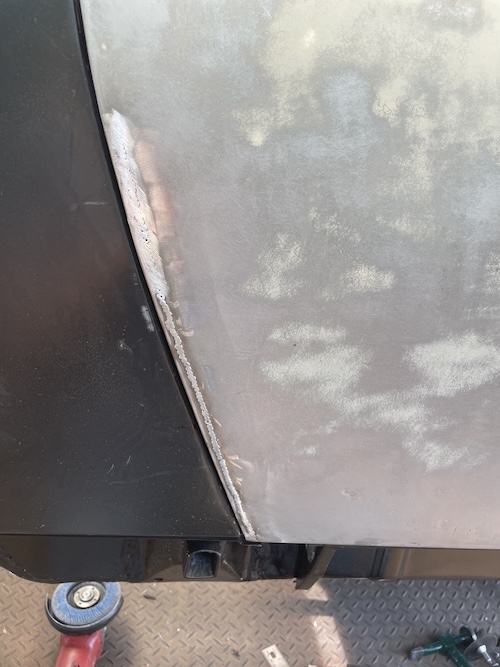 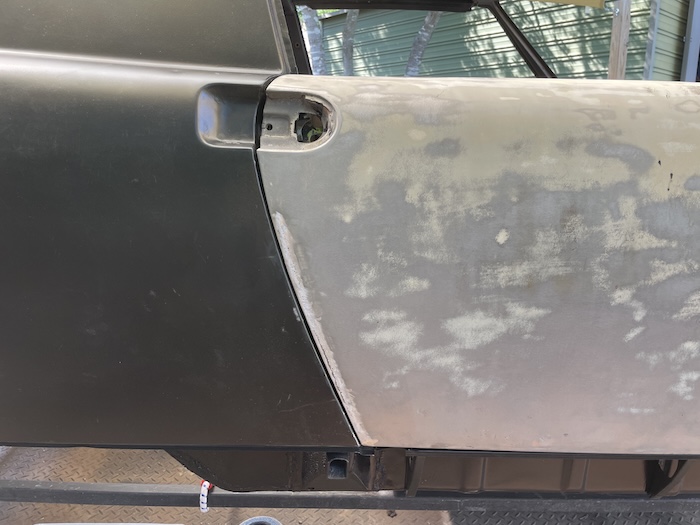 Non-stock Mirror Holes Since I had the welder out, this was the perfect opportunity to weld up those non-standard mirror holes. The last photo here shows the door with the gaps "loosened up". 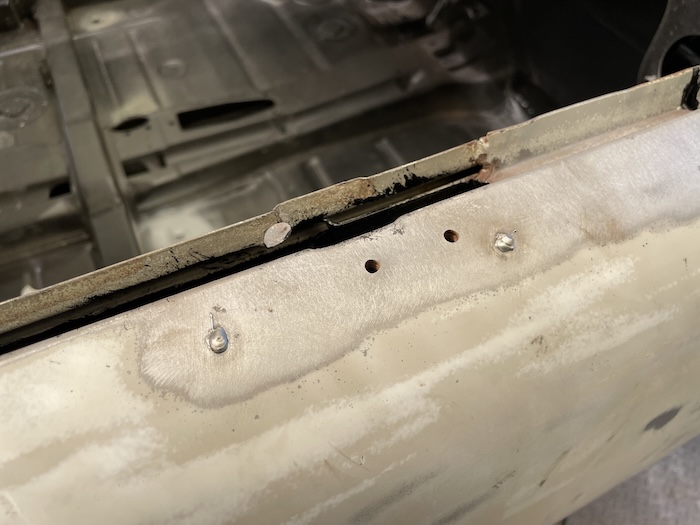 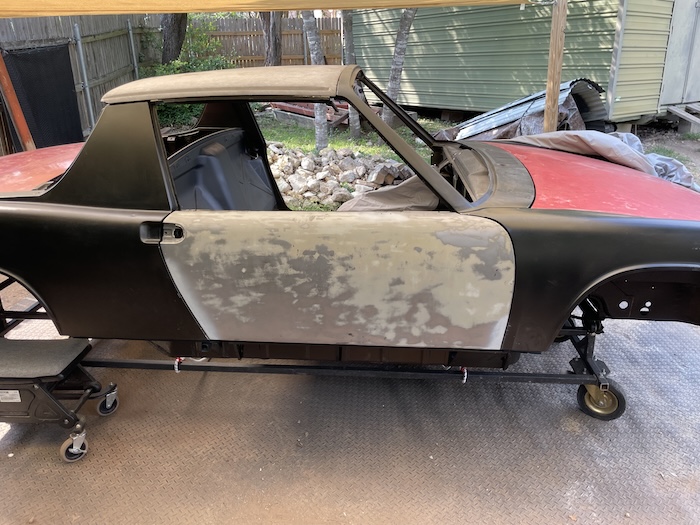 Closing Gaps The gaps at the top of the fender were a little large so decided to tighten them up a bit. To do this you have two options: 1) cut the fender skin edge [like before] but this time open up the cut and then weld it closed; or, 2) add metal to the edge. I decided on the later since a lot of the skin is brazed around the door handle which would require a lot of work. Adding metal is pretty easy to do. The following pictures show how I used a steel welding rod to add metal to the door edge - thus closing the gaps. This is a process of removing the flux from the rod and mig welding it to the car. You can actually trace down the edge as you go by bending the rod by hand using the heat from the previous weld. Note: the backside of the welding rod was also welded later - once the door was removed from the car. 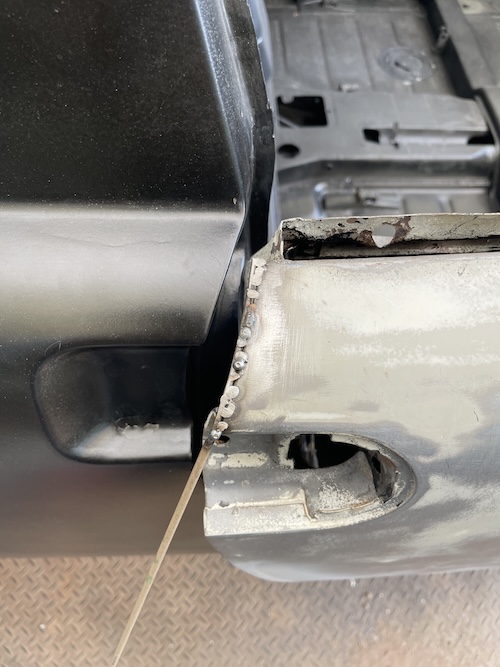 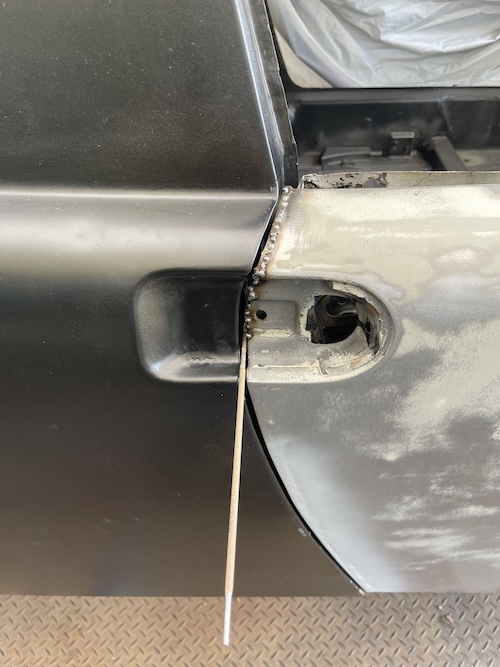 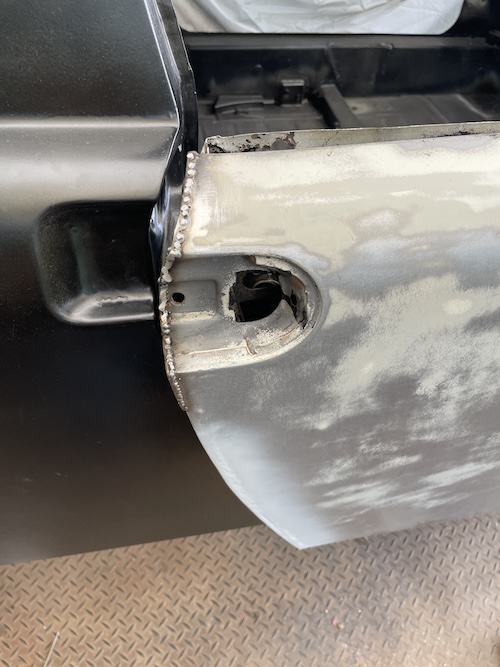  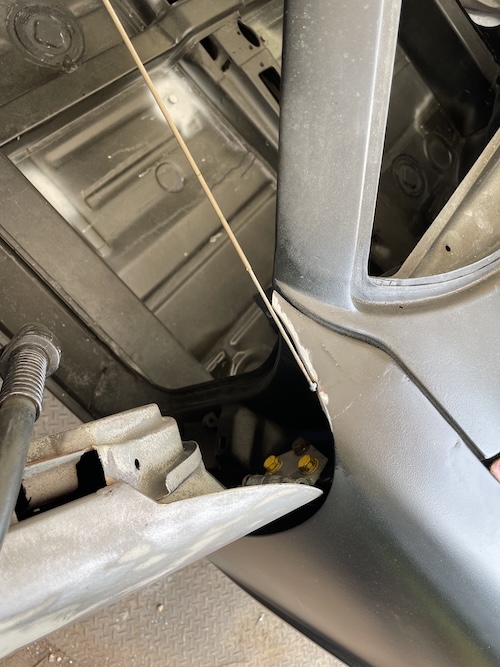  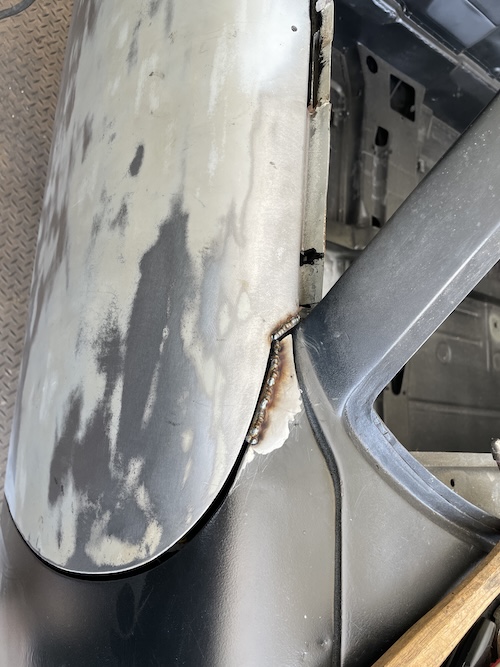 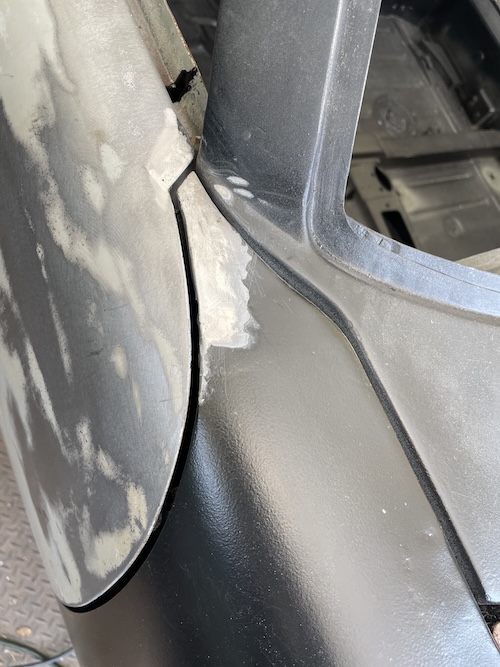 With all that accomplished, I had one more thing to fix. Since I had replaced the door striker panel, which was a little too wide, it caused 5mm overhang at the bottom of the rear quarter panel. This was fixed by cutting the rear fender and welding everything back-up. These pics show the adjustment. 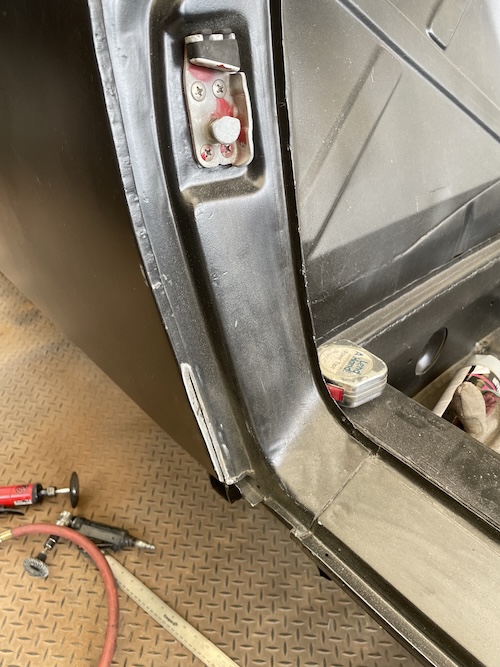 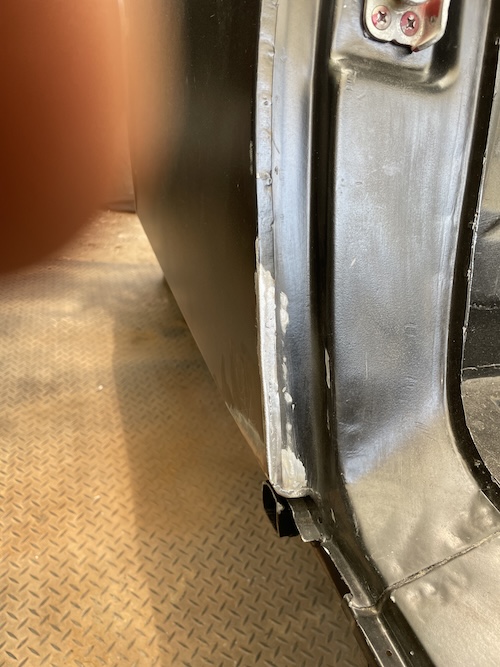  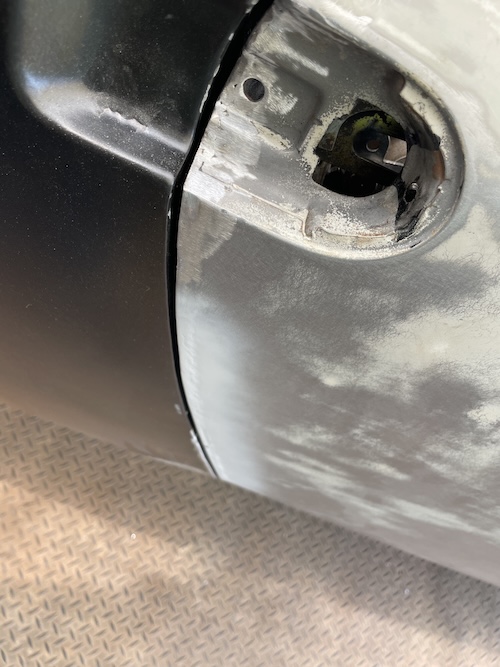 Feeling pretty satisfied with the door position and gaps, I removed the door and prep'd it for epoxy primer. Unfortunately, I was running short on time and paint. I had just enough to hit the backside of the door and the other small areas on the fenders. I will need to get more paint this week to paint the outside. Till then... Cheers! (IMG:style_emoticons/default/beerchug.gif) 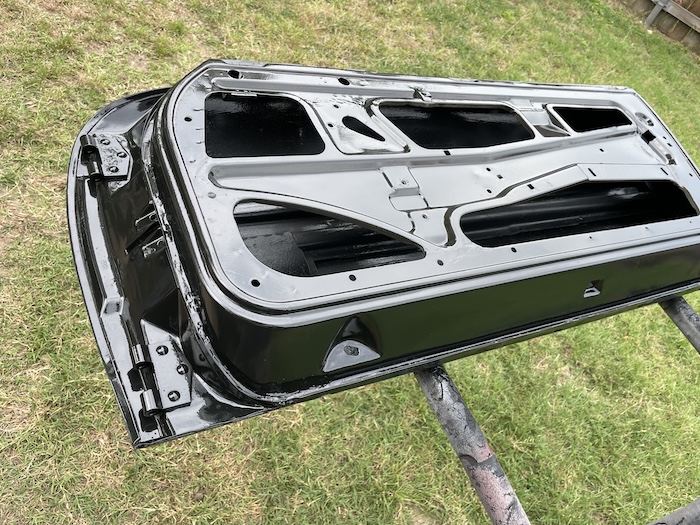 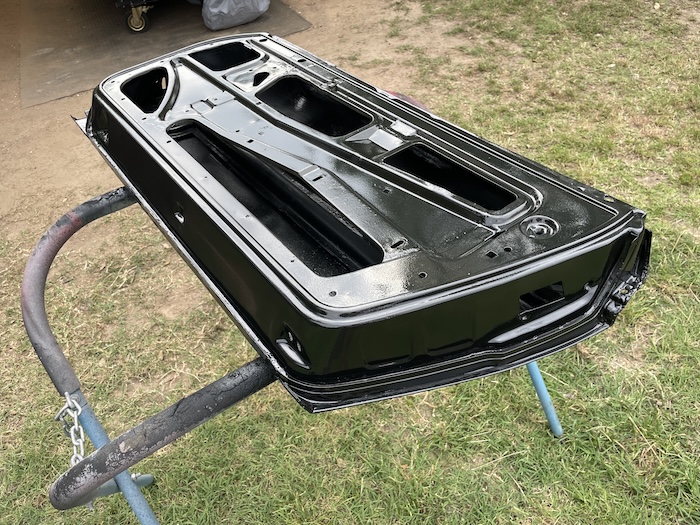 Attached image(s) 
|
|
|
|
| Dion |
May 19 2025, 07:07 AM
Post
#493
|
|
RN Group: Members Posts: 2,918 Joined: 16-September 04 From: Audubon,PA Member No.: 2,766 Region Association: MidAtlantic Region |
Nice work on the doors! That was quite a process.
|
|
|
|
| friethmiller |
May 19 2025, 08:59 AM
Post
#494
|
|
Senior Member Group: Members Posts: 1,069 Joined: 10-February 19 From: Austin, TX Member No.: 22,863 Region Association: Southwest Region |
QUOTE(Dion @ May 19 2025, 08:07 AM) Nice work on the doors! That was quite a process. Thanks! Yes, well some of this could have been avoided with a better mock up but it's hard to get everything welded-in in the exact position. We're talking mm here so I'm not too concerned with making a "custom fit". Actually, I enjoyed the process immensely. (IMG:style_emoticons/default/welder.gif) Plus, I'm starting to get climatized to the upper 90 degree weather. |
|
|
|
| friethmiller |
May 22 2025, 03:40 PM
Post
#495
|
|
Senior Member Group: Members Posts: 1,069 Joined: 10-February 19 From: Austin, TX Member No.: 22,863 Region Association: Southwest Region |
Passenger Side Door - Part 5 (5/22/2025):
Quick one: With more epoxy primer on hand, I was finally able to wrap up the passenger side door. Here's a few pics showing a quick "wetting" coat followed by 2 full coats. The last picture shows the door after several hours of dry-time. 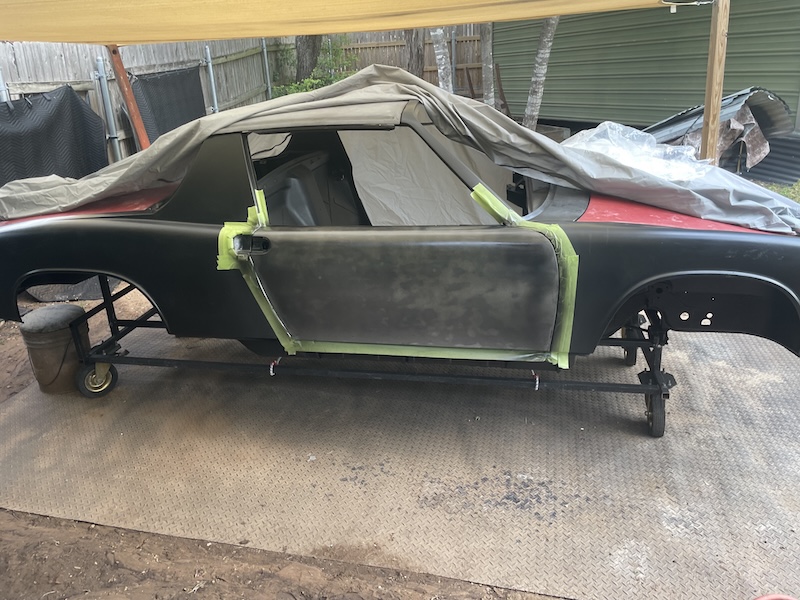 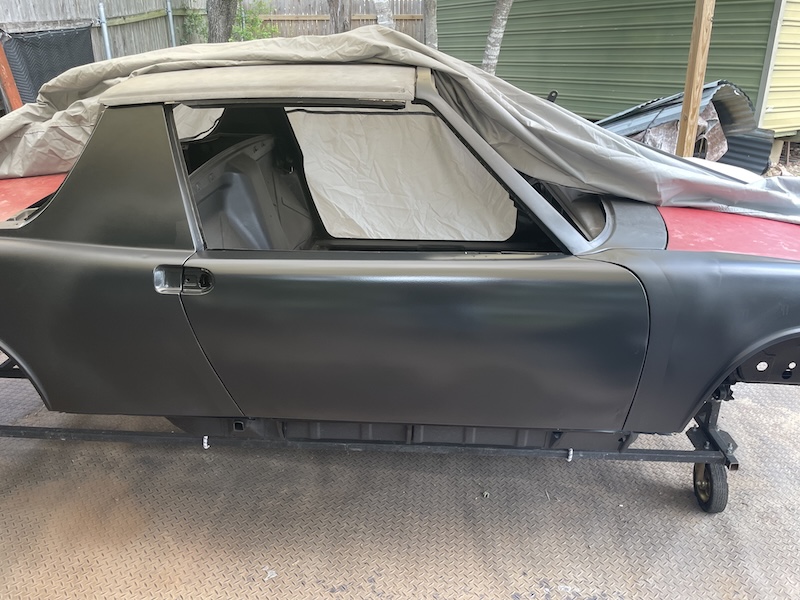 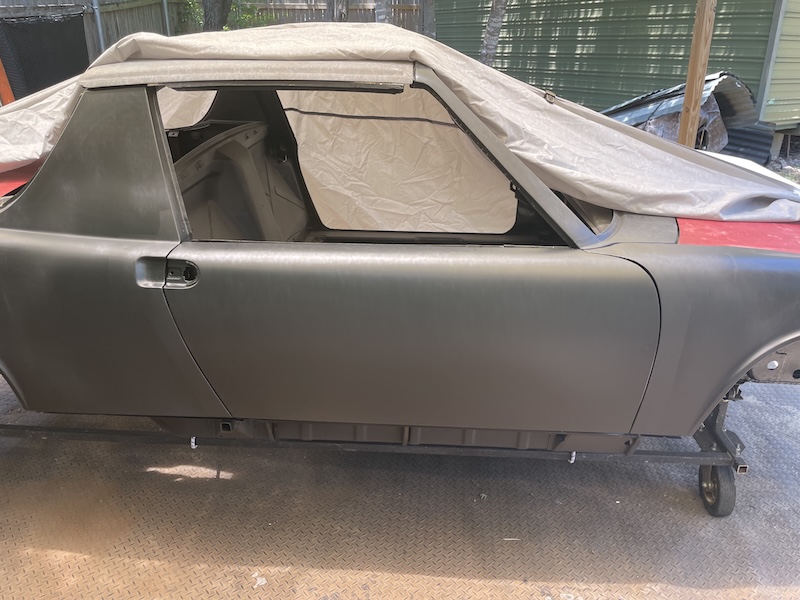 |
|
|
|
| Root_Werks |
May 22 2025, 04:33 PM
Post
#496
|
|
Village Idiot Group: Members Posts: 8,841 Joined: 25-May 04 From: About 5NM from Canada Member No.: 2,105 Region Association: Pacific Northwest |
Nice work on the gaps!
I wish I would have spent more time on my door gaps before painting. Drivers front was bumped and not really fixed correctly. The gap on the front of the drivers door shows it. |
|
|
|
| friethmiller |
May 22 2025, 05:44 PM
Post
#497
|
|
Senior Member Group: Members Posts: 1,069 Joined: 10-February 19 From: Austin, TX Member No.: 22,863 Region Association: Southwest Region |
QUOTE(Root_Werks @ May 22 2025, 05:33 PM) Nice work on the gaps! I wish I would have spent more time on my door gaps before painting. Drivers front was bumped and not really fixed correctly. The gap on the front of the drivers door shows it. Yeah, I hear ya on that! Every driver side door I've ever worked on has had the "catching the front fender" issue. Maybe it's related to the "hell hole" going out on the opposite side or something. (IMG:style_emoticons/default/confused24.gif) |
|
|
|
| friethmiller |
May 22 2025, 06:19 PM
Post
#498
|
|
Senior Member Group: Members Posts: 1,069 Joined: 10-February 19 From: Austin, TX Member No.: 22,863 Region Association: Southwest Region |
Driver Side Door - Part 1 (5/22/2025):
Here we go! I'm back on the driver side door. Having already stripped the top 4 layers of paint and removed the body filler from the bottom, I resumed work on the top half of the door. For this work I used a 4 1/2" paint/rust remover disk. This work is showed in pic #1. The second photo shows the small dents found below the body work and the area on the leading edge that caught the front fender at some point. 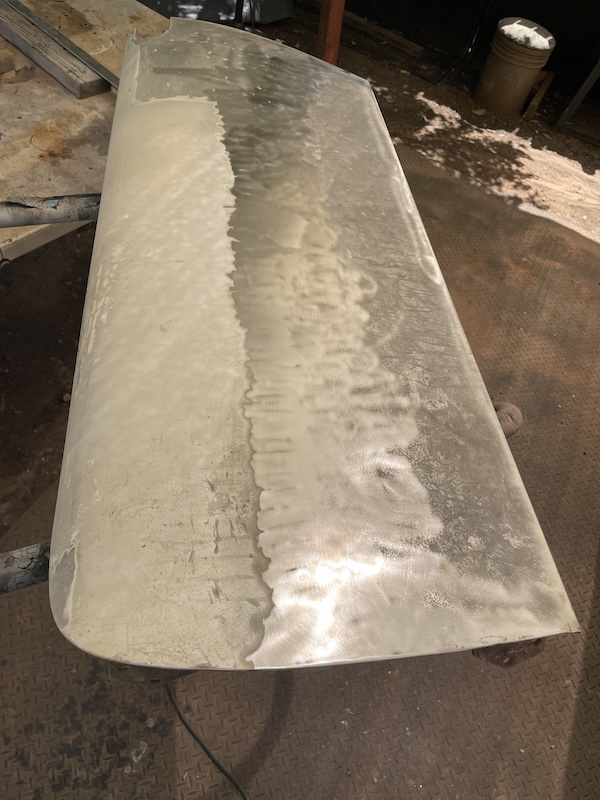 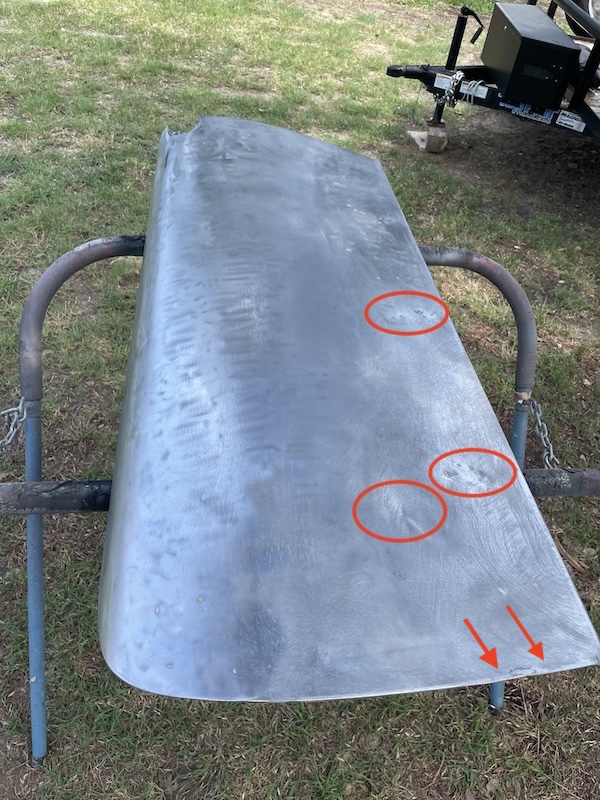 This 3rd photo shows the work to finalize the metal using an orbital sander. Followed-on by my favorite Phosphorus-based metal treatment. I can't believe there are no rust holes in this door. (IMG:style_emoticons/default/blink.gif) The other side isn't as good but, man, got lucky with this one. Really thankful I decided to save the doors from that parts car a few years back. (IMG:style_emoticons/default/aktion035.gif) 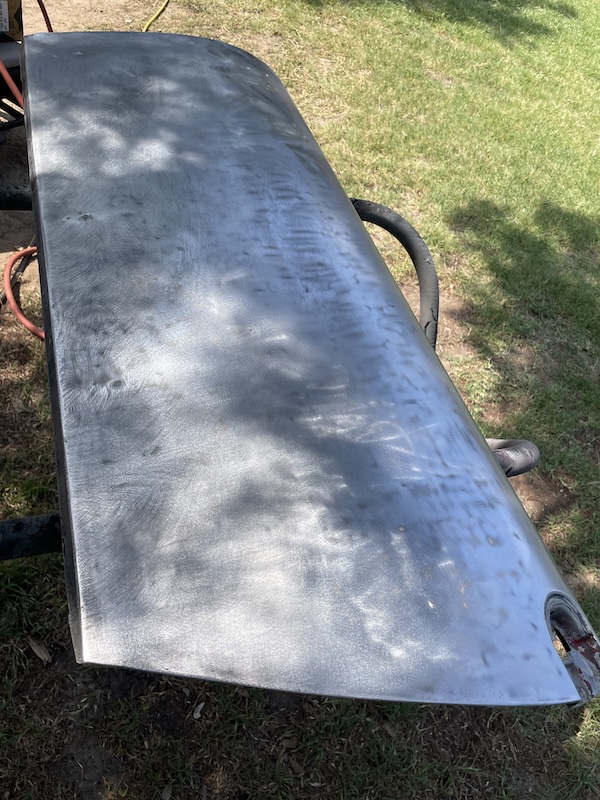 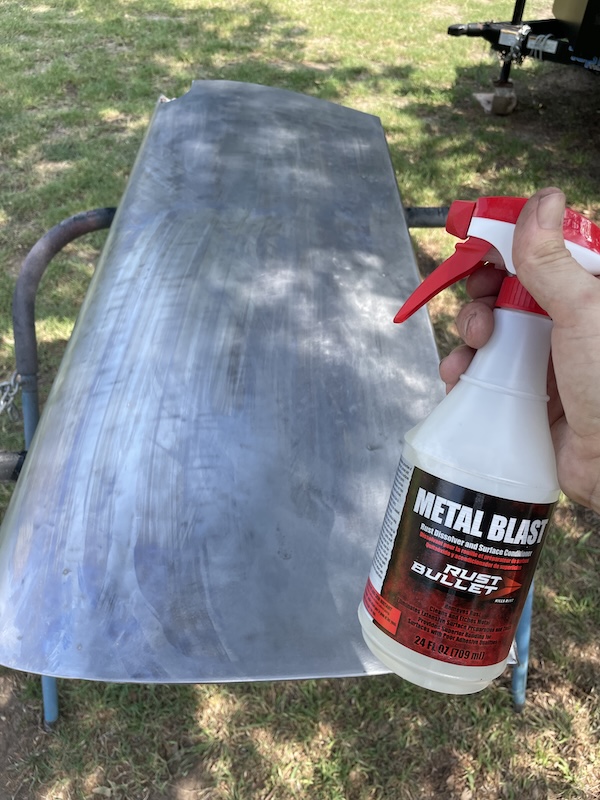 FYI, I'm out this weekend but back at it again in June. Happy Memorial Day! (IMG:style_emoticons/default/flag.gif) (IMG:style_emoticons/default/beerchug.gif) |
|
|
|
| mgarrison |
May 23 2025, 09:13 AM
Post
#499
|
|
Member Group: Members Posts: 398 Joined: 14-February 20 From: Chandler, AZ Member No.: 23,922 Region Association: Southwest Region |
This feels more like a resurrection than a restoration - amazing patience and skills! (IMG:style_emoticons/default/pray.gif)
|
|
|
|
| friethmiller |
May 24 2025, 05:09 AM
Post
#500
|
|
Senior Member Group: Members Posts: 1,069 Joined: 10-February 19 From: Austin, TX Member No.: 22,863 Region Association: Southwest Region |
QUOTE(mgarrison @ May 23 2025, 10:13 AM) This feels more like a resurrection than a restoration - amazing patience and skills! (IMG:style_emoticons/default/pray.gif) Thanks Mike! It feels like a lifetime of rusty metal repair (IMG:style_emoticons/default/welder.gif) This LE will drive again someday soon. (IMG:style_emoticons/default/shades.gif) |
|
|
|
|
3 User(s) are reading this topic (2 Guests and 0 Anonymous Users)
1 Members: friethmiller

|
Lo-Fi Version | Time is now: 10th November 2025 - 06:19 PM |
Invision Power Board
v9.1.4 © 2025 IPS, Inc.