|
|
|
Porsche, and the Porsche crest are registered trademarks of Dr. Ing. h.c. F. Porsche AG.
This site is not affiliated with Porsche in any way. Its only purpose is to provide an online forum for car enthusiasts. All other trademarks are property of their respective owners. |
|
|

  |

| friethmiller |
 May 28 2025, 07:54 AM May 28 2025, 07:54 AM
Post
#501
|
|
Senior Member  Group: Members Posts: 1,069 Joined: 10-February 19 From: Austin, TX Member No.: 22,863 Region Association: Southwest Region |
Driver Side Door - Part 2 (5/27/2025):
Starting in on the back side of the door. First up is removing the hinges. I like removing these, if for nothing else, in order to knock off 50 years of rust and grime. A small amount of grease would go a long way too. Photos show the use of a MAPP torch and a punch to remove the hinge pins. 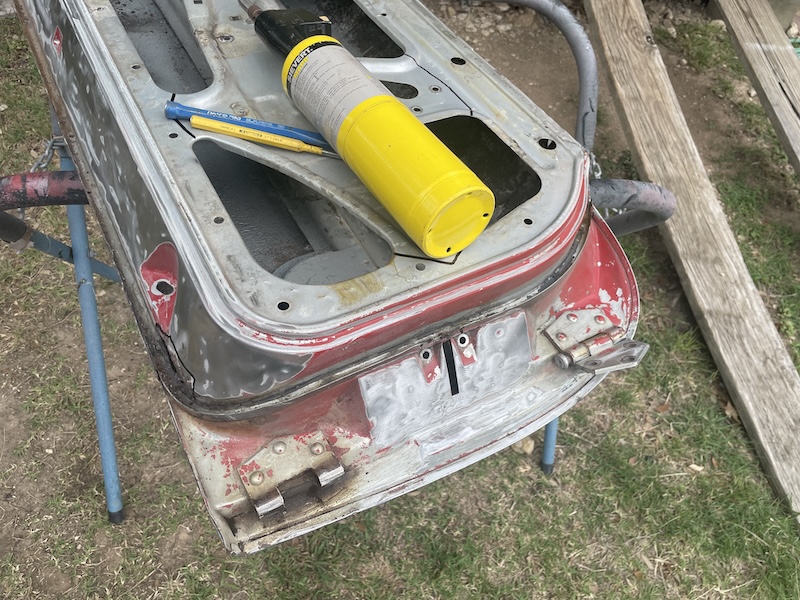 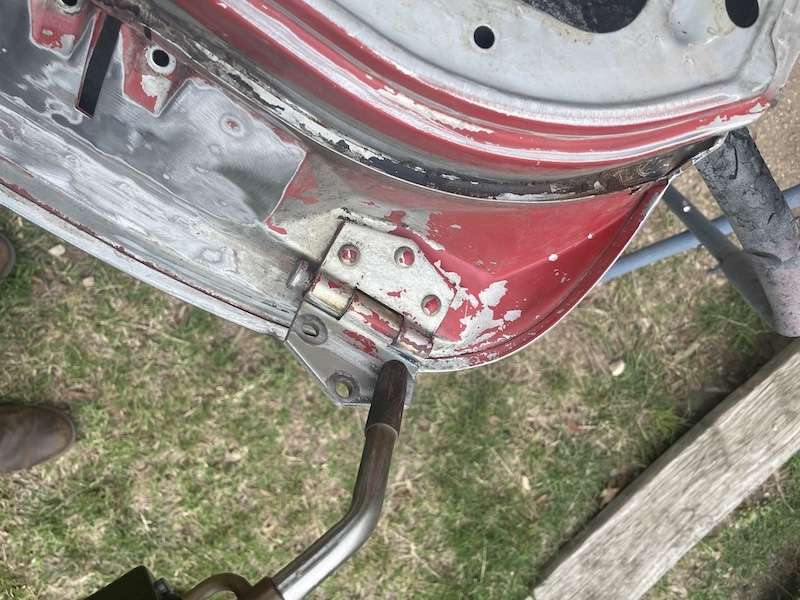 Next, I'm diving straight into removing part of the door. For this one, I thought I try removing the bottom section. I did this on my previous 914 and it worked out well. No right answer here. It's just a matter of getting access inside the door. My thinking was that with the dents in the bottom half, I might get in behind some of the support structures to pound out a few of these low spots. Here I've made three main cuts - avoiding any recesses in the door structure. Final cut was down about 90% of the door edge. This metal is crusty and needs to be replaced just like the other door. 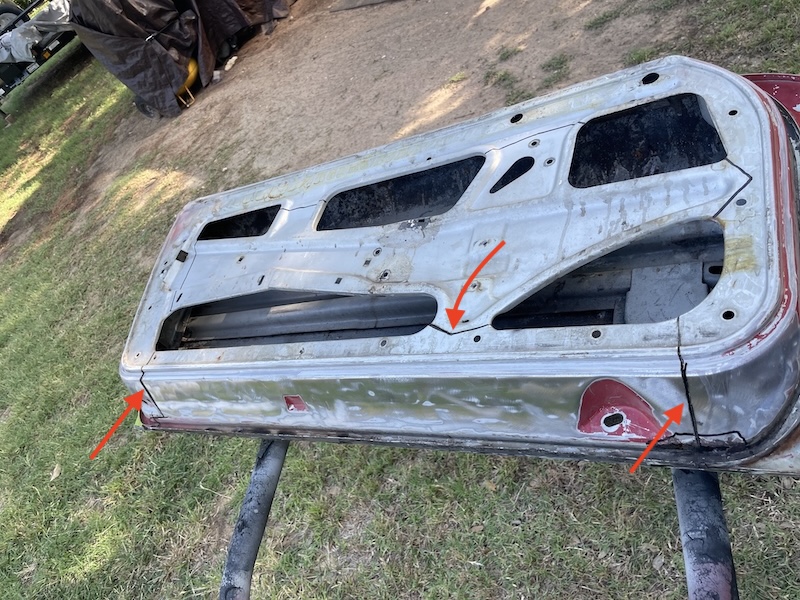  Looking inside you can see the rust. Not too bad but it needs to be removed. Here you can see at least 4 spots where somebody has done some heat-shrinking on the bottom half of this door. Not a bad thing. I guess the dents must have been much worse. You may notice that I screwed up and cut over a little too far on one side. Clipped off the edge of an internal structure. I'll will fix this prior to reassembly.  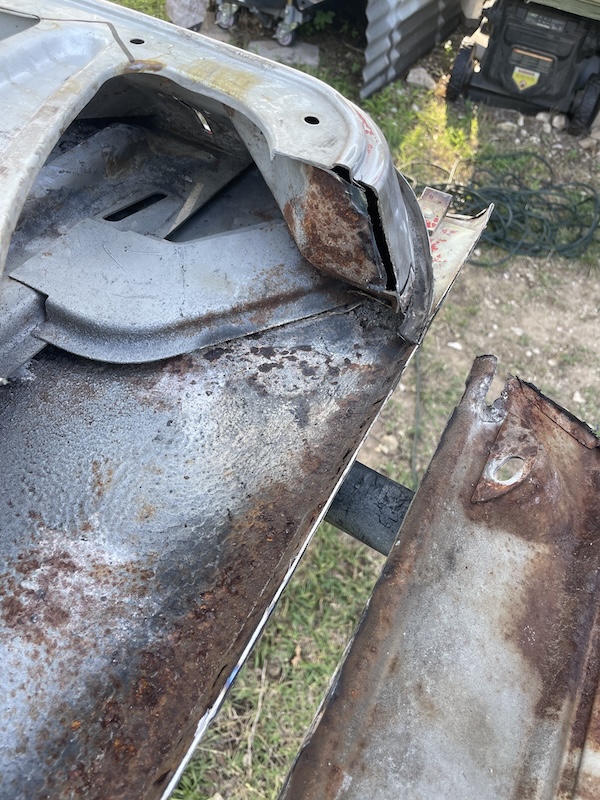 After flipping the door over, I was able to get one of my flappers in between the support and one of the low areas to work as a dolly. I could now push up from below and slap the surrounding highs to bring out a lot of this initial dent. After finding a marker, I continued a bit to see how the metal on this lower half of the door looked. Not bad if you ask me. I was able to get a good bit out and identify areas that need additional work. Going to get all my body tools out next and see what I can do. Stay tuned... 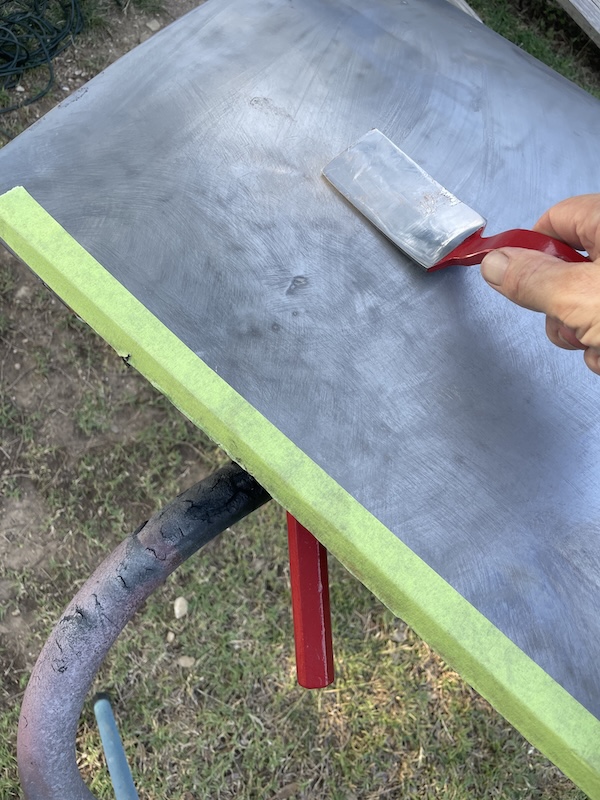 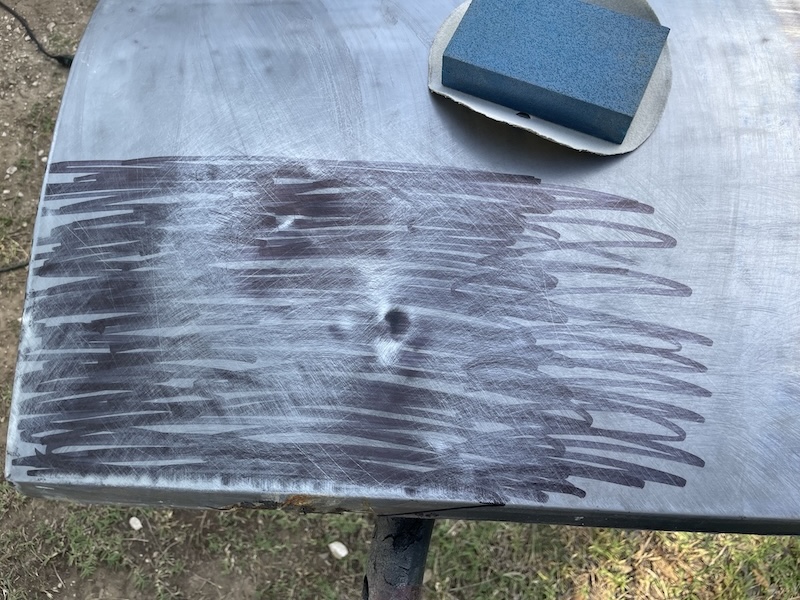 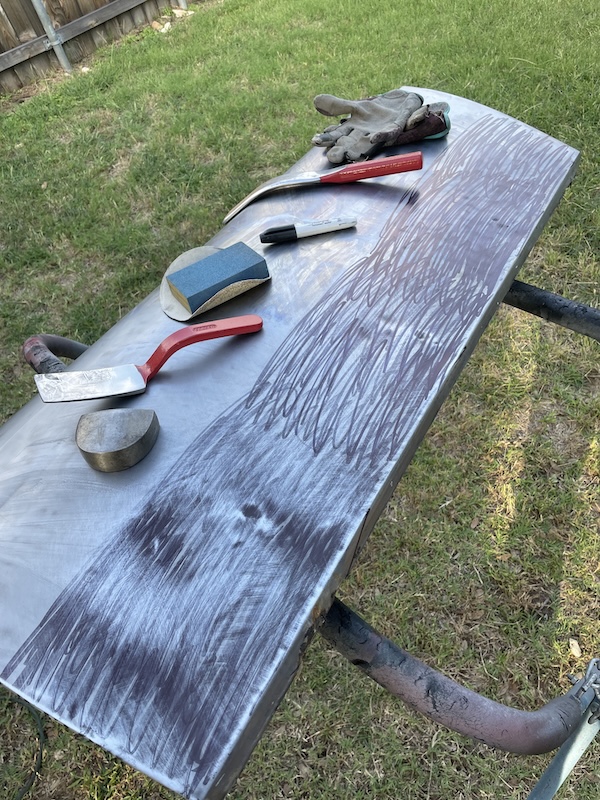 |
   |

 
|
| Puebloswatcop |
May 28 2025, 08:21 AM
Post
#502
|
|
Senior Member Group: Members Posts: 1,678 Joined: 27-December 14 From: Mineola, Texas Member No.: 18,258 Region Association: Southwest Region |
Looking good Fred. I love to watch you work and seeing the progress.
|
|
|
|
| friethmiller |
May 28 2025, 10:57 AM
Post
#503
|
|
Senior Member Group: Members Posts: 1,069 Joined: 10-February 19 From: Austin, TX Member No.: 22,863 Region Association: Southwest Region |
QUOTE(Puebloswatcop @ May 28 2025, 09:21 AM)  Looking good Fred. I love to watch you work and seeing the progress. Thanks Kevin. I see we're both doing doors at the same time. Good luck with yours (IMG:style_emoticons/default/beer.gif) |
|
|
|
| bkrantz |
May 28 2025, 08:30 PM
Post
#504
|
|
914 Guru Group: Members Posts: 8,530 Joined: 3-August 19 From: SW Colorado Member No.: 23,343 Region Association: Rocky Mountains |
Nice.
I never had enough patience to keep slapping until the metal was straight enough to avoid a skim coat of bondo, but getting the shape within 98% is a worthy goal. |
 |
|
| friethmiller |
May 29 2025, 07:48 AM
Post
#505
|
|
Senior Member Group: Members Posts: 1,069 Joined: 10-February 19 From: Austin, TX Member No.: 22,863 Region Association: Southwest Region |
QUOTE(bkrantz @ May 28 2025, 09:30 PM) Nice. I never had enough patience to keep slapping until the metal was straight enough to avoid a skim coat of bondo, but getting the shape within 98% is a worthy goal. (IMG:style_emoticons/default/agree.gif) Based on the amount of bondo that was on the panel (see photos), I think we are good for a bit of "slapp'n". A skim coat of bondo is fine with me. Let's make it the goal here. 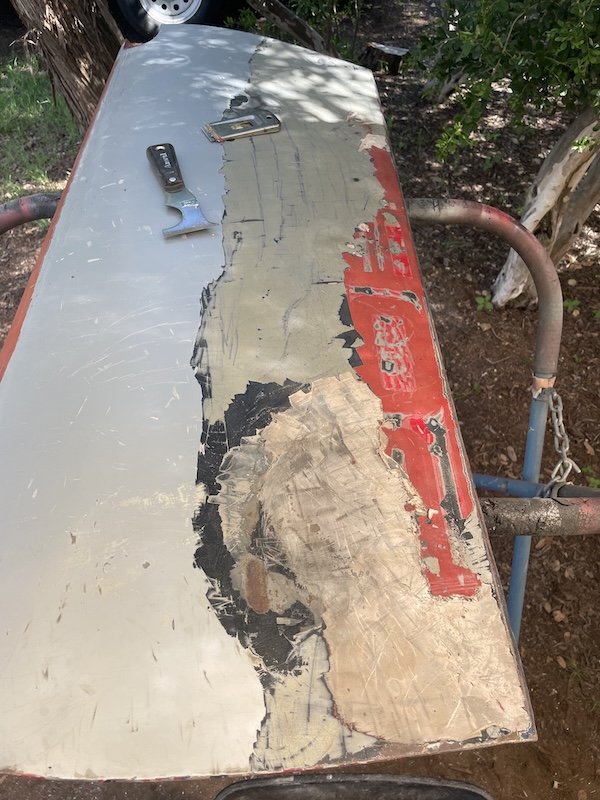 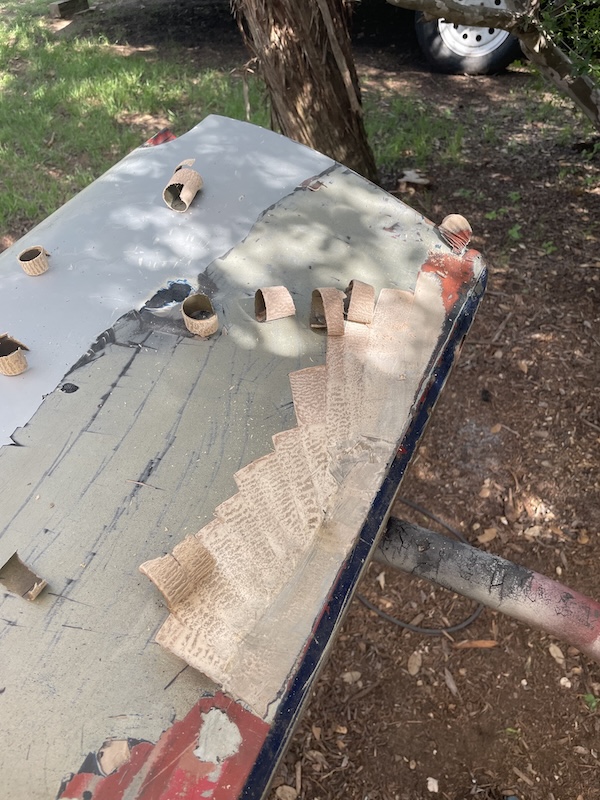 |
|
|
|
| gereed75 |
May 29 2025, 08:59 AM
Post
#506
|
|
Senior Member Group: Members Posts: 1,404 Joined: 19-March 13 From: Pittsburgh PA Member No.: 15,674 Region Association: North East States |
I have a cheap small 4 1/2 shrinking disc that I use on a 4” grinder that works fantastic on this kind of stuff. 10 seconds or so followed by a quick water squirt takes those local highs out quickly and tightens the panel - like magic!!
|
|
|
|
| friethmiller |
May 29 2025, 10:39 AM
Post
#507
|
|
Senior Member Group: Members Posts: 1,069 Joined: 10-February 19 From: Austin, TX Member No.: 22,863 Region Association: Southwest Region |
QUOTE(gereed75 @ May 29 2025, 09:59 AM) I have a cheap small 4 1/2 shrinking disc that I use on a 4” grinder that works fantastic on this kind of stuff. 10 seconds or so followed by a quick water squirt takes those local highs out quickly and tightens the panel - like magic!! Yes! That's the plan. I've got everything ready to go - just waiting on all this rainy weather to clear. |
|
|
|
| 930cabman |
May 30 2025, 04:40 PM
Post
#508
|
|
Advanced Member Group: Members Posts: 4,323 Joined: 12-November 20 From: Buffalo Member No.: 24,877 Region Association: North East States |
QUOTE(friethmiller @ May 29 2025, 10:39 AM) QUOTE(gereed75 @ May 29 2025, 09:59 AM) I have a cheap small 4 1/2 shrinking disc that I use on a 4” grinder that works fantastic on this kind of stuff. 10 seconds or so followed by a quick water squirt takes those local highs out quickly and tightens the panel - like magic!! Yes! That's the plan. I've got everything ready to go - just waiting on all this rainy weather to clear. something new to me, would a torch get the same result? excuse my ignorance |
|
|
|
| friethmiller |
Jun 1 2025, 07:37 PM
Post
#509
|
|
Senior Member Group: Members Posts: 1,069 Joined: 10-February 19 From: Austin, TX Member No.: 22,863 Region Association: Southwest Region |
QUOTE(930cabman @ May 30 2025, 05:40 PM) QUOTE(friethmiller @ May 29 2025, 10:39 AM) QUOTE(gereed75 @ May 29 2025, 09:59 AM) I have a cheap small 4 1/2 shrinking disc that I use on a 4” grinder that works fantastic on this kind of stuff. 10 seconds or so followed by a quick water squirt takes those local highs out quickly and tightens the panel - like magic!! Yes! That's the plan. I've got everything ready to go - just waiting on all this rainy weather to clear. something new to me, would a torch get the same result? excuse my ignorance Sure, but I think the torch is better for bigger stuff. The disc is really good as you get things closer. You'll see shortly what I had to do on mine this weekend. Currently uploading photos. (IMG:style_emoticons/default/type.gif) |
|
|
|
| friethmiller |
Jun 1 2025, 08:39 PM
Post
#510
|
|
Senior Member Group: Members Posts: 1,069 Joined: 10-February 19 From: Austin, TX Member No.: 22,863 Region Association: Southwest Region |
Driver Side Door - Part 3 (5/31/2025):
Saturday was the day that I had set aside to finish straightening out this door panel. However, the backing pad that went behind the shrinking disc on my grinder, that I had ordered, did not arrive in time. I attempted to use the disc without it but the grinder's nut was proud of the disc which only allowed the outer edge of the disc to make contact with the door metal. The result was insufficient friction so I was unable to heat the metal to the required temperatures. Instead, I was forced to use a hammer & dolly. However, I did use my torch to heat up the largest dent in the panel and lever it up with my large slapper from behind. Previous metal work done years ago attempted to do this but with all the support structure in these later doors, you just can’t get in behind a lot of these dents. The only reason, I had better access was the fact that I cut out the bottom half of the inner door. The first photo here shows the low areas I attacked first. The top low was the largest and this was later heated & and pushed up. The rest of the photos here show my work down the panel. It may be hard to tell but the lower section of this door is much better than before - see final photo. While not perfect, it will require a lot less filler to straighten out. After all this work, the door was cleaned again and the metal re-etched. Note the extreme scratches left by the previous work. Another reason to use filler here. 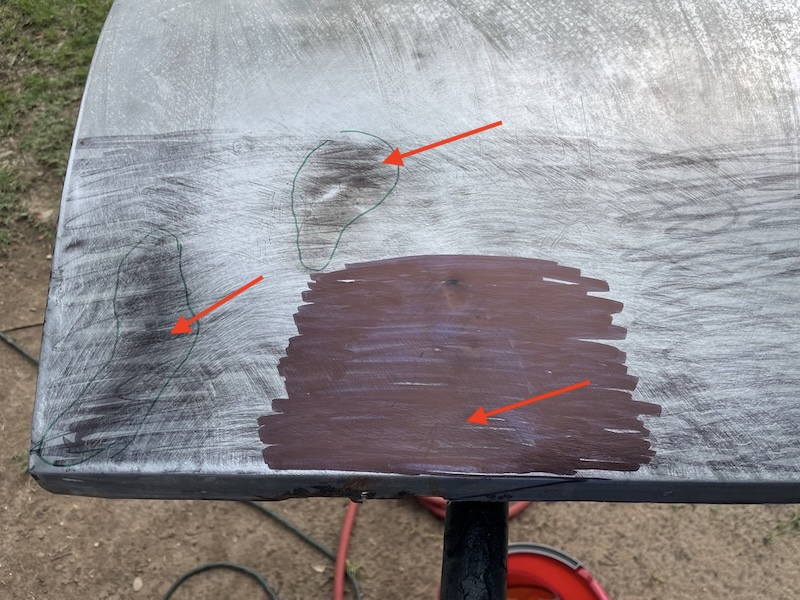 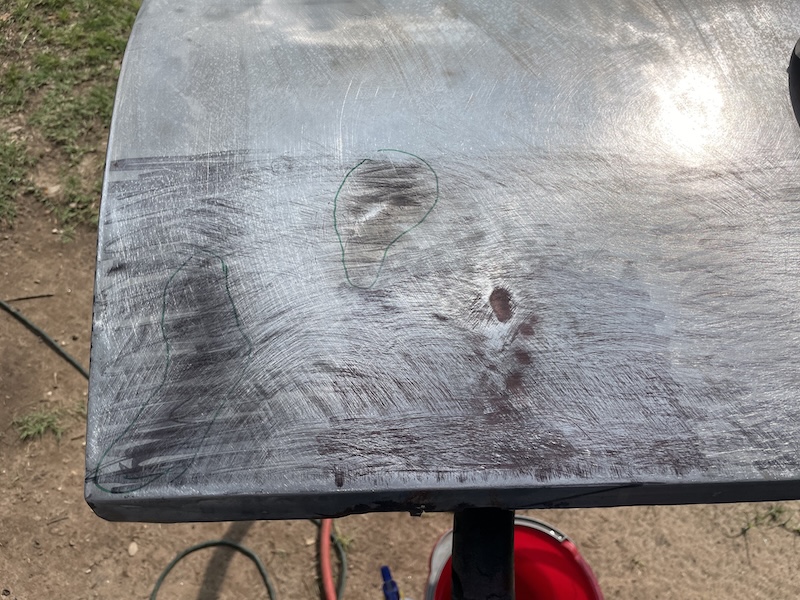 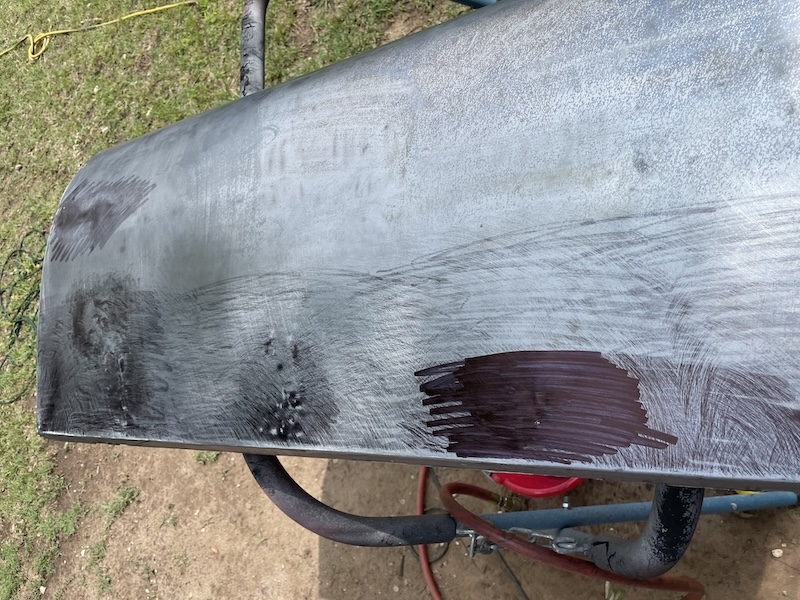 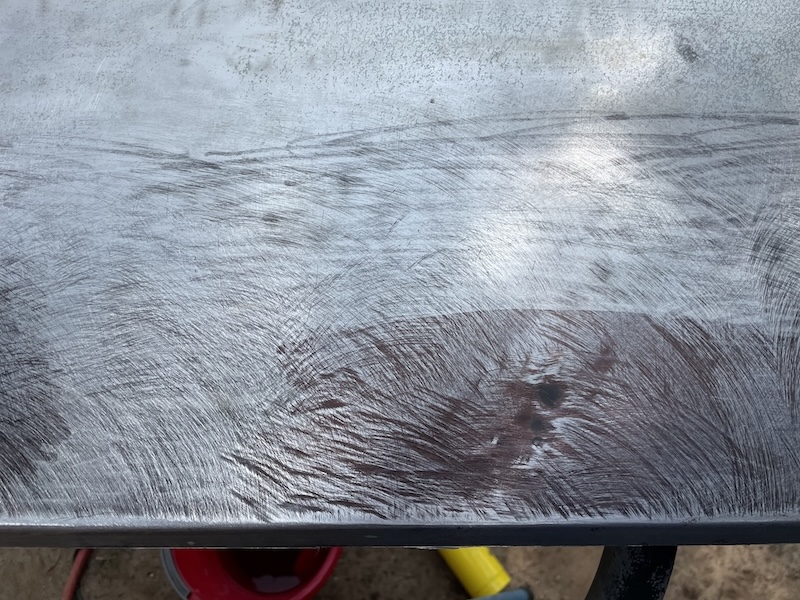 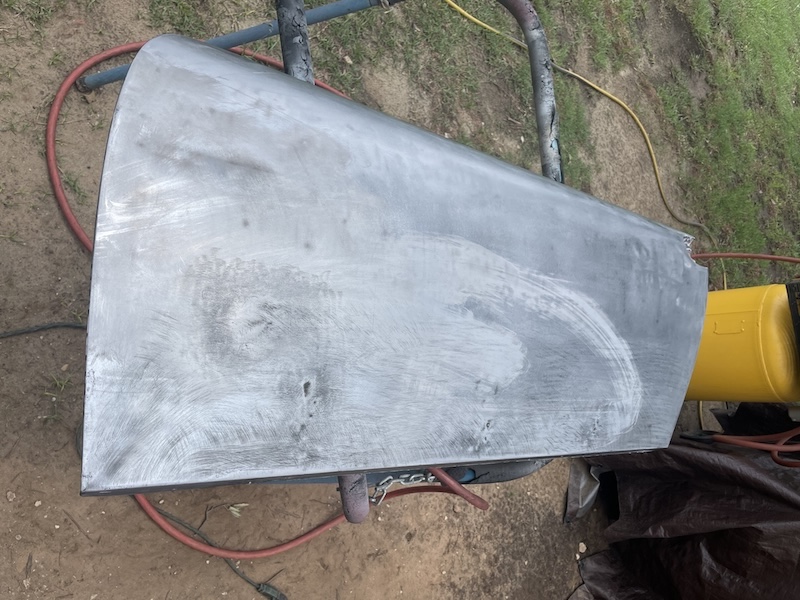 Next, Glass-blasting! My least favorate thing to do on a warm sunny Texas day. Placed a tarp down and went after it. Goal was to get the hard to reach areas on the inside front and back sides, followed by the inside of the door itself. In the end I was covered with glass, sweaty, and glad to be done with all that. Goal was to get the majority of the heavy rust that was inside the door. I will be using Rust Bullet epoxy to seal everything at the end. Here are two photos of the blasting process. 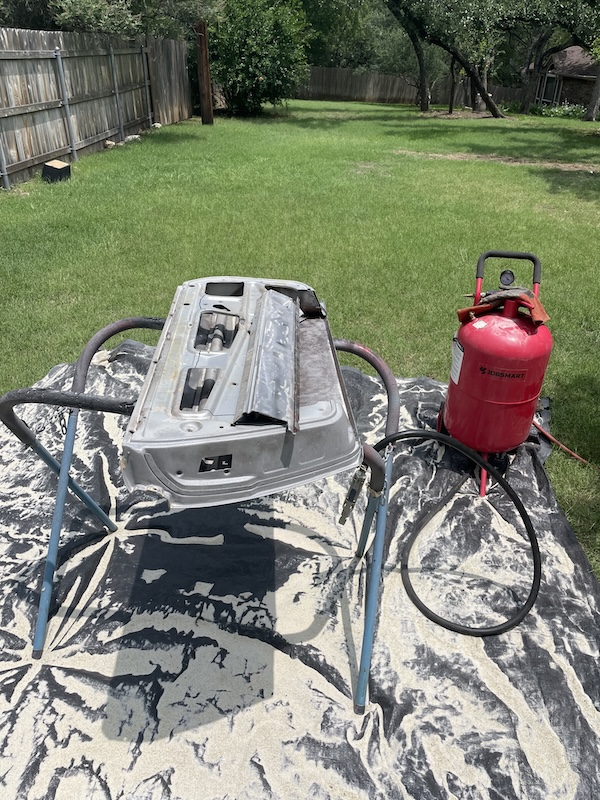 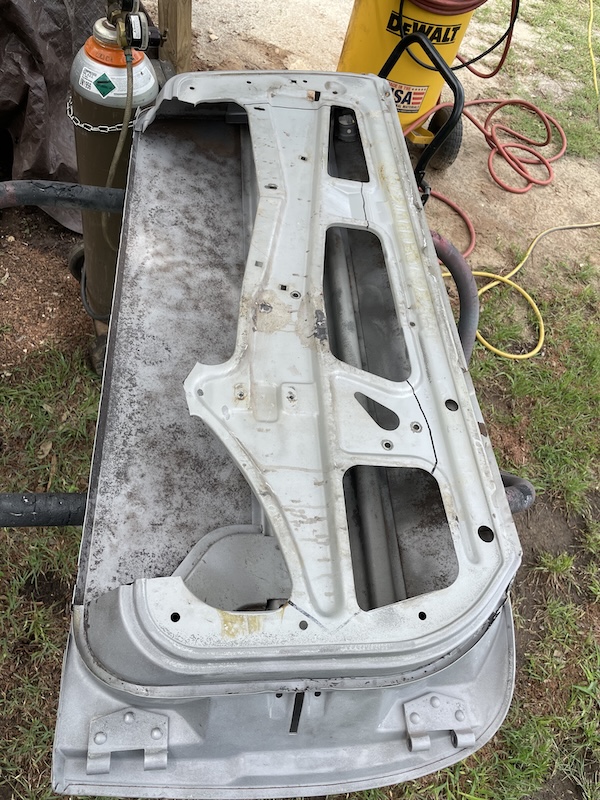 Blasting exposed two drill holes that had been filled with puddy. Fixed them by zapping them closed using a copper backer.   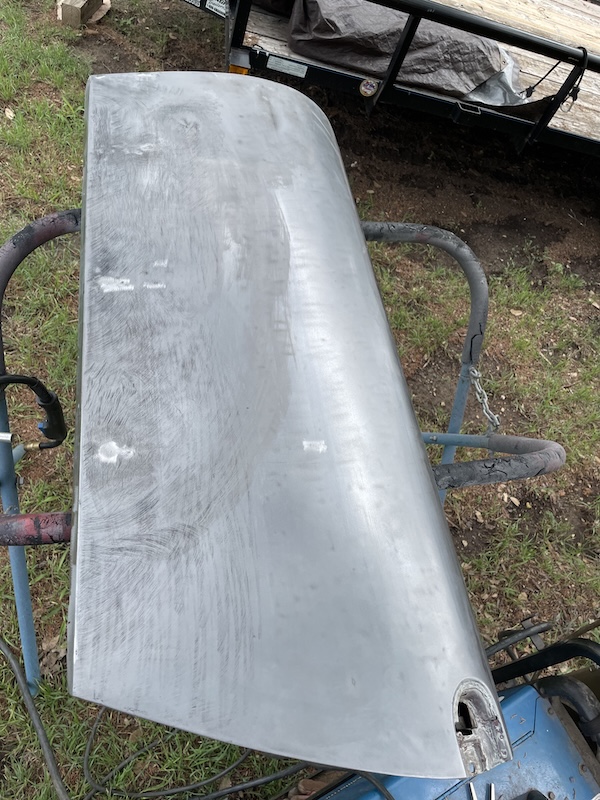 Final job of the day was to clean and paint the inside with the first coat of epoxy. This messy job was applied using a small paint brush. I plan to do the final coat once the door is welded back together. Tomorrow will be a lot of fiddly patches and reassembly of the lower door section. Stay tuned... 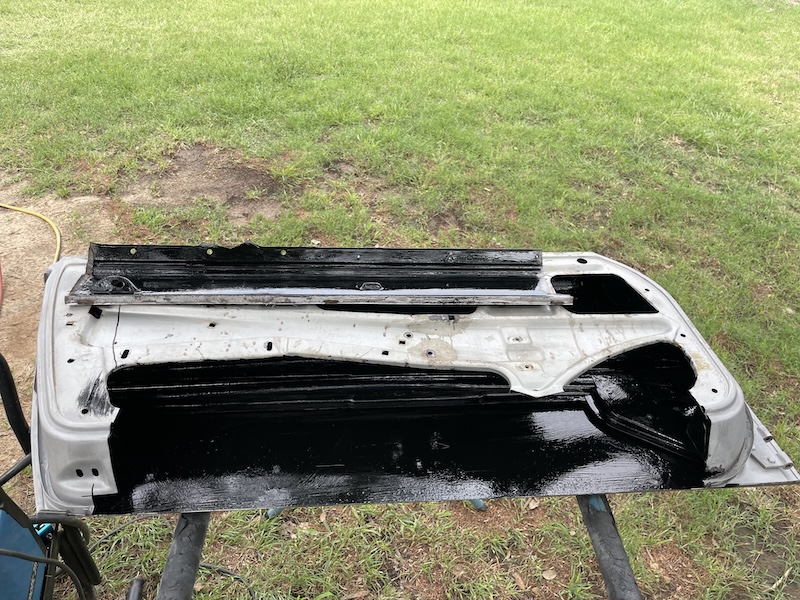 |
|
|
|
| Dion |
Jun 2 2025, 05:21 AM
Post
#511
|
|
RN Group: Members Posts: 2,918 Joined: 16-September 04 From: Audubon,PA Member No.: 2,766 Region Association: MidAtlantic Region |
Fred…. Wow, just wow. That is a lot of work. Patience for sure.
Outstanding stuff. Appreciate your documentation. Door are going to be the best around. |
|
|
|
| friethmiller |
Jun 2 2025, 07:36 AM
Post
#512
|
|
Senior Member Group: Members Posts: 1,069 Joined: 10-February 19 From: Austin, TX Member No.: 22,863 Region Association: Southwest Region |
QUOTE(Dion @ Jun 2 2025, 06:21 AM) Fred…. Wow, just wow. That is a lot of work. Patience for sure. Outstanding stuff. Appreciate your documentation. Door are going to be the best around. Ha! I'm just working my way through my to-do list here. Getting ready to post my work from yesterday [very soon]. Looks like it's going to take an additional day or two to get this door completed. That'll make it three weekends per door. Wow! (IMG:style_emoticons/default/blink.gif) |
|
|
|
| friethmiller |
Jun 2 2025, 08:20 AM
Post
#513
|
|
Senior Member Group: Members Posts: 1,069 Joined: 10-February 19 From: Austin, TX Member No.: 22,863 Region Association: Southwest Region |
Driver Side Door - Part 4 (6/1/2025):
Started my Sunday morning off by separating the inner door seal from the bottom edge of the door skin. This took a bit of time but the two pieces eventually separated. After that, I made templates for a bunch of little patches that I'll needed to do. 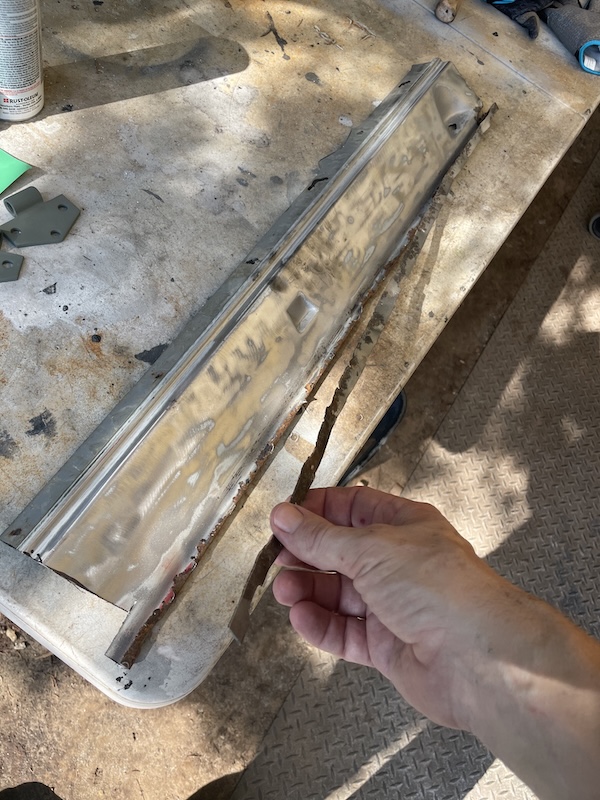 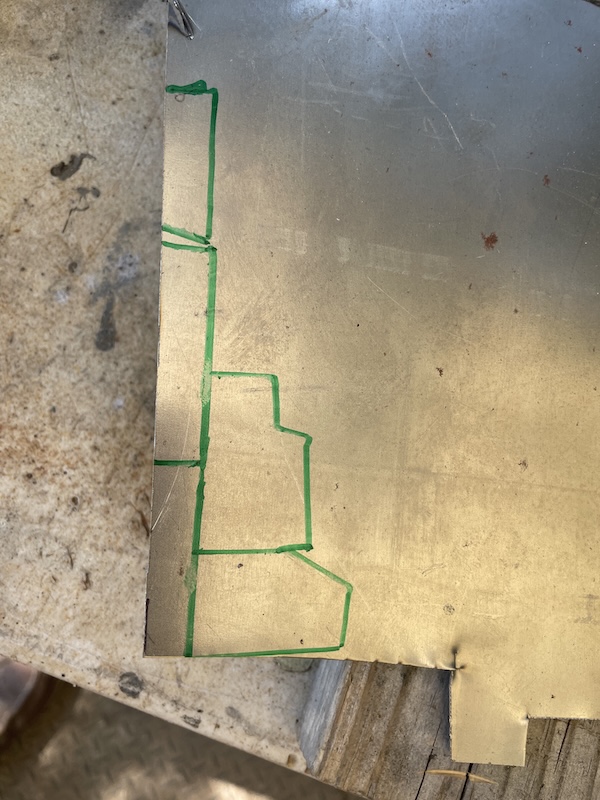 Patch #1 Here I'm fixing the first half of the hole in the bottom of the inner door. This is the spot where most doors rust-out. Note: Patch #3 is the second half of this spot. This repair wasn't my best but I will make time later to clean it up - once everything is reassembled. 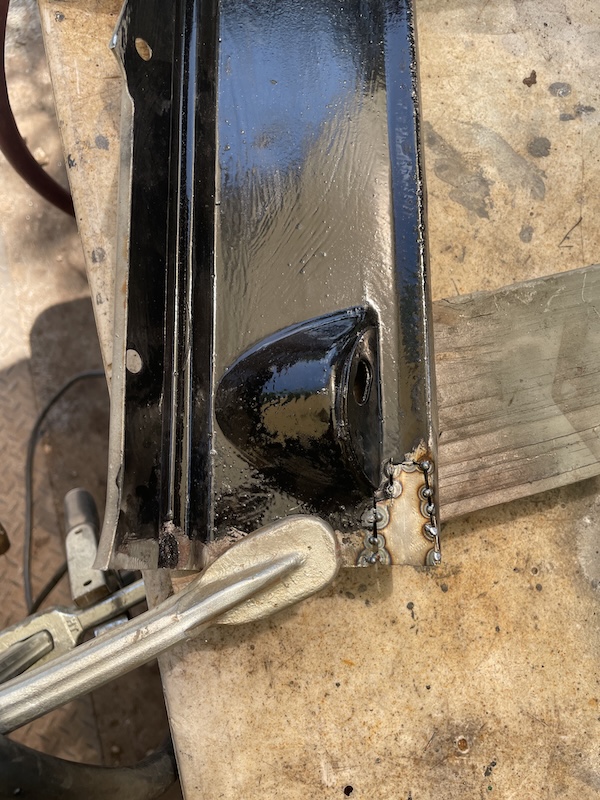   Patch #2 This is a small spot in the seal track about mid-way down the door. Simple/straight ahead repair here but done from the backside. Last photo shows the [weld] bleed-through into the seal track. 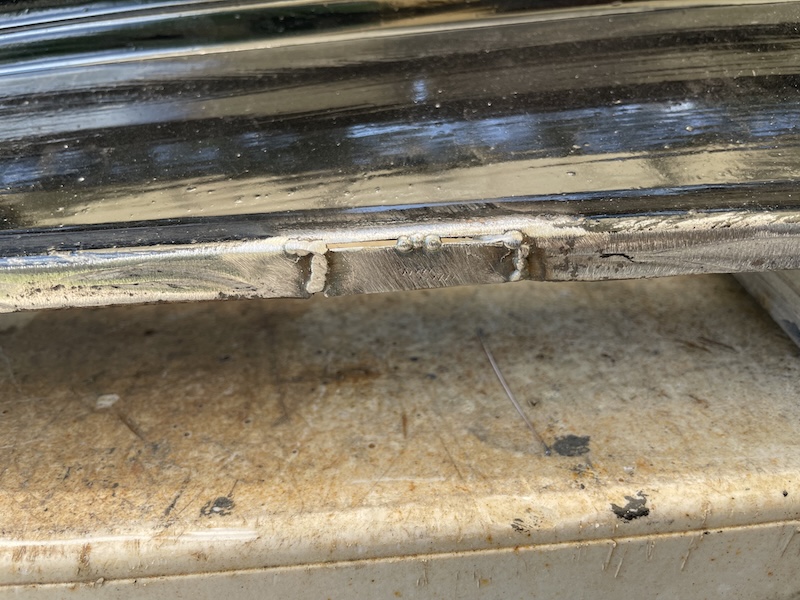 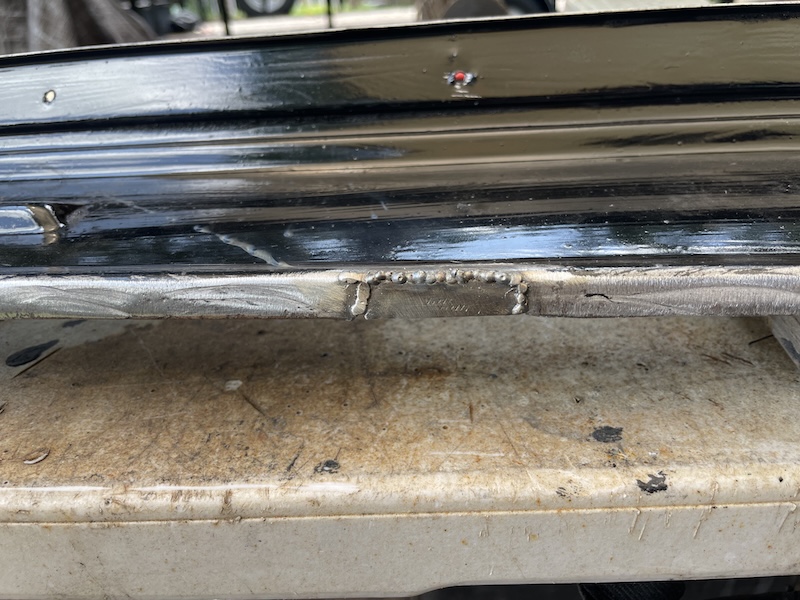 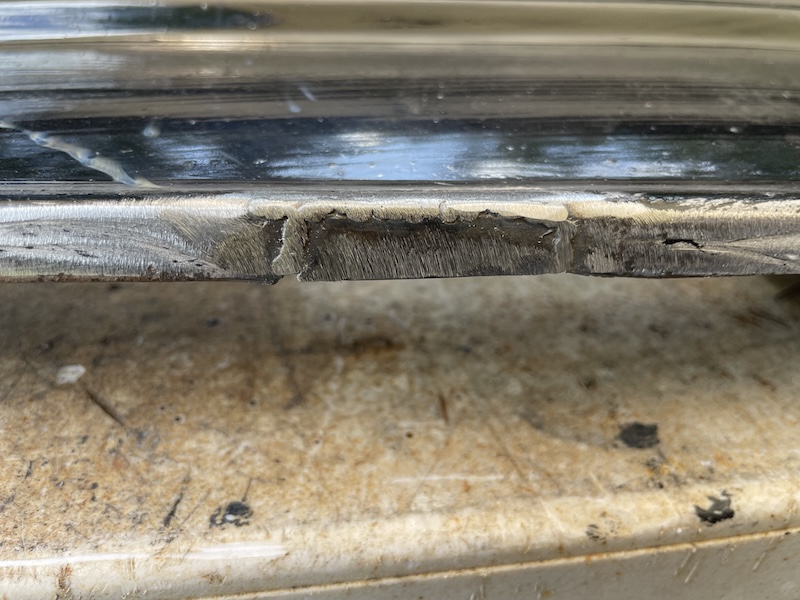 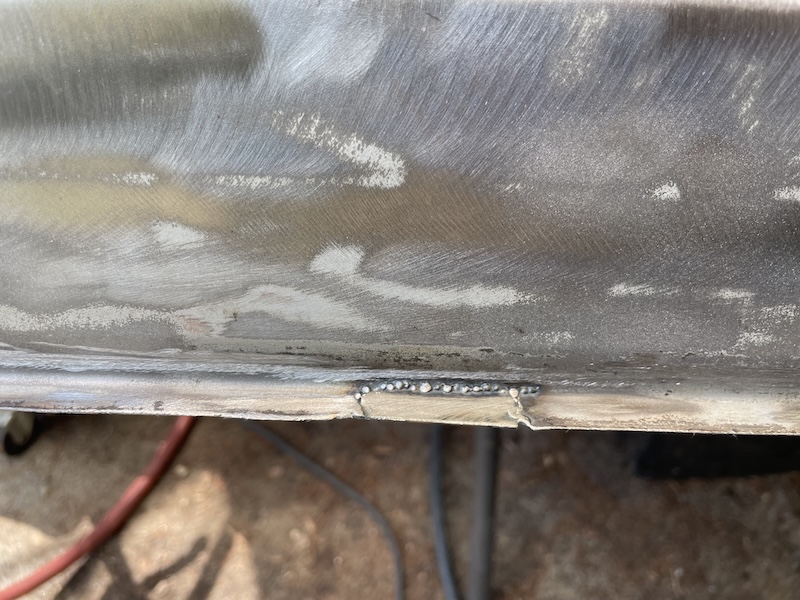 Patch #3 This is the other half of patch #1 but the repair was a bit more difficult. Access to the back wasn't even possible and the seal track prevents good welder positioning on about half of this patch. She's just ugly! But, again, we'll clean it up later. 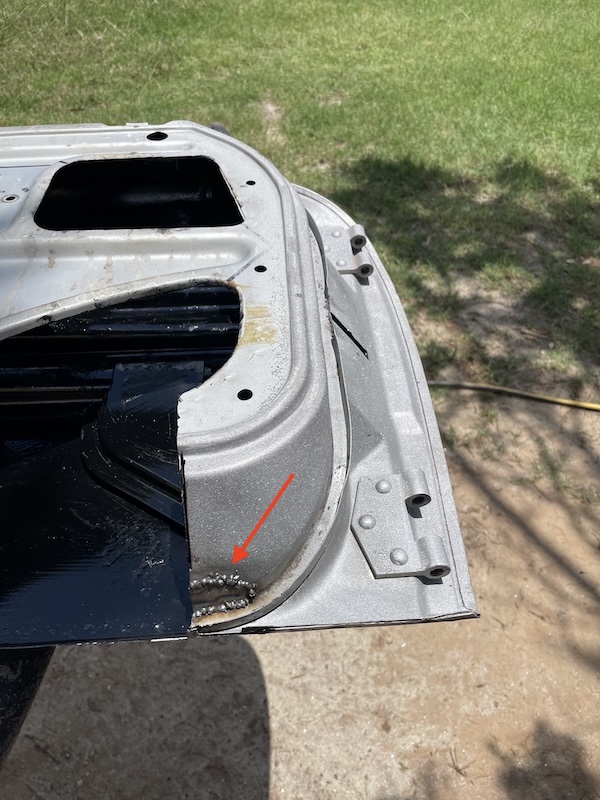 Patch #4 This is a small repair to the seal track adjacent to the door track (thingy). Pretty easy. 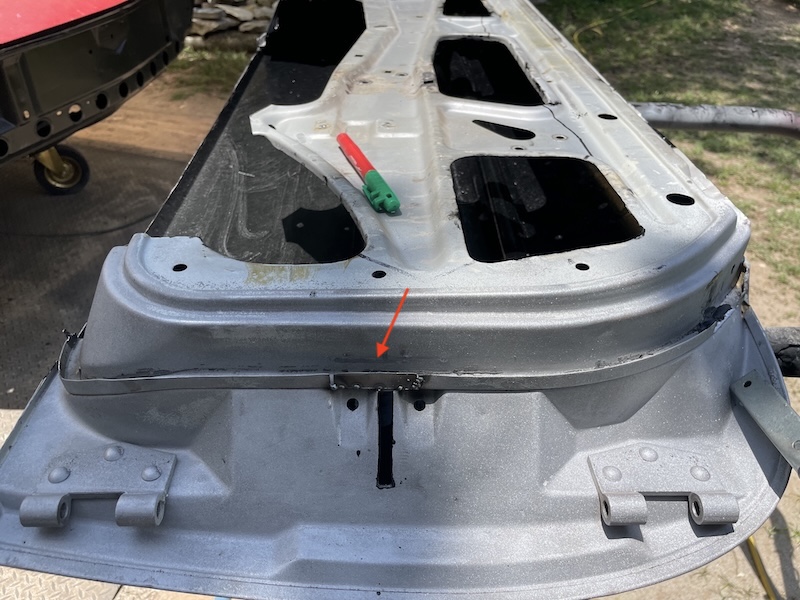 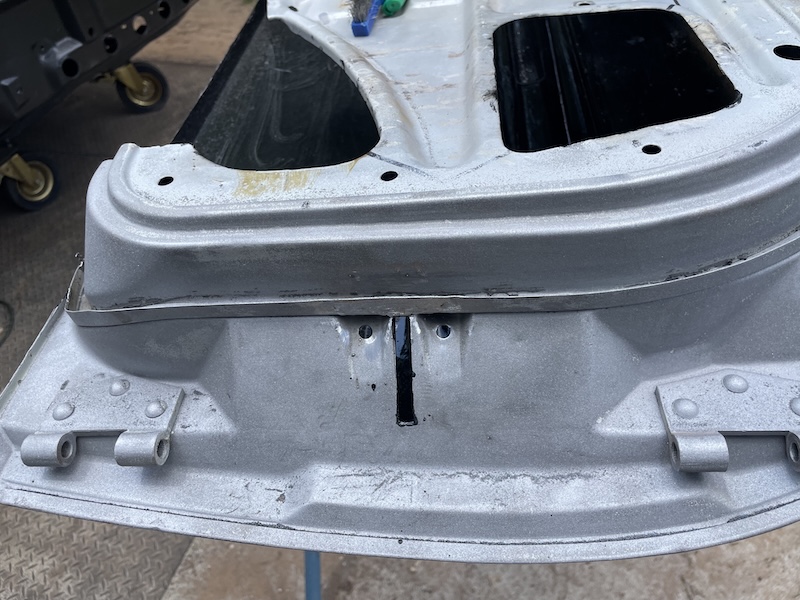 Patch #5 Repair to the same seal track just under the top of the door. This was another easy repair. 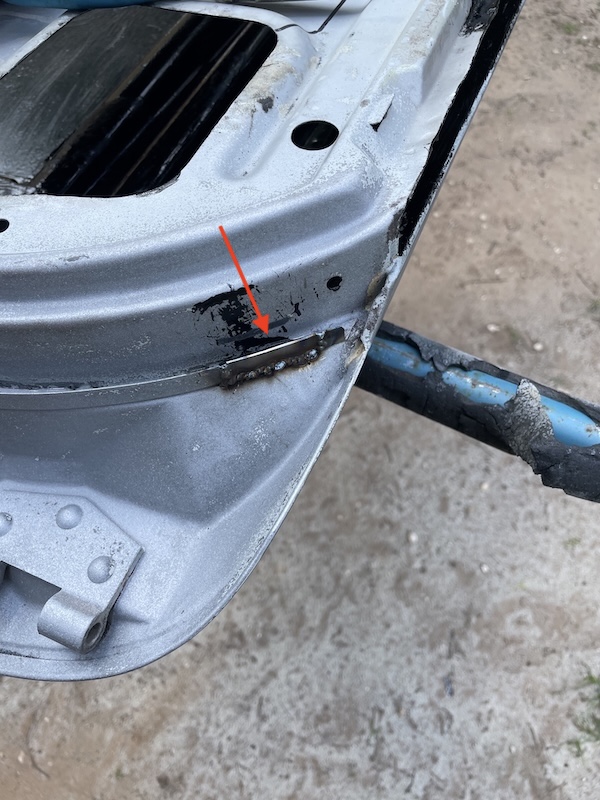 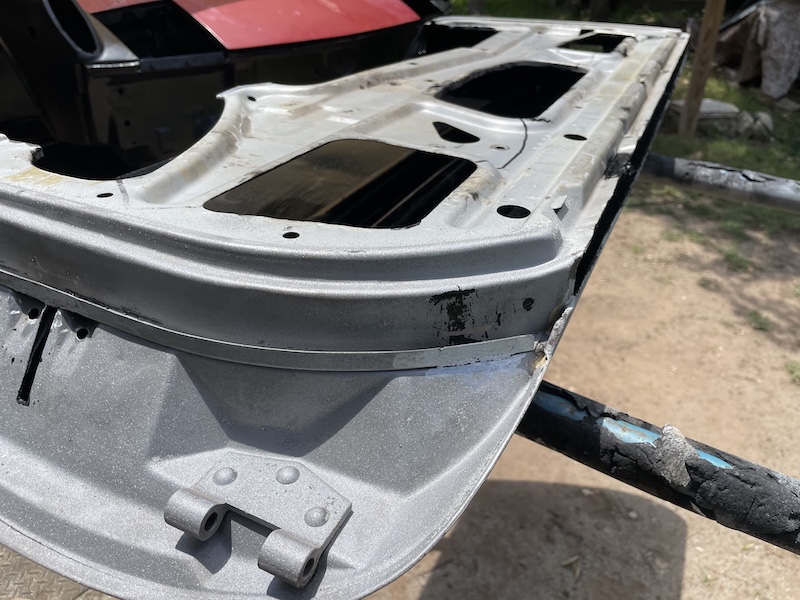 Mirror Hole Repair Another door, another set of after-market mirror holes to fill (IMG:style_emoticons/default/rolleyes.gif)  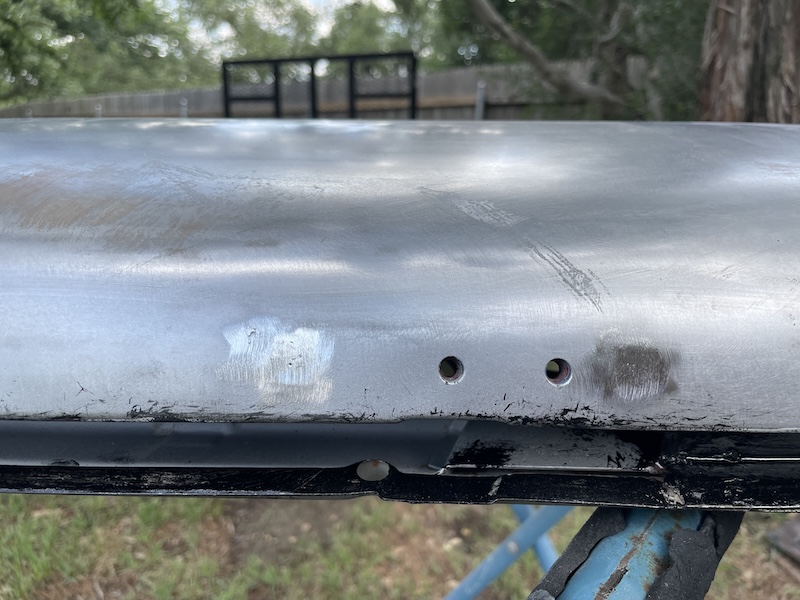 Inner Door Seal Track Replacement At this point I was finally able to get down to business with some larger structural fixes. Here I'm templating out two pieces that will replace the rusted edge of metal that I exposed earlier in the morning. You might notice that I am saving the three original inlets that allow the door to drain. This made the patch tricky to form and fit up but in the end retains the drains in their original configuration. The following photos show the repair that took about 3 hours to complete. 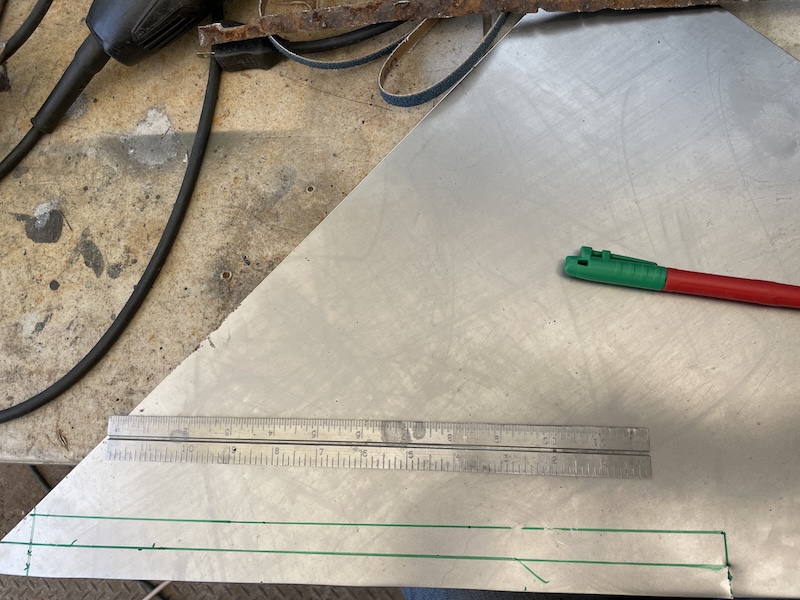 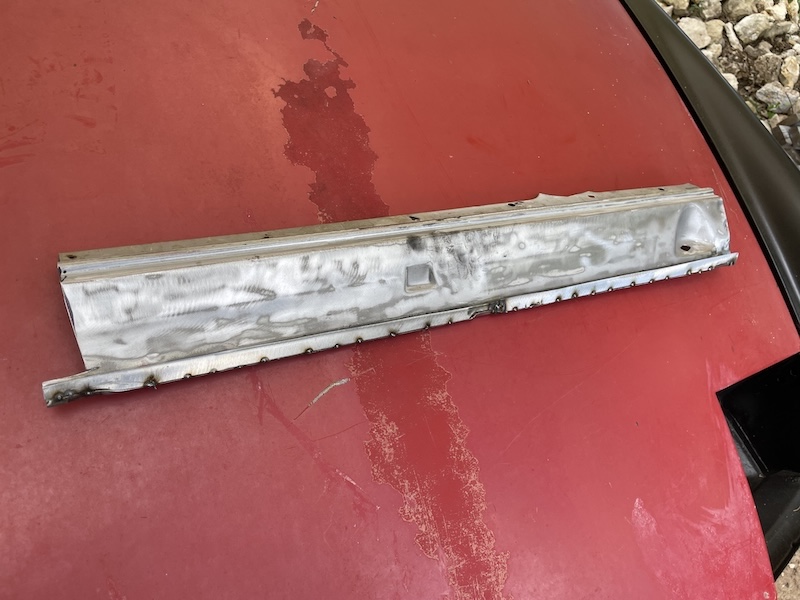 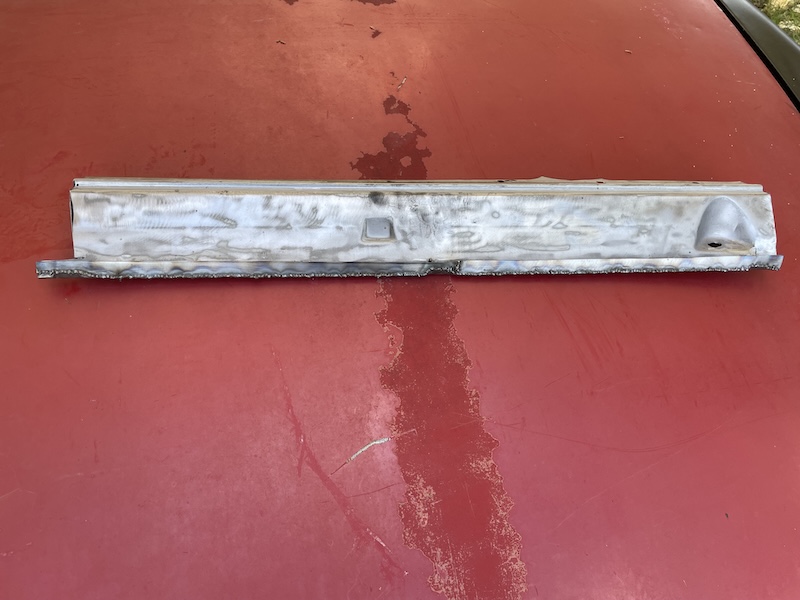 Reassembling the Door Bottom After grinding down all the welds down the length of the inner door repair, I was ready to re-weld the door. It was already pushing 5pm at this point so I decided to finish most of the welding and just call it a day. More to come in Part 5, I guess. Cheers (IMG:style_emoticons/default/beerchug.gif) 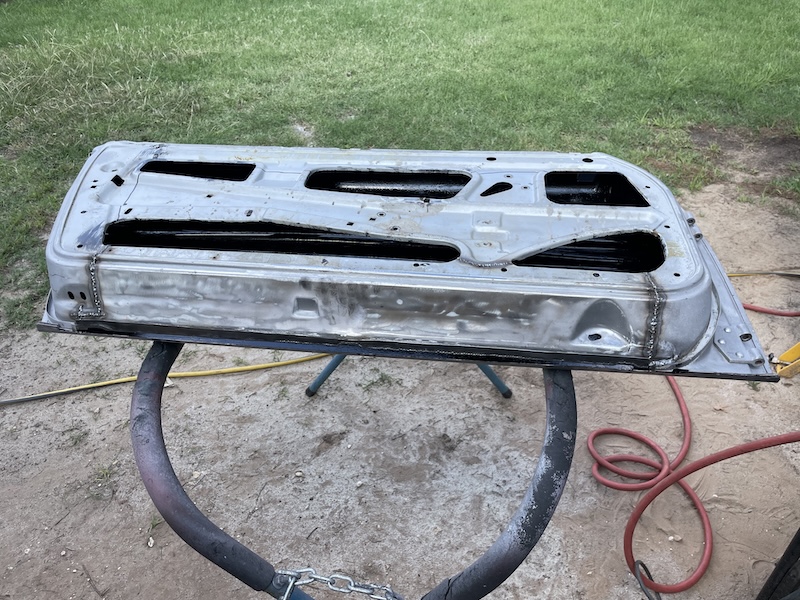 |
|
|
|
| 930cabman |
Jun 2 2025, 05:23 PM
Post
#514
|
|
Advanced Member Group: Members Posts: 4,323 Joined: 12-November 20 From: Buffalo Member No.: 24,877 Region Association: North East States |
I need to remove a section of the door bottom from my drivers door, but wish I had the time and talent of Fred.
Go Fred Go (IMG:style_emoticons/default/piratenanner.gif) (IMG:style_emoticons/default/piratenanner.gif) (IMG:style_emoticons/default/piratenanner.gif) (IMG:style_emoticons/default/piratenanner.gif) |
|
|
|
| friethmiller |
Jun 3 2025, 07:43 AM
Post
#515
|
|
Senior Member Group: Members Posts: 1,069 Joined: 10-February 19 From: Austin, TX Member No.: 22,863 Region Association: Southwest Region |
QUOTE(930cabman @ Jun 2 2025, 06:23 PM) I need to remove a section of the door bottom from my drivers door, but wish I had the time and talent of Fred. Go Fred Go I humbly submit... I'm making it up as I go along here. Just enjoying the process. (IMG:style_emoticons/default/welder.gif) |
|
|
|
| bkrantz |
Jun 3 2025, 07:31 PM
Post
#516
|
|
914 Guru Group: Members Posts: 8,530 Joined: 3-August 19 From: SW Colorado Member No.: 23,343 Region Association: Rocky Mountains |
QUOTE(friethmiller @ Jun 3 2025, 06:43 AM) QUOTE(930cabman @ Jun 2 2025, 06:23 PM) I need to remove a section of the door bottom from my drivers door, but wish I had the time and talent of Fred. Go Fred Go I humbly submit... I'm making it up as I go along here. Just enjoying the process. (IMG:style_emoticons/default/welder.gif) I always felt my over-confidence and naive optimism makes up for lack of expertise. |
|
|
|
| friethmiller |
Jun 3 2025, 09:06 PM
Post
#517
|
|
Senior Member Group: Members Posts: 1,069 Joined: 10-February 19 From: Austin, TX Member No.: 22,863 Region Association: Southwest Region |
QUOTE(bkrantz @ Jun 3 2025, 08:31 PM) I always felt my over-confidence and naive optimism makes up for lack of expertise. Right on! (IMG:style_emoticons/default/beerchug.gif) |
|
|
|
| 930cabman |
Jun 4 2025, 04:47 AM
Post
#518
|
|
Advanced Member Group: Members Posts: 4,323 Joined: 12-November 20 From: Buffalo Member No.: 24,877 Region Association: North East States |
QUOTE(bkrantz @ Jun 3 2025, 07:31 PM) QUOTE(friethmiller @ Jun 3 2025, 06:43 AM) QUOTE(930cabman @ Jun 2 2025, 06:23 PM) I need to remove a section of the door bottom from my drivers door, but wish I had the time and talent of Fred. Go Fred Go I humbly submit... I'm making it up as I go along here. Just enjoying the process. (IMG:style_emoticons/default/welder.gif) I always felt my over-confidence and naive optimism makes up for lack of expertise. or, I can mess up as good as the next guy |
|
|
|
| Puebloswatcop |
Jun 6 2025, 01:55 PM
Post
#519
|
|
Senior Member Group: Members Posts: 1,678 Joined: 27-December 14 From: Mineola, Texas Member No.: 18,258 Region Association: Southwest Region |
Hey Fred is it as hot and humid over there as it is here? If it is are you still working on the car in this misery? If so, be careful stay hydrated ansd take long breaks. As always love the work you are doing. (IMG:style_emoticons/default/beerchug.gif)
|
|
|
|
| friethmiller |
Jun 6 2025, 08:10 PM
Post
#520
|
|
Senior Member Group: Members Posts: 1,069 Joined: 10-February 19 From: Austin, TX Member No.: 22,863 Region Association: Southwest Region |
Yep! Hydration is key! I’ll be out on the LE in the morning - packing a cooler for sure!
BTW, Got the new bottom edge installed and welded in-place this evening. I have to address one area that’s oil-canning pretty bad (marker spot) Attached thumbnail(s) 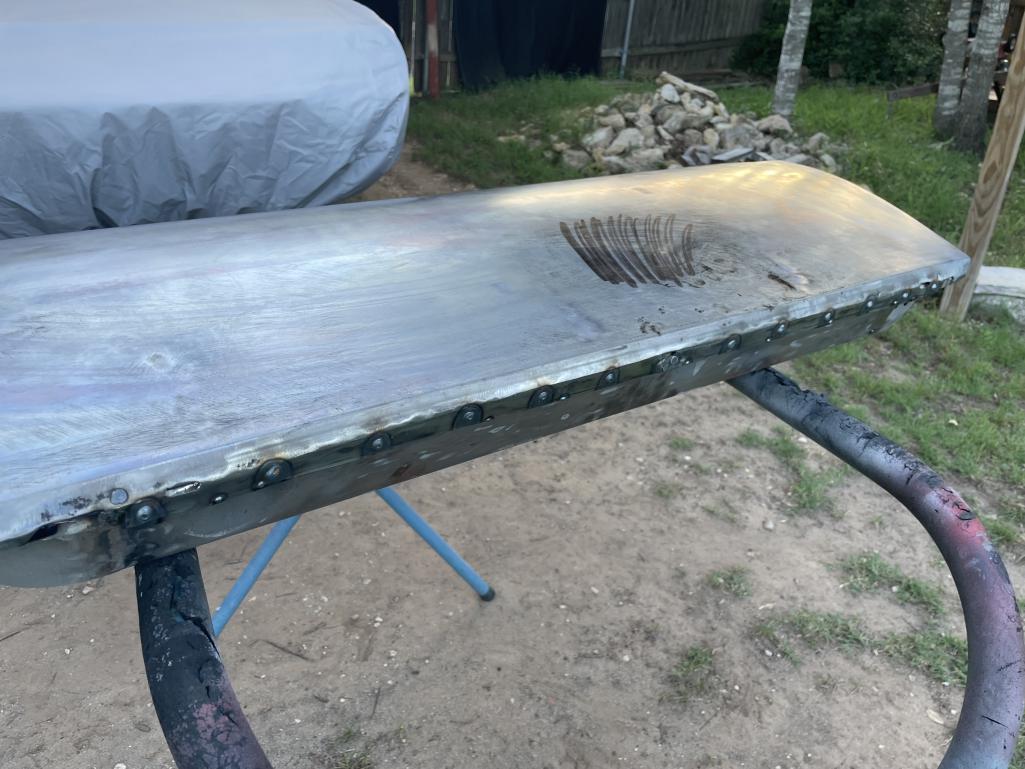
|
|
|
|
|
1 User(s) are reading this topic (1 Guests and 0 Anonymous Users)
0 Members:

|
Lo-Fi Version | Time is now: 10th November 2025 - 07:57 PM |
Invision Power Board
v9.1.4 © 2025 IPS, Inc.