|
|
|
Porsche, and the Porsche crest are registered trademarks of Dr. Ing. h.c. F. Porsche AG.
This site is not affiliated with Porsche in any way. Its only purpose is to provide an online forum for car enthusiasts. All other trademarks are property of their respective owners. |
|
|

  |

| friethmiller |
 Aug 14 2025, 08:42 AM Aug 14 2025, 08:42 AM
Post
#581
|
|
Senior Member  Group: Members Posts: 1,130 Joined: 10-February 19 From: Austin, TX Member No.: 22,863 Region Association: Southwest Region |
Front LE Valance - Part 1 (8/10 - 8/13/2025)
Knowing this valance would take a lot of time, I got underway on its restoration starting Monday evening. Here are a few photos of the progress to-date. It's going to get ugly here so hang on. First task was to finish all the plastic welding that I had done about a year ago just to hold the parts together. This ended up helping me out a lot since I didn't have to puzzle-piece anything together.  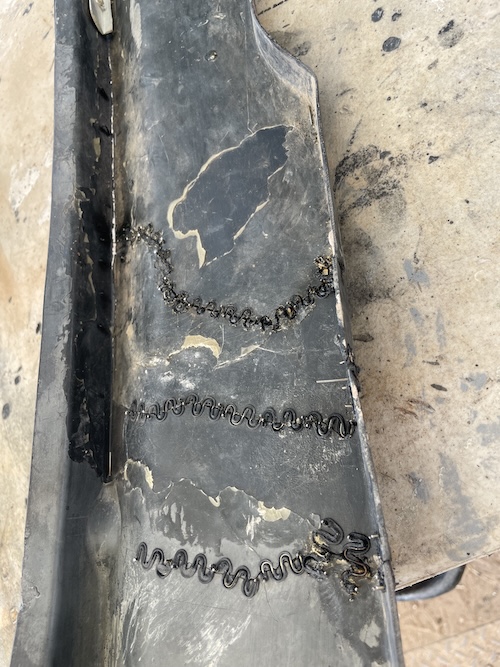 Next, using a bulb grinder bit I hollowed out all the major cracks on either end of the part from the front. This worked very well. Note the metal "floss" sticking through from the plastic welds.  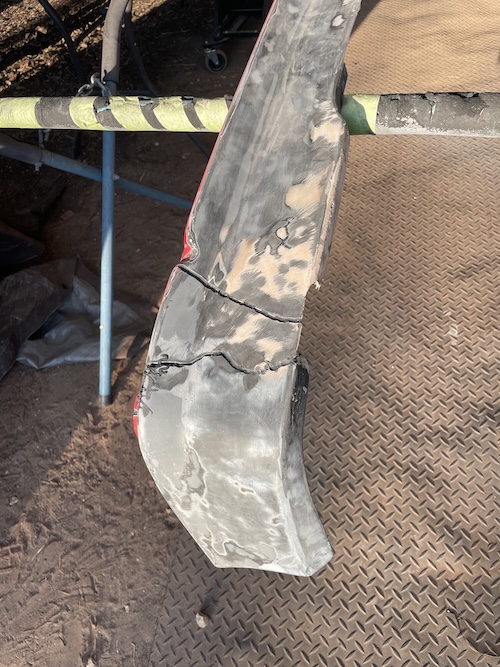 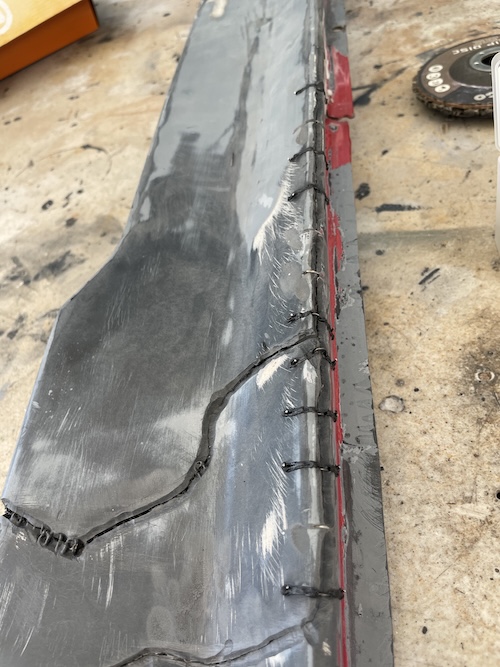 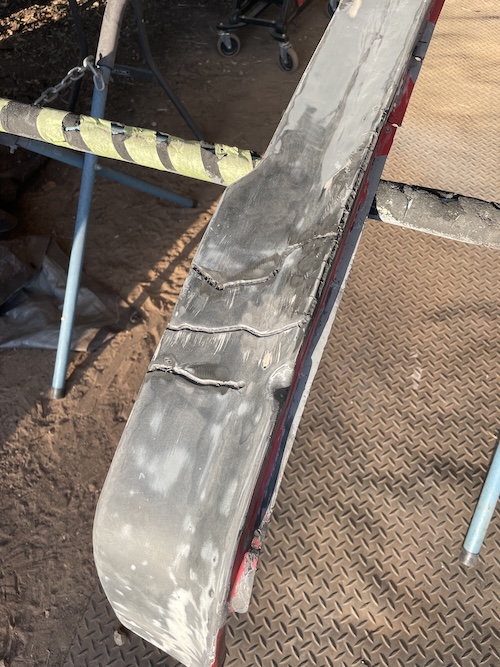 Next, in order to bond the cracks I used JB Weld's 2-part epoxy resin glue. Mixed a few batches and used a popsicle stick to make sure all the cracks got filled. Just like pre-school art here! 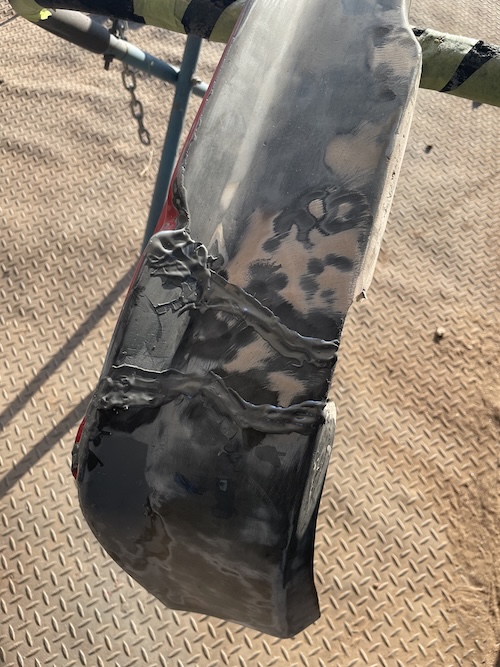 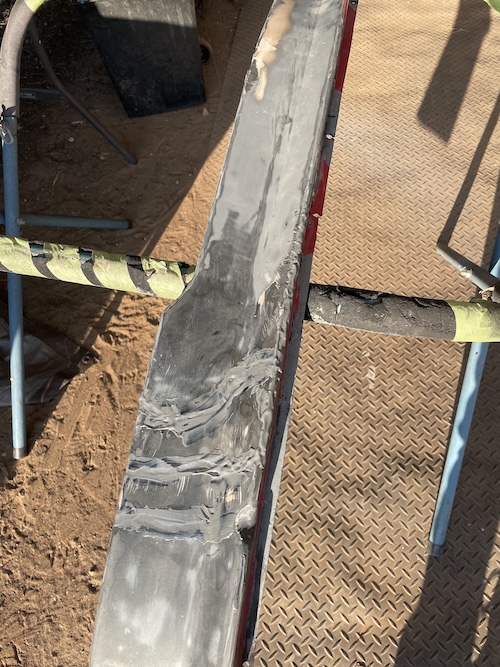 After all that dried, I went in and started the process by replacing two missing sections at the bottom-center of the valance. This is a very critical spot that, when repaired, will give back a lot of the rigidity to the part. To do this, I used cardboard as my form. I simply taped it in to provide just a bit of backing support for the fiberglass. With this done, I then mixed up the resin and layered in several pieces from the front. Note in the 3rd photo how I trimmed back the extra fiberglass. First with scissors and then with the grinder with a flip disk. Last photo shows the results of most of the cardboard and tape removed - showing just this outside layer applied/hardened. 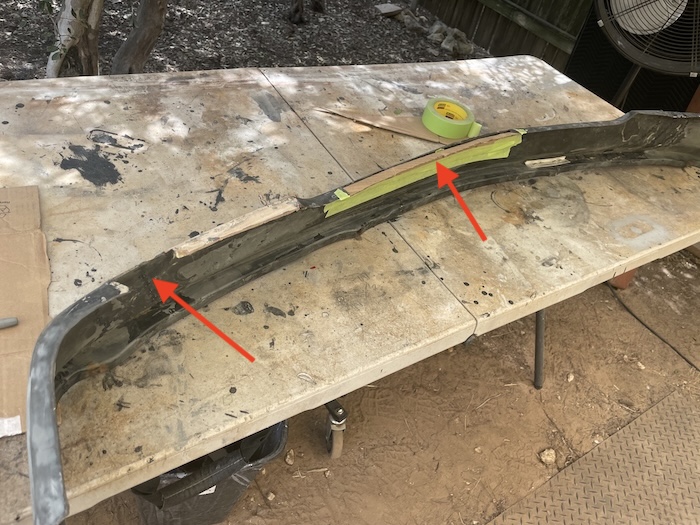 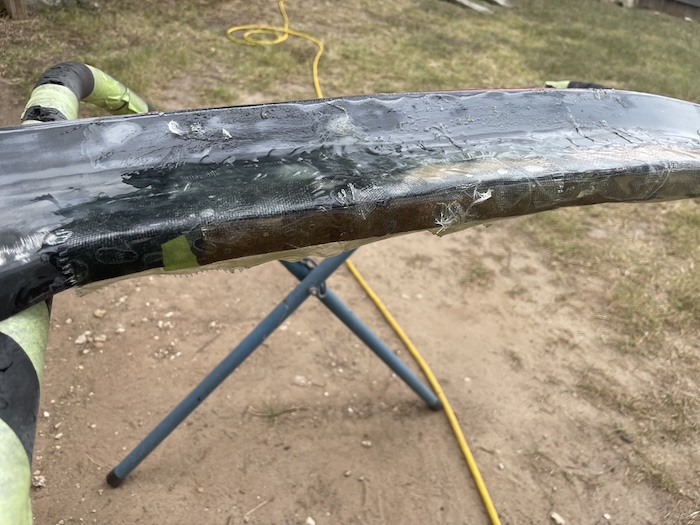 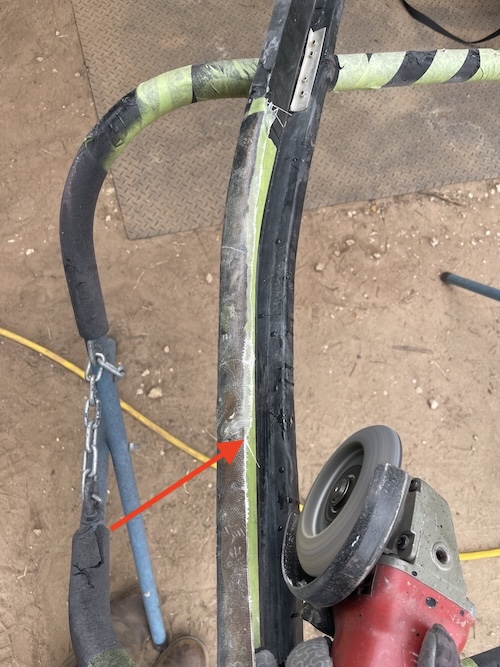 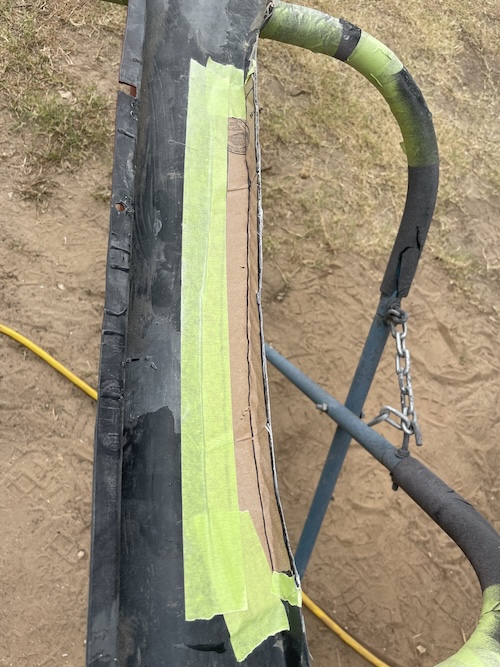 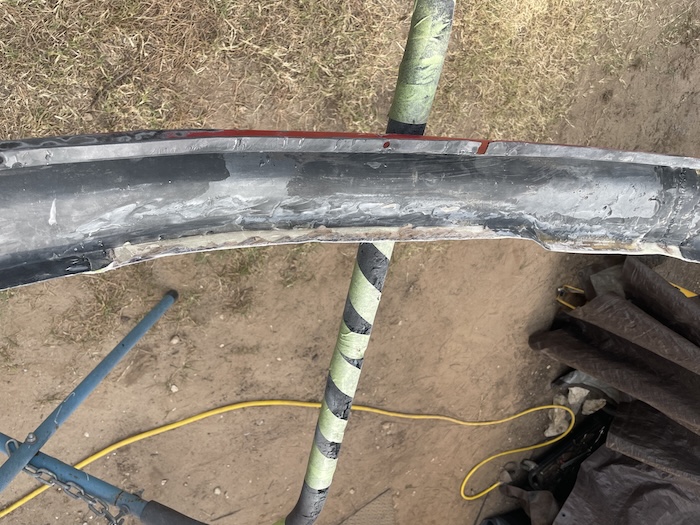 Next up is the application of addition glass to the backside of the repair. I also took the opportunity to cover the plastic welded areas with 2x sheets of glass to provide additional strength to these areas. 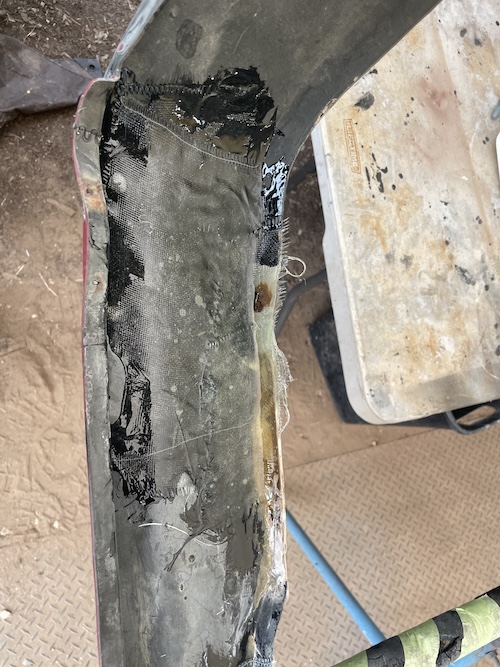  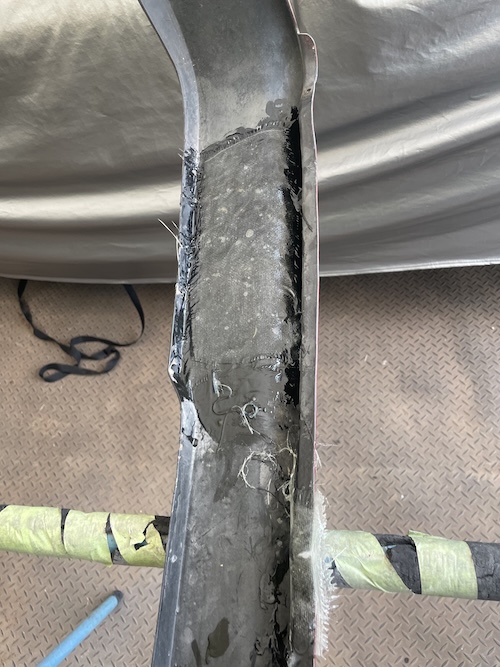 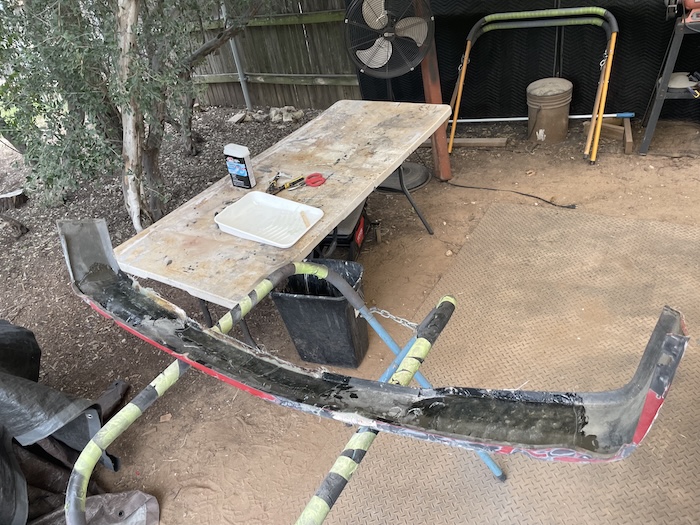 After letting all this dry overnight, I will trim every up and continue with additional repairs that are necessary for this valance. More to come soon... Cheers! (IMG:style_emoticons/default/beerchug.gif) |
   |

 
|
| Root_Werks |
Aug 14 2025, 10:53 AM
Post
#582
|
|
Village Idiot Group: Members Posts: 8,876 Joined: 25-May 04 From: About 5NM from Canada Member No.: 2,105 Region Association: Pacific Northwest |
If that's an original LE front valiance, worth every effort to repair it. If it's replacement fiberglass, hard to believe they are $400, yikes!
|
|
|
|
| Puebloswatcop |
Aug 14 2025, 12:20 PM
Post
#583
|
|
Senior Member Group: Members Posts: 1,691 Joined: 27-December 14 From: Mineola, Texas Member No.: 18,258 Region Association: Southwest Region |
You are moving swiftly on it Fred (IMG:style_emoticons/default/smash.gif) . Don't build too fast, or you won't have anything to keep you out of trouble. (IMG:style_emoticons/default/beerchug.gif)
|
 |
|
| friethmiller |
Aug 14 2025, 12:28 PM
Post
#584
|
|
Senior Member Group: Members Posts: 1,130 Joined: 10-February 19 From: Austin, TX Member No.: 22,863 Region Association: Southwest Region |
It's hard to believe!
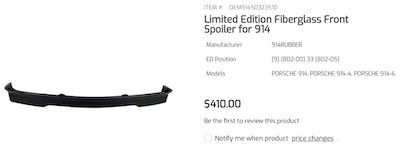 This isn't an original LE valance that I'm working on here but a vintage OEM replacement. It isn't worth saving on it's own. I'm just unwilling to pony-up 400 clams for this part. I'm also worried that the AA part, while cheaper, won't be the same quality. It's too late at this point anyways... I'm committed (IMG:style_emoticons/default/screwy.gif) |
|
|
|
| friethmiller |
Aug 17 2025, 11:39 AM
Post
#585
|
|
Senior Member Group: Members Posts: 1,130 Joined: 10-February 19 From: Austin, TX Member No.: 22,863 Region Association: Southwest Region |
Front LE Valance - Part 2 (8/16/2025)
On Saturday, I started from a point where the epoxy glue had been sanded down and the panel cleaned. From here... many iterations of body filler & hand sanding with blocks (soft and semi-soft). 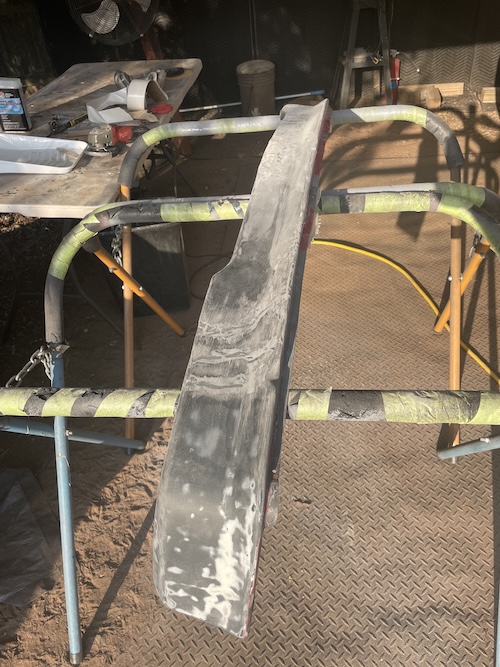 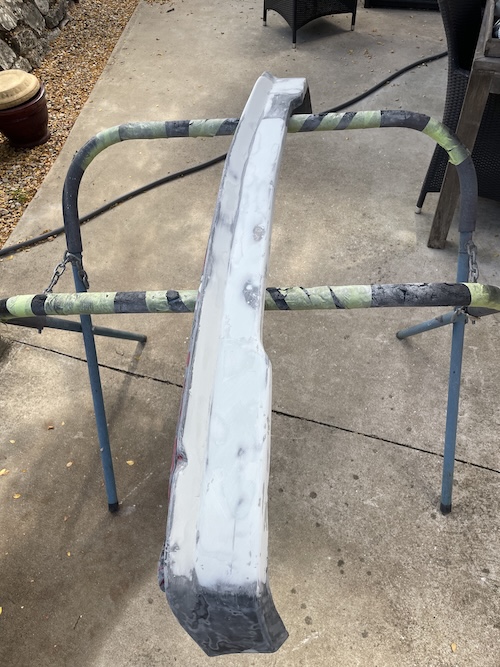 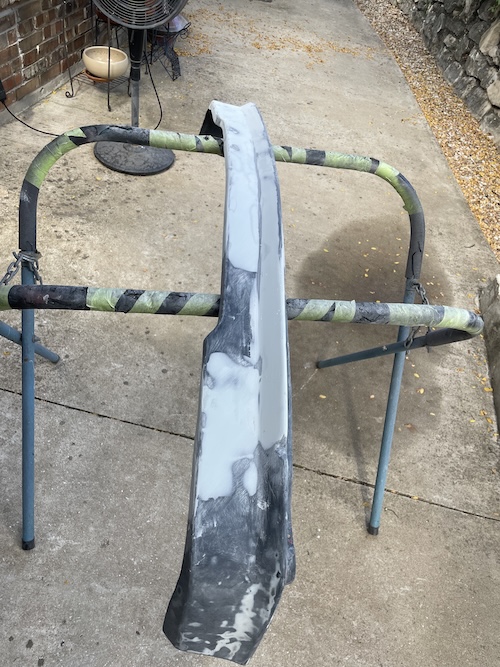 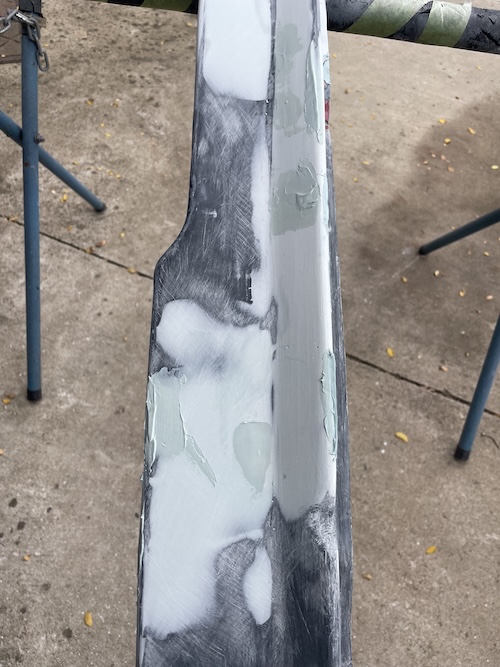 Once satisfied that I was getting close, I mounted the spoiler to check gaps and see how the wheel arches looked. These non-factory panels tend to have some weird forward sweeping ends that I was going to try and fix. Using washers to simulate the thick rubber spacers (which are on order), I had a look at the backend of the spoiler. Not great. You can see by the last set of photos what I'm shooting for, approximately. I used cardboard to help mock up where I wanted the new edges to be. 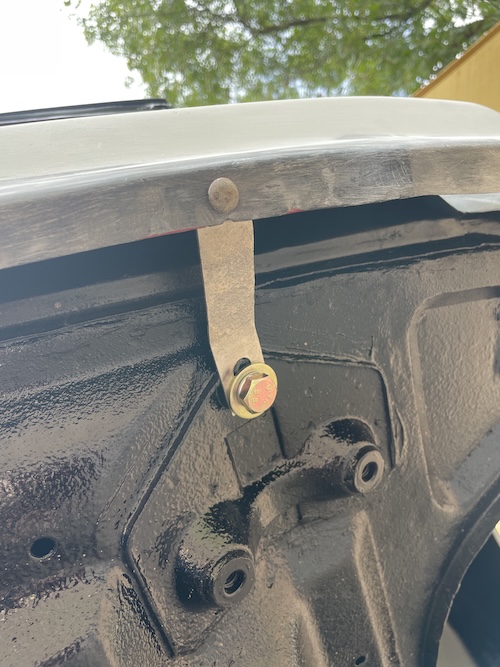 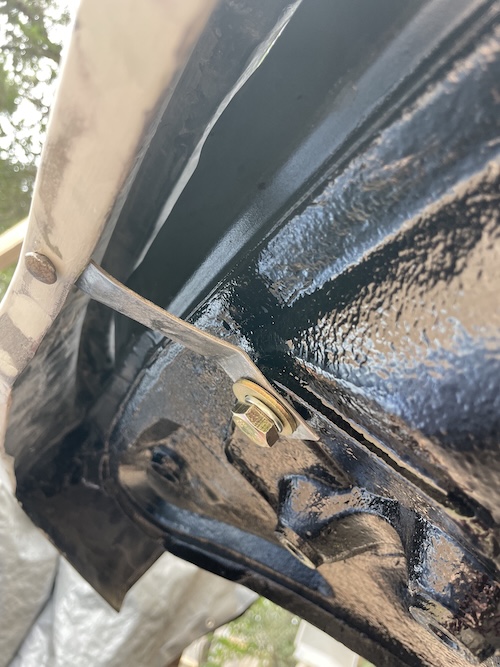 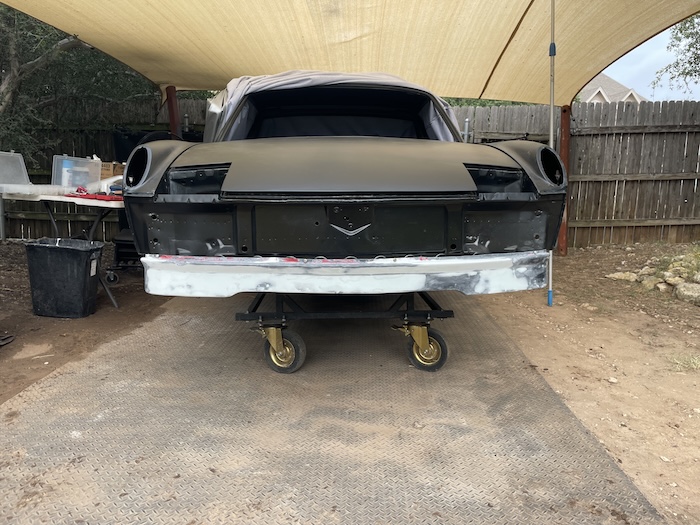 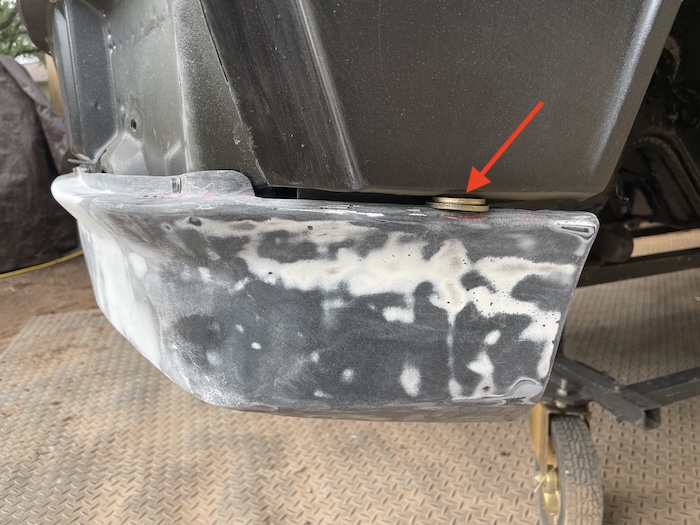 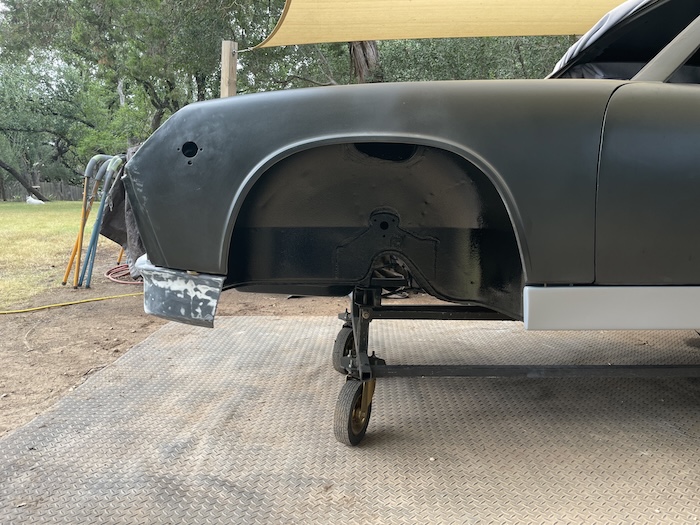 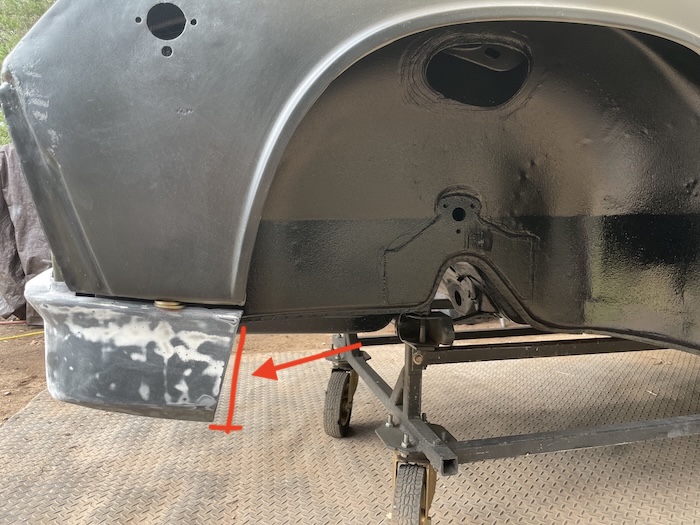 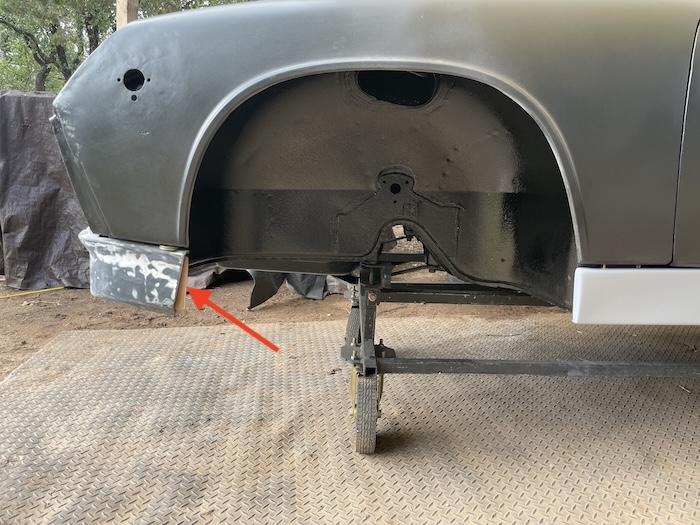 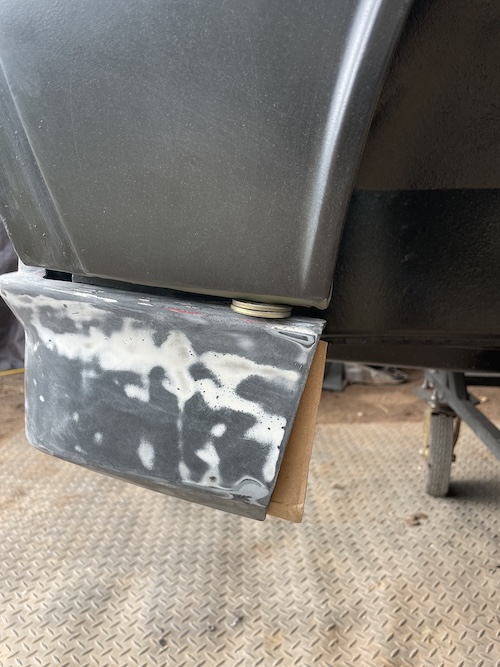 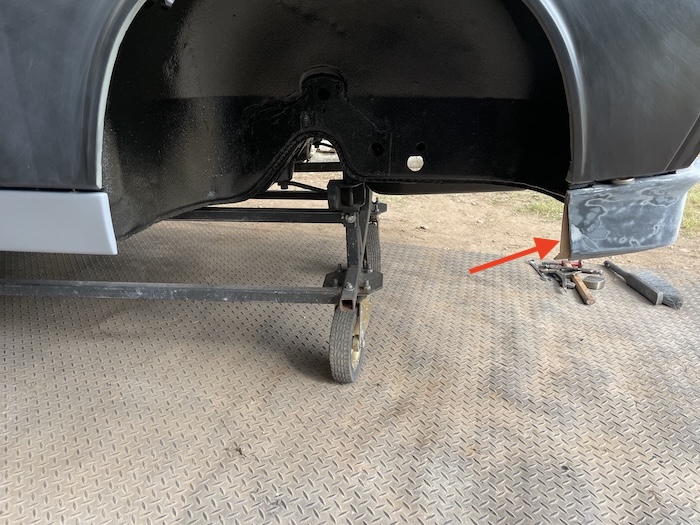 Once the valance was removed, I then trimmed the cardboard and taped it onto the panel from the backside. Next, it was a couple of layers of fiberglass put down from the front. After drying, most of the cardboard was removed and glass was placed on the backside. Once this was dry, I then trimmed back the excess fiberglass and used 3M Fiberglass filler to fill and help strengthen the ends. Love this stuff! It's super strong but hard to sand! You need 40 to 80 grit, to get any where with it. Here are some photos of the process. Sunday will be painting and mounting this panel. 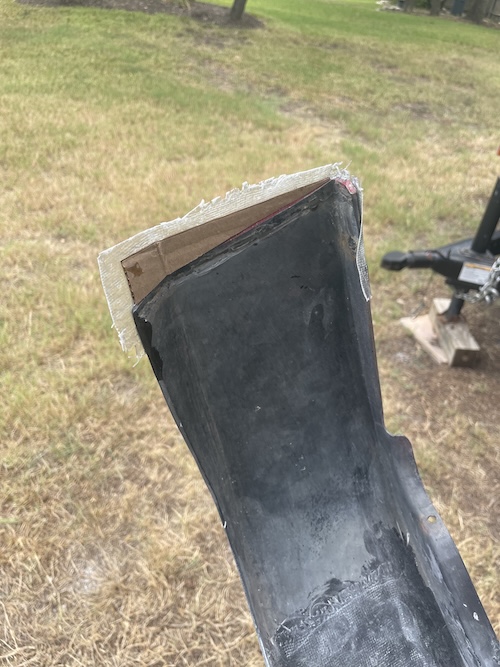 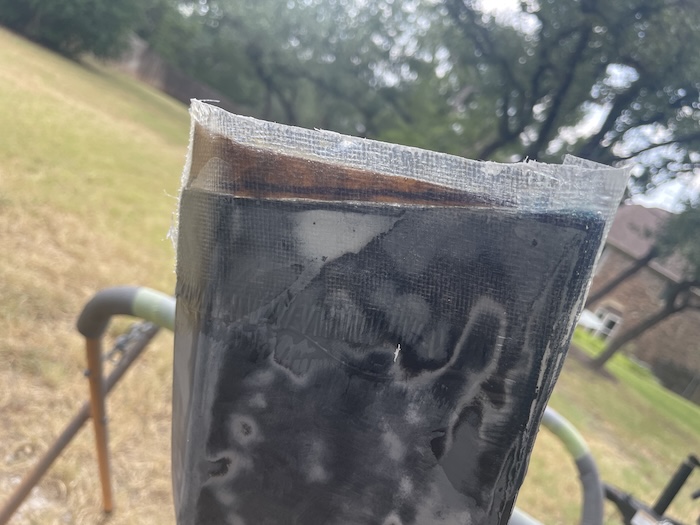 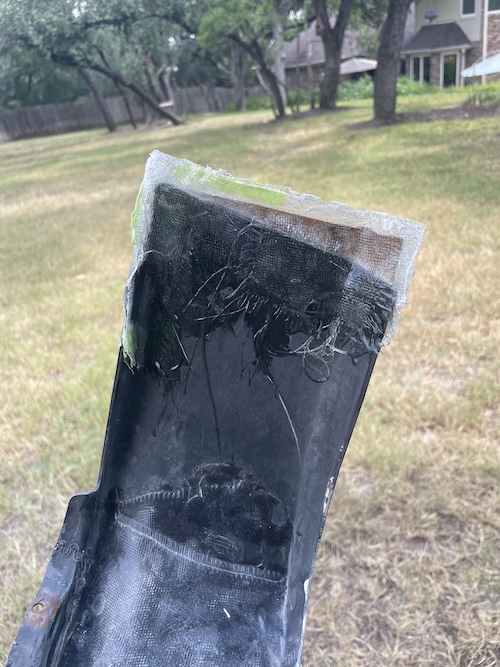 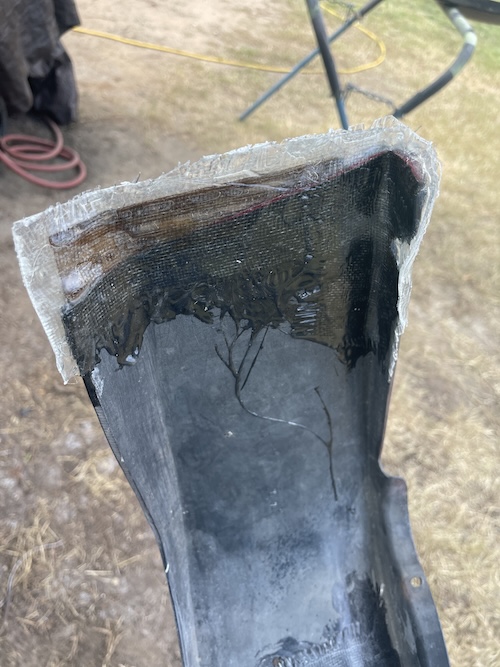 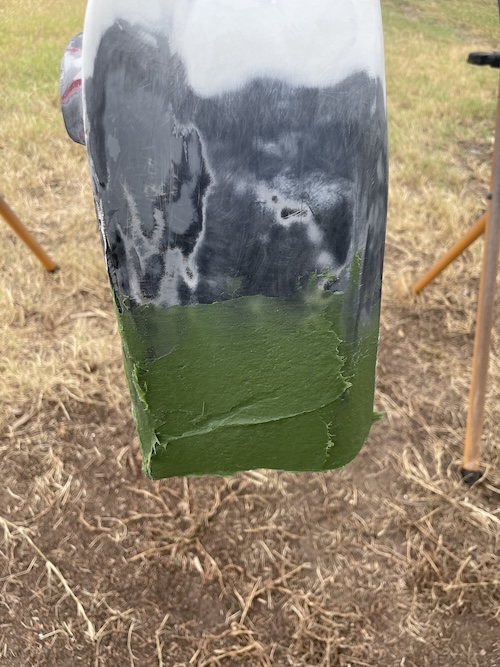 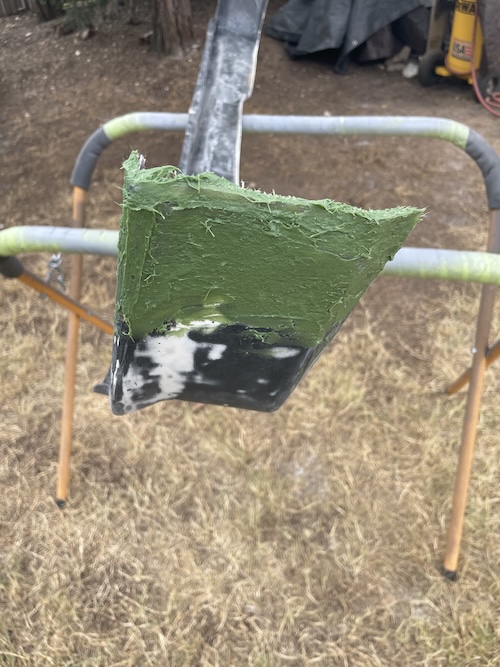  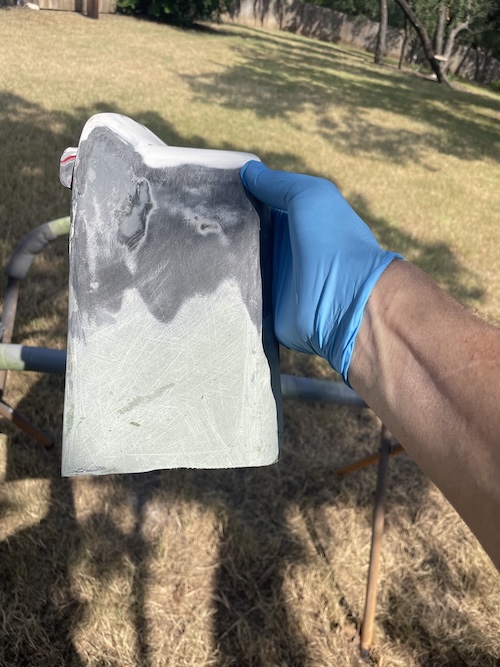  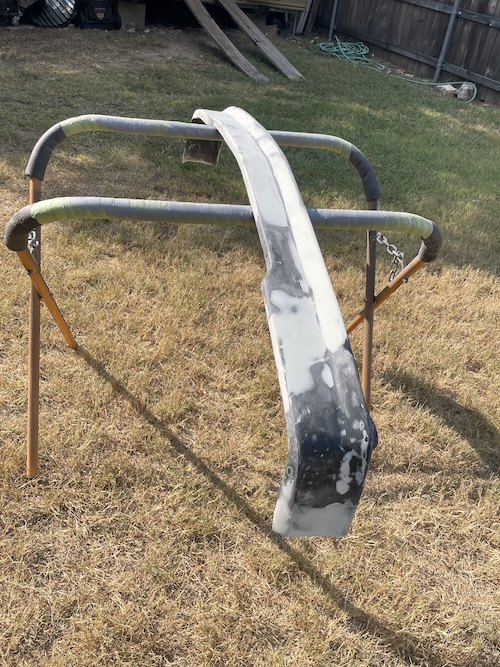 |
|
|
|
| friethmiller |
Aug 17 2025, 11:59 AM
Post
#586
|
|
Senior Member Group: Members Posts: 1,130 Joined: 10-February 19 From: Austin, TX Member No.: 22,863 Region Association: Southwest Region |
Front LE Valance - Part 3 (8/17/2025)
I had the paint ready this morning at sunrise. (IMG:style_emoticons/default/smile.gif) After hitting the spoiler with 2 coats of gray epoxy, I let it dry for a few hours. I then came out and mounted the panel on the car with the new mounting hardware [that I had bagged from the previous day]. Here's a quick set of photos showing the rebuilt spoiler + other shots. While it still needs additional bodywork and finer sanding, I think I call it restored. 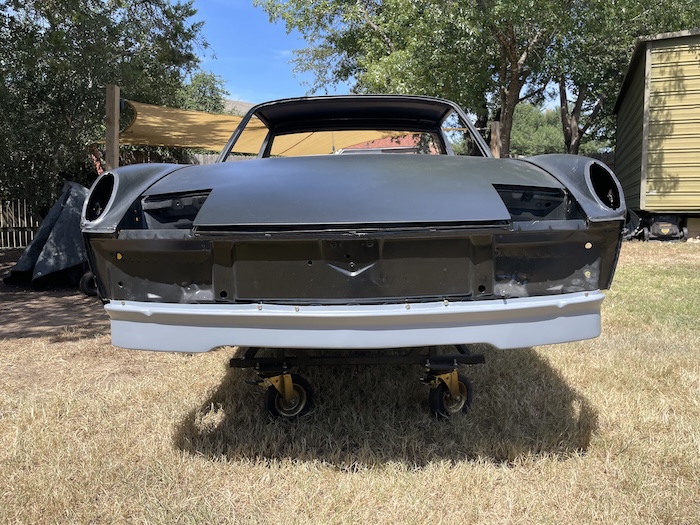 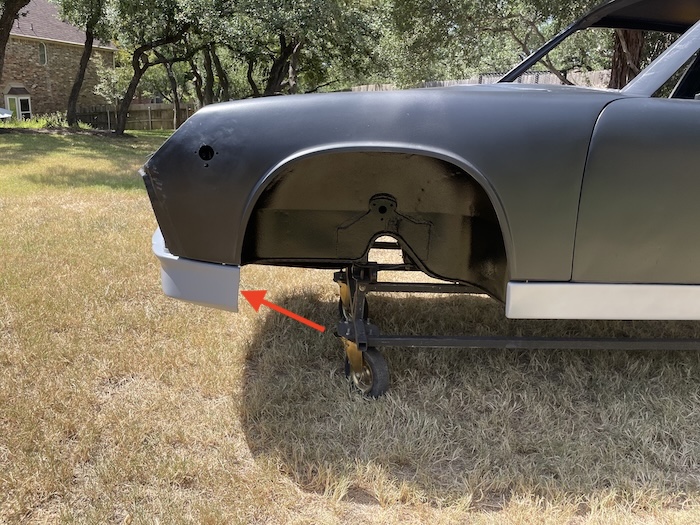 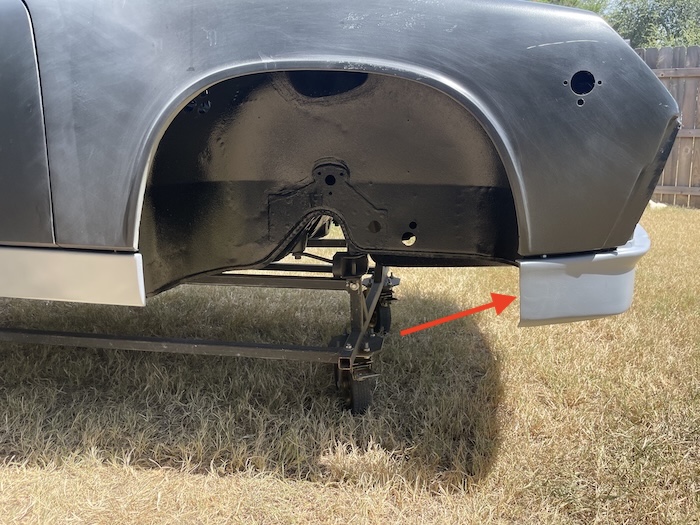 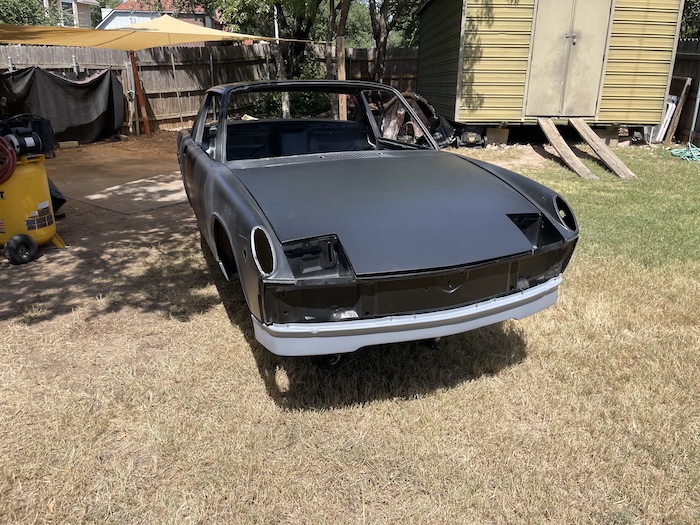 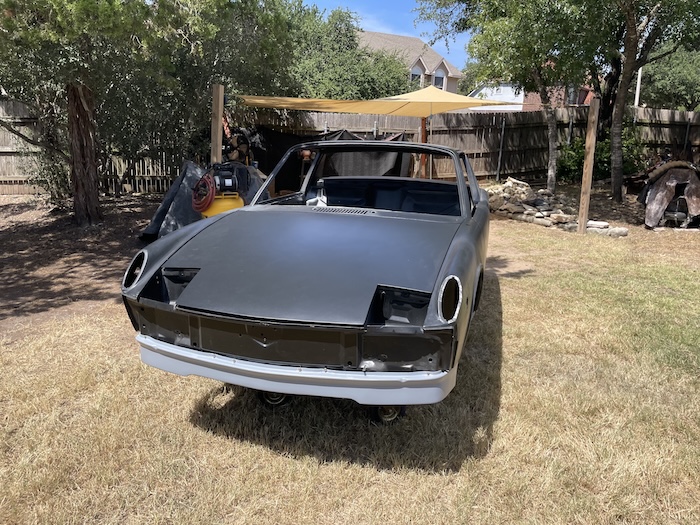 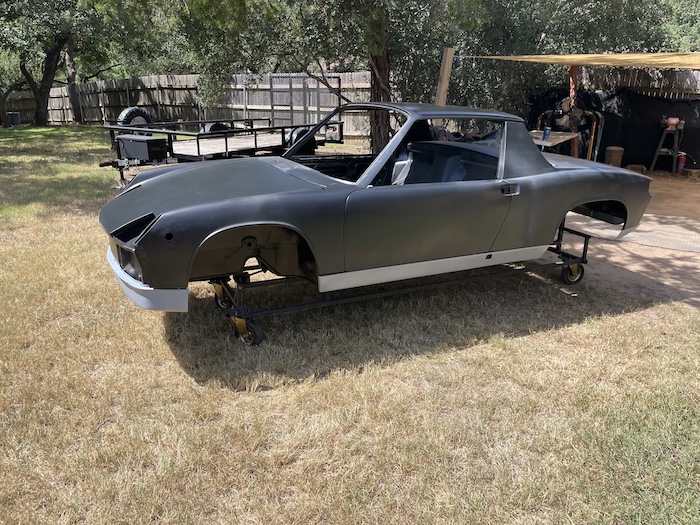 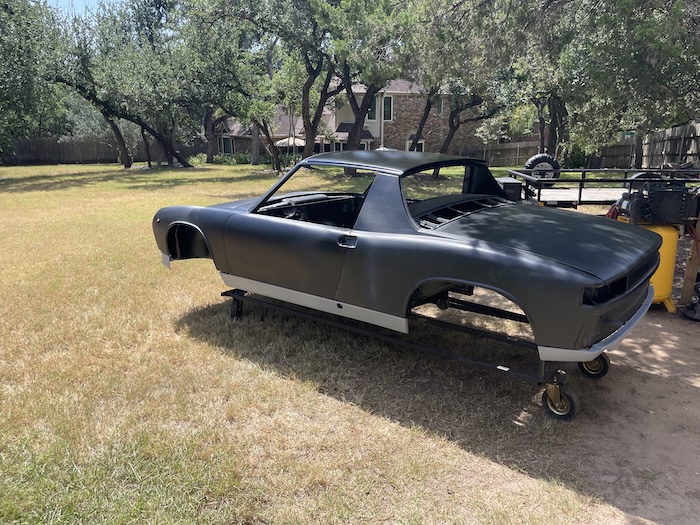 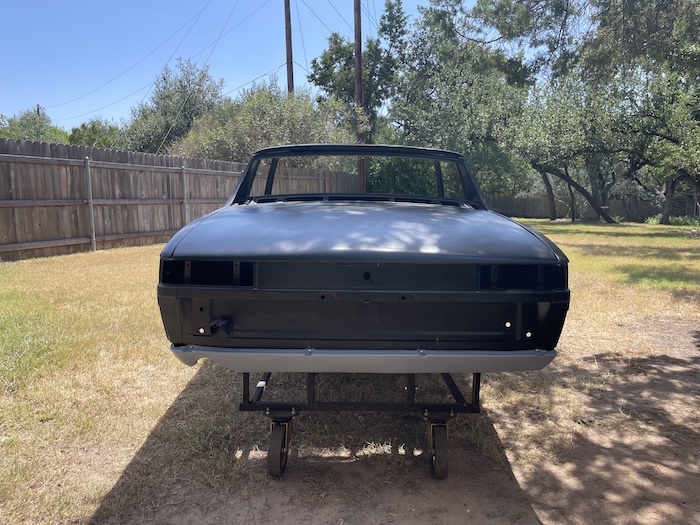 Next up, bumpers!! (IMG:style_emoticons/default/bootyshake.gif)  |
|
|
|
| slowrodent |
Aug 17 2025, 12:26 PM
Post
#587
|
|
Member Group: Members Posts: 218 Joined: 29-February 20 From: Tucson/Oro Valley Member No.: 23,981 Region Association: Southwest Region |
Very very nice job on the glass repair! (IMG:style_emoticons/default/smile.gif)
|
|
|
|
| trojanhorsepower |
Aug 17 2025, 01:40 PM
Post
#588
|
|
Senior Member Group: Members Posts: 1,021 Joined: 21-September 03 From: Marion, NC Member No.: 1,179 Region Association: None |
Looks great. Looking for ward to seeing how you deal with the bumpers.
|
|
|
|
| Montreal914 |
Aug 17 2025, 02:19 PM
Post
#589
|
|
Advanced Member Group: Members Posts: 2,003 Joined: 8-August 10 From: Claremont, CA Member No.: 12,023 Region Association: Southern California |
Very nice job on the LE replica valance. (IMG:style_emoticons/default/smilie_pokal.gif)
While you are working on the ends, ever though of adding those dowel shaped reinforcement à la real LE valance? (IMG:style_emoticons/default/idea.gif) Phote courtesy of Jeff Bowlsby's website: 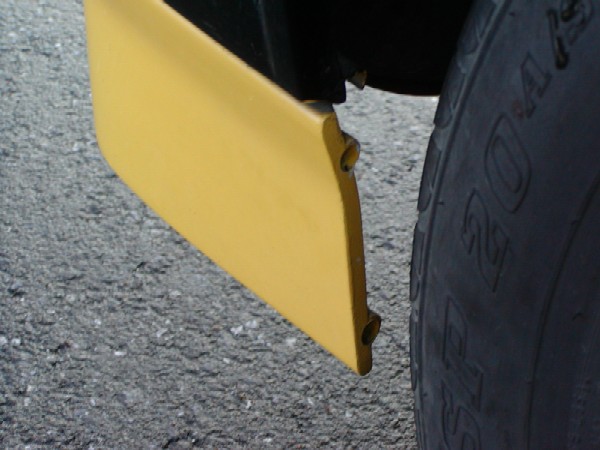 |
|
|
|
| East coaster |
Aug 17 2025, 02:52 PM
Post
#590
|
|
Senior Member Group: Members Posts: 1,910 Joined: 28-March 03 From: Millville, NJ Member No.: 487 Region Association: None |
I’m confused by the plastic welding portion. Isn’t it a fiberglass part?
|
|
|
|
| friethmiller |
Aug 17 2025, 03:58 PM
Post
#591
|
|
Senior Member Group: Members Posts: 1,130 Joined: 10-February 19 From: Austin, TX Member No.: 22,863 Region Association: Southwest Region |
QUOTE(East coaster @ Aug 17 2025, 03:52 PM)  I’m confused by the plastic welding portion. Isn’t it a fiberglass part? Perhaps @JeffBowlsby knows more about it but this vintage part is some sort of plastic - not fiberglass. I just added some for this repair, of course. |
|
|
|
| friethmiller |
Aug 17 2025, 04:05 PM
Post
#592
|
|
Senior Member Group: Members Posts: 1,130 Joined: 10-February 19 From: Austin, TX Member No.: 22,863 Region Association: Southwest Region |
QUOTE(Montreal914 @ Aug 17 2025, 03:19 PM) Very nice job on the LE replica valance. (IMG:style_emoticons/default/smilie_pokal.gif) While you are working on the ends, ever though of adding those dowel shaped reinforcement à la real LE valance? (IMG:style_emoticons/default/idea.gif) Yeah, I thought about doing that but it's not anything close to the original in shape. I may, however, close the ends with a vertical piece. It looked like it once had closed off ends. Not sure. It's more work but I think it would look more finished. |
|
|
|
| friethmiller |
Aug 17 2025, 04:20 PM
Post
#593
|
|
Senior Member Group: Members Posts: 1,130 Joined: 10-February 19 From: Austin, TX Member No.: 22,863 Region Association: Southwest Region |
QUOTE(slowrodent @ Aug 17 2025, 01:26 PM) QUOTE(trojanhorsepower @ Aug 17 2025, 02:40 PM) Looks great. Looking for ward to seeing how you deal with the bumpers. Thanks guys! Front bumper has a good bit of damage in the middle - just removed a lot of bondo (1/2 inch thick in places), this afternoon. In progress on the rear bumper. It has damage on the left rear, as well. It's not as bad but more bondo. Going to need to get out the BFH and a dolly (IMG:style_emoticons/default/biggrin.gif) |
|
|
|
| Montreal914 |
Aug 17 2025, 06:43 PM
Post
#594
|
|
Advanced Member Group: Members Posts: 2,003 Joined: 8-August 10 From: Claremont, CA Member No.: 12,023 Region Association: Southern California |
QUOTE(friethmiller @ Aug 17 2025, 03:05 PM) QUOTE(Montreal914 @ Aug 17 2025, 03:19 PM) Very nice job on the LE replica valance. (IMG:style_emoticons/default/smilie_pokal.gif) While you are working on the ends, ever though of adding those dowel shaped reinforcement à la real LE valance? (IMG:style_emoticons/default/idea.gif) Yeah, I thought about doing that but it's not anything close to the original in shape. I may, however, close the ends with a vertical piece. It looked like it once had closed off ends. Not sure. It's more work but I think it would look more finished. My replica folds in on its ends for a thicker/sturdier look. Unfortunately it's in the rafters so I can't take pictures... |
|
|
|
| friethmiller |
Aug 17 2025, 07:05 PM
Post
#595
|
|
Senior Member Group: Members Posts: 1,130 Joined: 10-February 19 From: Austin, TX Member No.: 22,863 Region Association: Southwest Region |
QUOTE(Montreal914 @ Aug 17 2025, 07:43 PM) My replica folds in on its ends for a thicker/sturdier look. Unfortunately it's in the rafters so I can't take pictures... No worries! I'll see about adding them when I get a chance. |
|
|
|
| friethmiller |
Aug 17 2025, 07:16 PM
Post
#596
|
|
Senior Member Group: Members Posts: 1,130 Joined: 10-February 19 From: Austin, TX Member No.: 22,863 Region Association: Southwest Region |
Bonus Photos
Better lighting and larger photos so you can see the less-than-perfect body work. Definitely needs some additional blocking with finer grit sandpaper. 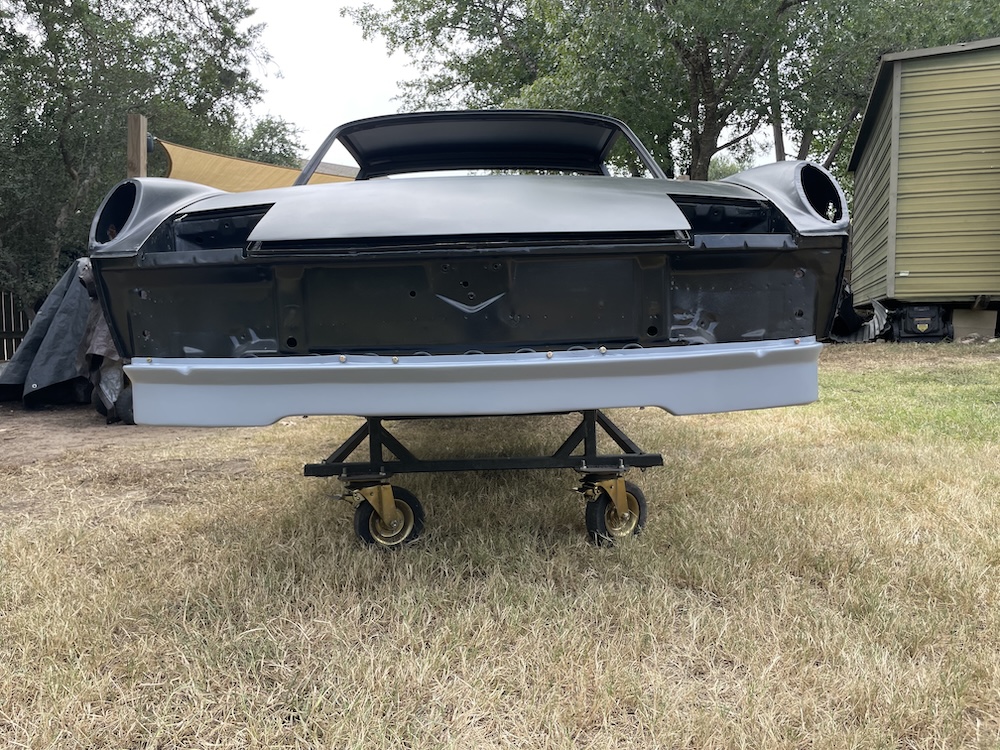 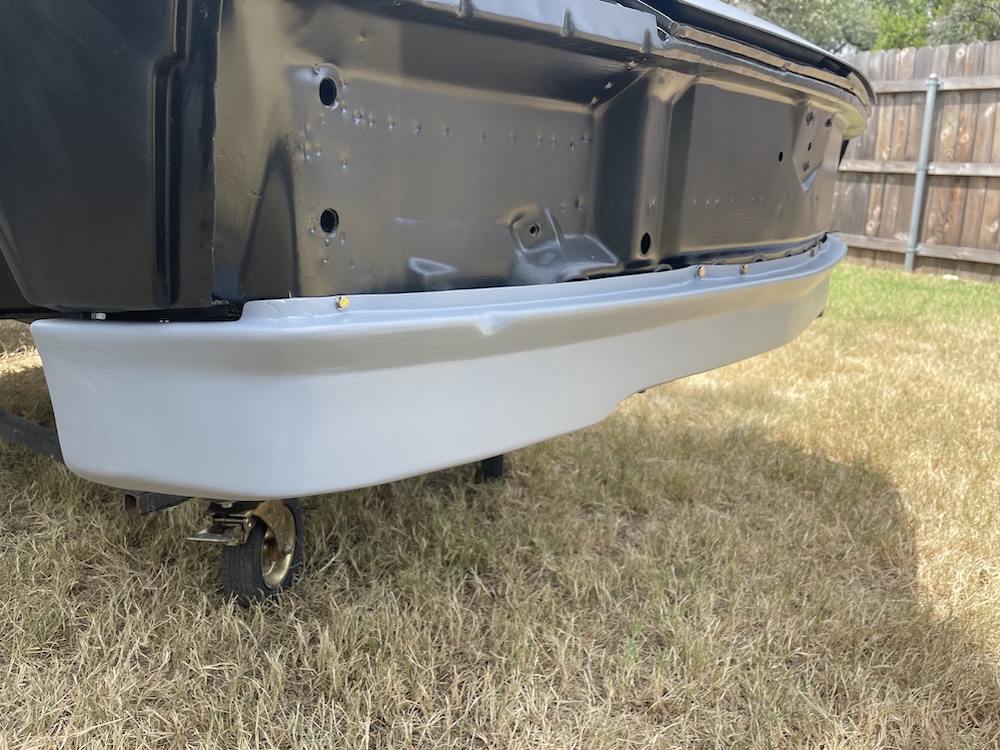 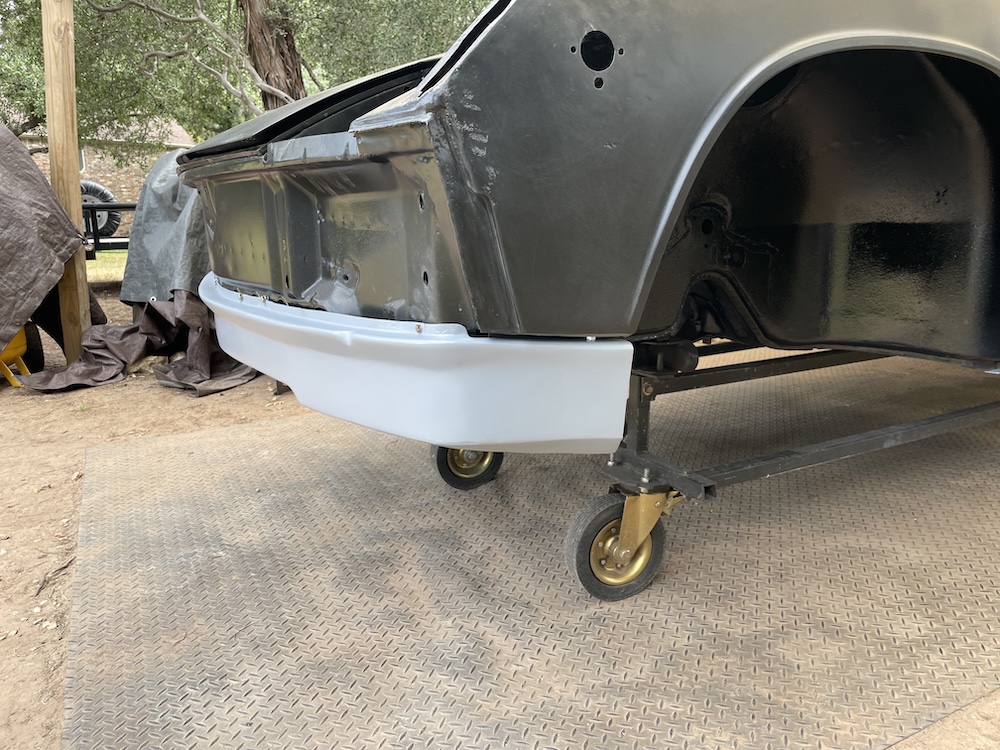 |
|
|
|
| JeffBowlsby |
Aug 17 2025, 09:07 PM
Post
#597
|
|
914 Wiring Harnesses & Beekeeper Group: Members Posts: 9,157 Joined: 7-January 03 From: San Ramon CA Member No.: 104 Region Association: None |
QUOTE(friethmiller @ Aug 17 2025, 02:58 PM) QUOTE(East coaster @ Aug 17 2025, 03:52 PM) I’m confused by the plastic welding portion. Isn’t it a fiberglass part? Perhaps @JeffBowlsby knows more about it but this vintage part is some sort of plastic - not fiberglass. I just added some for this repair, of course. I was told by a plastics specialist who examined my original factory spoiler that it is fabricated using molding dough compound. MDC is (or was) used prolifically in the automotive industry for fast, high volume parts. It’s a process that uses a two part mold, heat and compression to make the part. Epoxy/fiberglass is compatible with MDC. |
|
|
|
| JeffBowlsby |
Aug 17 2025, 09:07 PM
Post
#598
|
|
914 Wiring Harnesses & Beekeeper Group: Members Posts: 9,157 Joined: 7-January 03 From: San Ramon CA Member No.: 104 Region Association: None |
QUOTE(friethmiller @ Aug 17 2025, 02:58 PM) QUOTE(East coaster @ Aug 17 2025, 03:52 PM) I’m confused by the plastic welding portion. Isn’t it a fiberglass part? Perhaps @JeffBowlsby knows more about it but this vintage part is some sort of plastic - not fiberglass. I just added some for this repair, of course. I was told by a plastics specialist who examined my original factory spoiler that it is fabricated using molding dough compound. MDC is (or was) used prolifically in the automotive industry for fast, high volume parts. It’s a process that uses a two part mold, heat and compression to make the part. Epoxy/fiberglass is compatible with MDC. |
|
|
|
| friethmiller |
Aug 18 2025, 08:04 AM
Post
#599
|
|
Senior Member Group: Members Posts: 1,130 Joined: 10-February 19 From: Austin, TX Member No.: 22,863 Region Association: Southwest Region |
QUOTE(JeffBowlsby @ Aug 17 2025, 10:07 PM) I was told by a plastics specialist who examined my original factory spoiler that it is fabricated using molding dough compound. MDC is (or was) used prolifically in the automotive industry for fast, high volume parts. It’s a process that uses a two part mold, heat and compression to make the part. Epoxy/fiberglass is compatible with MDC. Thanks Jeff! This stuff was definitely not fiberglass. The spoiler had been repaired before so no telling how old it actually is. Glad it will live on for a little while longer (IMG:style_emoticons/default/driving.gif) |
|
|
|
| friethmiller |
Aug 31 2025, 08:03 AM
Post
#600
|
|
Senior Member Group: Members Posts: 1,130 Joined: 10-February 19 From: Austin, TX Member No.: 22,863 Region Association: Southwest Region |
Bumper Restoration - Part 1 (8/16 - 8/17/2025)
Review These bumpers have seen better days - no doubt. Before even starting on them I could see that the paint and bono was thick with a lot of spider cracking over most of the surface. Rust seemed to be accident-related. Arrows show the damage and heavy bondo areas. 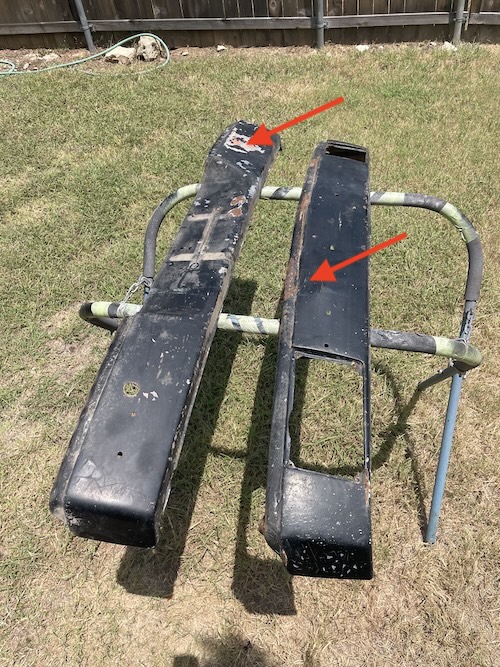 Reveal Getting to work on the front bumper, the paint-removing disk shows just how much filler was involved. After the dust cloud settled the primary damage was in the center of the bumper. Cleaning up the backside a bit revealed just how much hammering somebody had done before. Last photo shows the filler and the 10 layers of paint present. No wonder there were cracks. In the end, the rear bumper was in pretty good shape. The front was another matter. 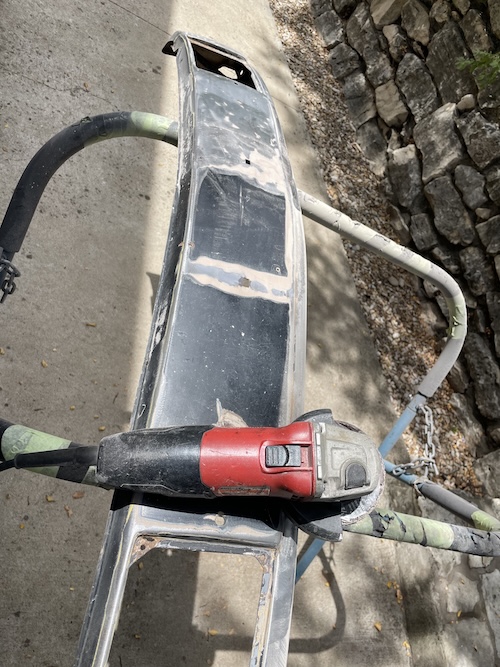 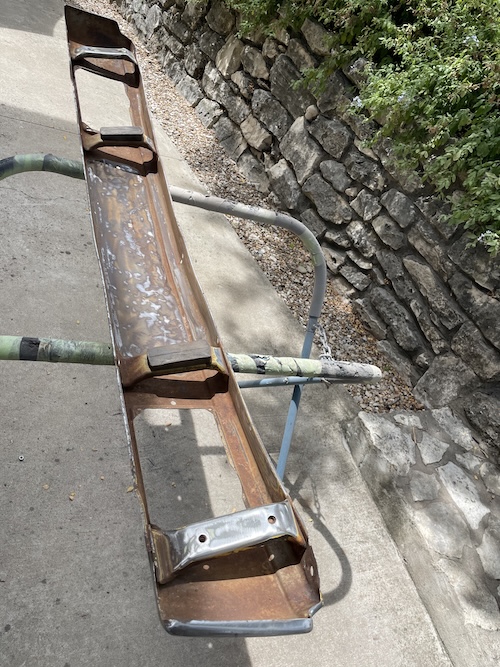 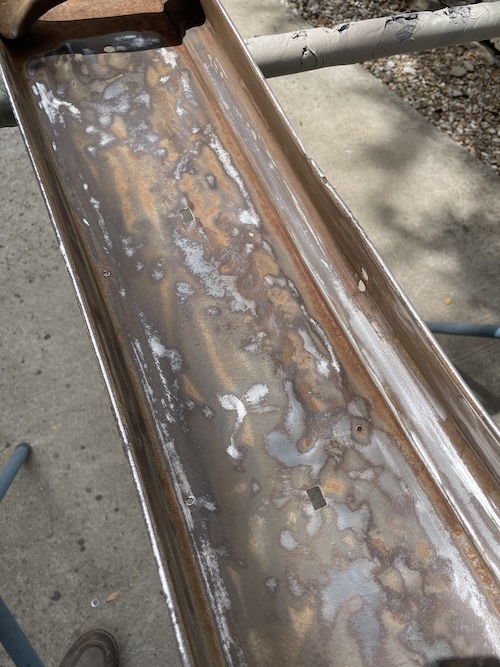 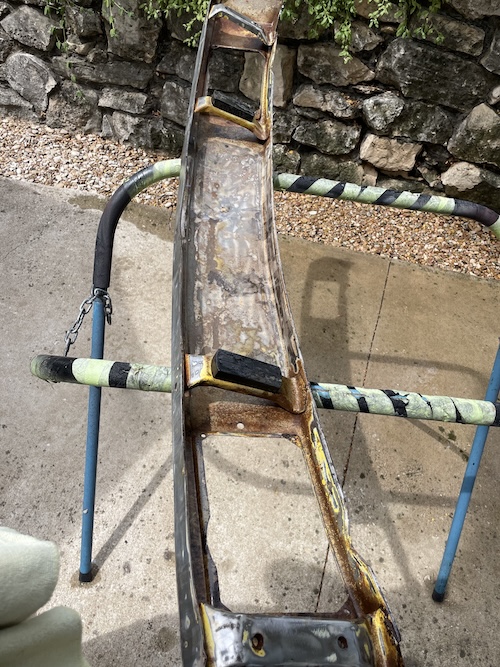 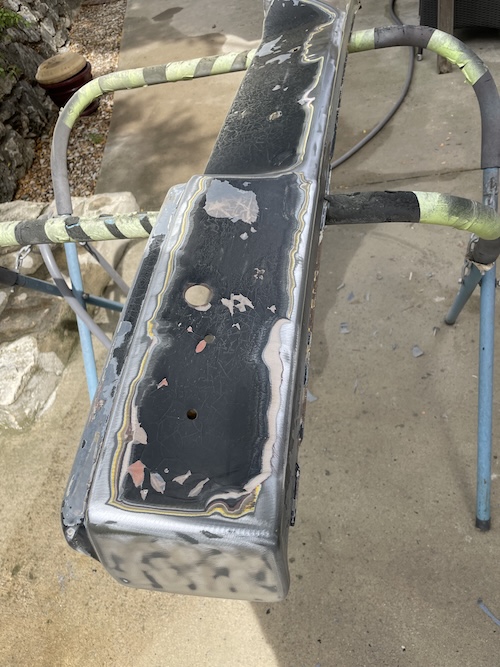 Hammer and Dolly Time While I couldn't get to everything, I could certainly get a lot of the damage hammered out. Using a large marker and a flexible block with 80-grit sandpaper, I was able to quickly identify all the low spots in the bumper. By holding the dolly on the front over the low spot, I used my body hammer to work the lows back inline. This process went on for many hours over the next couple of days. Final photo show a low section on the end of the bumper that was directly in front of the main bumper mounting bracket on the backside. I was only able to get out so much of these dents - so filler will need to be reapplied. In the end, I was actually pretty happy with the results. It will take much less filler to flatten this bumper. 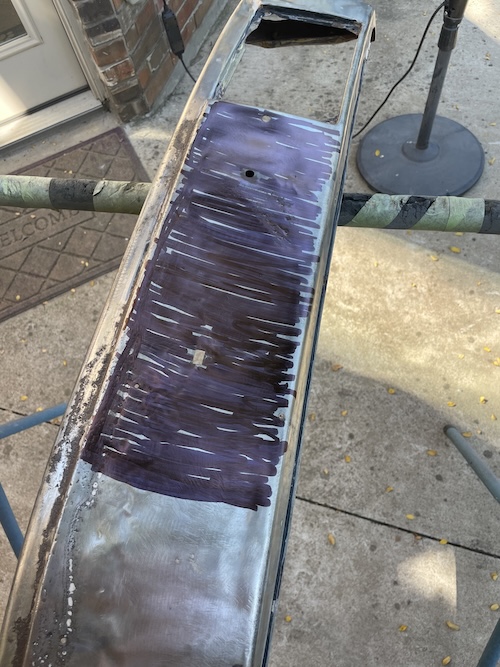 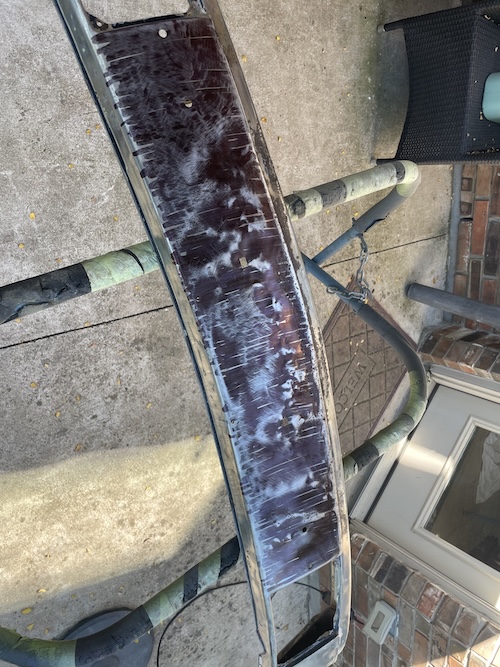 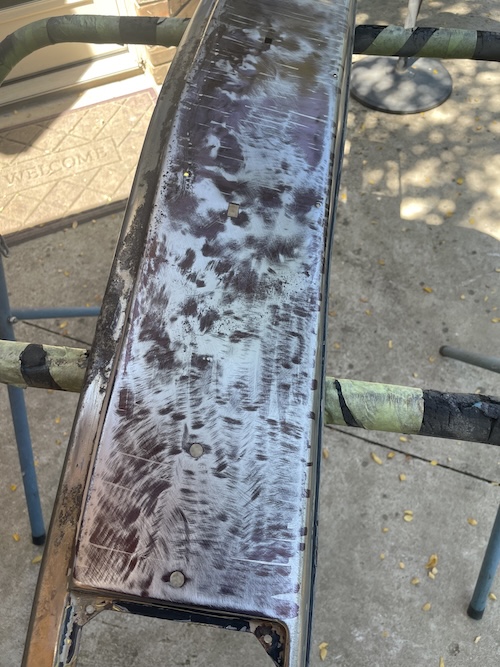 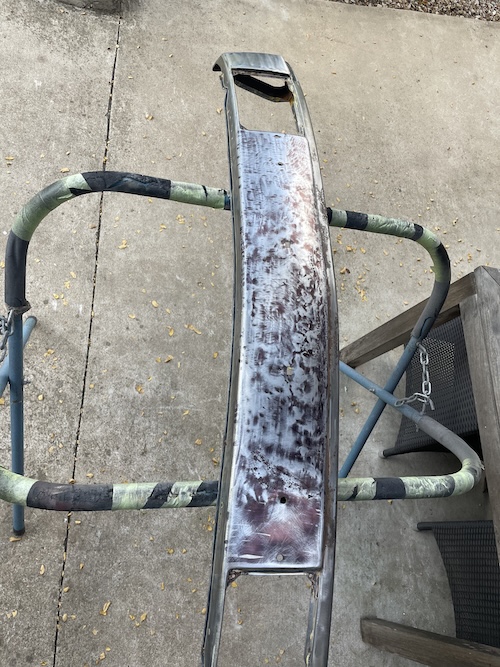 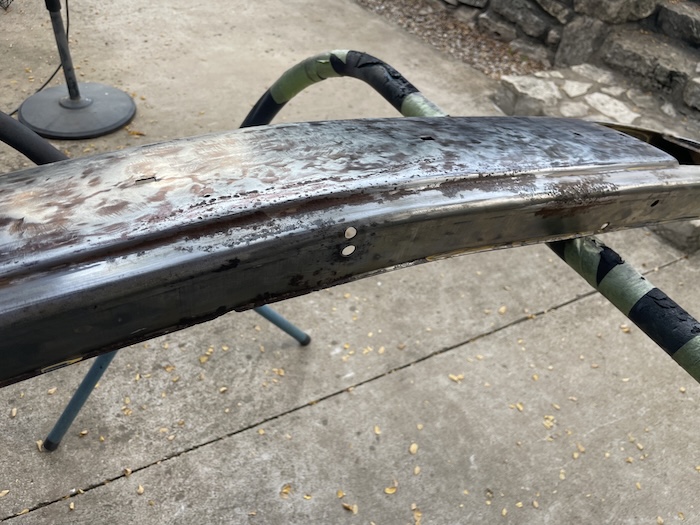 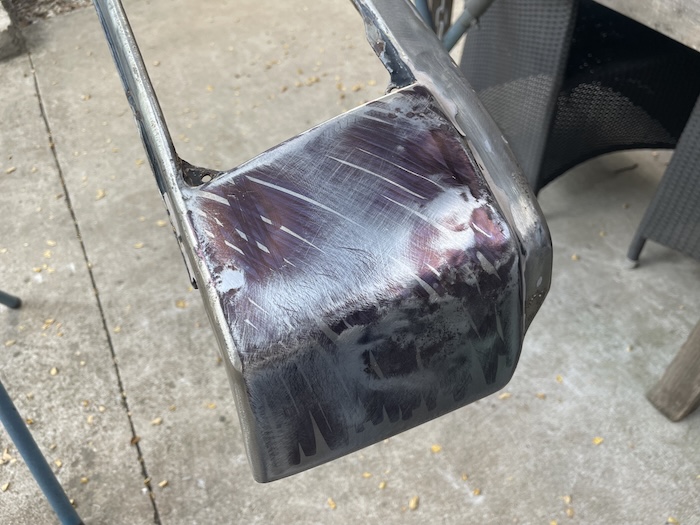 Rust-Prevention After deciding not to sandblast these fine specimens, I pulled out the Rust Bullet, prep'd the bumpers, and then painted 2x coats on the backside. I also did the same for the pitted areas on the front bumper. Note: the phosphorus-based prep done prior to painting cleaned off all the remaining black marker. Windex and Wax & Grease Remover won't remove it. 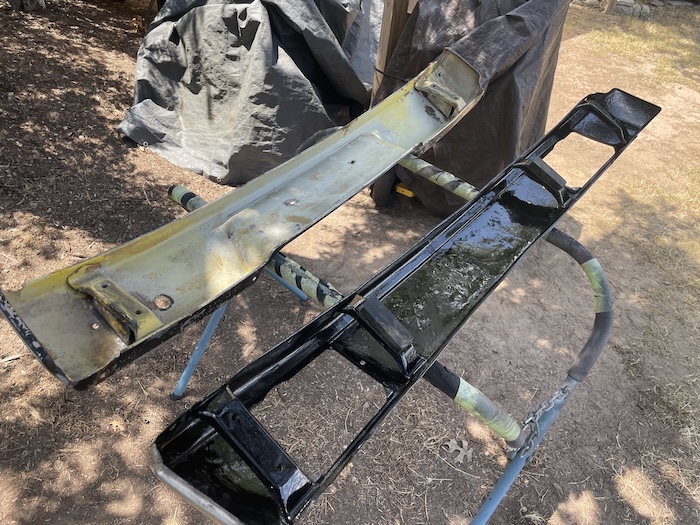 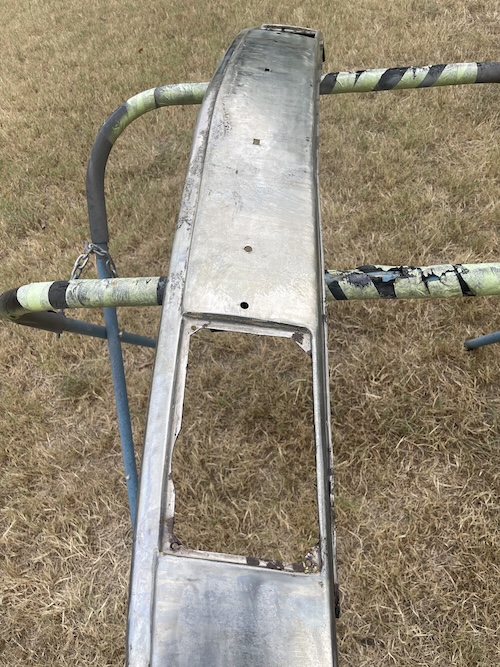 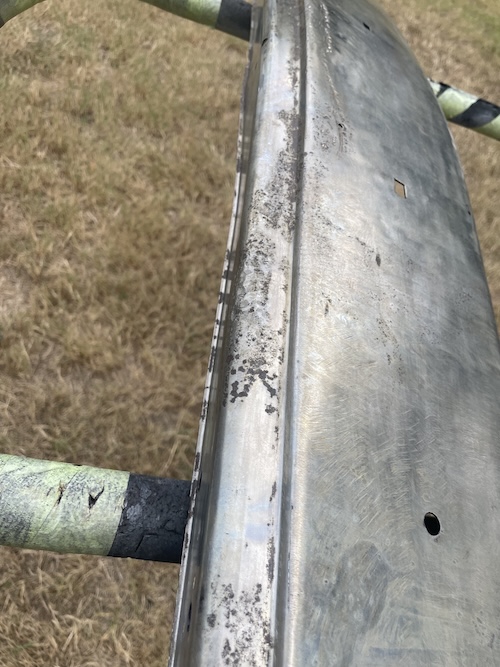 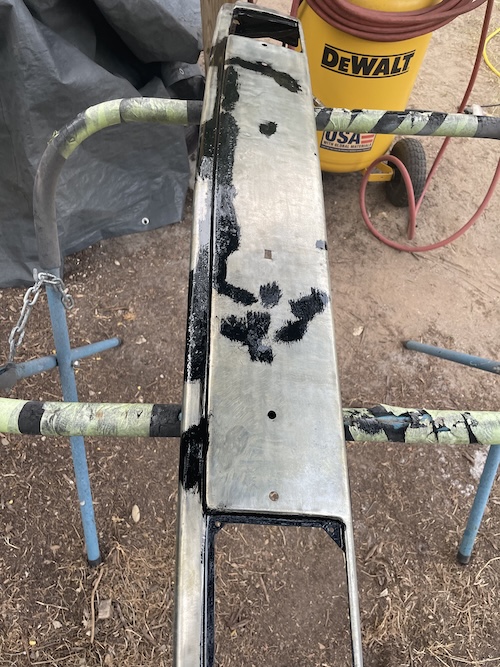 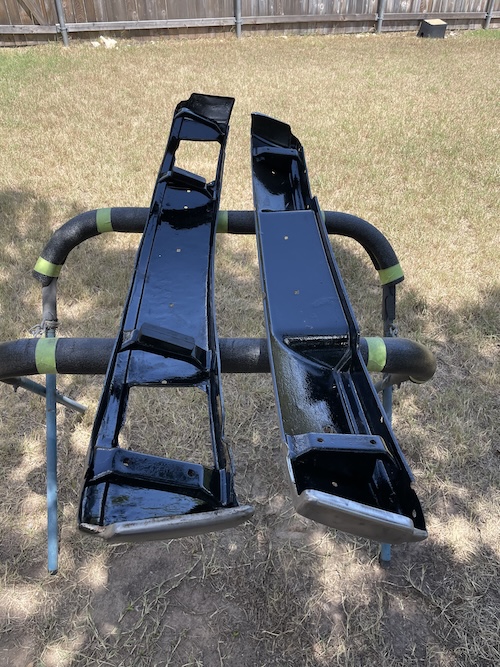 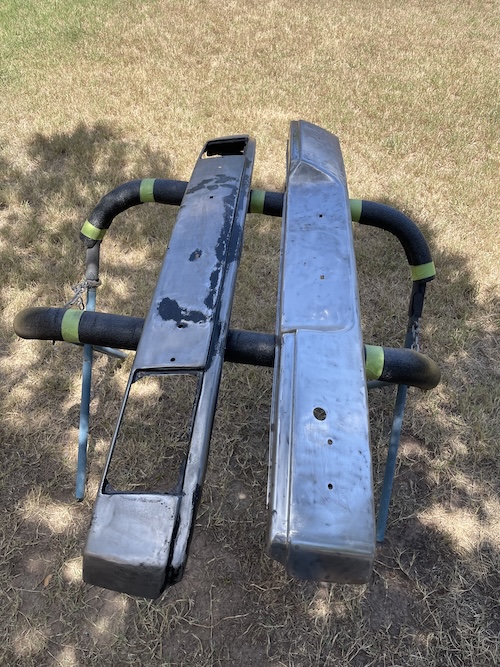 Epoxy Primer Had to use black epoxy here, since I was out of gray. I will hit this with gray later after filler has been applied. 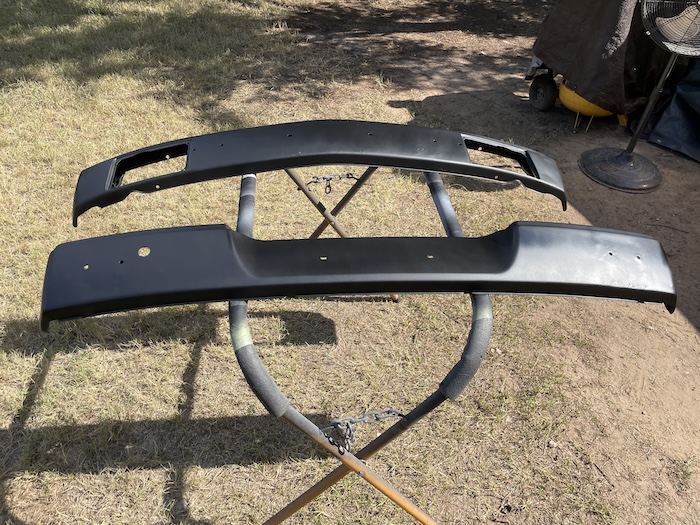 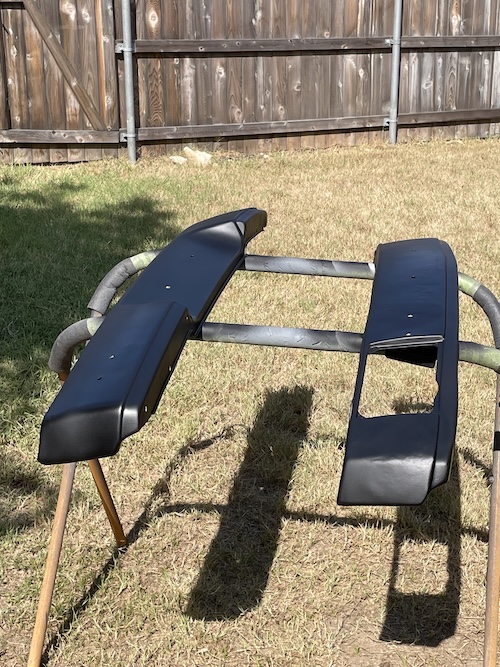 |
|
|
|
|
1 User(s) are reading this topic (1 Guests and 0 Anonymous Users)
0 Members:

|
Lo-Fi Version | Time is now: 10th January 2026 - 02:48 PM |
Invision Power Board
v9.1.4 © 2026 IPS, Inc.